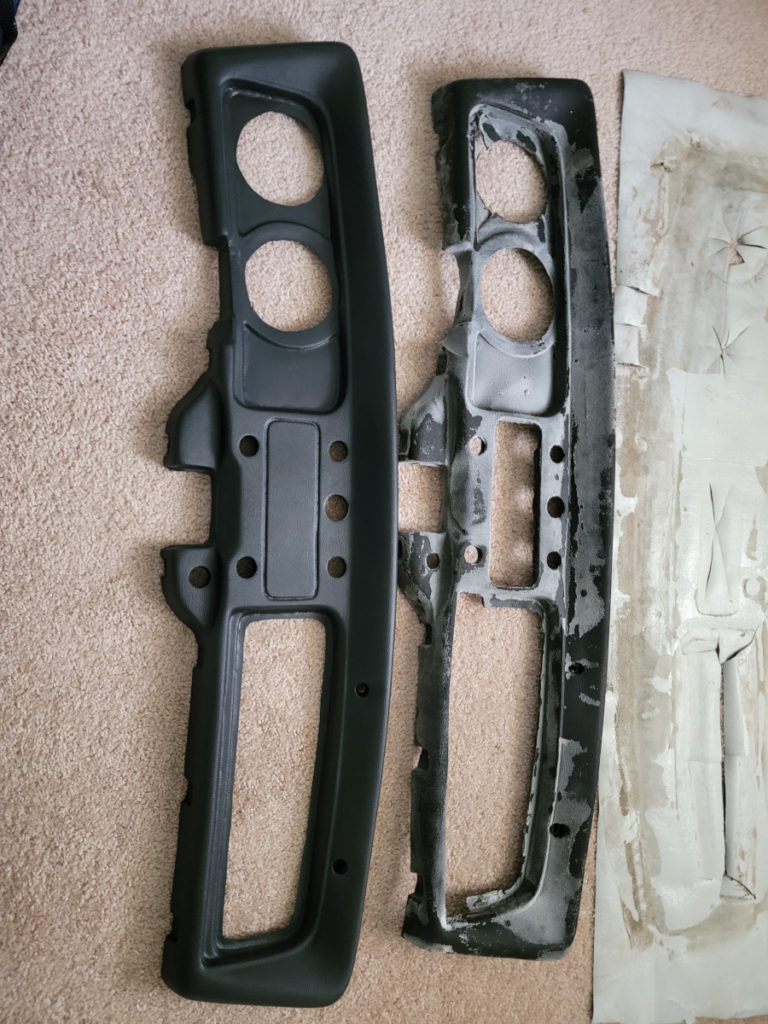
As we saw last time, I had to order a new padded dash and it has now arrived.
The new padded dash seems to be very high quality, metal reinforced, and made in USA, which means different things to different people (re: PT Cruiser).
It is not an exact match to the one that came out of the car, which is a little concerning.
It also doesn’t have all of the screw holes pre-drilled, but that shouldn’t be an issue. My plan is to tackle all of this tomorrow and try to get the car back together and on the road for the first time this year.
I have been putting off recovering this padded dash for a while.
Knowing that I tend to overthink things and that my man hands aren’t well suited for this type of project, I asked my sister to help. She is super crafty and much better at those types of things than I am.
I had a long weekend away visiting family. I brought the dash pad, remaining roll of vinyl, and a bag full of glue, clothes pins, binder clips, and chopsticks with me. The chopsticks were to help push the vinyl down into the tighter creases in the dash.
In doing some further research, we decided that 3m Super 77 spray adhesive (Amazon link) would be the best way to go for long term adhesion.
The plan
My original idea was to get the top edge of the dash pad covered and let that sit. Once the bond is strong enough, move down, from top to bottom, affixing a little bit at a time. That would leave all of the complicated bends and contours on the face of the dash to be tackled later on.
My sister’s idea was to start in the center of the dash face, where the most complicated parts are, and work our way out from there. That was, in theory, a much better way of doing it. Somewhere along the line, we also decided to just spray the whole thing down at once, rather than doing it a little bit at a time.
And we’re off!
The process went exactly as you would expect, a nearly immediate disaster.
For a start, we didn’t get the vinyl positioned properly, to line up with where I had already started cutting in the contours of the air vents in the top edge. We then had to start cutting around the openings, like the glove box, radio, and speedometer to be able to push the vinyl into place. So, with it starting in the wrong position and now being cut even more than it was before, we quickly gave up on it.
Now I have this:
The crumbly old rubber dash pad is also now covered in spray glue for life.
So, I immediately went on the hunt for a better price than the $300 at jbugs. I found a seller on eBay that I had ordered from once or twice before and a new padded dash was only $110.
I will update here once the new dash pad is delivered.
On a brighter note…
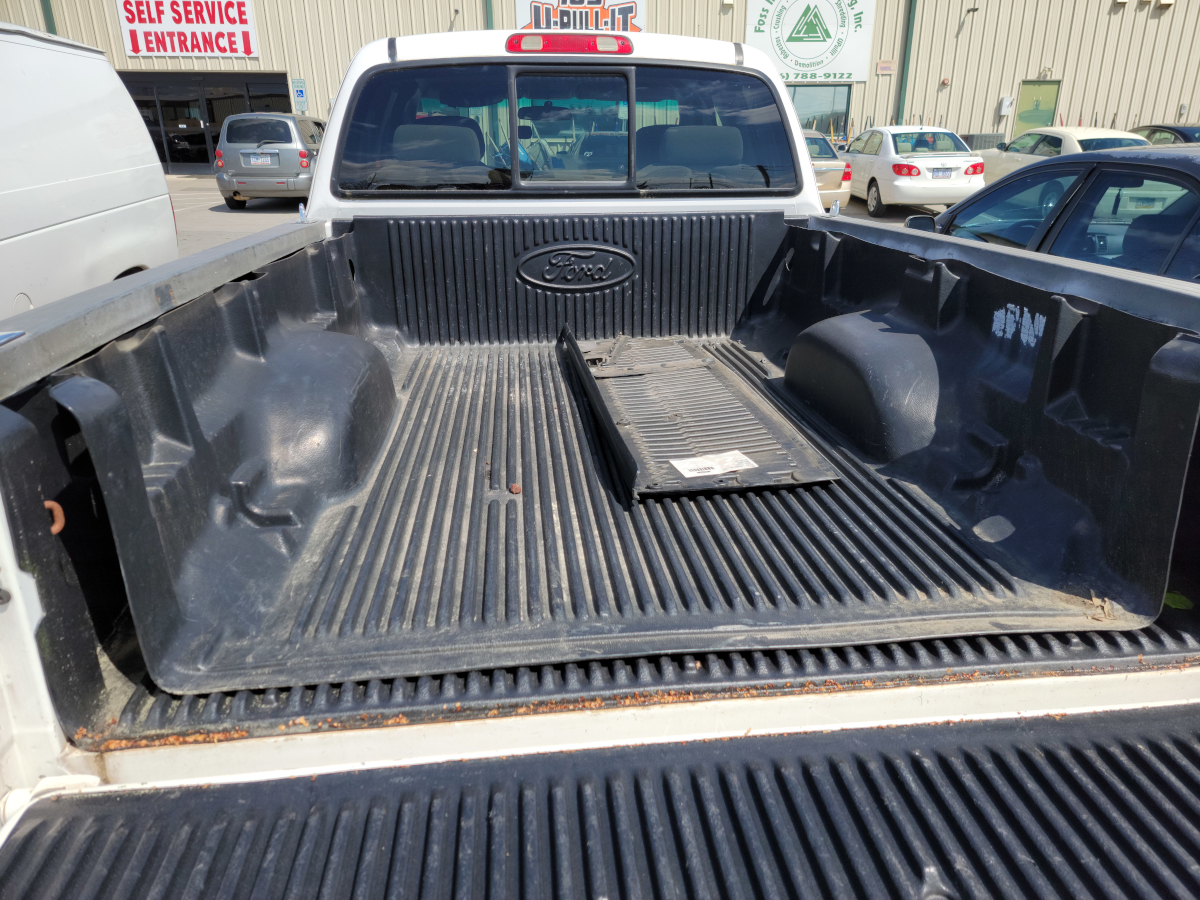
My dad and I went out to a local U Pull It junkyard to walk around and look at cars and see if there’s anything we need. Years ago, last time I had a Ranger, it had no bed liner. We picked one up at the junkyard for $30-40, which was a steal.
The Ranger I have now has a nice rubber mat in the bed, but again, no bed liner. Once again, we were able to find a really nice one from a comparable year and it was $43.
I had to laugh, seeing the Ford bed liner in the back of my dad’s old Tundra.
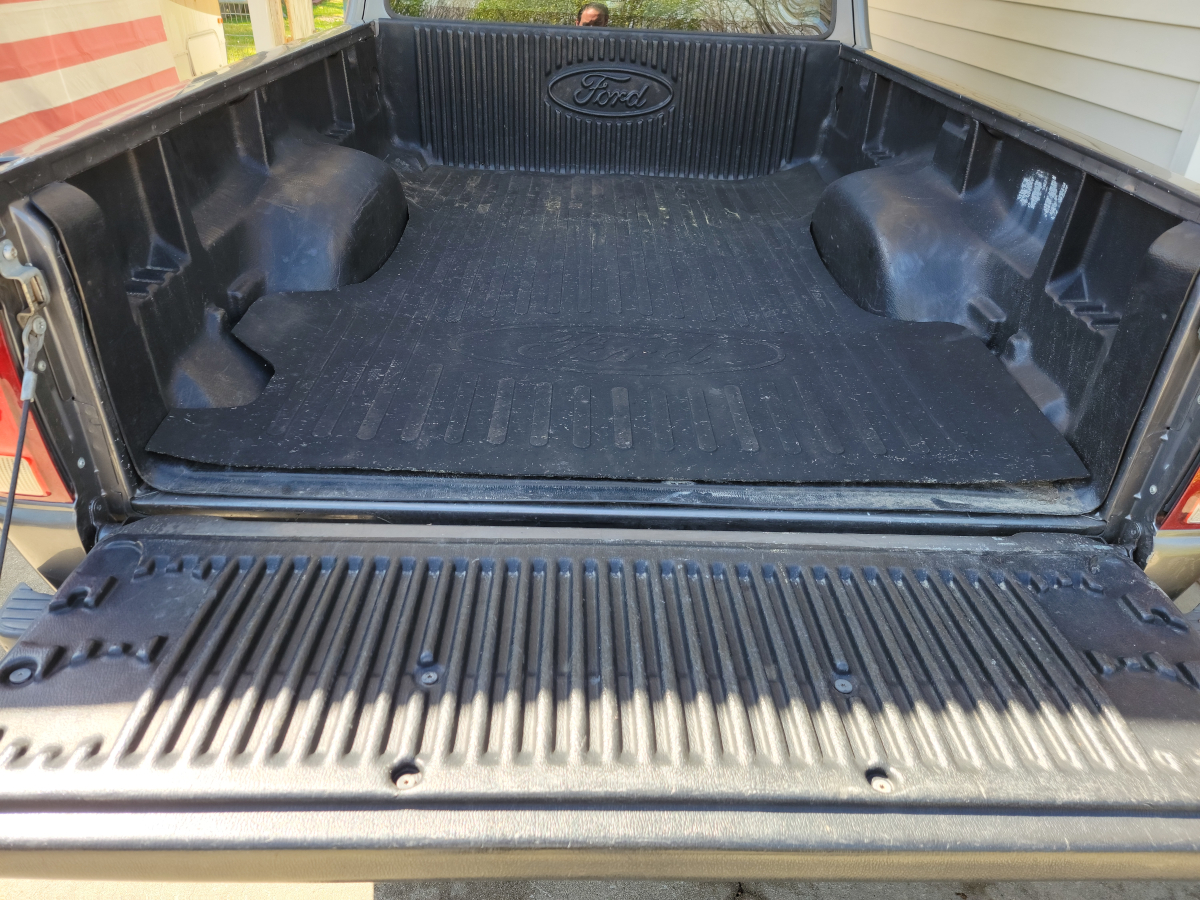
We got it mounted up in the Ranger with little drama.
The rubber mat will need to be cut around the edges for a better fit. It wasn’t designed to be used with a bed liner.
I like the idea of not having stuff slide around back there, especially bags of trash going to the dump.
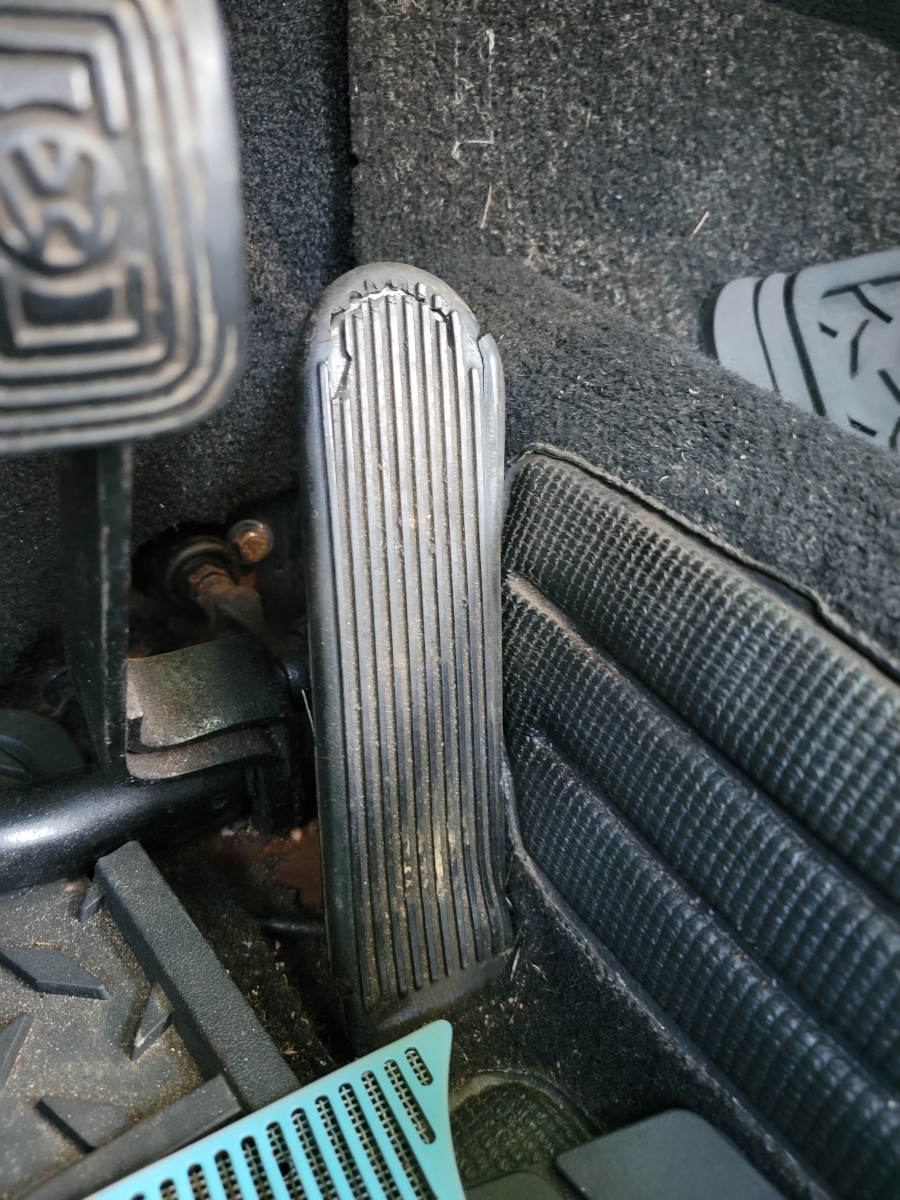
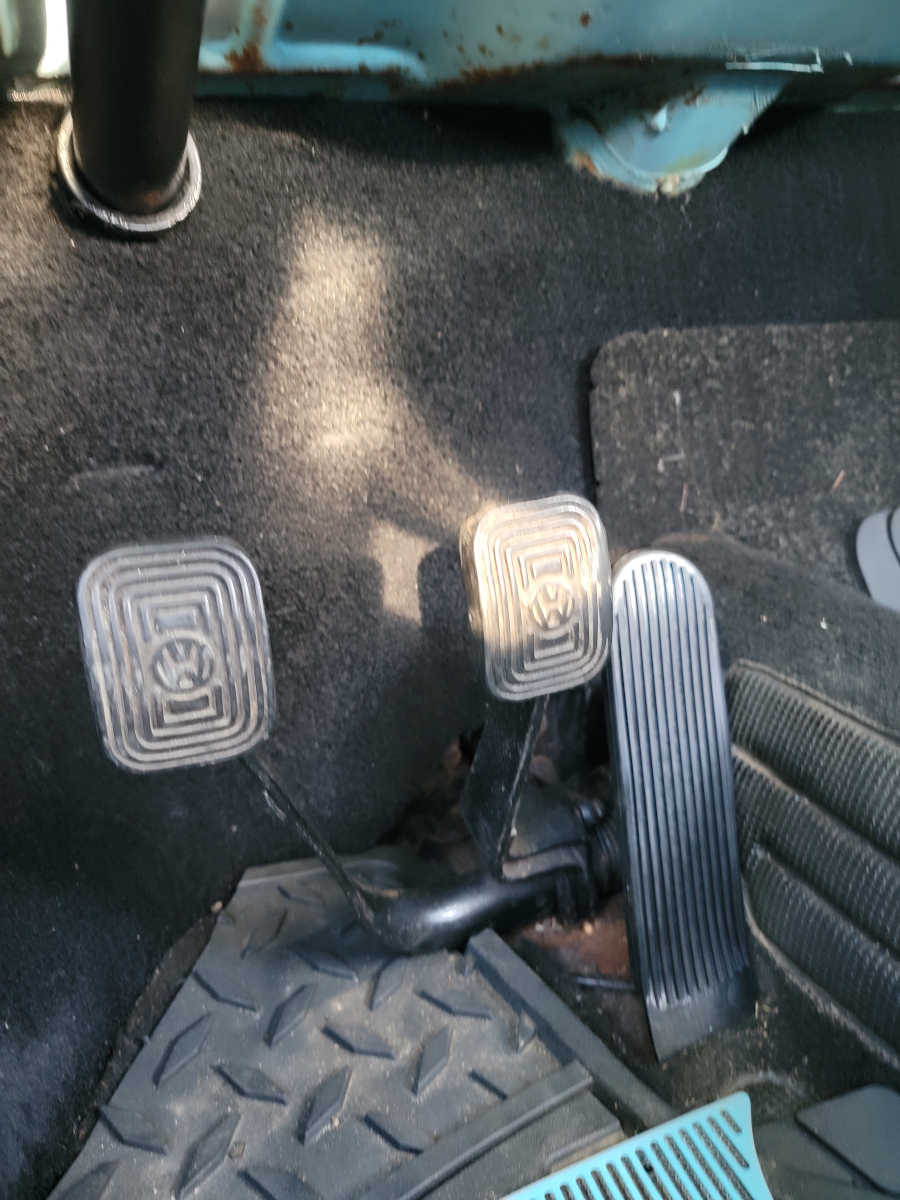
One of the pile of interior tidbits I ordered was a new gas pedal rubber (jbugs link). The old one was in pretty bad shape.
On my way out to the grocery store, I decided to pop in and replace that real quick-like.
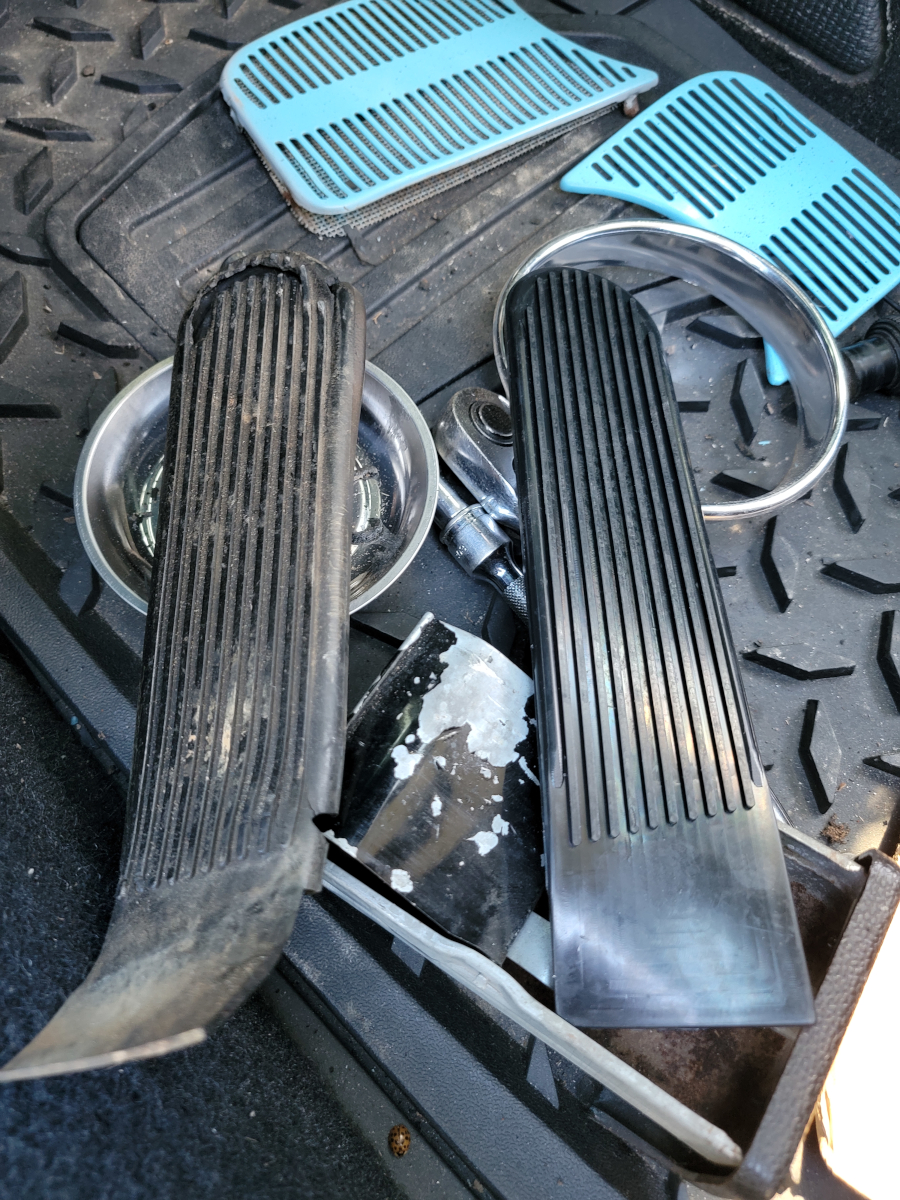
I struggled a bit at first, trying to figure out how the new pedal rubber was supposed to channel in, but it’s very soft, pliable rubber, and stretched around the edges for a perfect fit.
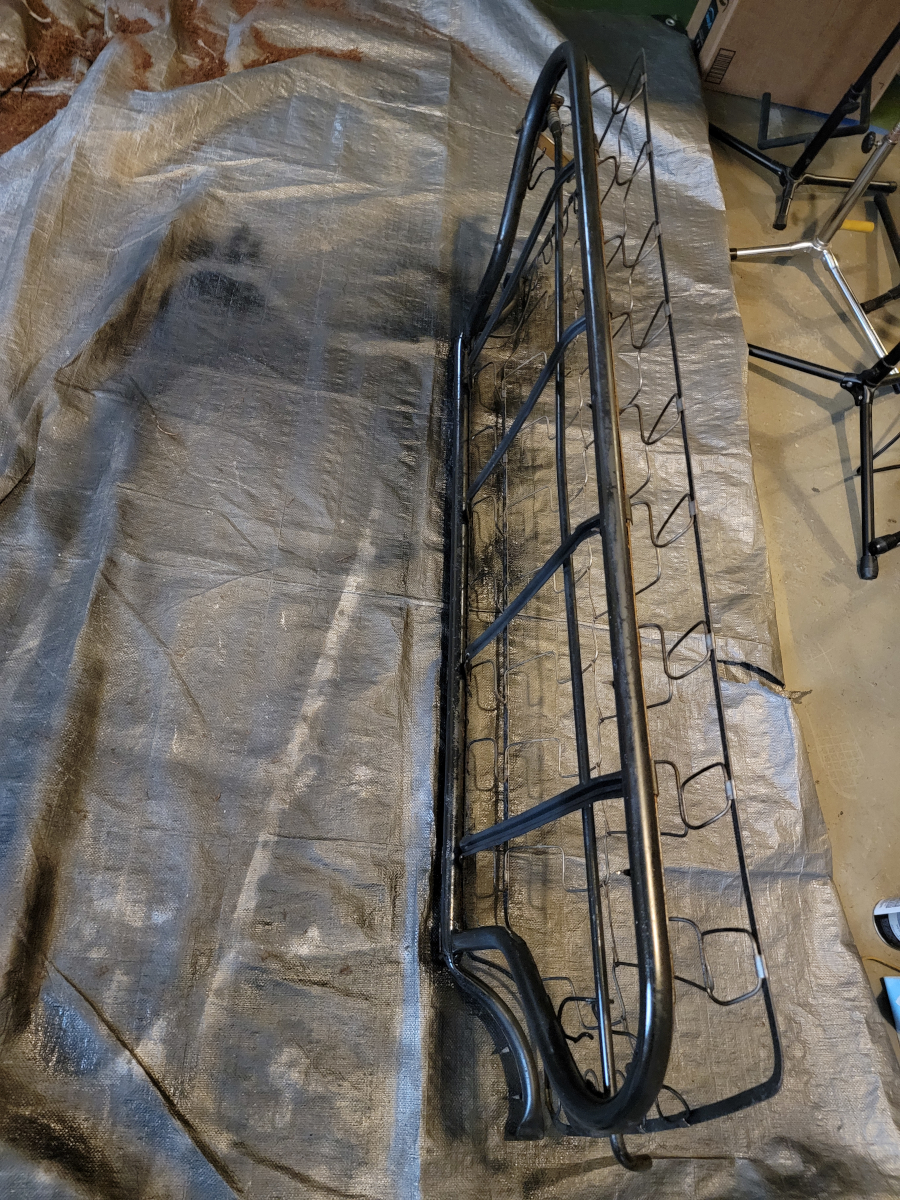
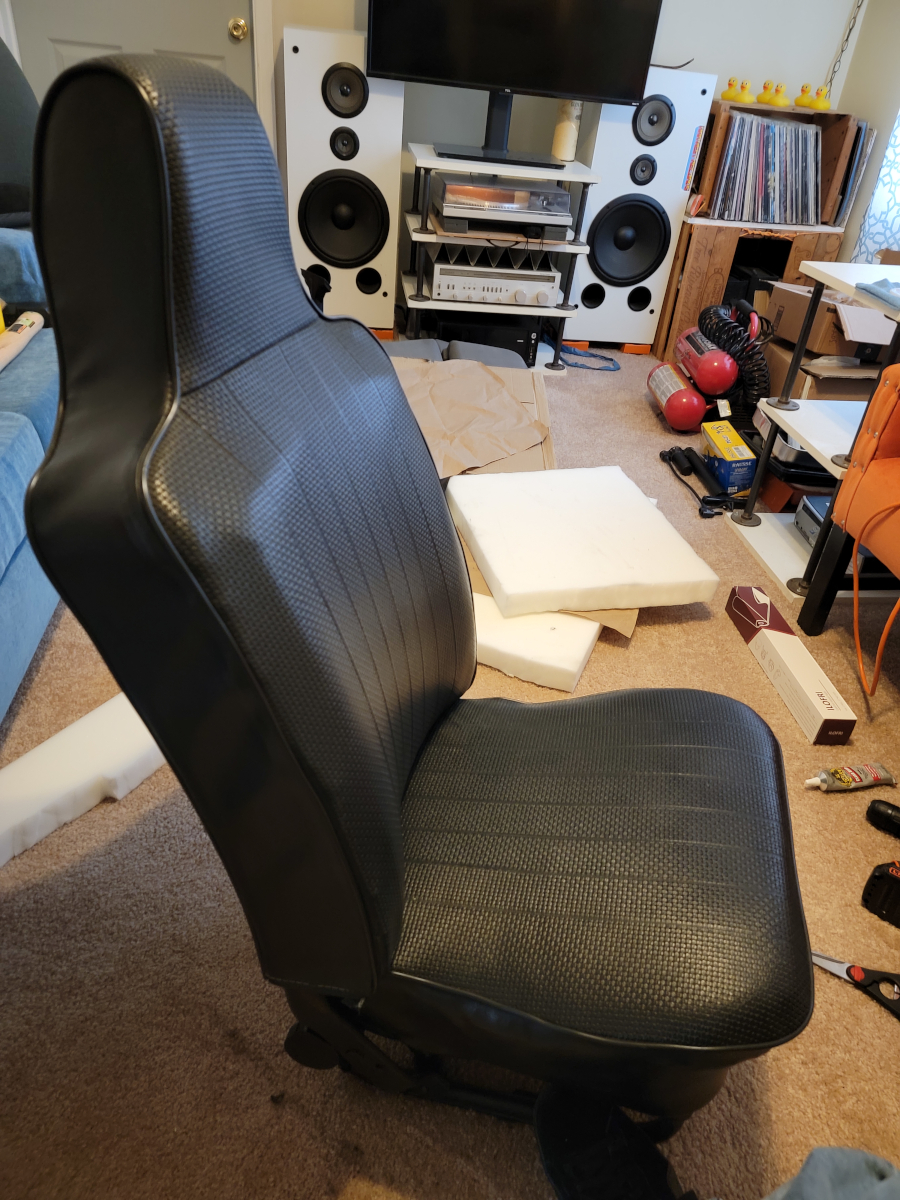
In what I promise is the last post about refinishing the seats, we move on to the rear seat back.
Disassembly
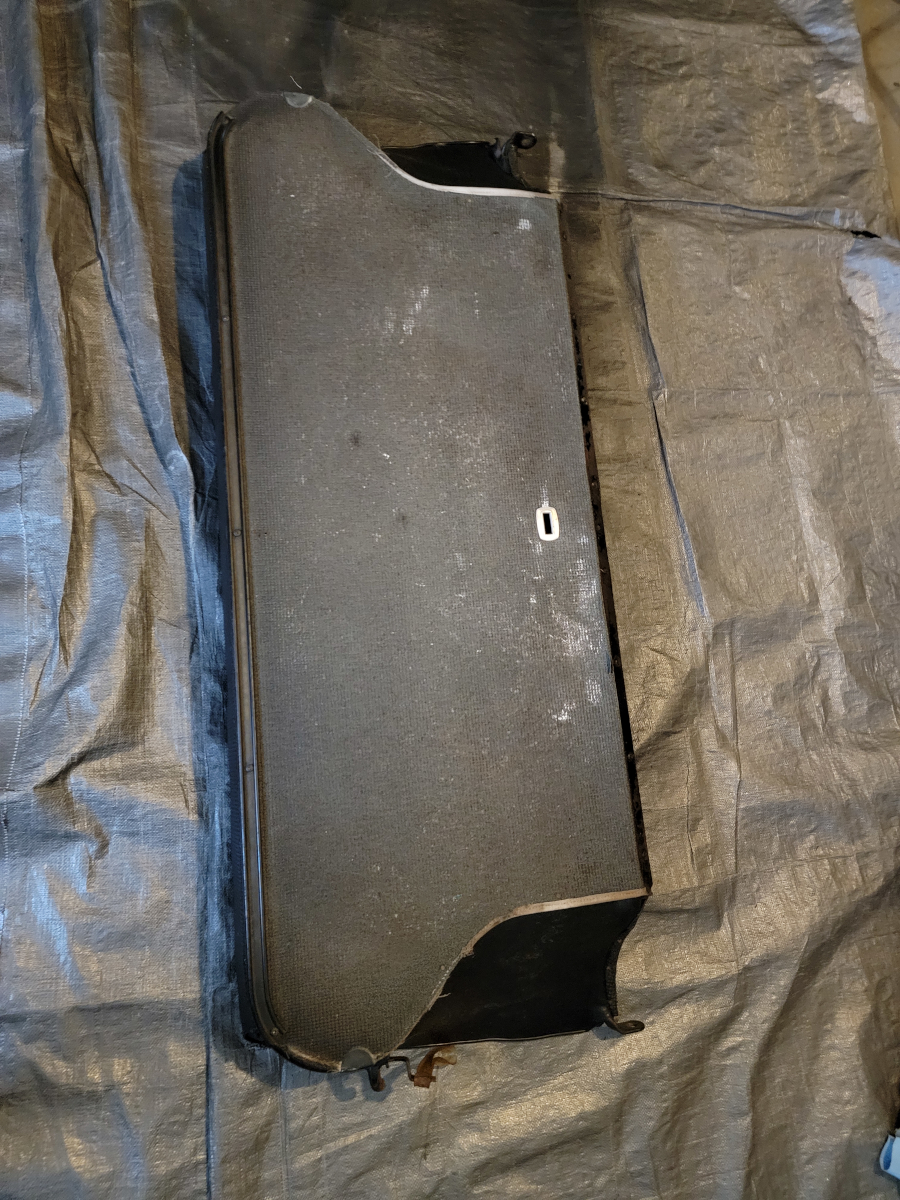
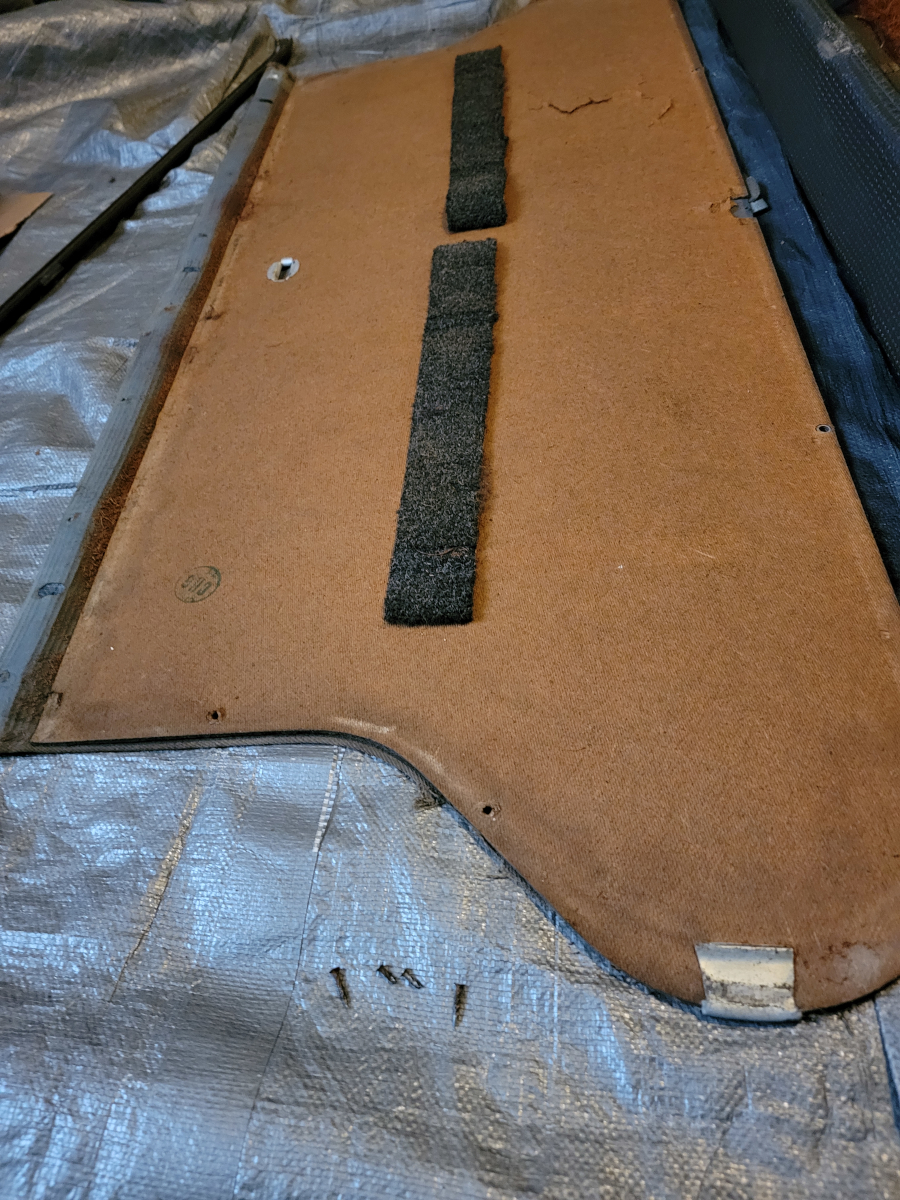
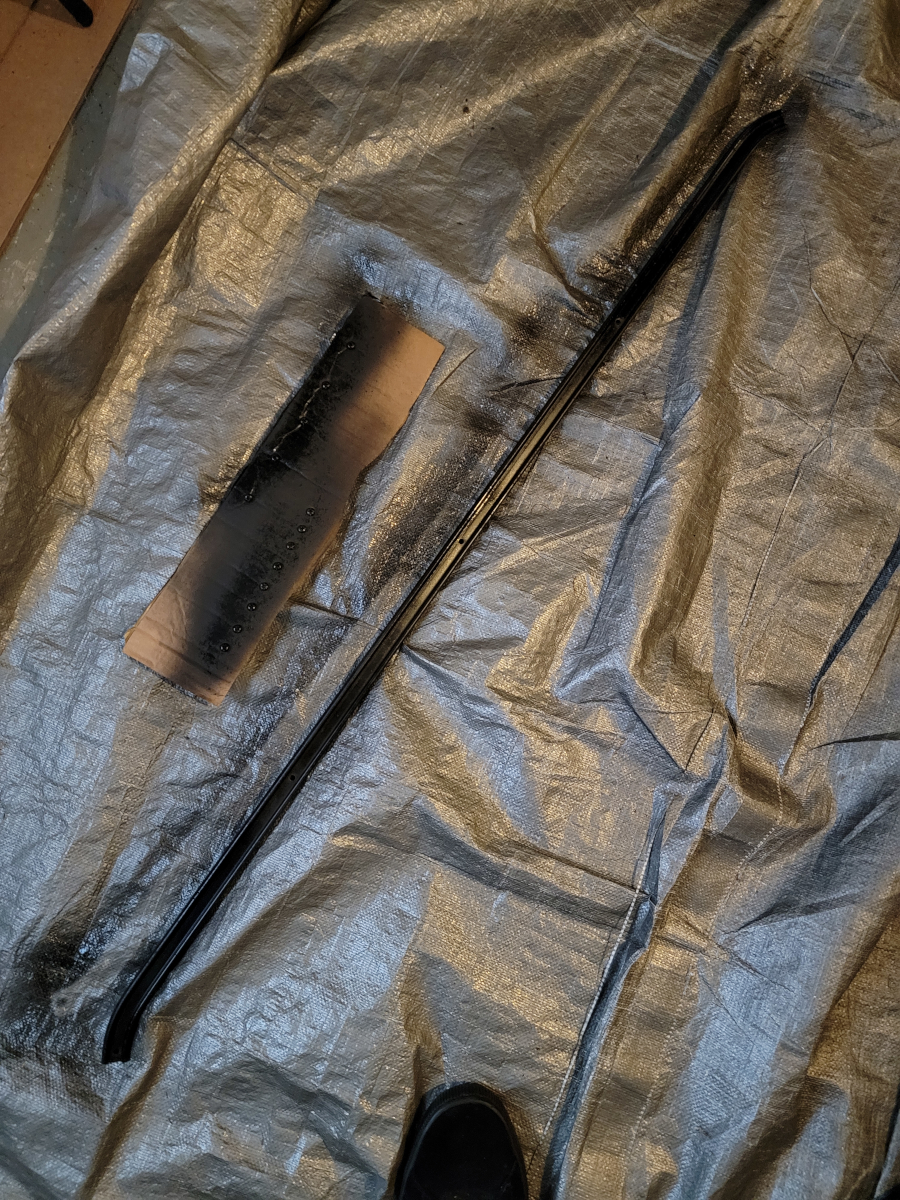
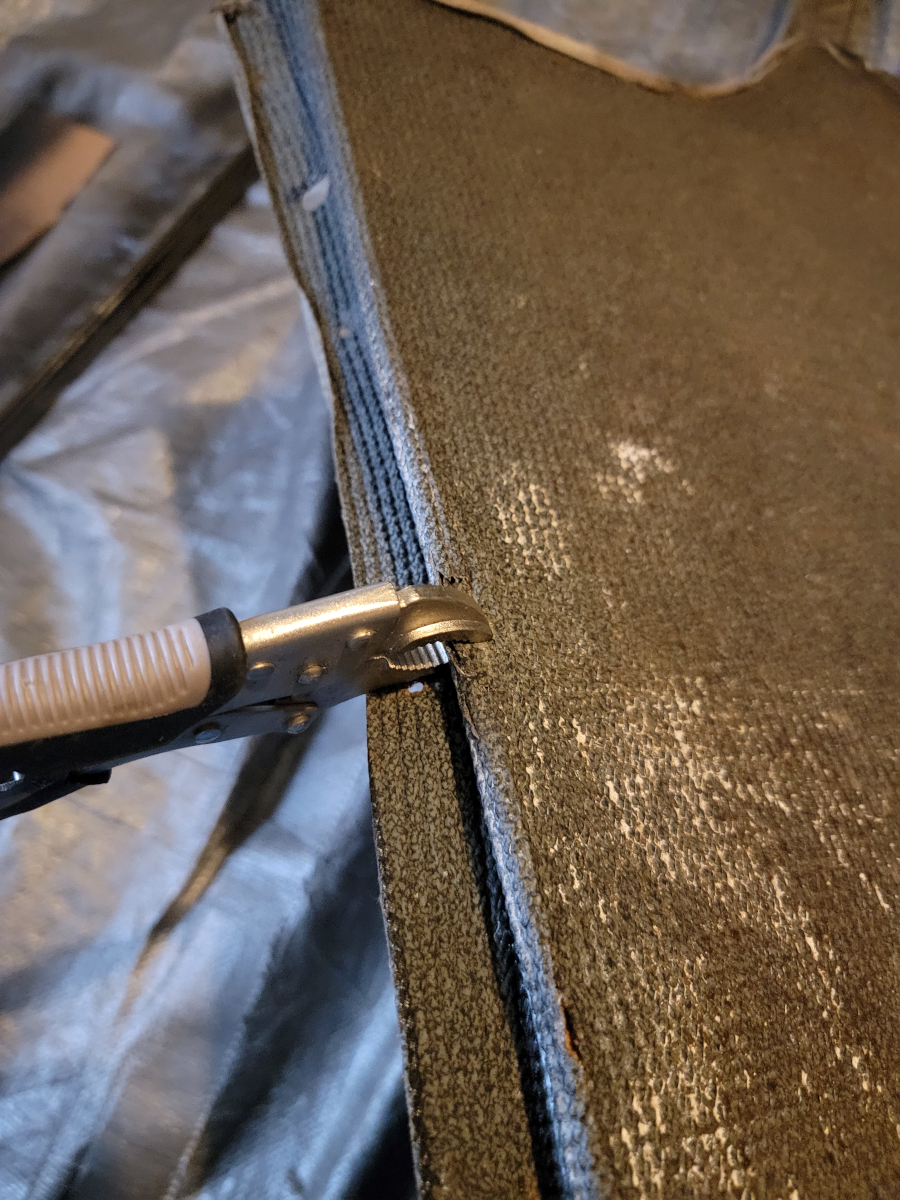
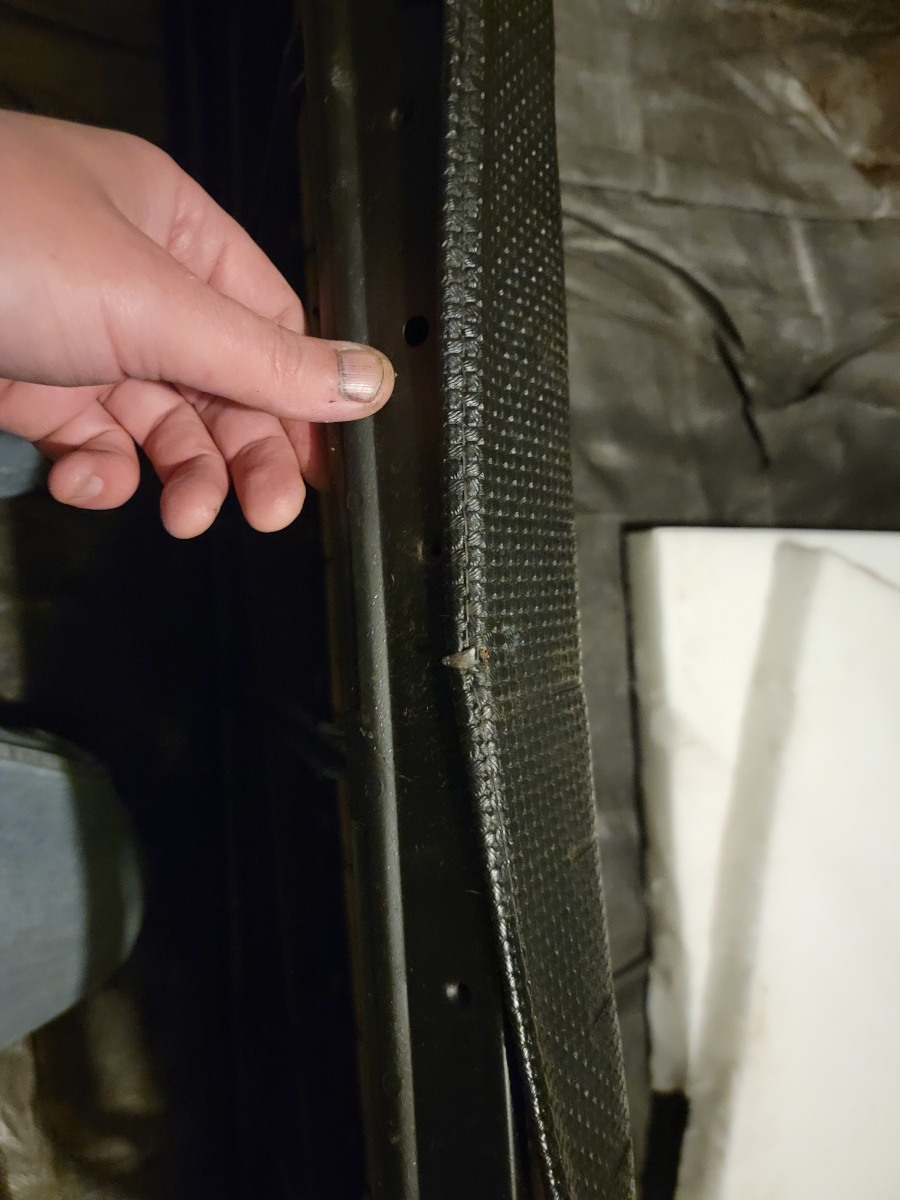
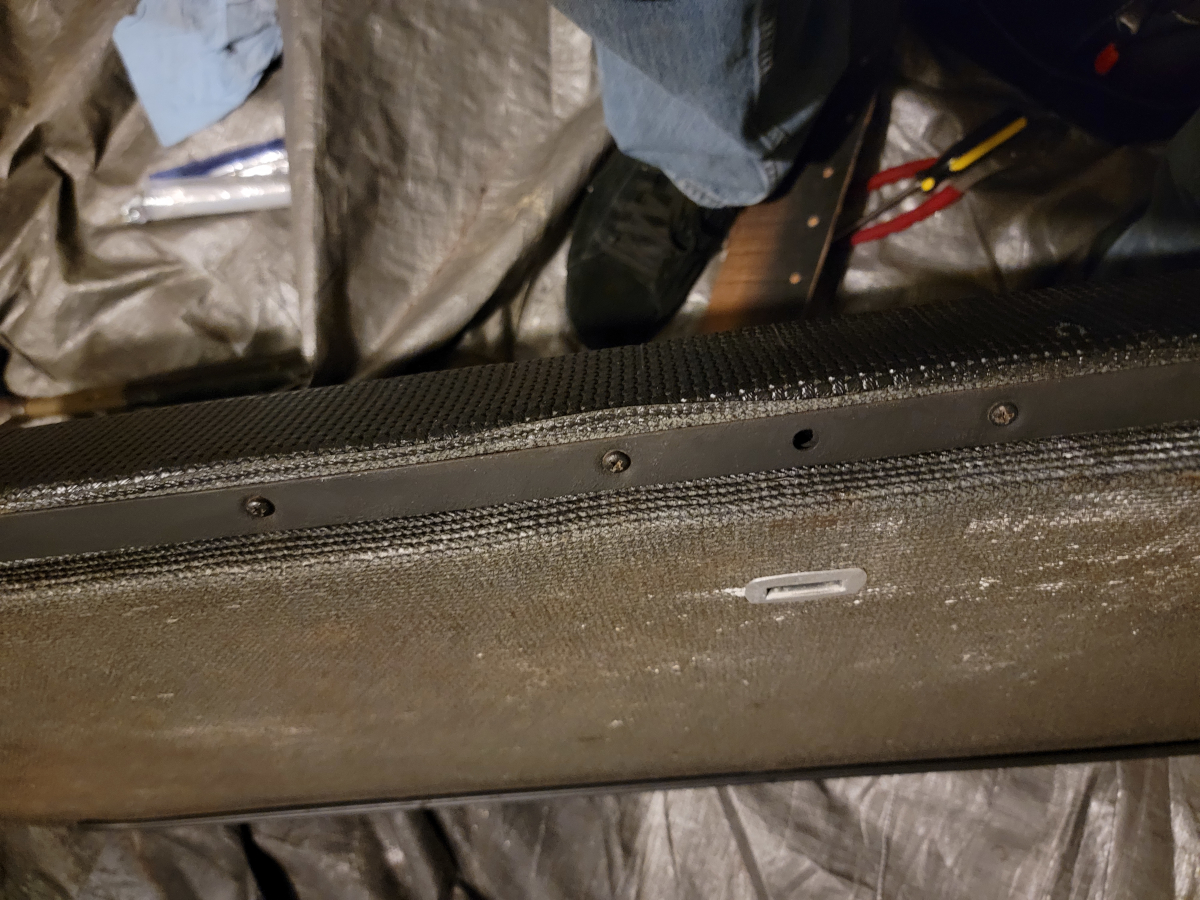
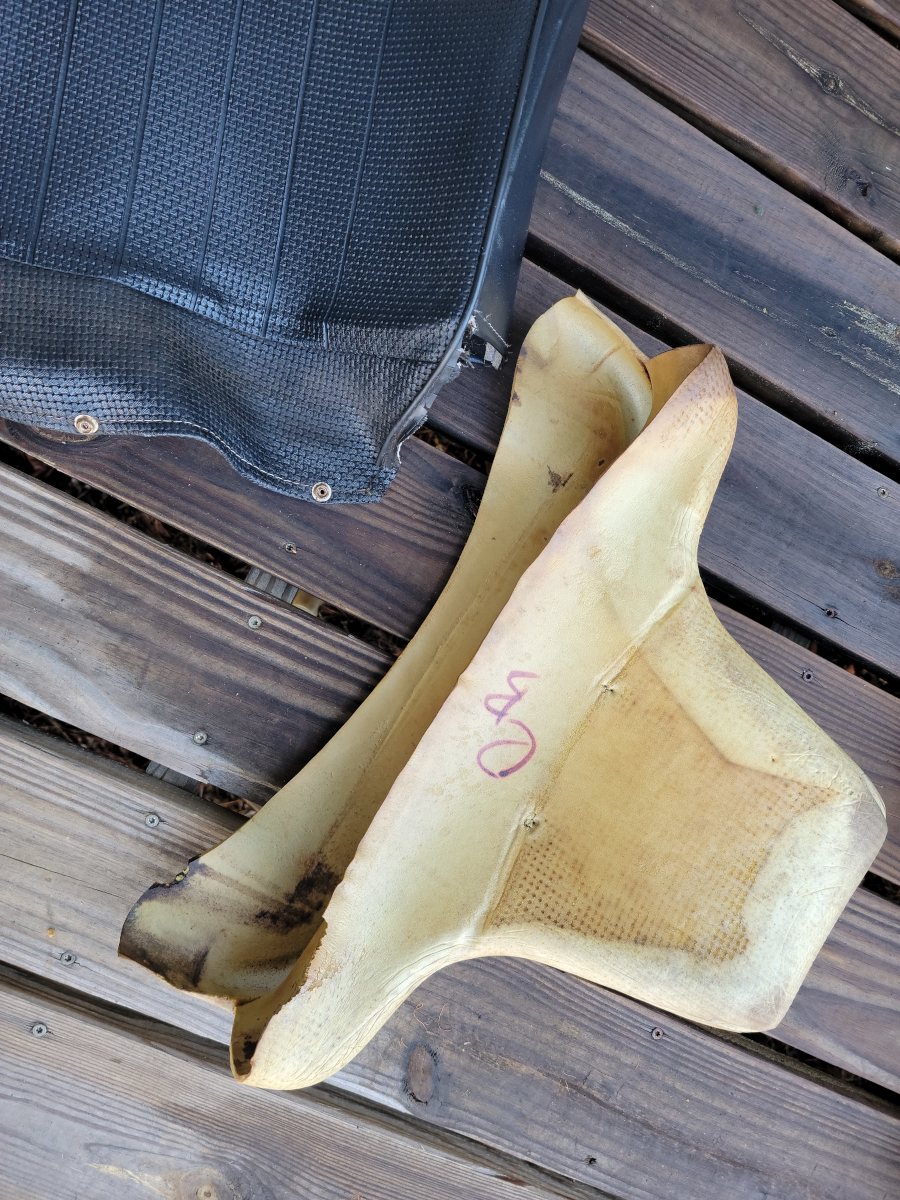
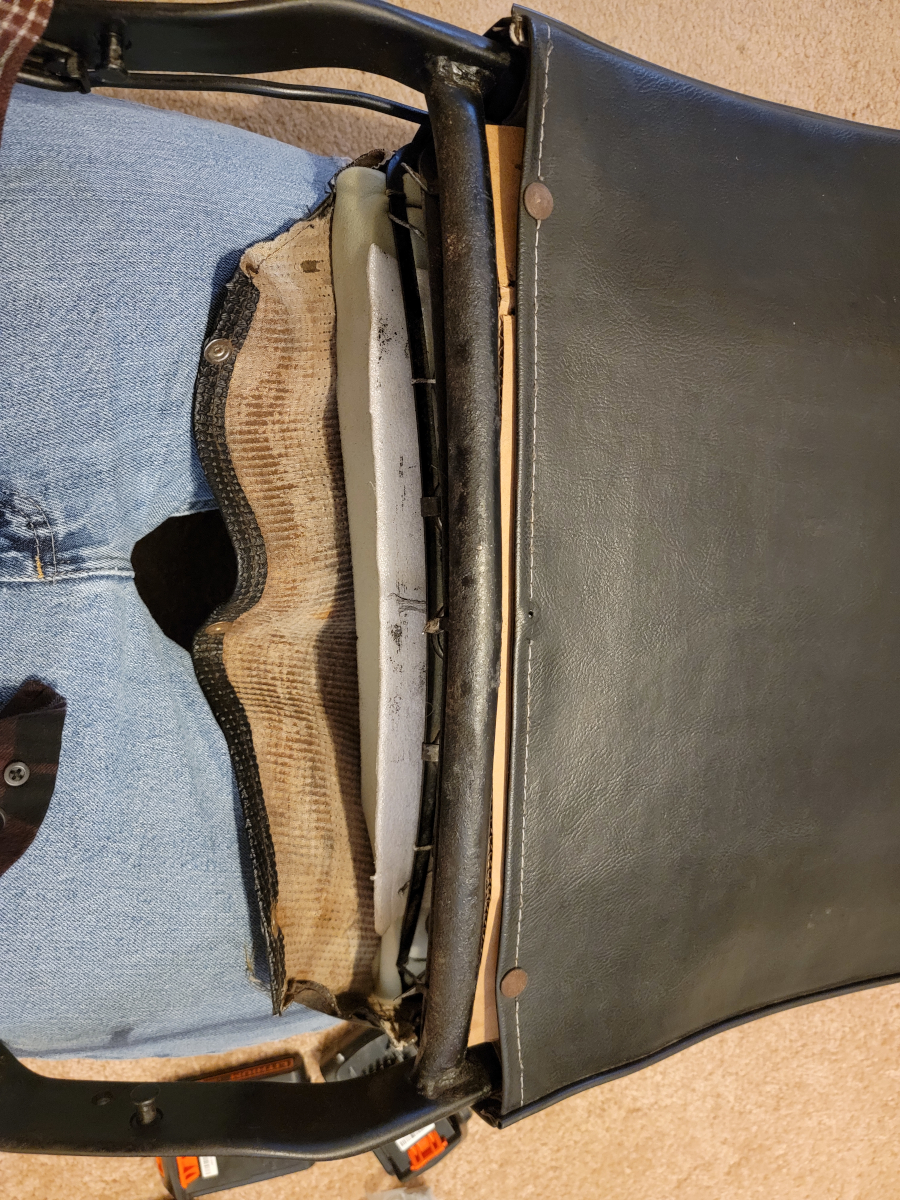
It is closed back, kind of a fiber board material with a vinyl coating on the outside. There are metal trim pieces screwed on to the top and bottom edges.
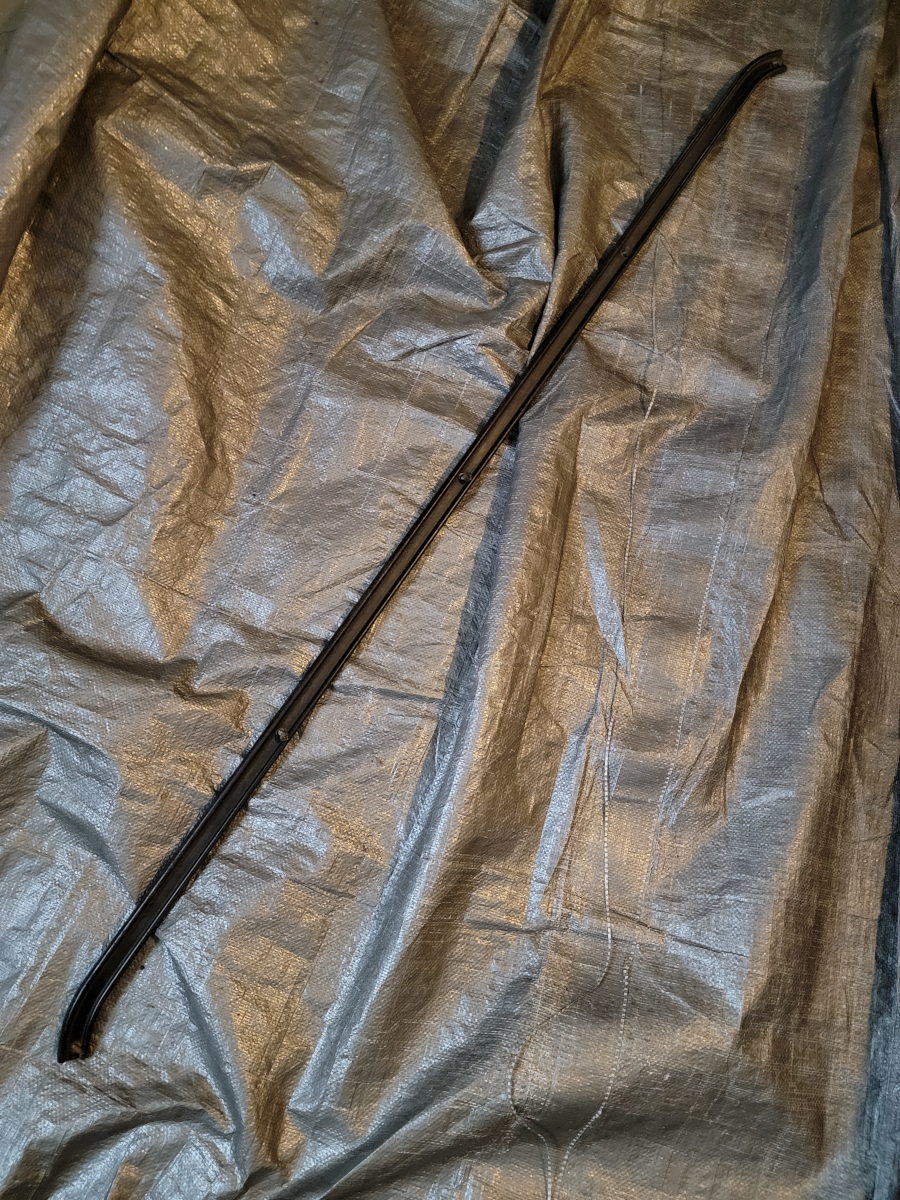
They unscrewed easily enough. The top one is clearly aluminum or some other non-rusting material…
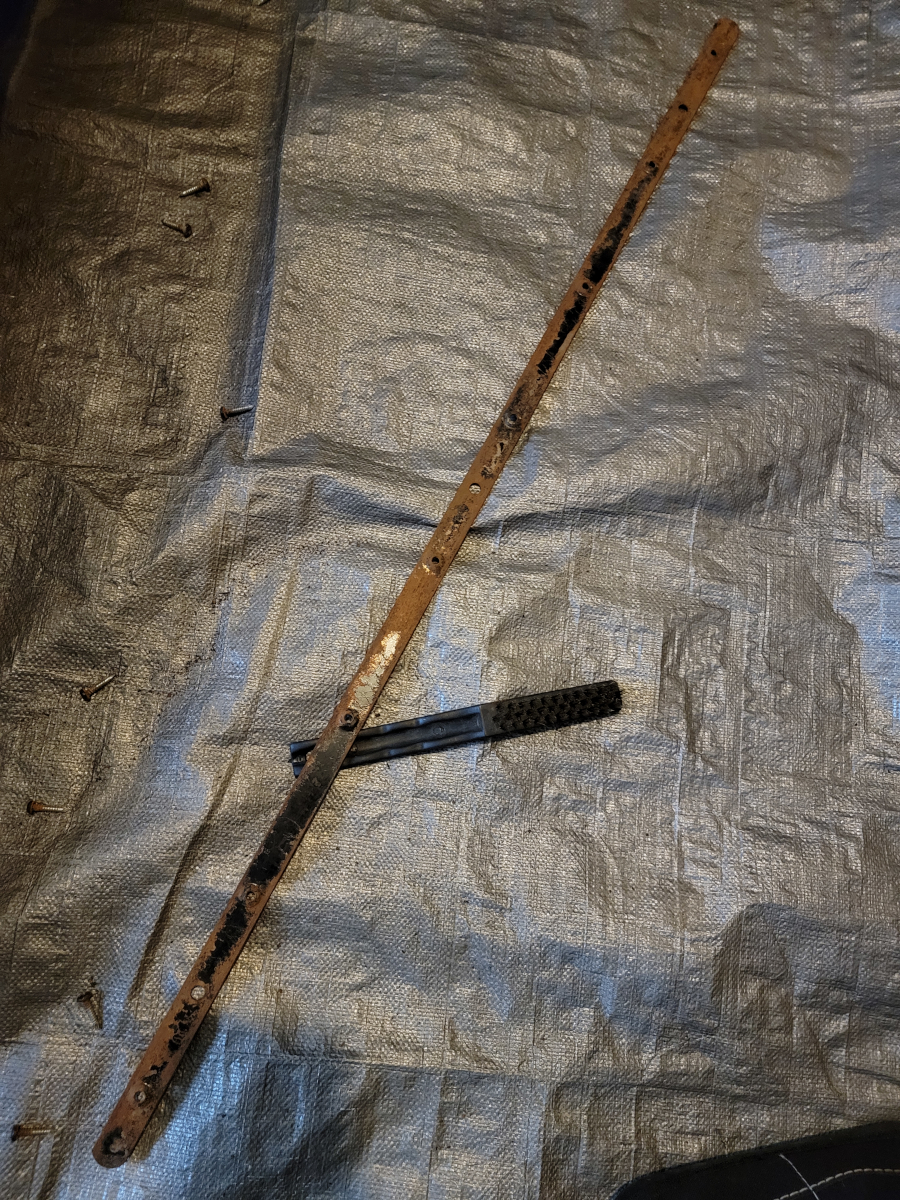
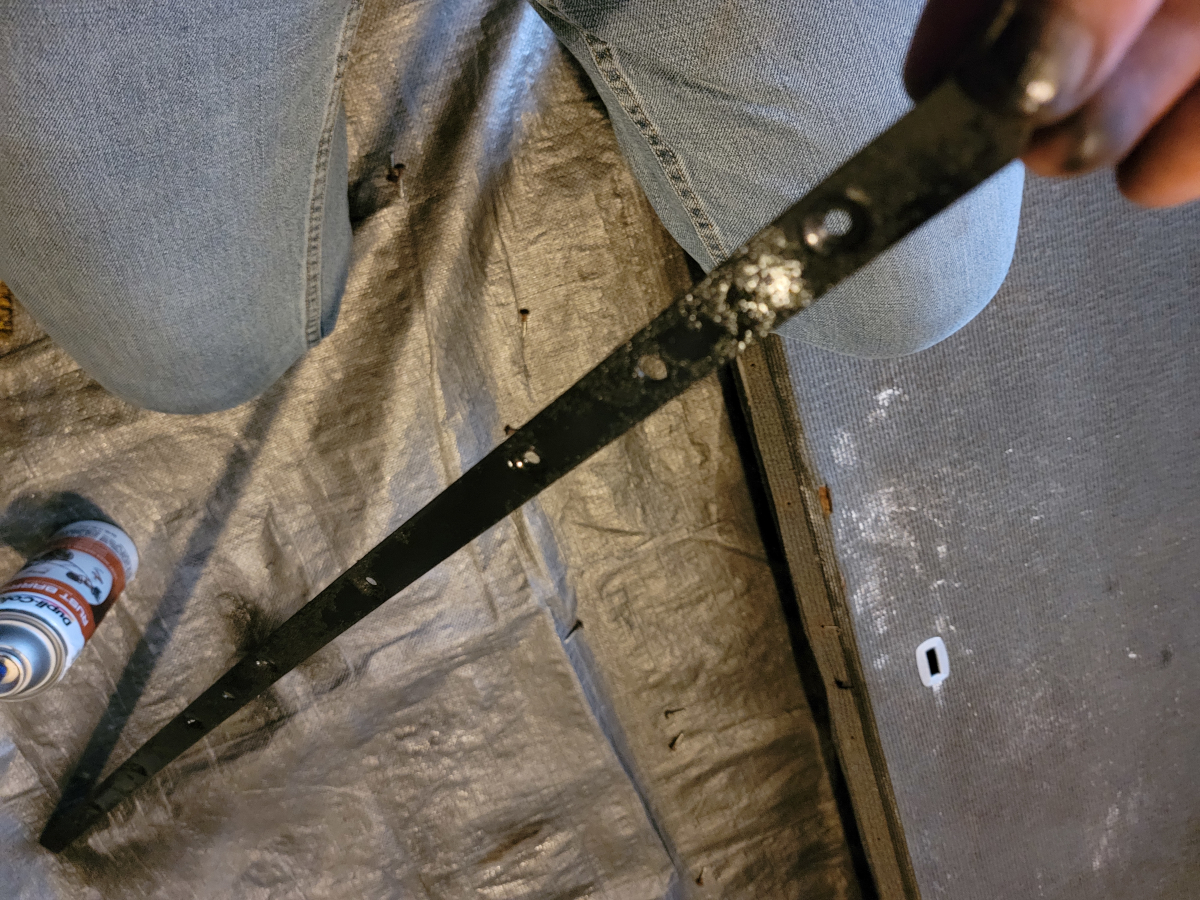
While the bottom one… Not so much.
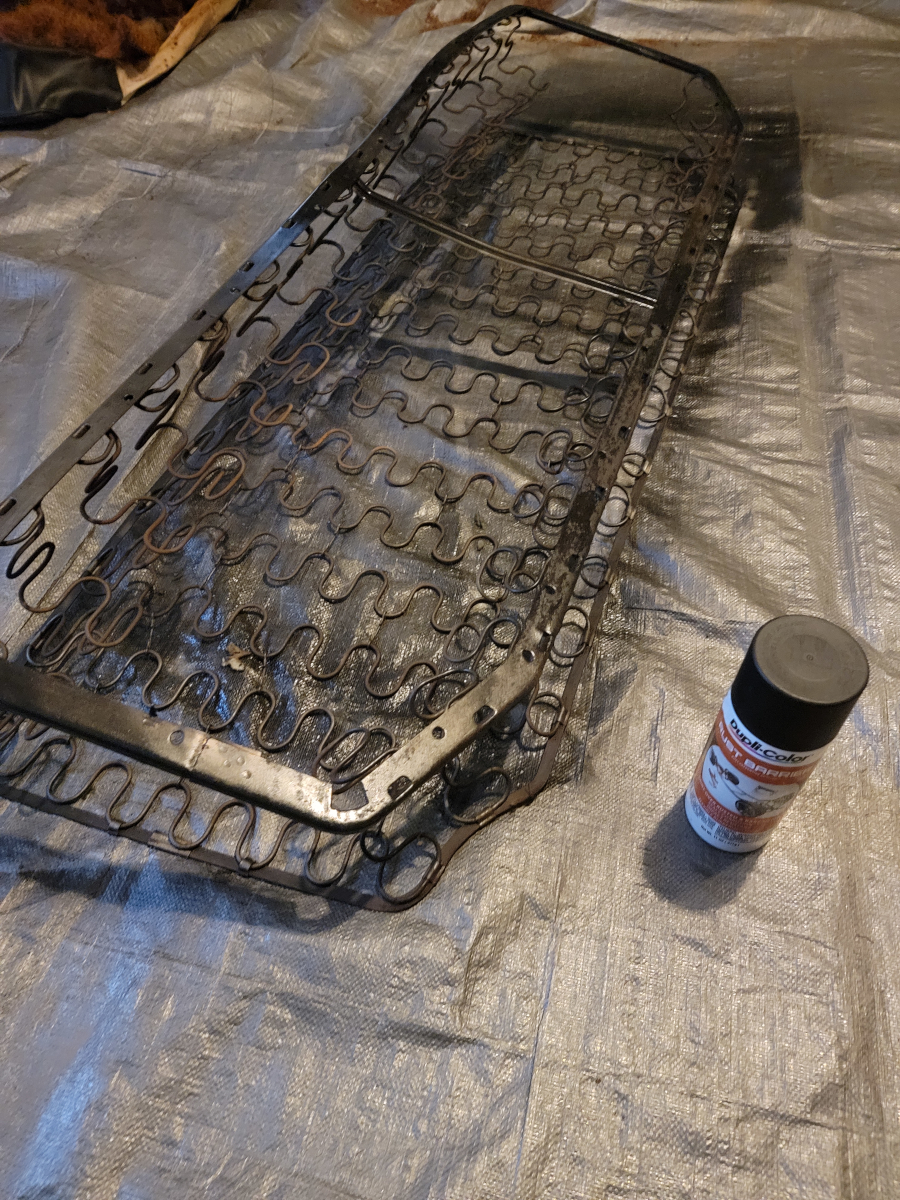
I scrubbed it with a wire brush, sprayed some brake parts cleaner, and wiped it down.
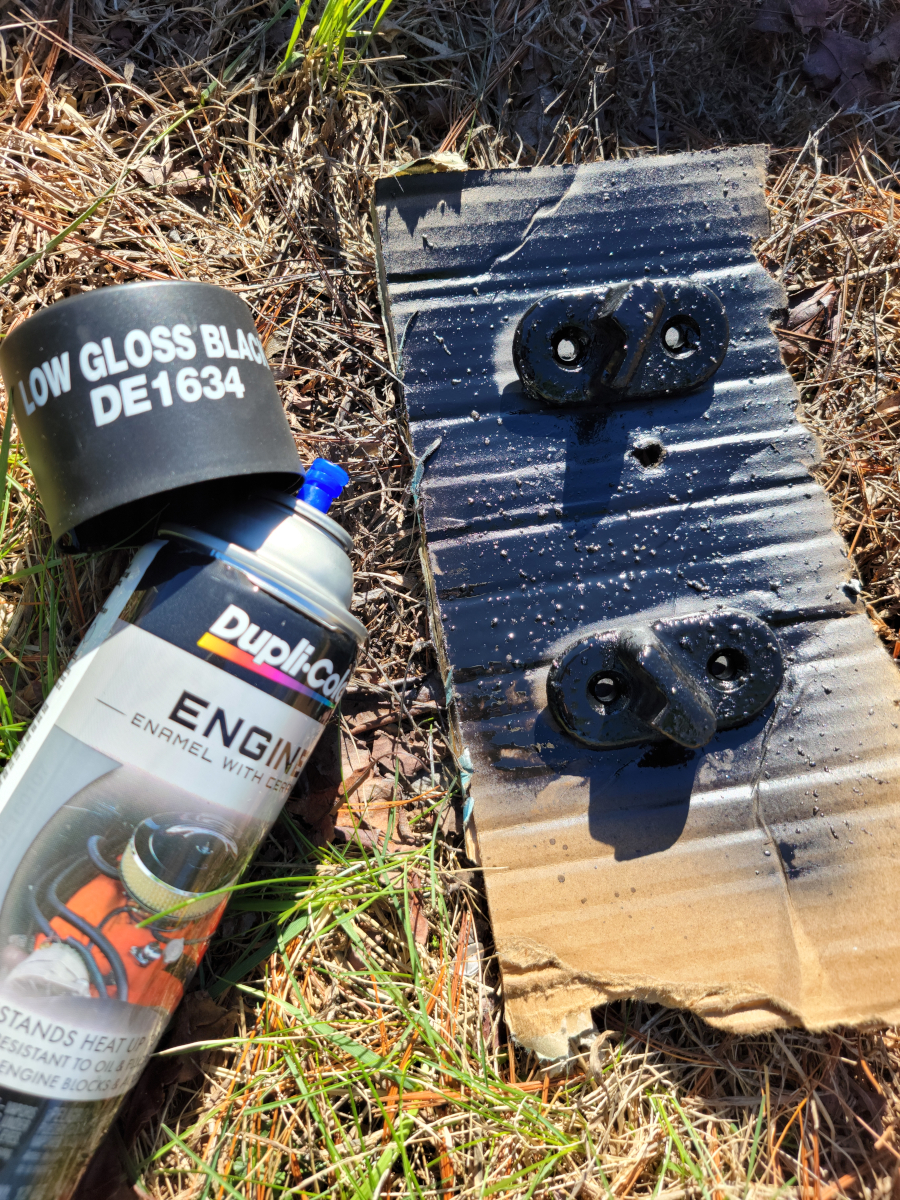
And sprayed it with some rust barrier, then engine enamel. The screws (and my thumbnail) were in really good shape, but could use a blackening.
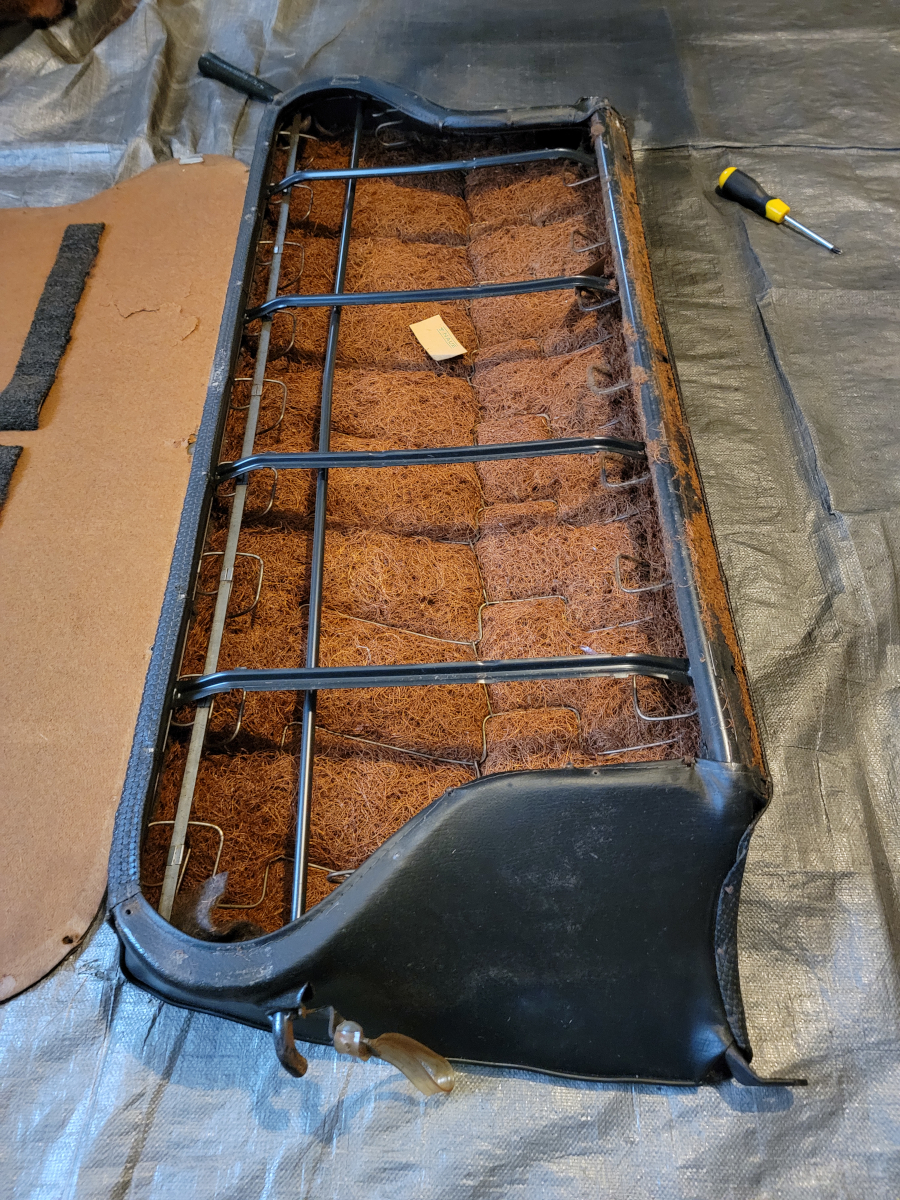
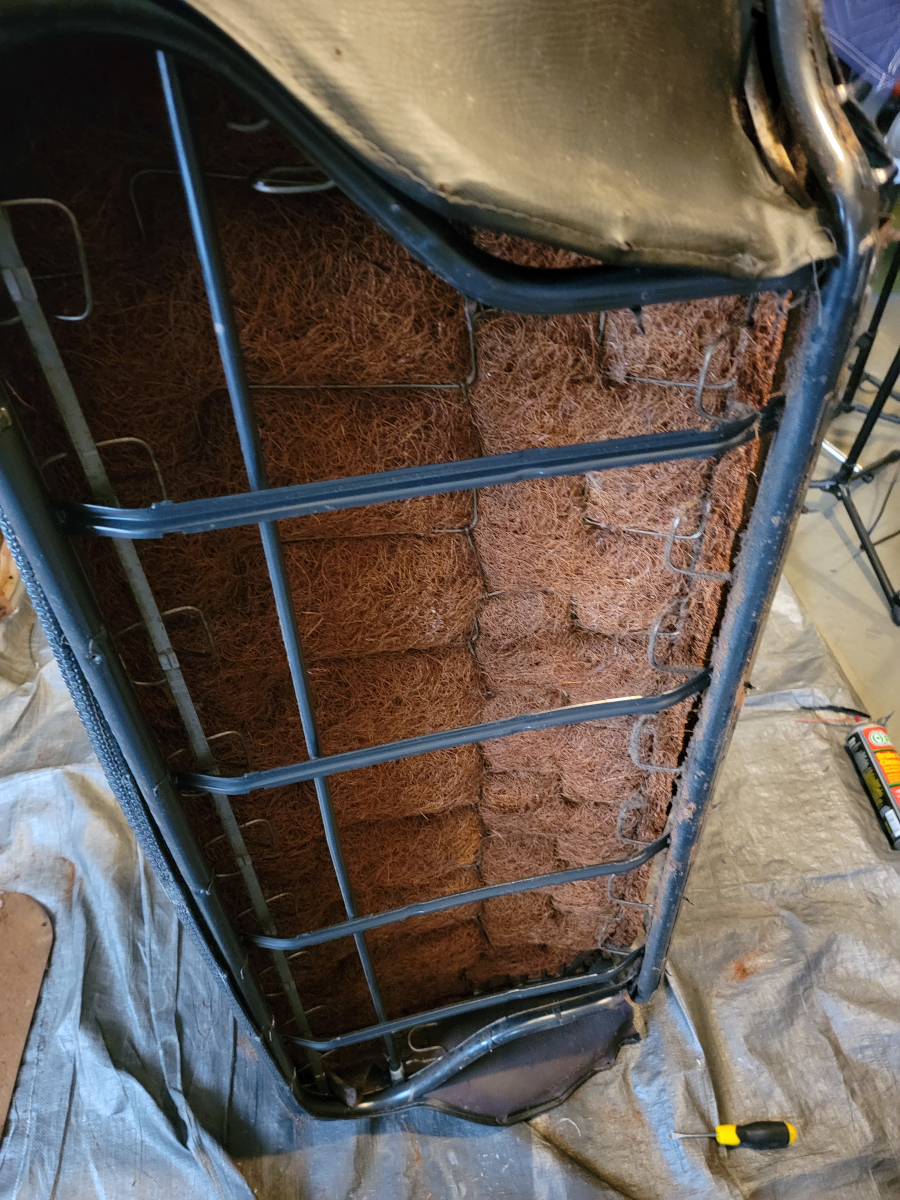
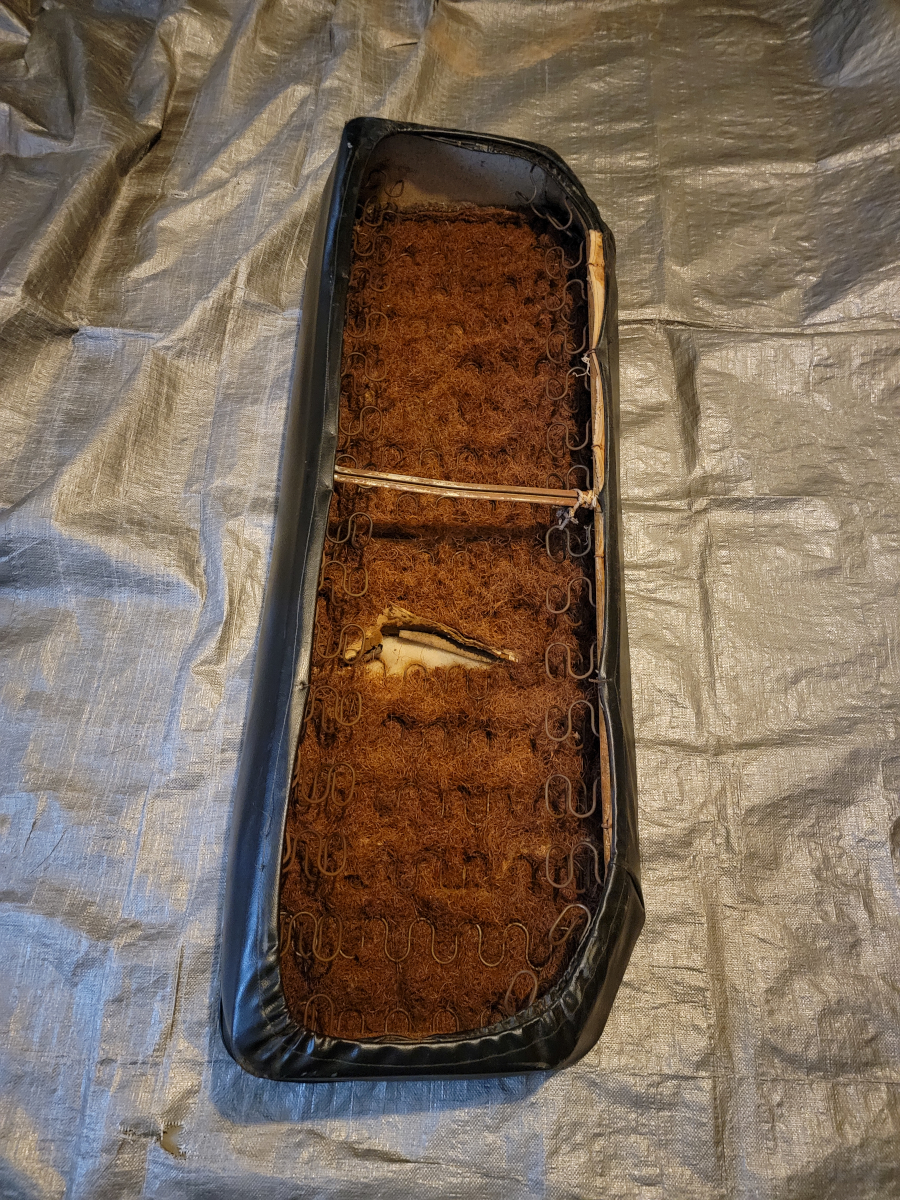
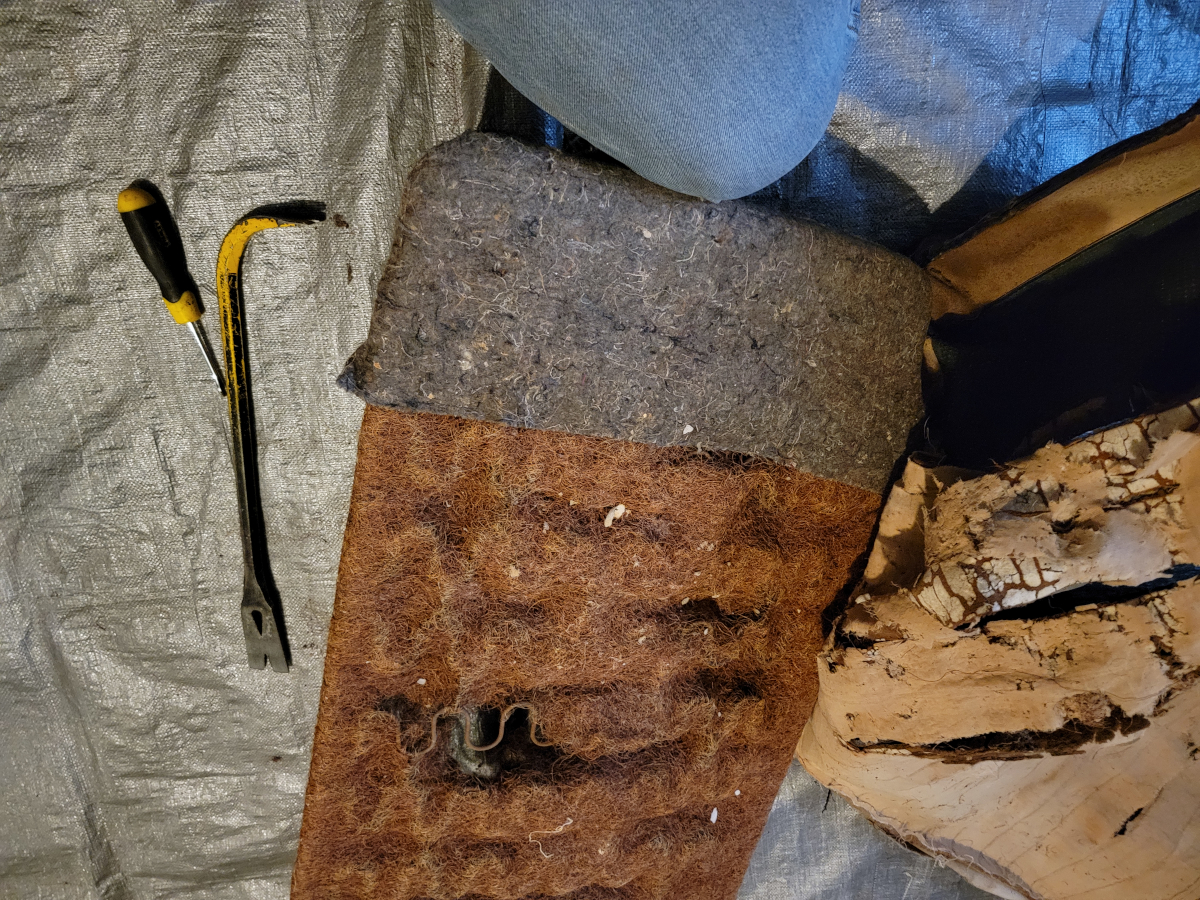
With the back of the seat back removed, we’re presented with a familiar site. More coconut hair.
The inside of the seat back shows it is in pretty rough shape, but not hopeless.
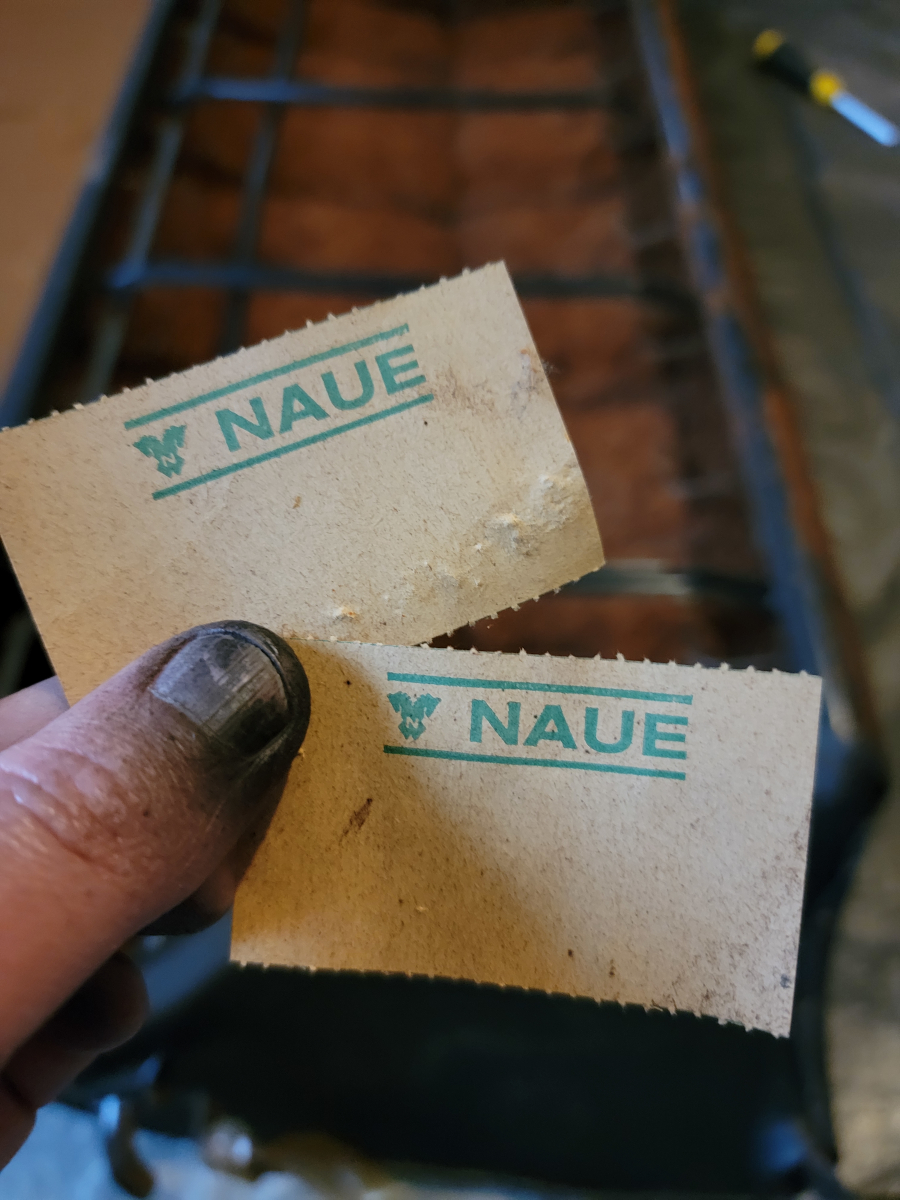
There were two perforated paper tickets I found inside the seat back. NAUE is German for NEW.
That seems like a redundant thing to put inside a seat as the car rolled off the factory floor, so I would imagine this has been replaced at some point? With a naue one, zu buten.
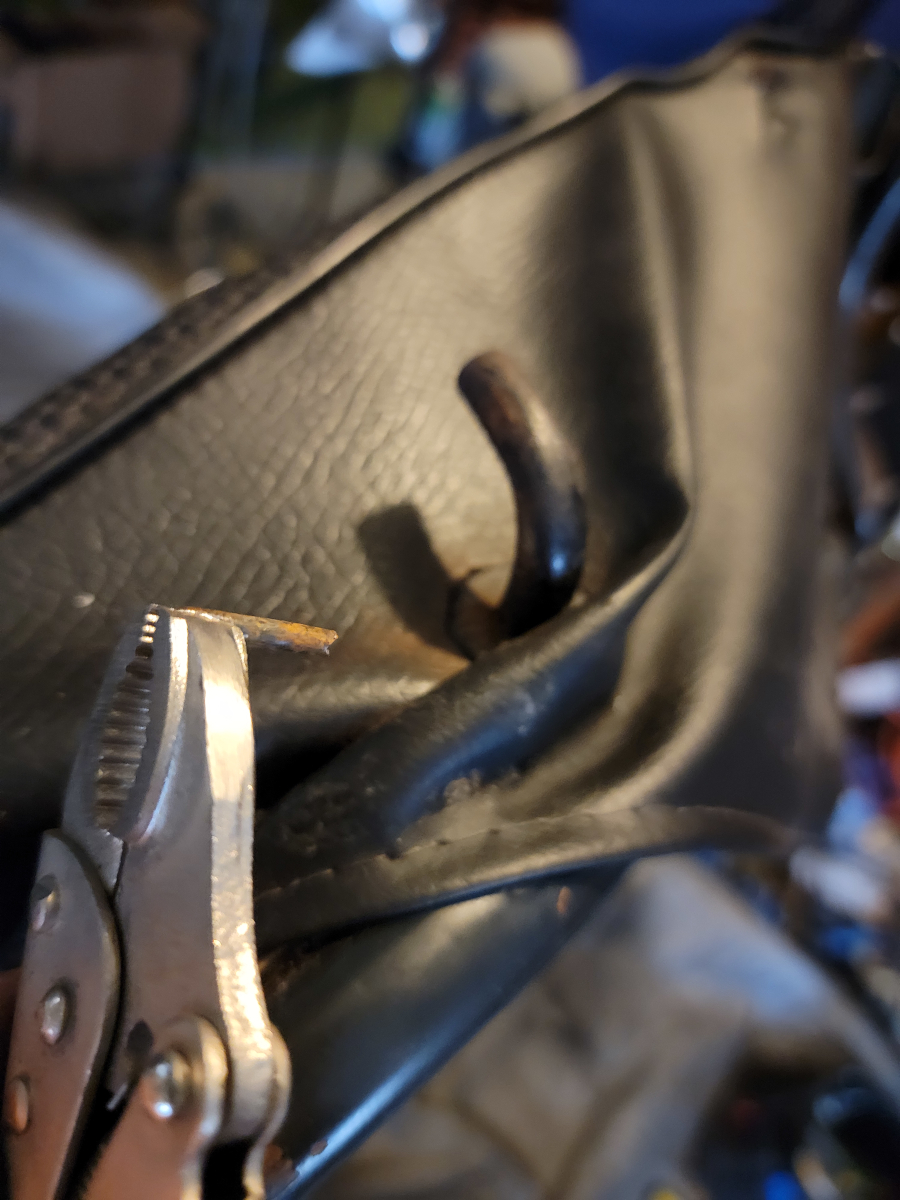
There were a lot of bendy prongs holding the seat cover on this time and there wasn’t evidence of the cover having ever been removed.
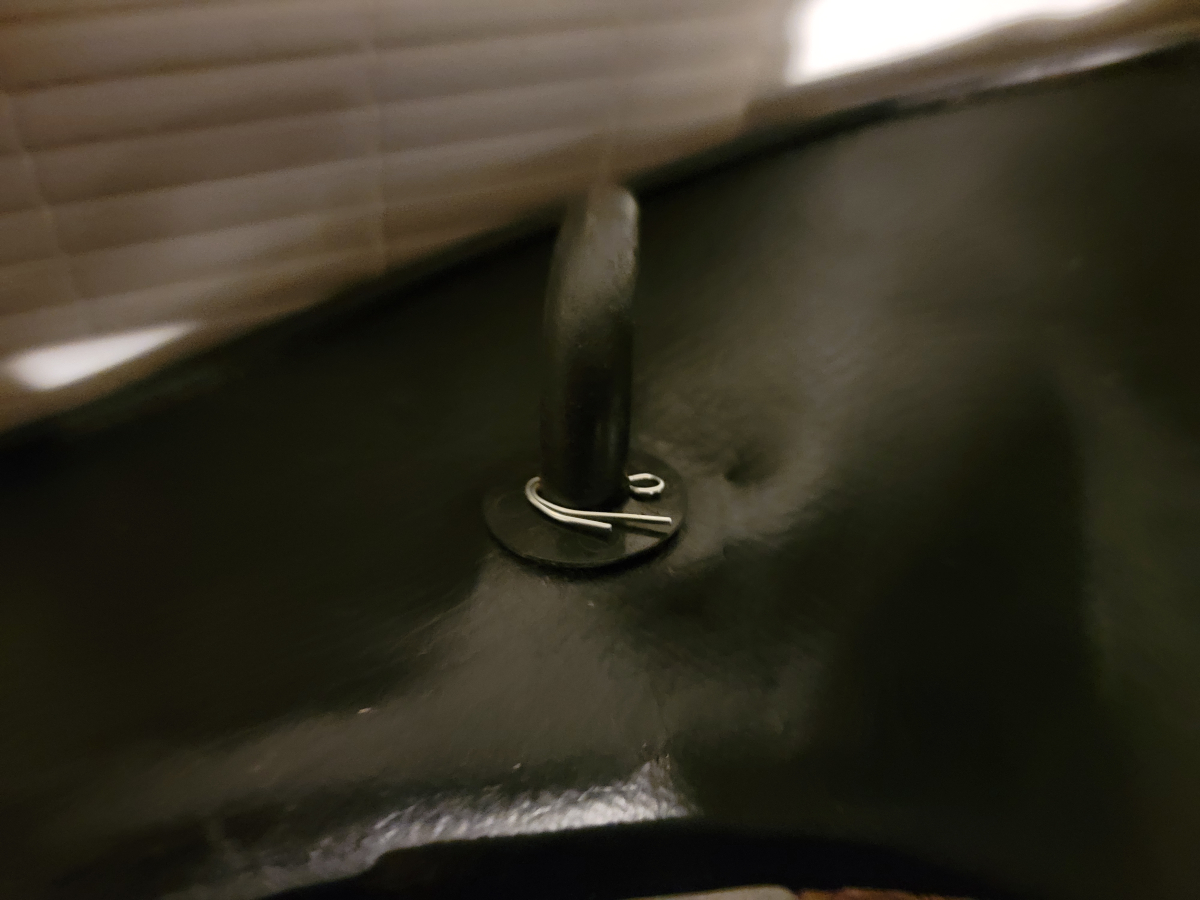
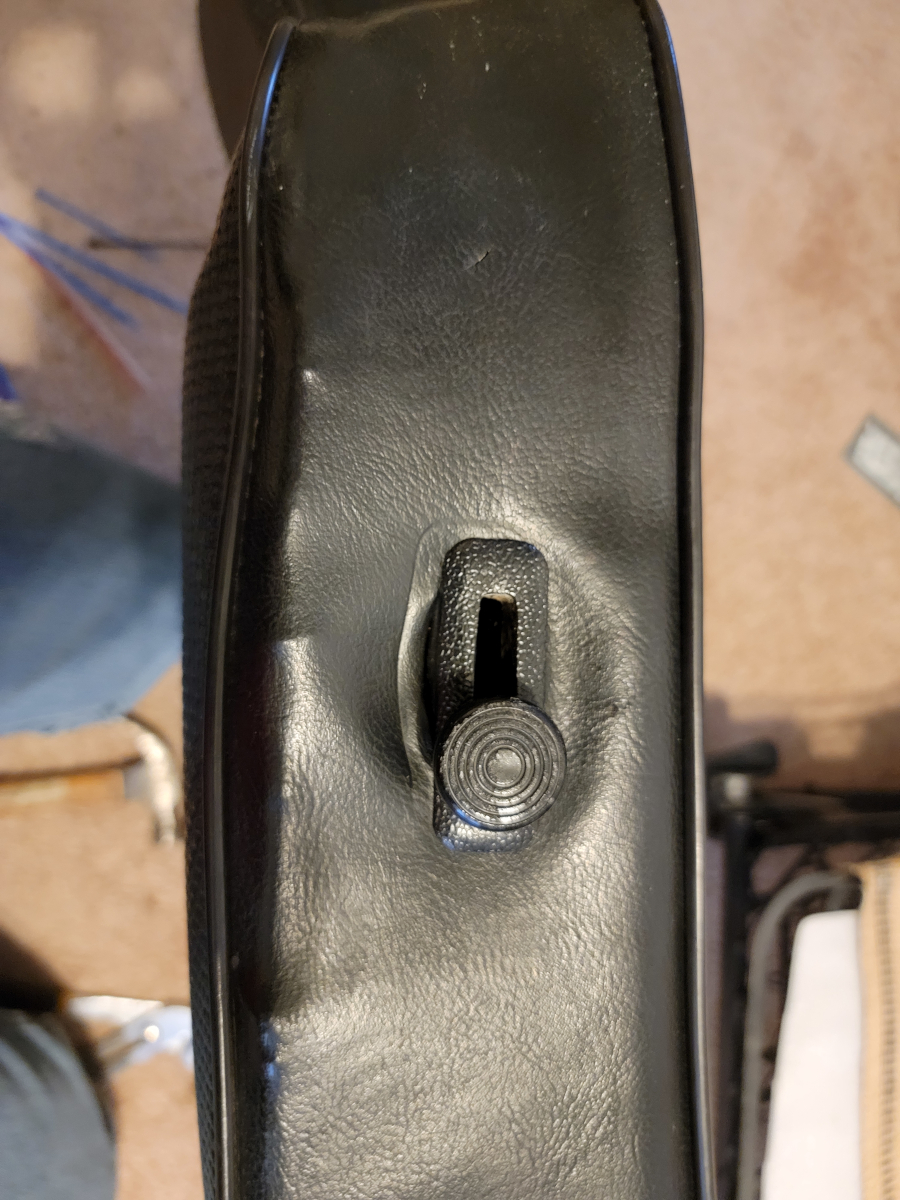
There is a small punch pin holding the plastic trim ring around the business end of the seat release lever. <foreshadowing>I definitely need to keep track of that part so as not to lose it!</foreshadowing>
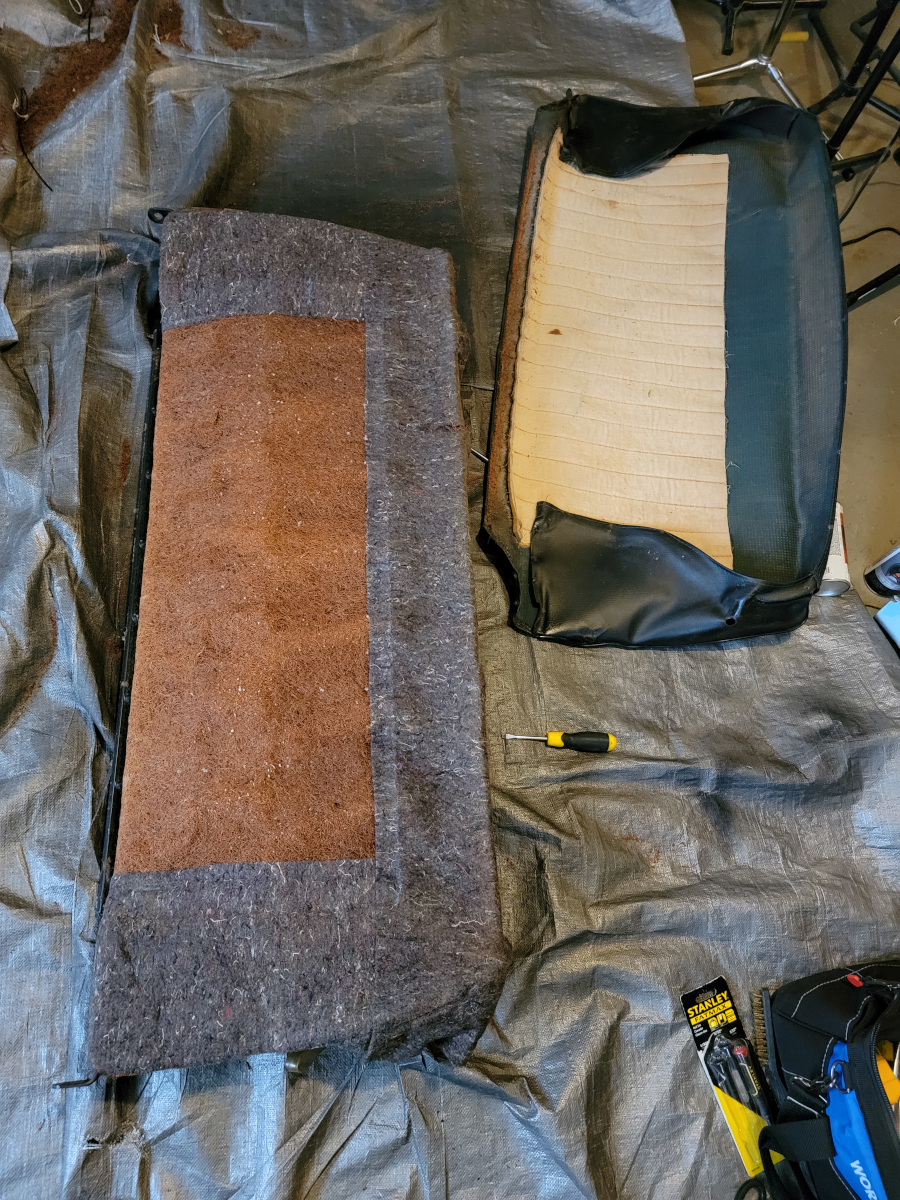
With the seat cover removed, I saw a familiar sight, the padding wrapped coconut hair cushion mat.
No extra layers of bubble wrap and random other packing materials, no second seat covers inside. This time it was a straightforward removal.
Cleanup
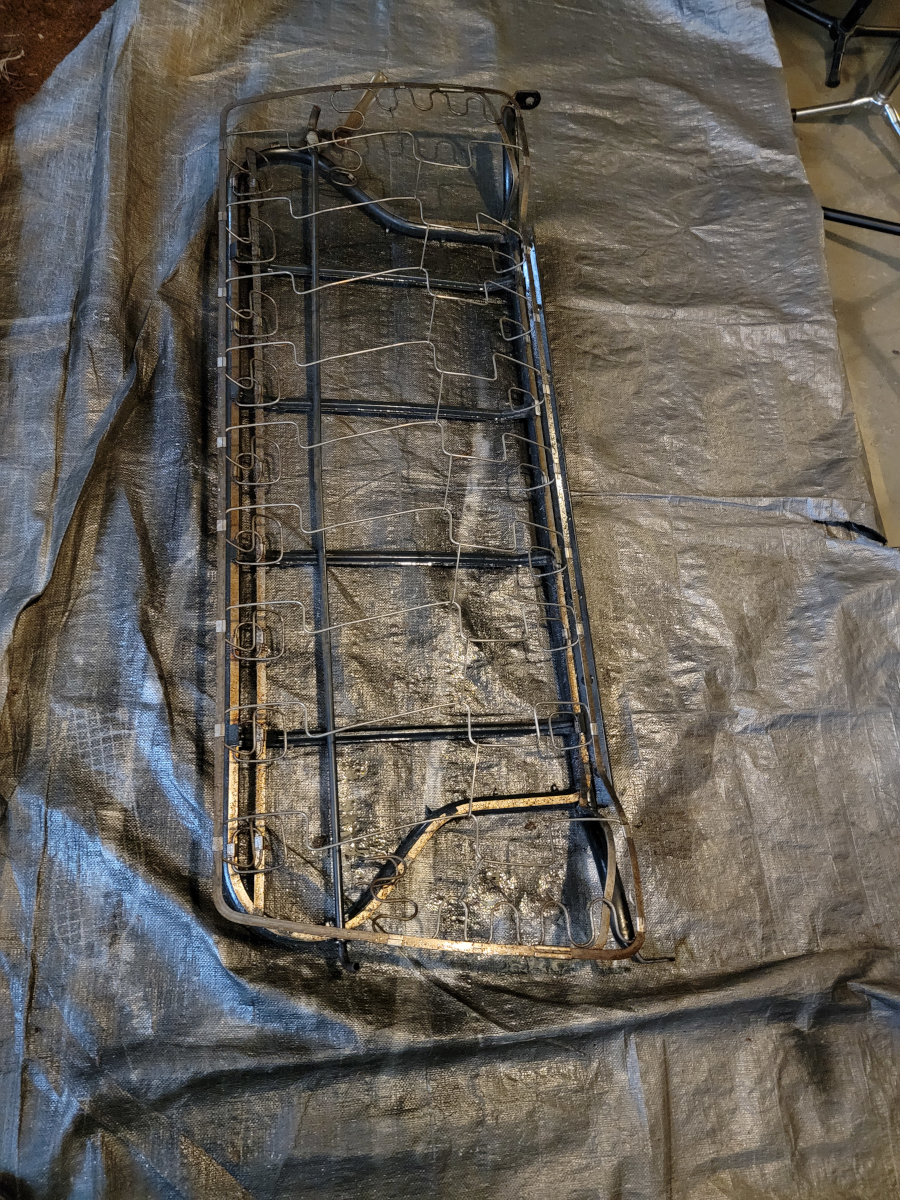
I hosed the frame down with brake parts cleaner, then wiped it dry. Then, of course, sprayed the rust barrier…
and engine enamel.
I resprayed that top aluminum (or whatever) trim piece as well, though it was in good shape already.
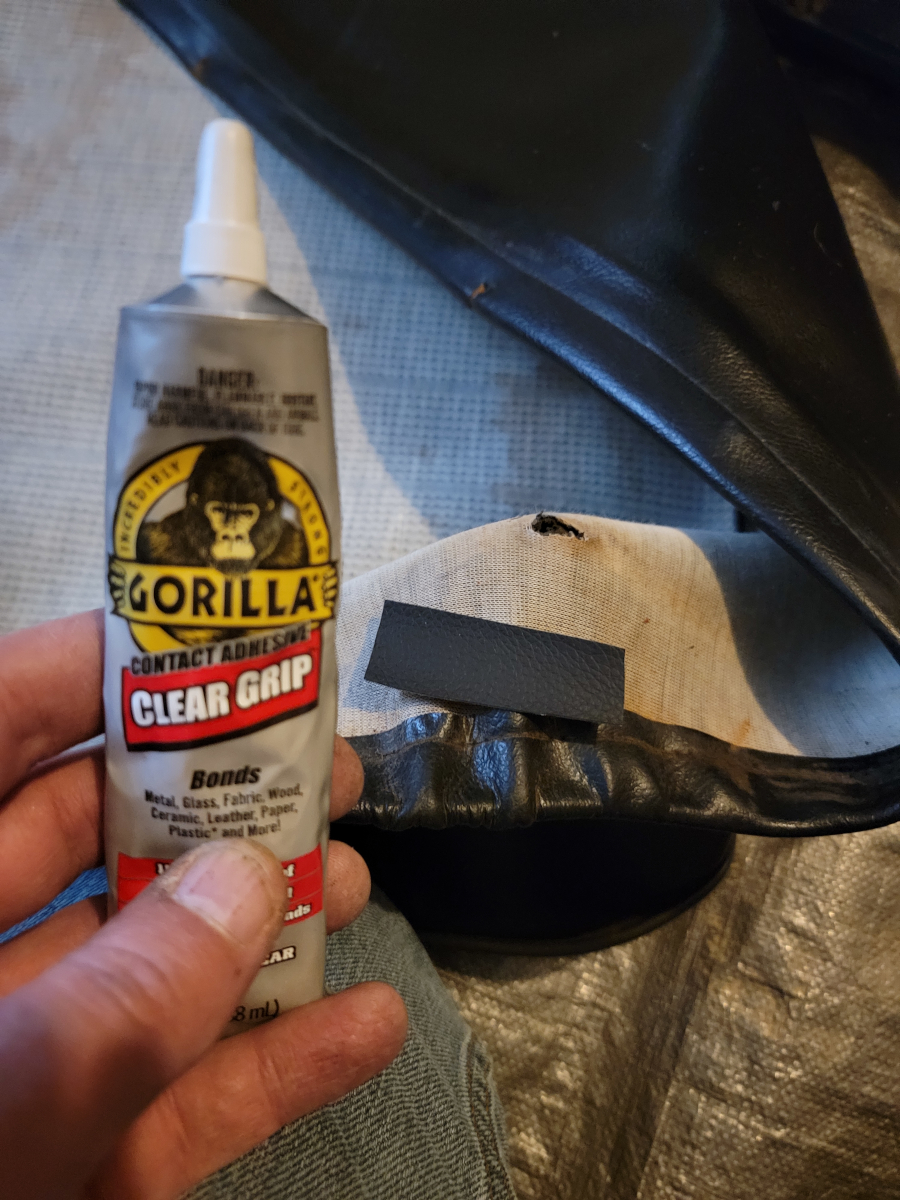
There was a chunk of fiber board that was broken and the vinyl backing was peeled up. I glued it up with Gorilla Clear Grip and clamped it in a vice grip to let it dry. The metal support plate on the opposite edge had also come loose. Glued and gripped.
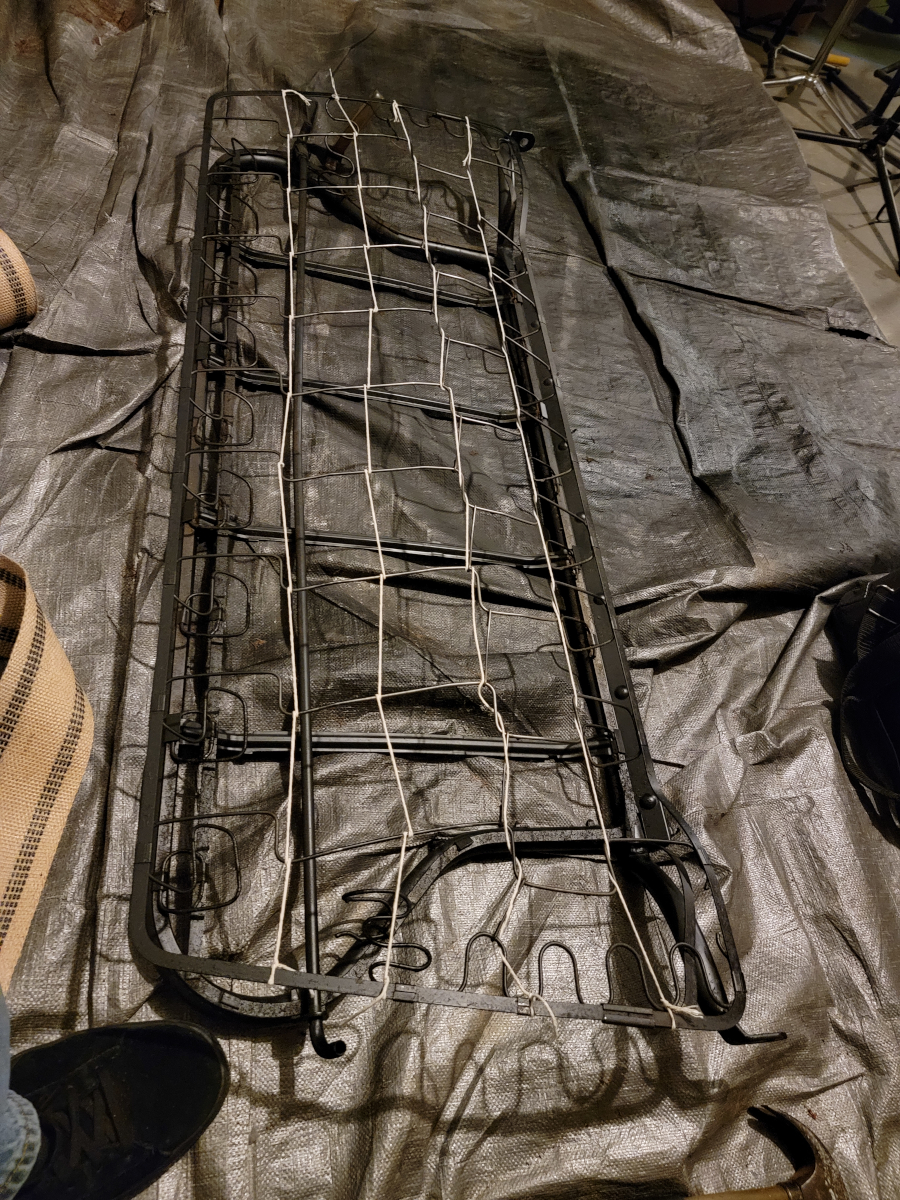
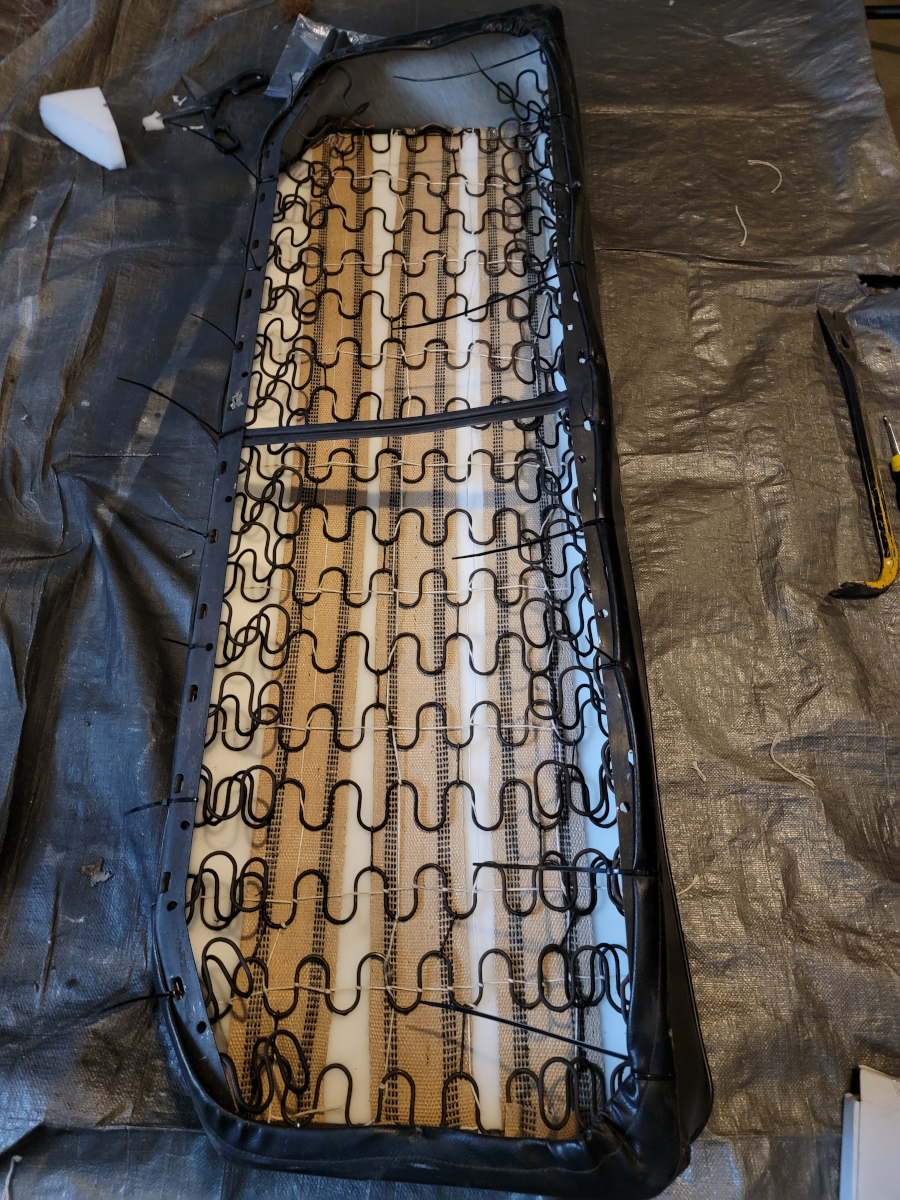
Rebuilding
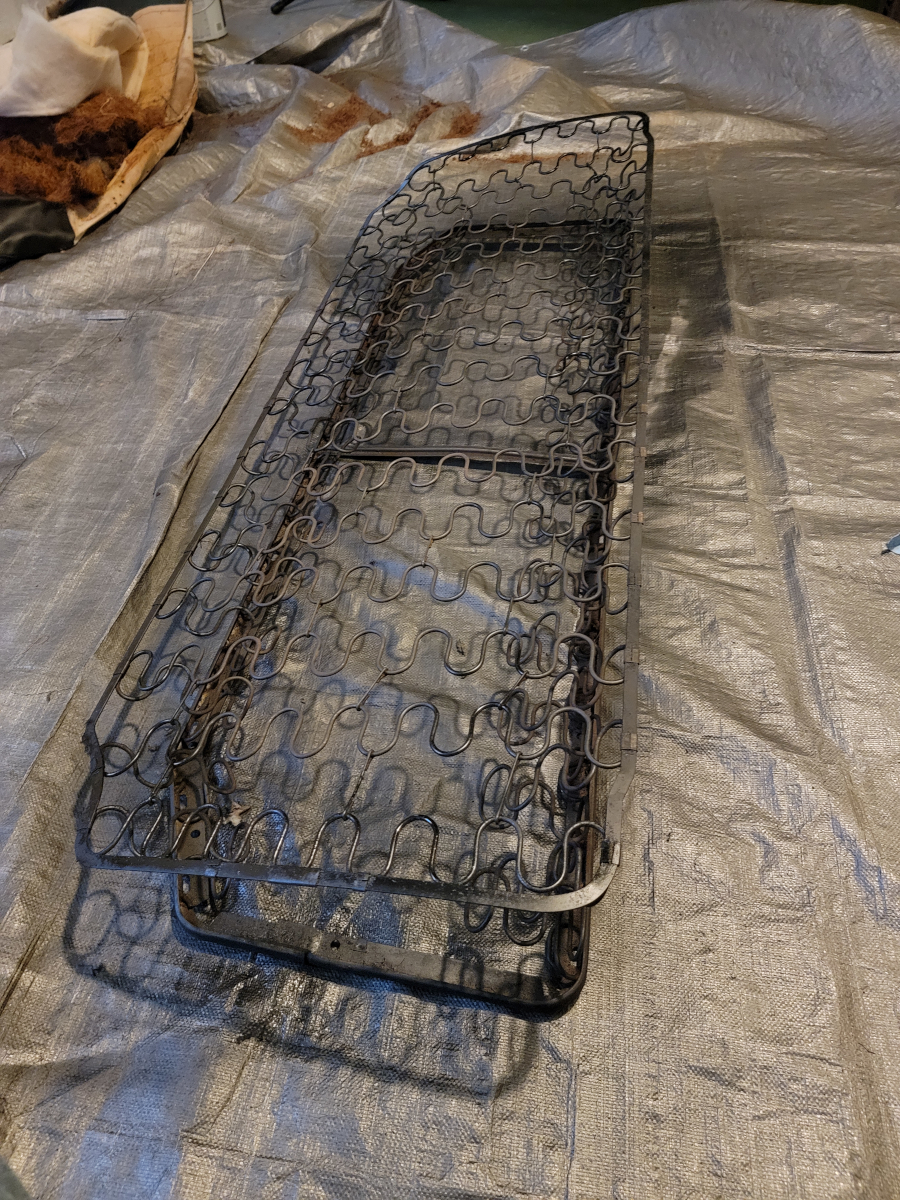
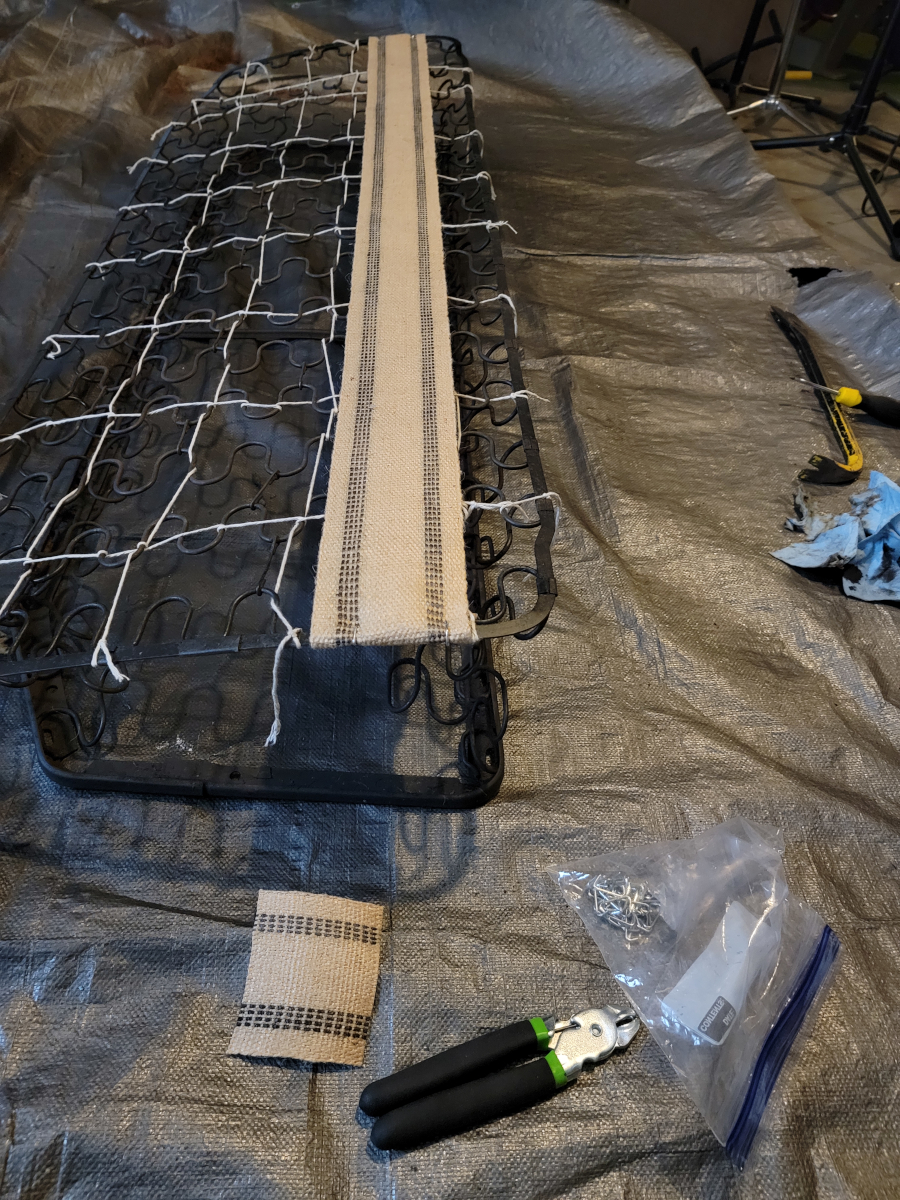
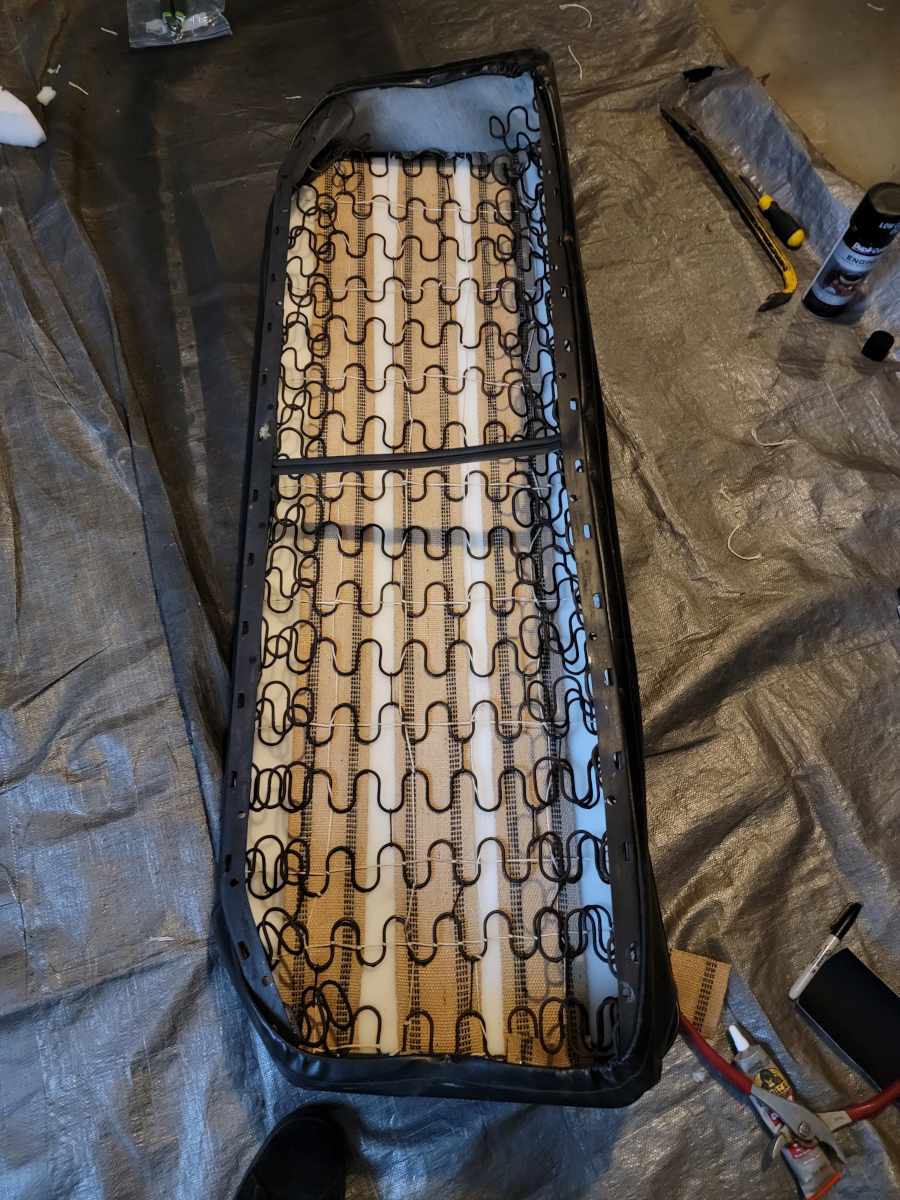
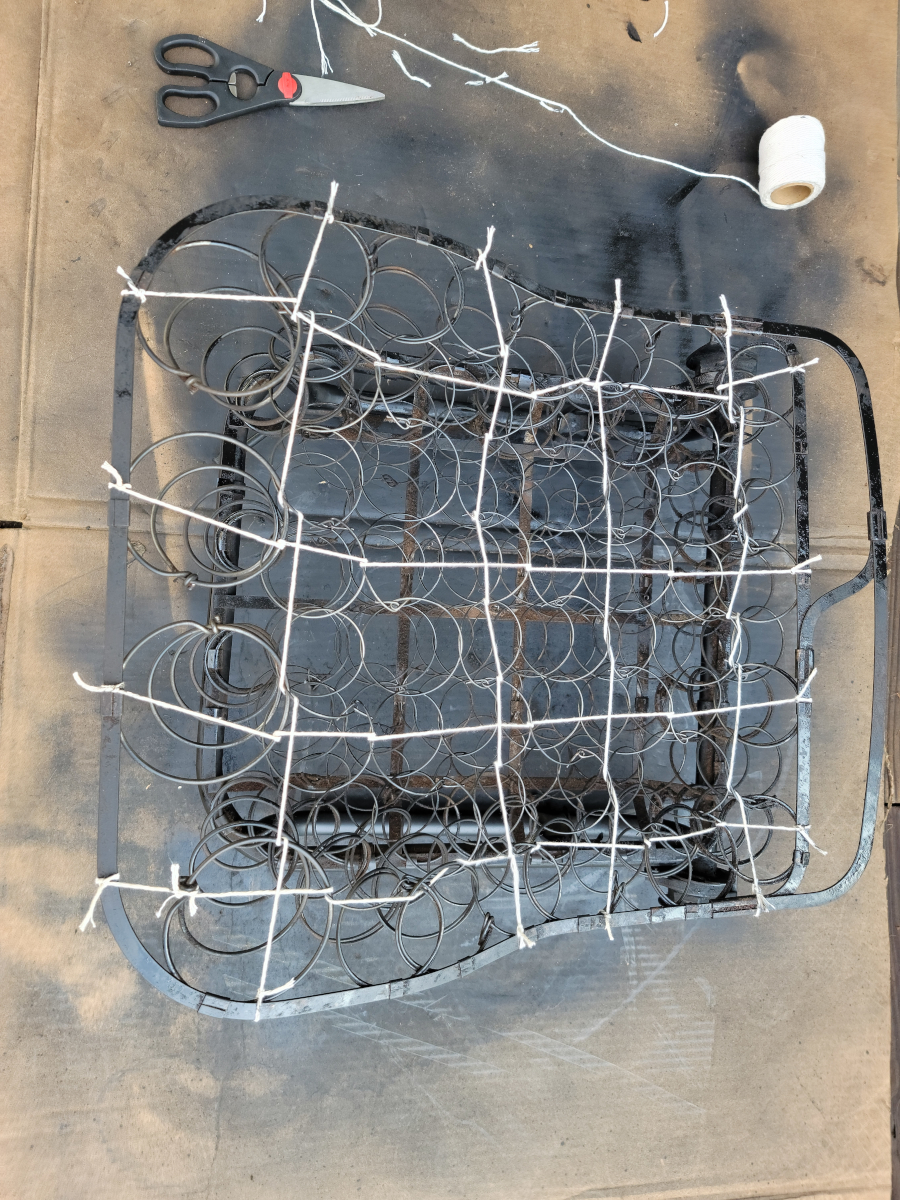
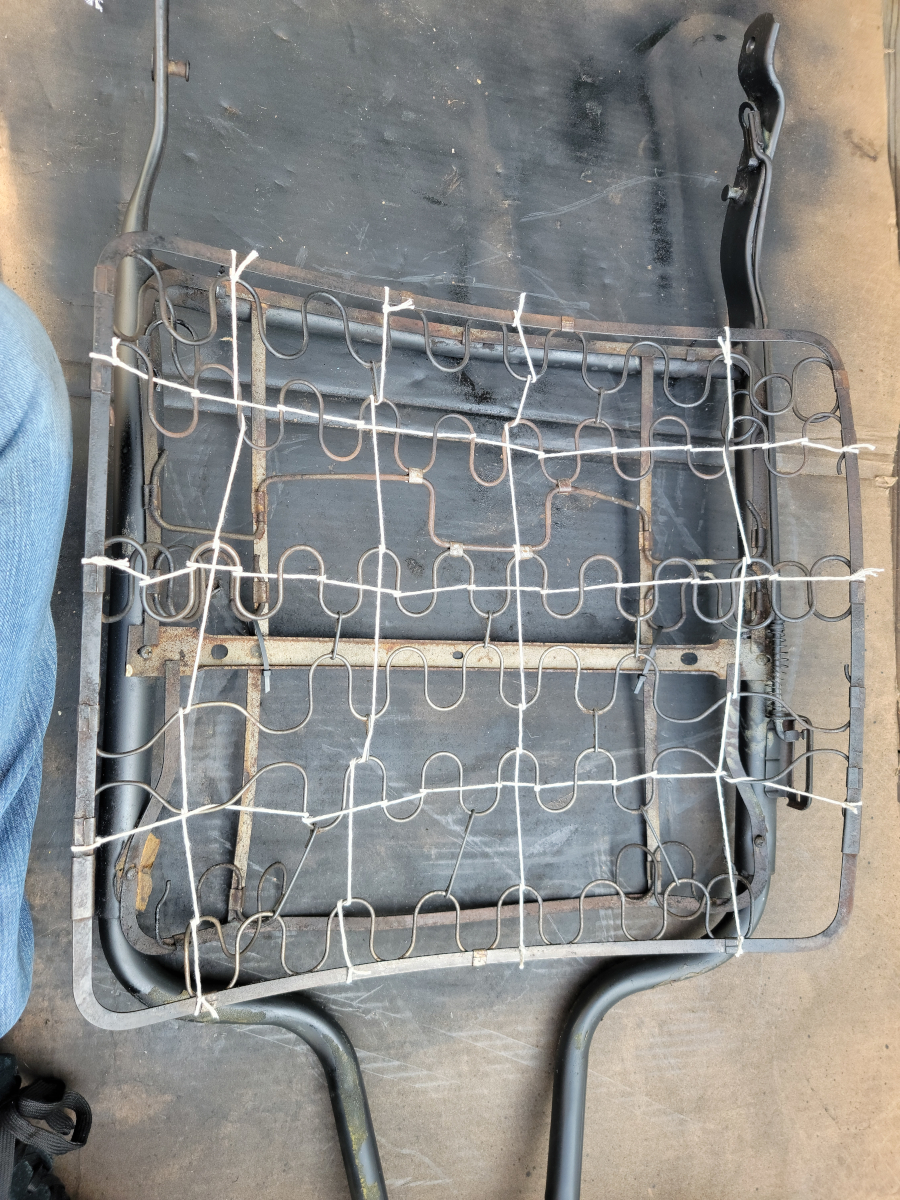
And then it was time for the twine tied grid-work.
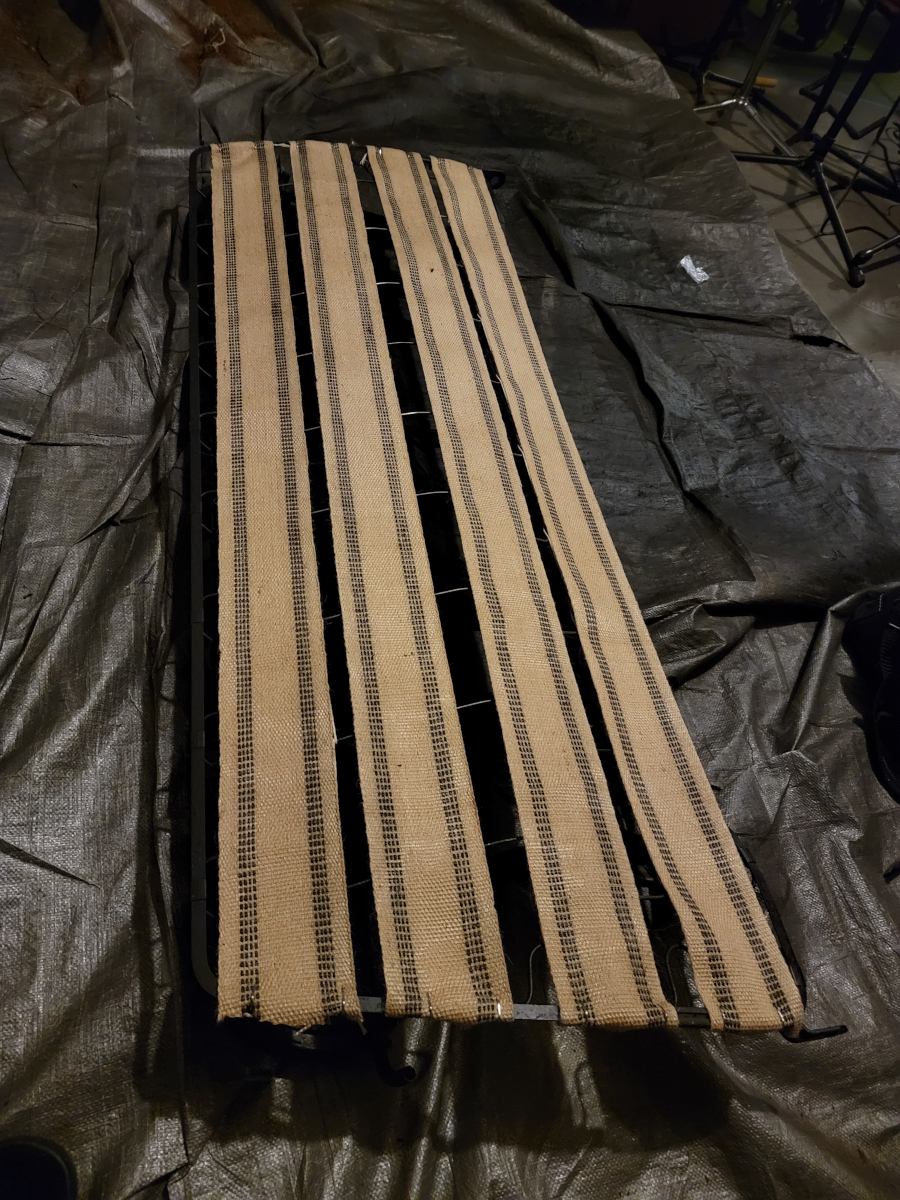
And then jute webbing.
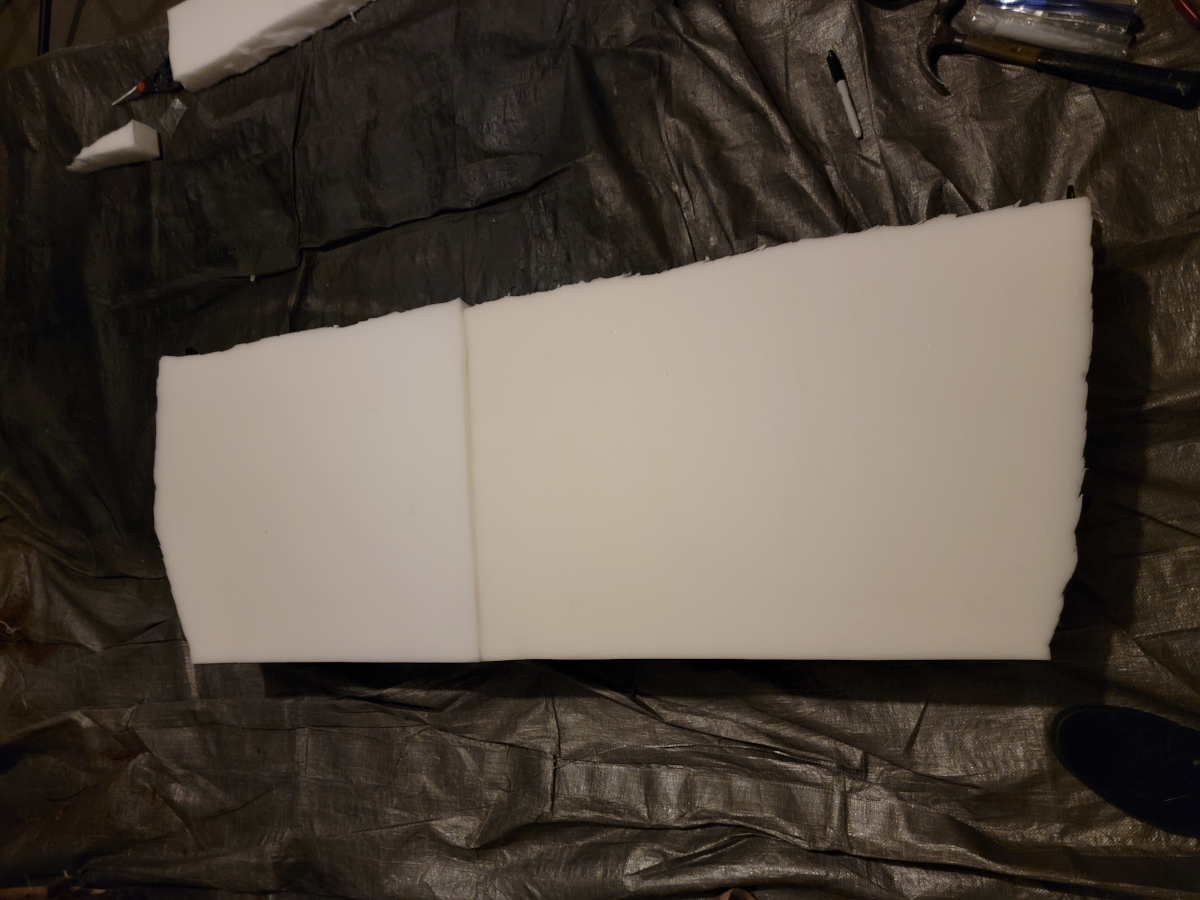
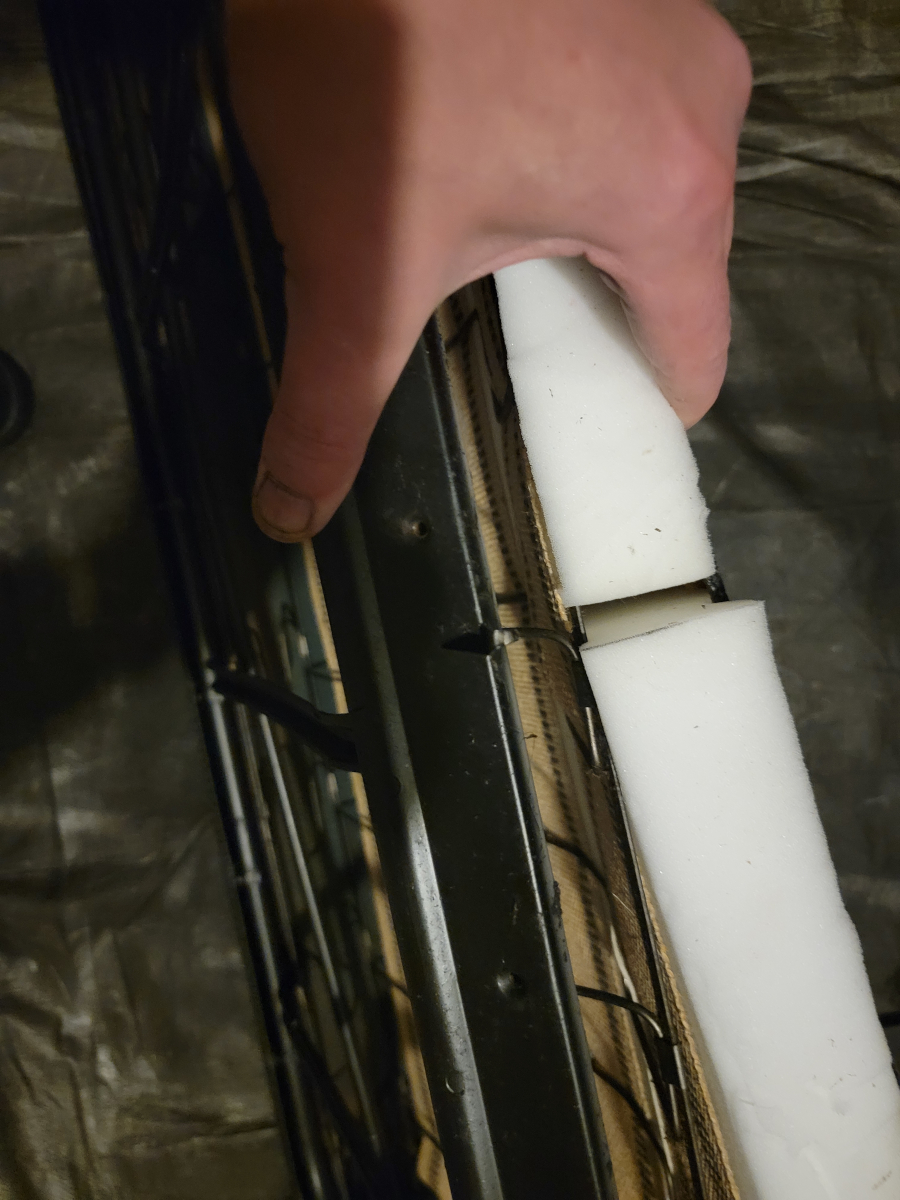
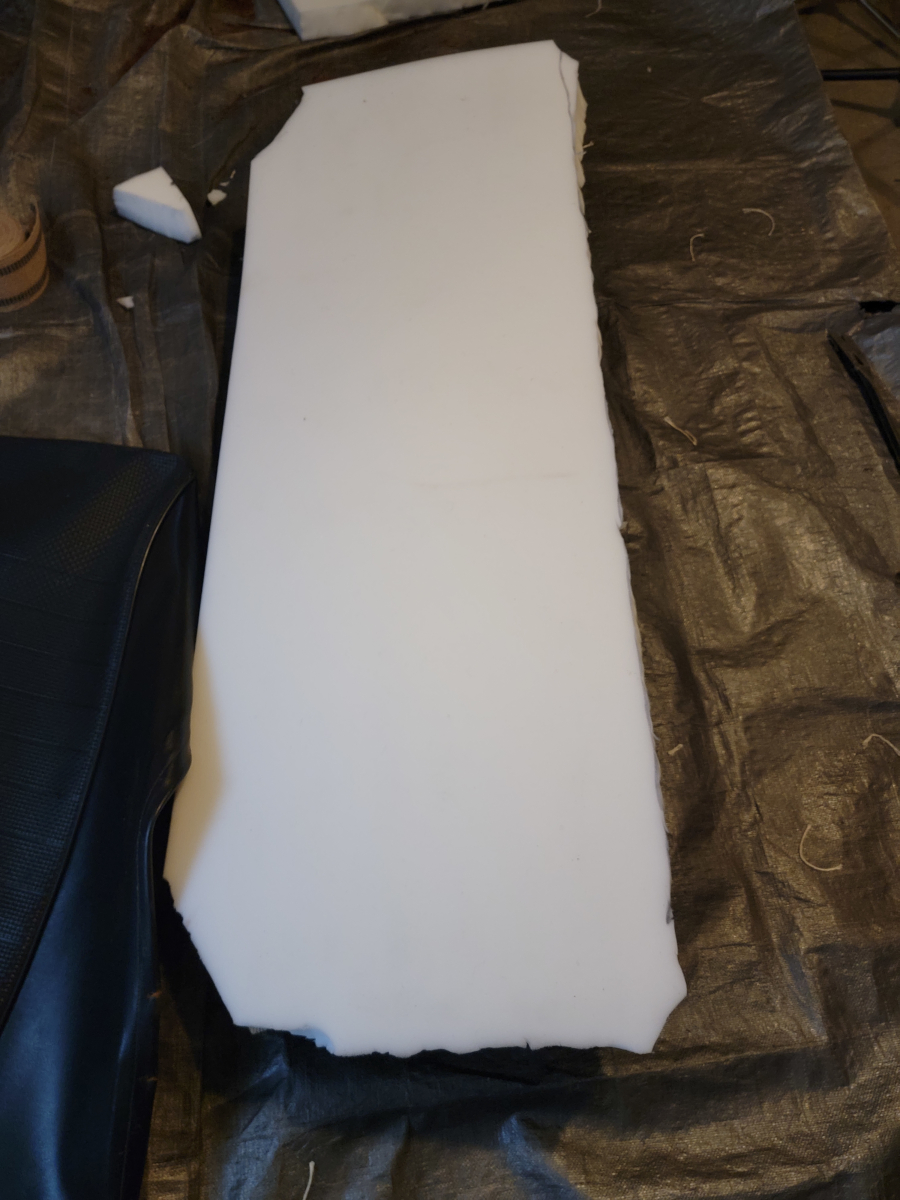
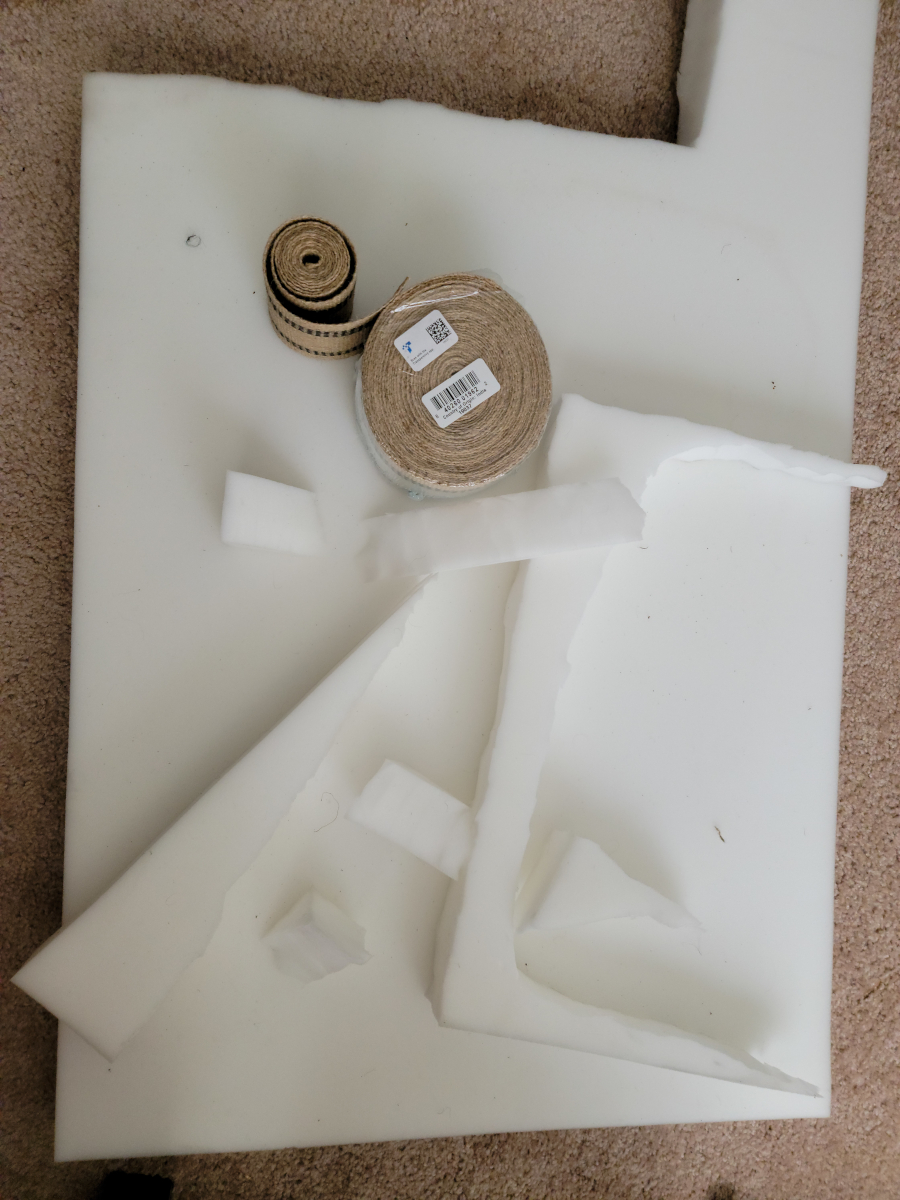
I had the two cut foam pieces from before and shaped them to fit the frame.
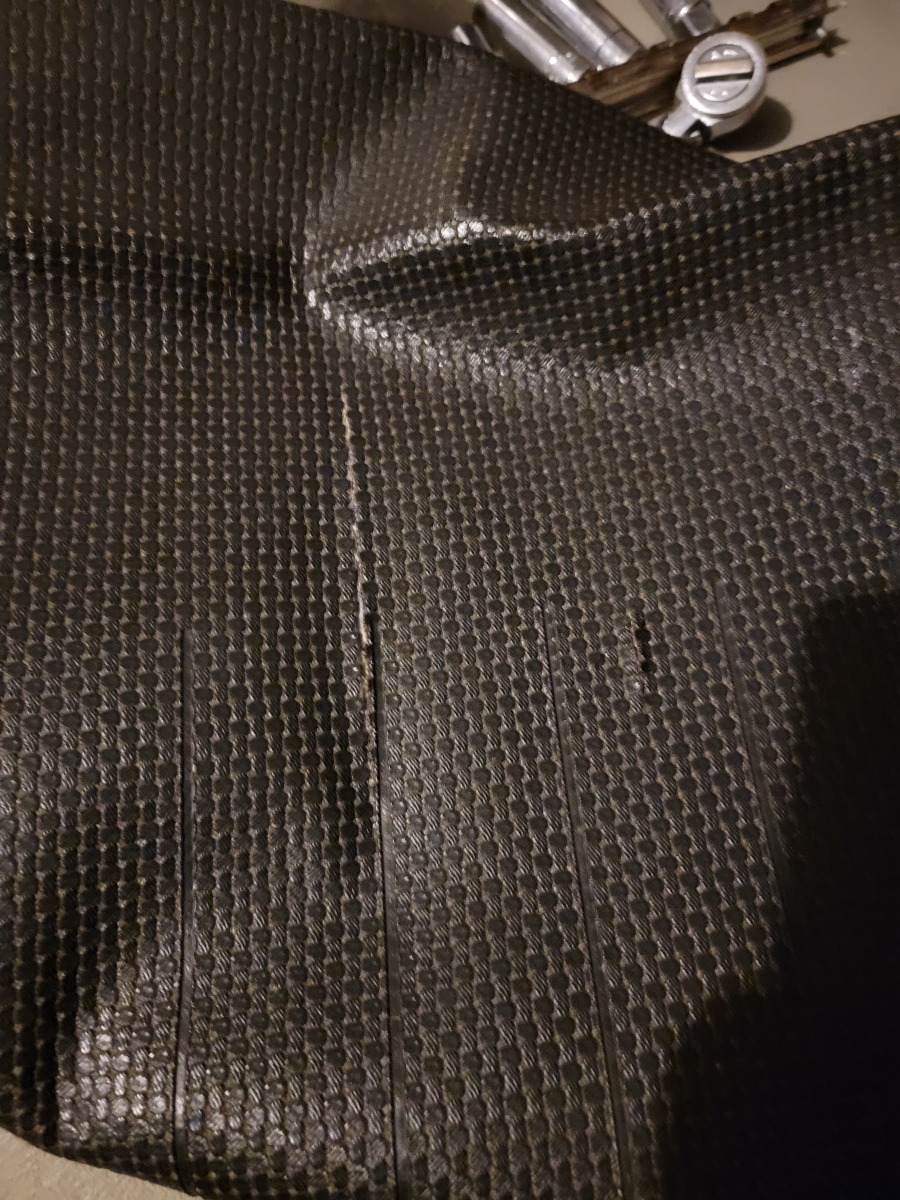
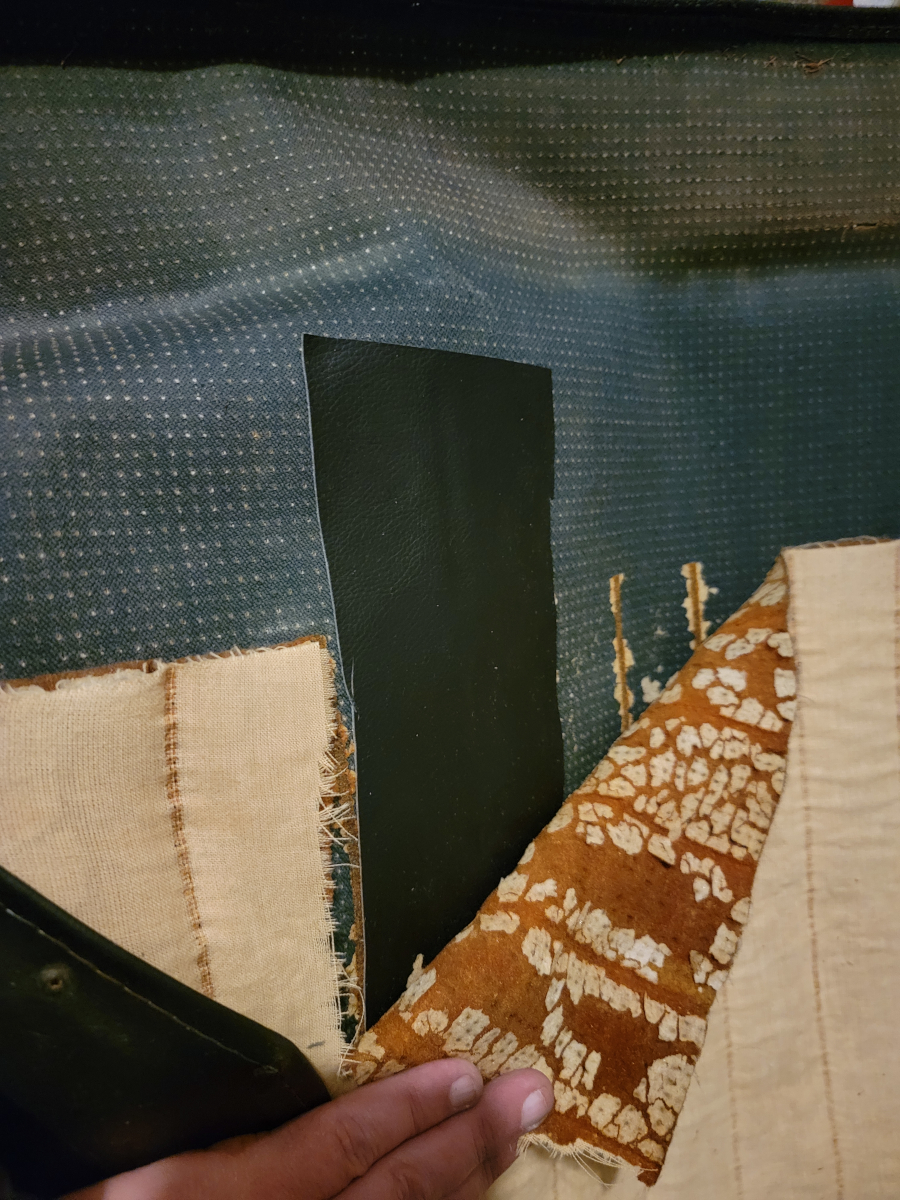
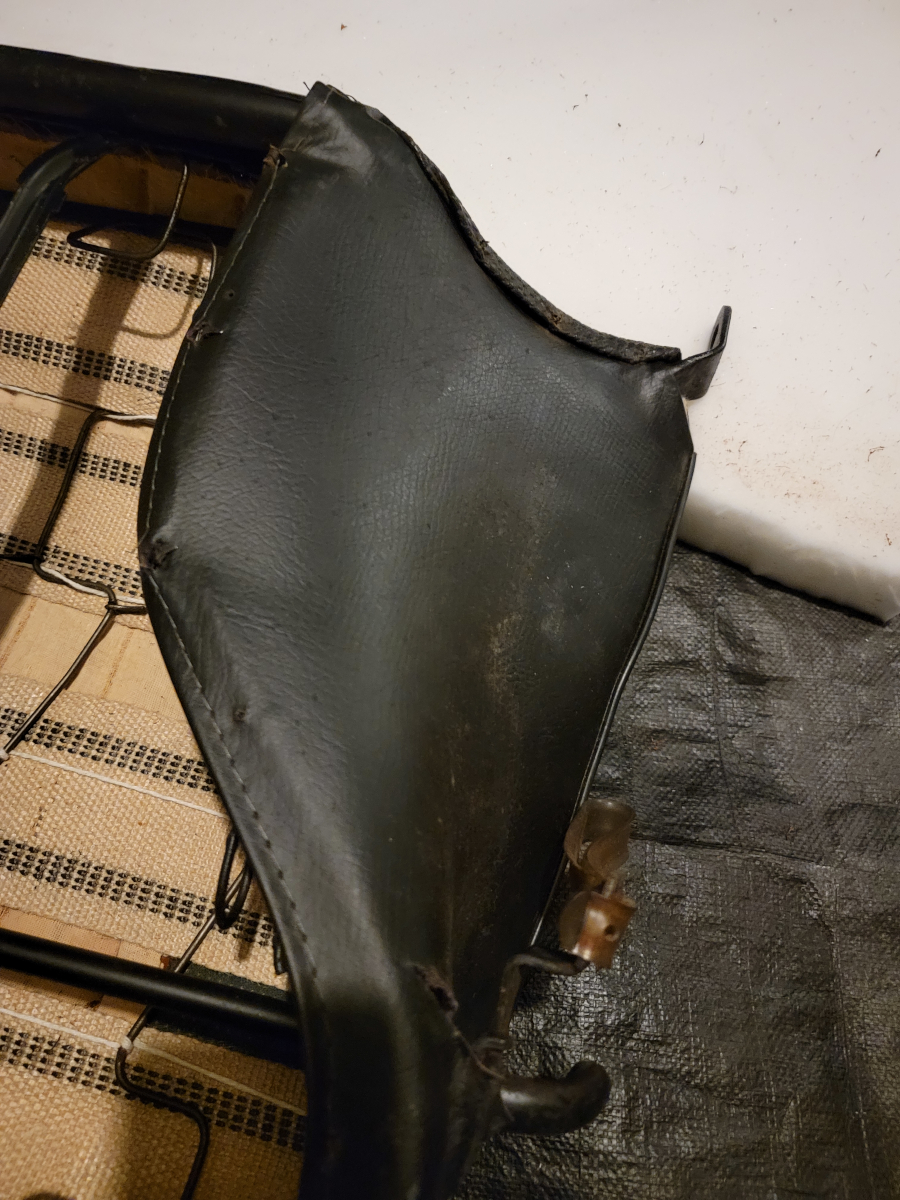
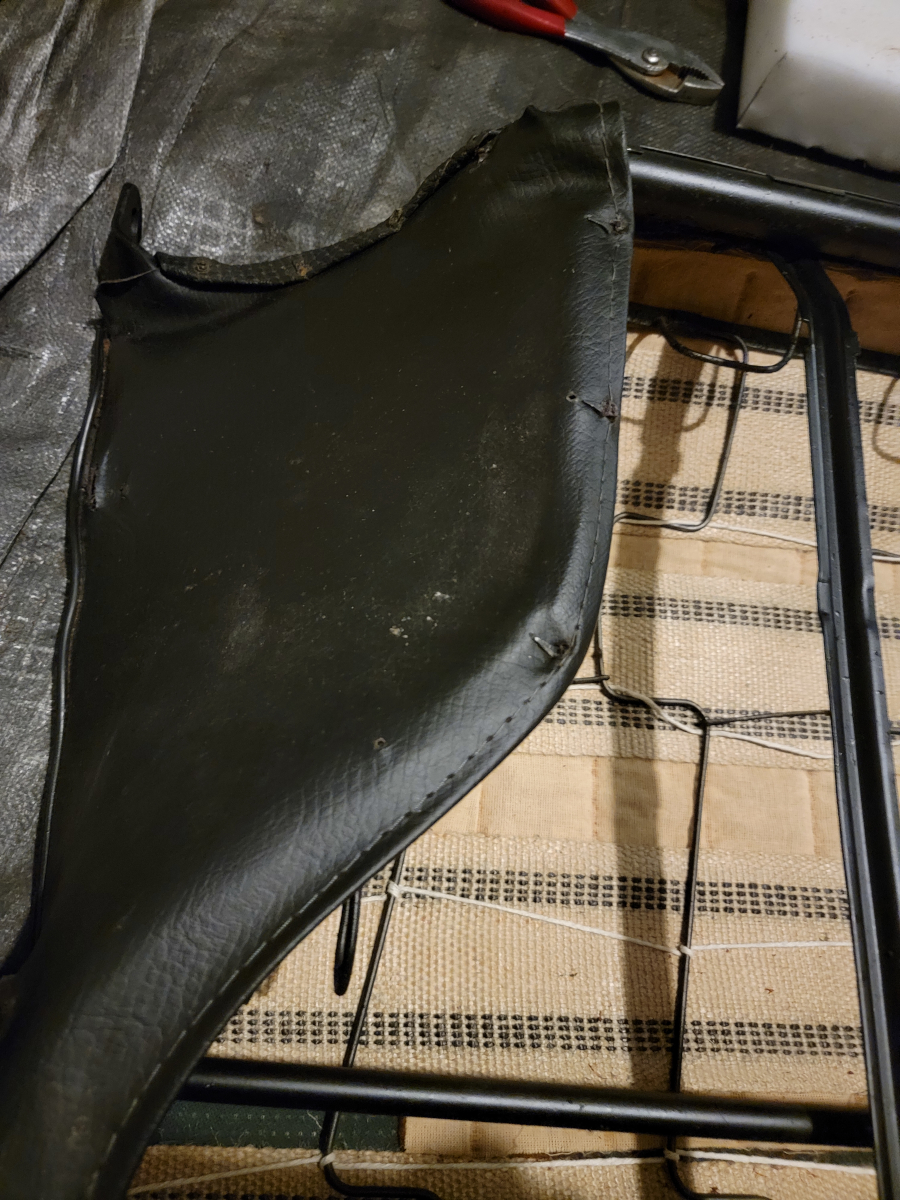
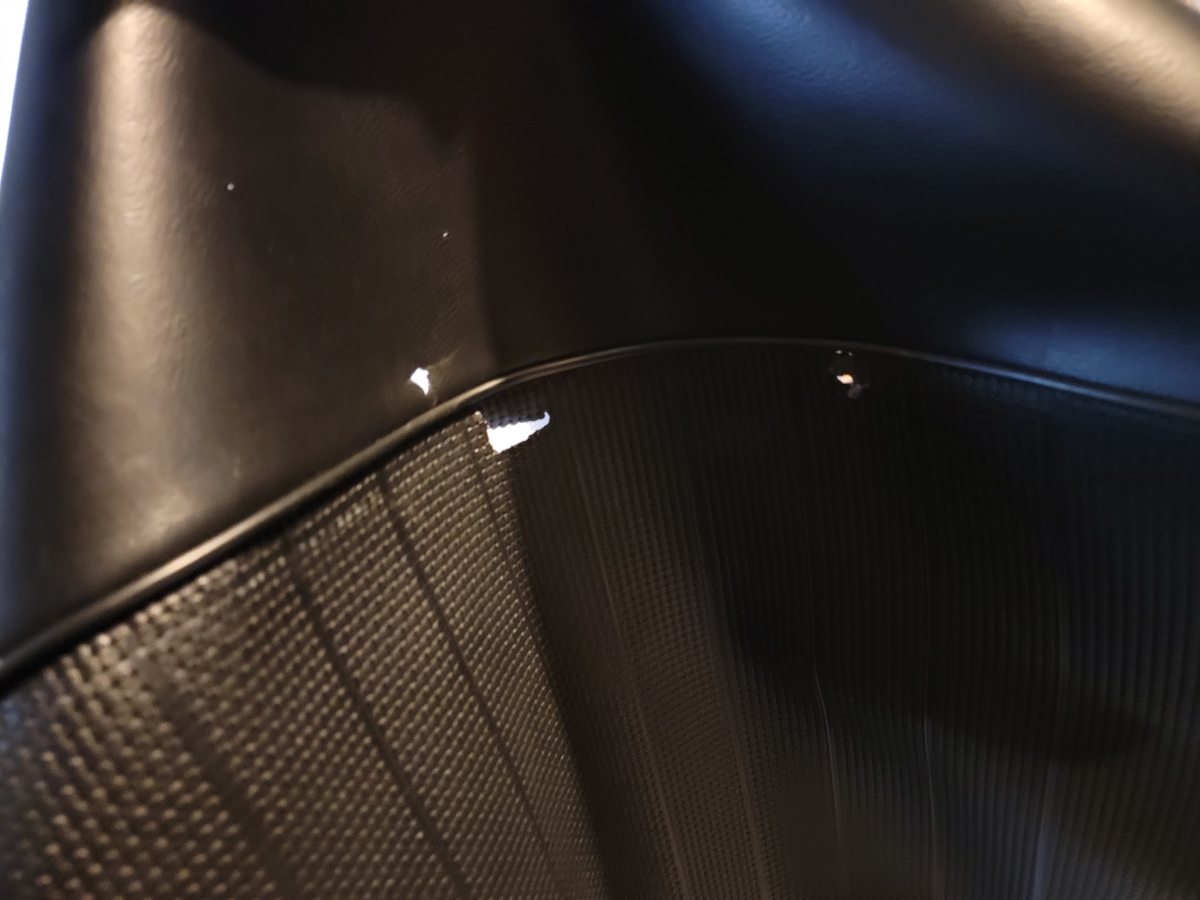
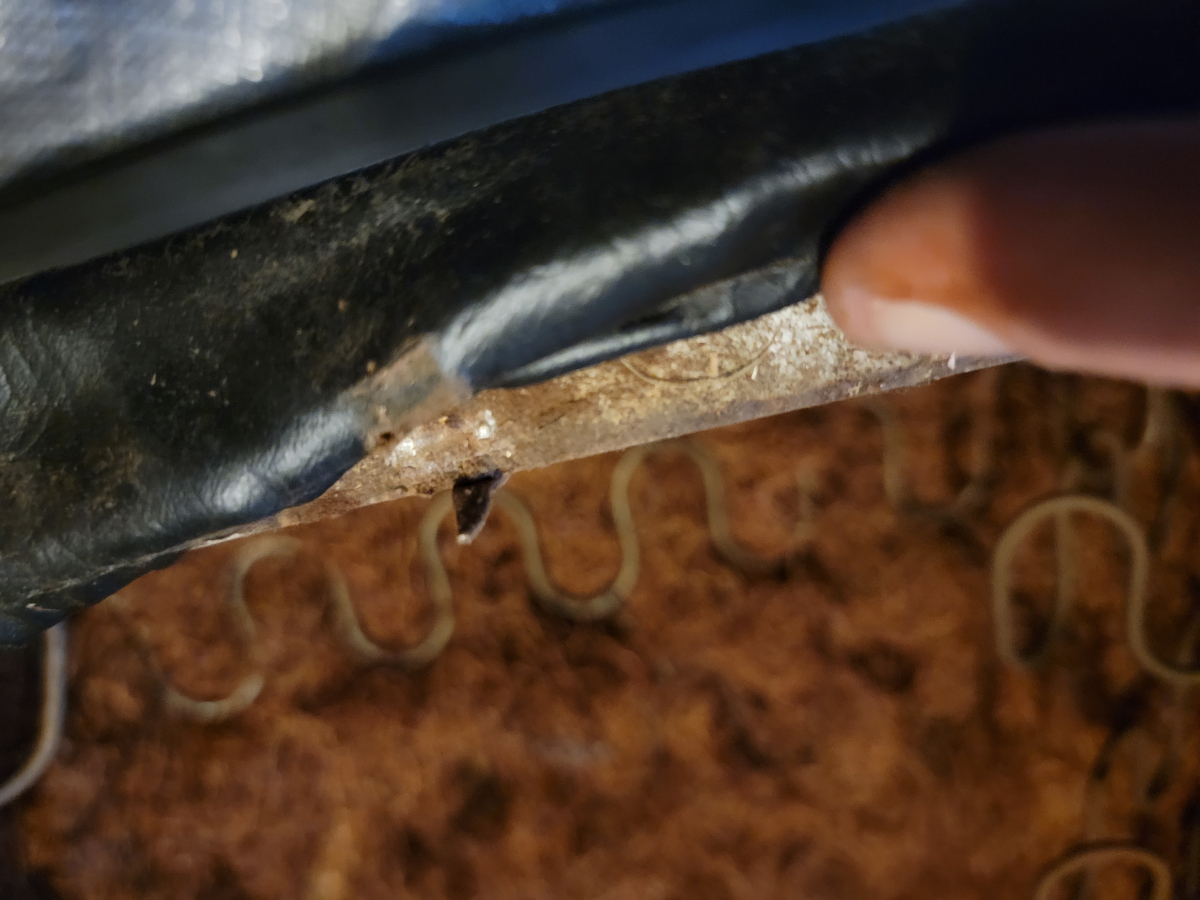
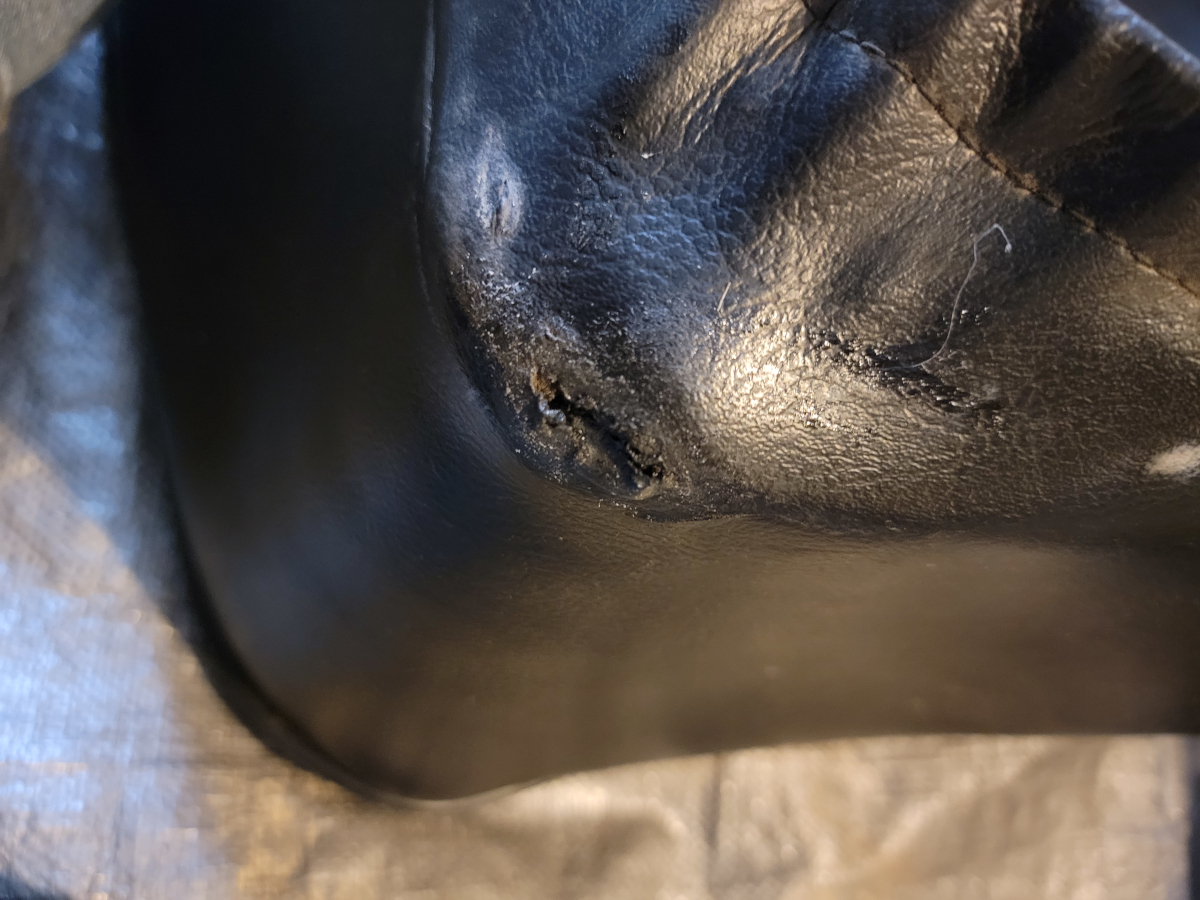
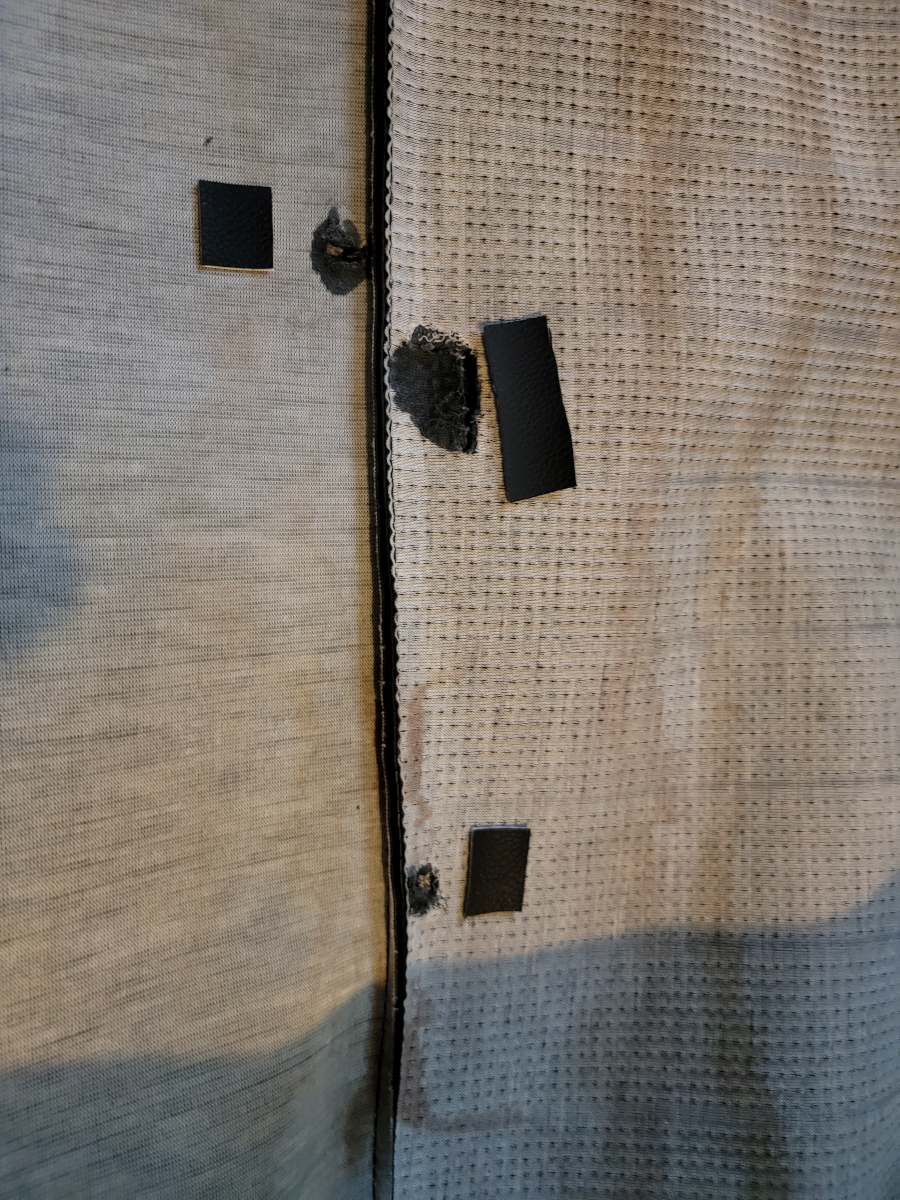
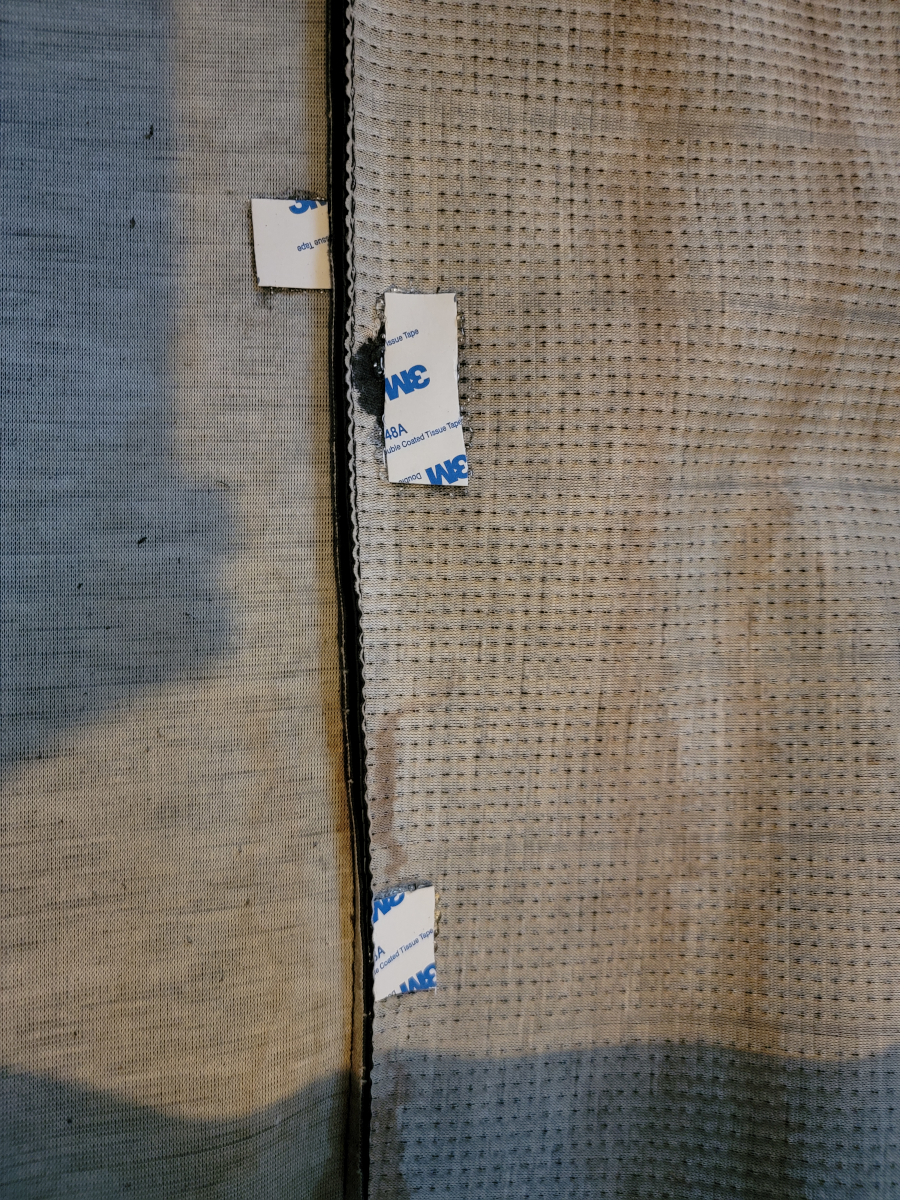
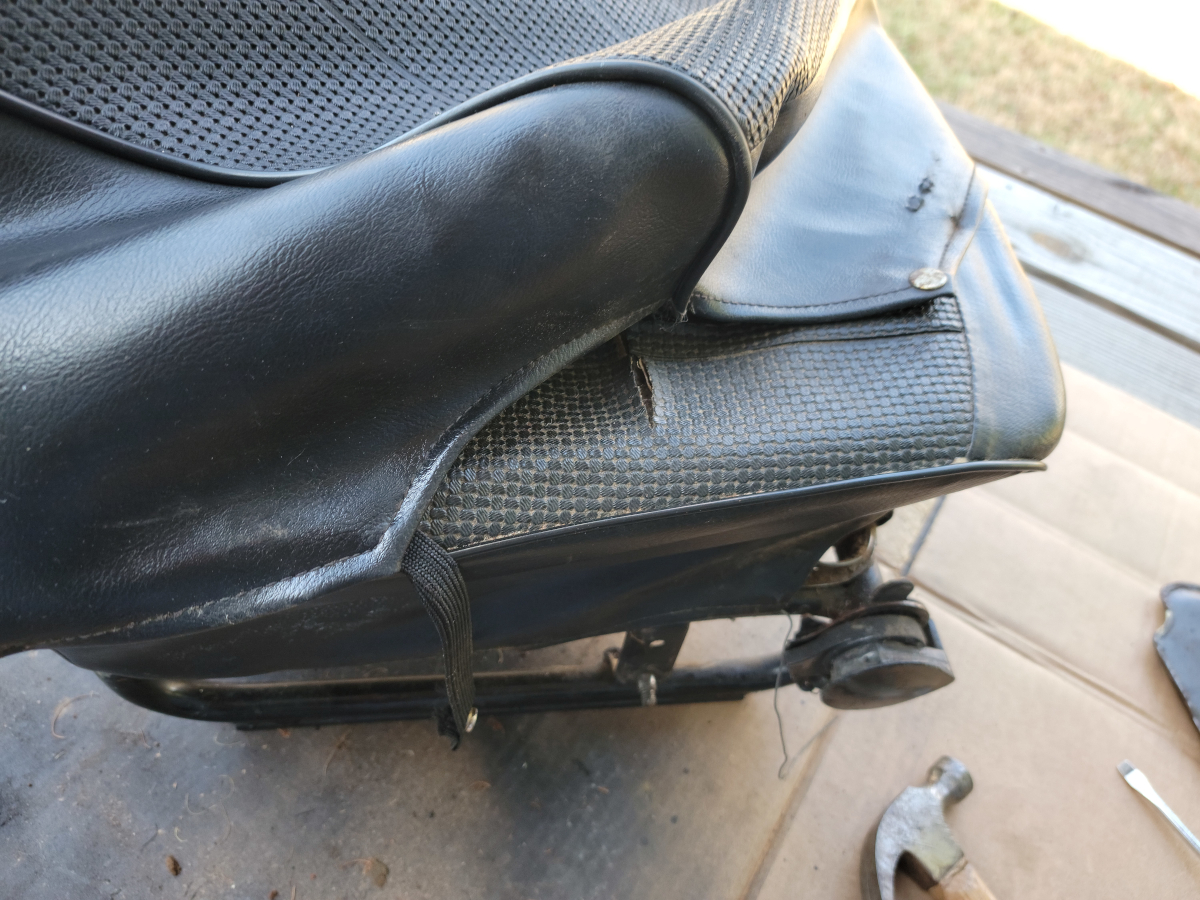
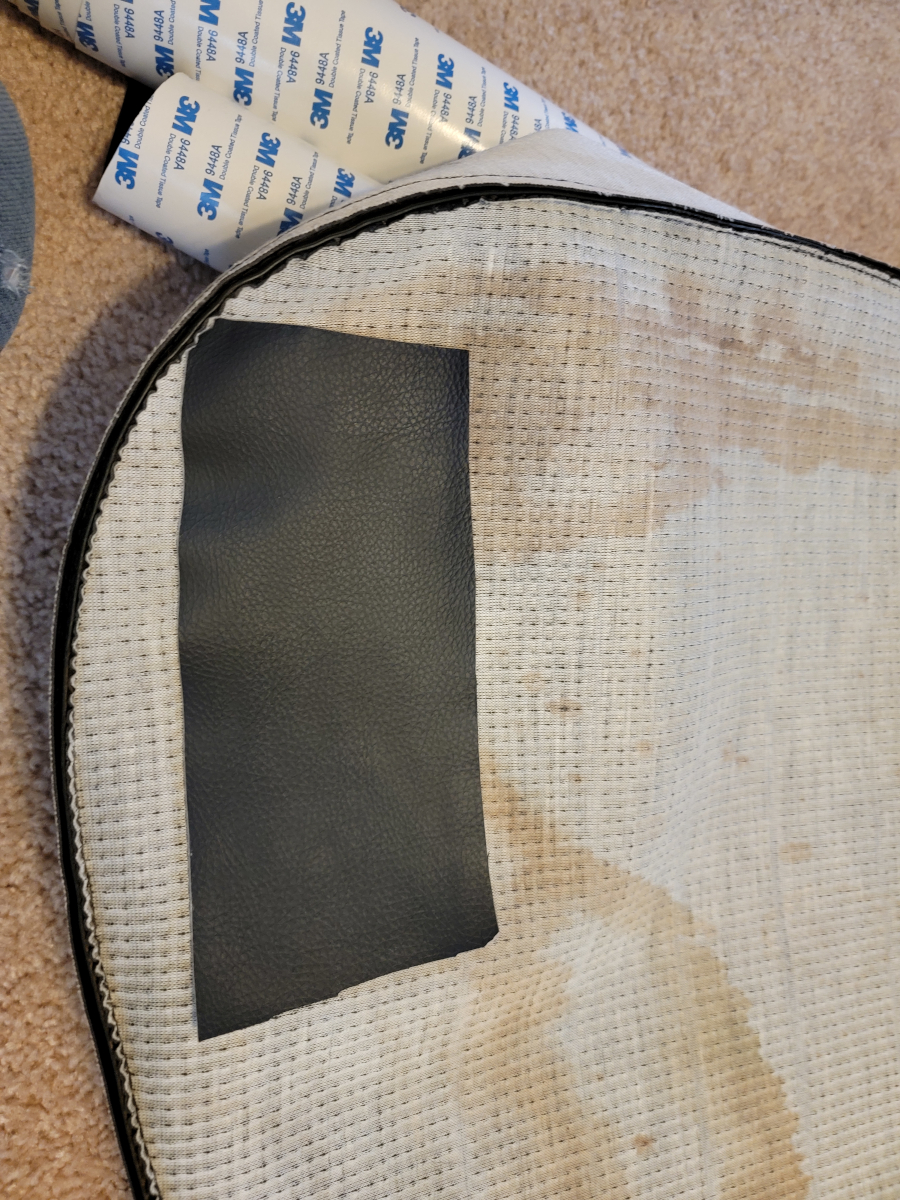
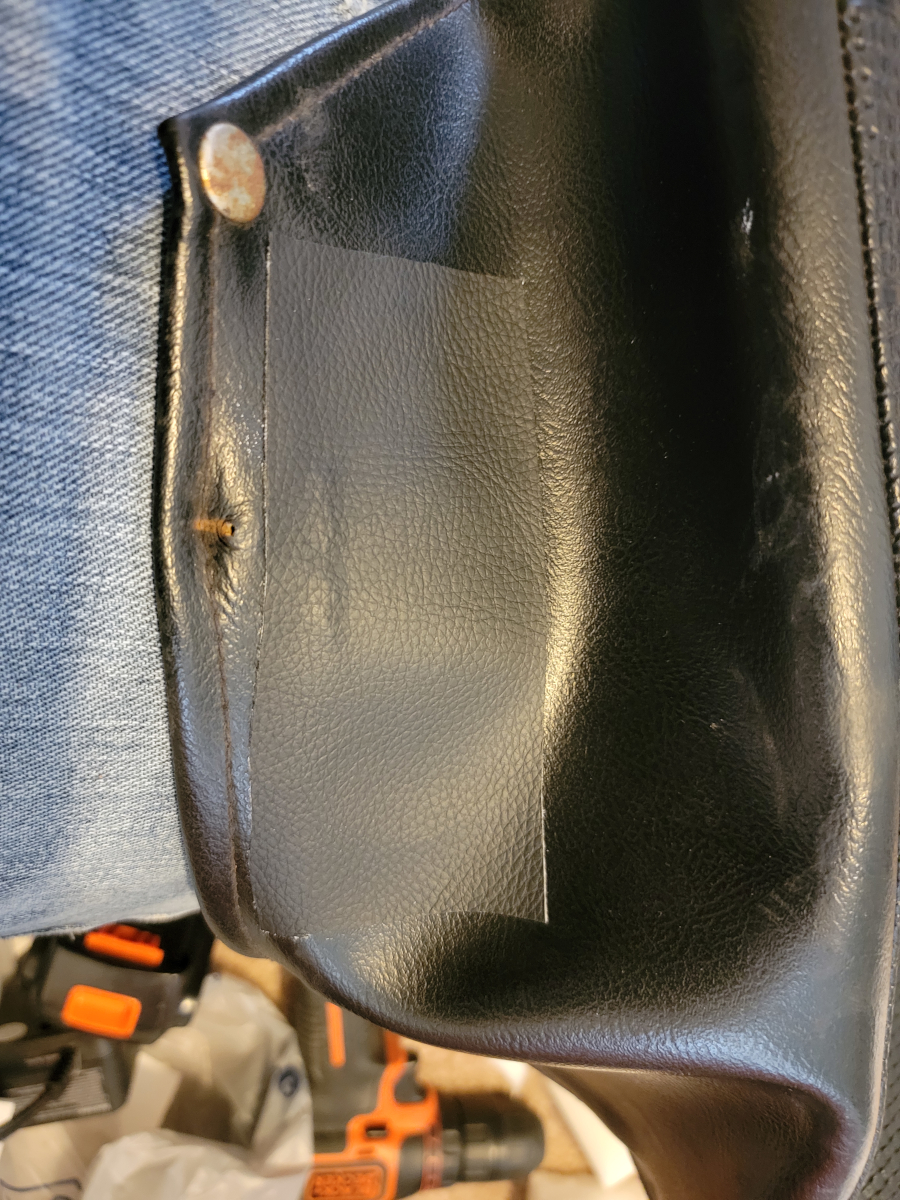
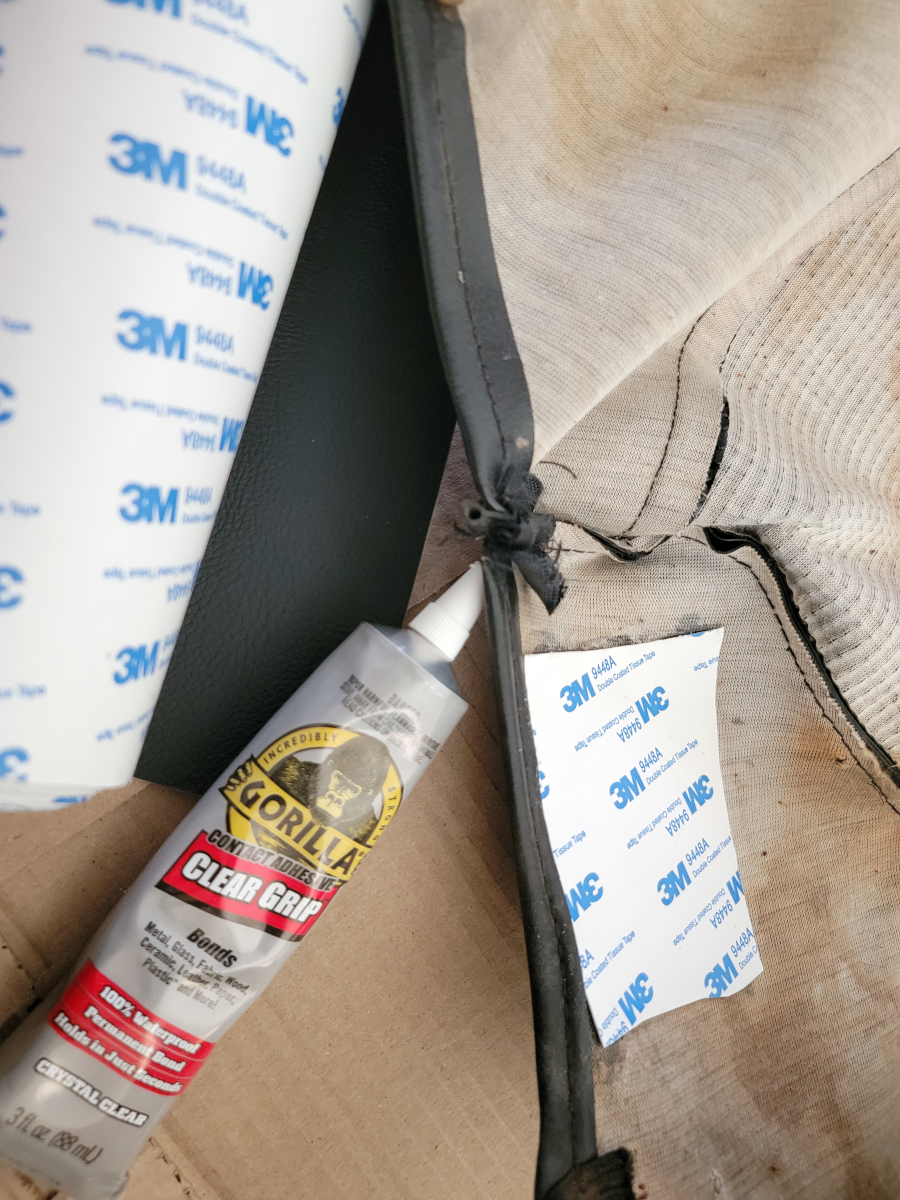
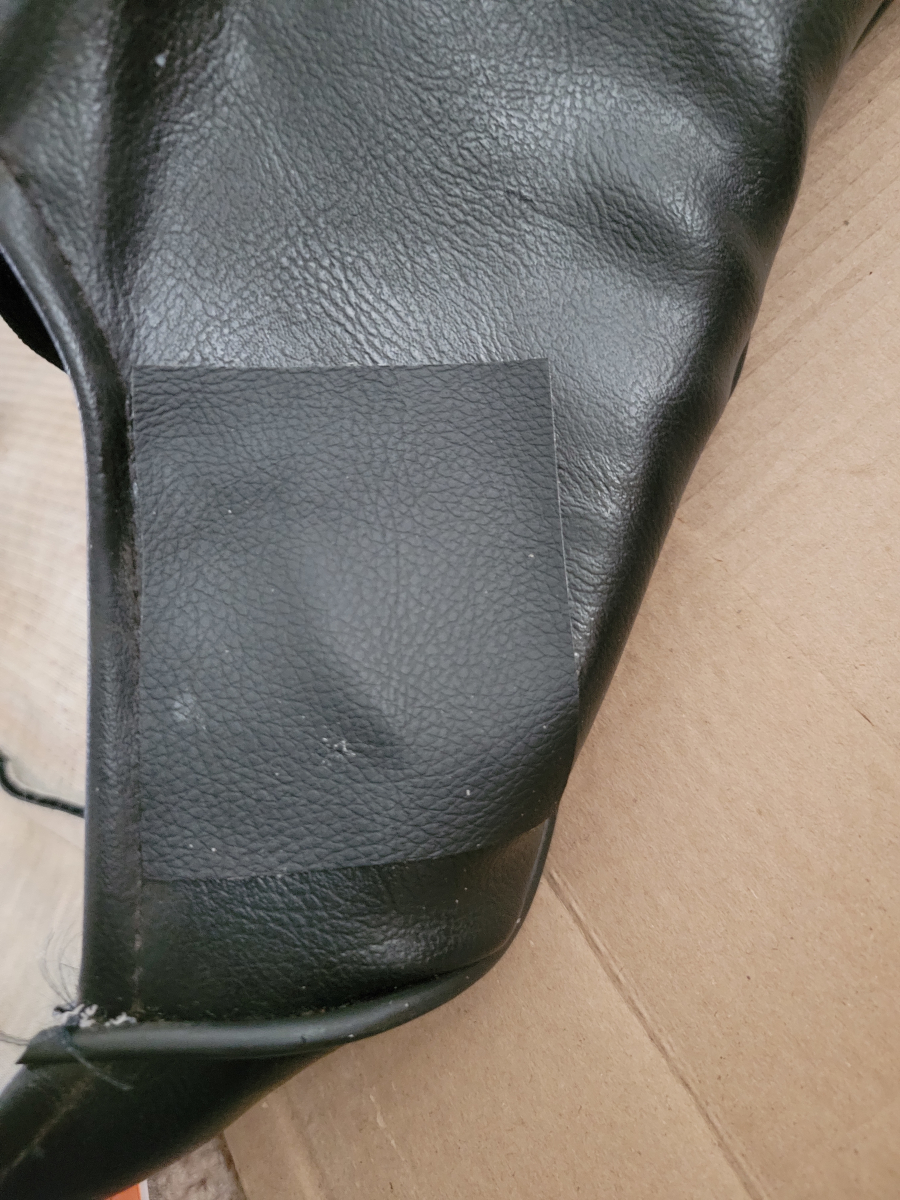
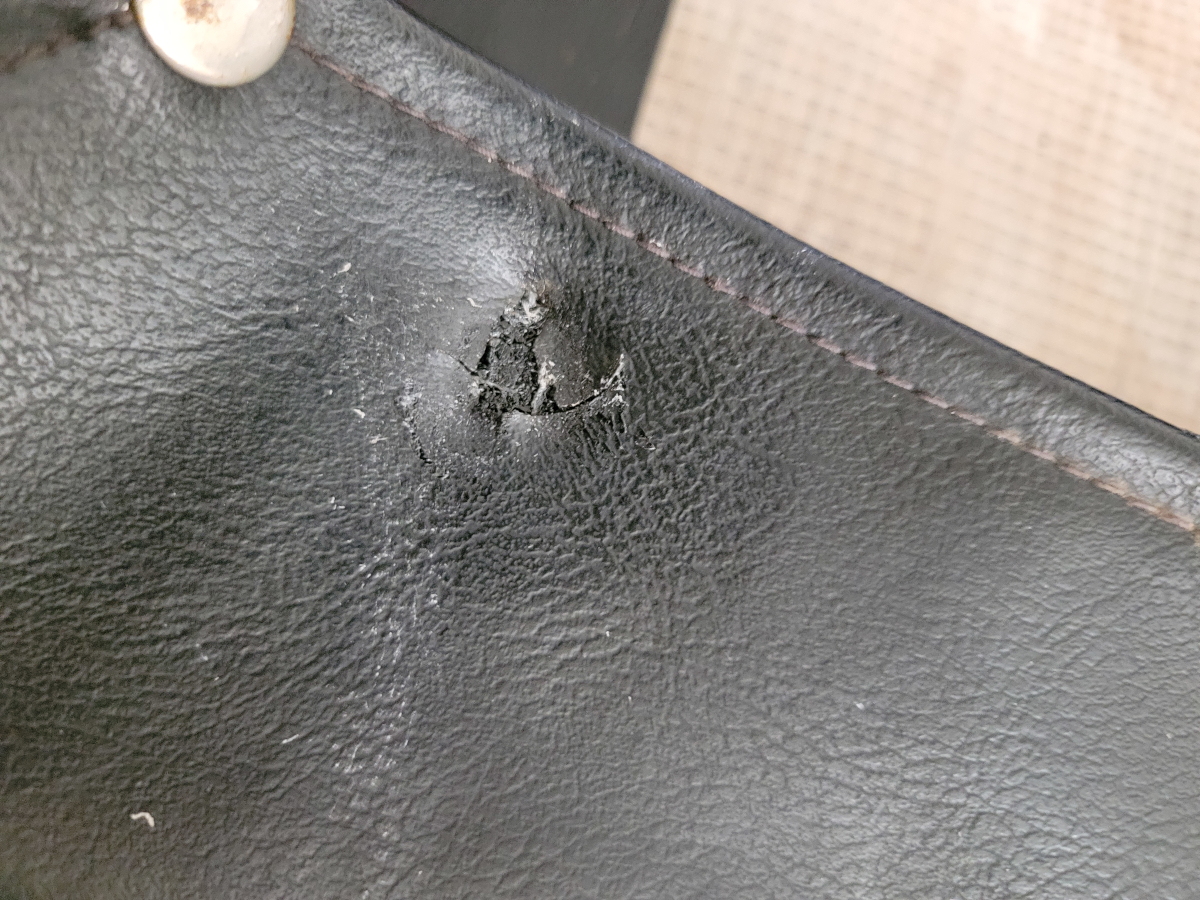
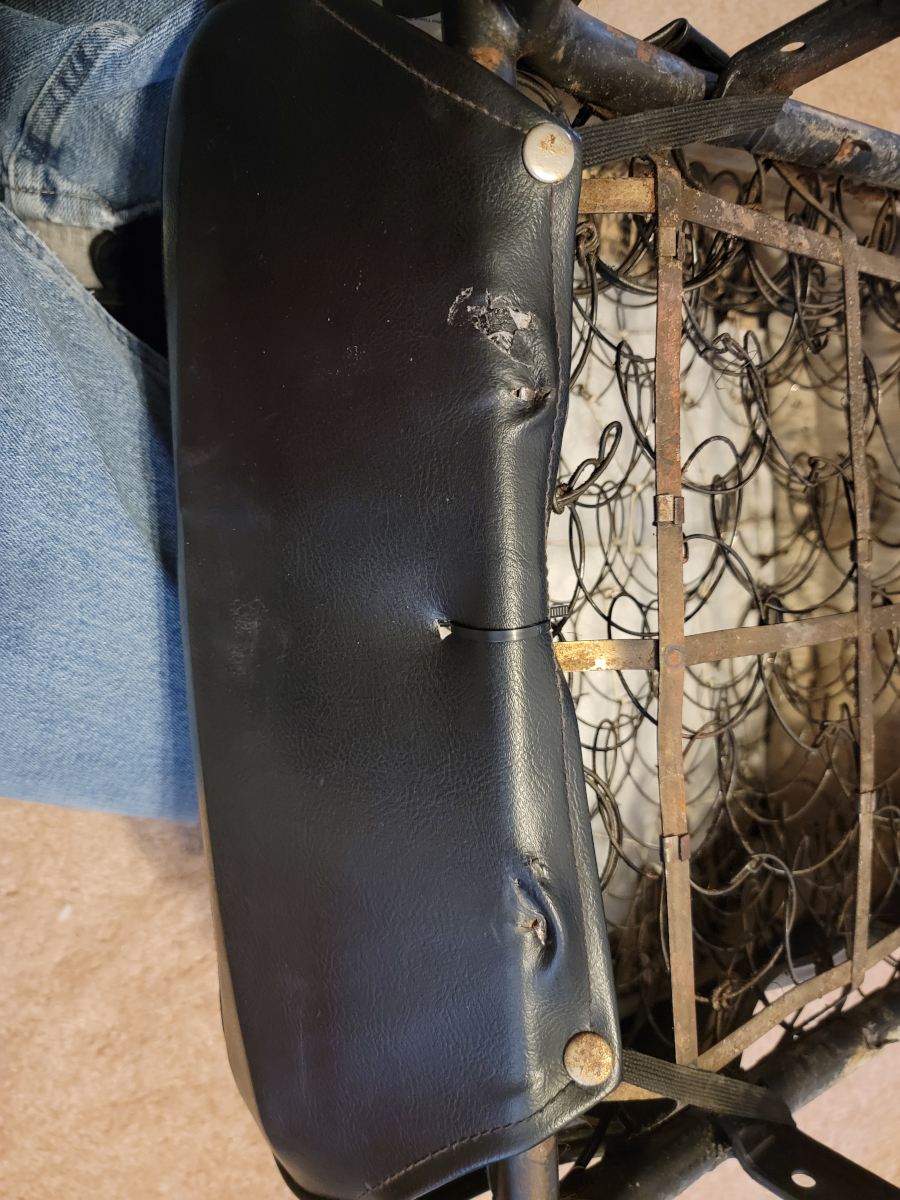
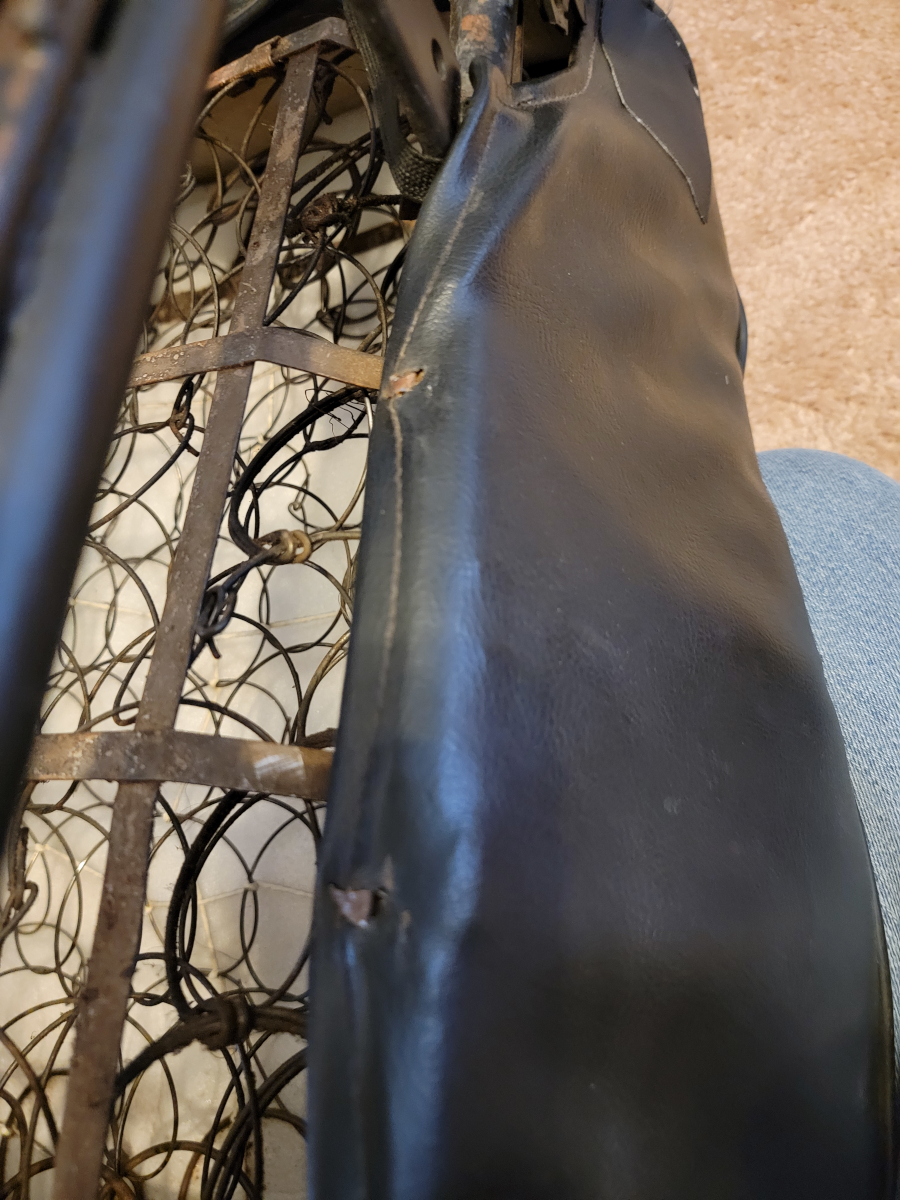
Now it’s time to try and do something about this dry, cracked vinyl. I leaned in once from the open driver’s door and my hand went right through the seat back cover.
I took the last chunk of that self-adhesive vinyl repair roll and applied it across the whole area, hoping it would provide some kind of stability.
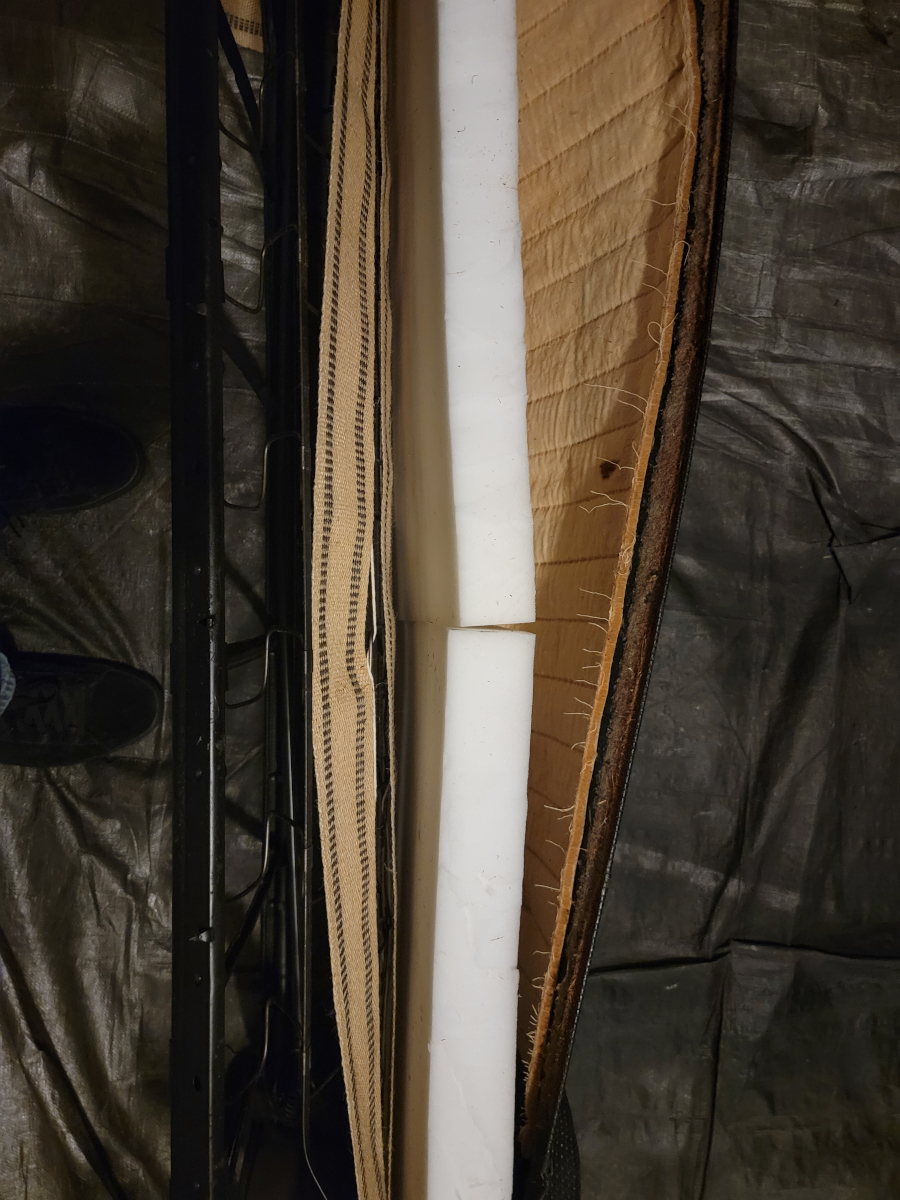
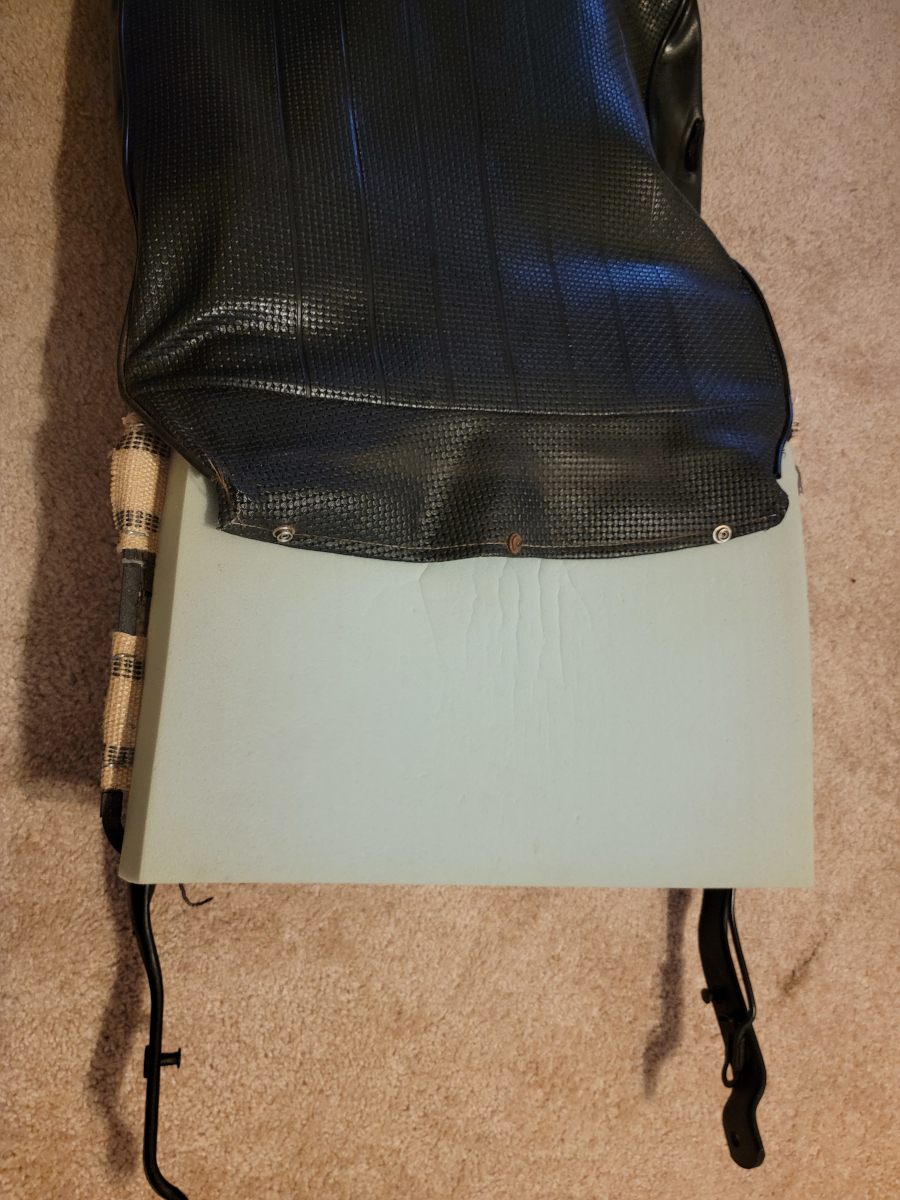
With the high density foam in place, it’s clear that this is going to be a tight fit.
And here we have the first prong bent in place, holding the seat cover on. The foam pad had to be removed. There was no chance it was ever going together. The rest of the seat covers fit nicely over the foam, but clearly, the seat back wasn’t used to that much volume underneath.
I worked my way around the first end of the seat, bending each prong over as I went.
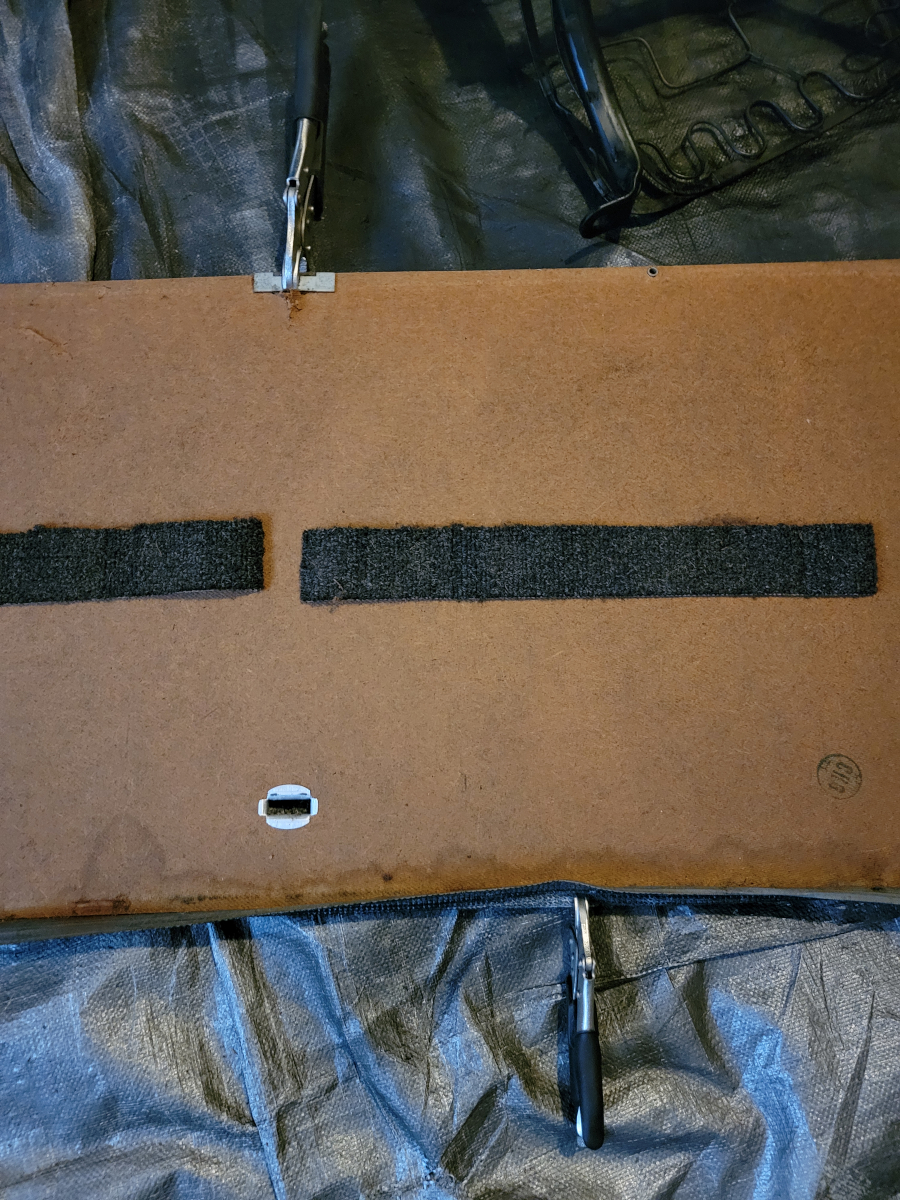
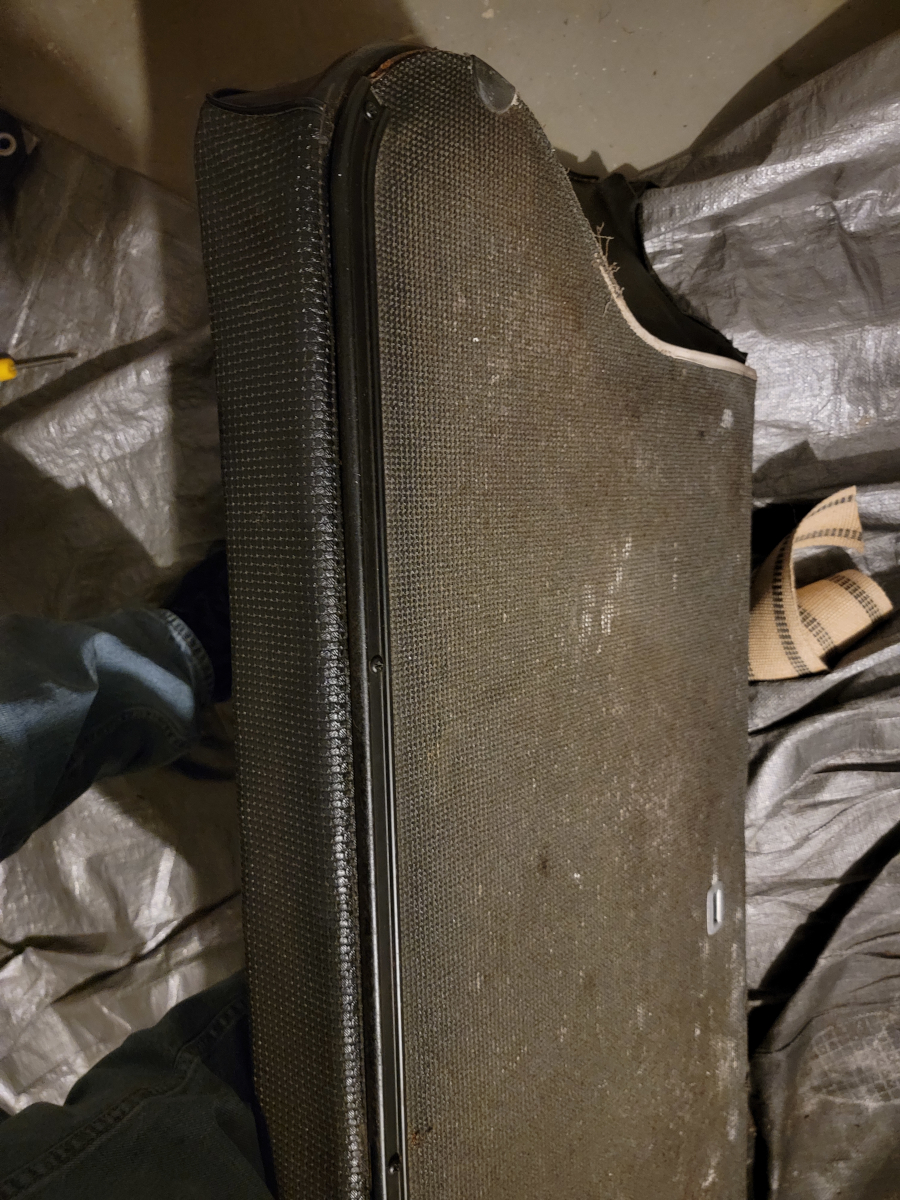
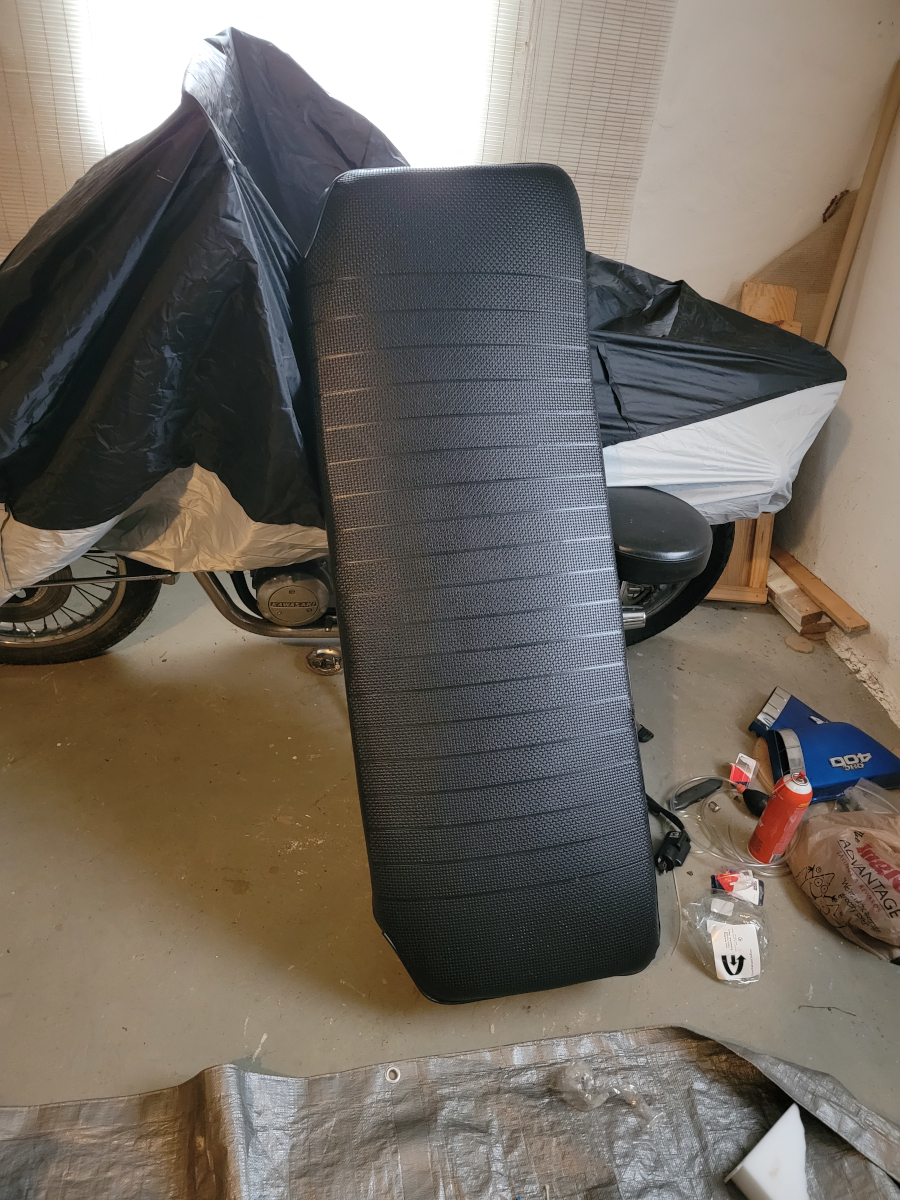
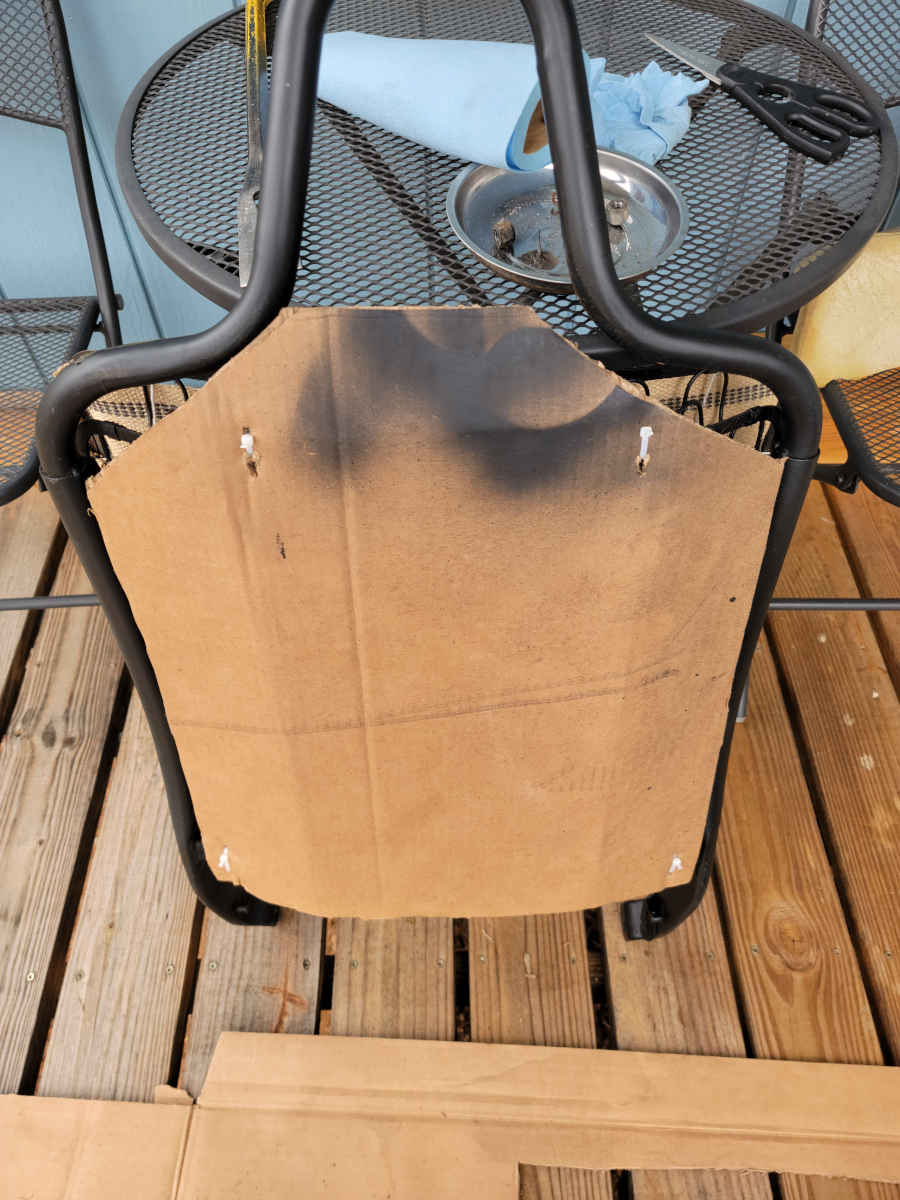
And now it’s time to put the fiber board cover back in place to close it all up.
The top trim piece screwed on without issue…
…then the bottom one did as well. All of the rust was on the inside, so it looks nice from here. And I totally forgot to put the NAUE tickets back inside. I kept them in a safe place, though.
But, I did lose that push pin and had to replace it with a cotter pin.
Bonus
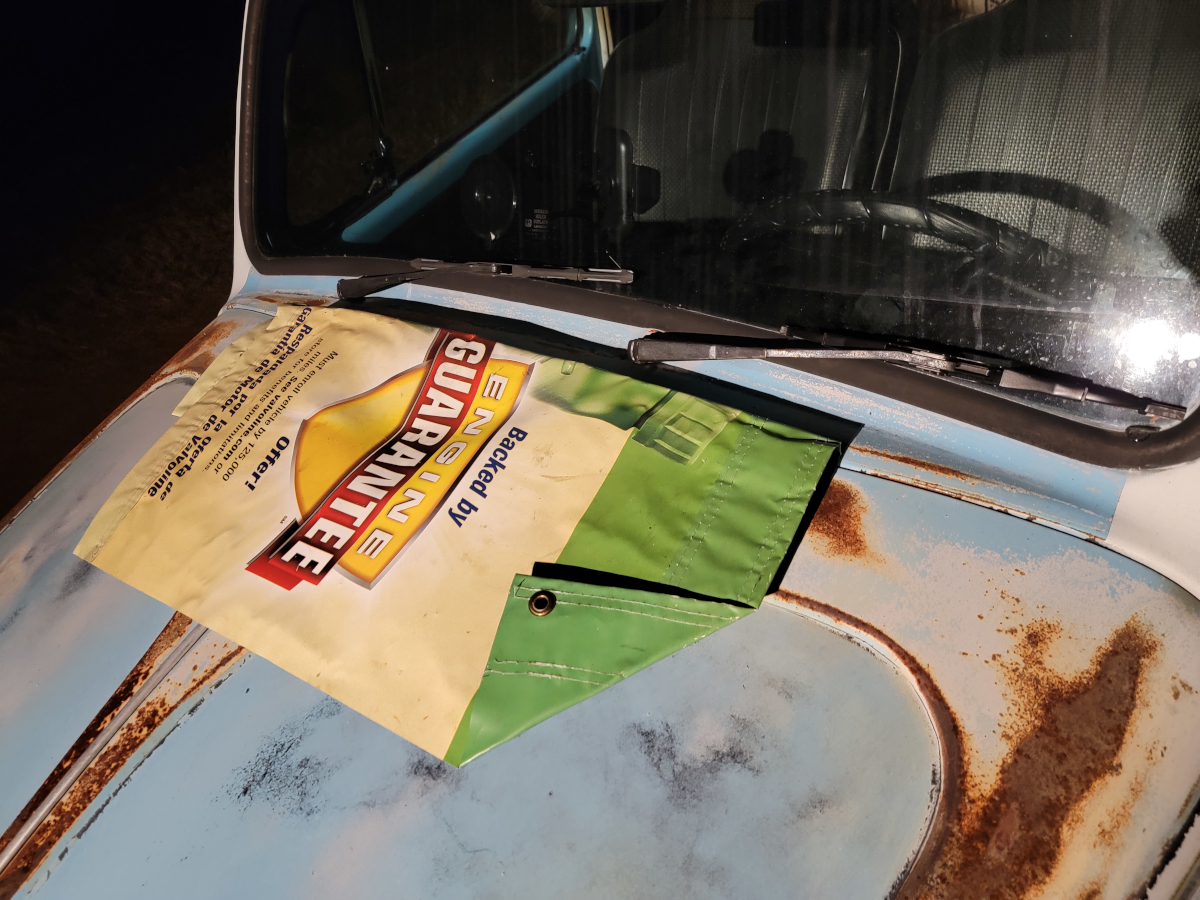
It had been raining for days and that night I just happened to remember that I had removed all the air vents and fresh air system under the bonnet, behind the dash. When I went out and checked on it, I could see straight down into my toolbox full of water. Luckily, it seems to have caught all the water that came in through the bonnet vents.
I grabbed the banner tarp my dad had given me for crawling around under the car. Folded it up and closed the bonnet lid over it. I’m still waiting for that backordered center vent to arrive and if I’m honest, I’m not looking forward to having to put all of that mess back together.
The Spring Tease has passed and we’re back into cold, wet weather, so I moved the seat refinishing operations from the front porch to the basement. I laid down a silver Harbor Freight tarp to catch some of the mess and over spray and began the process of refinishing the rear seat.
Disassembly
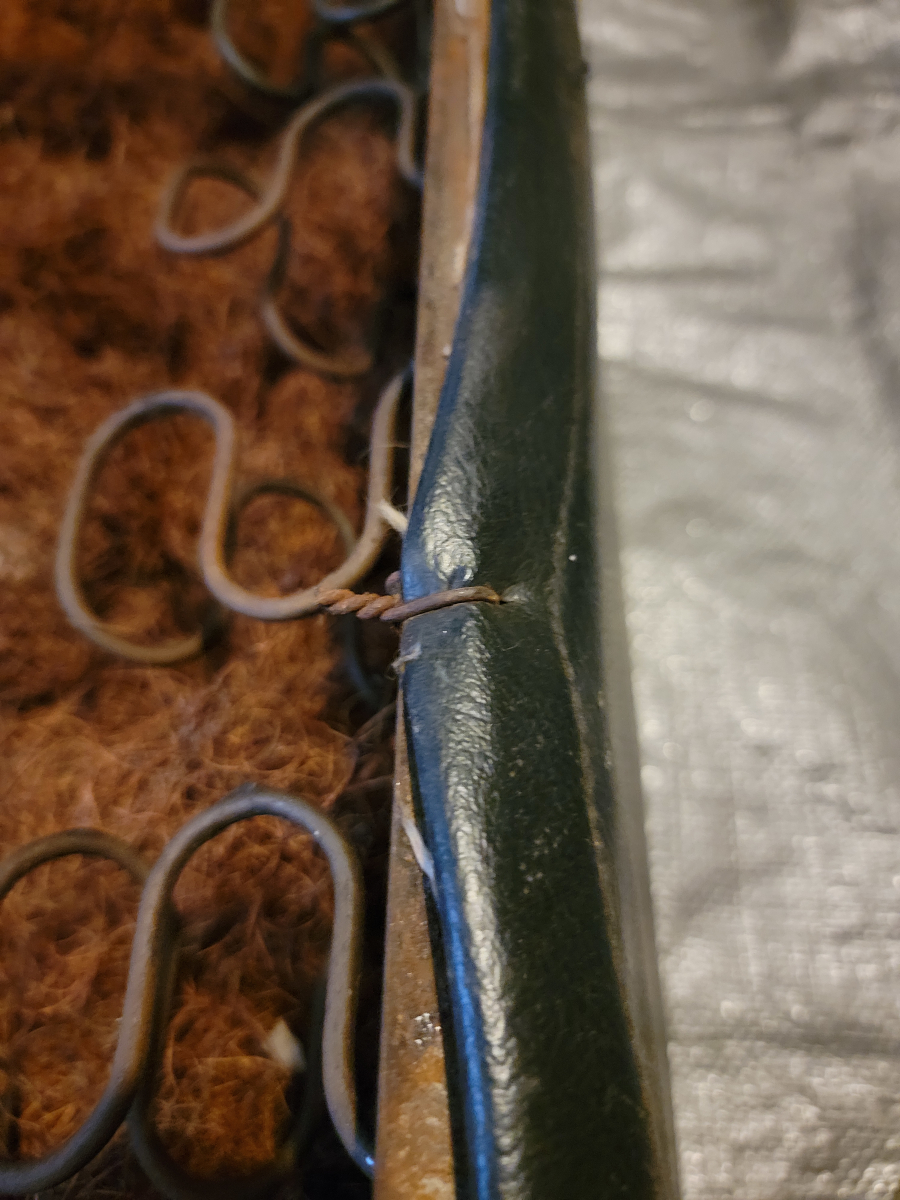
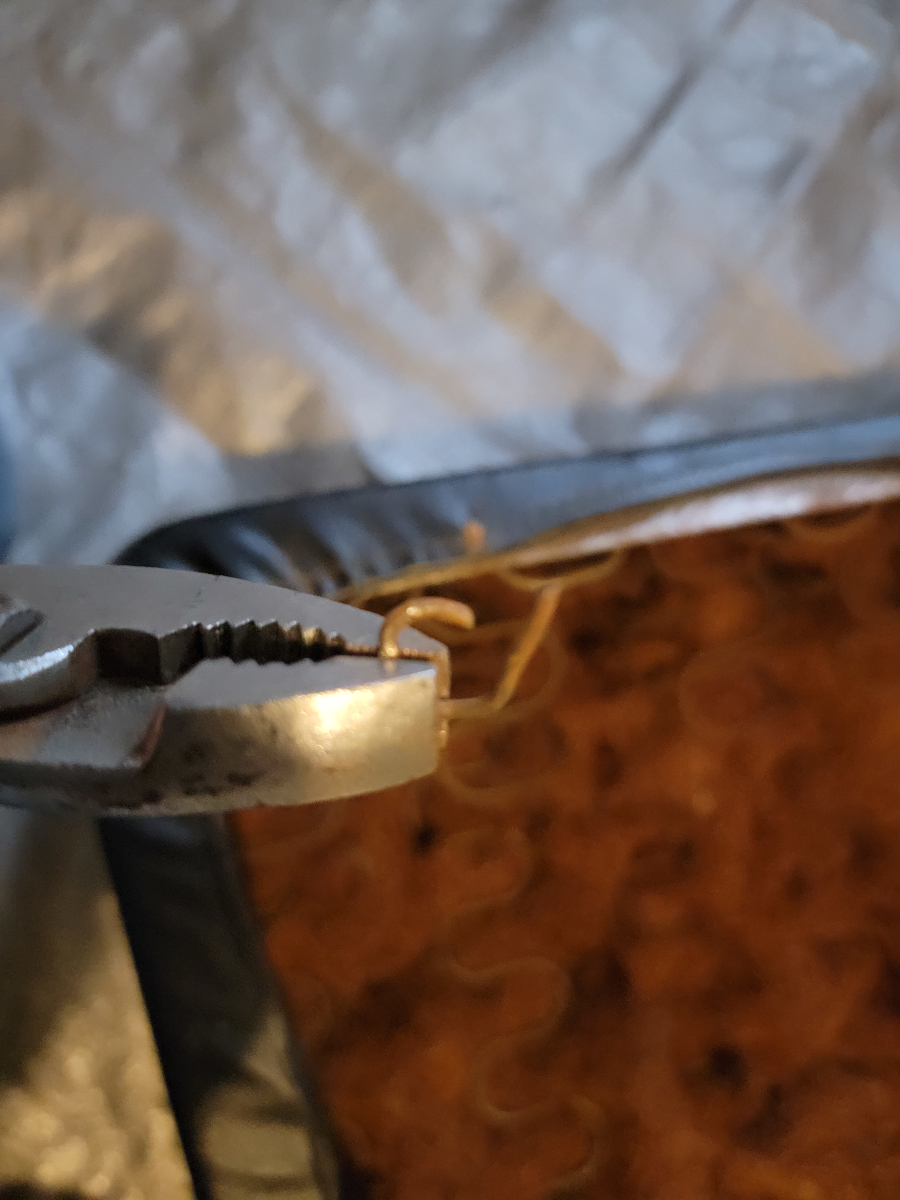
Instead of hog rings, this time, I found the seat cover held on with expertly twisted bits of mechanics wire. Lots of them.
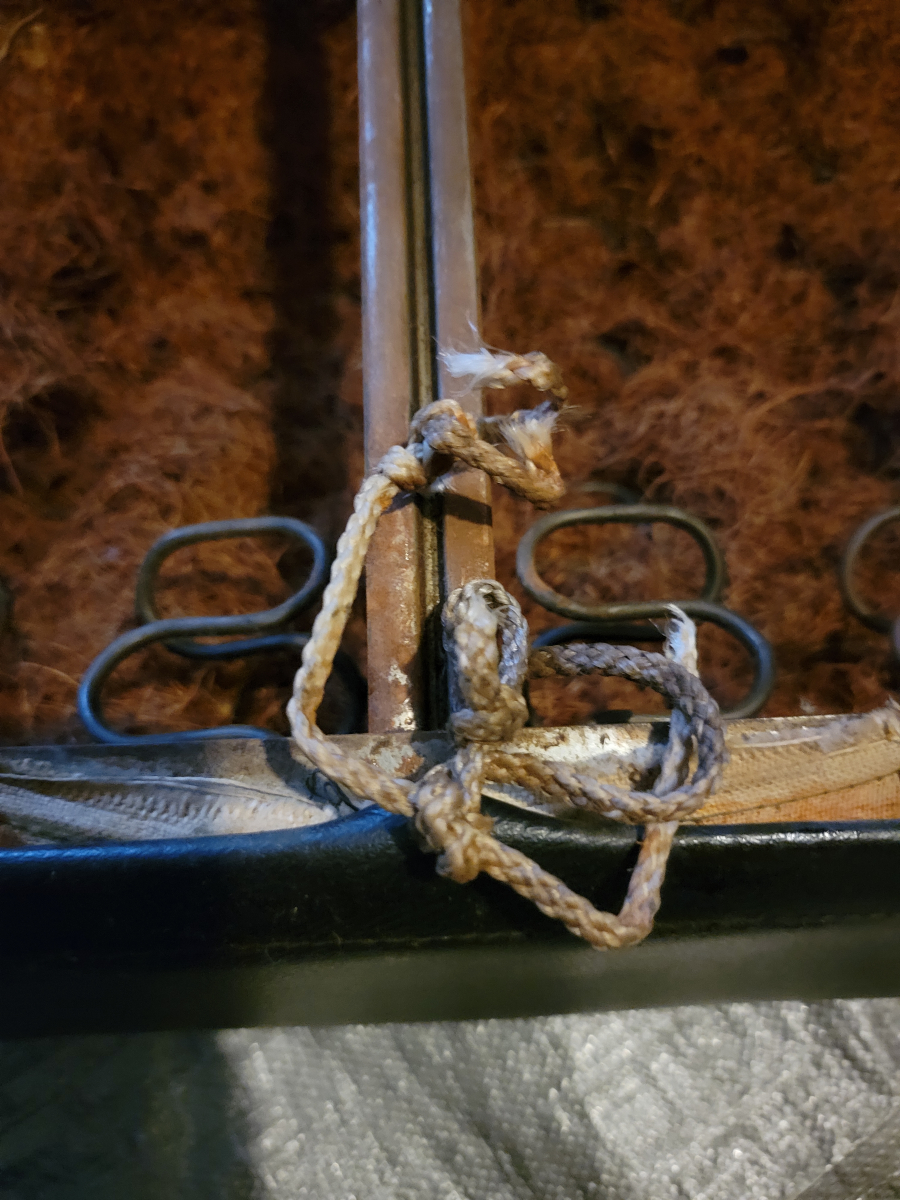
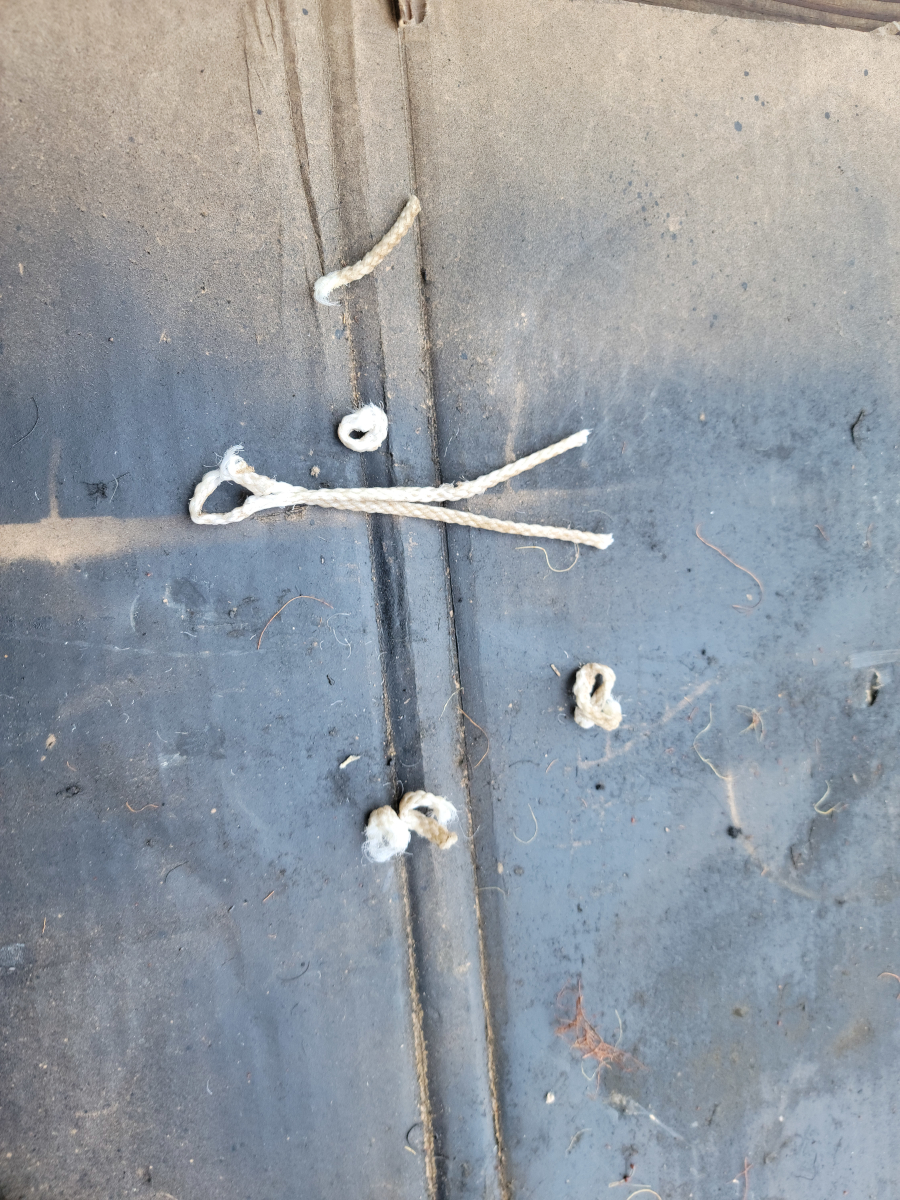
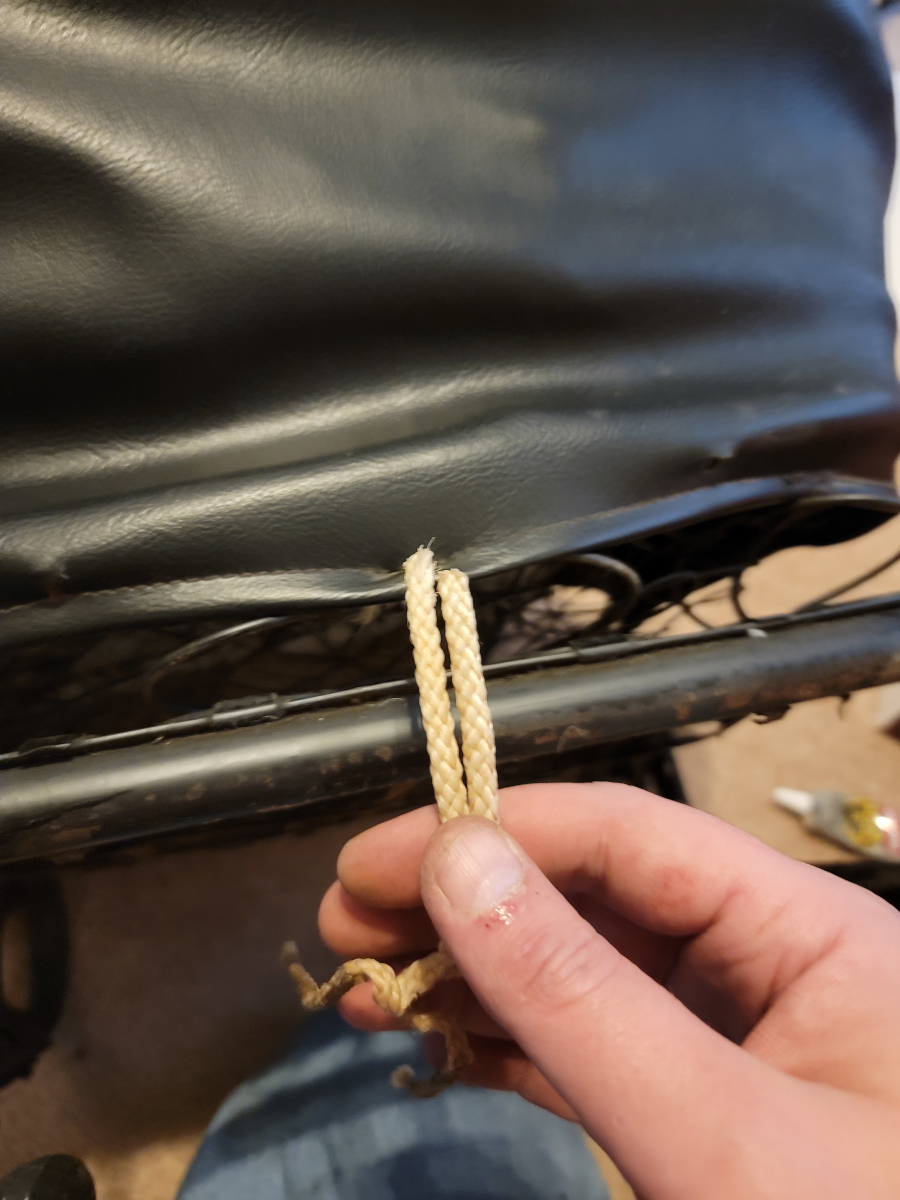
Here was another instance of that rotted rope, which pulled apart with ease. She’s nothing if not consistent.
What do we have here? Another hat on a hat!
This time, I believe the seat cover under the seat cover may have been the original. As you can see in the pic above, there are proper hog rings holding this one on.
A nice cushioned pad separated the two seat covers. It was thick and not too nasty. <foreshadowing>I need to remember to reuse that!</foreshadowing>
This seat cover had a white fabric back side edge. Almost linen-y feeling.
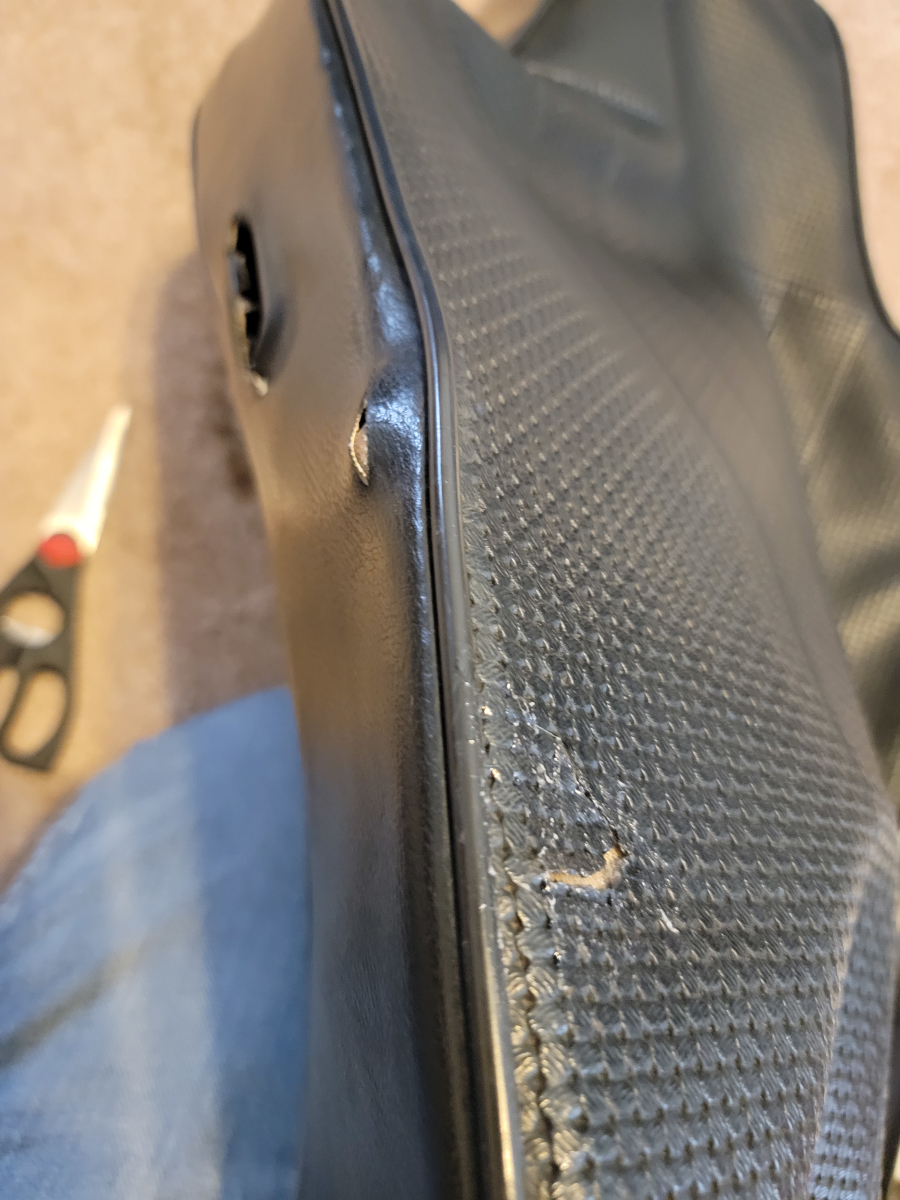
There are a couple of bad holes in the front edge of the outer seat base cover, which I plan to reuse.
Let the hog rings removal begin!
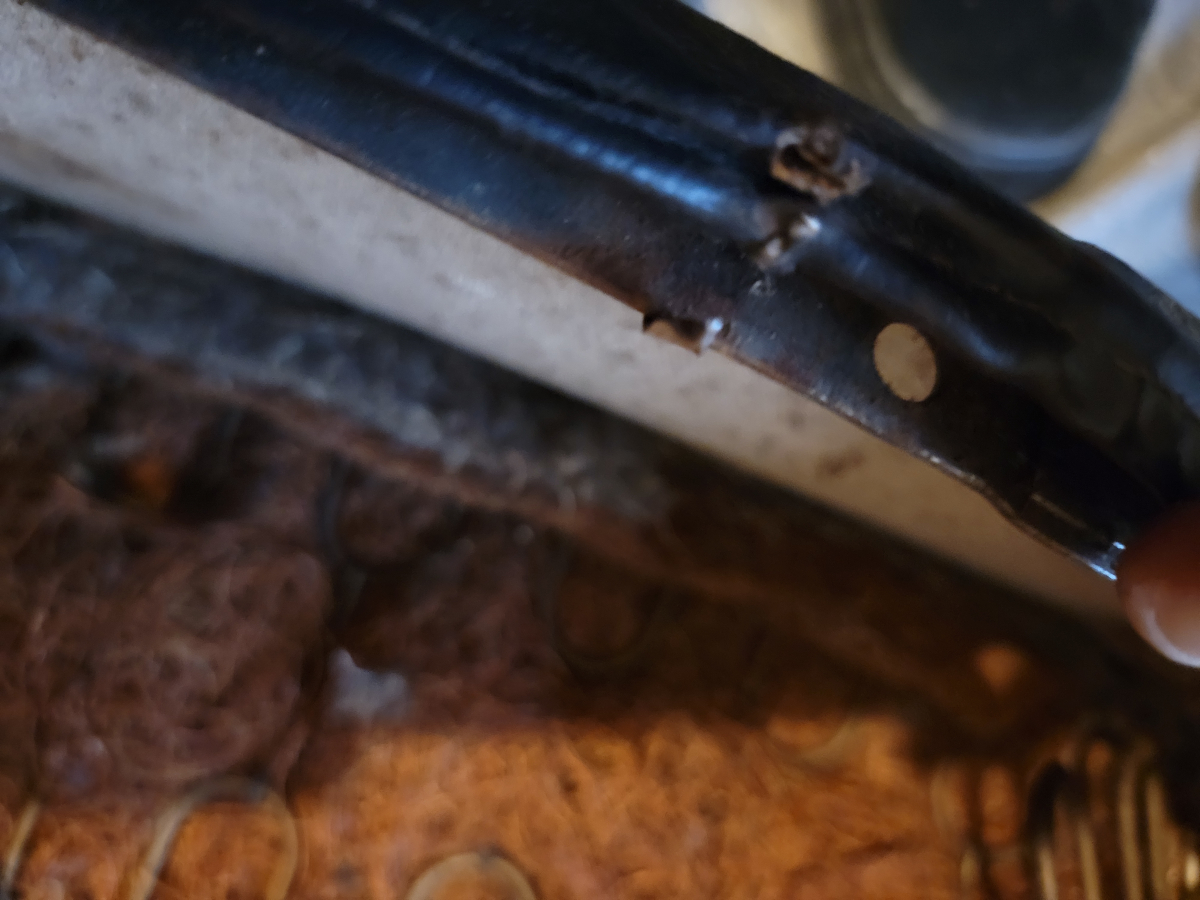
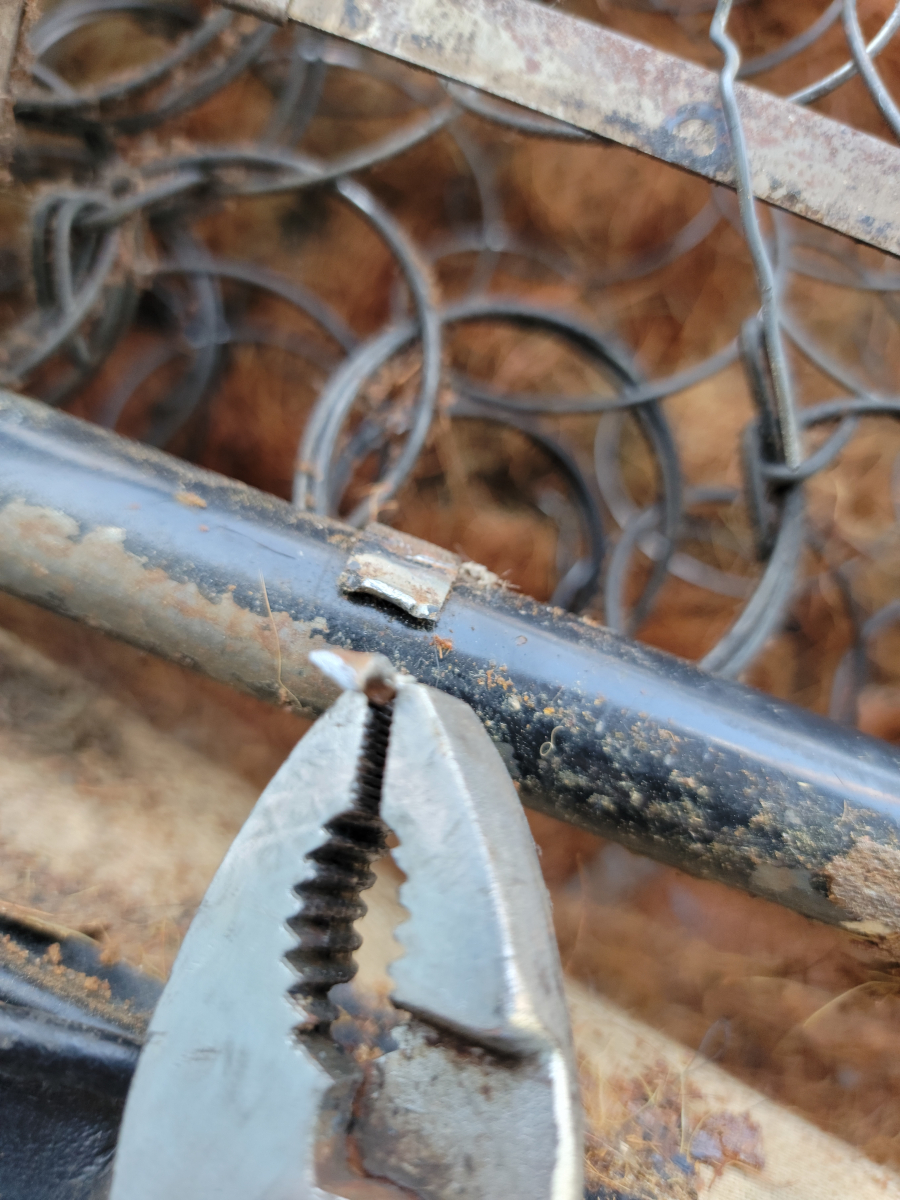
There are some more bendy spikes at each end of the seat base.
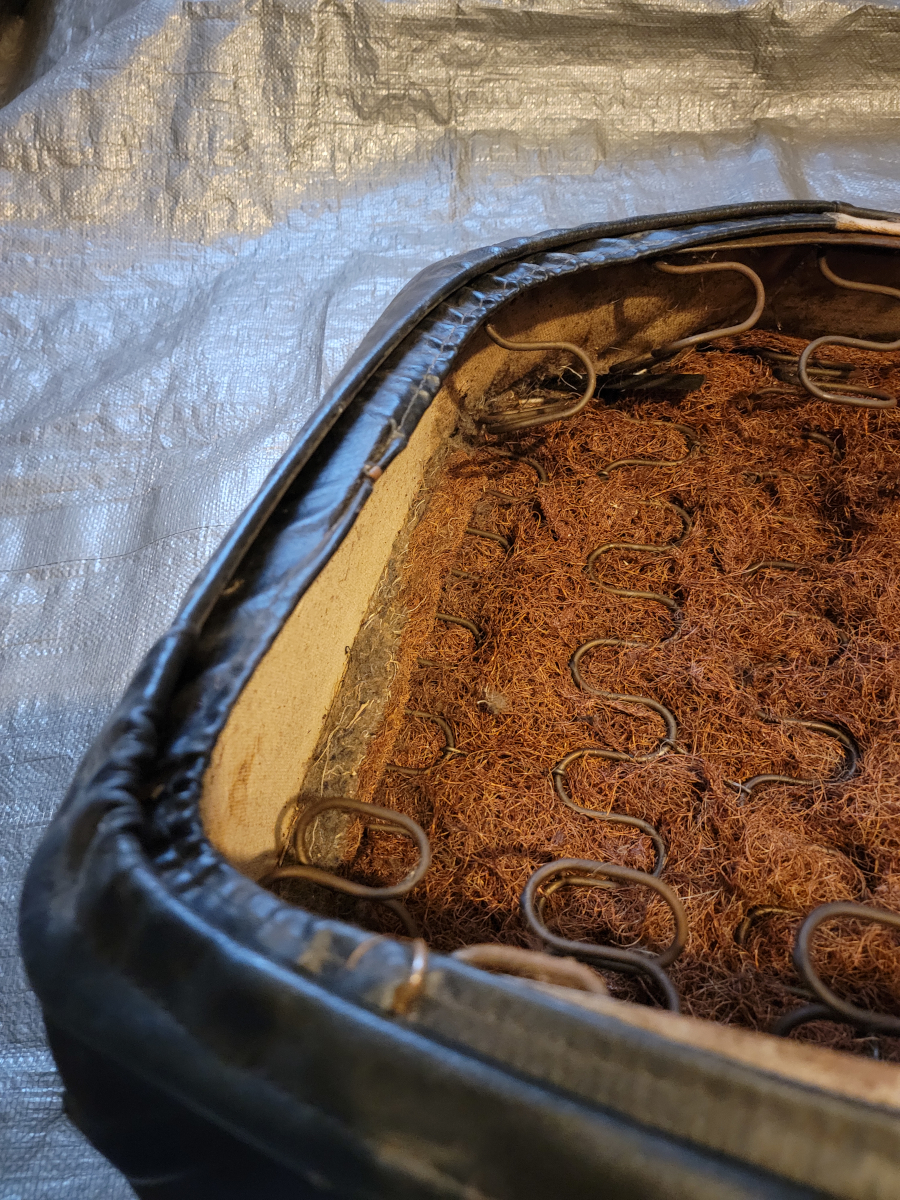
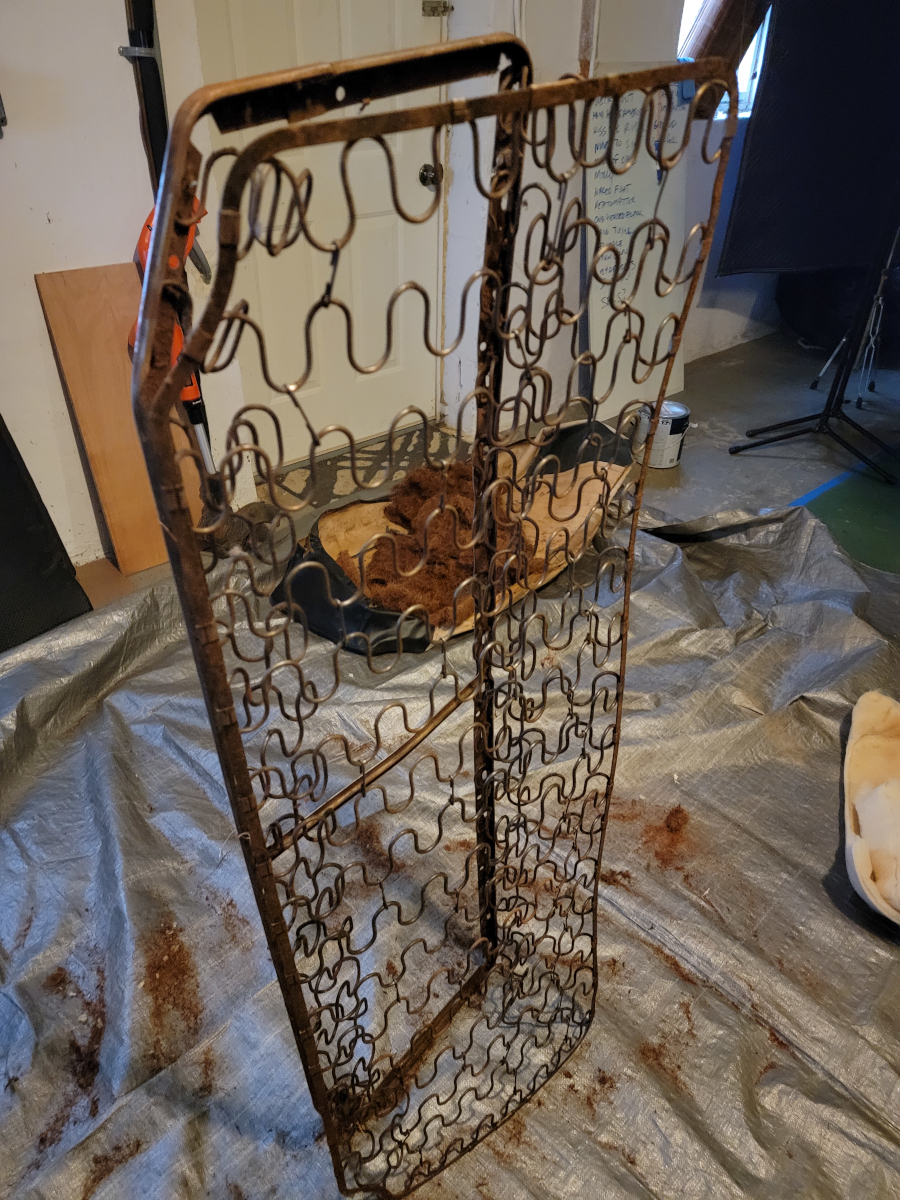
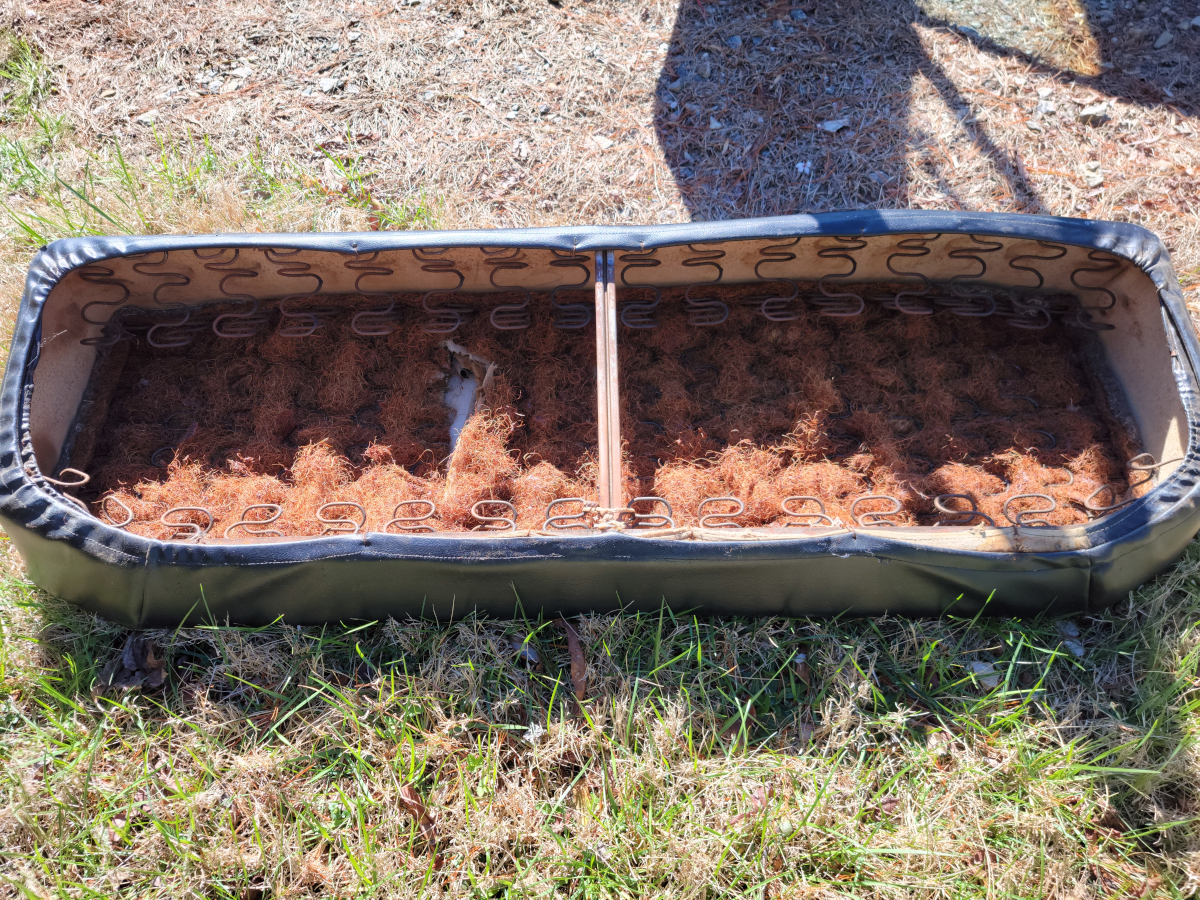
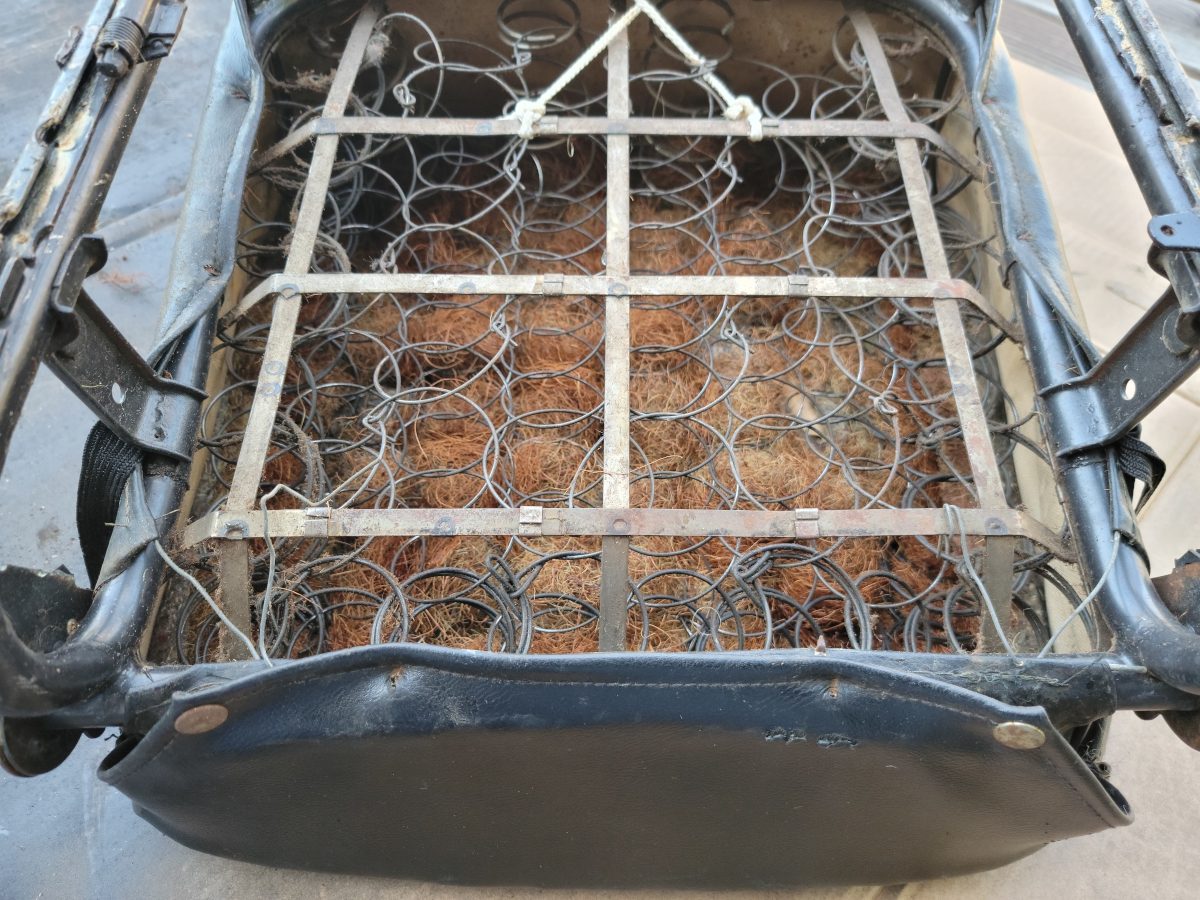
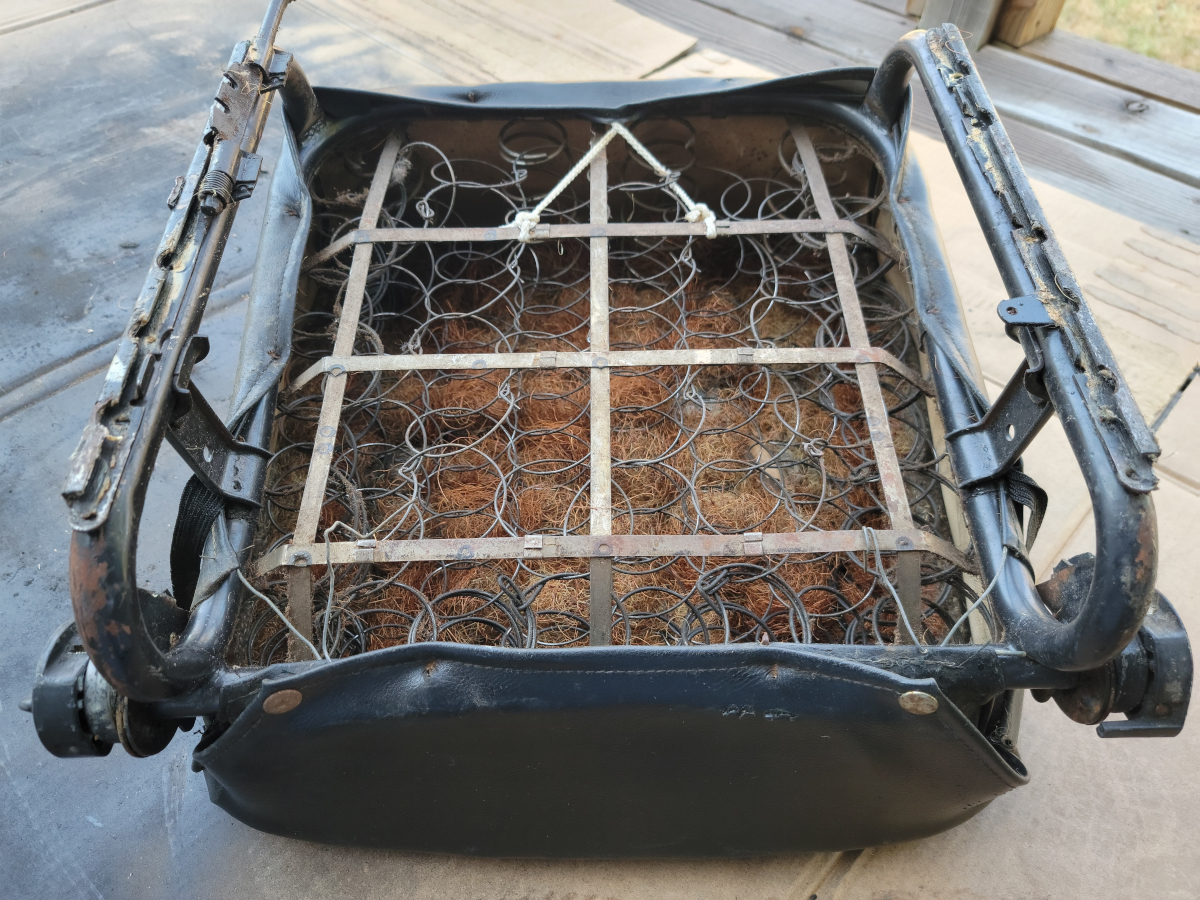
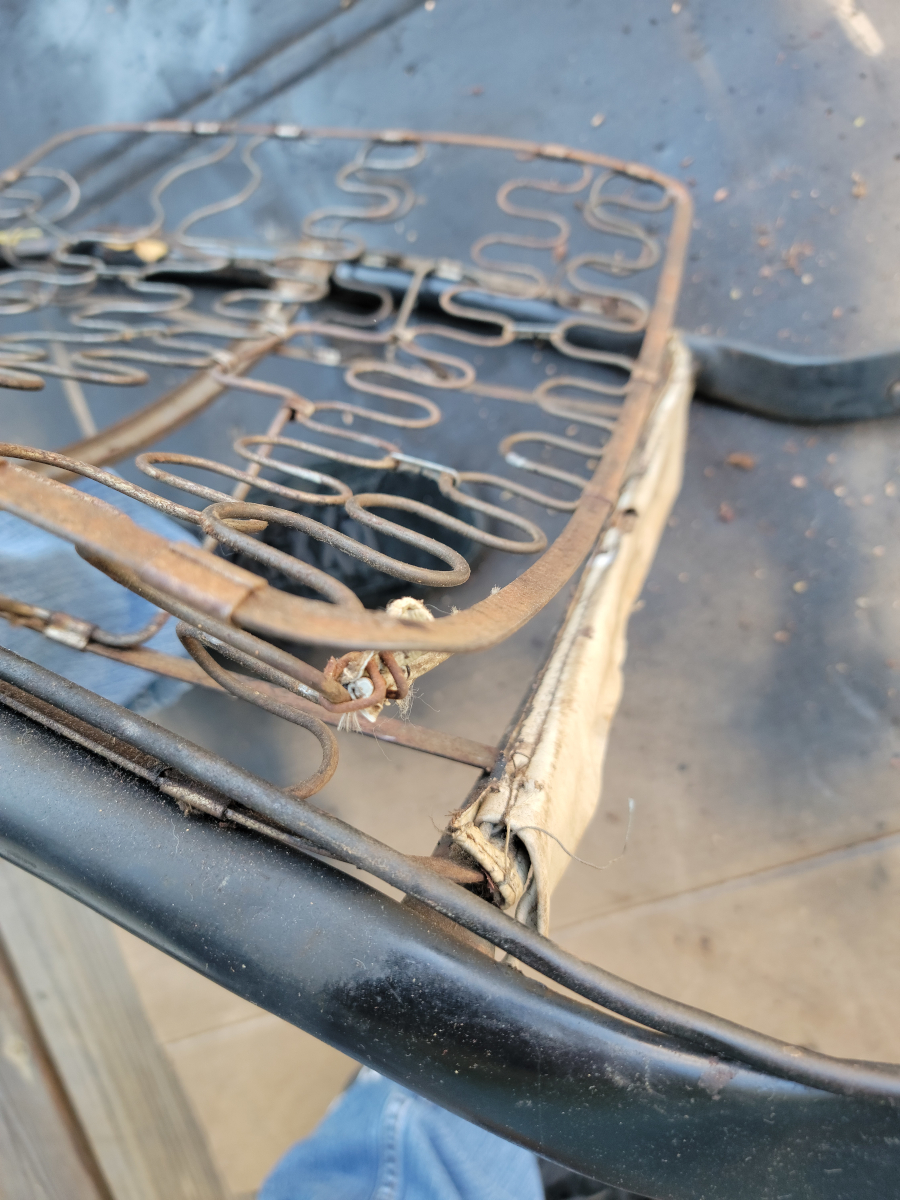
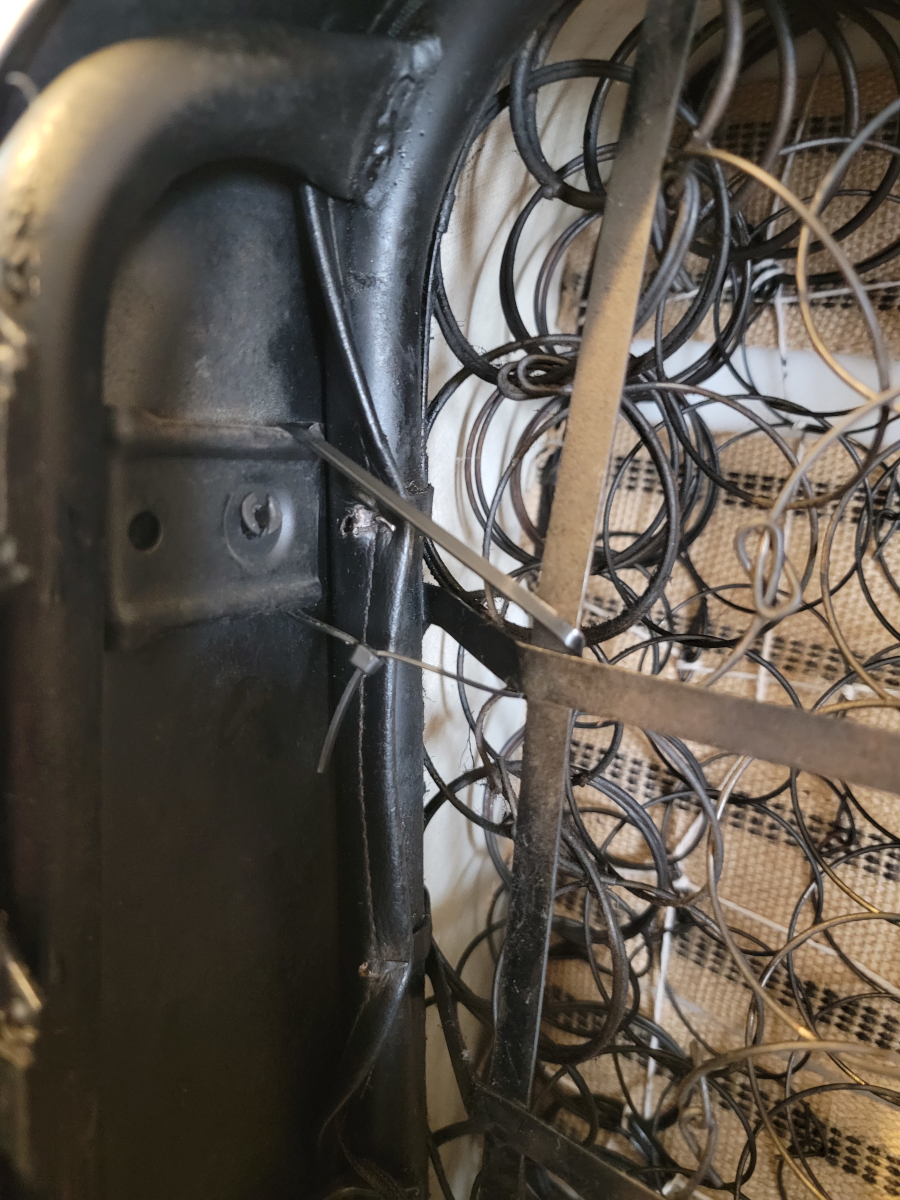
With the inner seat cover removed, it was clear to see the state of the coconut hair pad and exposed springs.
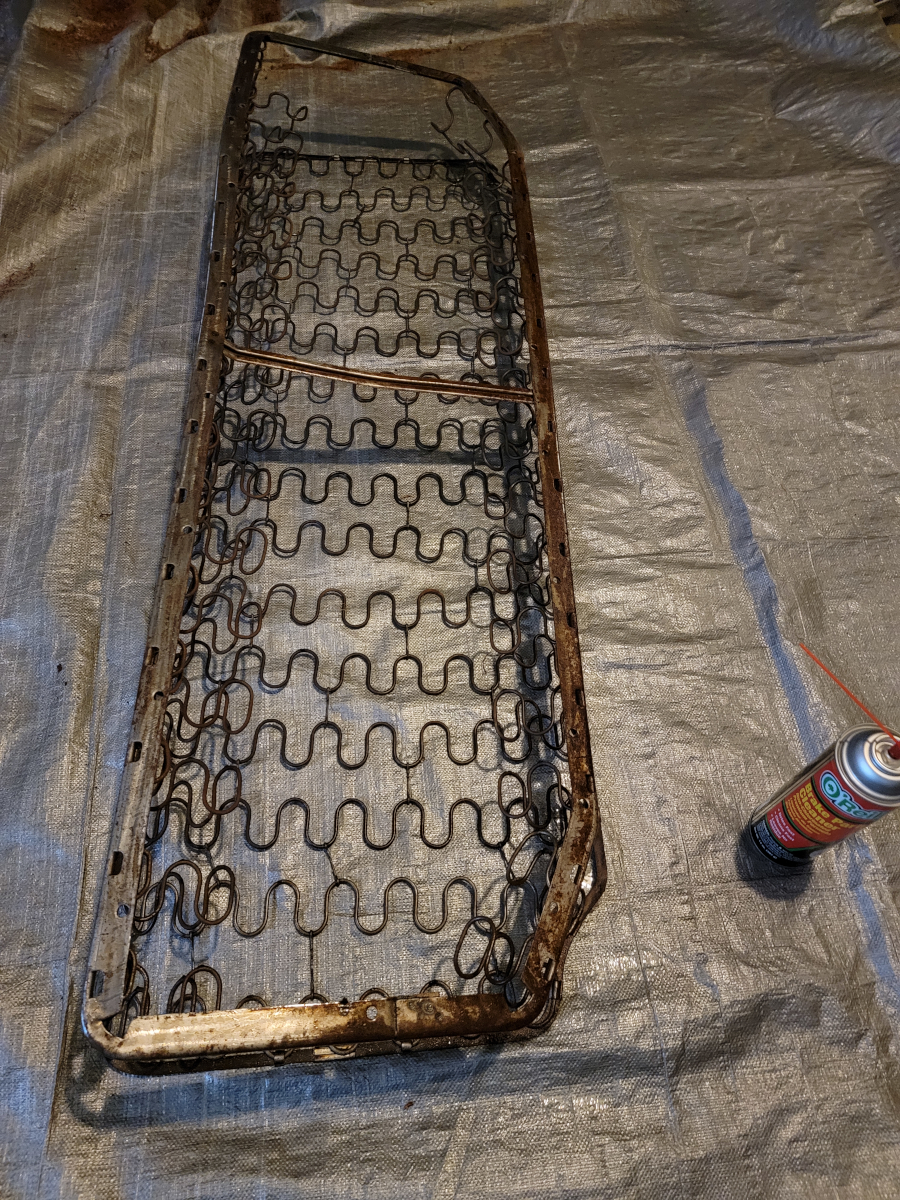
With everything removed, the seat base frame was in surprisingly good condition. A little dirty. A little surface rust. No problems.
Cleanup
Brake parts cleaner in an enclosed space is no joke. I opened the laundry room window to let in some fresh air for a couple of hours, but I could smell it throughout the house for a couple of days after.
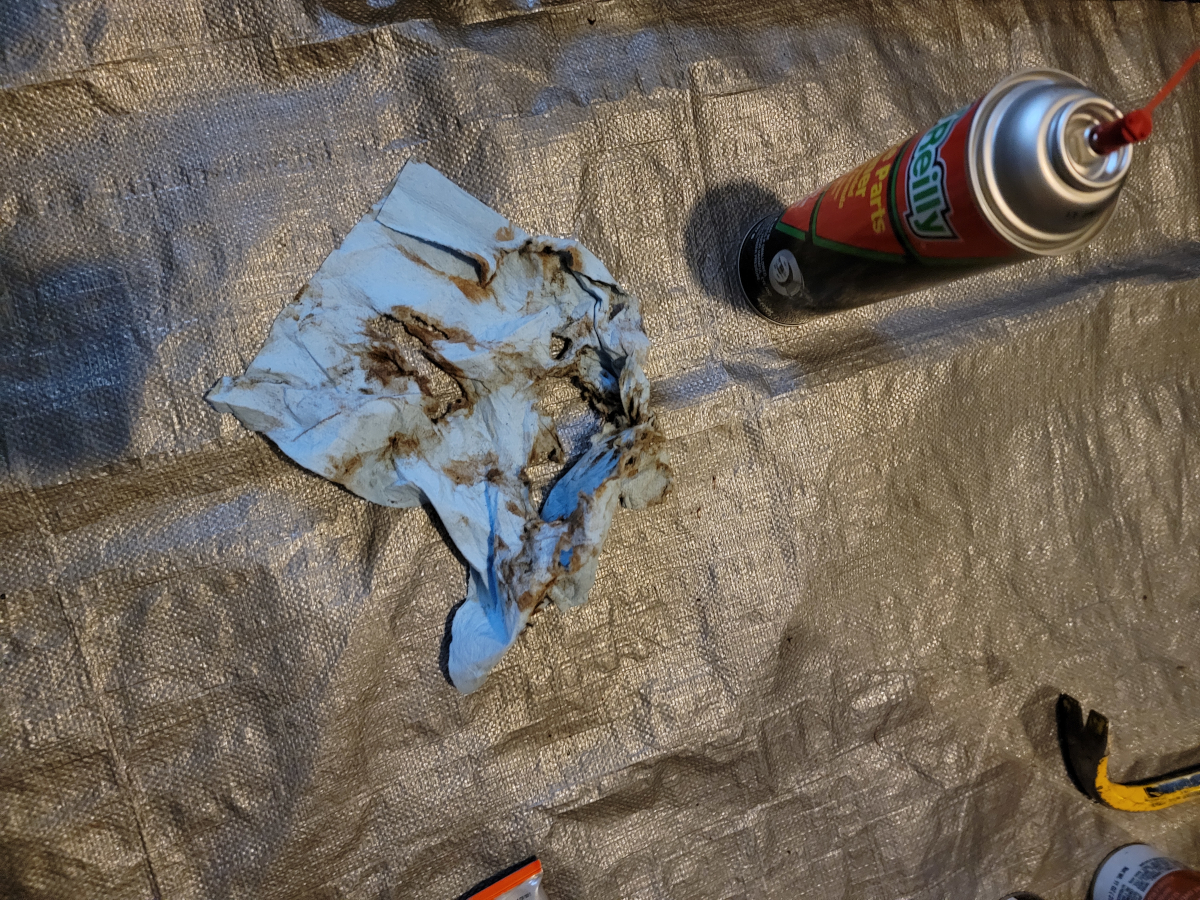
I wiped it all down with a blue shop towel, which didn’t do a whole lot, aside from shredding the paper towel.
Rebuilding
Once the brake parts cleaner dried up or evaporated or whatever, I put a quick coat of rust barrier spray down.
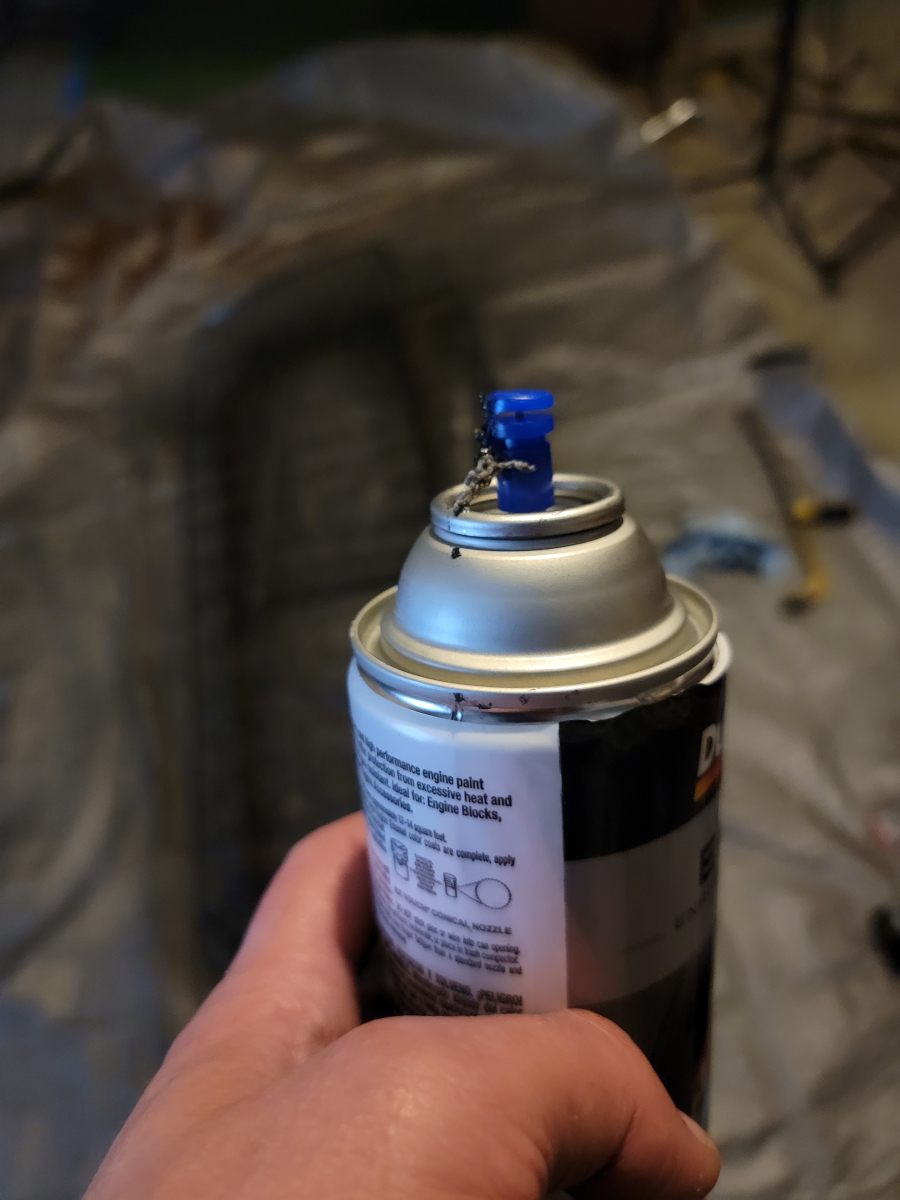
Once that had a chance to dry, I went back over it lightly with some engine enamel and was quickly reminded about the silly string situation.
But it covered pretty well regardless.
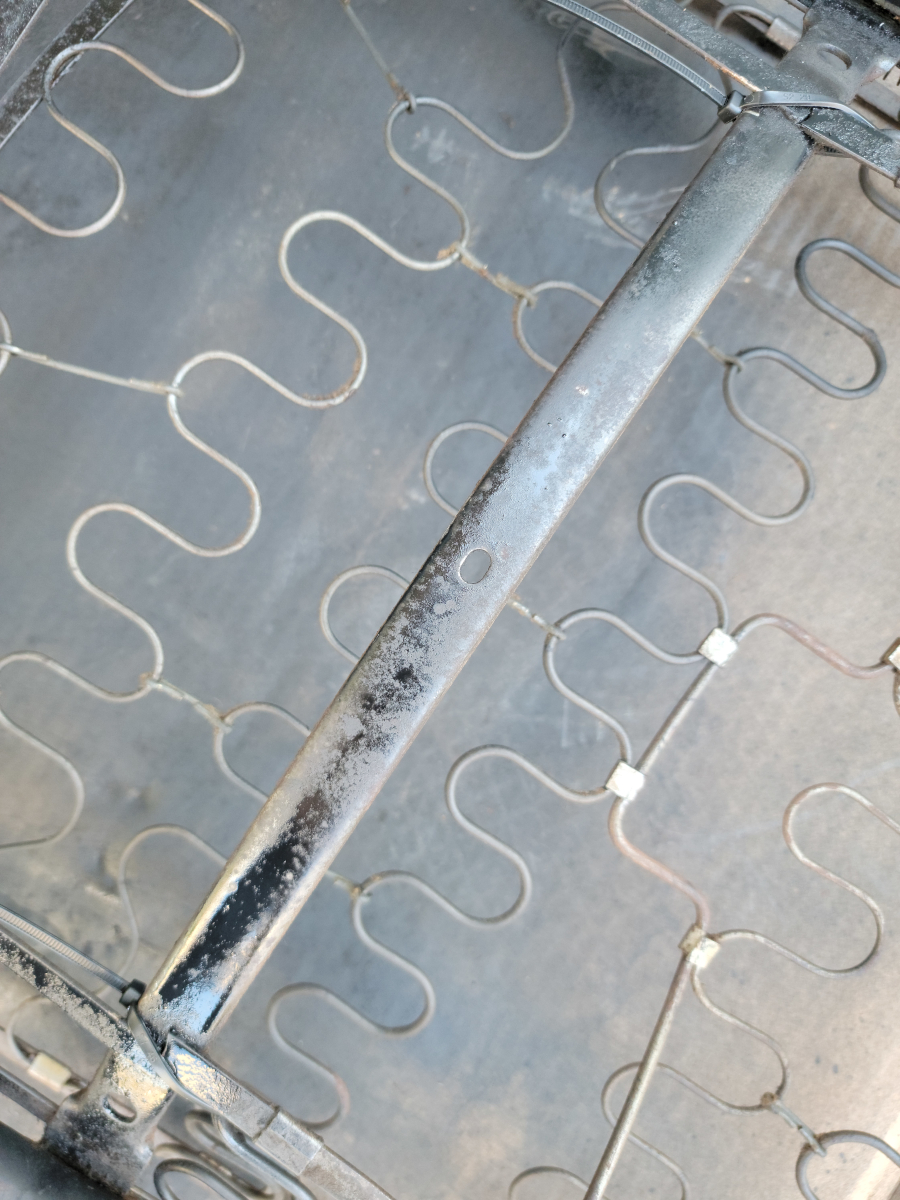
Now, it’s time to weave back through with the twine!
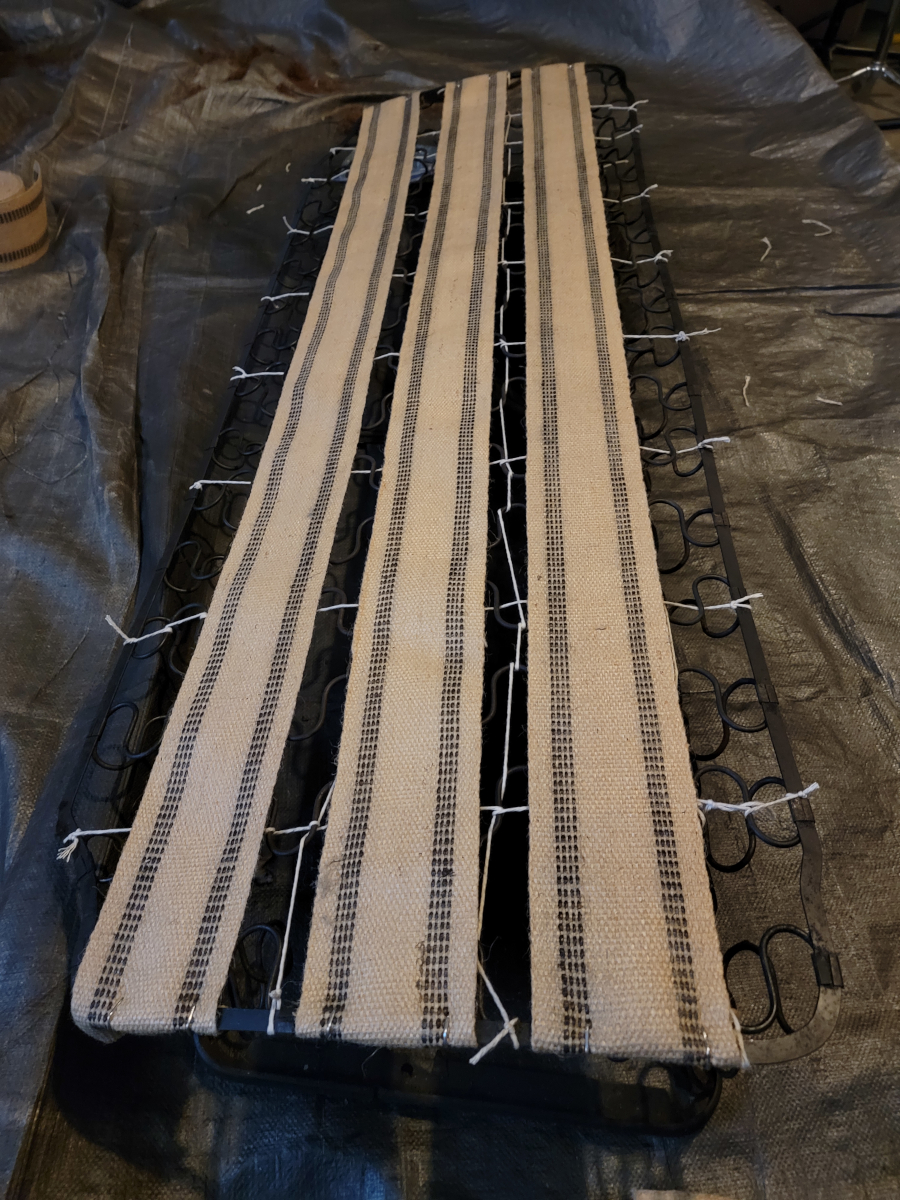
And then the jute webbing. The remainder of the first roll I bought was enough to cover the length once.
Second roll engaged!
Seat cover patching
Now, it’s time to move on to patching that holy seat cover. The bulk of my remaining vinyl roll has been dedicated to recovering the dash pad, but I do have enough left over to patch these bits up.
These front corners take a lot of abuse, since the rear seat base is just a friction-fit in the frame.
I squirted some more glue in between the layers from the front and smooshed it around.
There was only enough of the high density foam roll left to cover about a third of the seat base. I took the rest out of the new roll and they married up fairly well.
Reassembly
It was a bit of a stretch to get the seat cover on over the new foam, but I got it there eventually and pinned the end spikes over.
I didn’t have enough hog rings left over to do the front and back edges up properly and that would have taken all day anyway, so the next best solution is always zip-ties.
I even managed to use all black ones. Barrett-Jackson, here I come.
I’ll just leave this over here until Actual Spring has sprung.
Also, I completely forgot about that nice cushion pad I mentioned earlier.
It’s Saturday morning. Too early and too cold to be outside working. Luckily, I brought lots of projects inside with me after tearing the dash panel and rear seat apart.
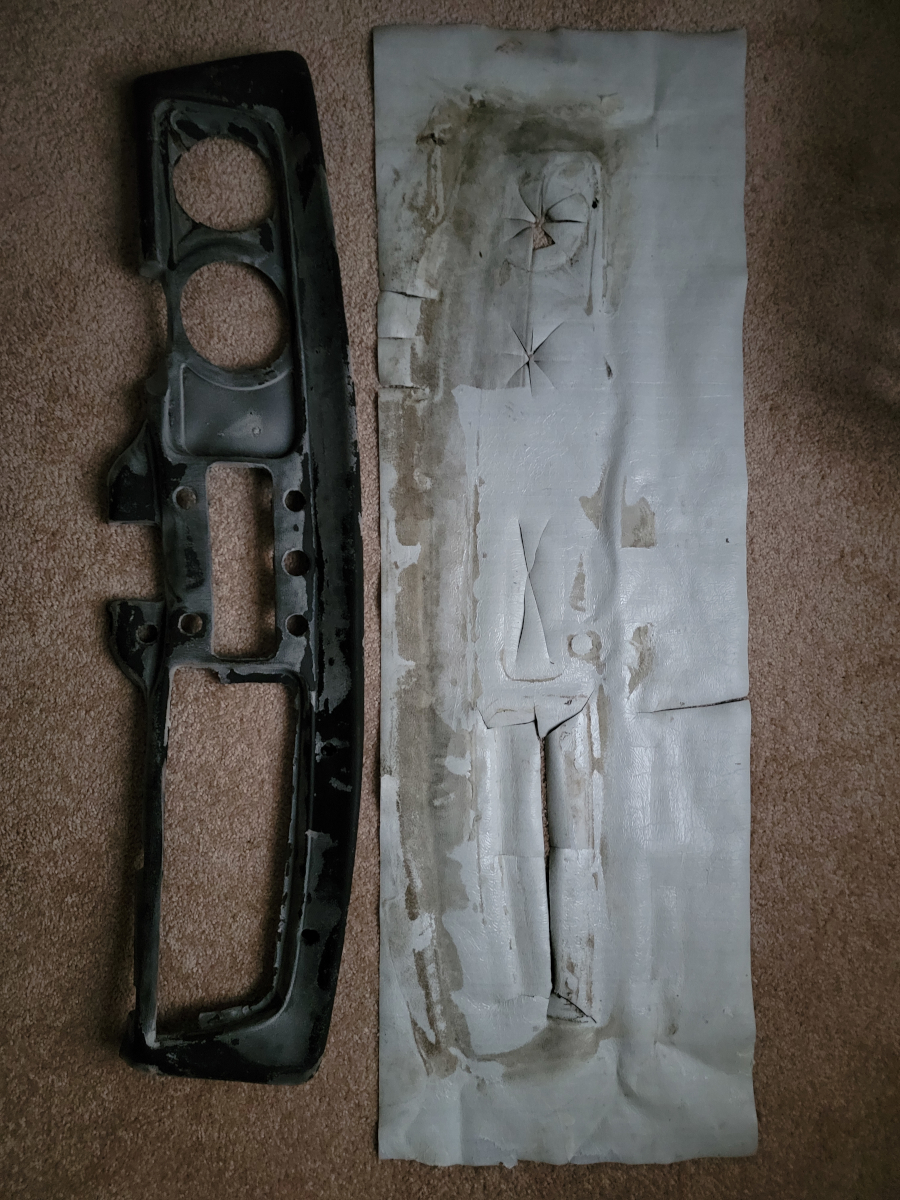
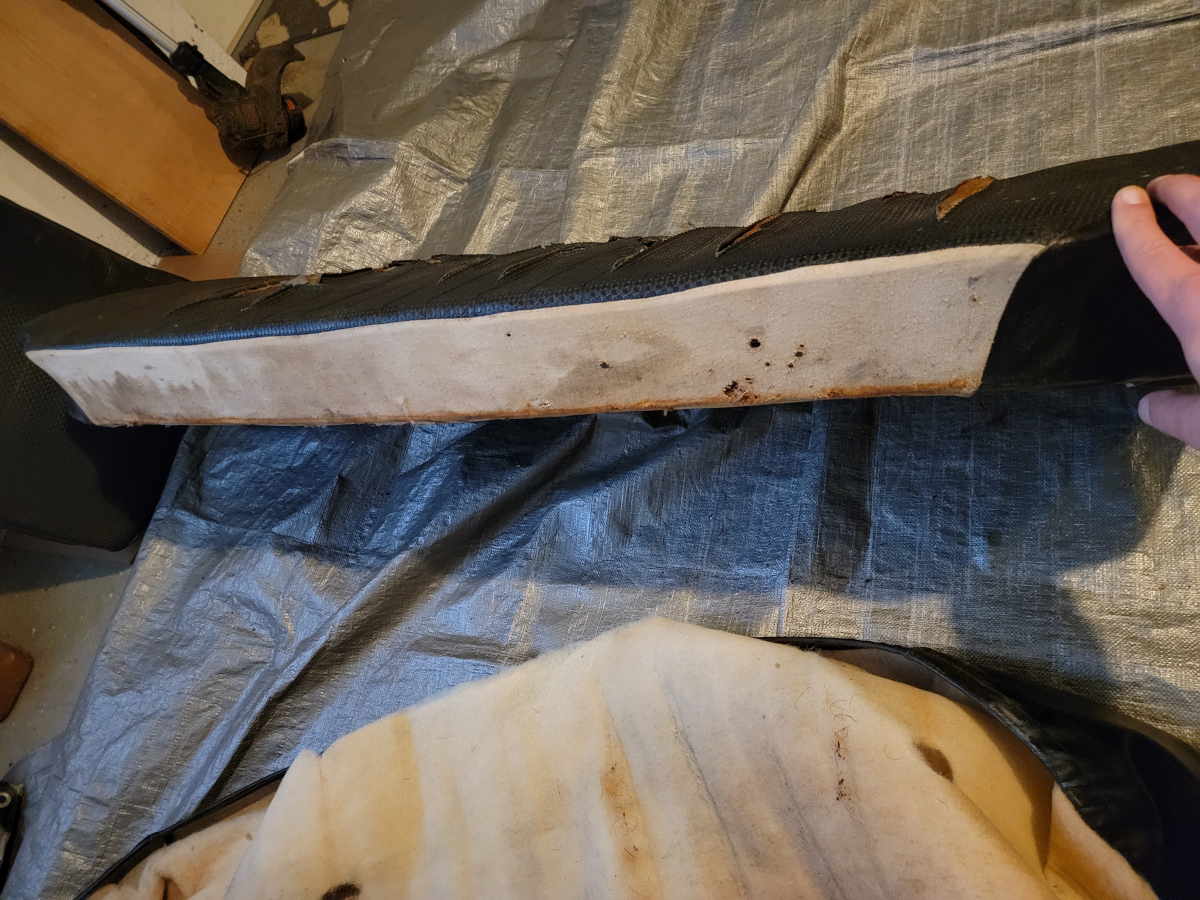
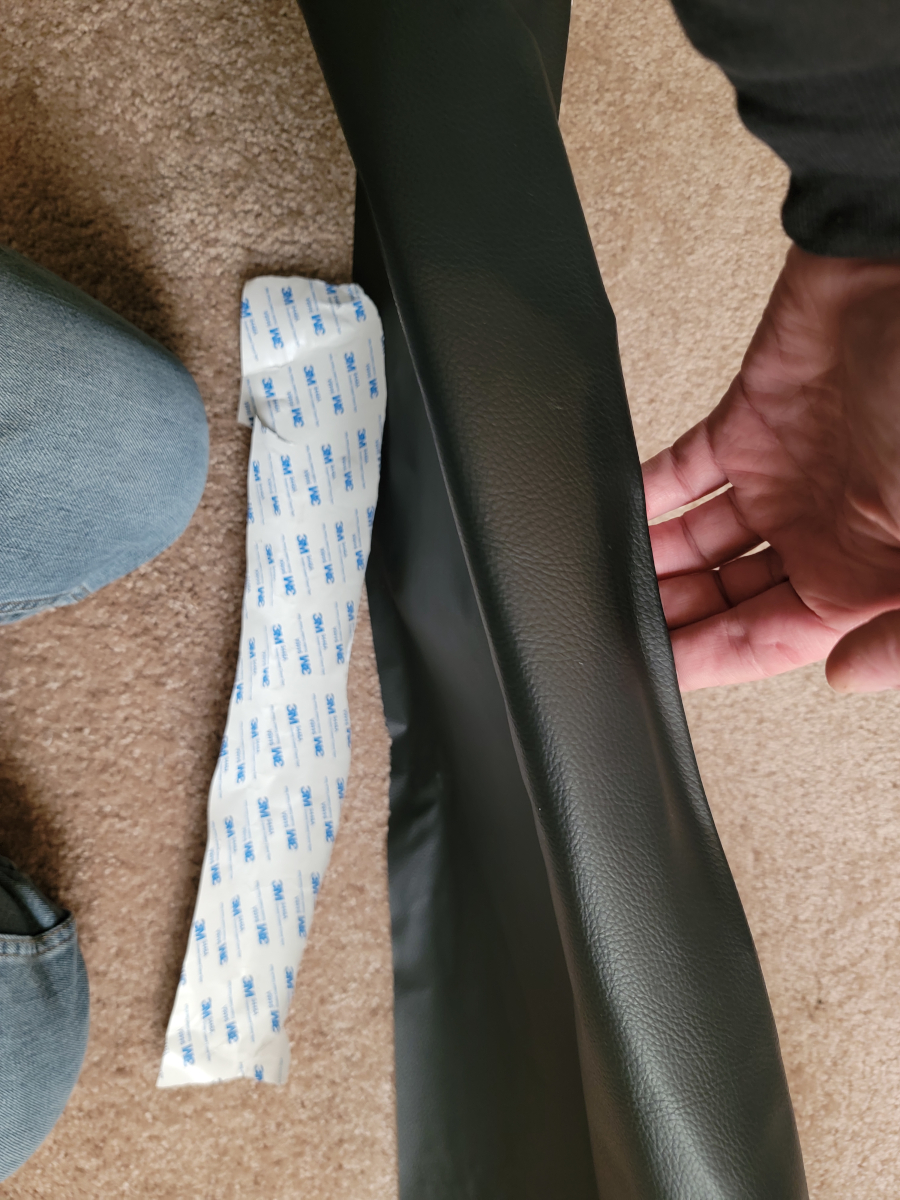
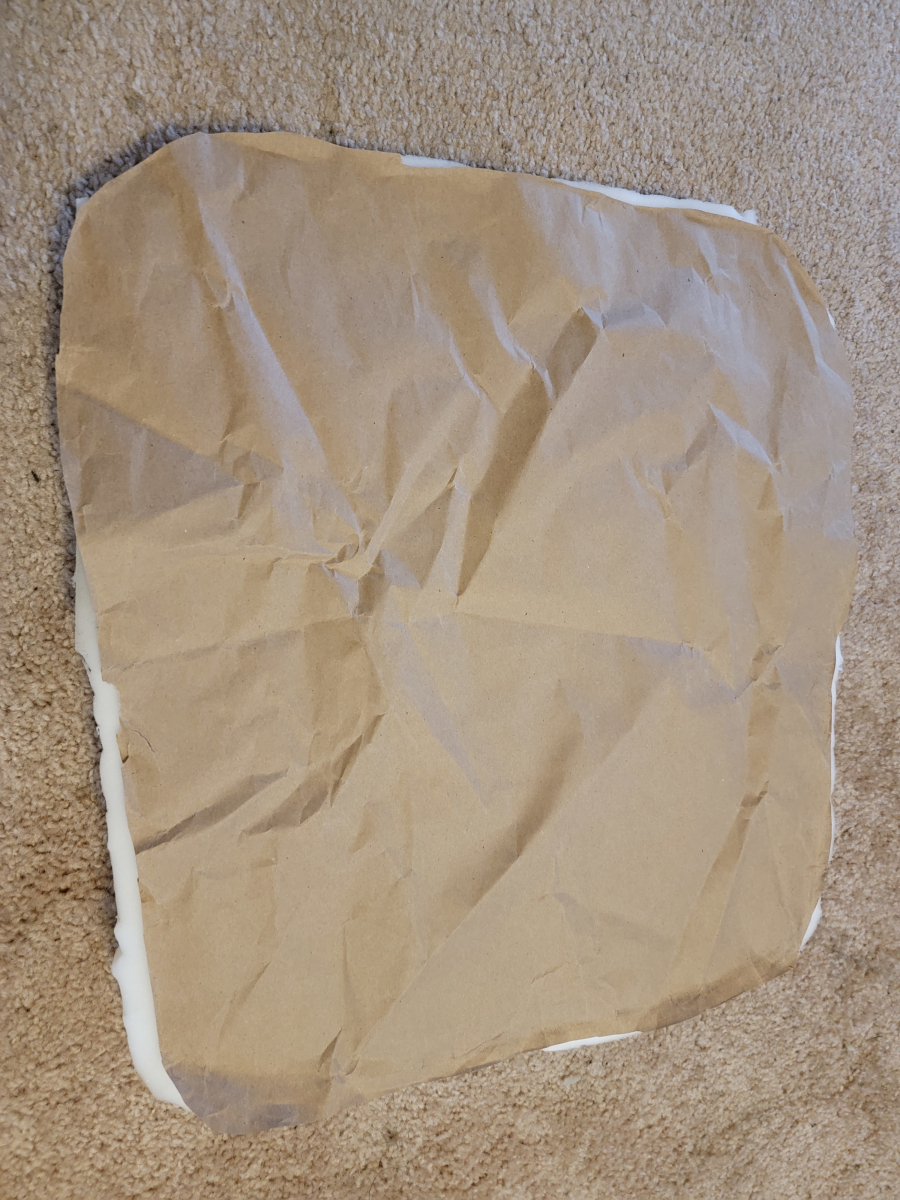
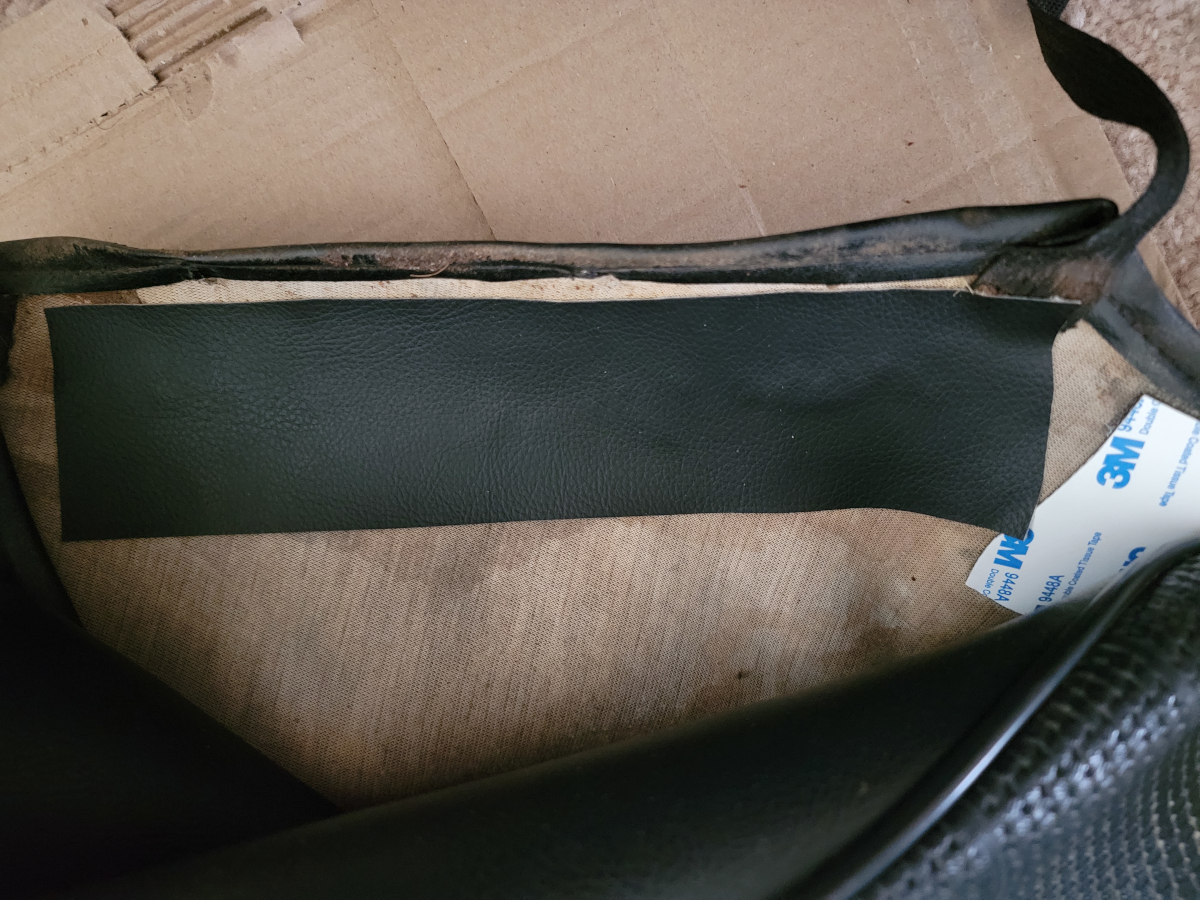
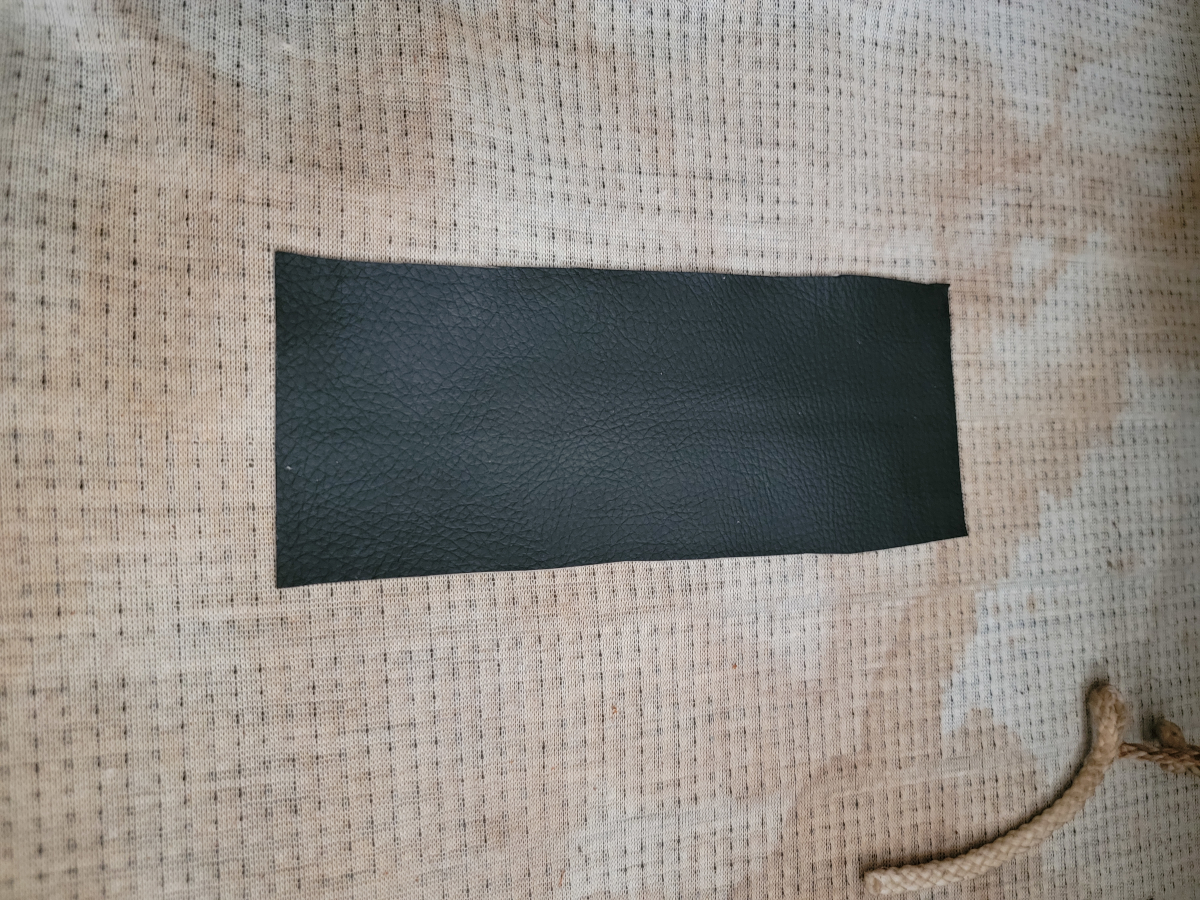
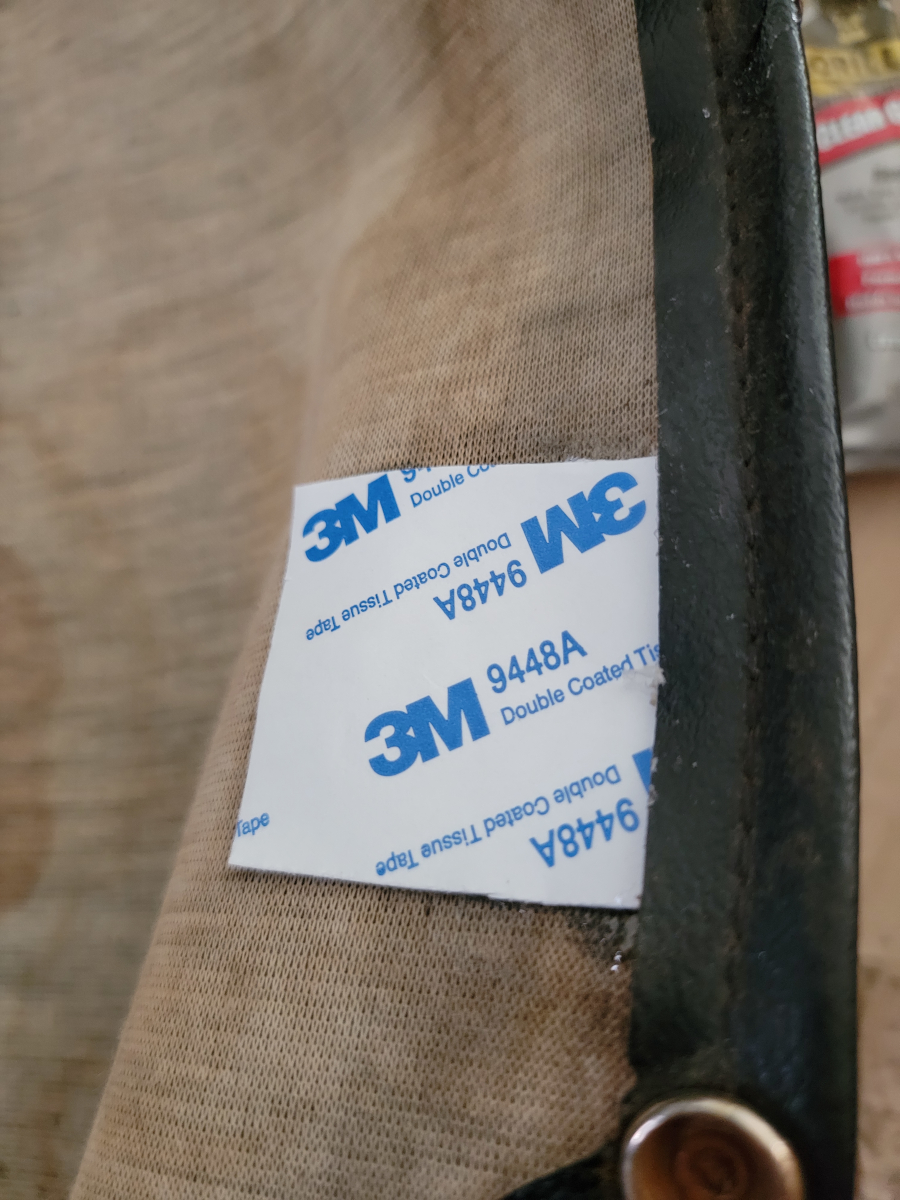
I have just enough of this roll of vinyl patch kit (Amazon link) left to recover this crumbling foam rubber dash pad. I wiped it down, to get some of the old, caked-on dust off, then laid it out on the remainder of the roll of vinyl.
There are some tight bends around the edges of this dash pad and some complicated contours. The vinyl roll was thick enough that I expected to have to use a hair dryer or heat gun to get it shaped in properly. Surprisingly, it actually bends and curves nicely into place.
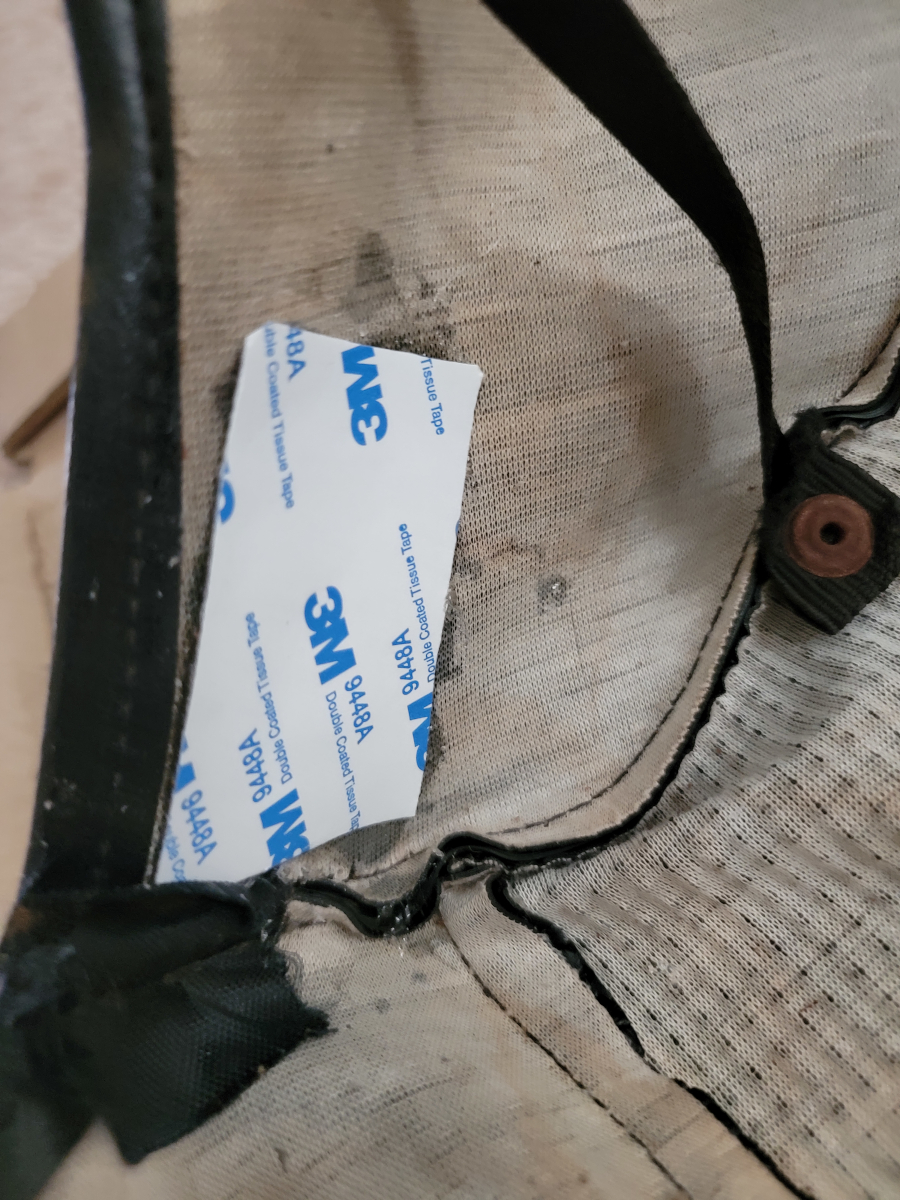
The self-adhesive 3M backing on the roll of vinyl is surprisingly strong, but I wouldn’t trust it long term in a closed up car in the sun, so I’m going to have to glue it somehow as well.
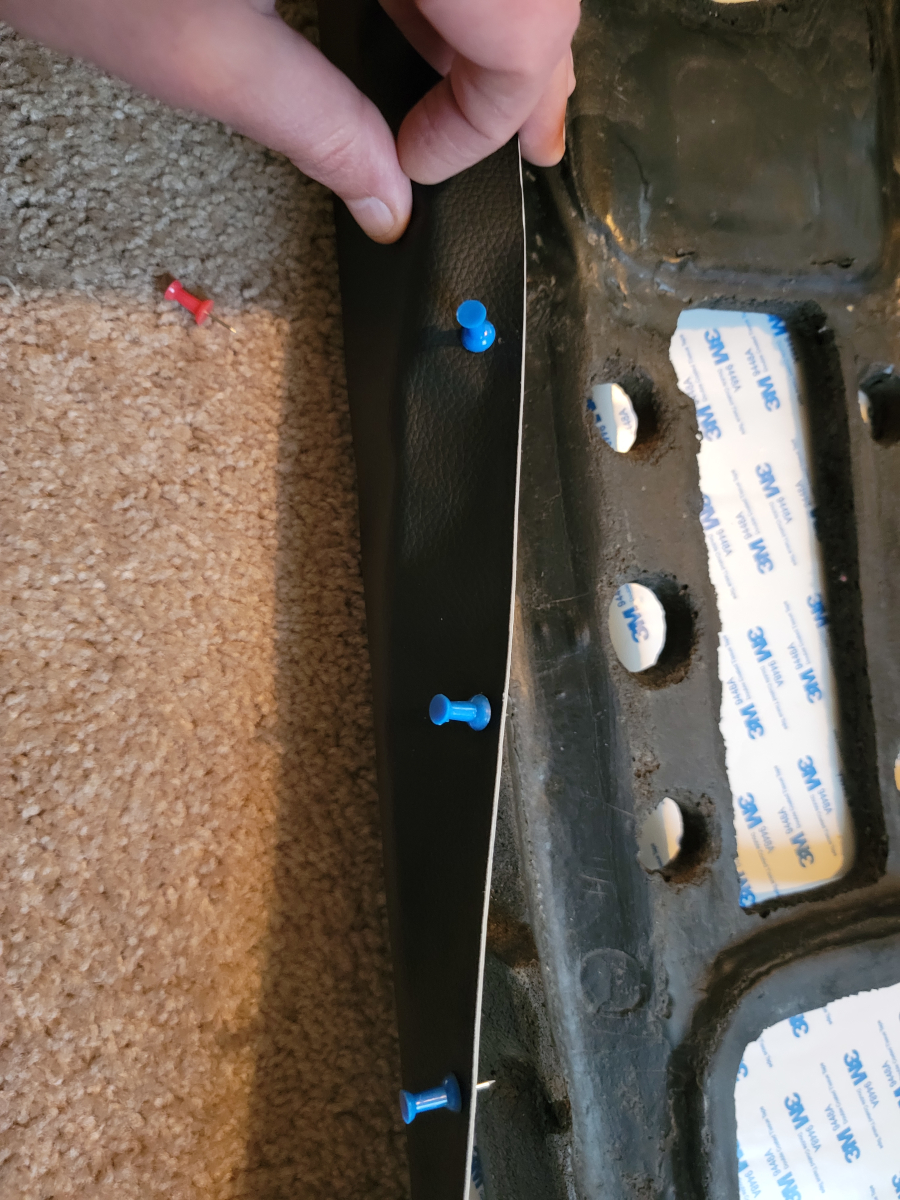
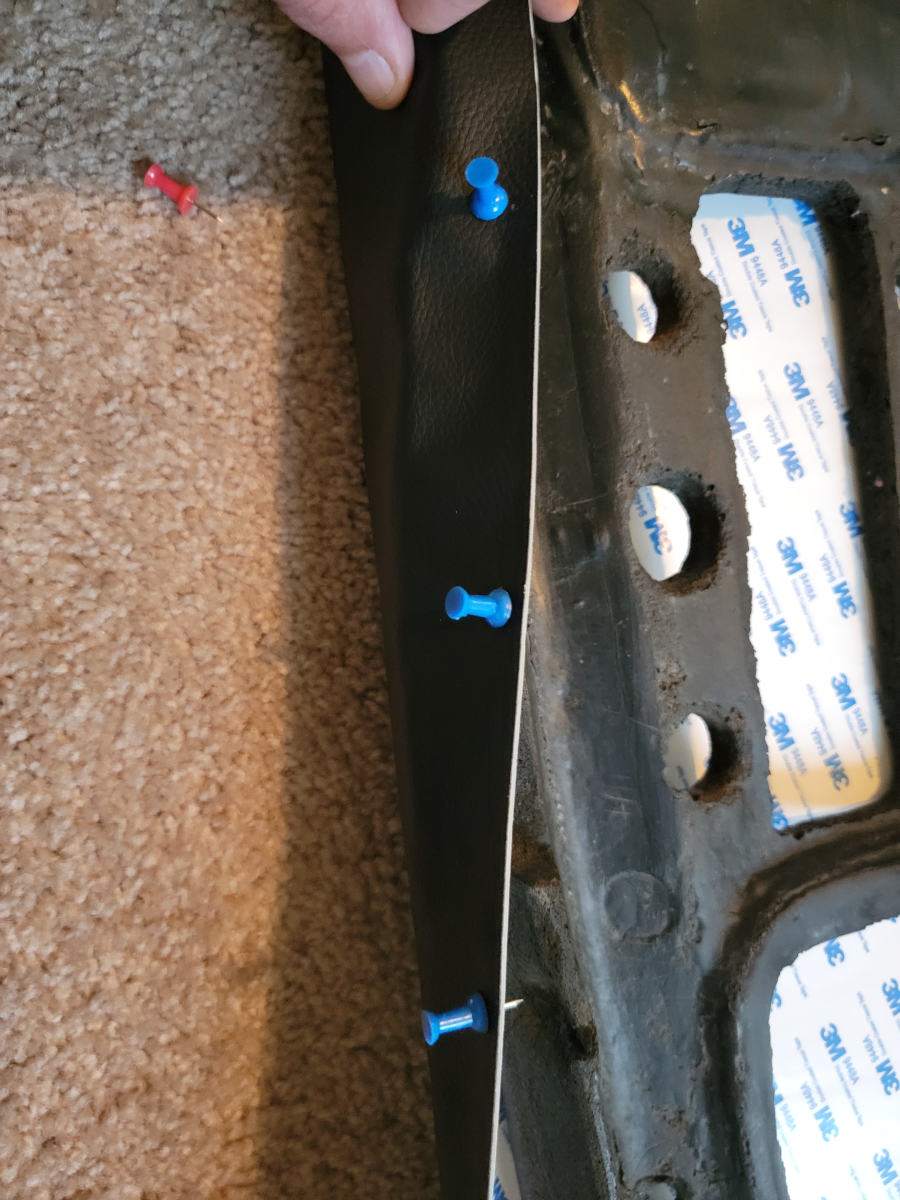
Approach 1. Push Pins
Last night, I picked up a pack of push pins in the office supplies isle at the grocery store. I was looking for thumb tacks, because they would have been flat enough to leave in place on the back side of the dash pad. These multi-colored plastic handled push pins was all they had at the grocery store.
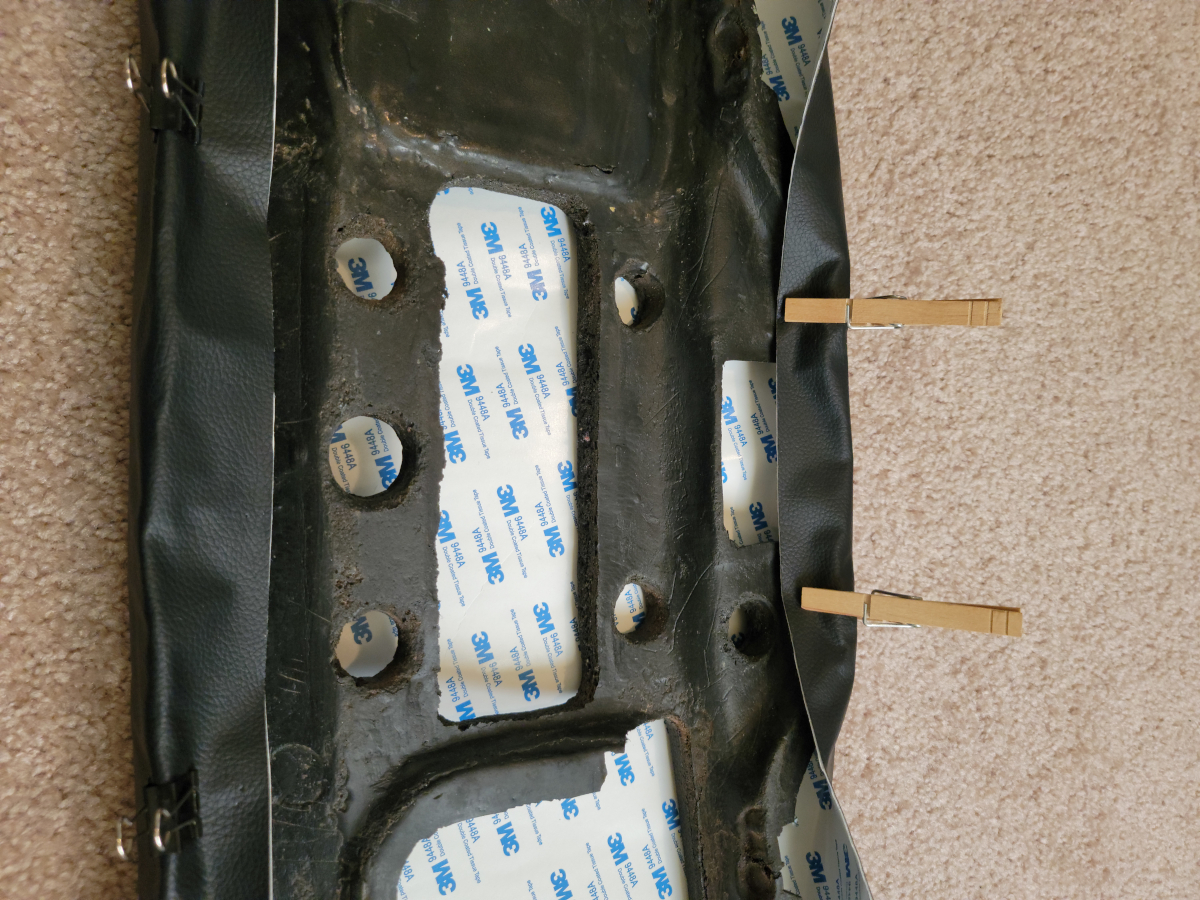
Approach 2A: Binder Clips
The push pins pulled right out. They wouldn’t hold up against any pressure at all. So, next, I grabbed the last few unused binder clips I had laying around. They worked better, if situated just right, in the right place.
Approach 2B: Clothes Pins
I also have quite a few clothes pins left over from hanging the moving blankets in the basement (to calm down the echos when recording drums).
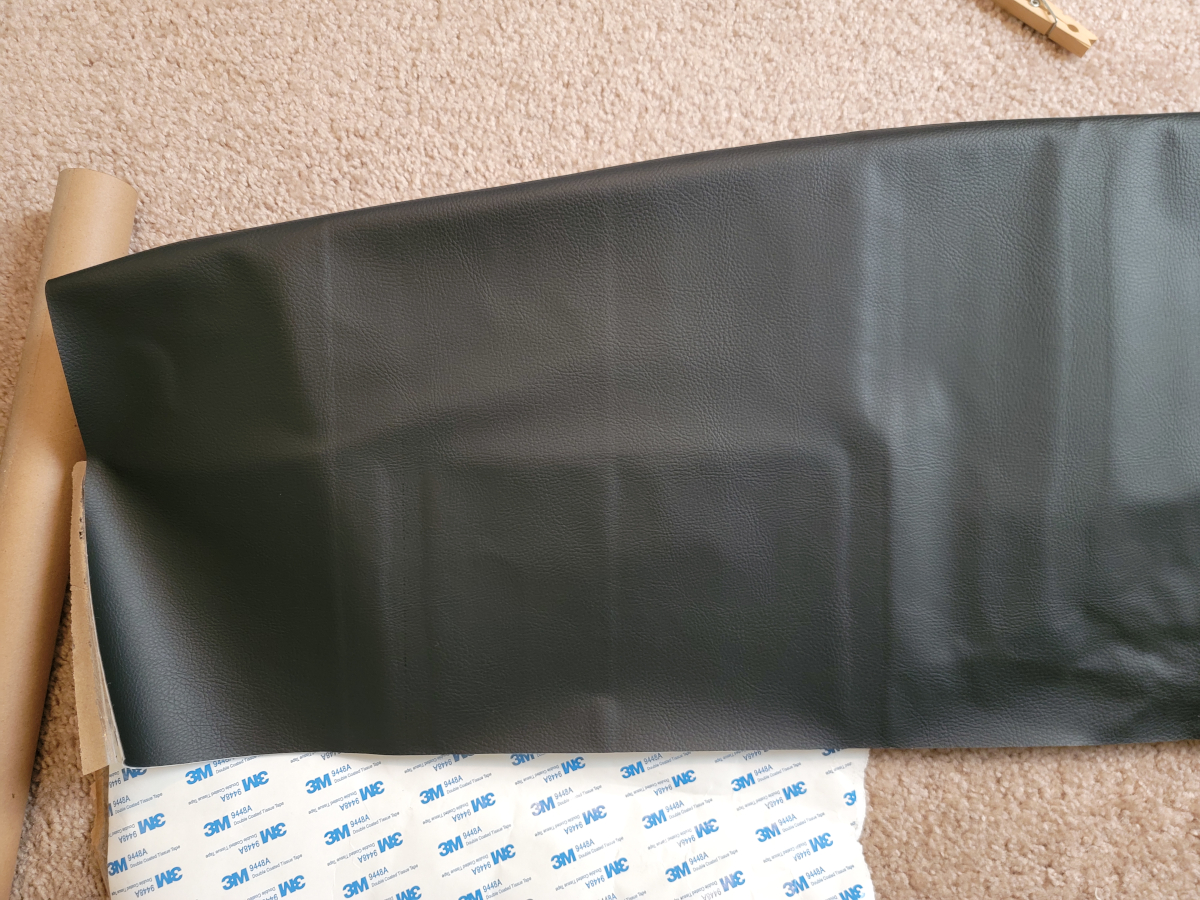
I started peeling off little bits of the wax paper covering the self-adhesive backing and started trying to snug the vinyl in from the top down.
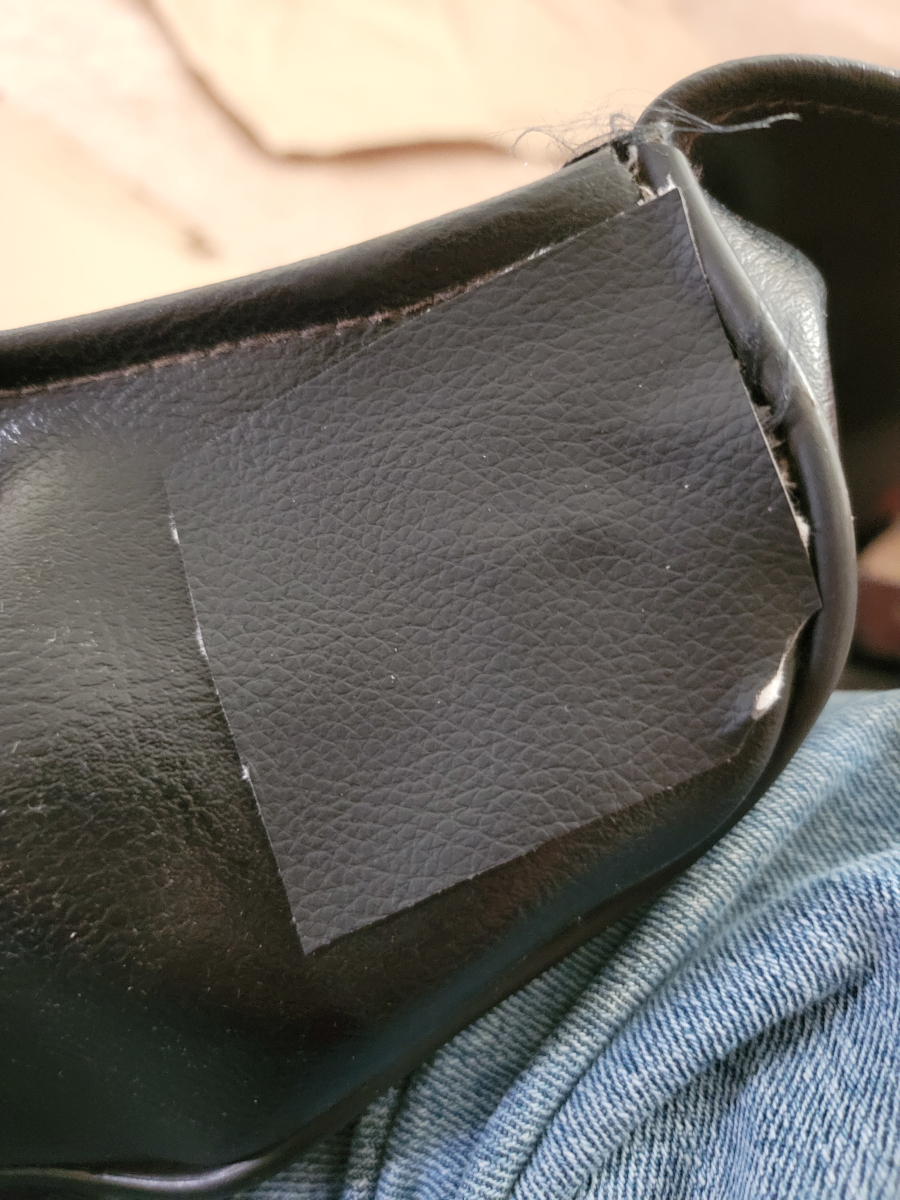
There are two mile-long screws embedded in the top corners of the dash pad. I figured they would be good anchor points for the vinyl, but it stretched and tore instead.
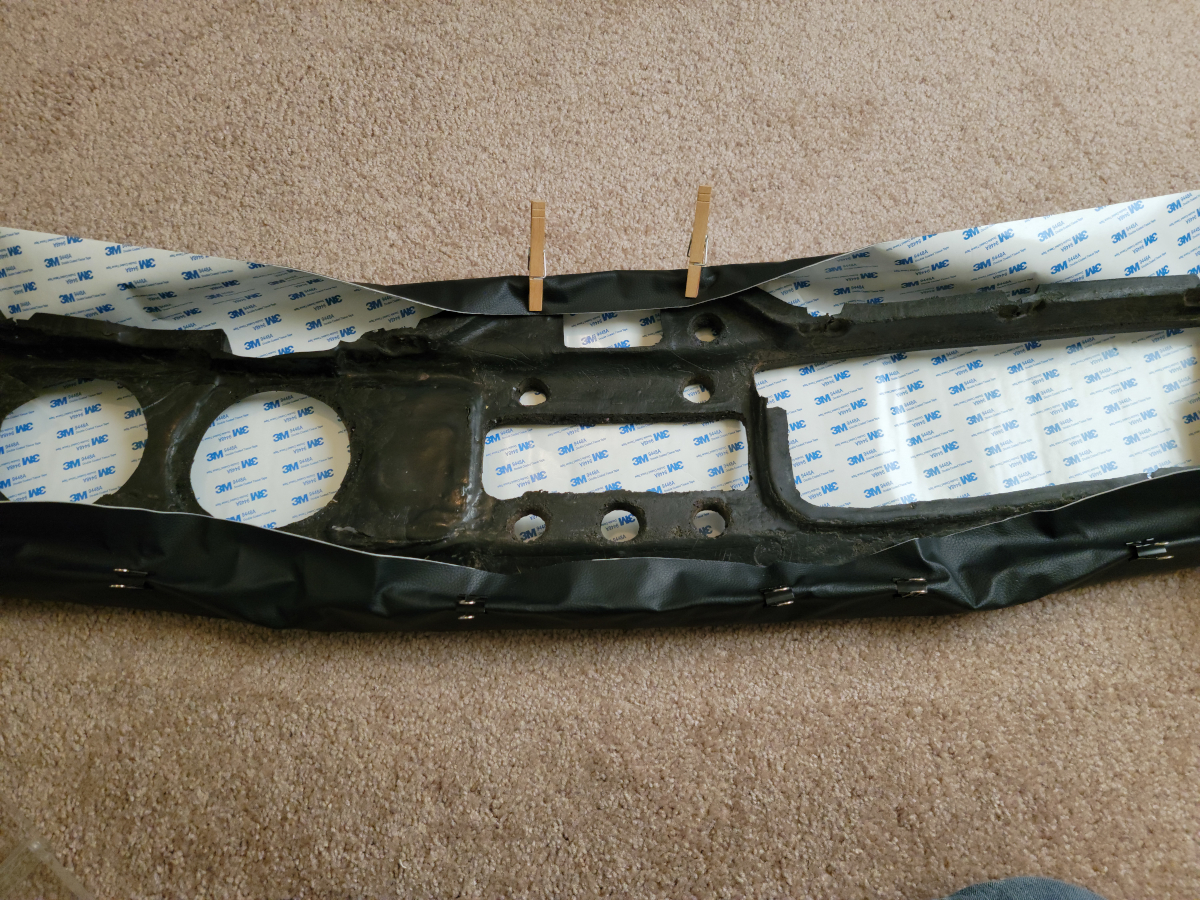
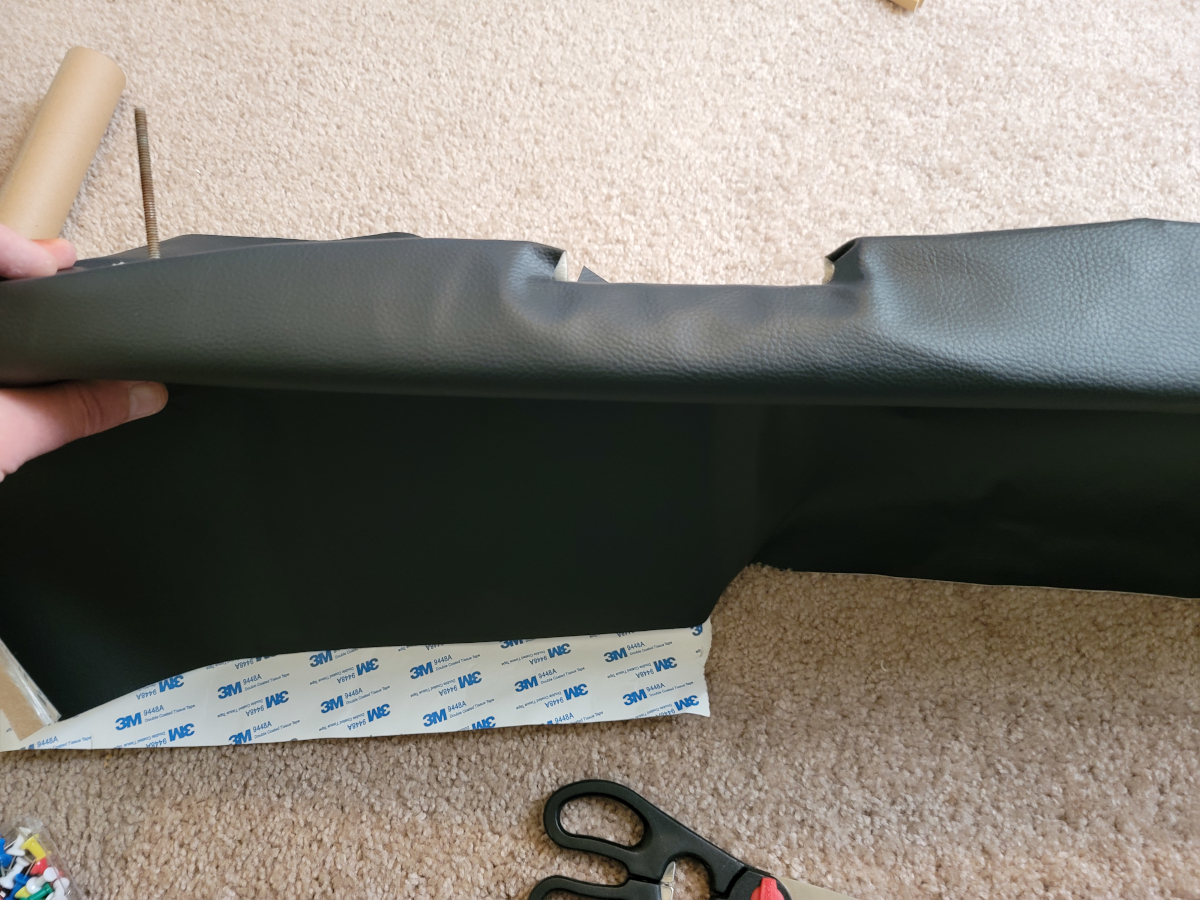
Cutting in the vent holes
It doesn’t look bad from the front, at least around that top edge and slicing, folding, and fitting around the vent holes on the back edge.
I took that last picture about 30 minutes in. I wasn’t ready to make anything permanent yet. I’m not sure that this is the direction I want to go. Should it fail in a month or two once the summertime heat and humidity come, I don’t want something like Gorilla Glue or whatever smeared all over underneath the vinyl.
I have left it in this state, with most of the wax paper still on the self-adhesive backing. The center vent piece (jbugs.com link) hasn’t been shipped yet. I may end up searching for a different source for that part. It is still back-ordered and the rest of the items have already arrived.
Anyway, what I’m trying to say is I’ve got some time until I can actually reassemble the dash panel.
* Update 03/16/2023
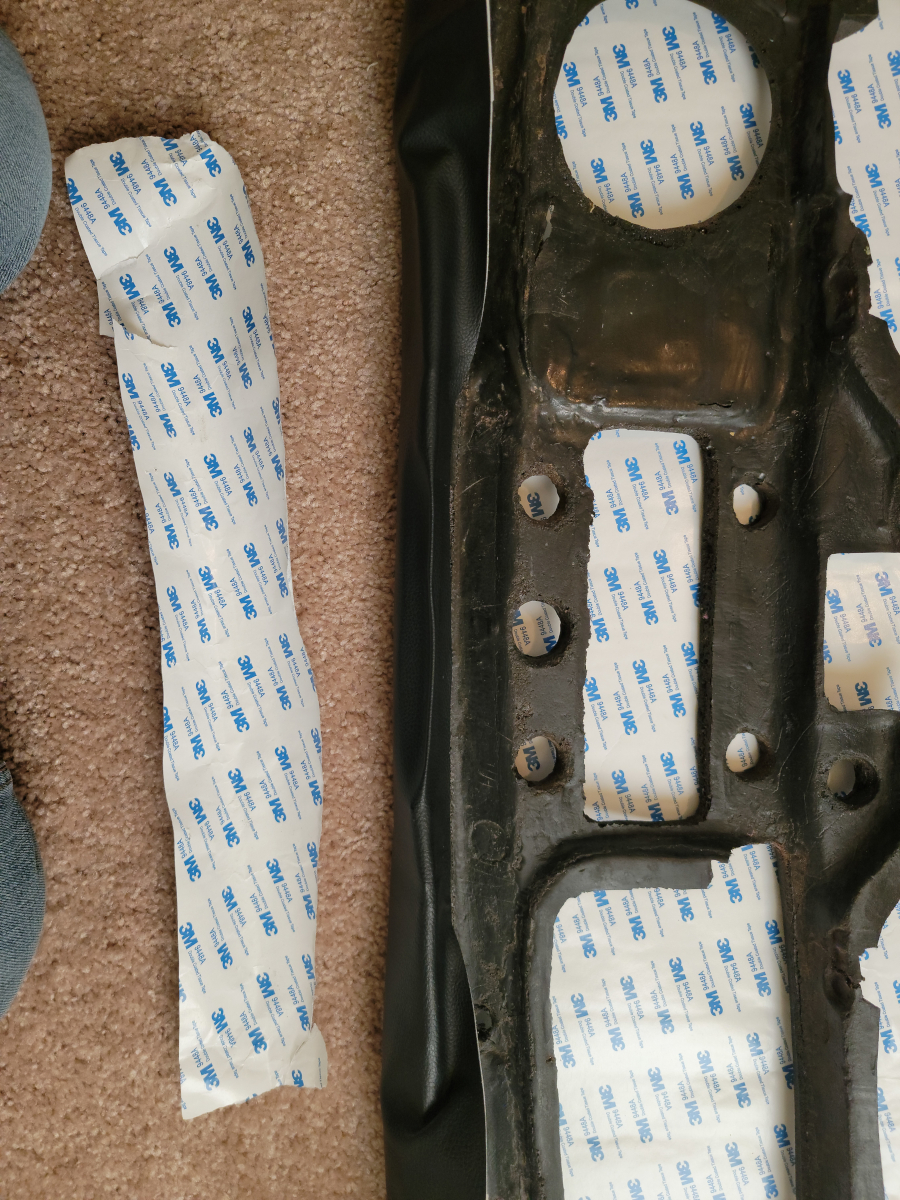
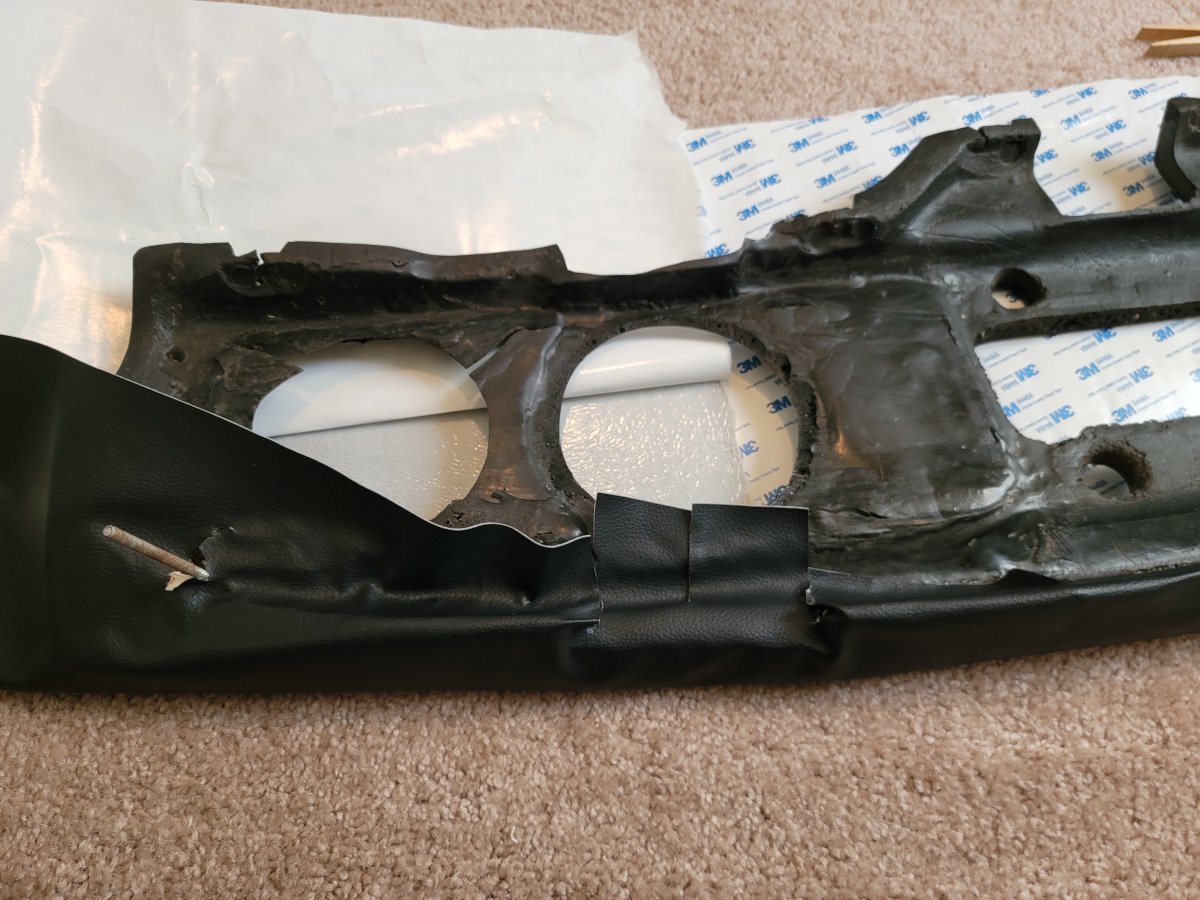
As mentioned, I left it in that state, laying on the floor, half of the adhesive backing along the top edge removed and sure enough, it has pulled away from that grimy, crumbly foam rubber.
I think that some really strong, yet flexible, glue will be required. Either that, or abandon the idea and just put the ugly thing back in place as is. Again, there is no way I’m spending $300 for a new one.
As mentioned in previous posts, I purchased this roll of self-adhesive vinyl to patch and refinish the seat covers. My plan was once finished with the seats, to take the rest of the roll and recover the crumbly foam rubber dash panel. A new one is around $300 and I’m far too cheap to pay that much.
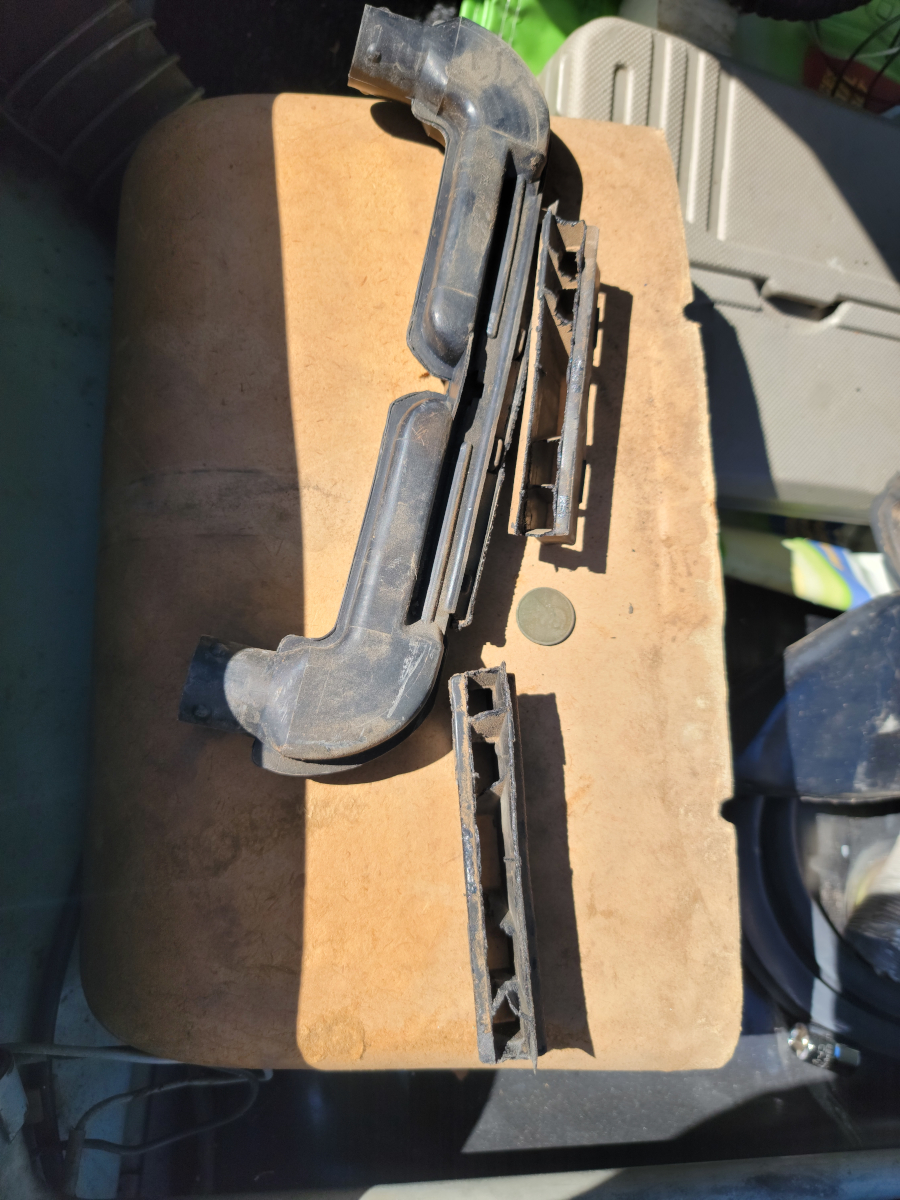
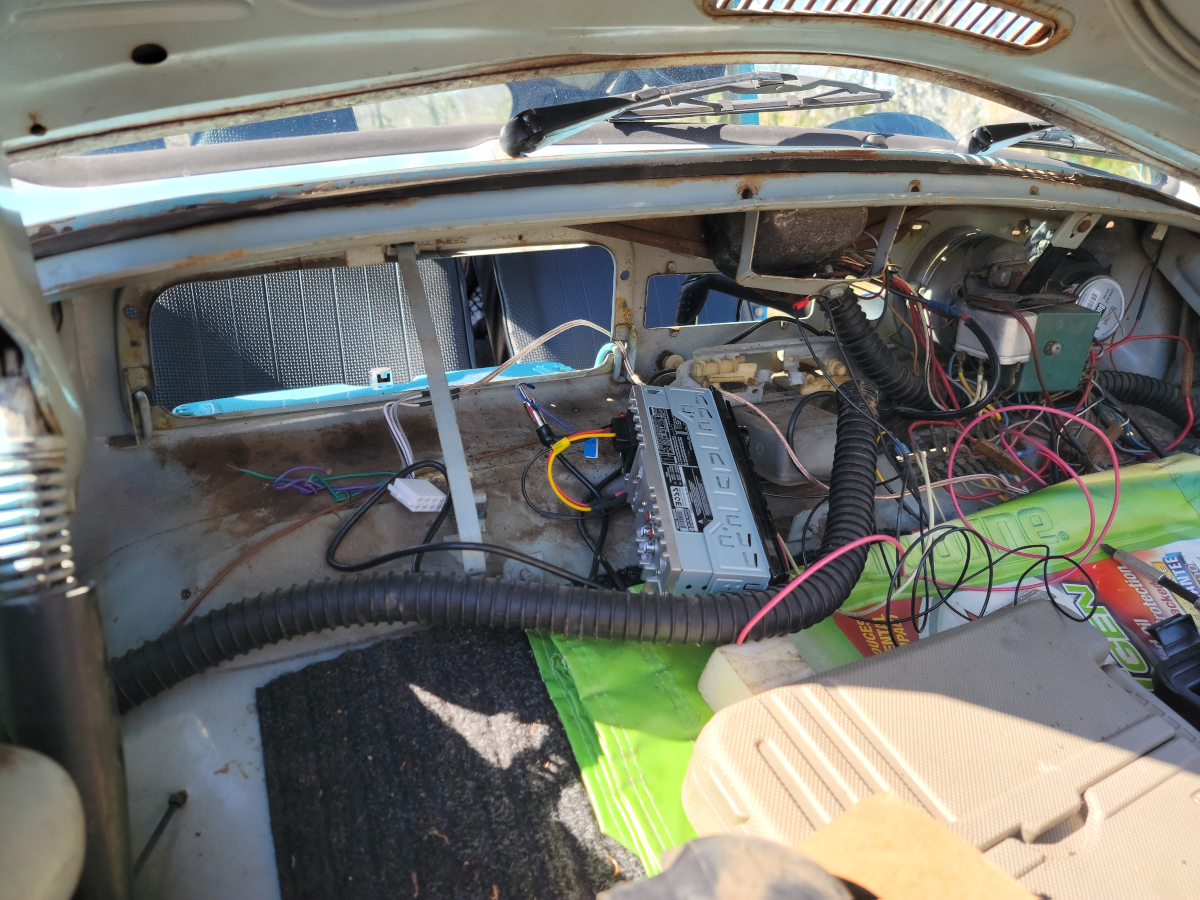
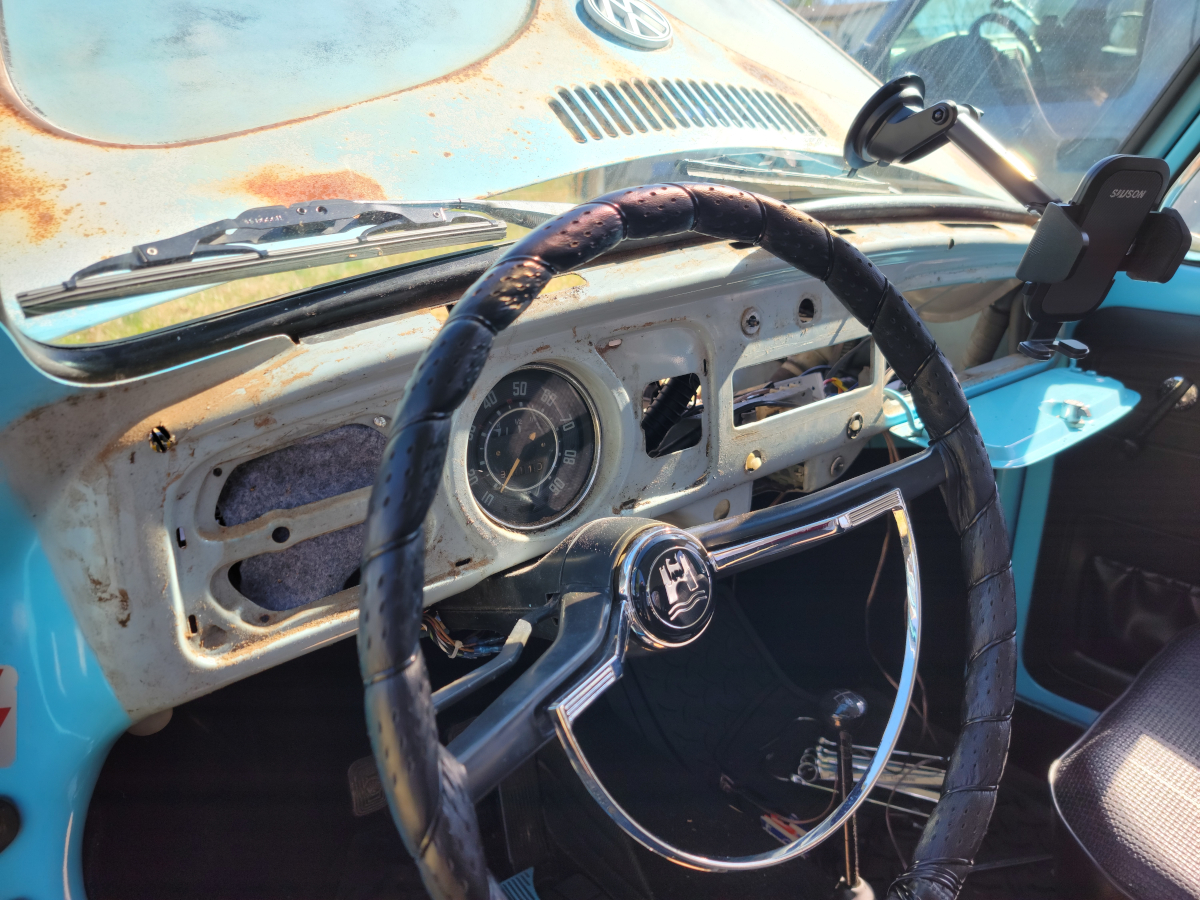
To get at the dash panel, I removed the visible screws and washers from inside the car. The dash panel wouldn’t budge. The air vents are in really bad shape, so I remove those and set them aside. Removing the center vent meant removing a lot of stuff from under the bonnet, including the glove box, which also contained the stereo. The grills behind the steering wheel had some metal tabs that needed to be untwisted to allow them to push through into the passenger compartment.
With all of that removed, I still couldn’t get the dash pad out. There were a couple of quarter mile long screws in the corners. The grab handle above the glove box had to be removed. There were some very tricky nuts hiding up under, where there was only room for a wrench to make quarter turns.
Then the speedometer/gauge cluster. The chrome trim ring around the speedo had some more metal tabs folded over, under, around the back side edge. The fuel gauge worked the day I bought the car, but the needle disappeared when I filled the car up after lunch three miles from where I picked the car up, so that has been a job that I’ve been putting off for over a year.
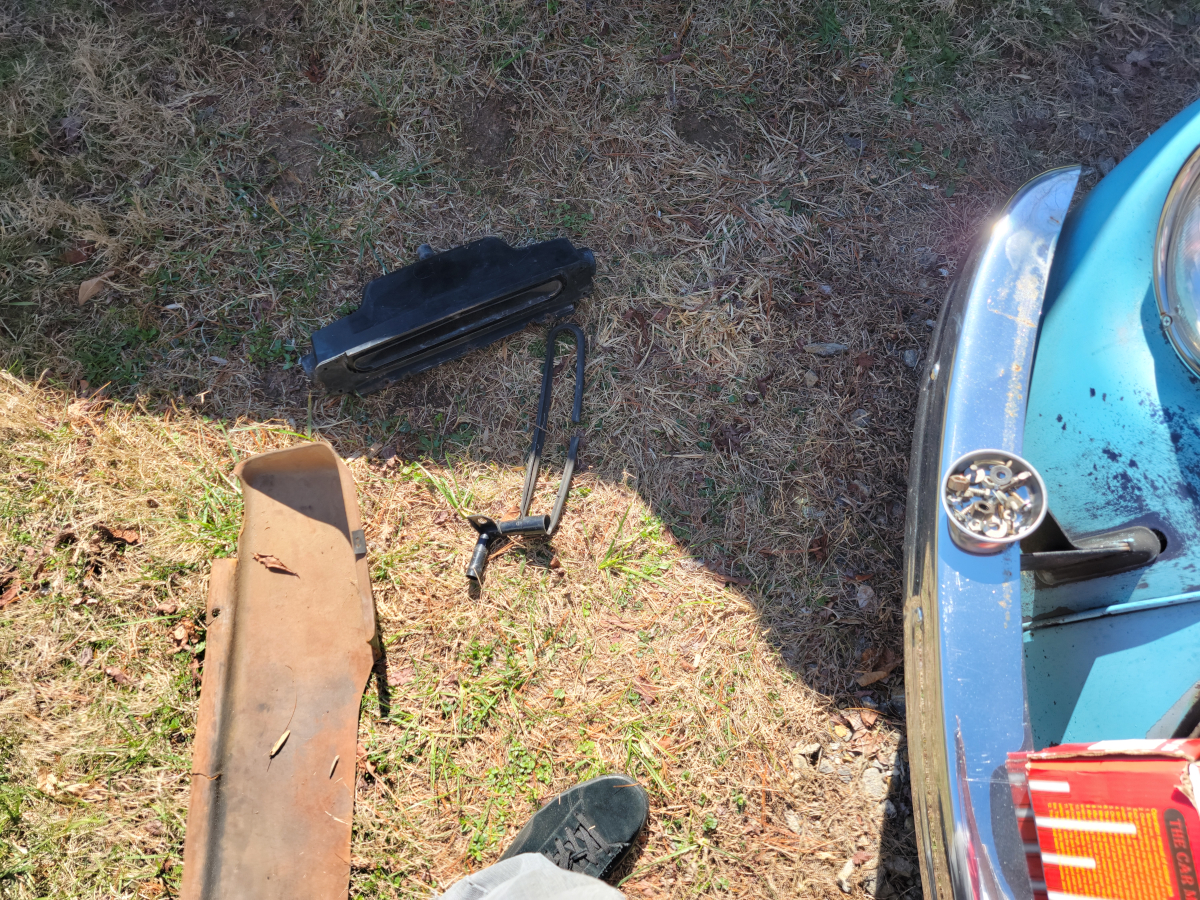
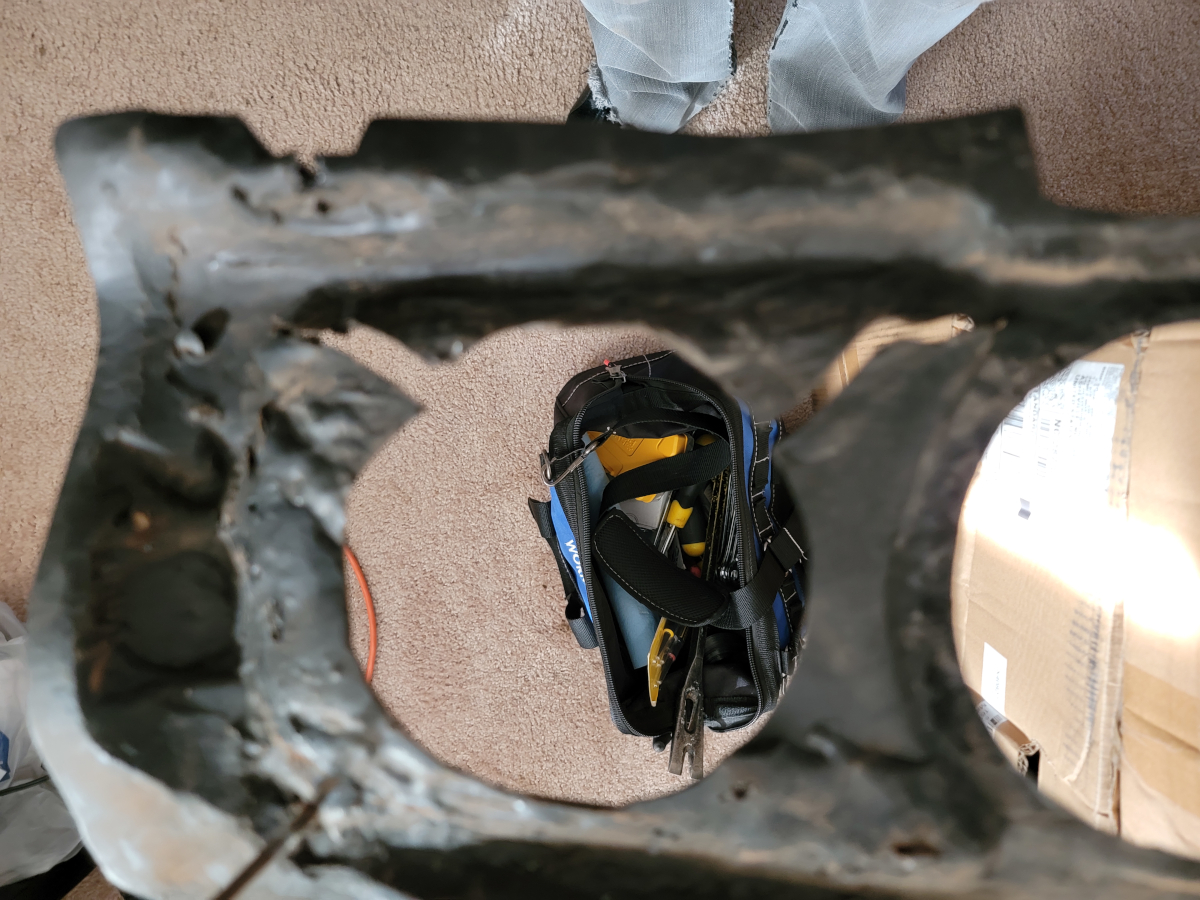
The little 4″ kicker speaker on the left side of the steering wheel will need to be removed, but I left it in there for the moment. And finally, success! The dash pad has been liberated.
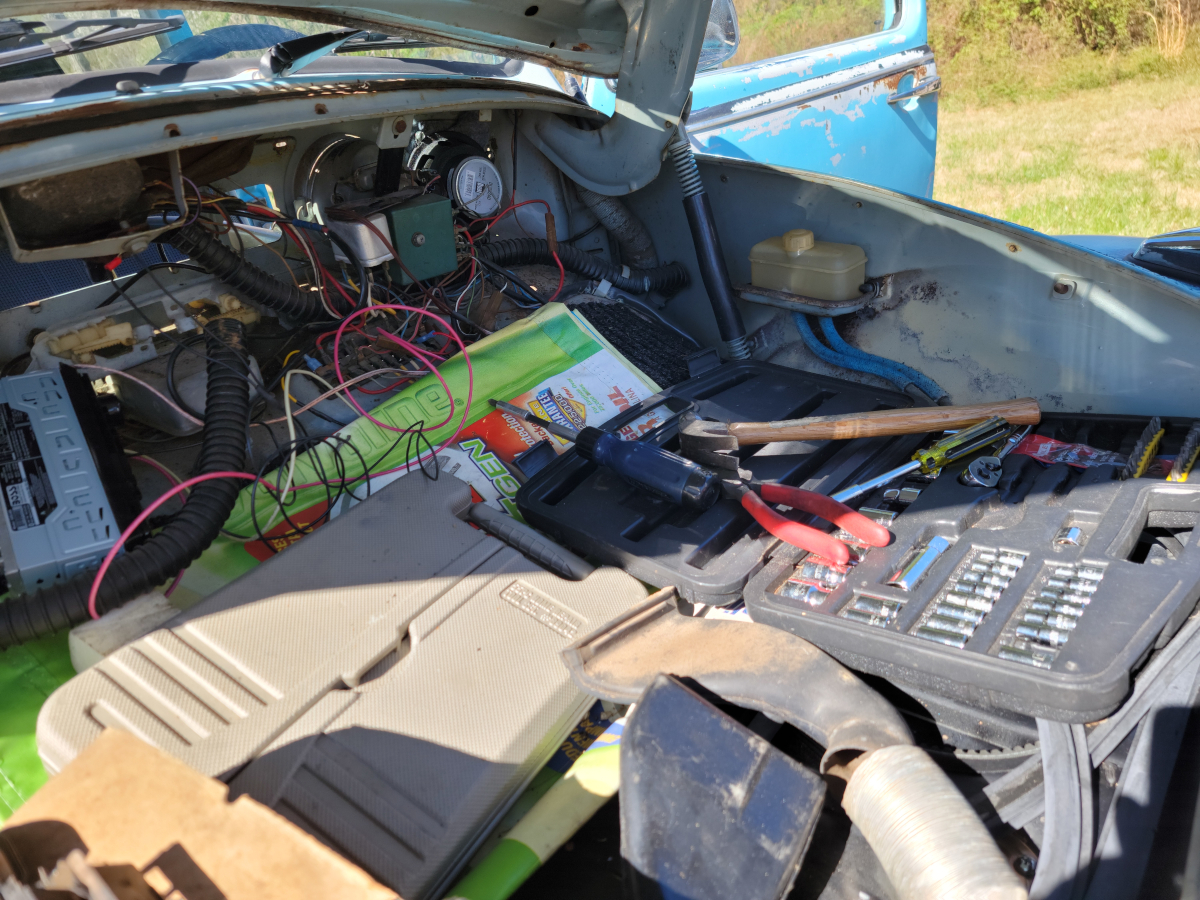
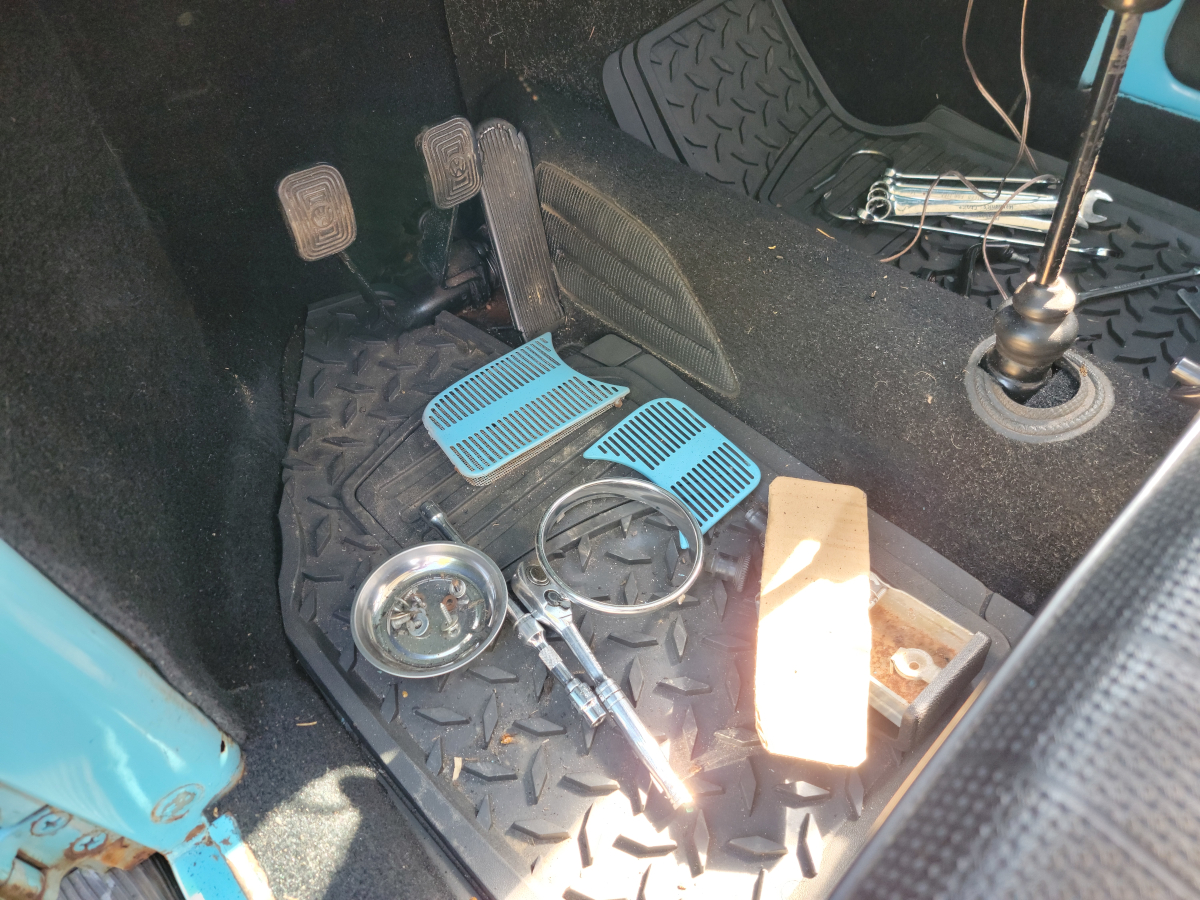
AND WHAT A MESS I HAVE MADE.
Those are two separate magnetic parts bowls full of screws, bolts, nuts, and washers. The first one was stuck to the front bumper in one of the earlier pictures.
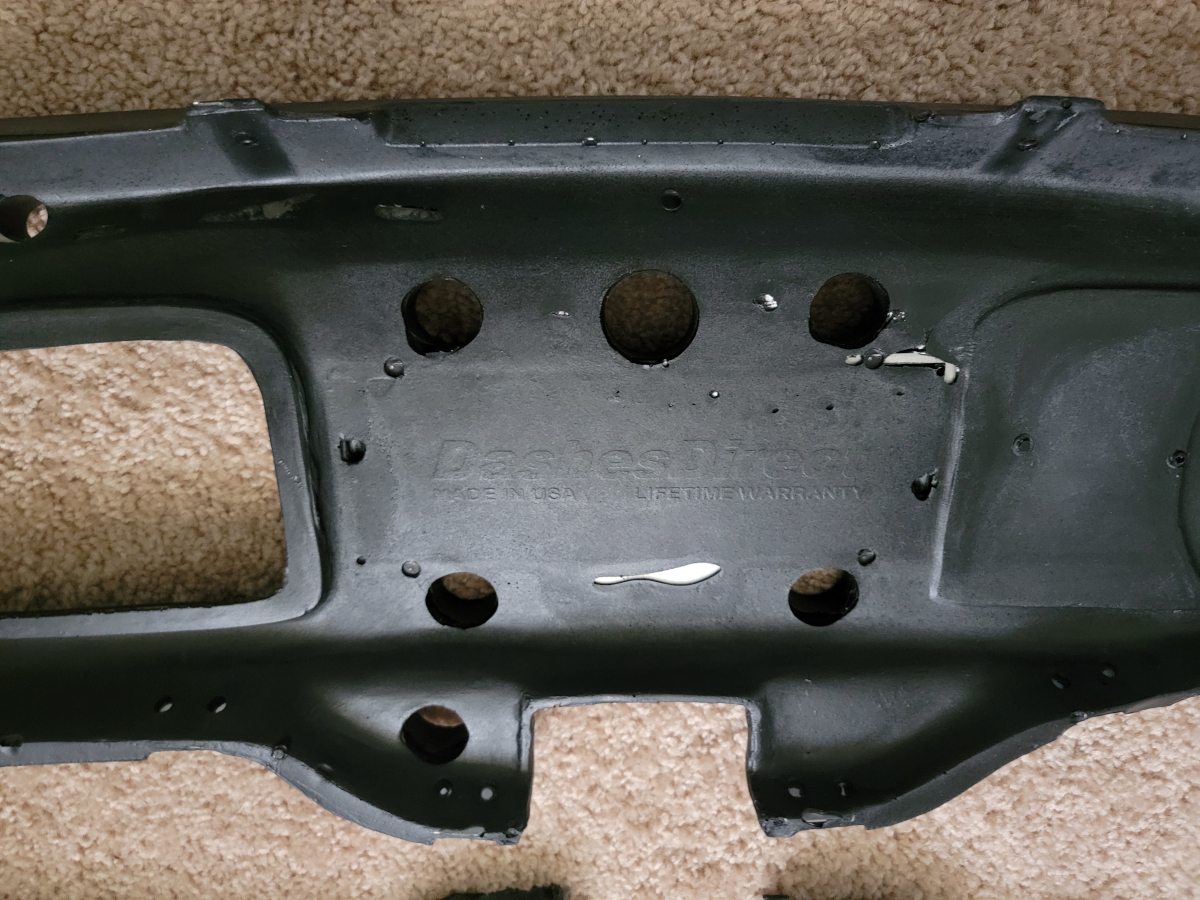
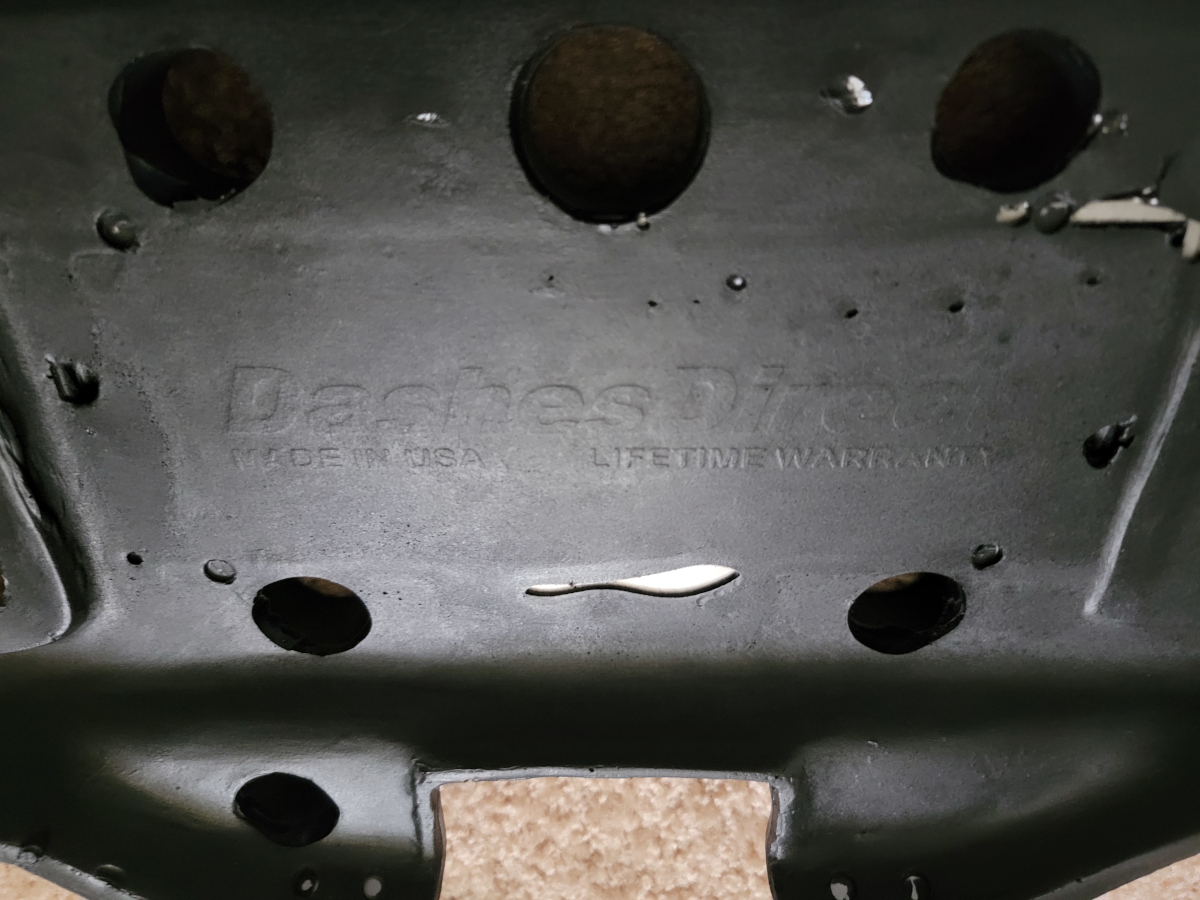
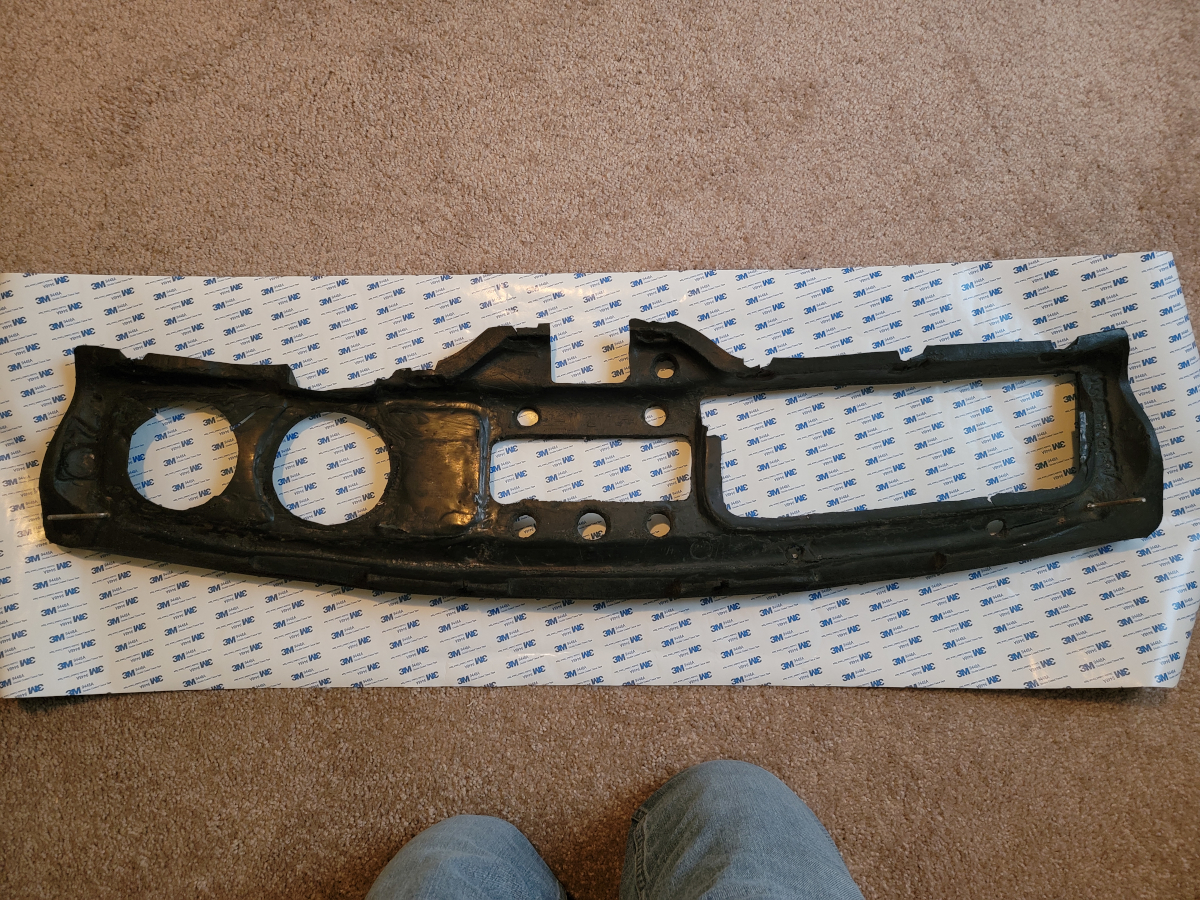
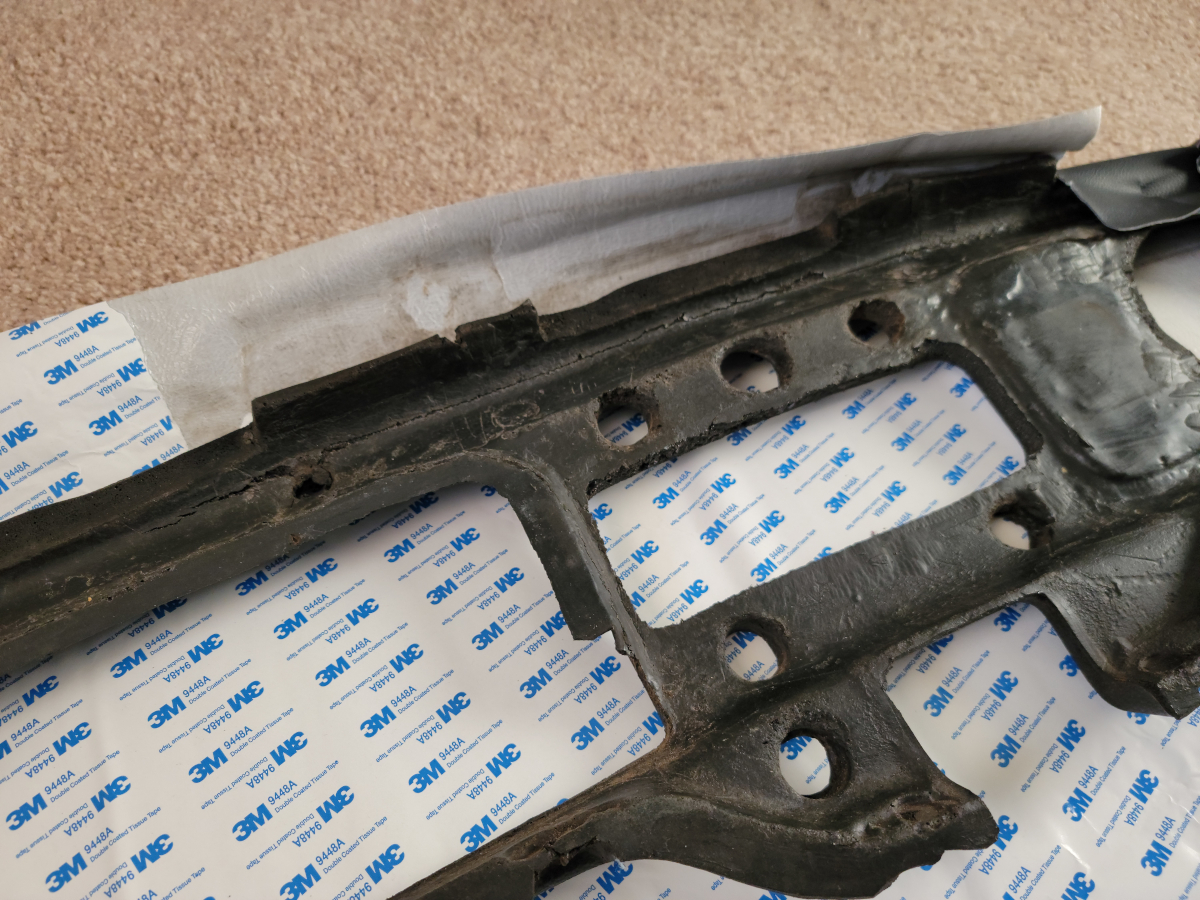
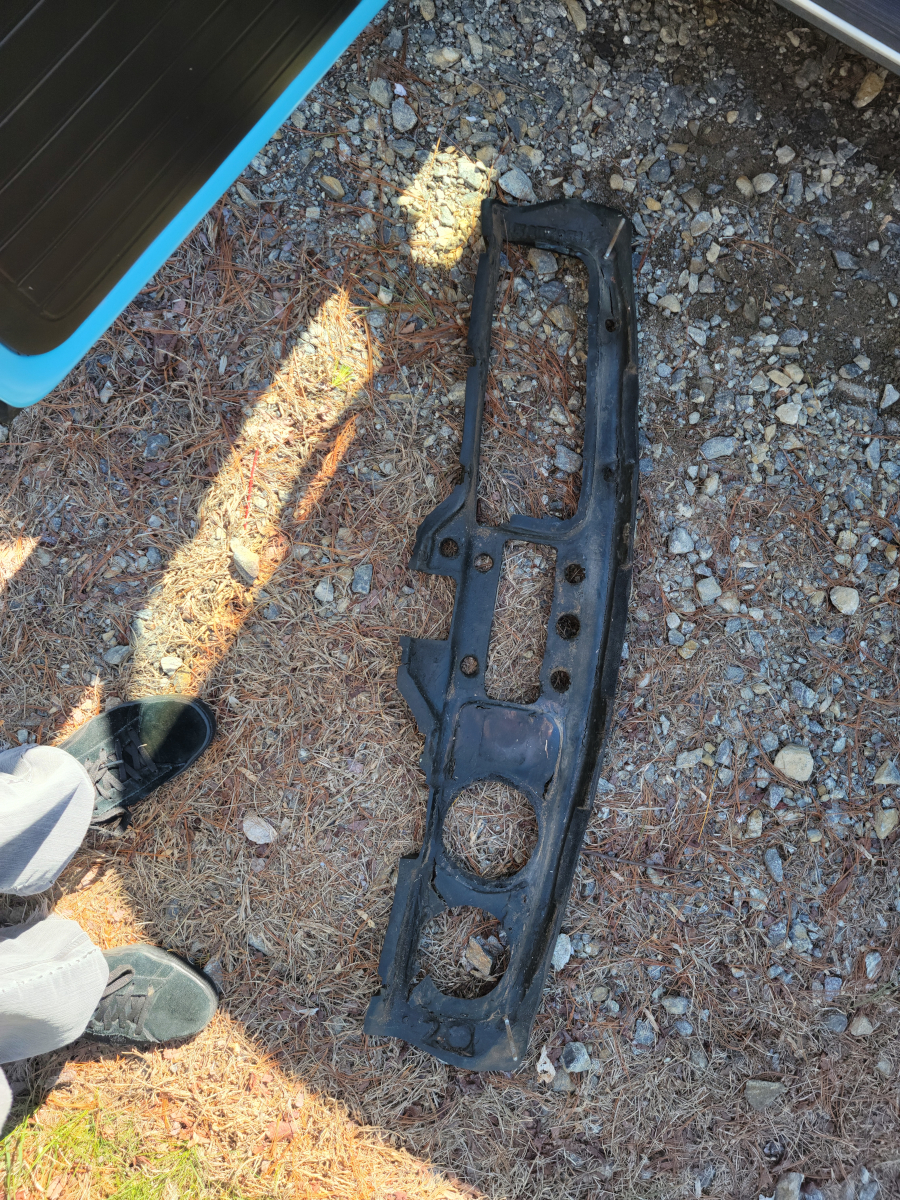
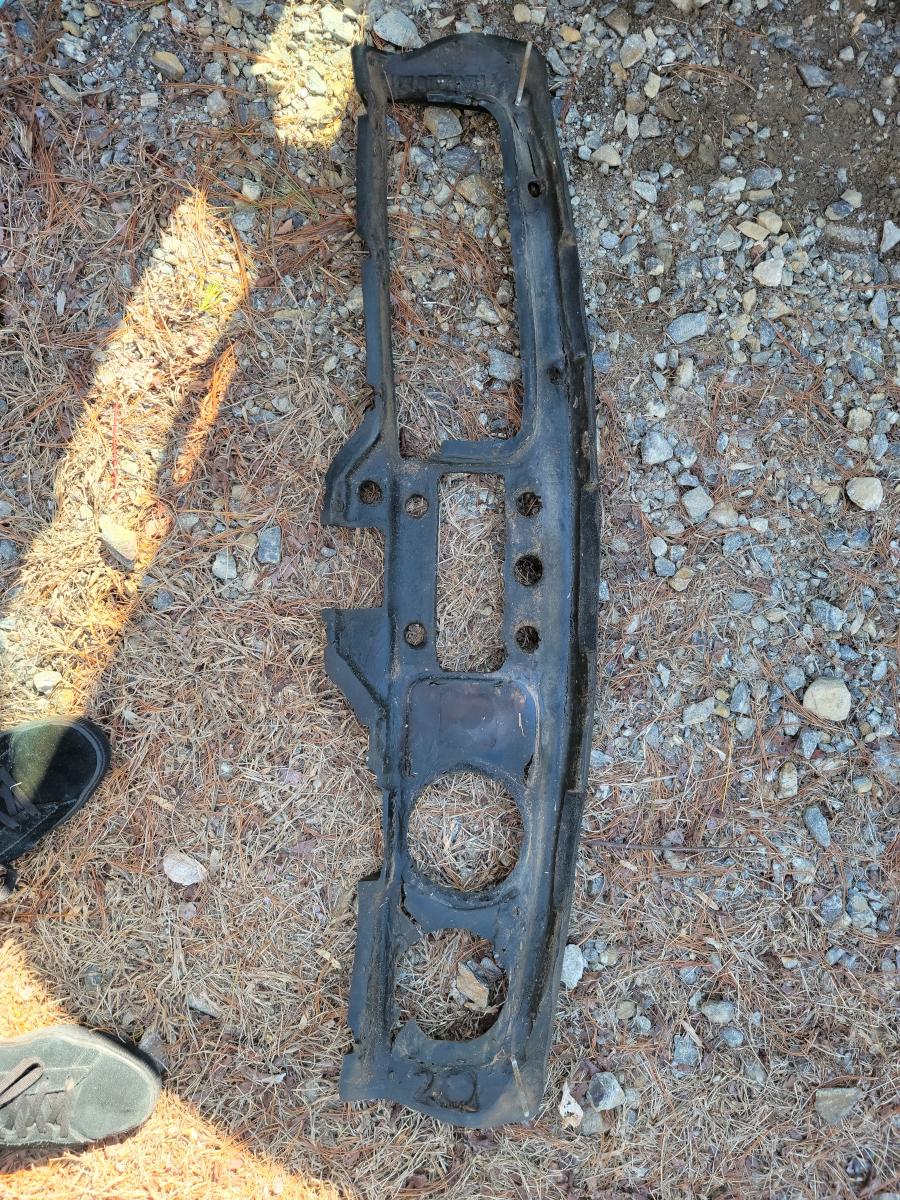
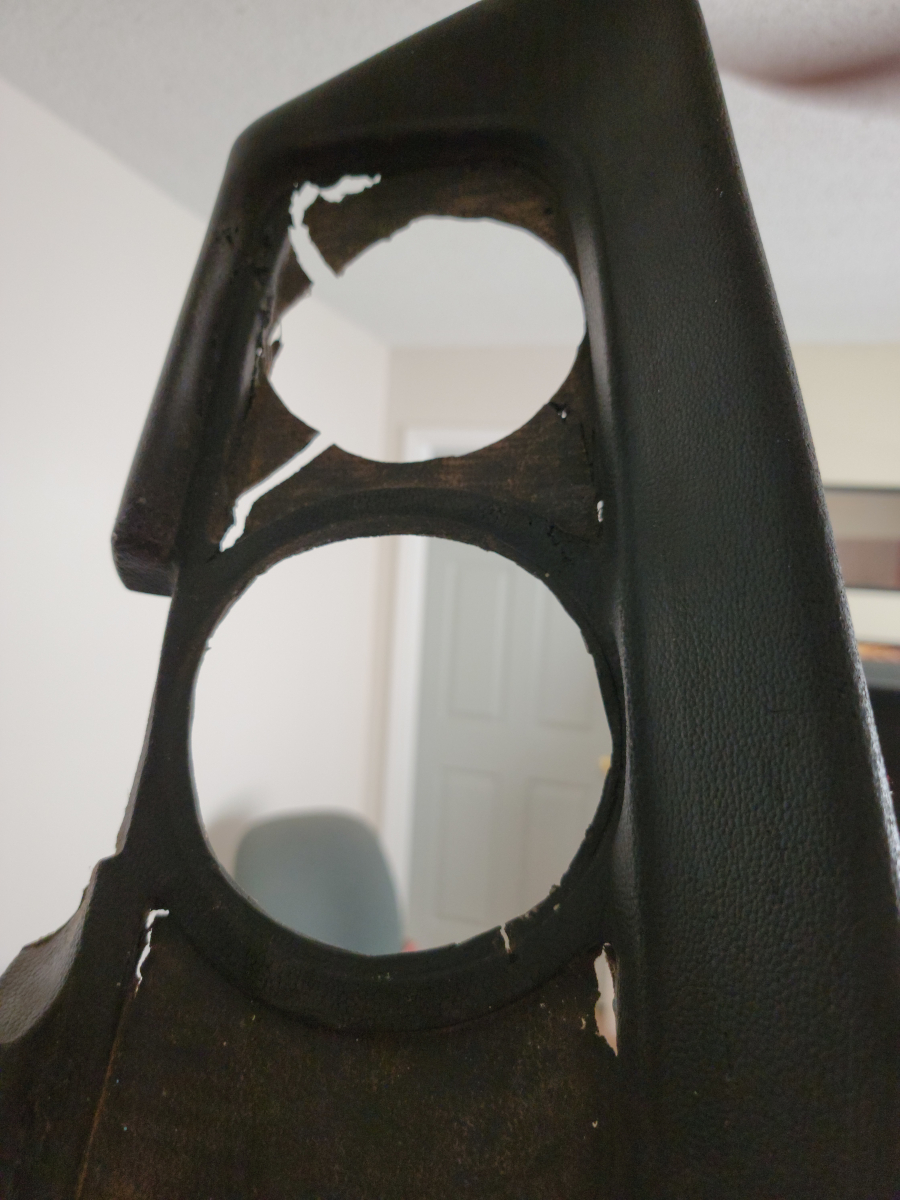
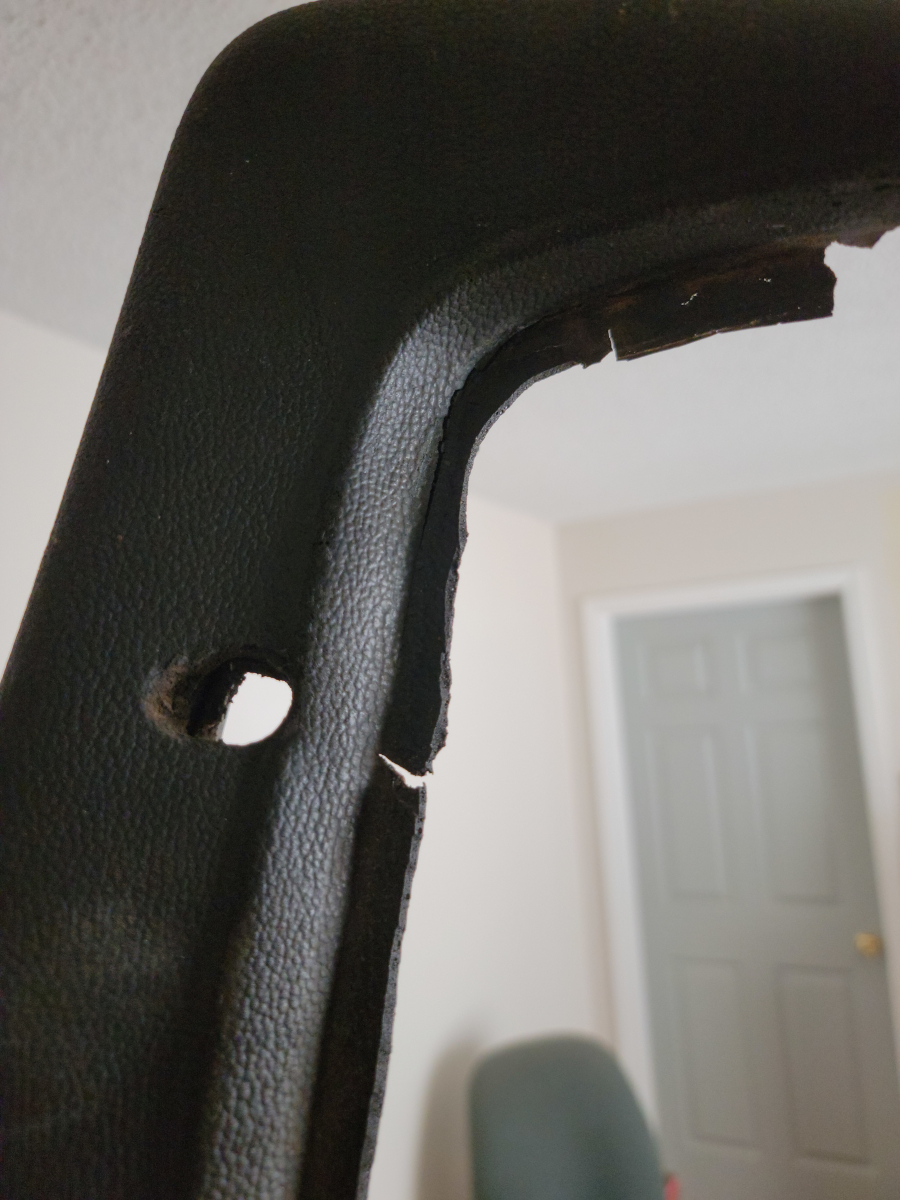
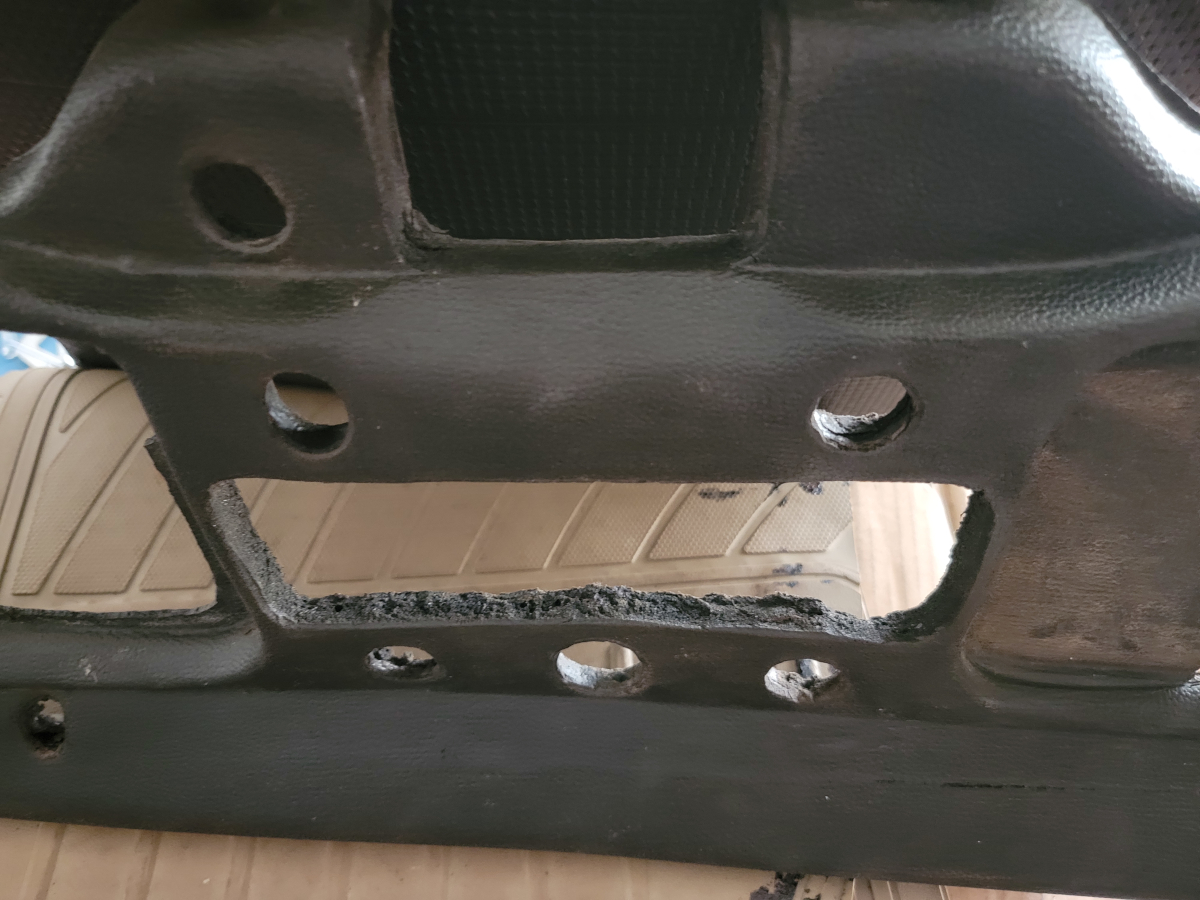
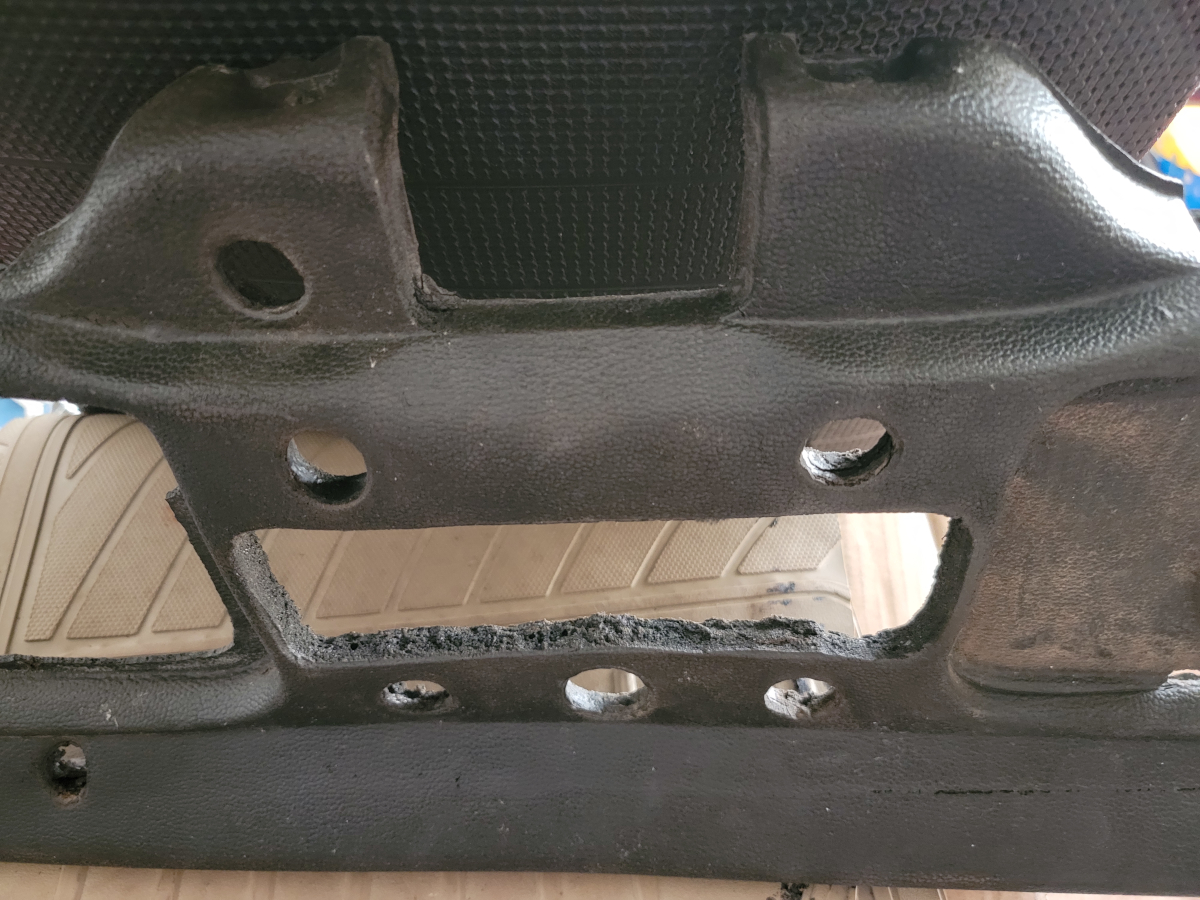
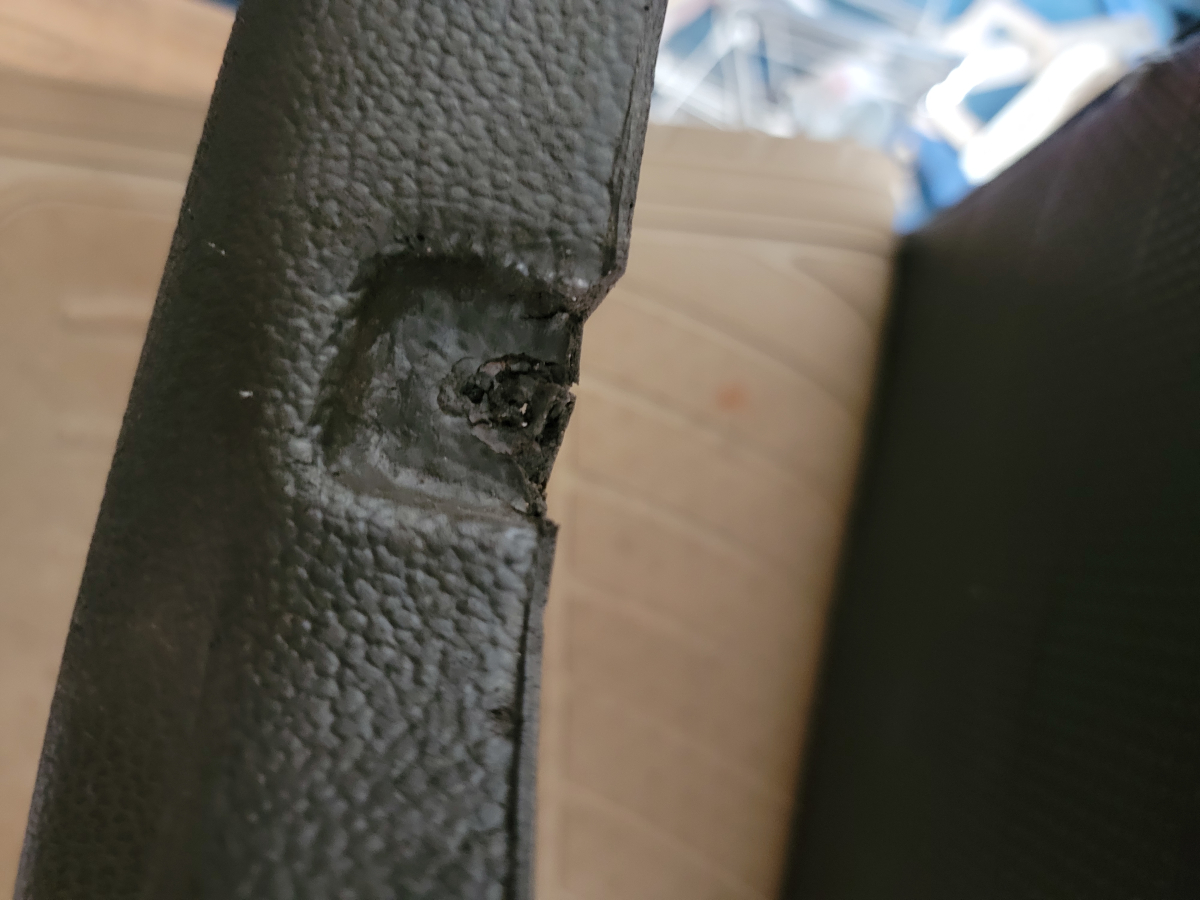
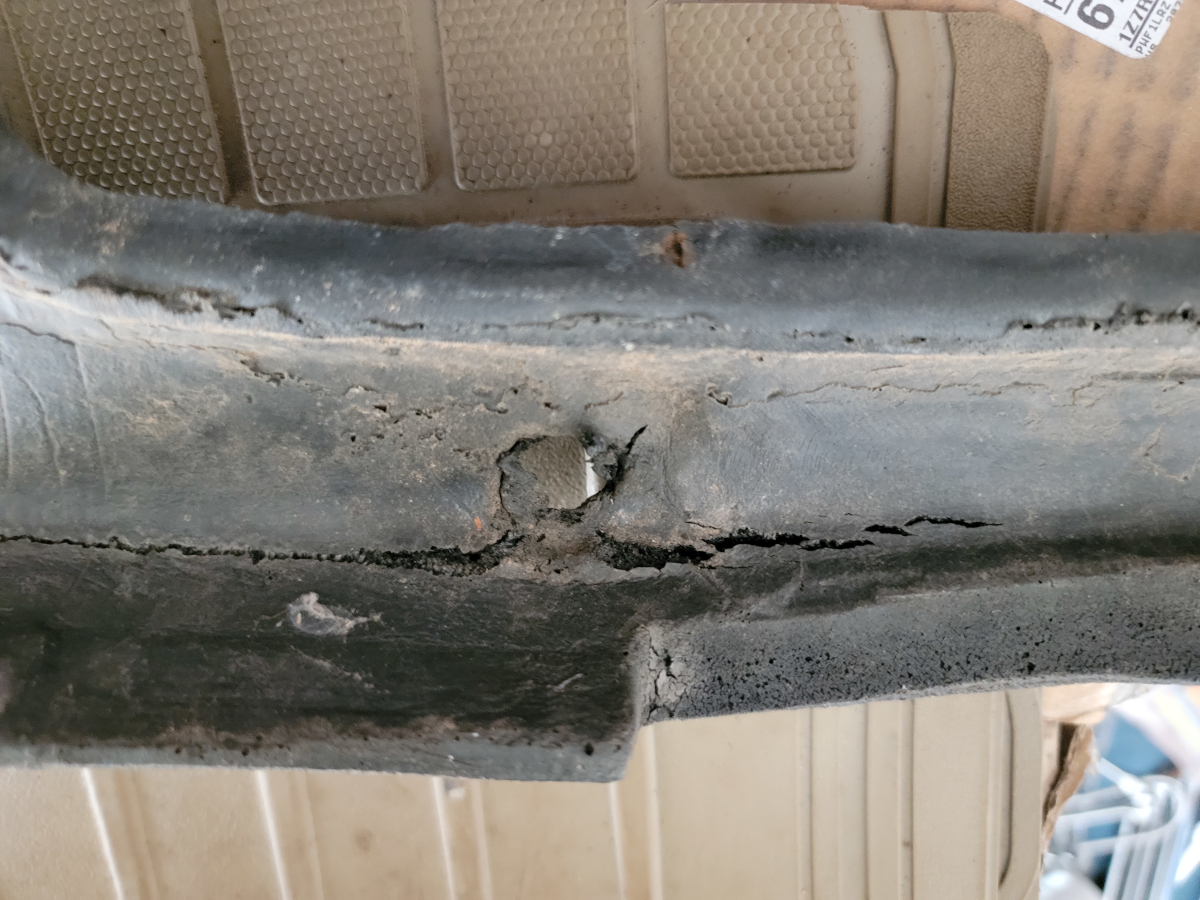
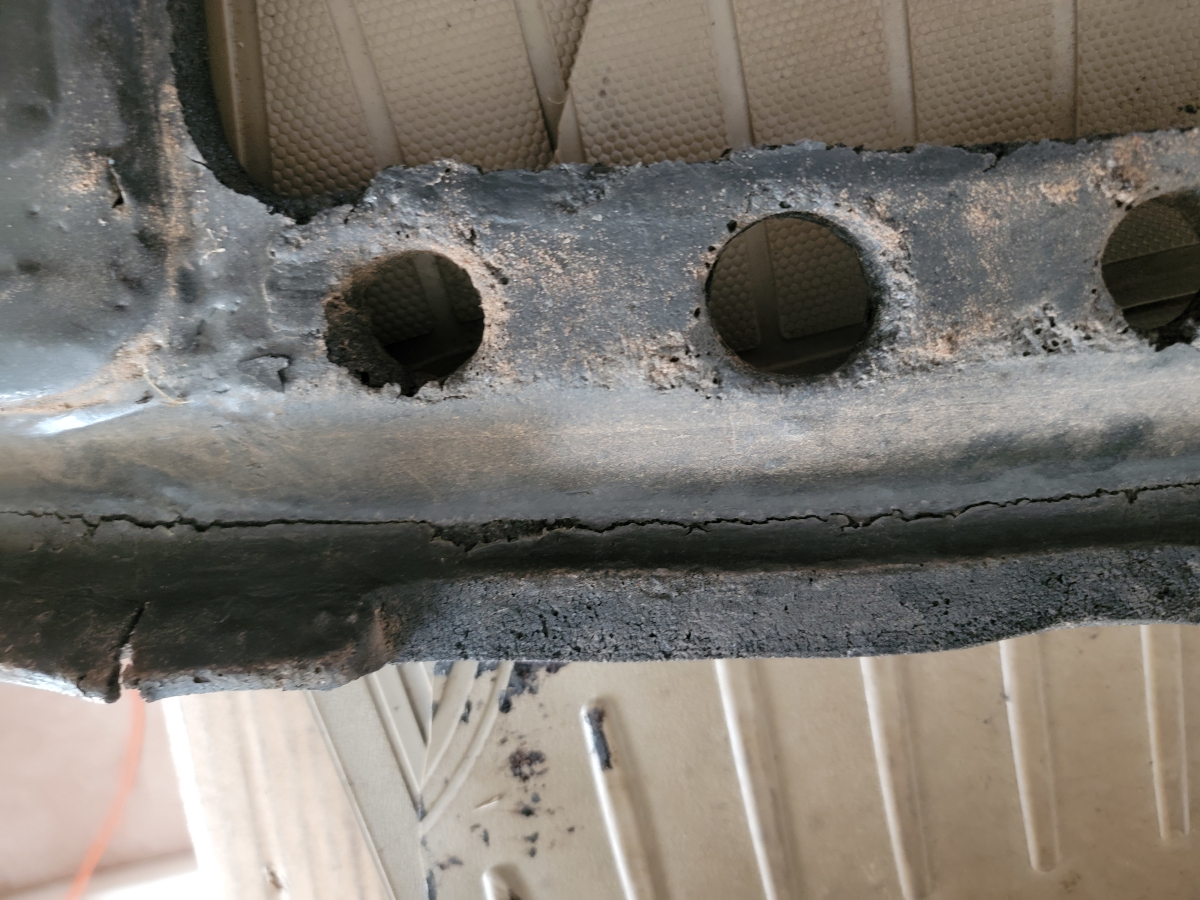
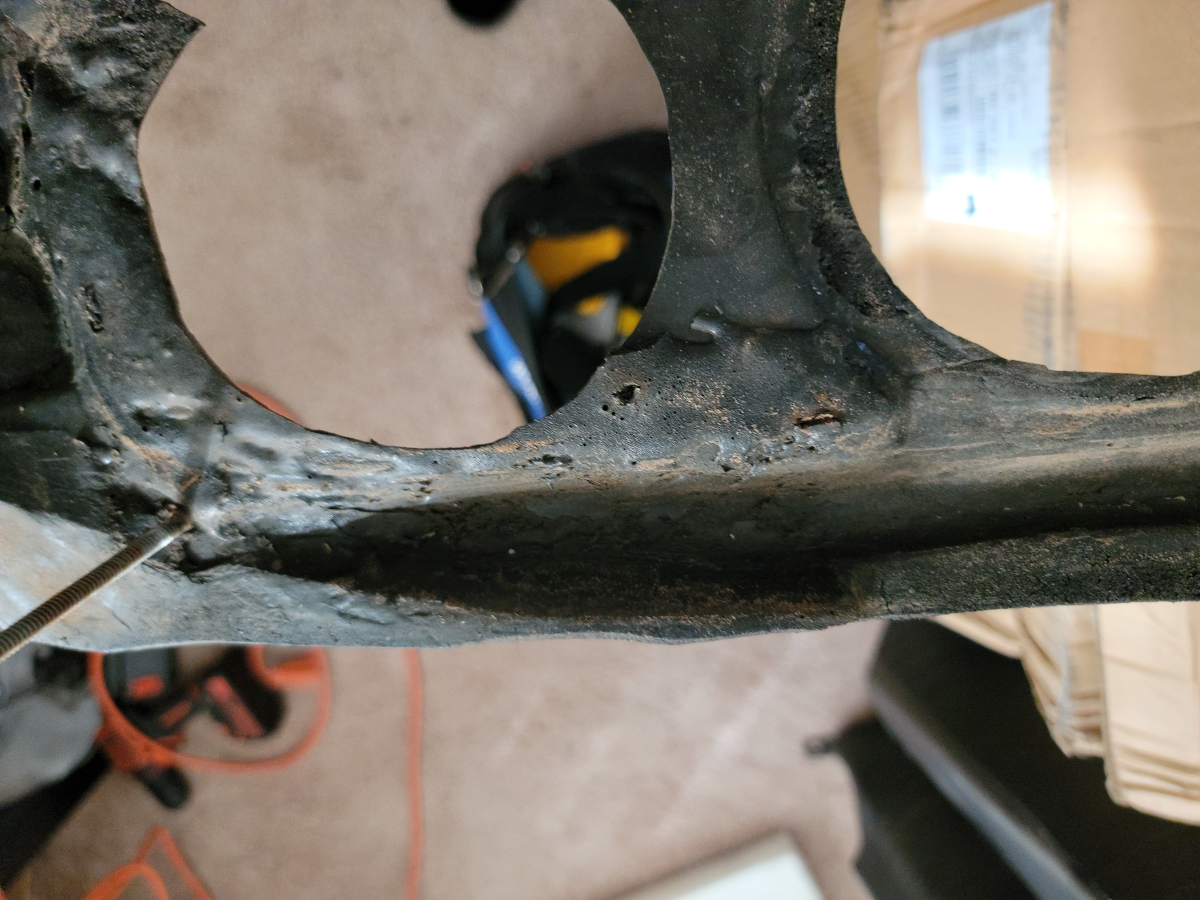
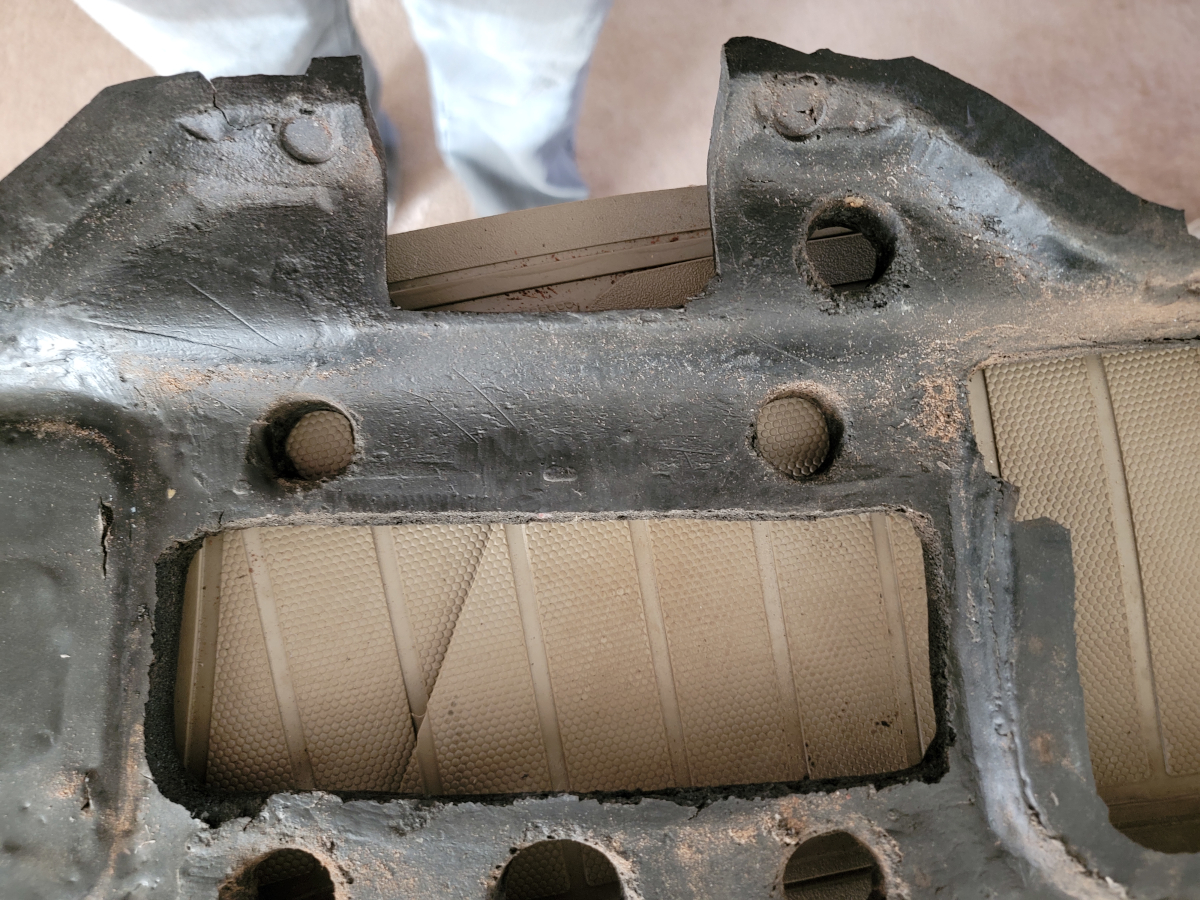
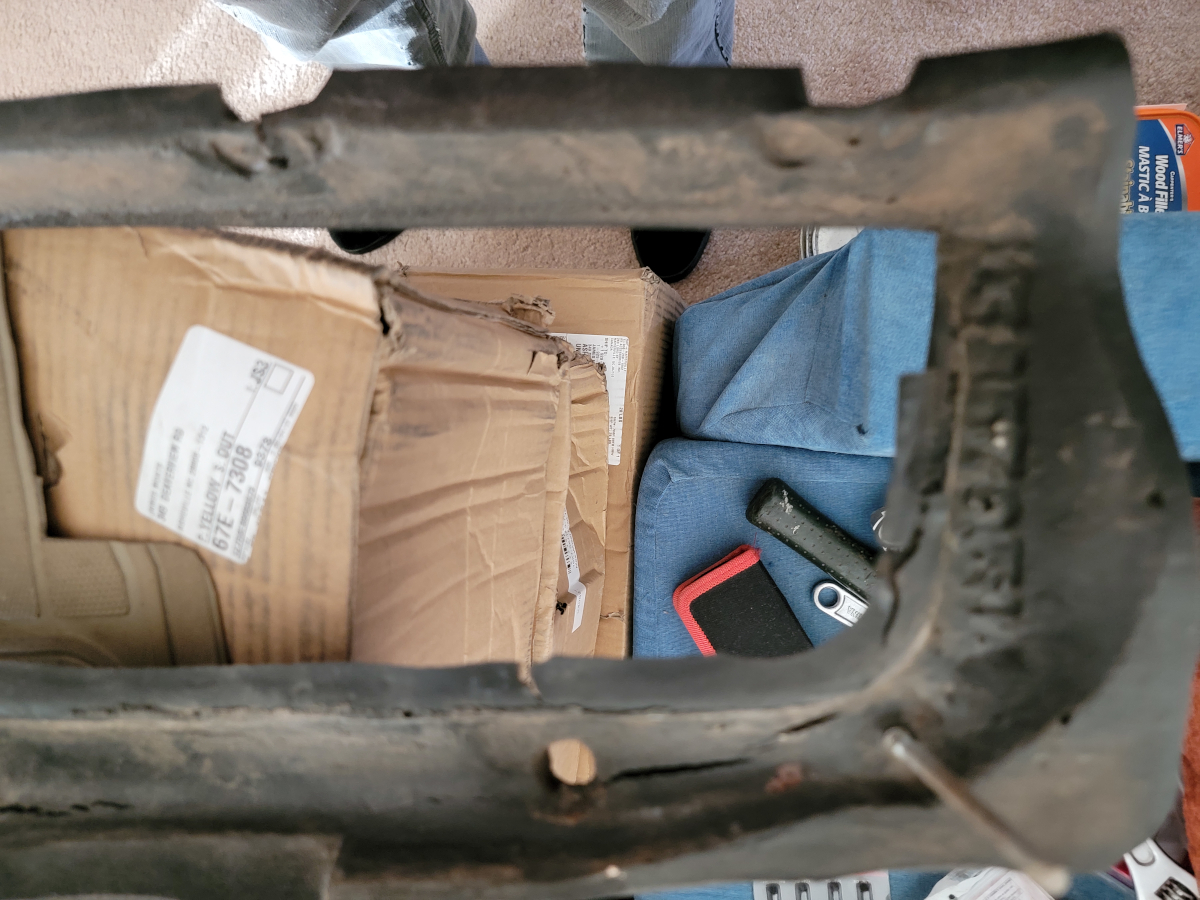
Once I got the car packed up for the day, I brought the dash pad inside and snapped some more pics to document its current state.
I don’t want to just wipe this down and cover it with vinyl. There are so many structural issues. Also, the speaker hole that is cut out in the left side of the steering wheel will need to be covered over. I can block that off, since I plan to put speakers in the kick panels in the front floor boards.
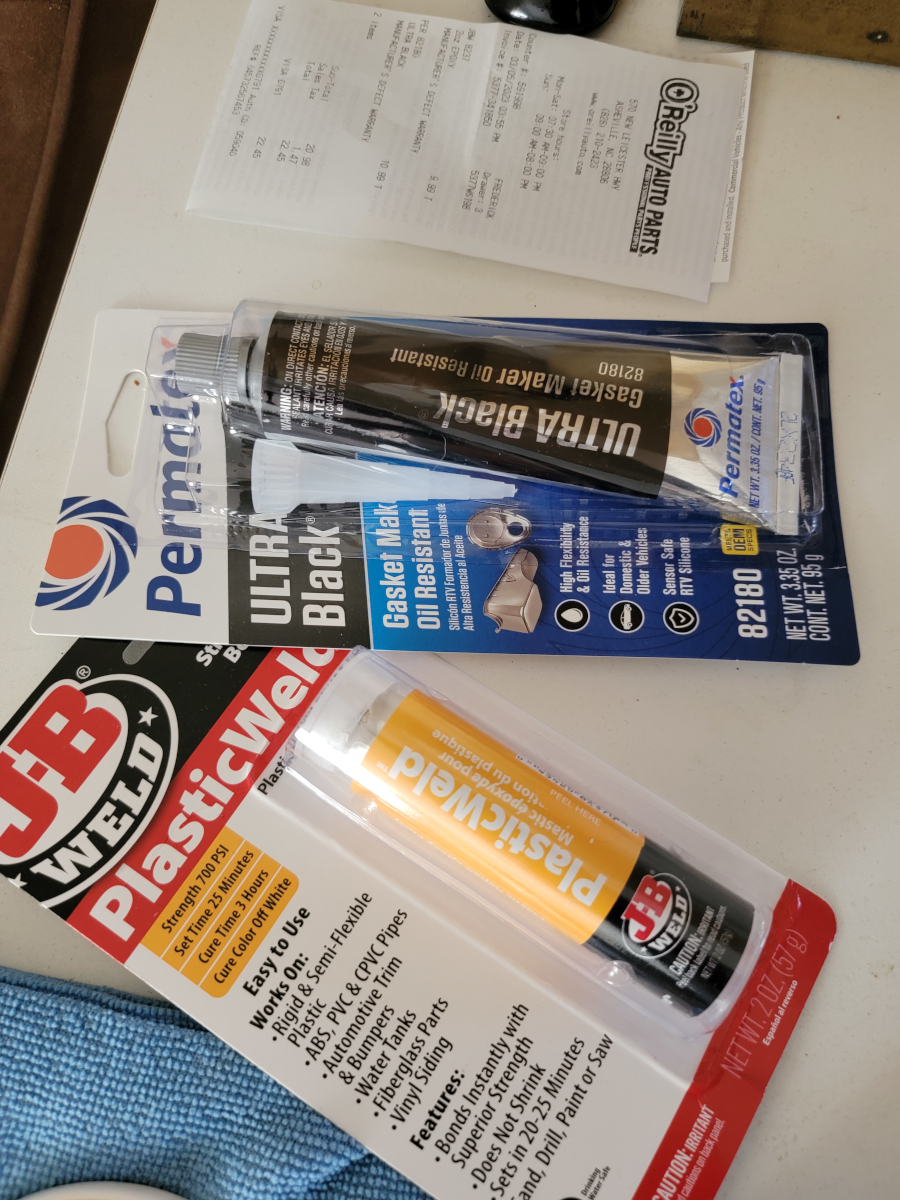
I made a trip to O’Reilly and picked up some ultra black silicon RTV and JB Weld PlasticWeld.
Somehow, that came to over $22. Anyway…
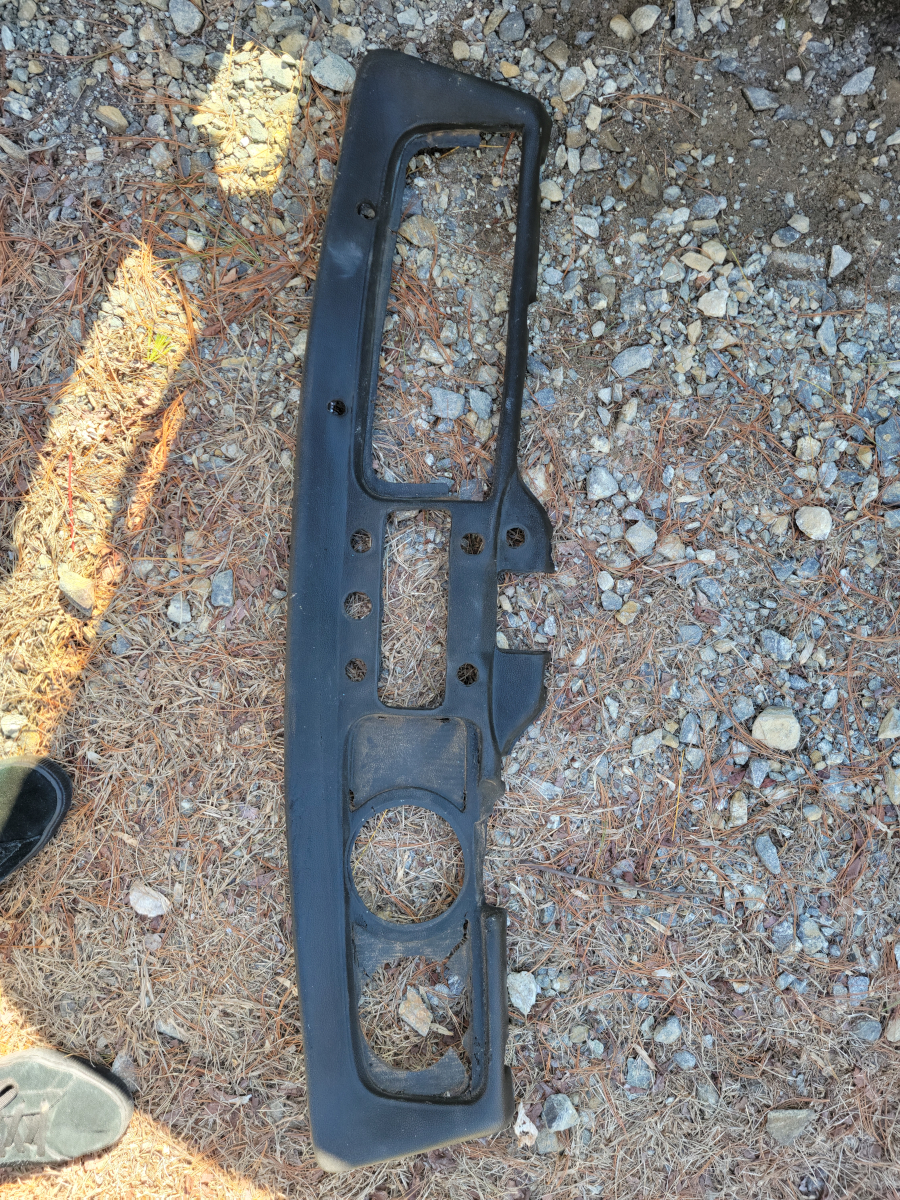
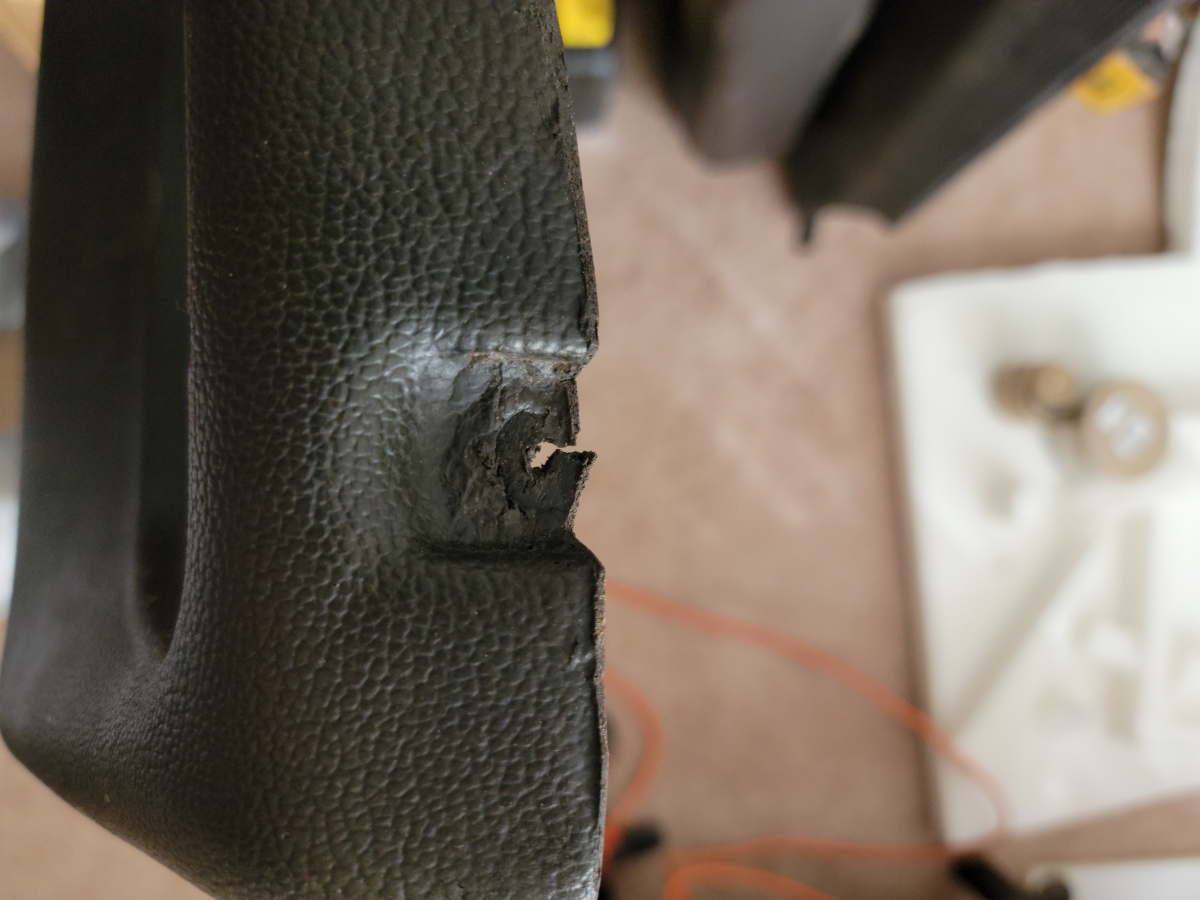
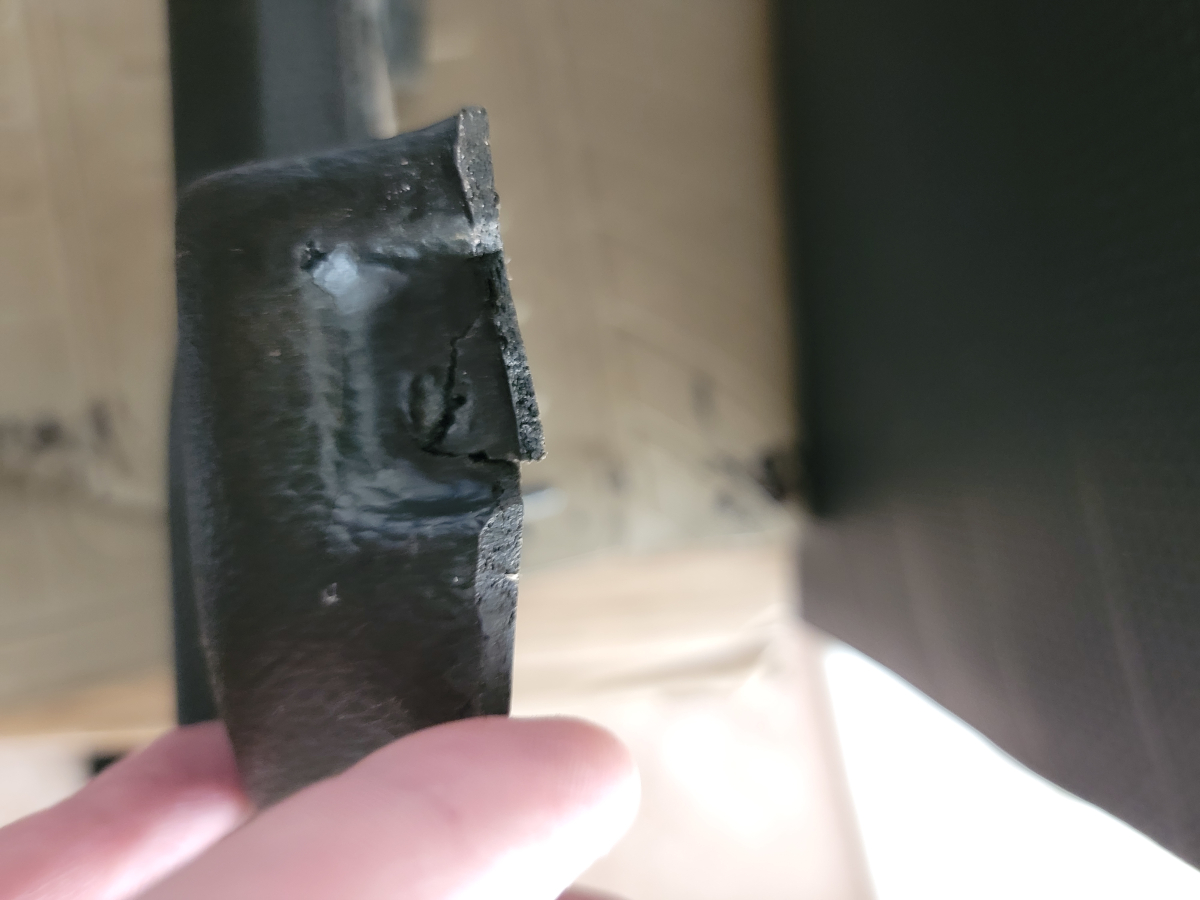
For the heavier structural problems, I plan to use the PlasticWeld and for the rest of the cracks and surface imperfections, I will fill in with the ultra black. I didn’t realize how many different contours this dash pad had, but I imagine I will be able to stretch the vinyl into shape a little better with the aid of a heat gun.
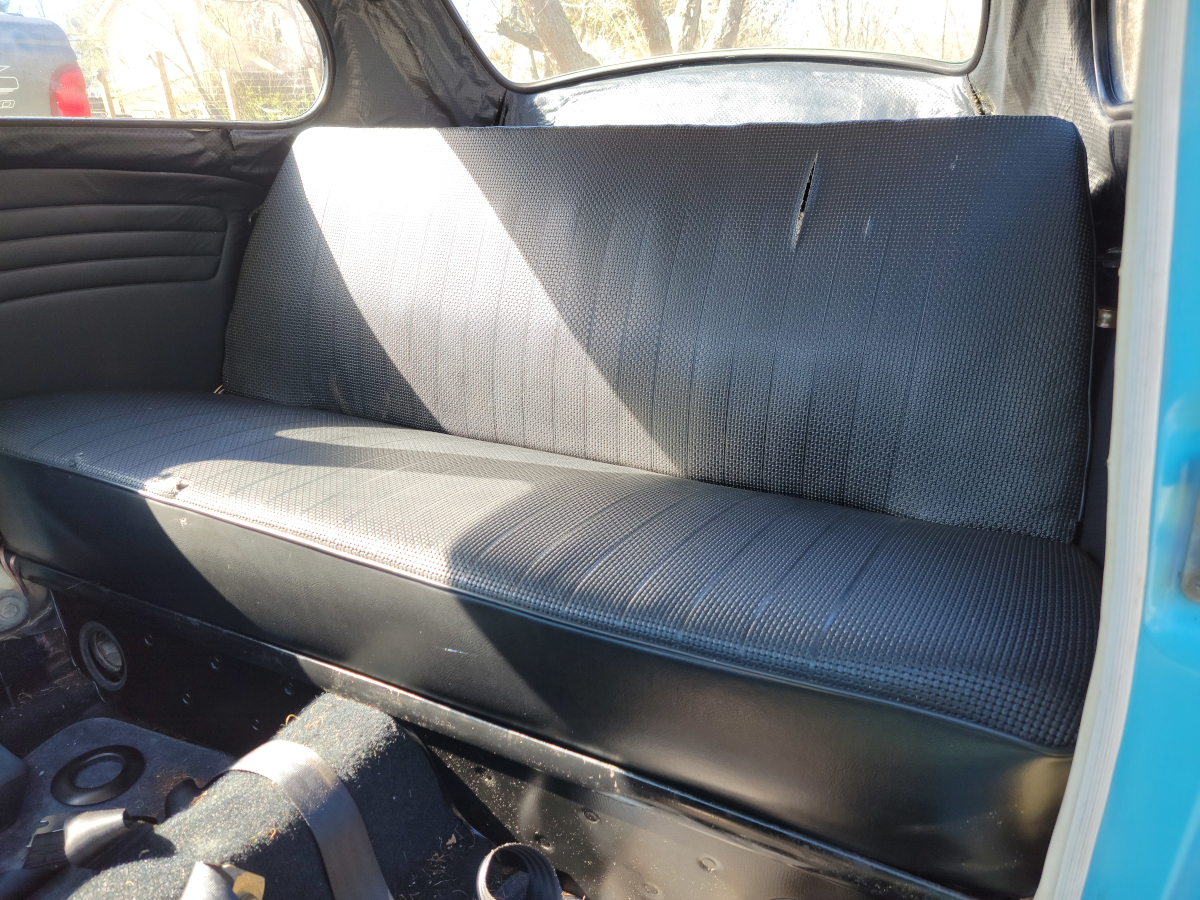
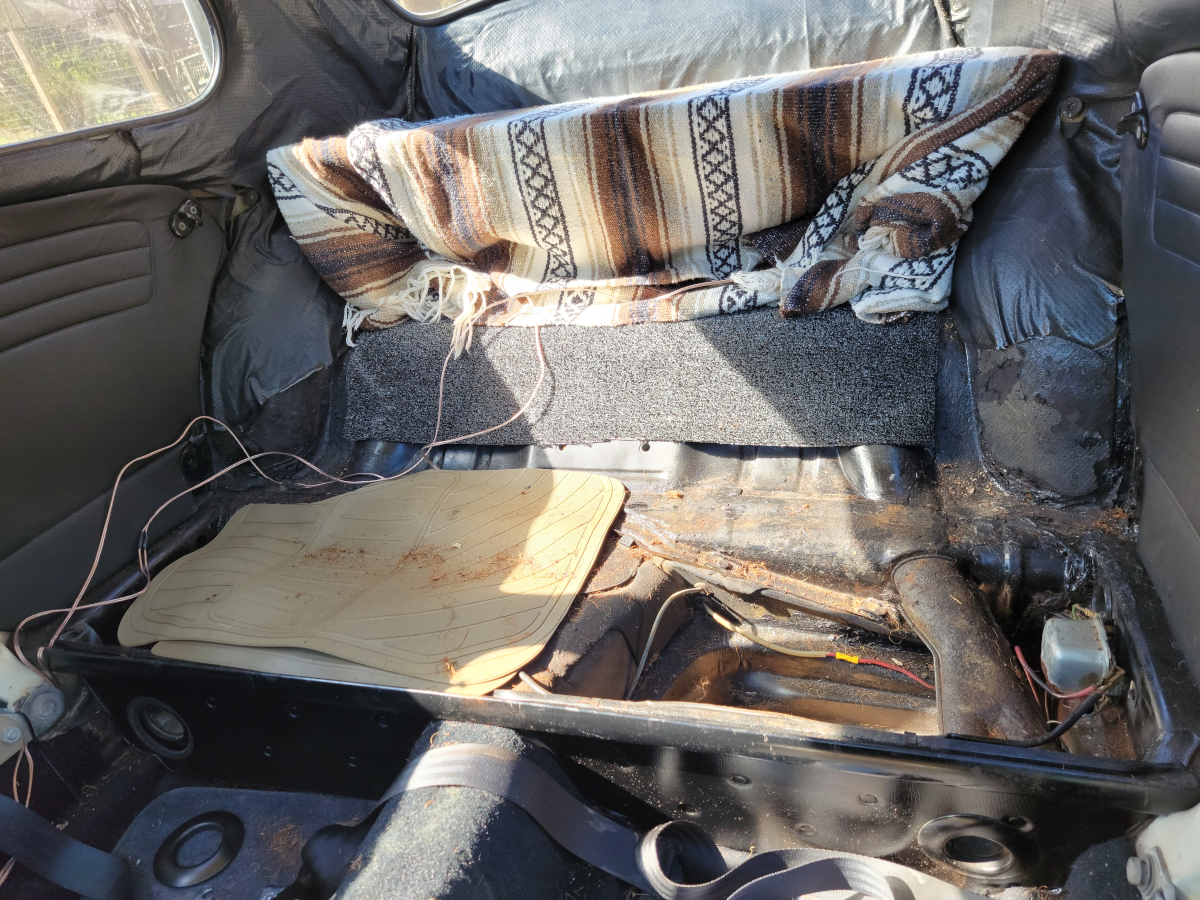
I’m still waiting for the roll of high density foam (Amazon link) to arrive for the back seats, but it’s a beautiful day, so I decided to get some prep work done.
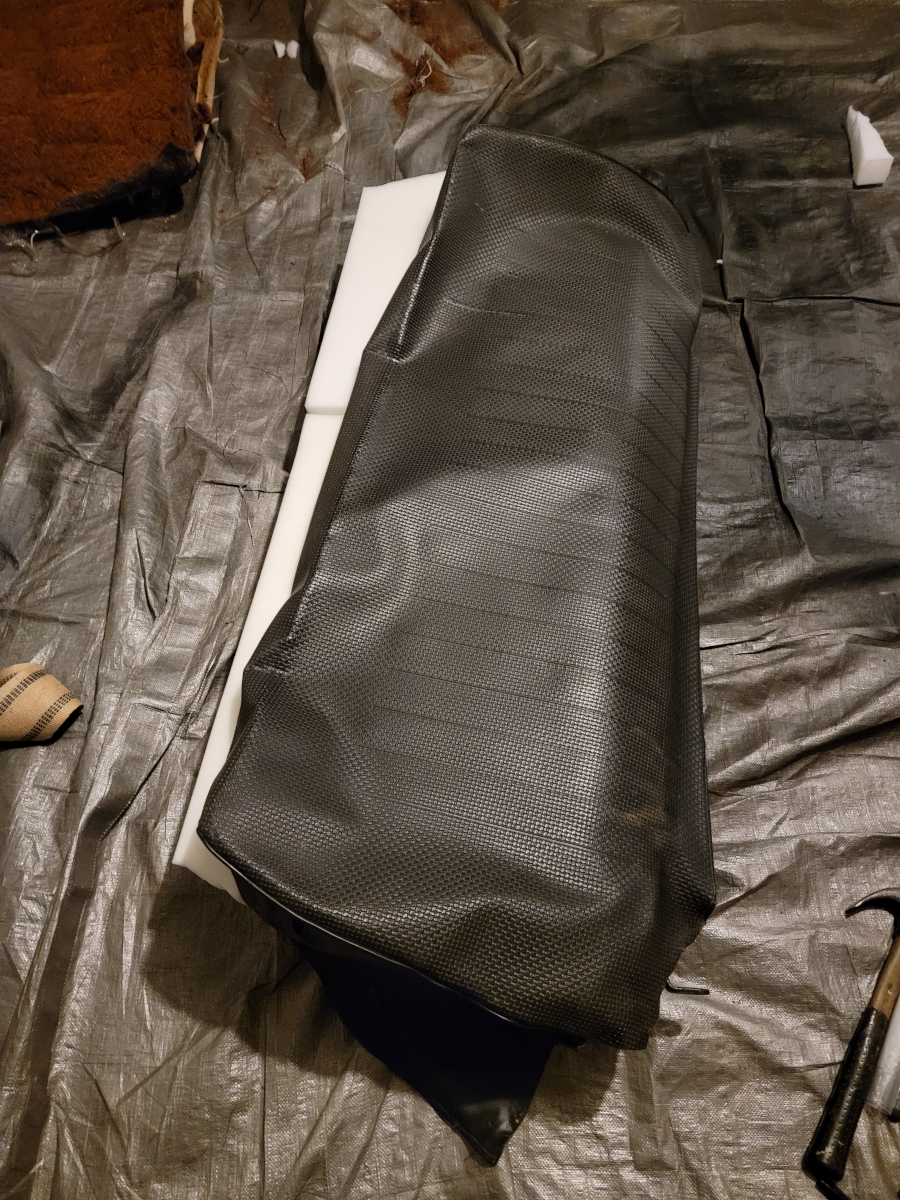
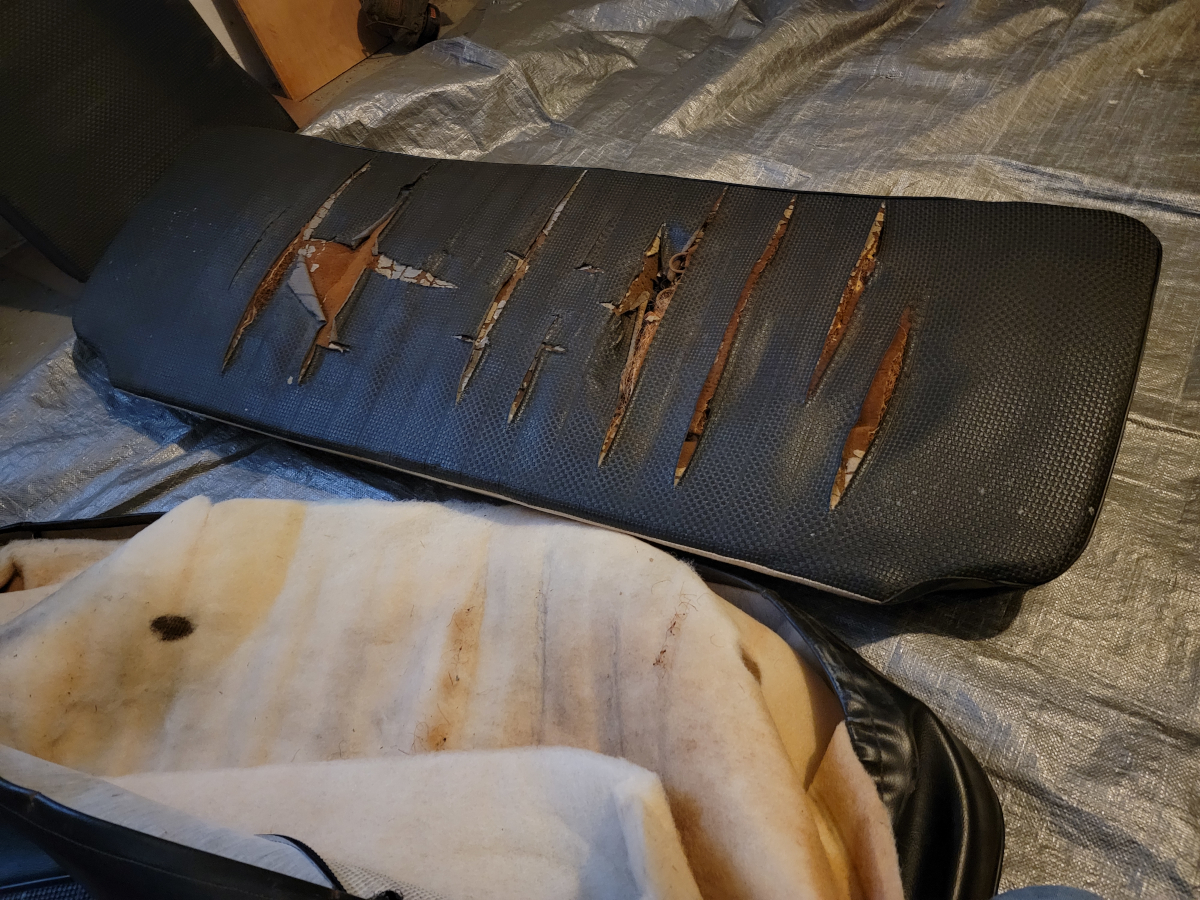
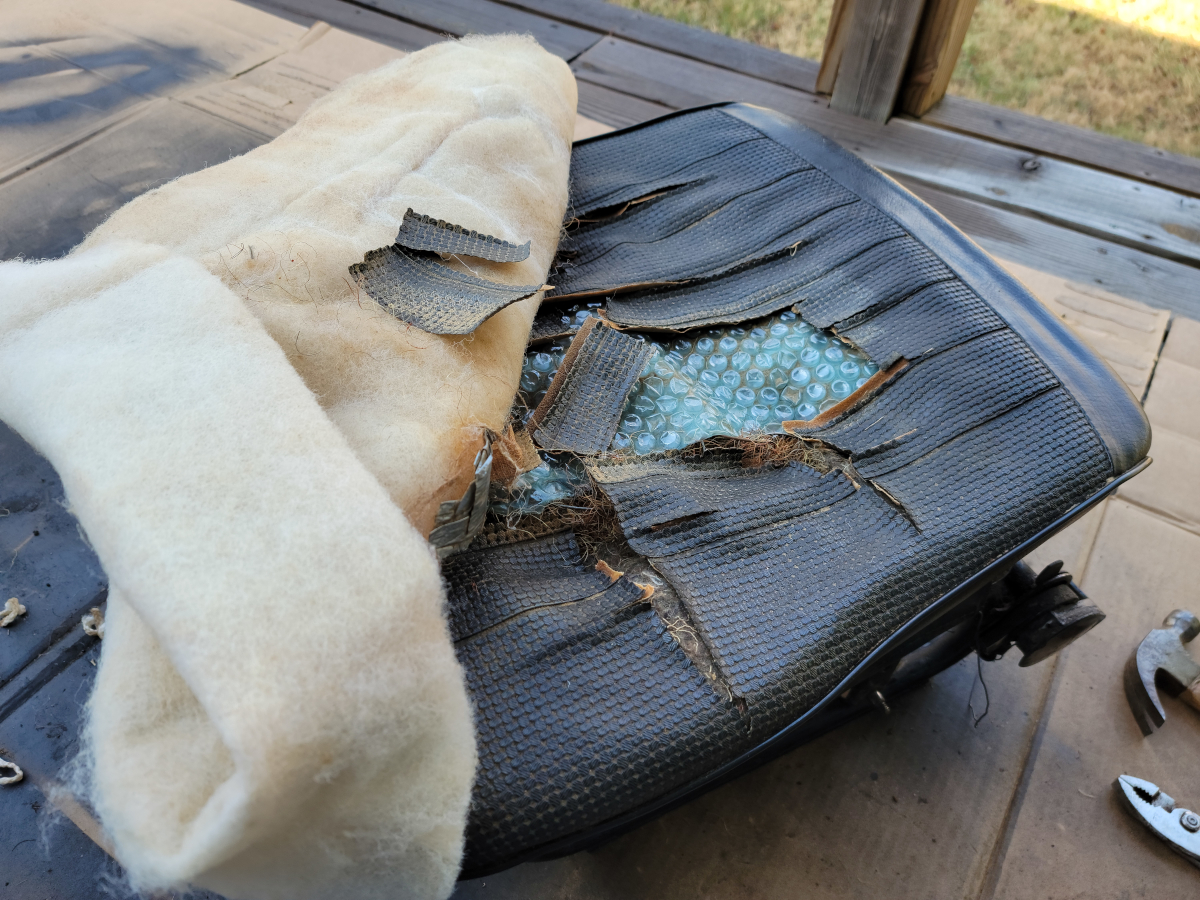
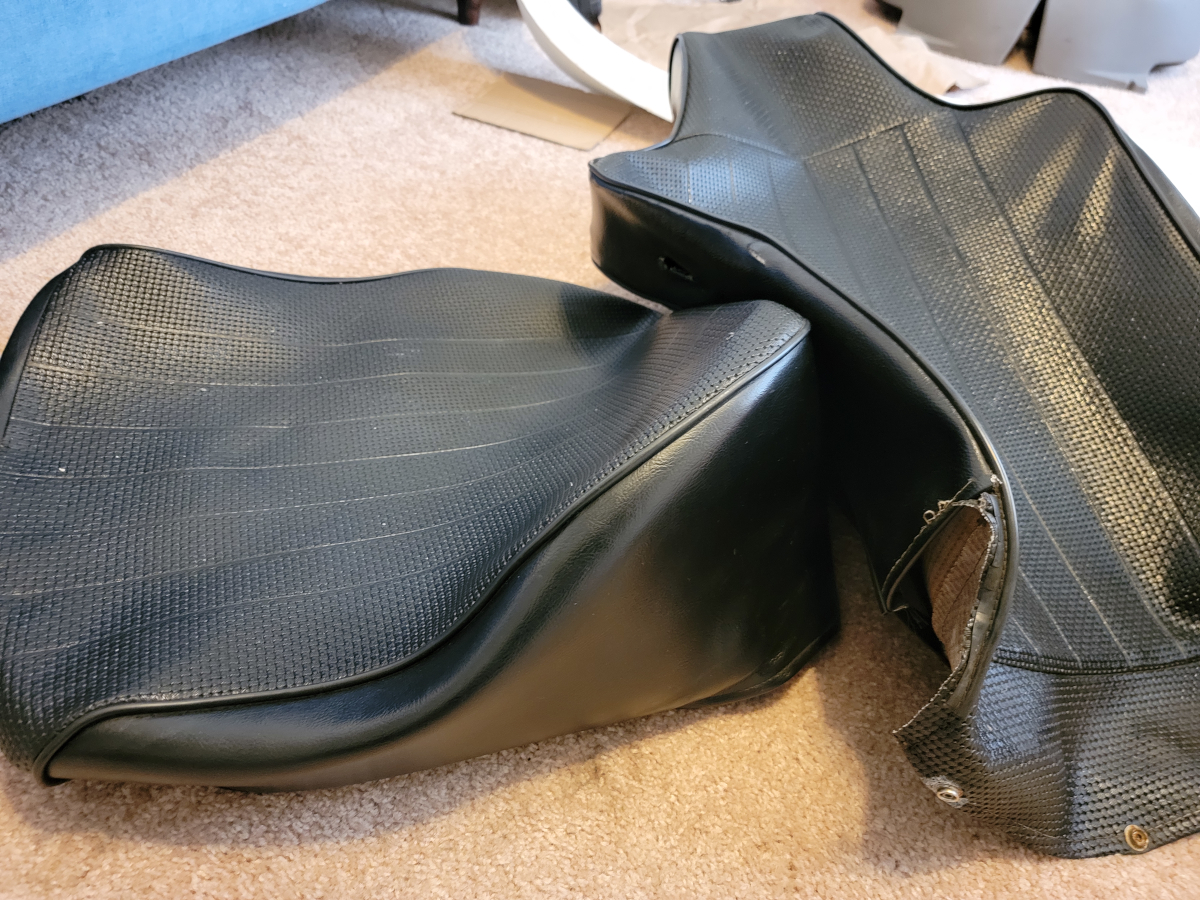
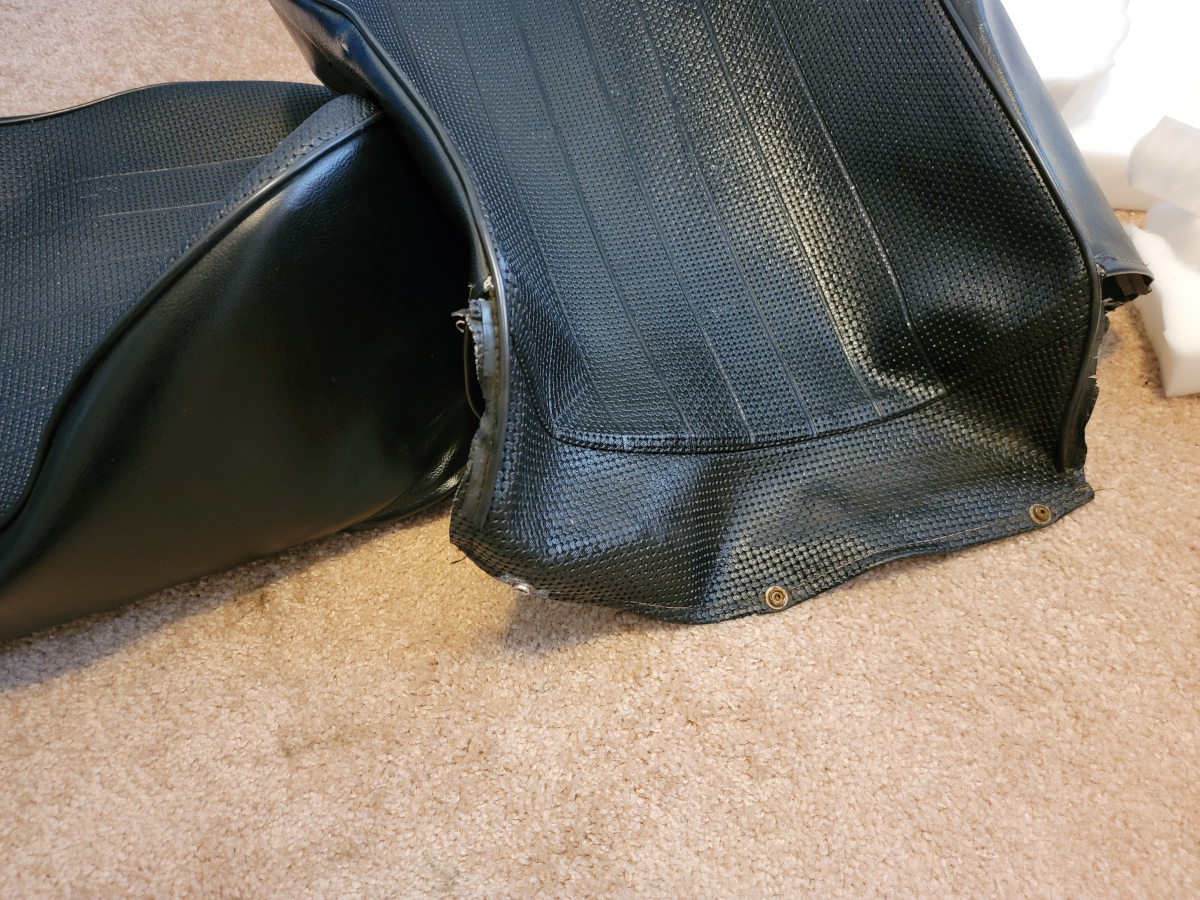
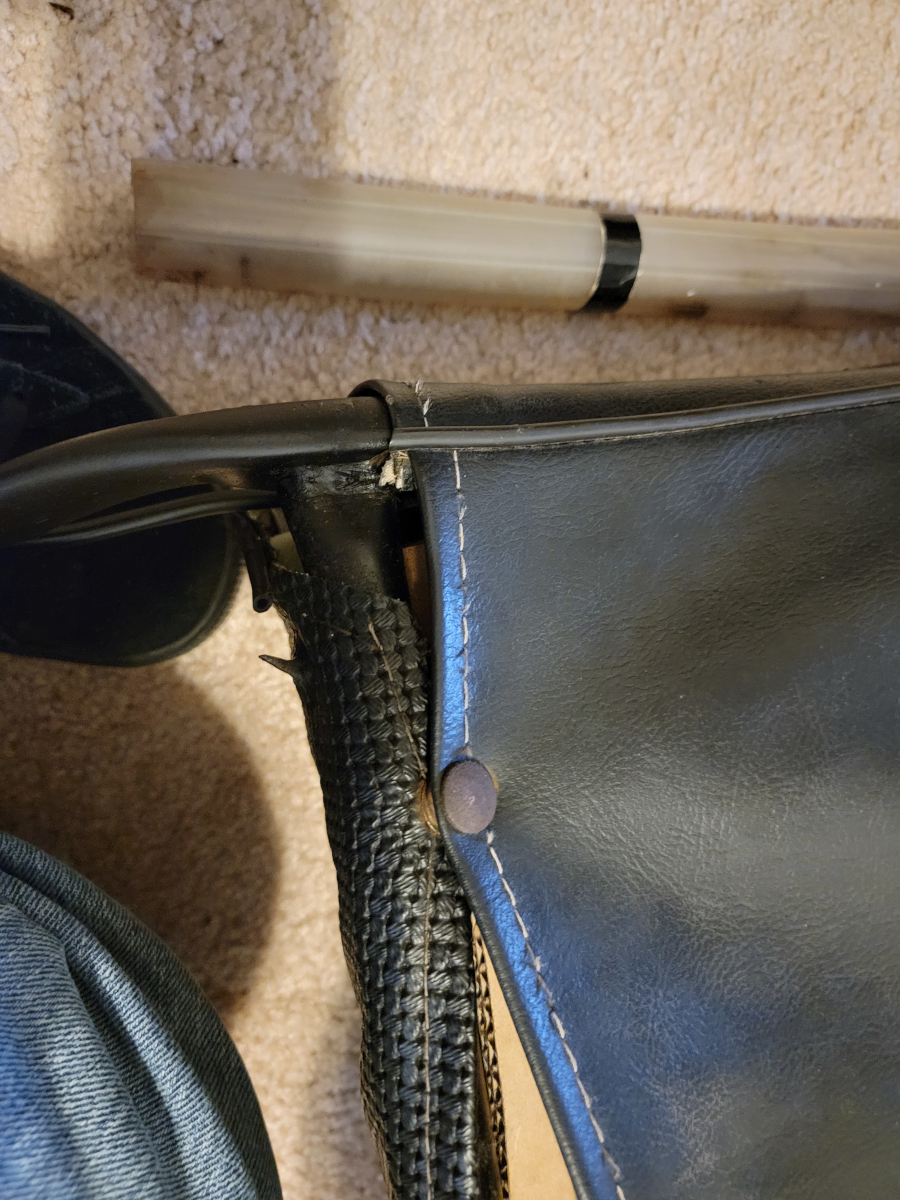
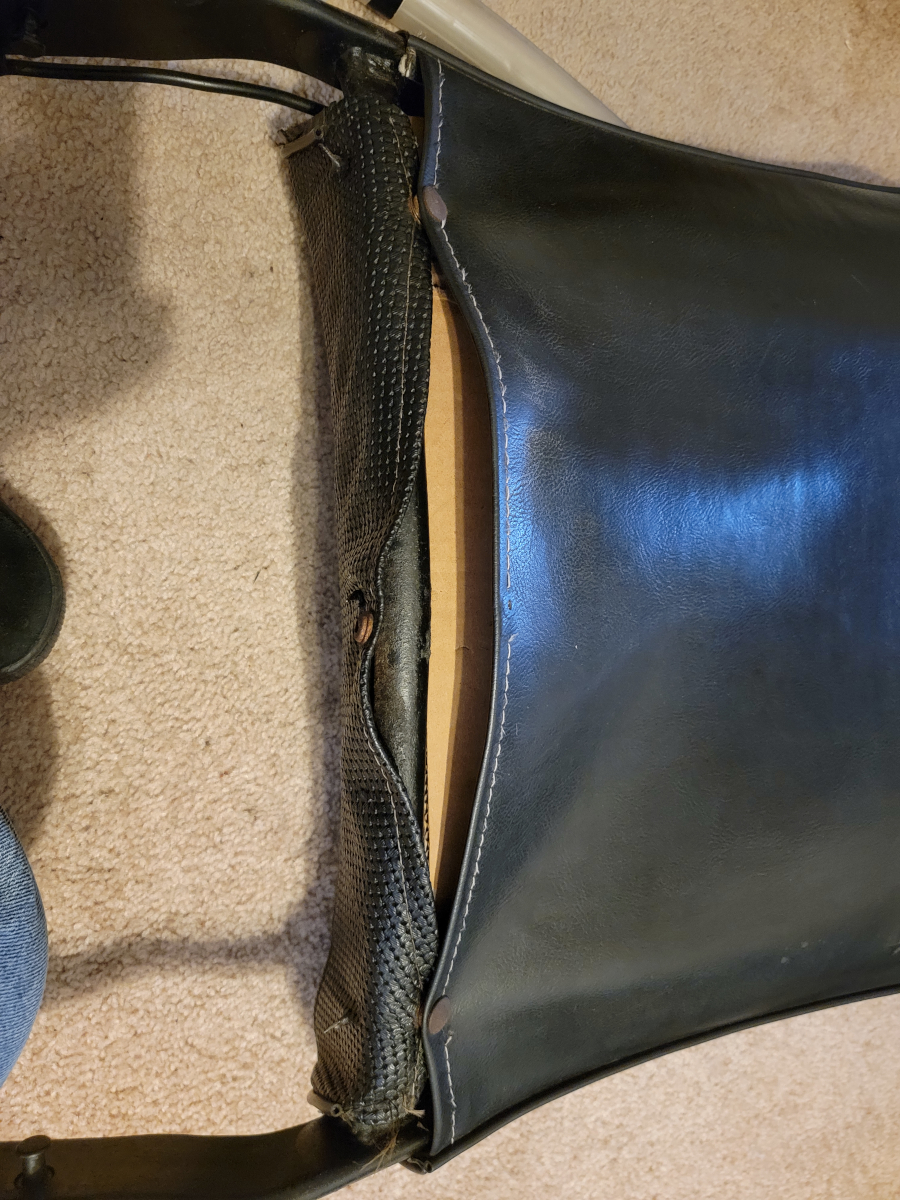
As you can see, the back seat covers have similar issues to the front. At one point in the past, I leaned in through the driver’s door and put my weight against the seat back. The seat cover ripped through, along one of the molded in, fake seams.
Disassembly
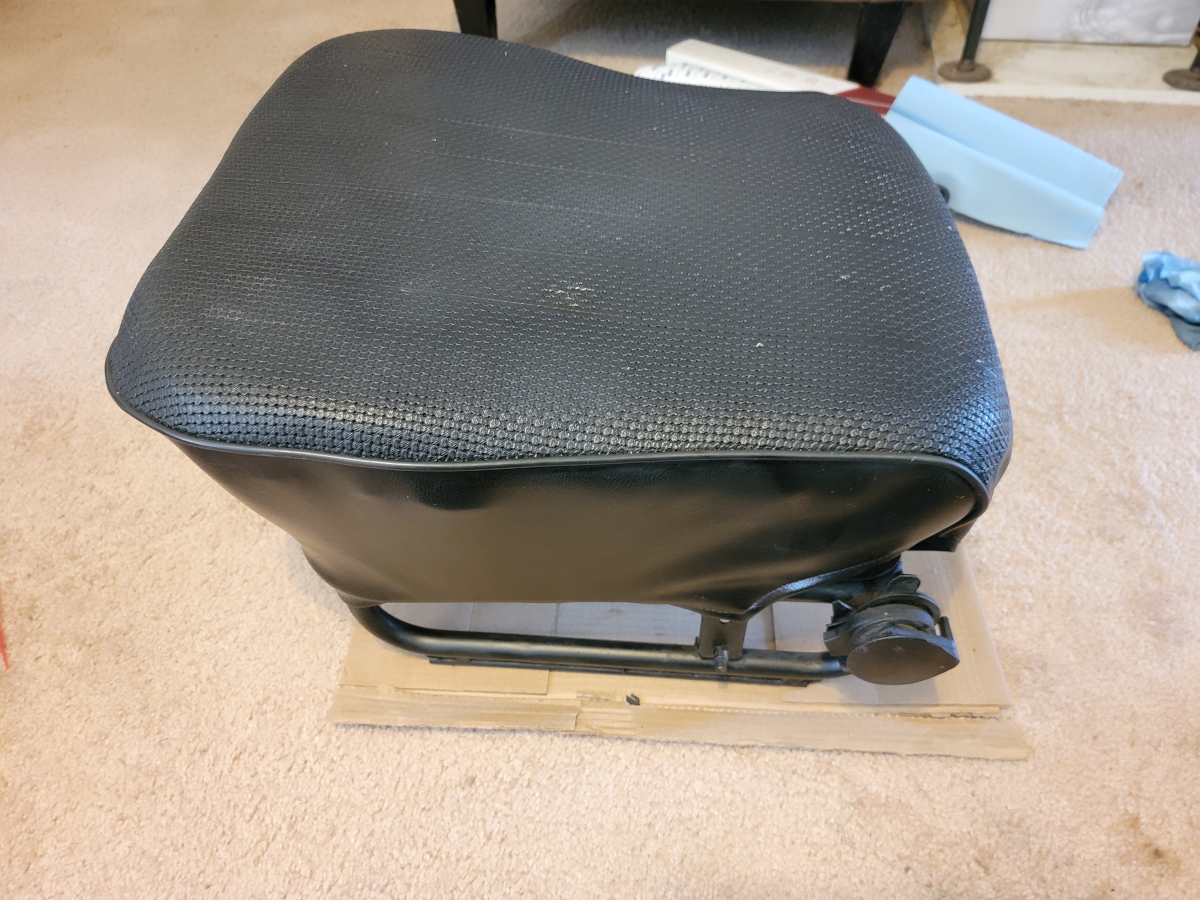
After removing the seat base, it’s easy to see from underneath that it appears to be in similar condition to the front seats.
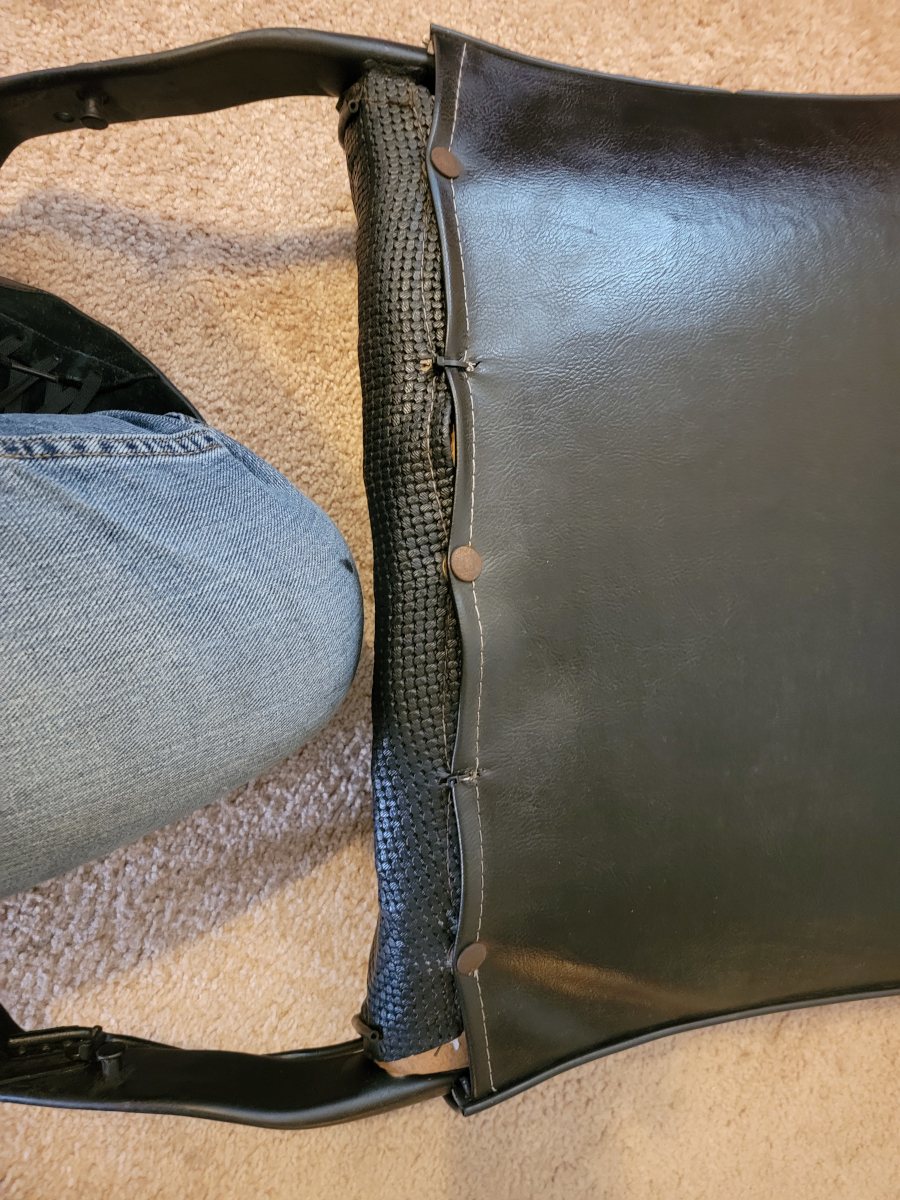
Removing two bolts from the sides, the seat back was easily removed.
The seat back is closed in with a trim panel, so I won’t know the internal condition until I get that disassembled. I’m expecting more mouse house, based on what I saw in both front seats.
Cleaning up
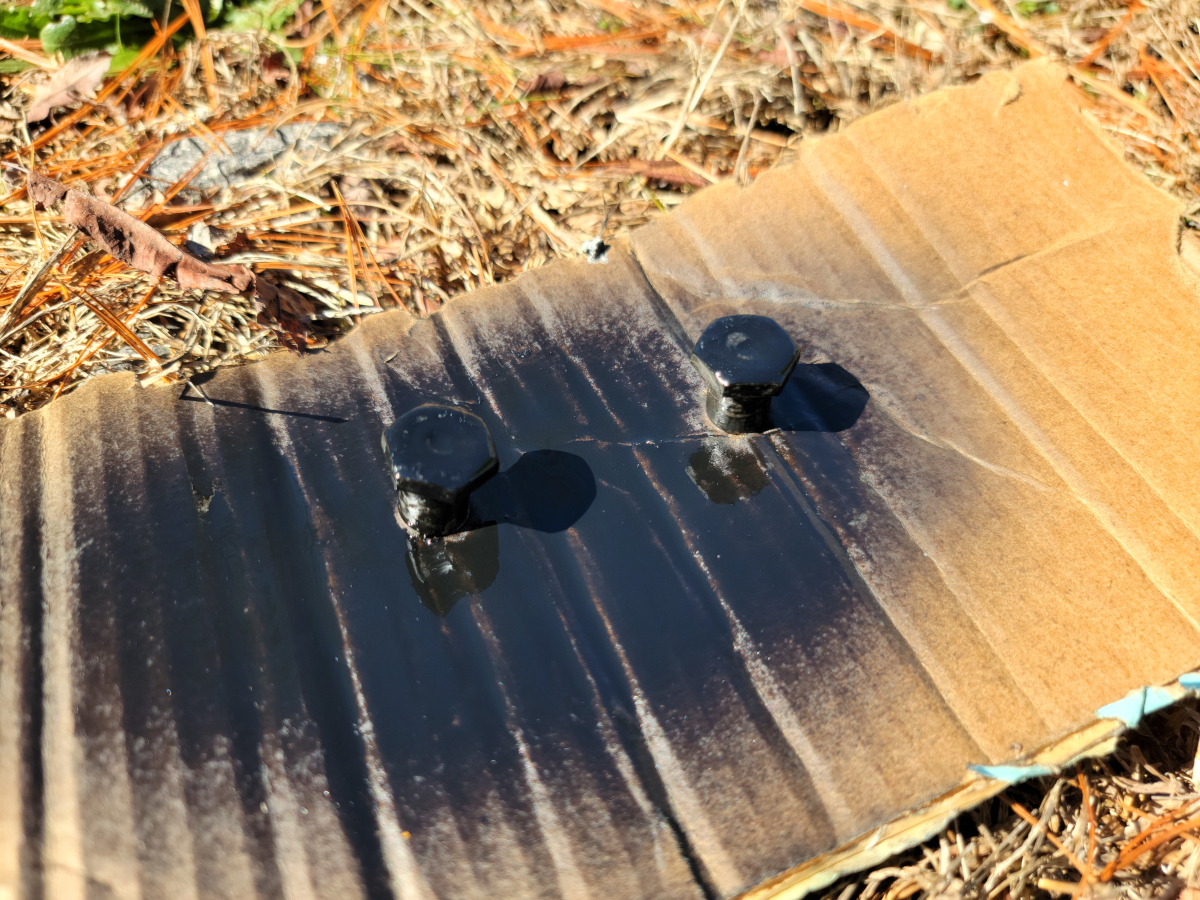
The black paint was mostly flaked off of the bolts, so I took care of that while they were out.
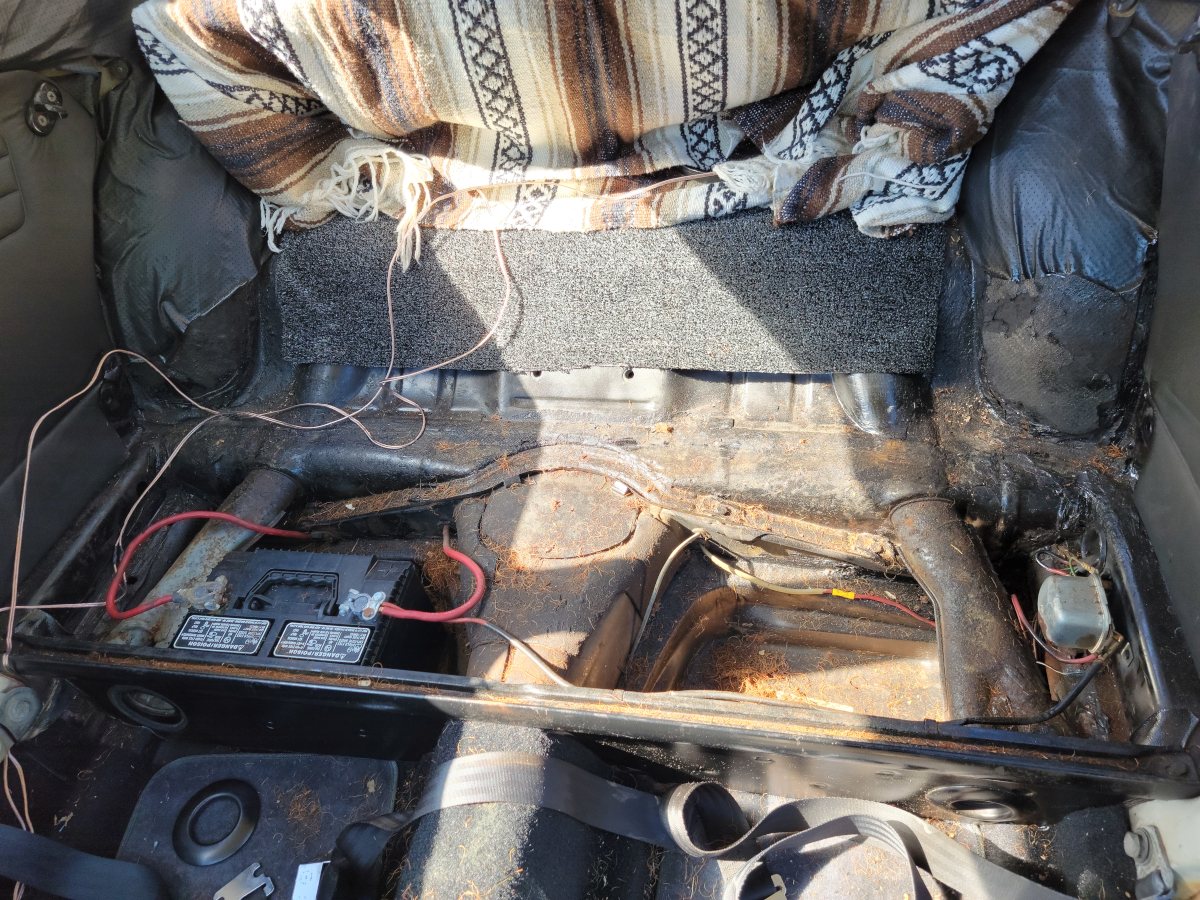
With the seats removed, there’s clearly a mess that needs attention.
After removing the rear trim pieces in the foot well, I brought out the little shop vac and let it eat.
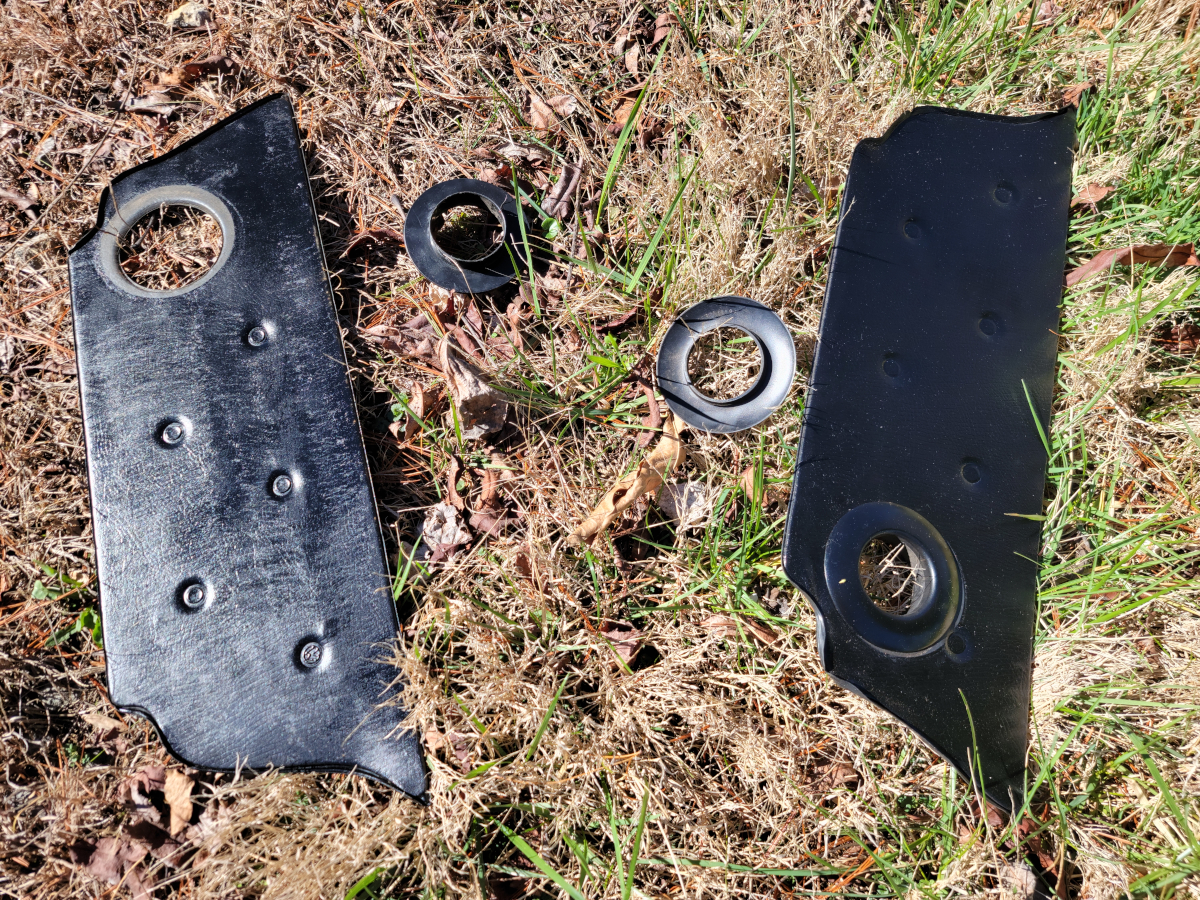
The plastic heater pipe grommet on the passenger’s side is always falling apart. I will need to take a look at that to see if the two halves need to be glued together or something. Otherwise, the panels are in good shape.
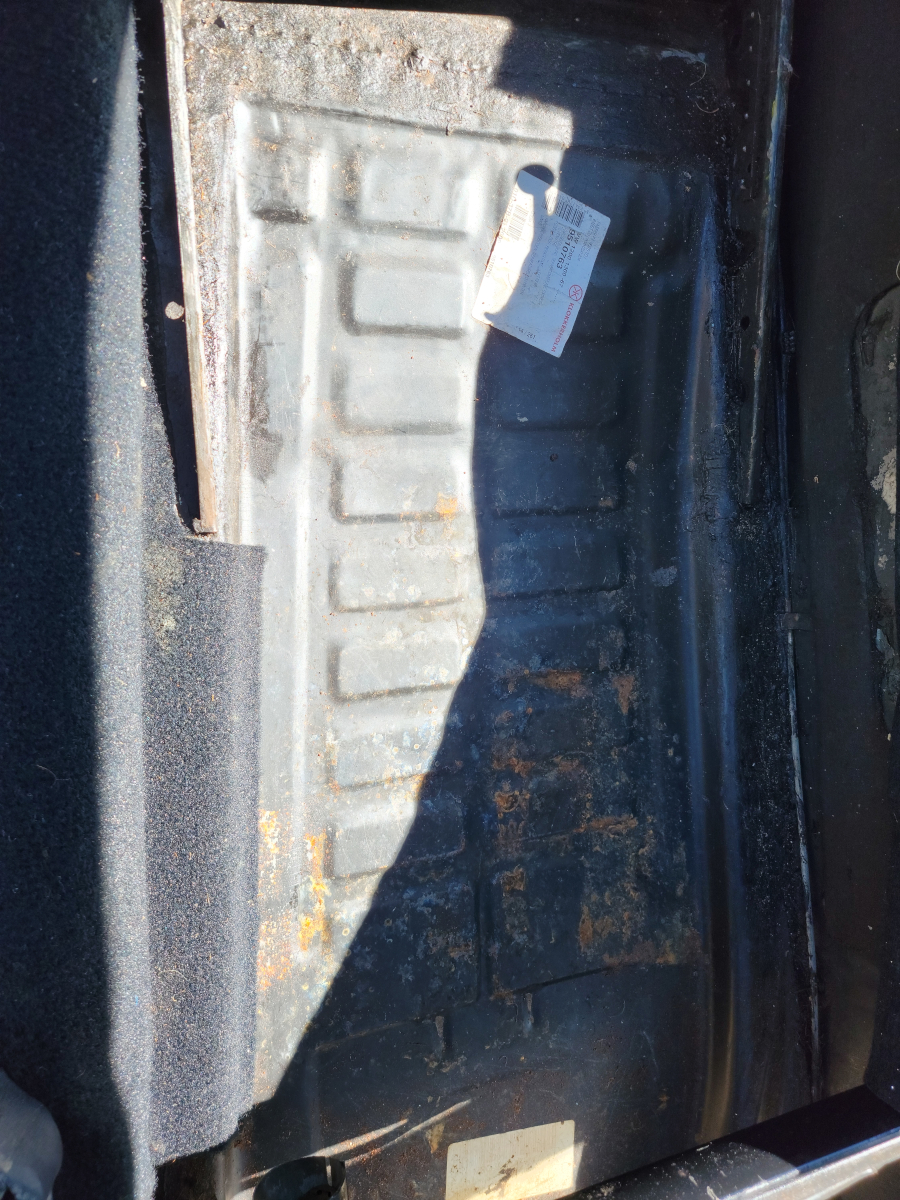
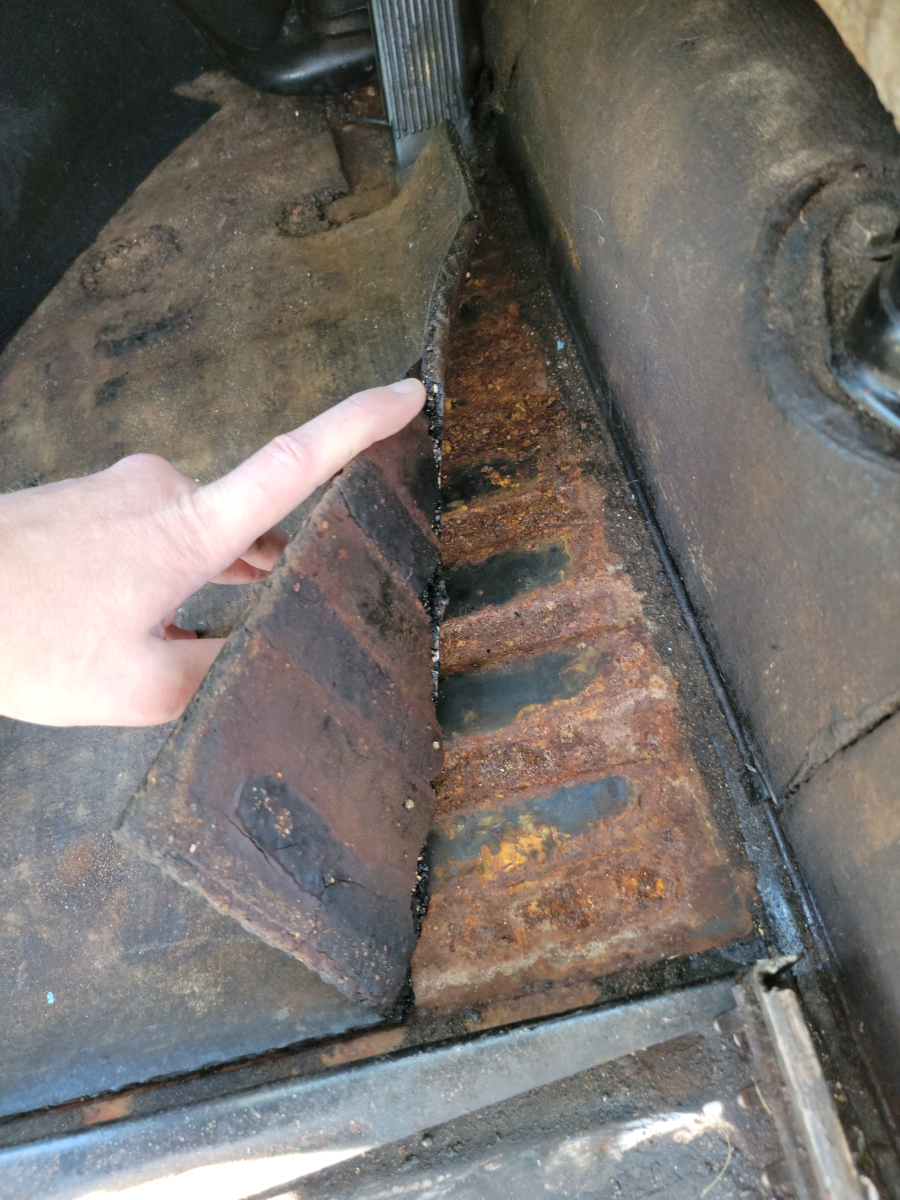
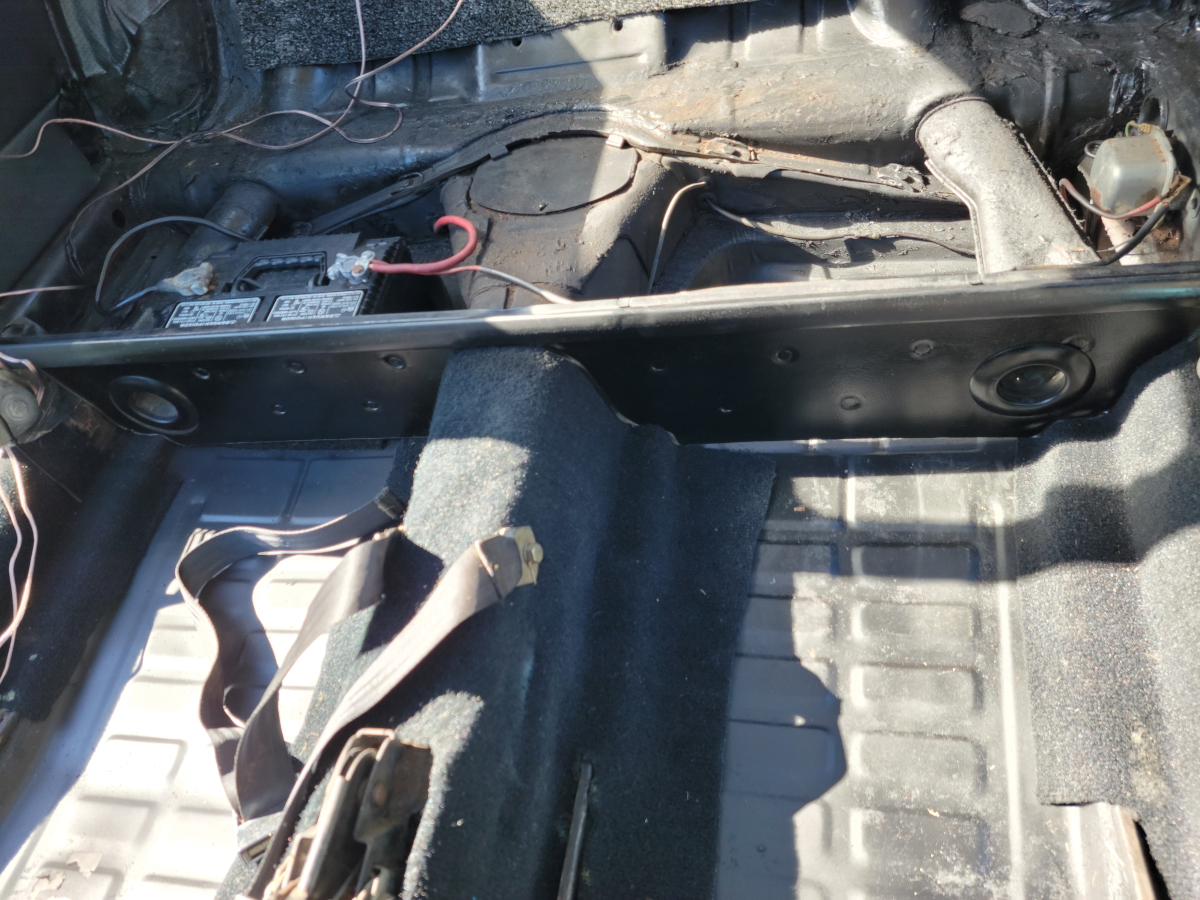
I noticed some surface rust on the “new” floor pan under the driver’s seat, which is concerning.
Also, in the driver’s side front foot well, there is a mat glued down, covering the floor board. Peeling back the corner of that, it’s clear why the rear half of the pans were replaced.
That mat felt to me like something that could be asbestos based and I wasn’t too keen on trying to get the rest of that peeled up, as crumbly as that first corner was. So that’s a job for another day.
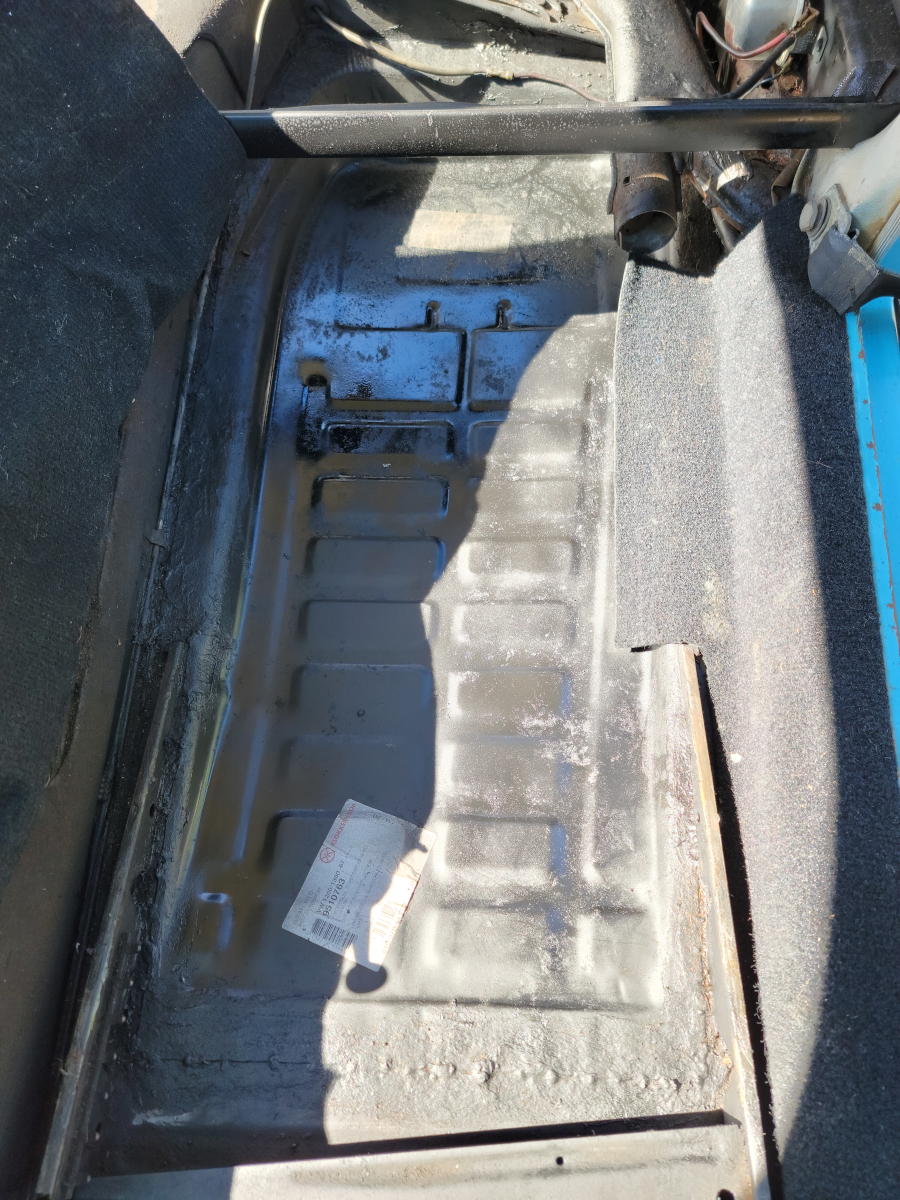
I vacuumed out the now empty interior and sprayed some rust inhibitor (Amazon link) and DE1634 (Amazon link) on the driver’s side floor board.
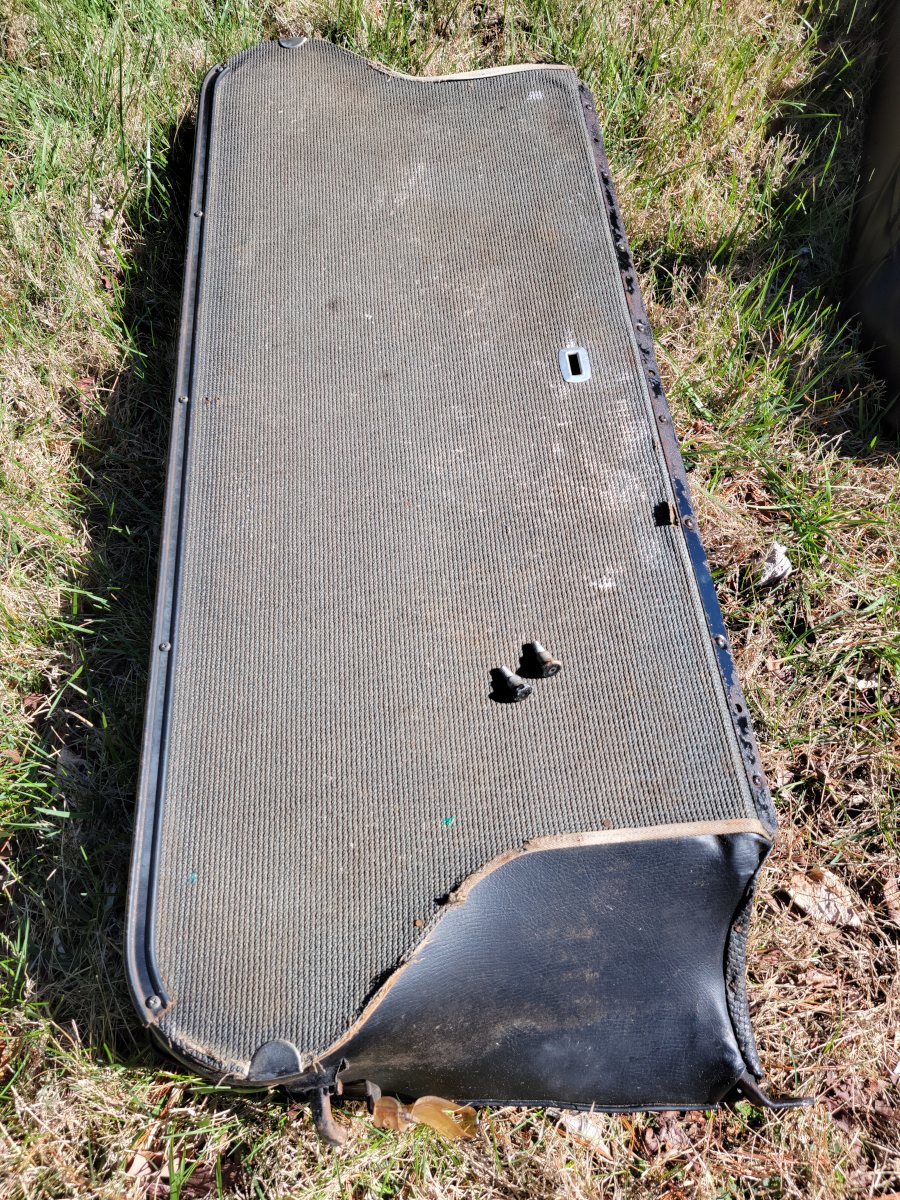
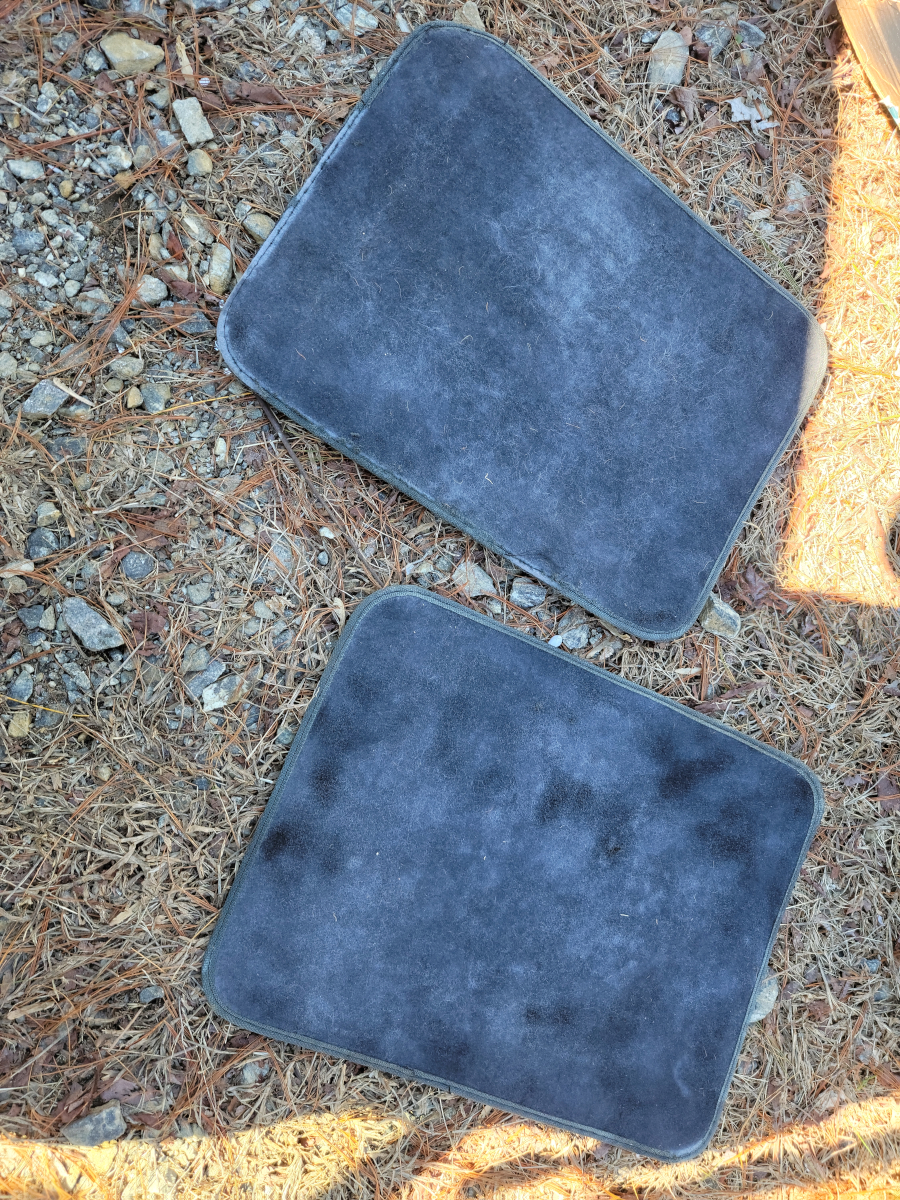
The rear floor mats are the only thing hiding the floor boards in the back. I’m surprised the carpet kit that was previously installed didn’t cover those areas. The floor mats are in OK condition, but were either not black to start with or are very sun faded.
The passenger side floor board didn’t have nearly as much surface rust as the driver’s side, but I went ahead and sprayed rust inhibitor and black paint on it as well.
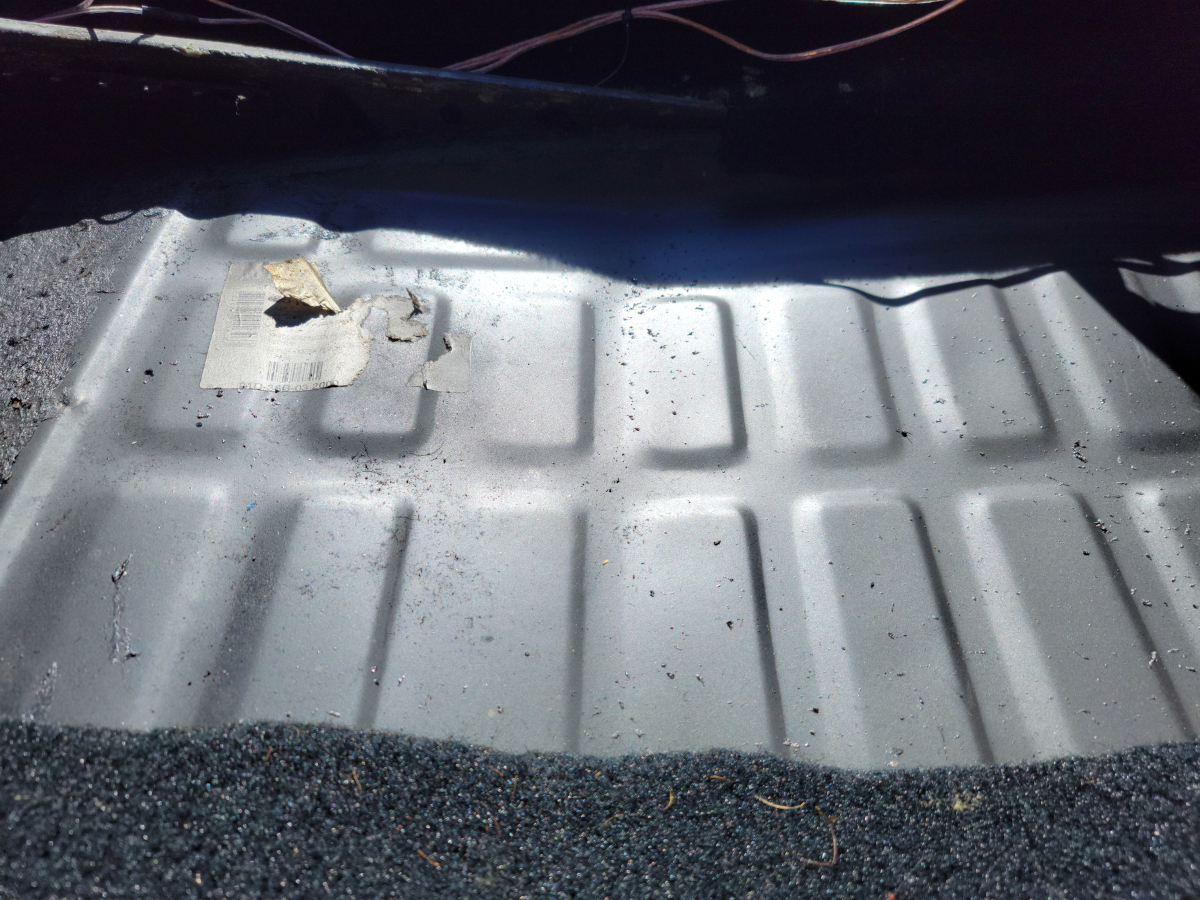
The nozzle of this new can of DE1634 started spitting out chunks, like silly string. You can see bits of it in the picture above. Thinking I must not have shaken the can well enough, which hasn’t ever been an issue with this paint in the past, I shook and shook and shook it some more.
I pulled the rear seat clips off of the pillars to paint them, as the black paint was very thin and chipping on them as well.
More cheese curds from the spray can. It’s actually getting worse over time. I flipped the can and cleared the nozzle multiple times, shook it some more, but it continued to make silly string.
Reassembly
I couldn’t find any real issue with that plastic heater pipe grommet on the passenger side foot well trim piece, so I snapped it back together and reinstalled them both.
I soldiered on, spraying more rust inhibitor and low gloss black cottage cheese around the exposed interior.
While I was at it, I sprayed the negative battery cable black, since they were both red before. It was always easy to tell which was which. The negative cable goes directly to a body ground and the positive cable has another red wire joined in at the connector.
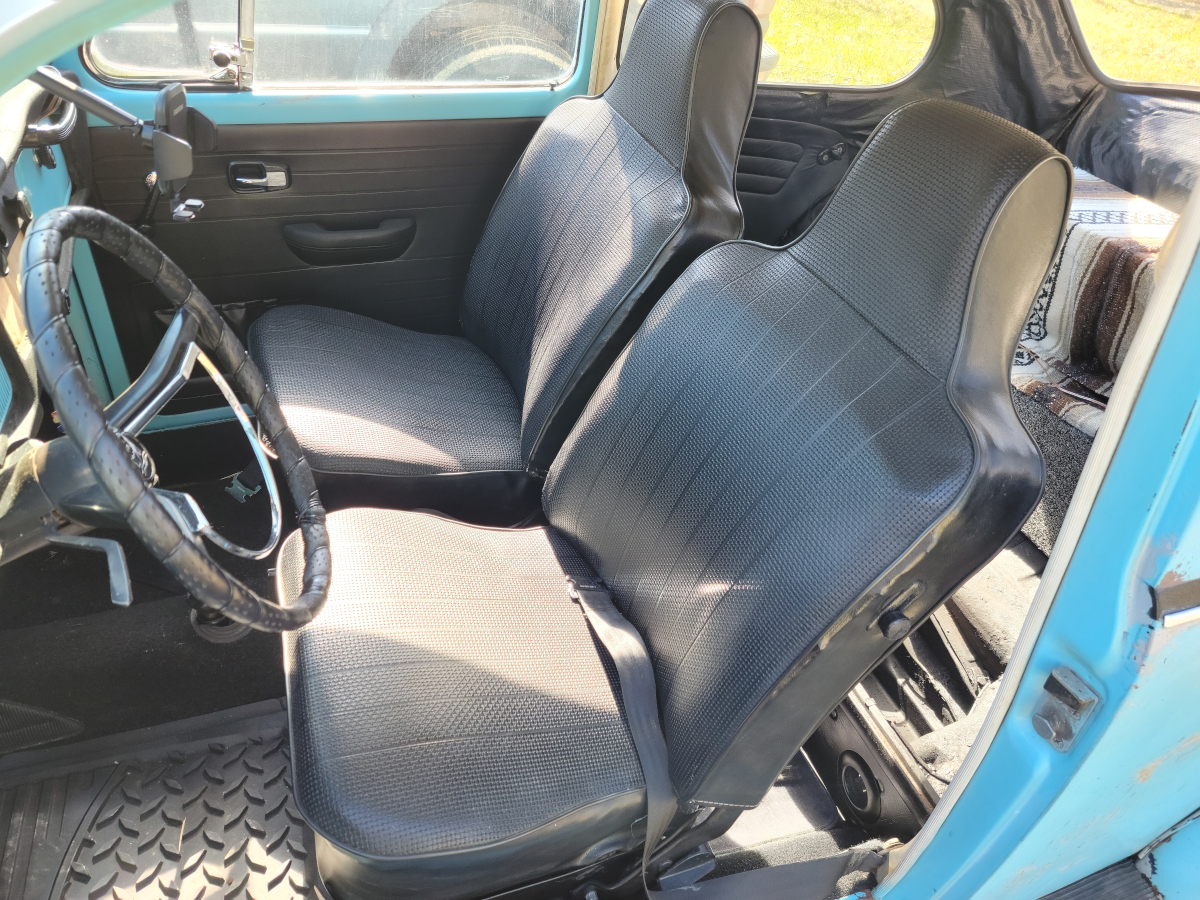
After removing the rear seats, I needed to make some room for them in the house, while I wait for the upholstery foam to arrive. So I went ahead and reinstalled the front seats.
As expected, I’m now sitting a couple of inches higher, but still have plenty of head room. Also, in the driver’s seat, I’ve no longer got to fight an outside lean toward the window.
After last weekend’s front seat refinishing progress in Inside the Driver’s Seat and Driver’s Seat Part 2, I had been looking forward to the weekend, to be able to dig back in to refinishing the seats. Saturday was a rain out, but Sunday was a sunny treat. I pulled the front passenger seat out and started disassembling it on the front porch.
Deconstruction
I saw some green bubble wrap showing through from the underside of the seat. There also appeared to be some mechanic’s wire of a decent thickness twisted up, tying the seat cover on. That would require some more investigation.
As I started unfolding the little prongs to release the seat cover, one on the back side of the seat base popped off.
I pulled the metal trim piece off the side of the seat. It was missing the rotating metal bracket that holds the back half in place. It looks like someone had previously tried to put a plastic GM push button trim thing in there, but it was broken off.
This passenger side seat cover also had the tie down strings in the front, though they were tied differently than those on the driver’s side. When I tried to untie the knots, they quickly fell to pieces, just like the ones on the driver’s seat.
When I had everything disconnected and started peeling back the vinyl seat cover, I found another hat on a hat type situation.
I got the seat base all stripped down and brushed it clean. I used all my brake parts cleaner spray last weekend and hadn’t been back to the parts store to pick up some more. I’m sure it will be fine.
Friends, let me just say that most of the DE1634 paint (Amazon link) I sprayed never actually set. My experience on the driver’s side was after emptying a can of brake parts cleaner into/onto the seat frame, the paint stuck like glue. Also, I have sprayed that engine enamel on the oily, dirty underside of the car many times with no issues.
Here on the passenger side, five hours after spraying the paint, it was still gelatinous and quickly became a mess I had to deal with.
Moving on to the seat back, I stripped it all down and there was only a trace of the two tone tan seat back cover like the driver’s side seat back had. It appears the prior seat back cover was just quickly cut off at some point.
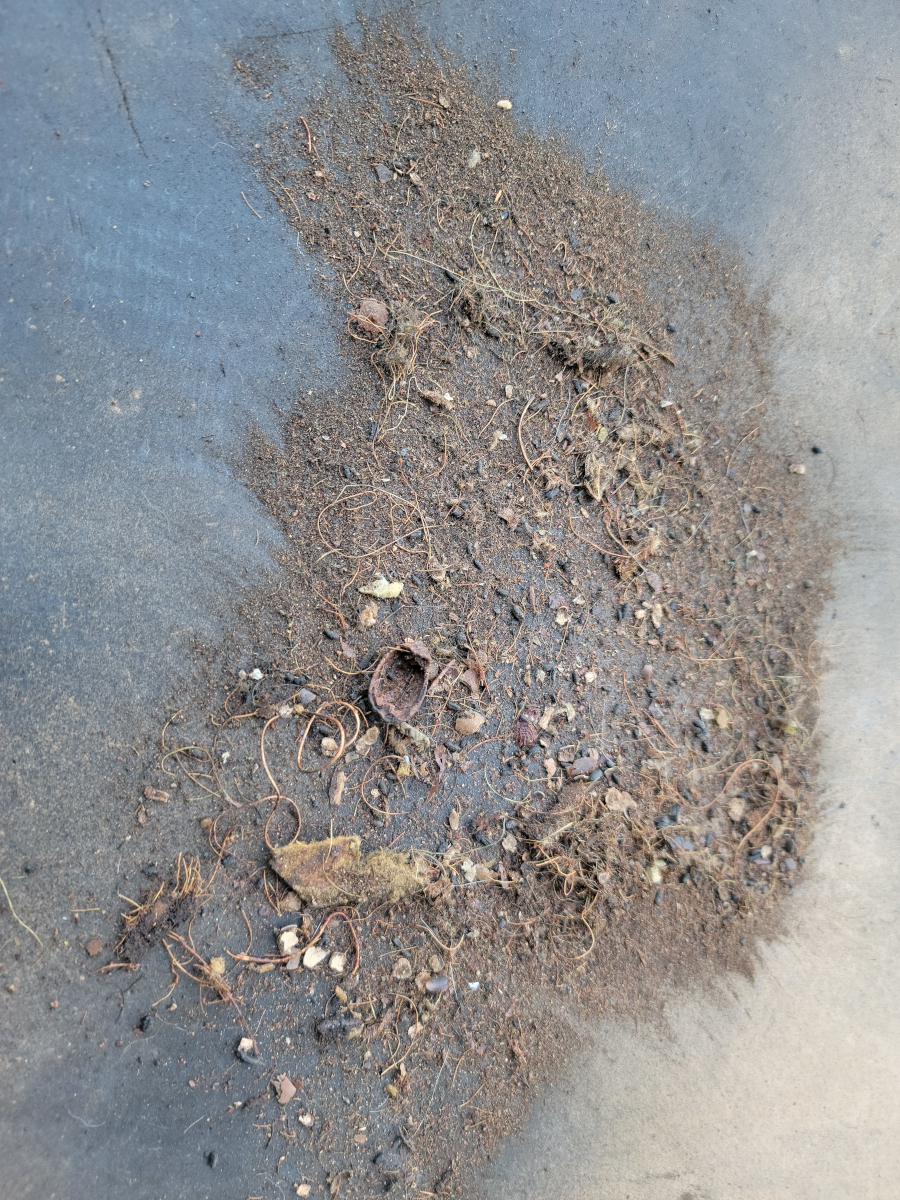
It did have the same traces of mouse house, with chewed up acorn shells or whatever, as the driver’s side, as seen here, after sweeping up.
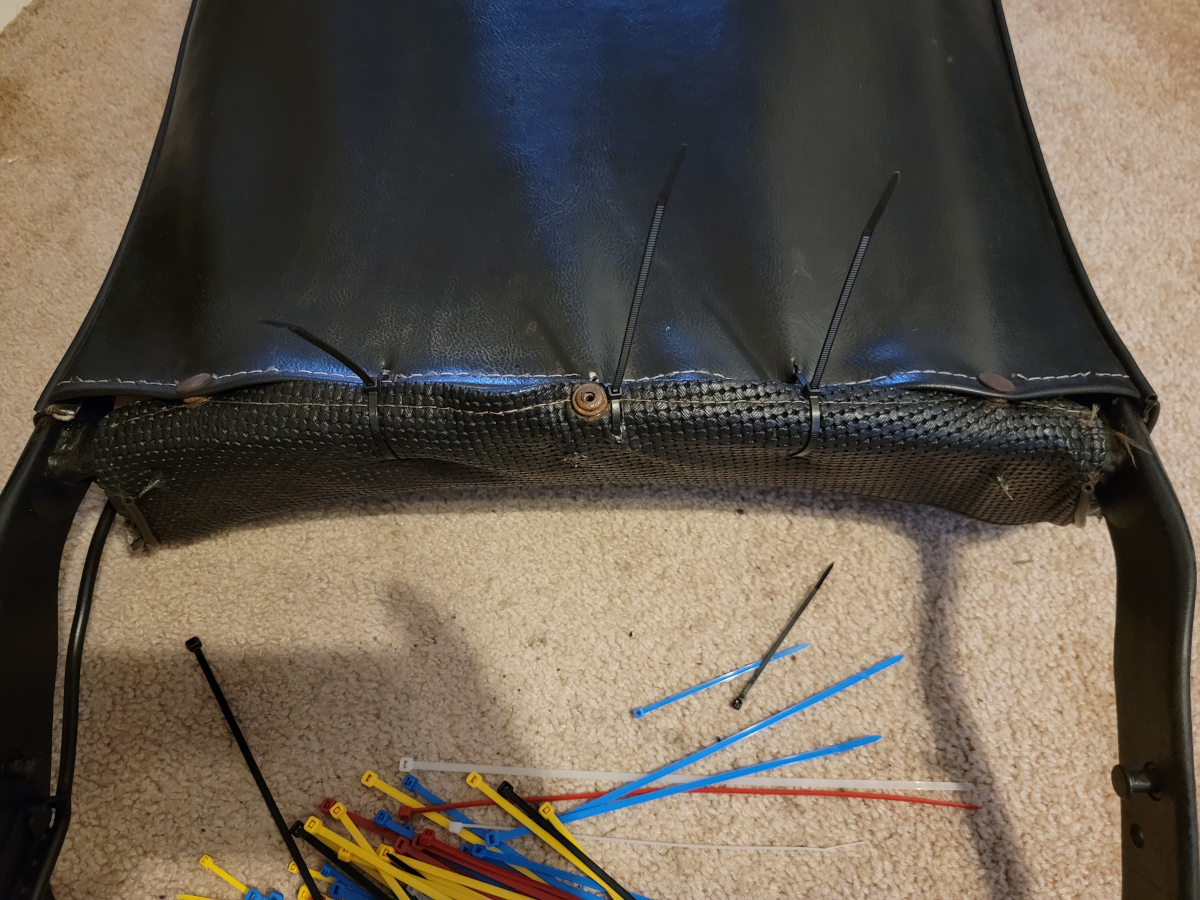
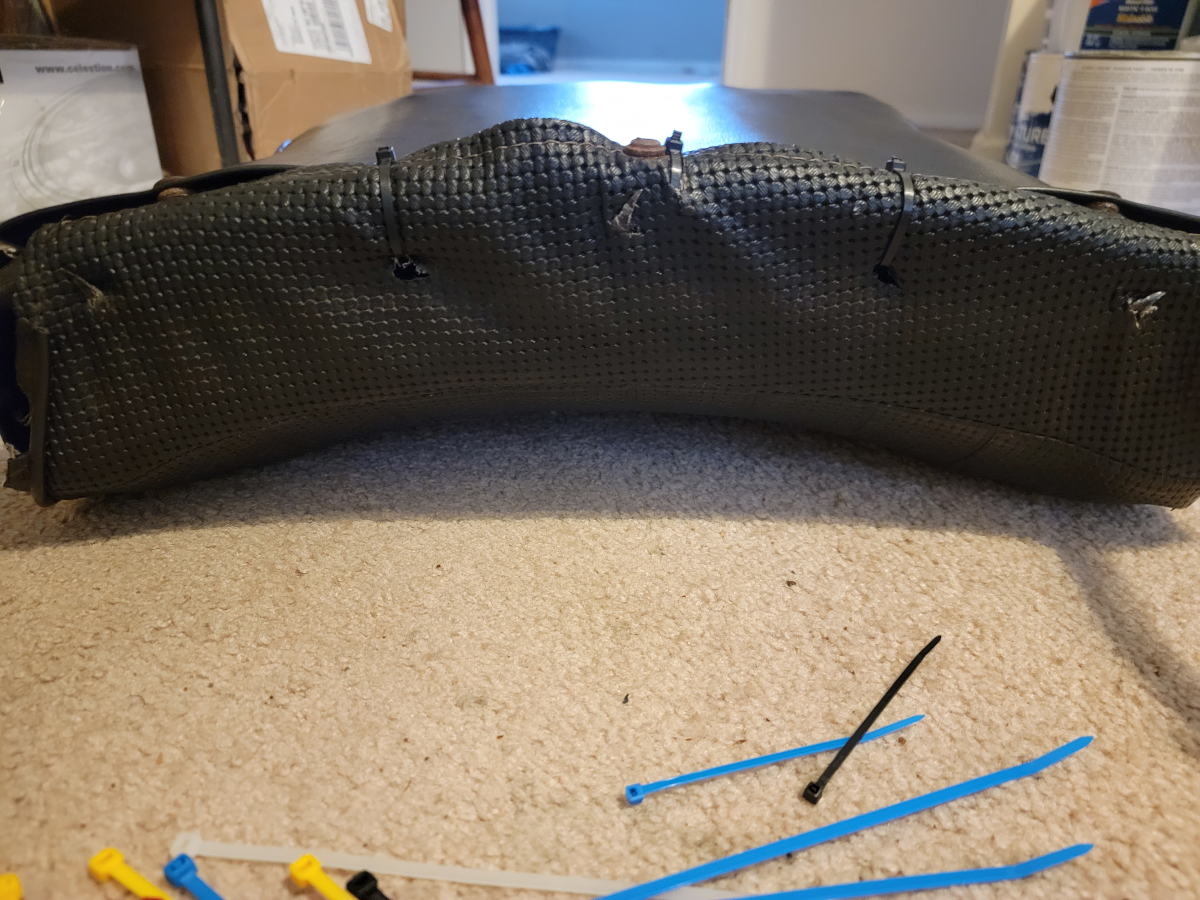
The seat back had the same broken braces as the driver’s side, though these didn’t have the additional broken welds. I zip-tied them together.
It also had the same surprisingly high quality foam headrest in surprisingly good condition that the driver’s side side had.
Rebuilding
I performed the act of tying twine into a grid on both the seat base and back.
I then hog-ringed some jute webbing across the seat base and back, but apparently forgot to take a picture of the seat back. Still wet/forever wet paint is visible in this picture.
Next up, I cut another panel off of that dishwasher box to flatten the back of the seat and zip-tied it on.
Last time, I had cut a piece of high density foam for the seat back, but decided to use some softer foam I had purchased a year ago for this purpose. I cut that seat back piece into a seat base shape using the craft paper pattern from the driver’s side.
Now onto patching the vinyl seat covers. On the outside, the passenger side was in worse condition than the driver’s side, but from the inside, was not as worn. There was only light showing through in a couple of little places. Using a combination of the self adhesive vinyl patch (Amazon link) and Gorilla Clear Grip (Amazon link), I got them sealed up as best I could. I have been really impressed with that roll of vinyl patch! The texture is great and the adhesive back sticks well.
I wiped the seat covers down with Mothers VLR (Amazon link) spray – it Cleans, Conditions, & Protects!
I got the seat back cover slipped on with relative ease. The passenger side was missing the plastic rail guards, which made it a much looser fit. All three snaps on the seat back cover were holding firm, but I went ahead and added a couple of zip-ties as well, just to be safe.
The cover on the seat base also went on without issue.
I mounted the metal trim piece on the side of the seat with another zip-tie.
I had just enough of everything to finish the passenger side seat. Another Amazon order was required to get enough jute webbing (Amazon link) and high density foam (Amazon link) to start on the back seat.
I’m again waiting for the upholstery foam to be delivered. That’s my only complaint with any of this lot is that the roll of seat foam isn’t sold by Amazon directly and takes a week or more to receive once the order has been processed, shipped, and delivered. Let’s just hope next weekend’s weather is cooperative. It tends to rain for a couple of months here once the weather starts to change into Spring.
Once the roll of vinyl repair stuff (Amazon link) arrived, I got started patching up the seat covers. I picked up some Gorilla Clear Grip (Amazon link). The package says to use it like E6000, so I did.
In places where there were gaping holes in the seat cover, I used the vinyl patch as a backing and glued it with the glue. Where that didn’t look great from the outside, I just slapped a patch on the outside and used the adhesive backing on the vinyl repair roll.
Replacing the seat foam
I had previously picked up some low density green upholstery foam pads (Wal-Mart link) and decided to use those in the seat backs. After cutting a seat pad and seat back out of the high density foam roll I bought, I realized there wasn’t going to be enough for both front seats.
It was a really tight fit in the seat back and needed to be massaged into place. The seat back cover started off being 2-3 inches away from being able to snap closed.
I apologize for the gratuitous crotch shot, but luckily, I’m still a baggy pants 90s kid, so it could have been worse.
We don’t need no rusty snaps
I pulled the plastic side bar supports out to free up some space and was finally able to get the ends to meet up, but the snap was failing. After bending the female side of the snap into a little oblong, it finally held.
I did the same with the other side and got it snapped as well.
The middle snap had been previously pulled through the vinyl, so I cinched it all together with zip-ties.
I then got the side of the seat back wrestled into place to be able to put the plastic trim piece and knob for the seat back release lever in place.
Once the seat back was fitted, I wriggled those plastic side bar supports back into place. The fit is now very revealing. As you can see in the picture above, much like Robert Plant’s hip-huggers, you can see the hog rings that are holding the jute webbing in place.
Moving on to the seat base, it was a much better fit than the seat back, initially at least. With all the stretching and pulling, the strings sewn into the front edge of the seat cover snapped off. They were very crispy. A zip-tie helped cinch it down.
One edge at a time, I stretched the cover down over the bottom of the seat base and stabbed the little prongs through. The last edge was the toughest, as you might imagine, but smooshing the seat springs down with one hand while pulling with the other was enough to bring it home.
Buttoning it up
I flattened the prongs down all around, only stabbing myself several times, and it was a nice, secure fit with no need for more zip-ties.
The foam pads are too much for the seat back and you can see the square edges, but other than that, it is very firm and comfortable! The high density foam would have looked even worse. I’m glad that I remembered I had those low density green pads laying around for the last year.
Pardon the mess! The housekeeping staff is on a gap year.
As an Amazon Associate I earn from qualifying purchases. I also often provide links to products on other sites that do not provide affiliate income.