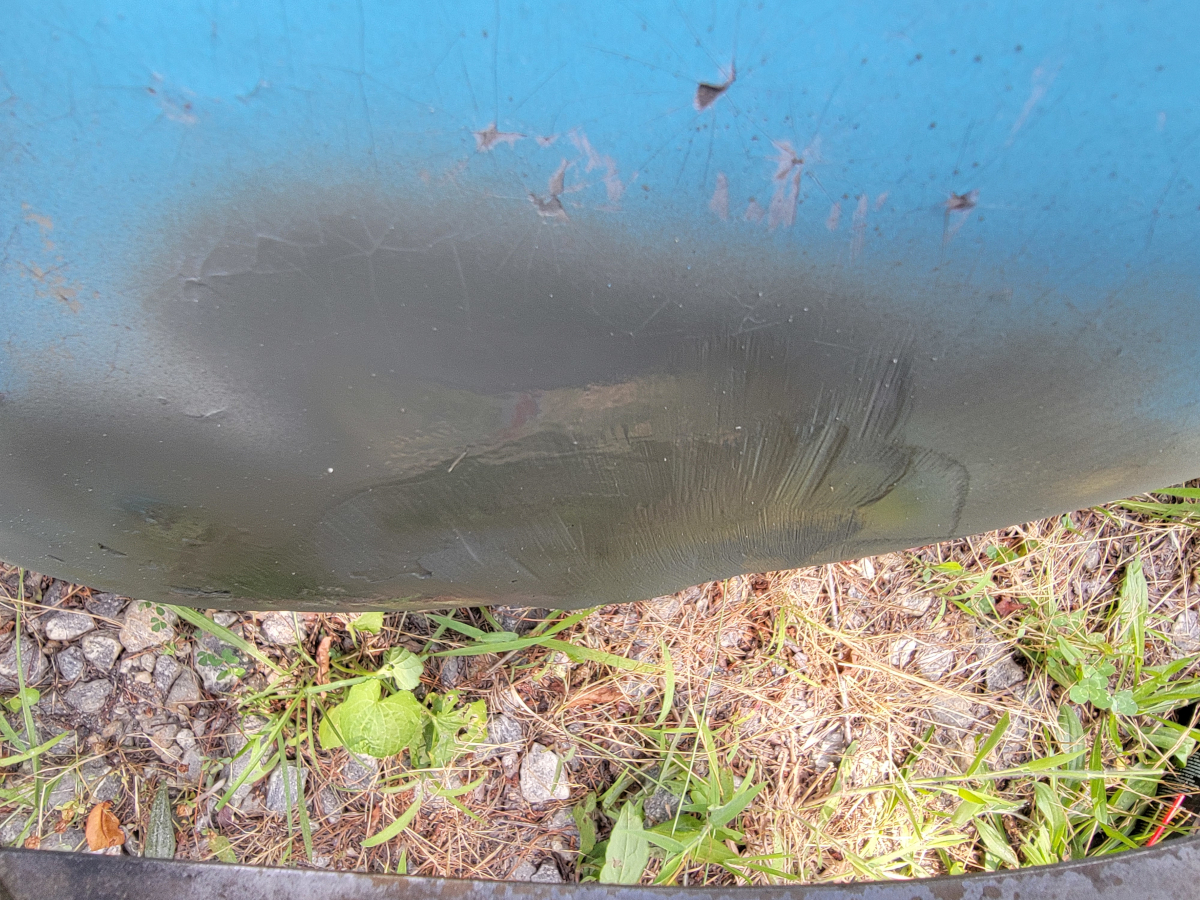
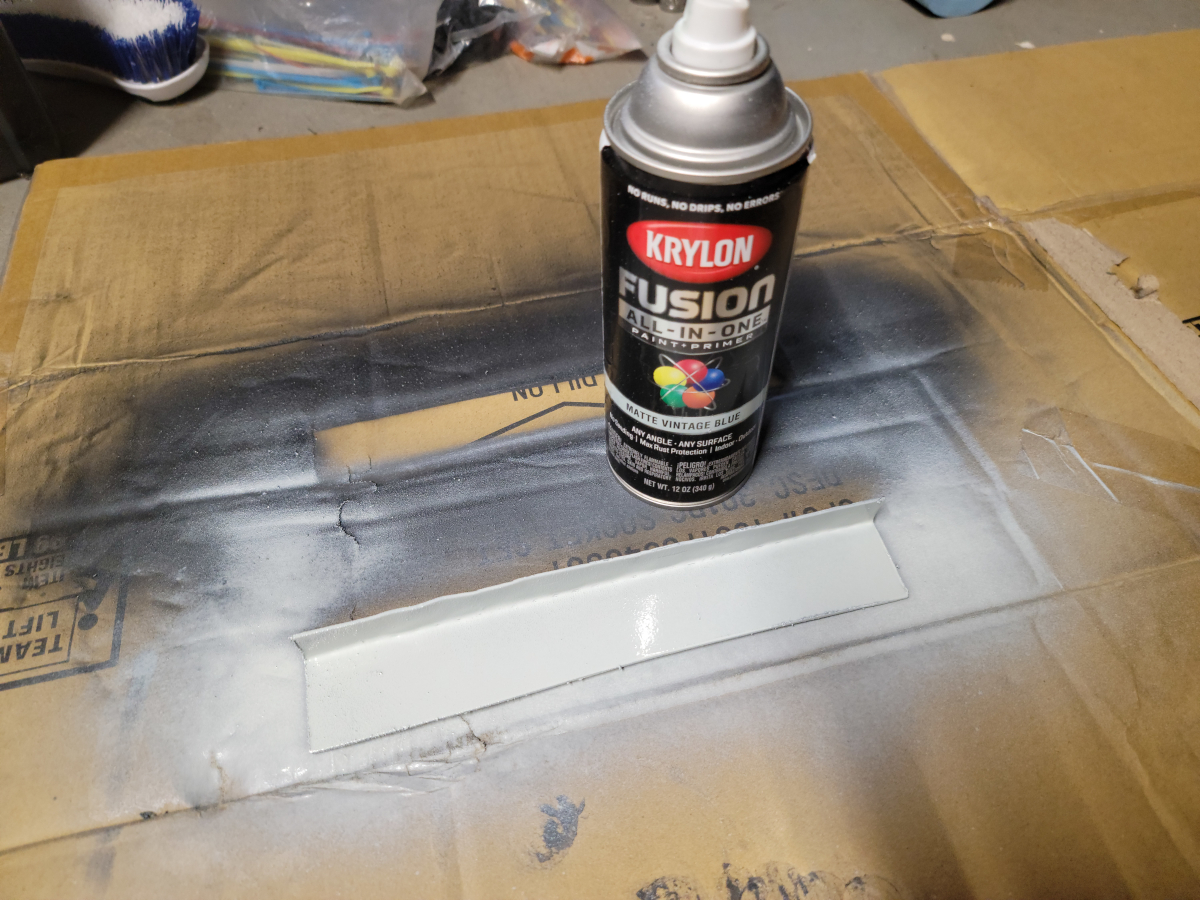
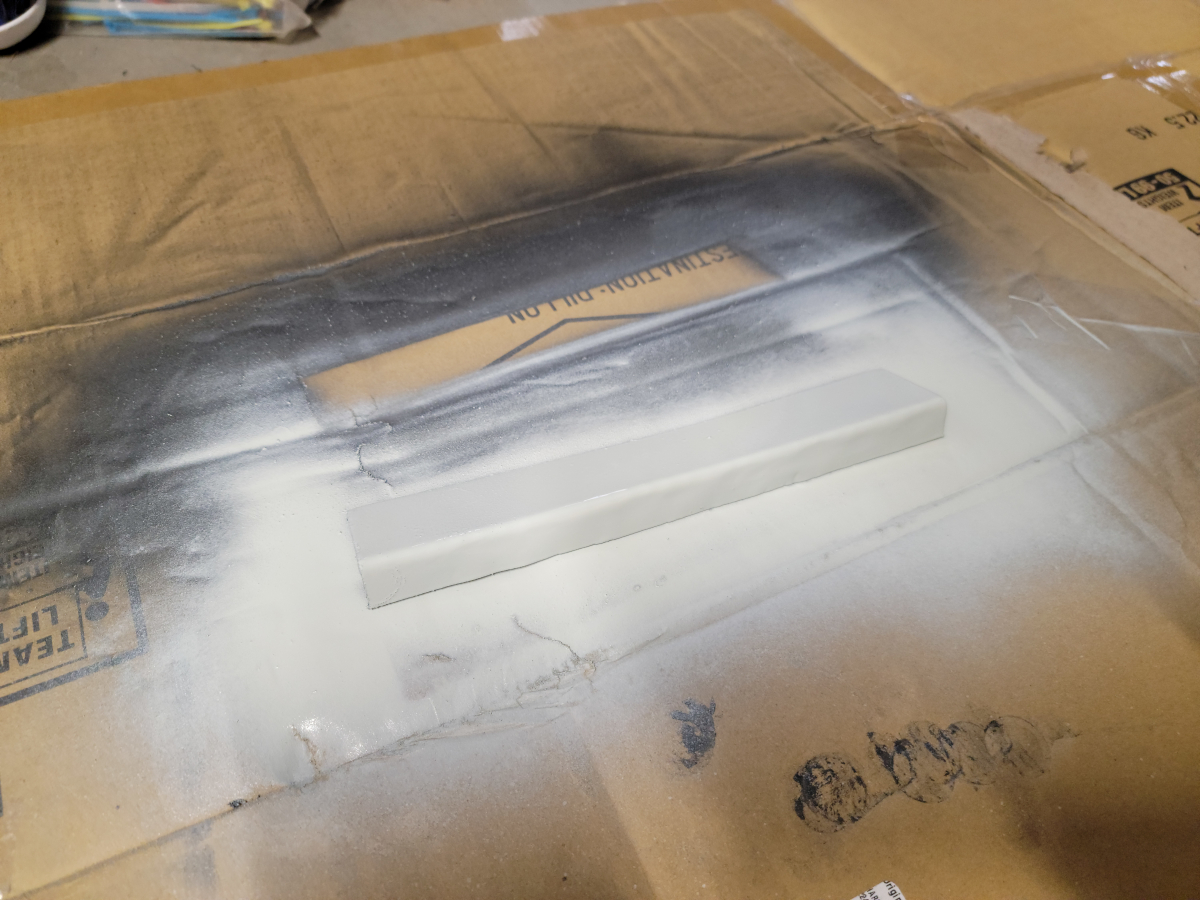
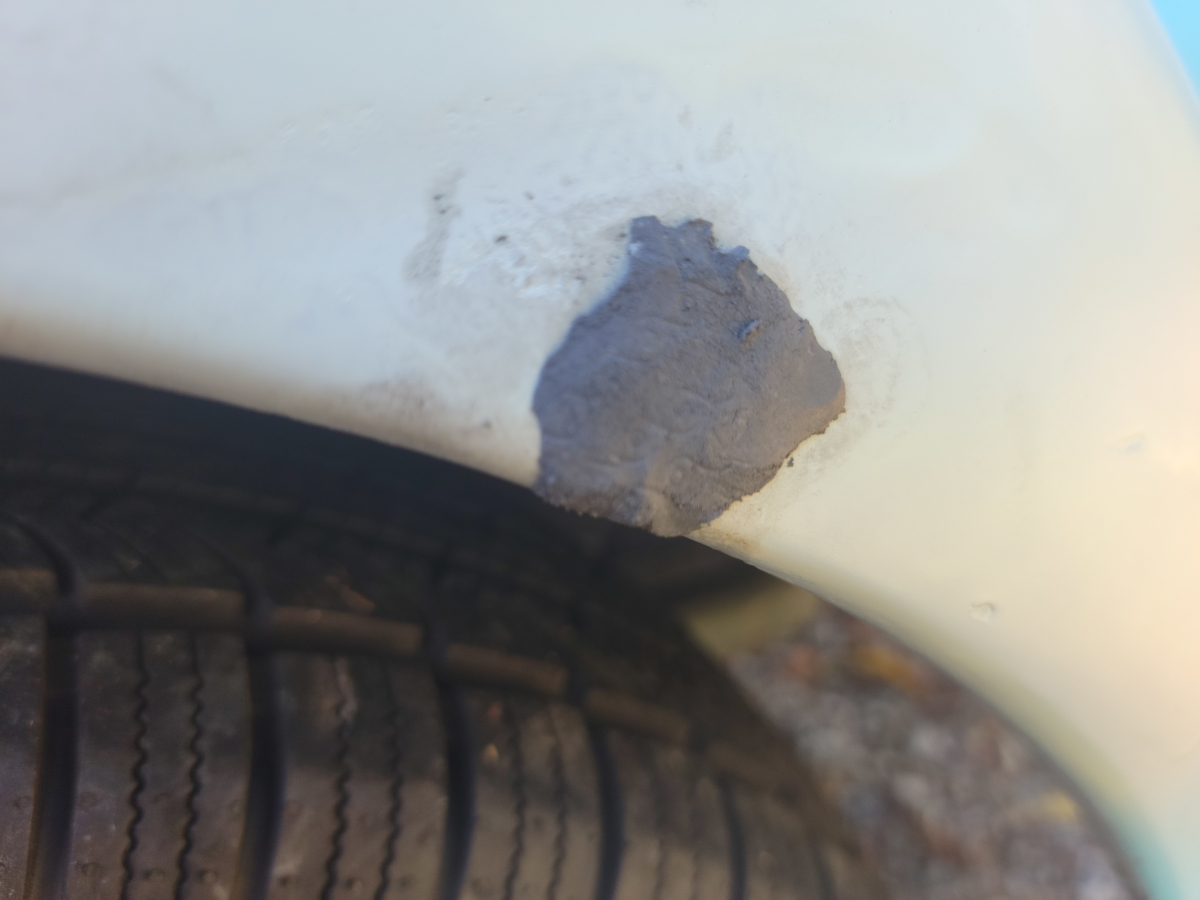
I used too much SteelStik and left a blobby mess, thinking I could just file it down smooth. After an hour with a file, I gave up on it and just sprayed the spots with Krylon Fusion Matte Vintage Blue (of course).
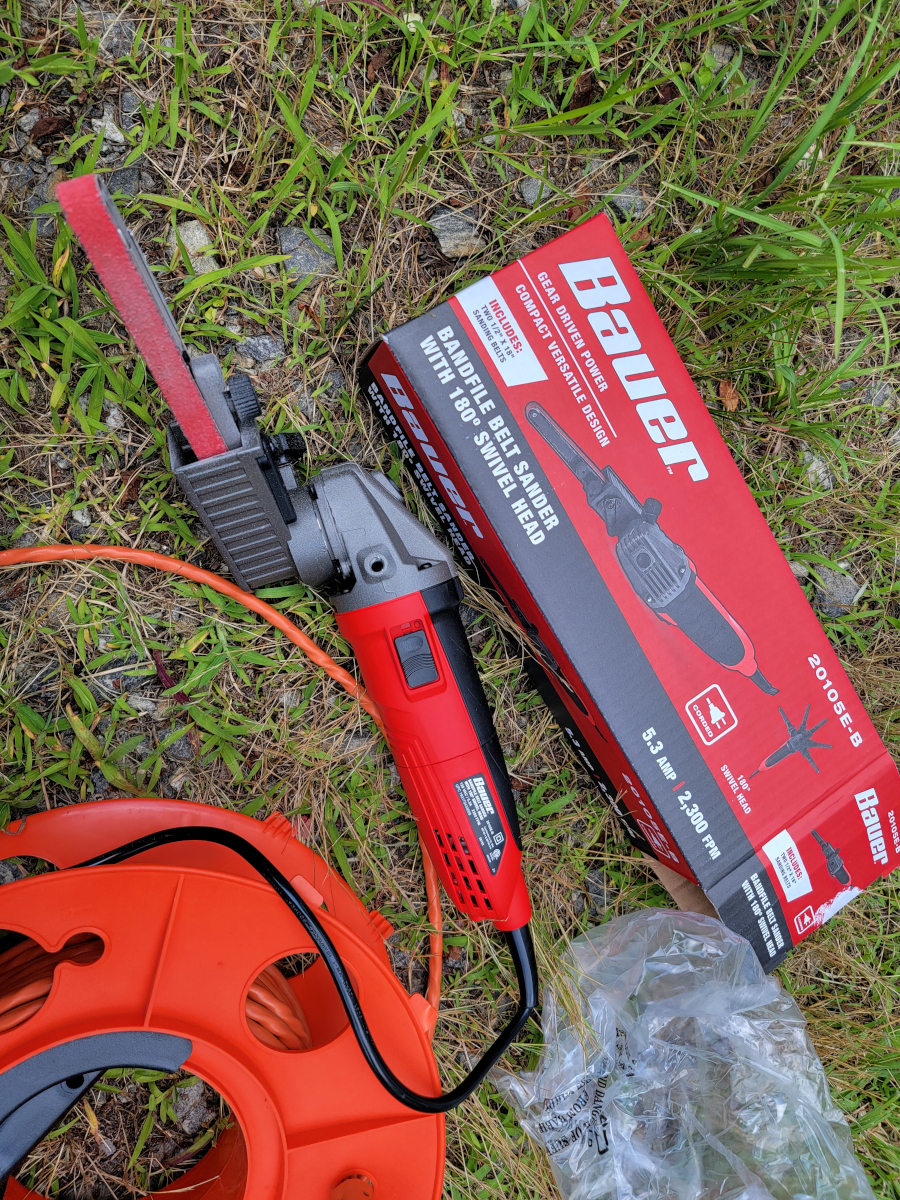
I recently picked up handy Bandfile Belt Sander from Harbor Freight (link):
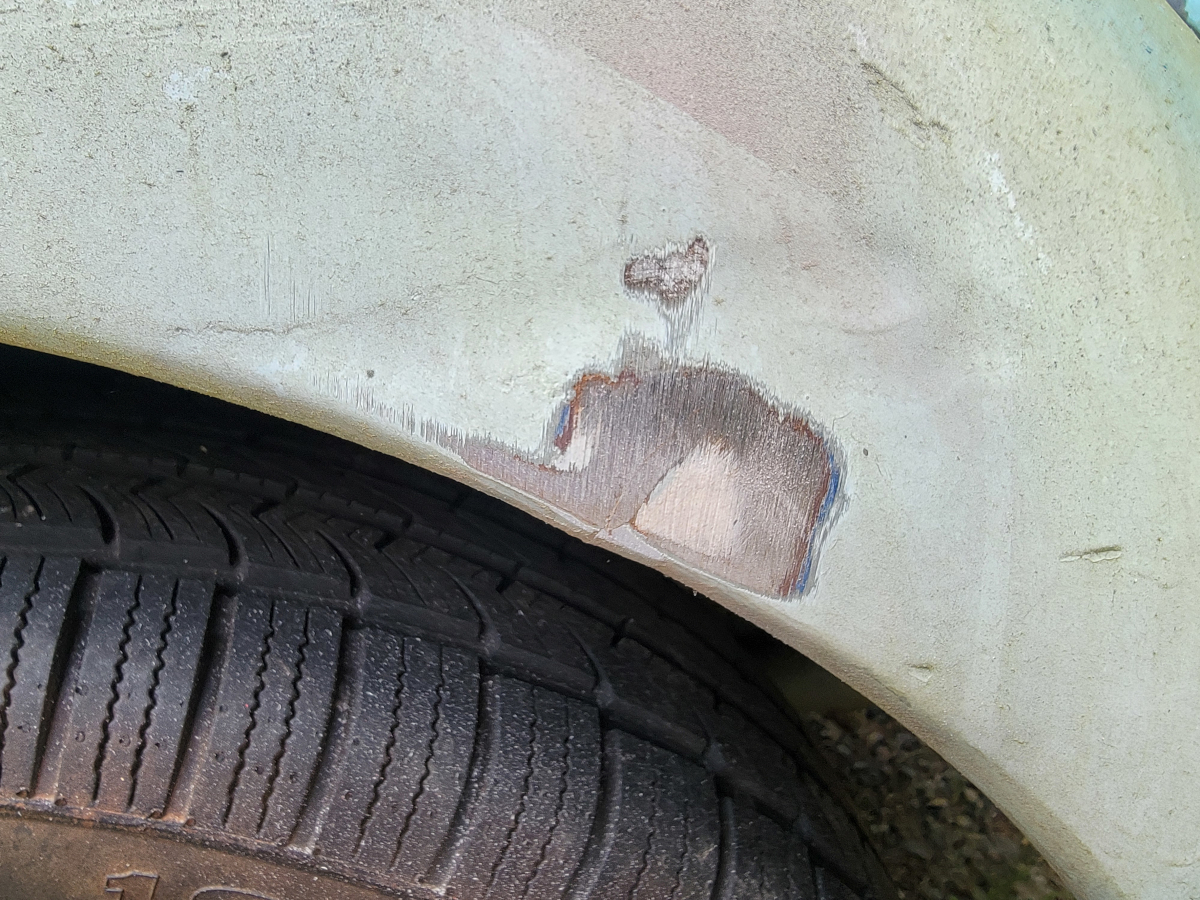
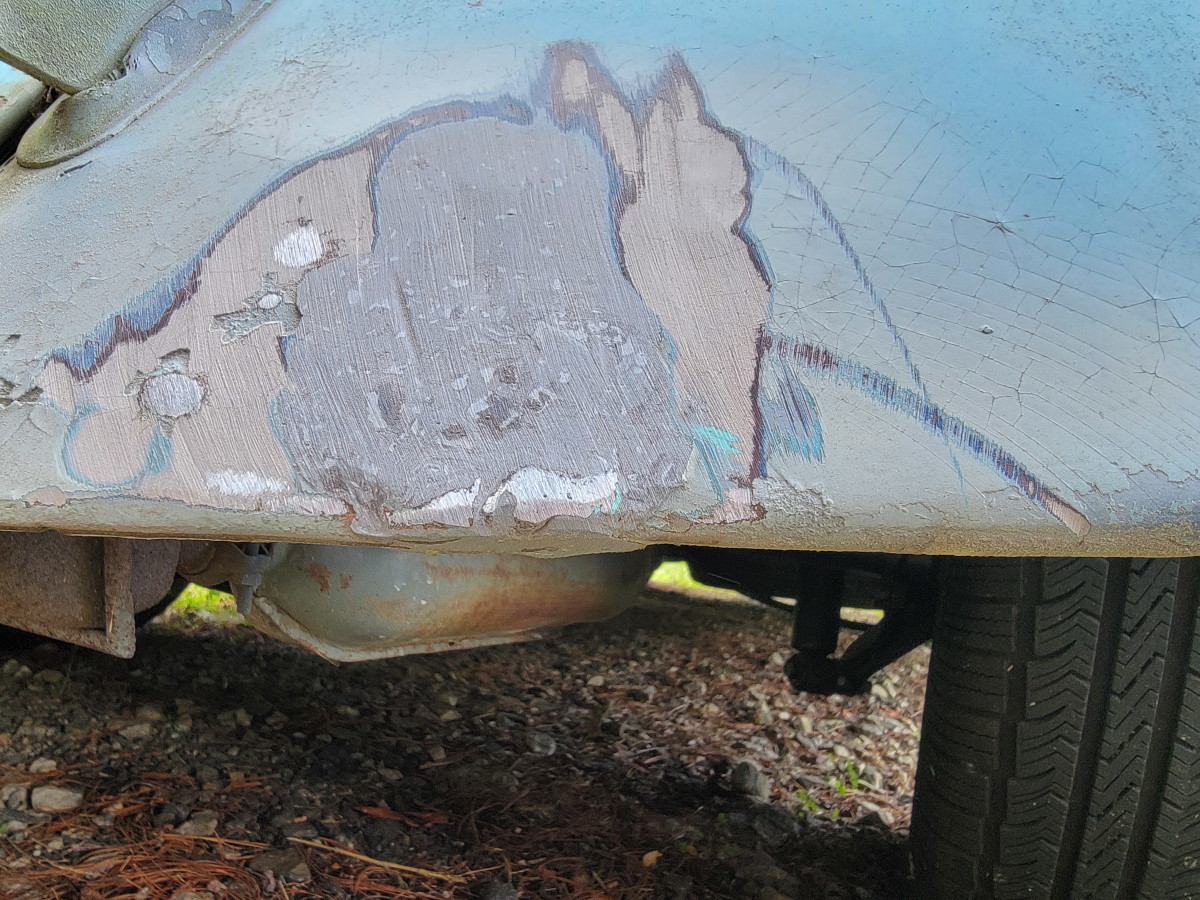
Not so much of a big deal on the side of the fender, but my regular palm sander wouldn’t have fit up in between the rear bumper and rear skirt where the other big ouchy is located. I used a little too aggressive of a belt , but it took the blob right off.
The story was the same around the back.
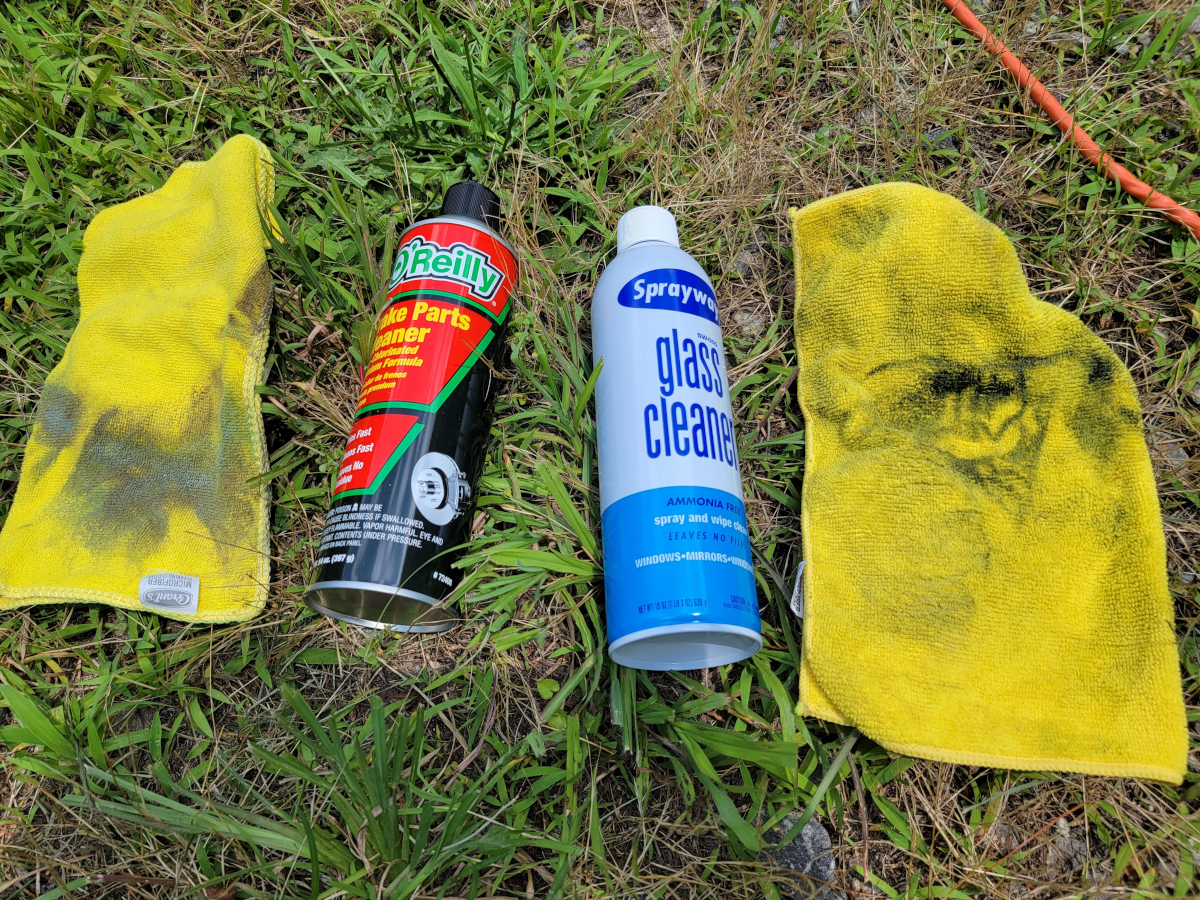
I cleaned off the affected areas with brake parts cleaner, then Sprayway glass cleaner.
Then I added a couple coats of primer.
And again on the rear…
Then I wiped it all down again and sprayed it blue.
It’s rough as guts, but at least it’s smoothable-outable now. Those fenders are covered in a thick layer of filler, though the steel as visible from the underside is totally smooth and unharmed. I’m guessing they may just have rust pitting like the roof did and bonnet does.
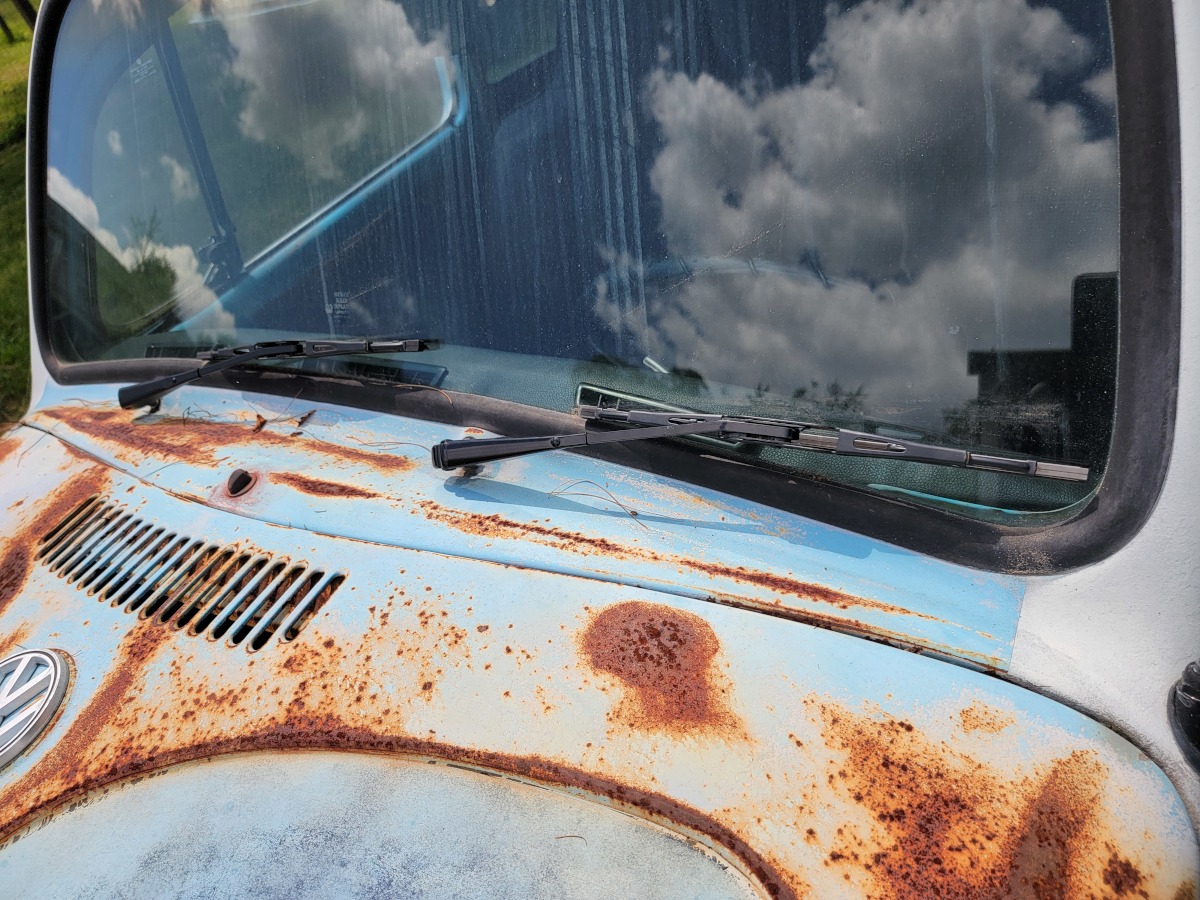
While I’m out here, I may as well fit those new wipers I bought.
This after giving up on finding springs small enough, yet strong enough at any local hardware or auto parts stores, as seen in the series of posts below:
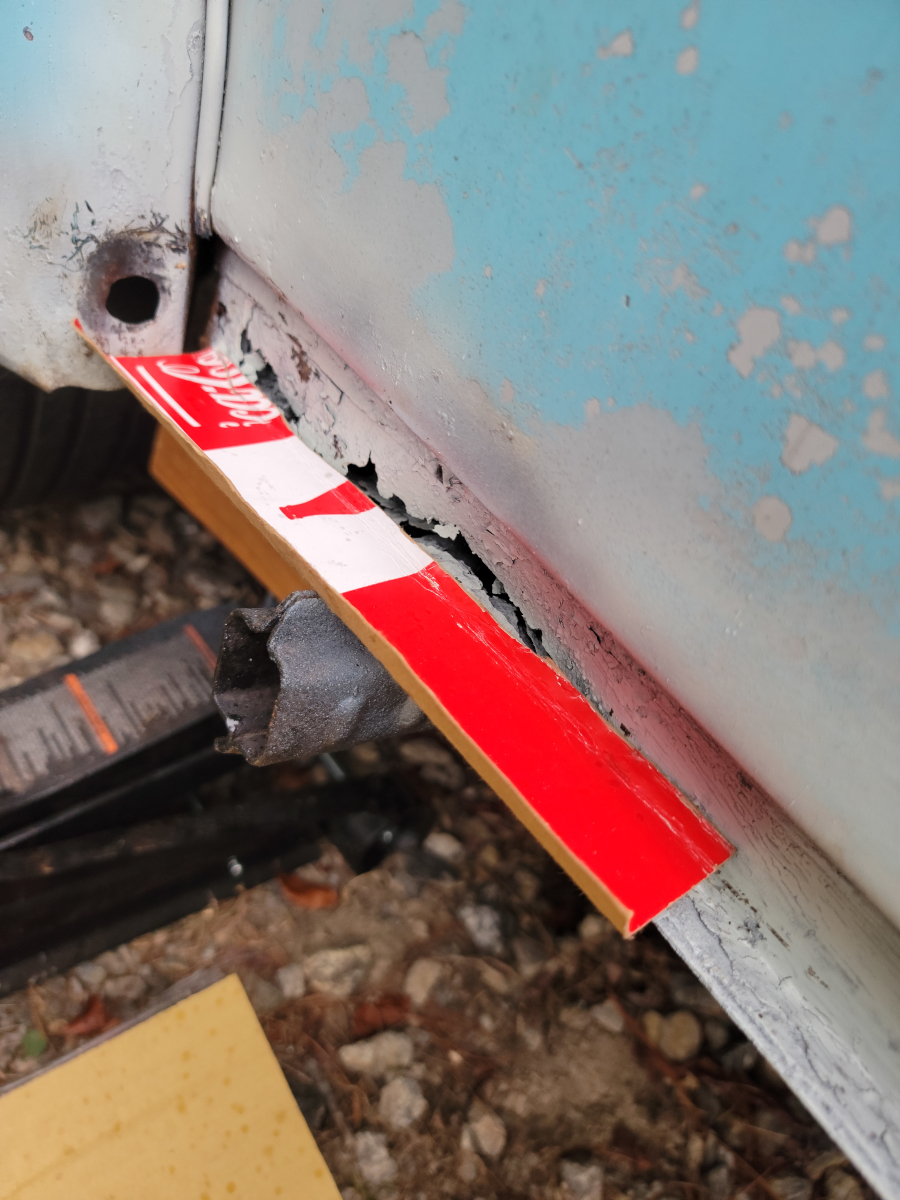
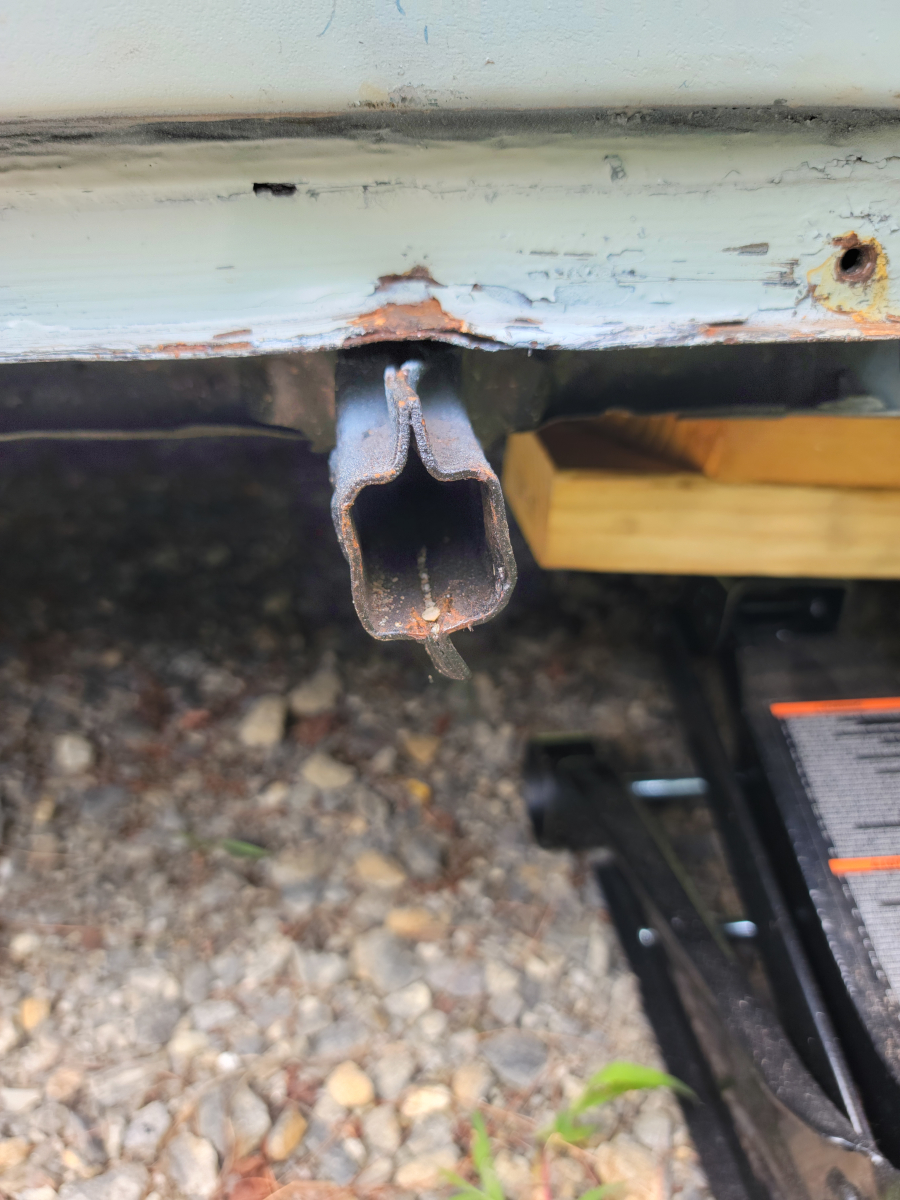
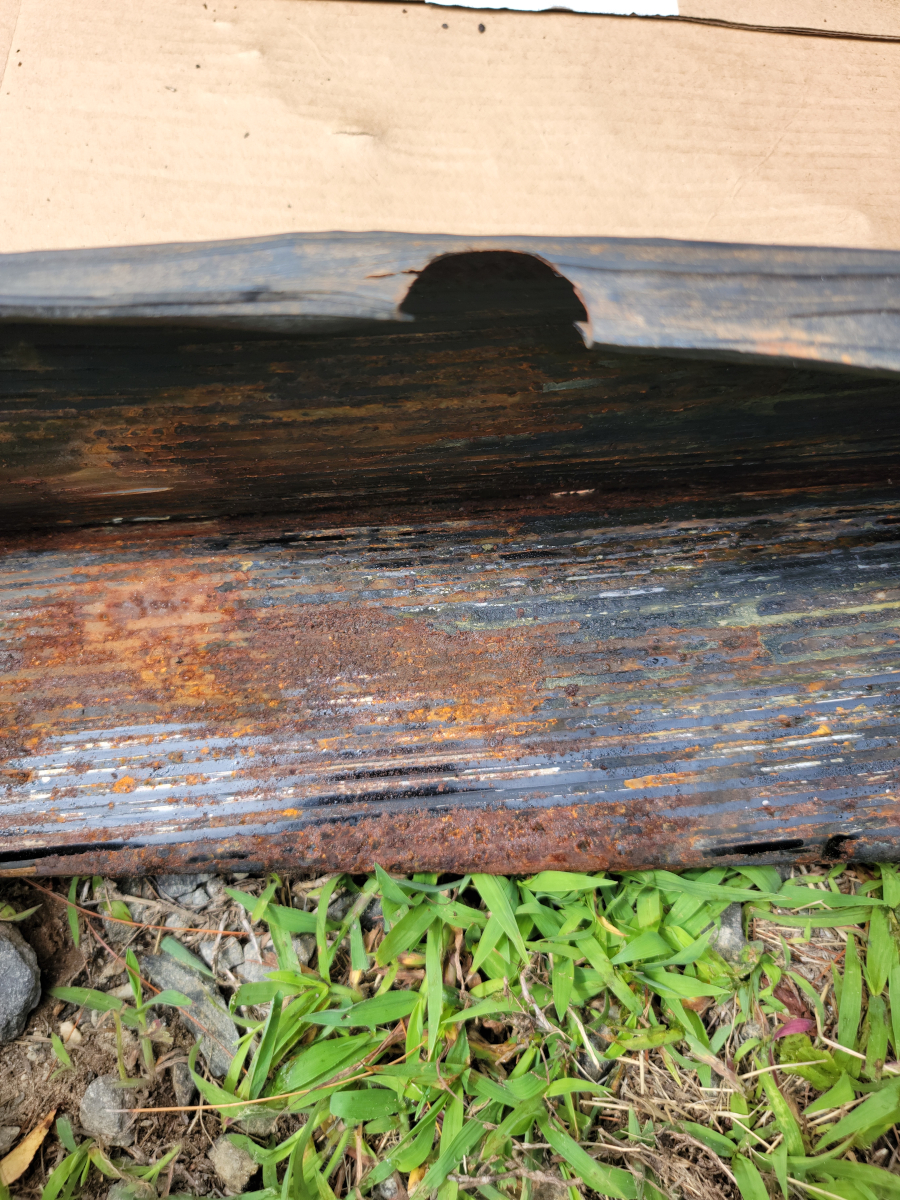
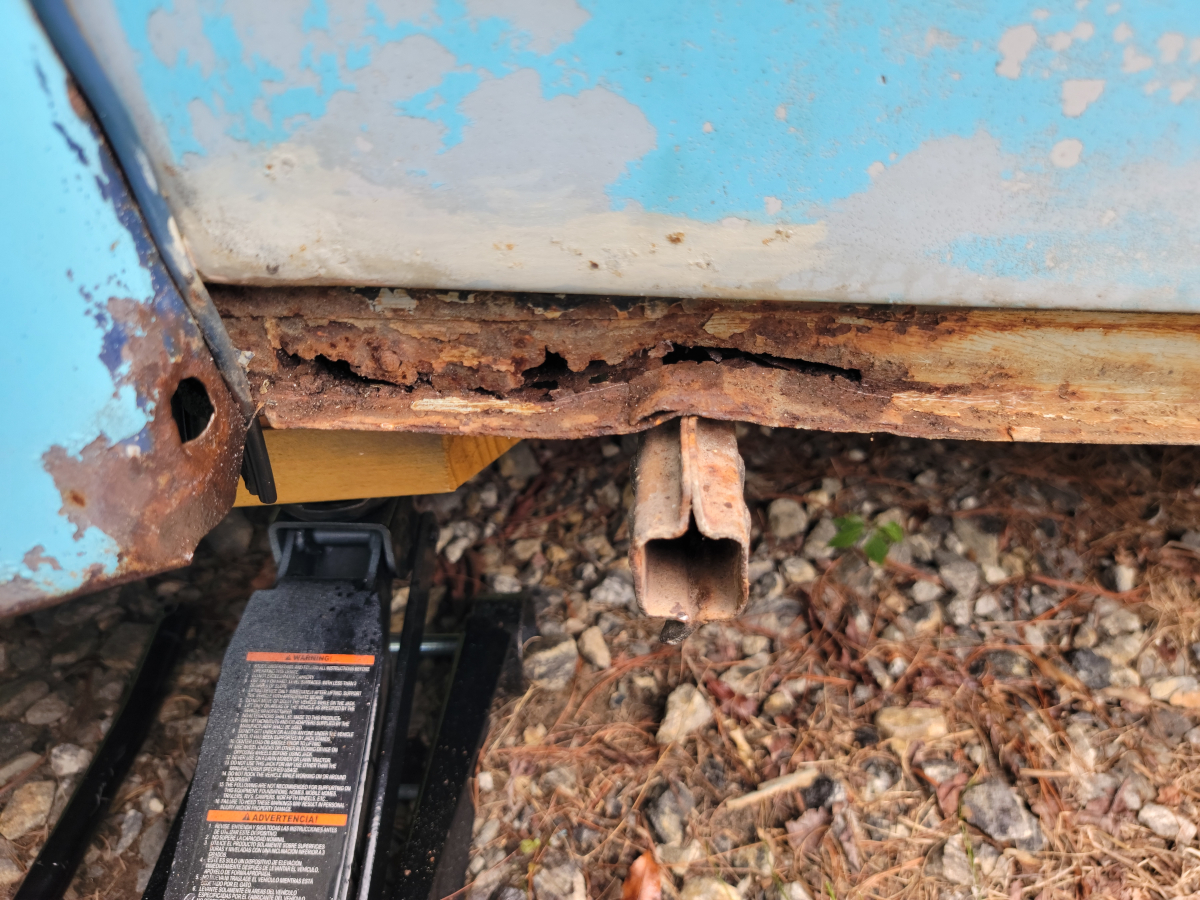
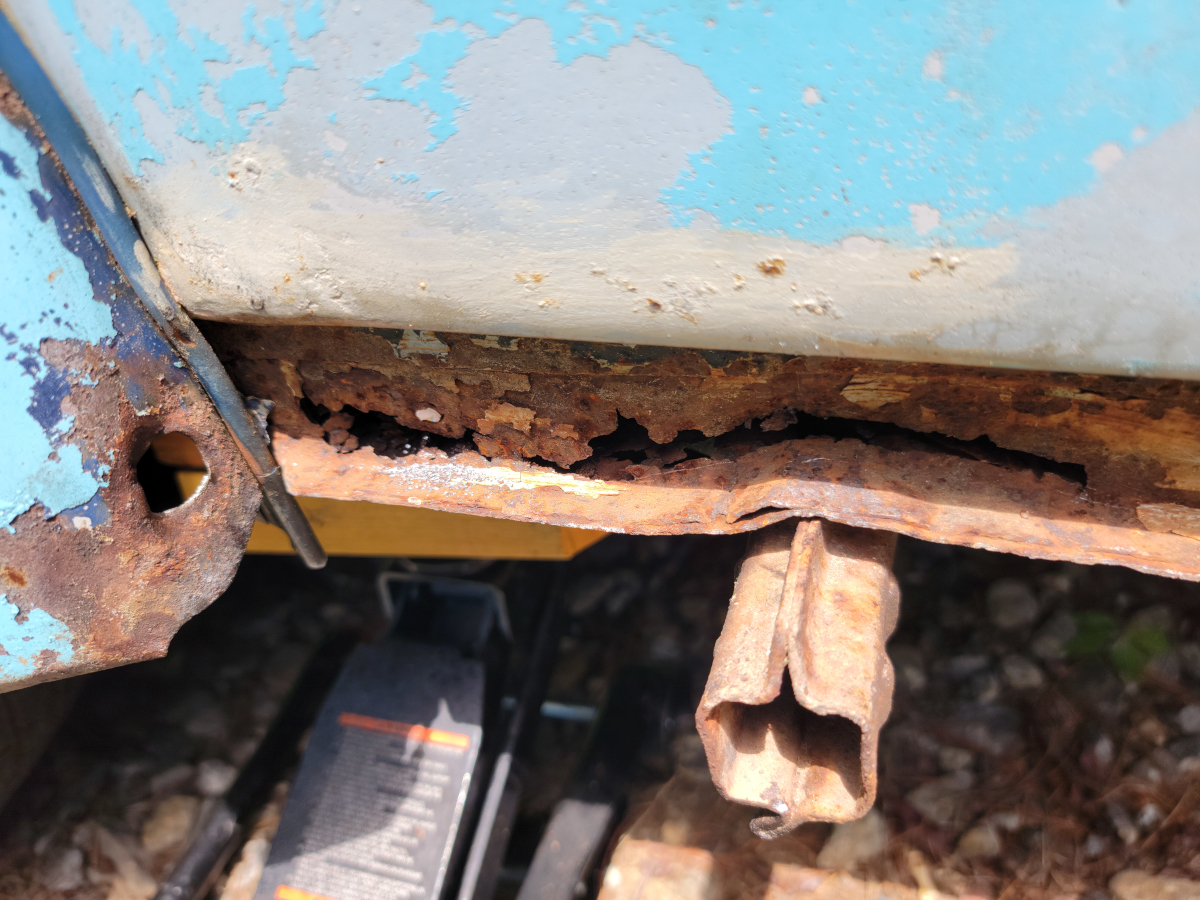
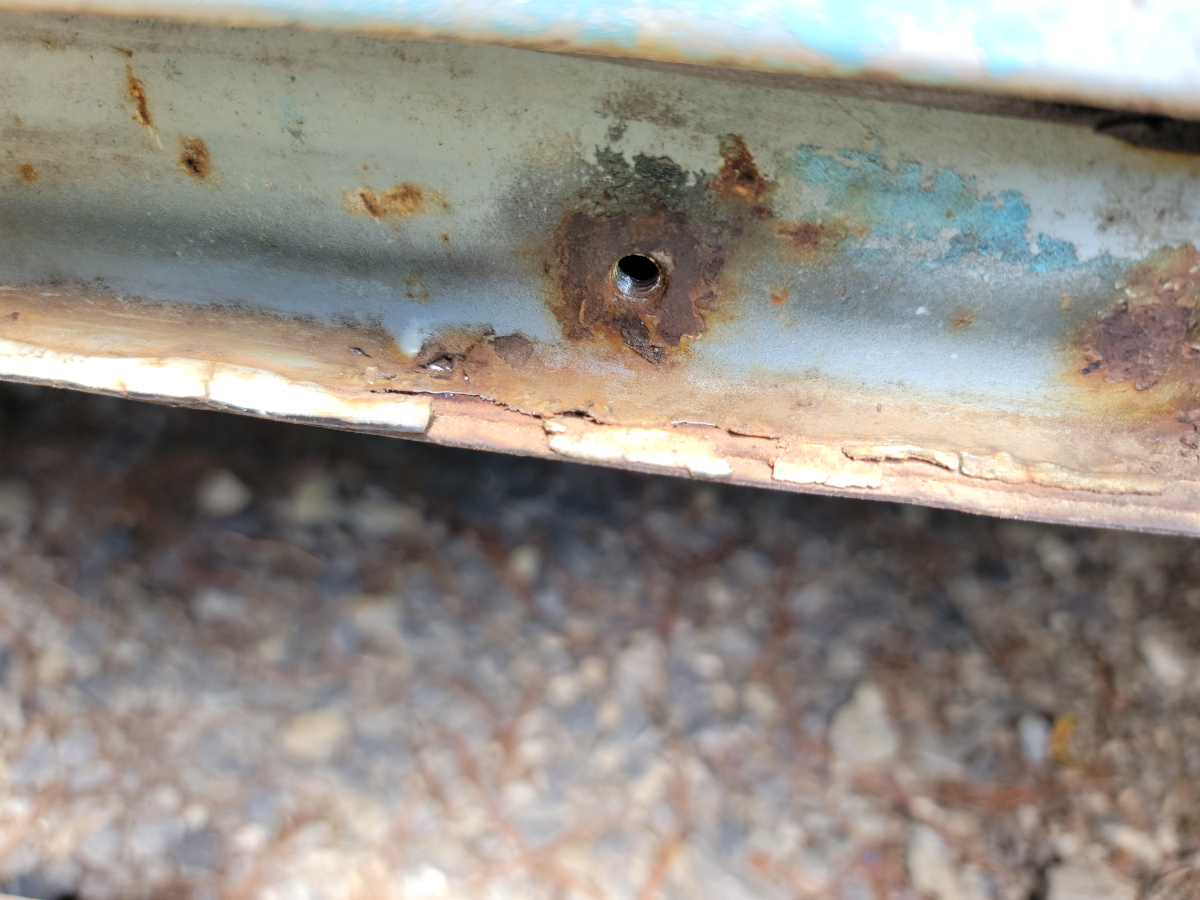
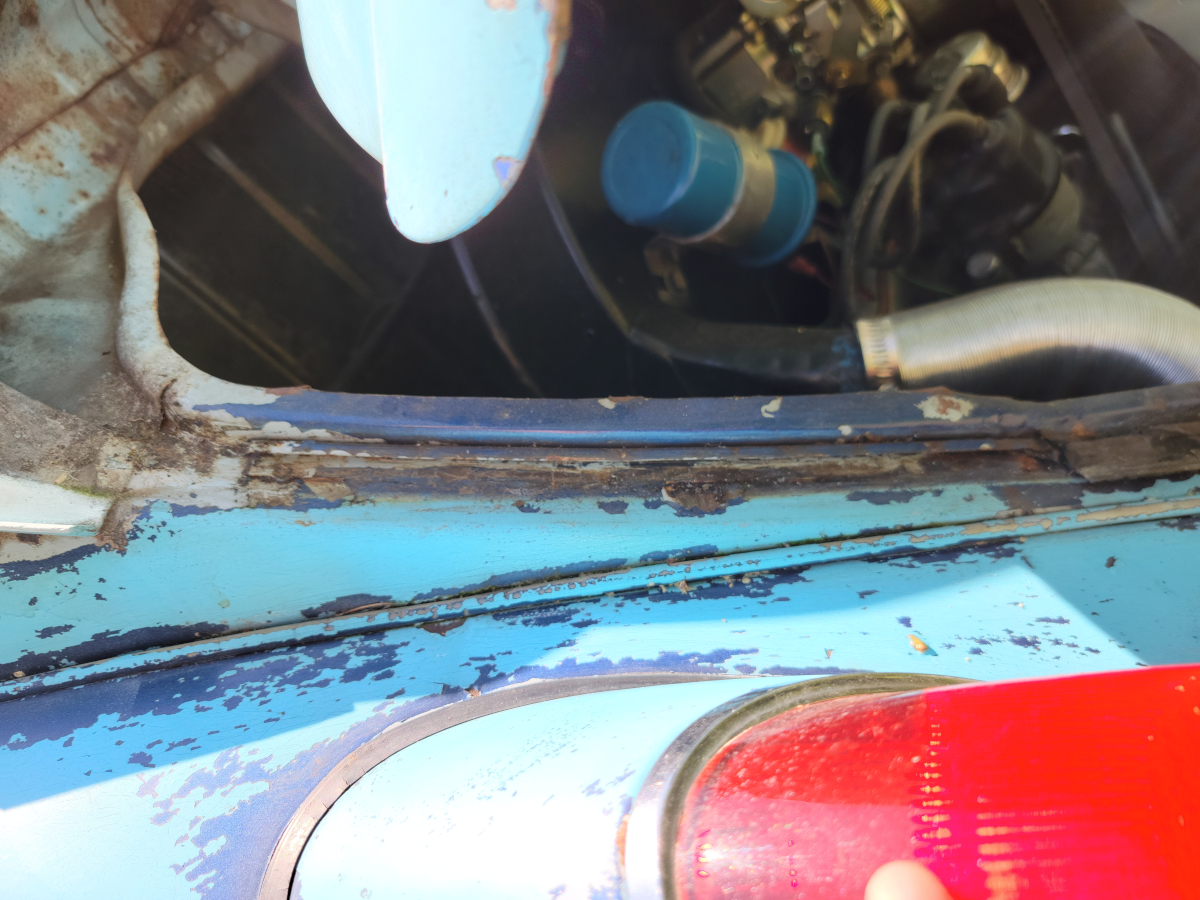
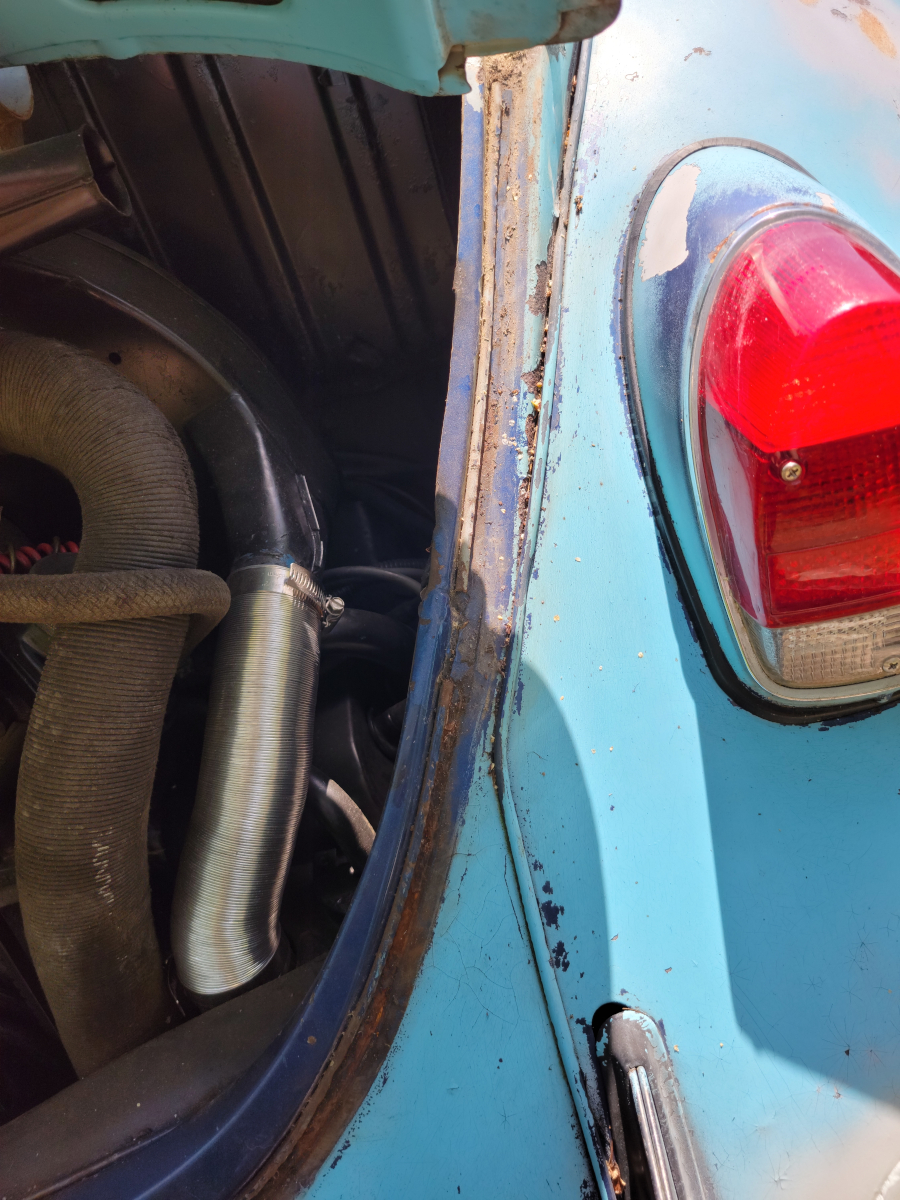
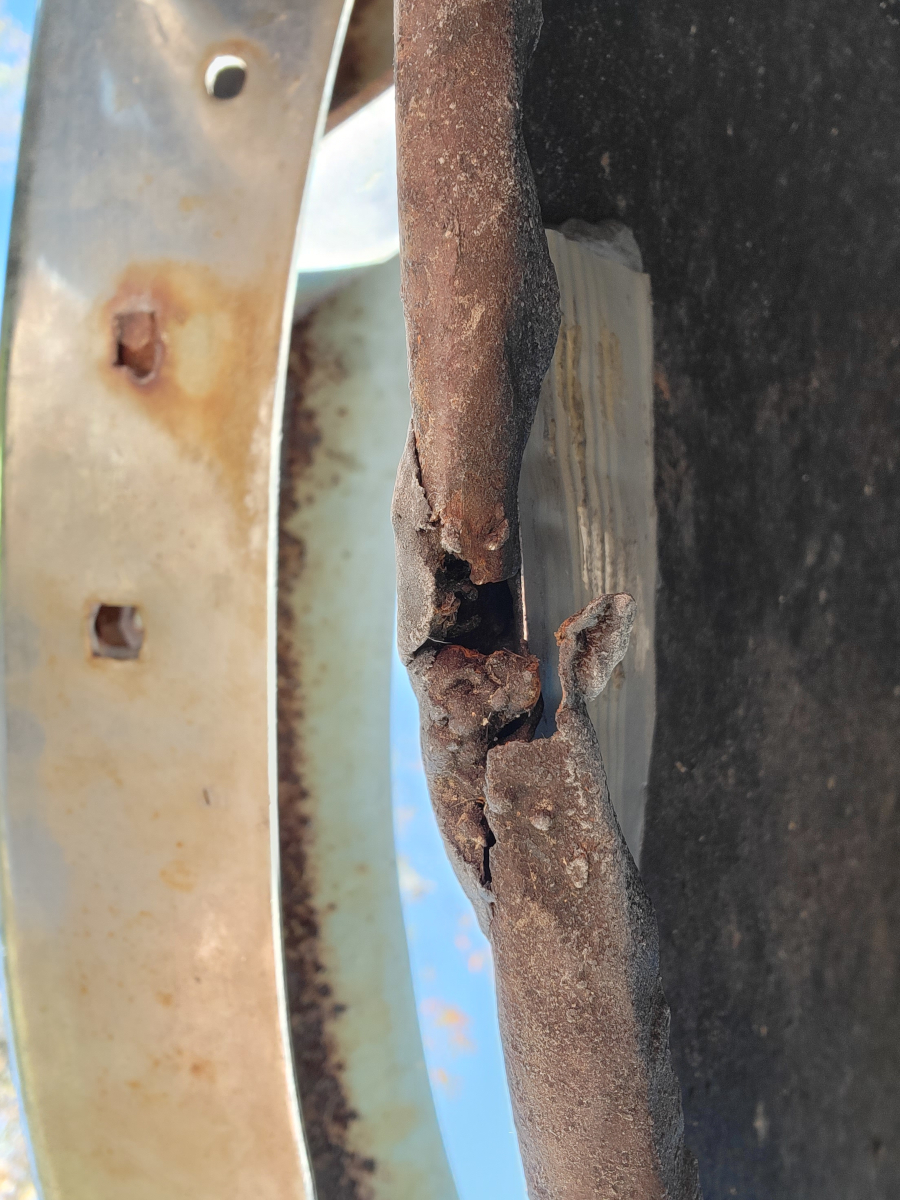
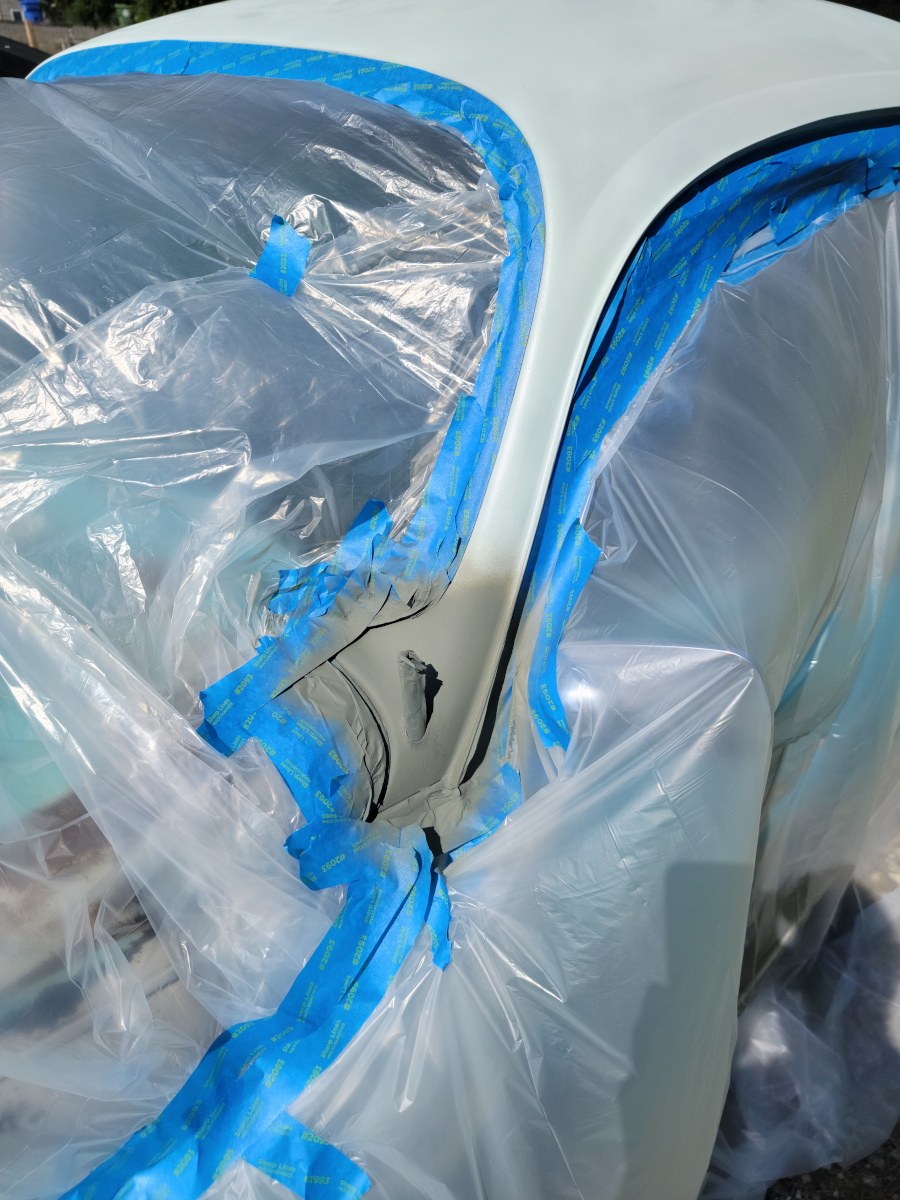
In the previous post, I found a nasty rust hole in the heater channel/frame in front of the rear fender on the passenger side. Through that hole in the side, I could also see the ground underneath, so there is more work to do under there. Today, I’m going to (not) repair the rust hole in the side.
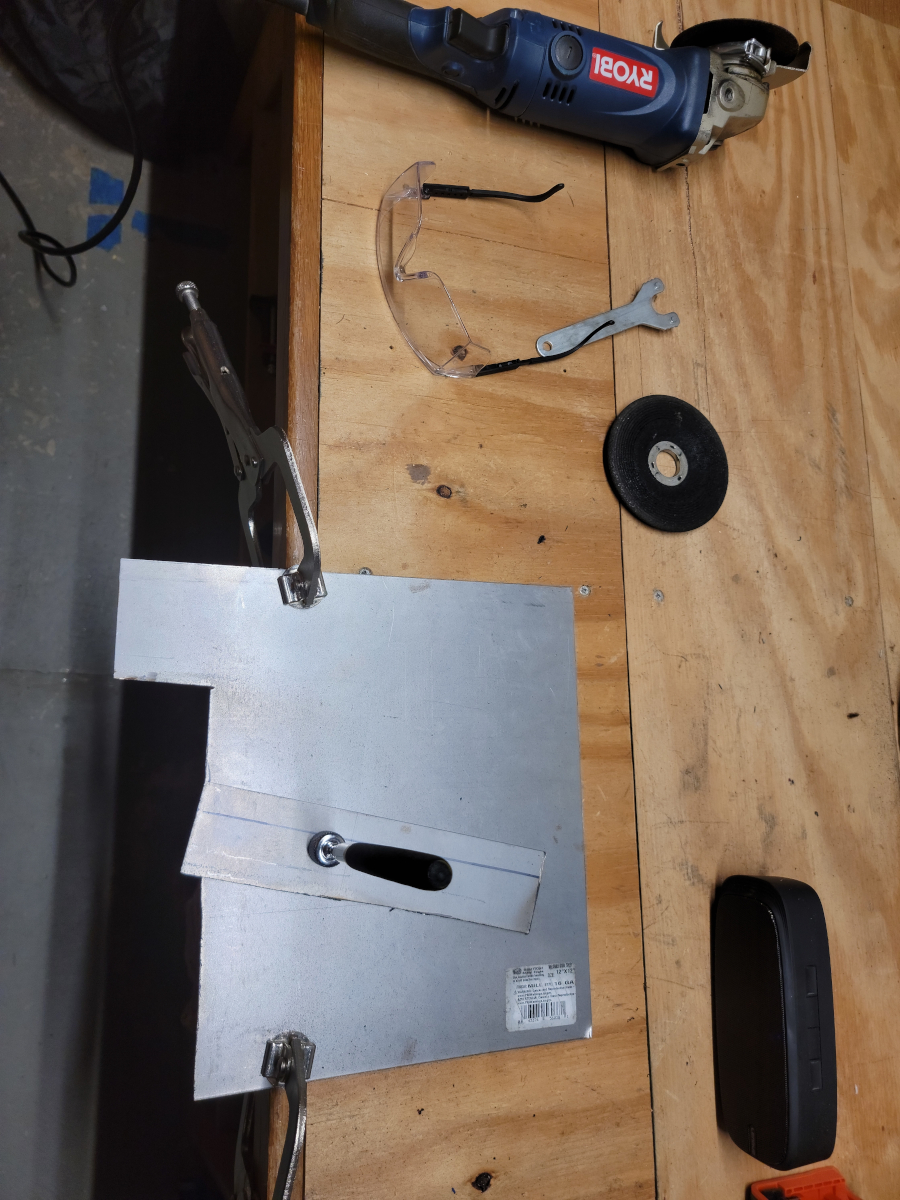
I don’t have a welder and it will potentially be a couple of months before I can get access to one. I decided to take quick action and create plates to box in the affected area. Later, I will cut out the affected areas and properly weld the plates in.
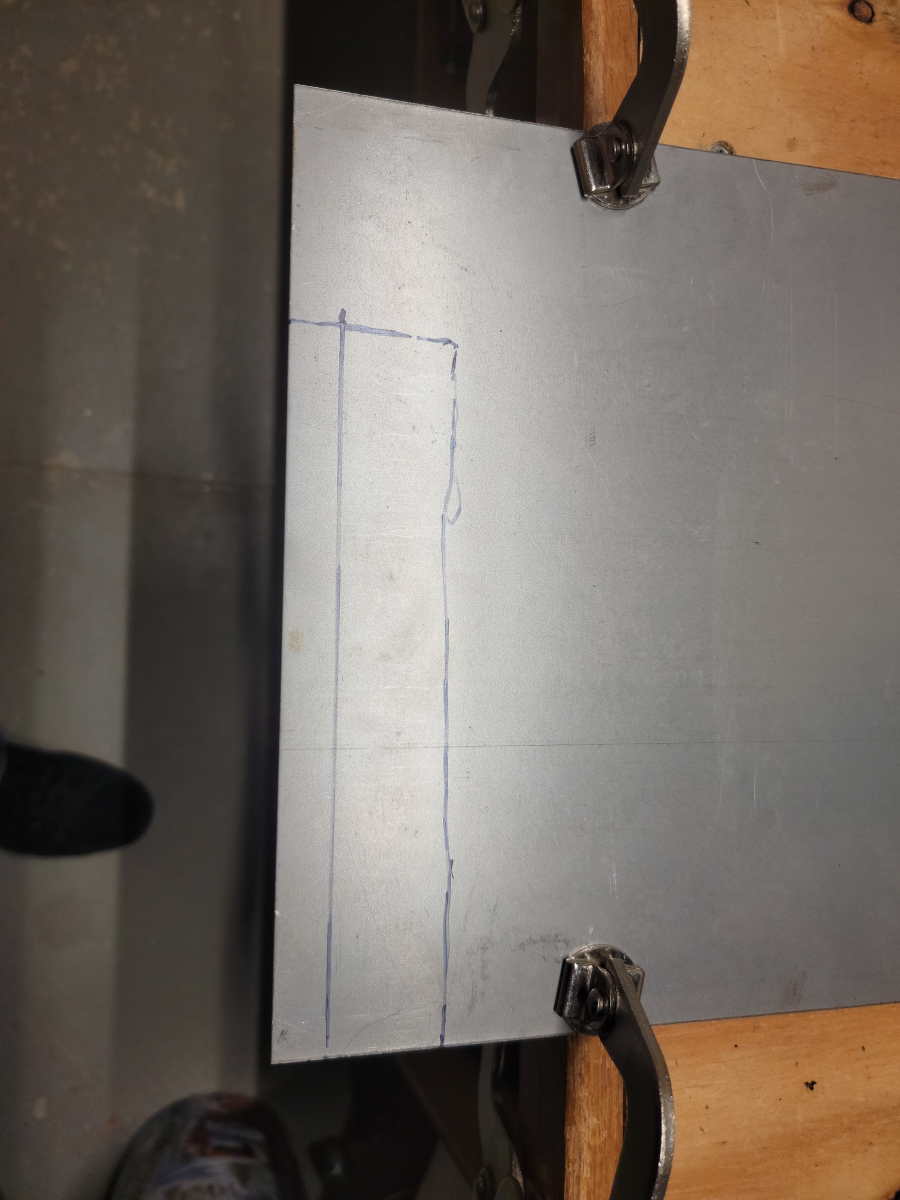
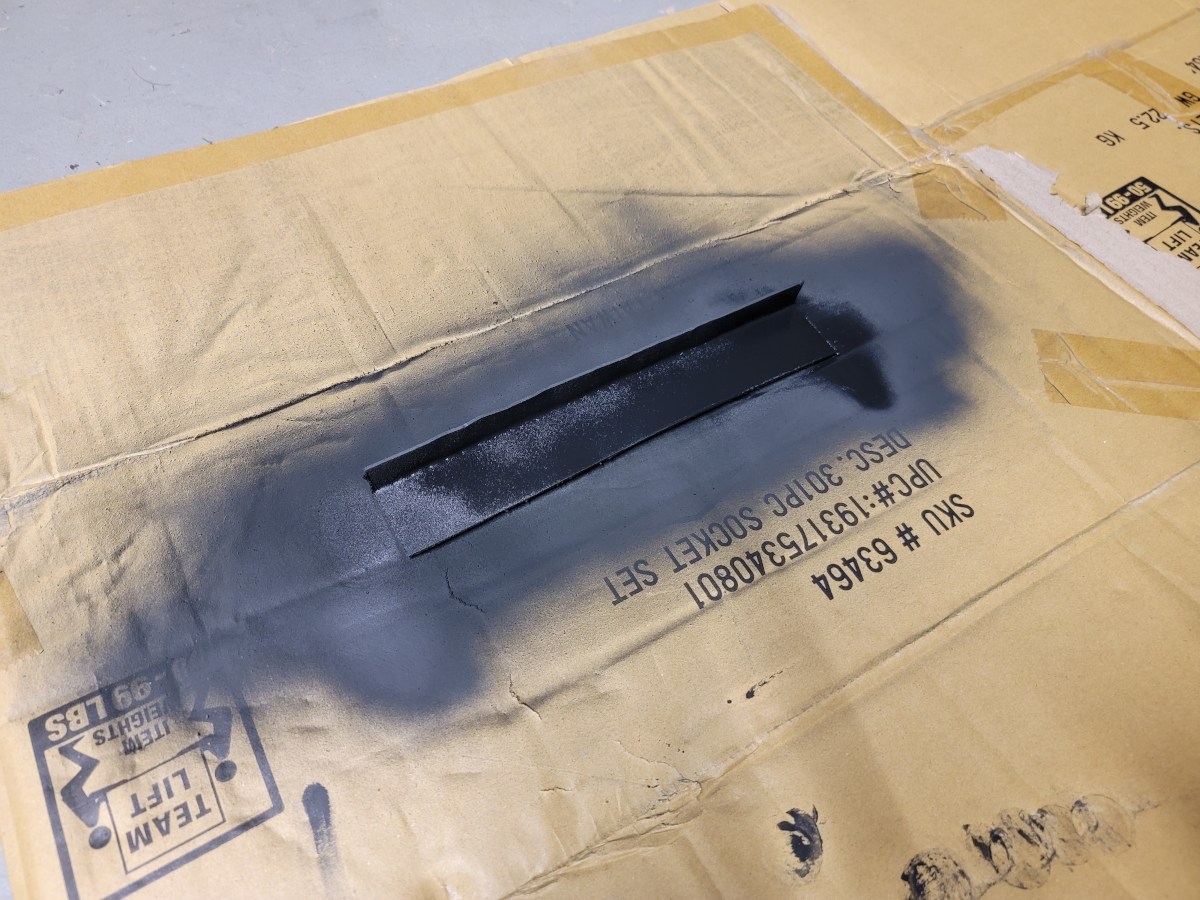
I started the process by cutting out a template for the C-channel. For simplicity, my plate will be an L. Since the size of the C-channel should be consistent, I made the template under the door, nearer to the front of the car. Back in the rusty area, the channel was bent out of shape (as per usual) from the factory jack point below.
The plate, once it’s in place, will strengthen and reinforce the area, but also will force the channel back into shape.
I had purchased a 12 inch by 12 inch panel of 16 gauge sheet steel at Home Depot (homedepot.com link). I will likely only have access to a stick welder and from what I’ve read online, 16 gauge is as thin as you would want to go to have a chance at getting a solid weld. That’s also the thickest that they had available in stores.
I traced the template out on the sheet steel with a marker.
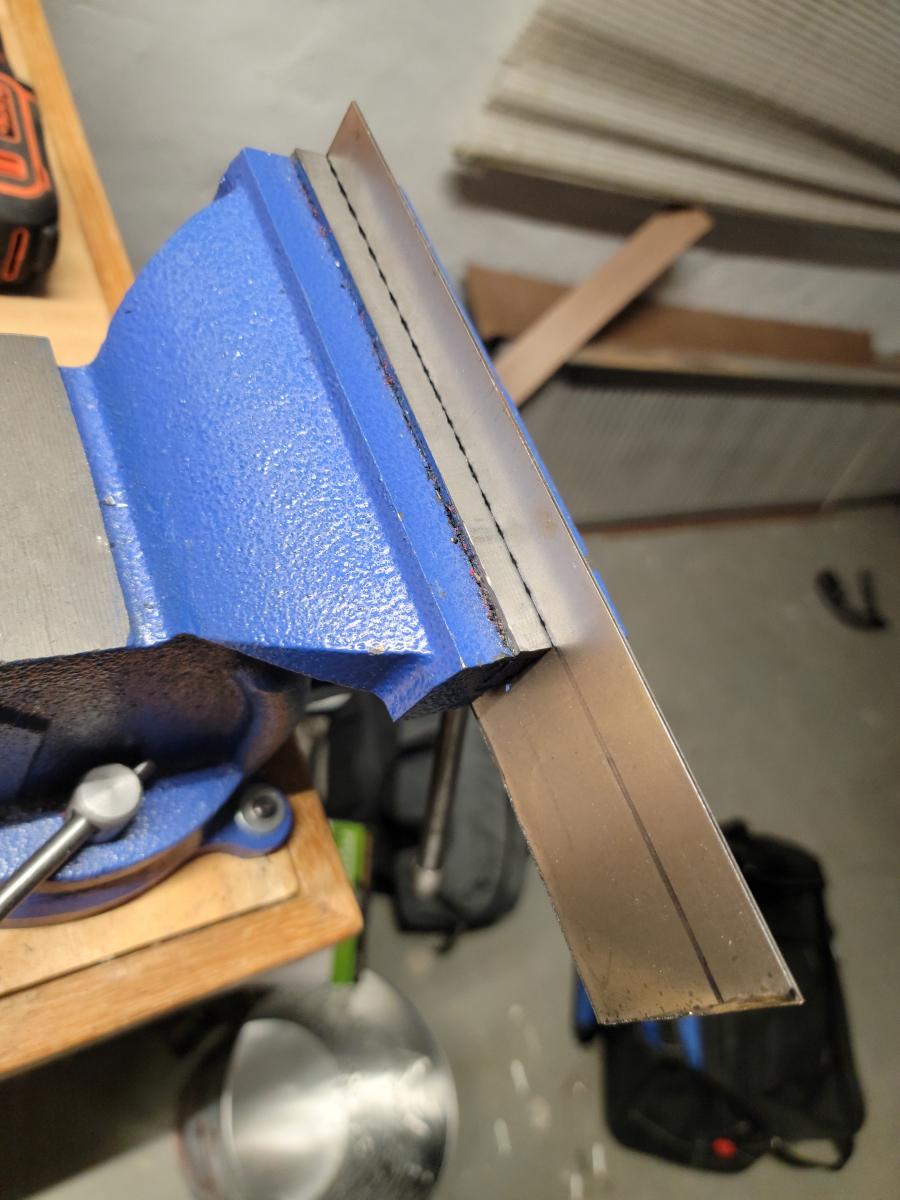
And then applied my best death wheel artistry.
I then locked it in the bench vise…
…and applied some 4 pound mini sledge artistry. We don’t need no stinking sheet metal brake.
Actually, the whole piece bowed a bit from the force, so yeah, a sheet metal brake would have been great…
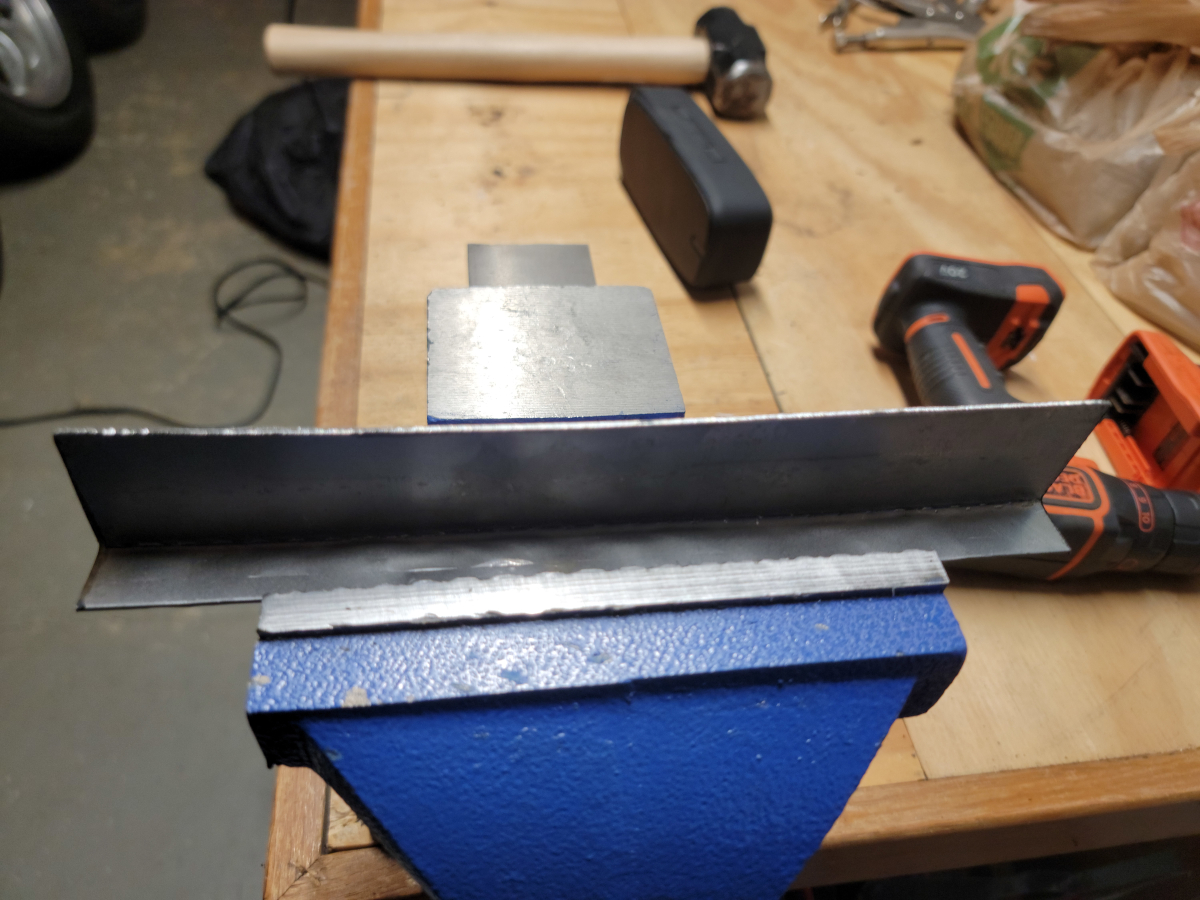
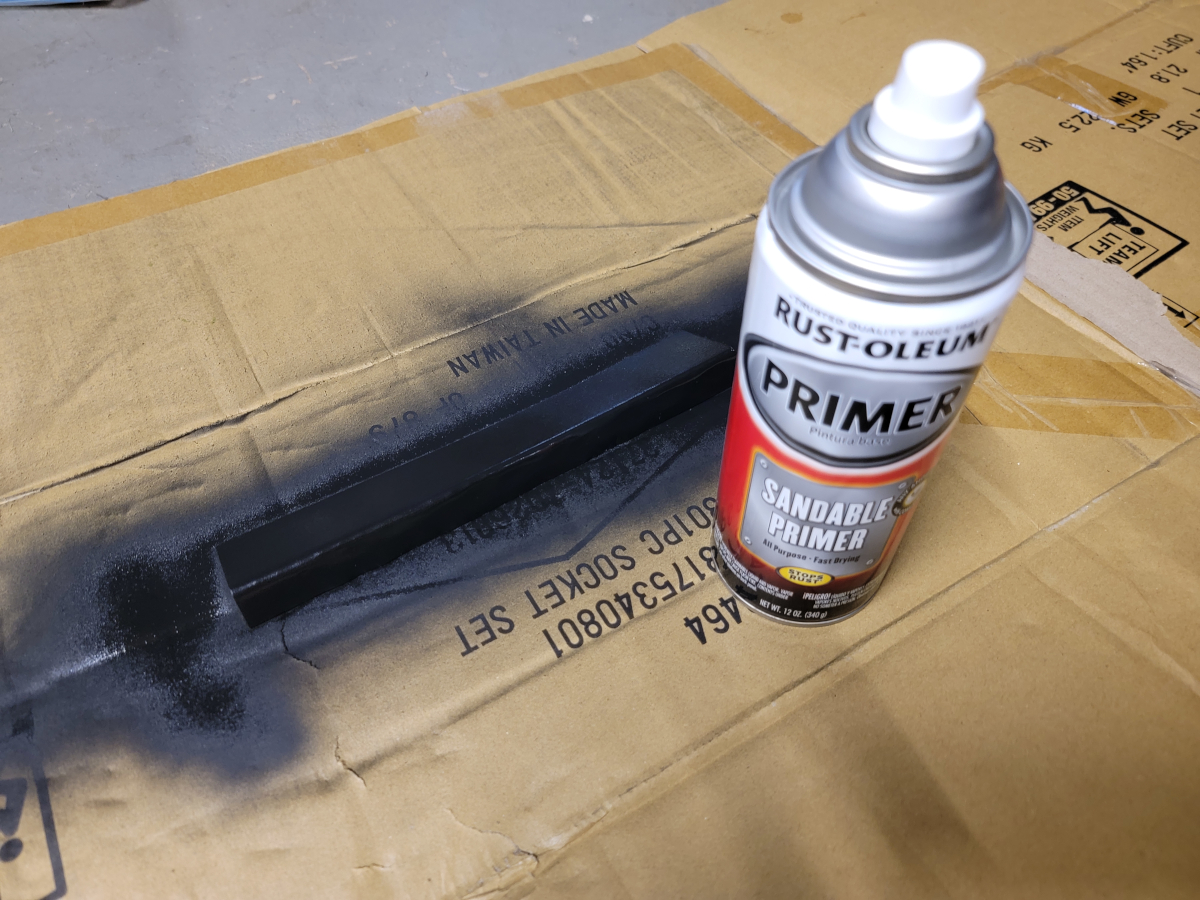
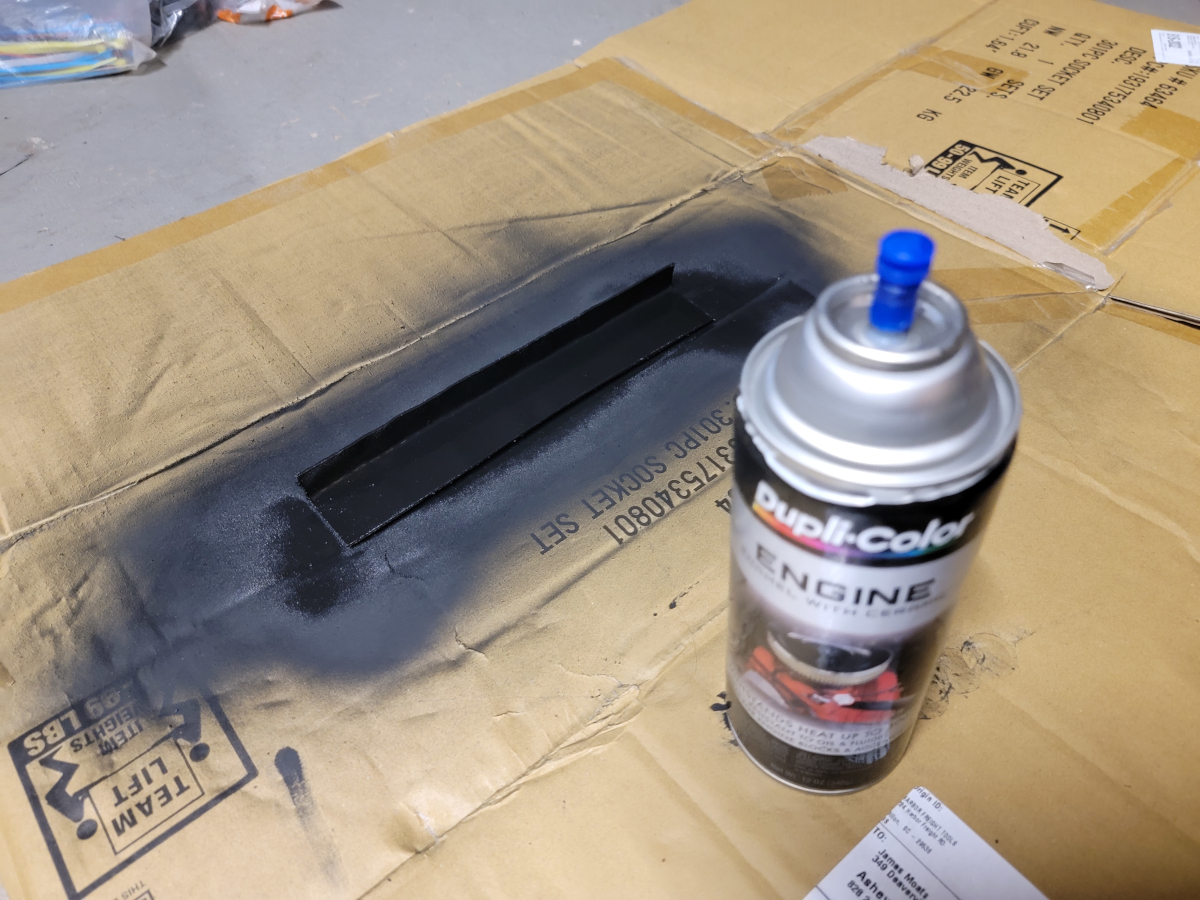
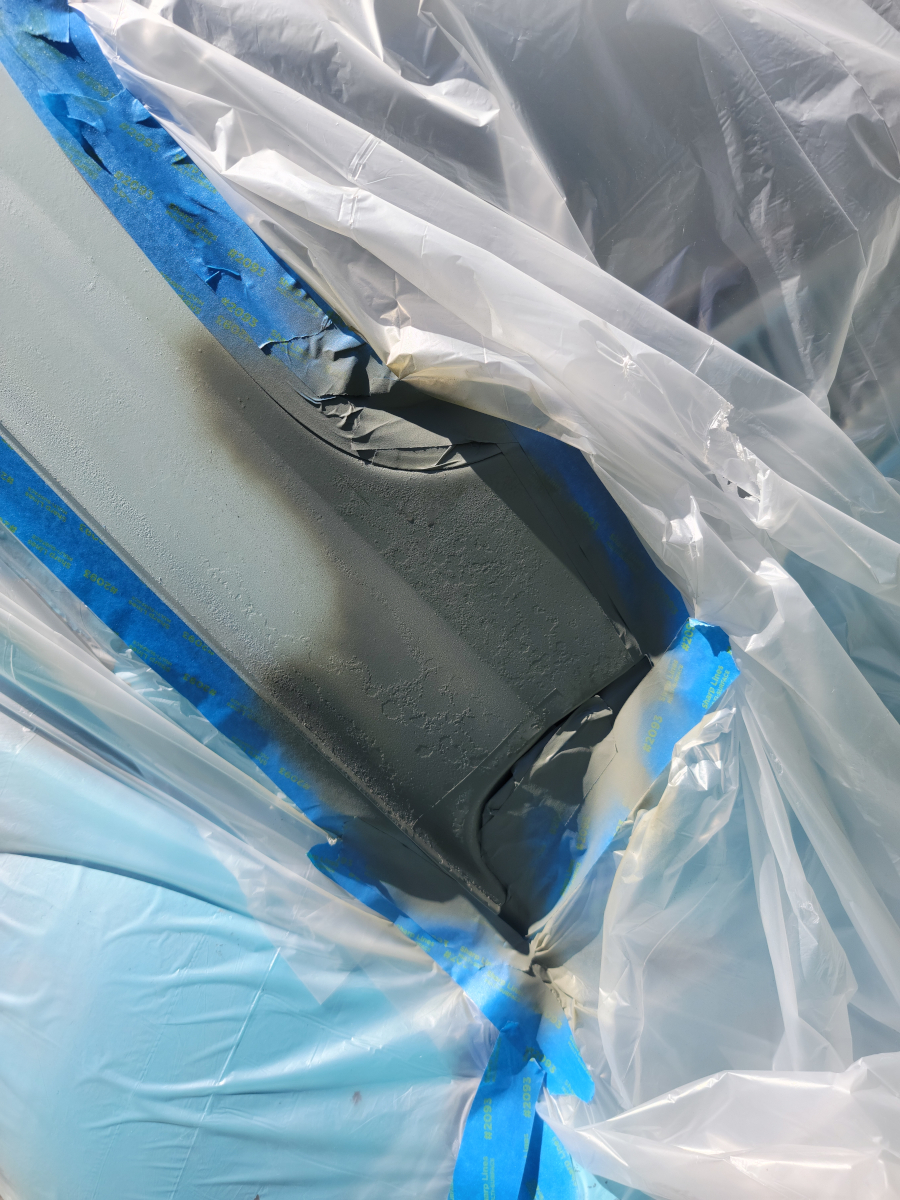
I washed and wiped the plate down with brake parts cleaner and then acetone, both of which nearly blackened the rag. Once it was dry, I sprayed it down with primer.
And then a layer of engine black. The can is still spitting little bits of ceramic (I assume). Luckily, it’s not the full silly string action that started happening in the Refinishing the Rear Seat post.
A couple of hours later, I took the plate back outside and clamped it in place with a couple of vise grips. I had a little remnant of a roll of shelf lining stuff that I hoped would “cushion” the grip.
In the image above, it’s clear that I really wasn’t paying attention – or if I may be so bold as to say “being super lazy” – I didn’t cut the necessary notch to allow the plate to fit in behind the edge of the fender. That left a little bit of exposed rust and pushed the plate forward an inch or so. I will need to cut that notch out and align the plate properly before welding.
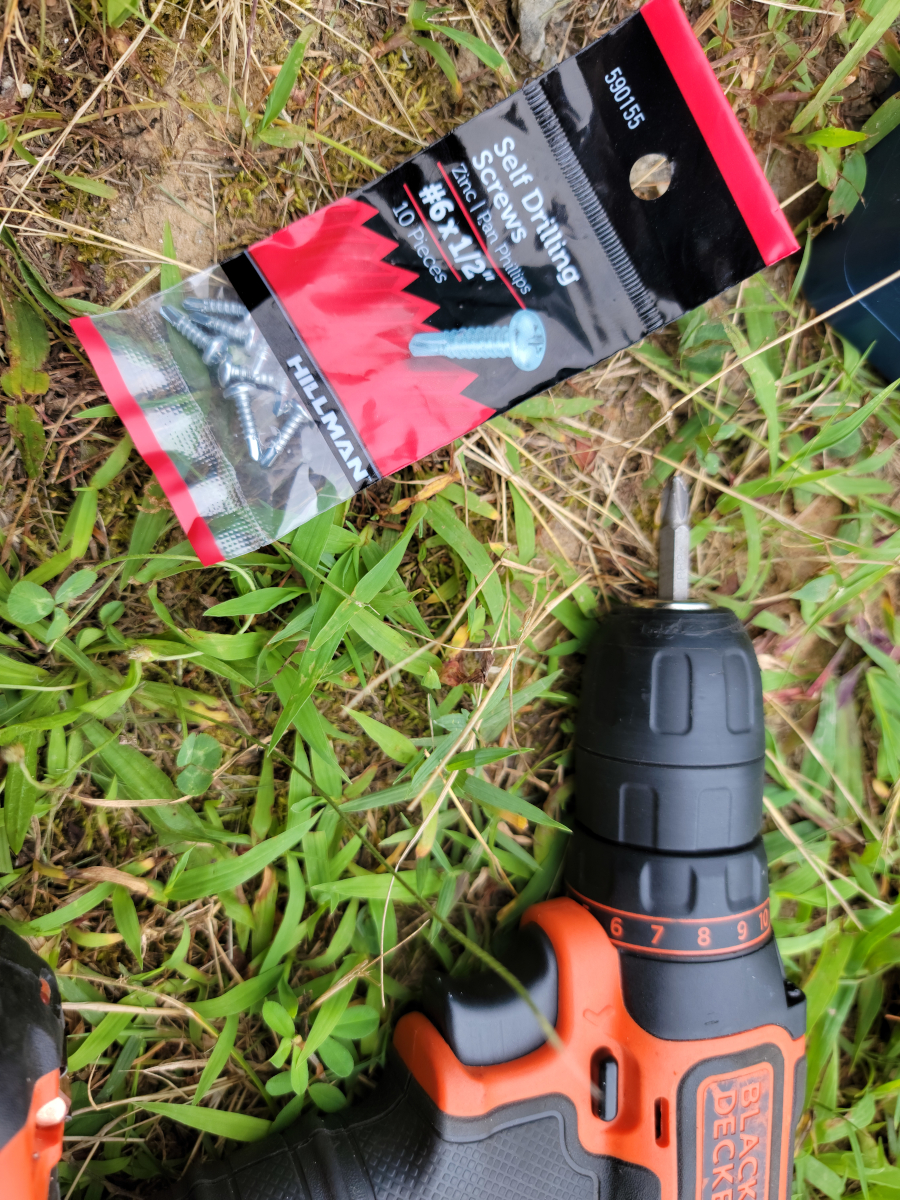
Along with the sheet steel, I picked up a couple of packs of the smallest self drilling screws they had at Walmart (walmart link).
Once the screws were in place and the vise grips removed, it was clear that my paint prep was subpar. I didn’t scuff up the surface like I knew I should have. All of those layers of paint and primer peeled right off, stuck to the shelf liner material.
Regardless, we’re square again.
I then added another quick coat of engine black to cover up the bare metal spots.
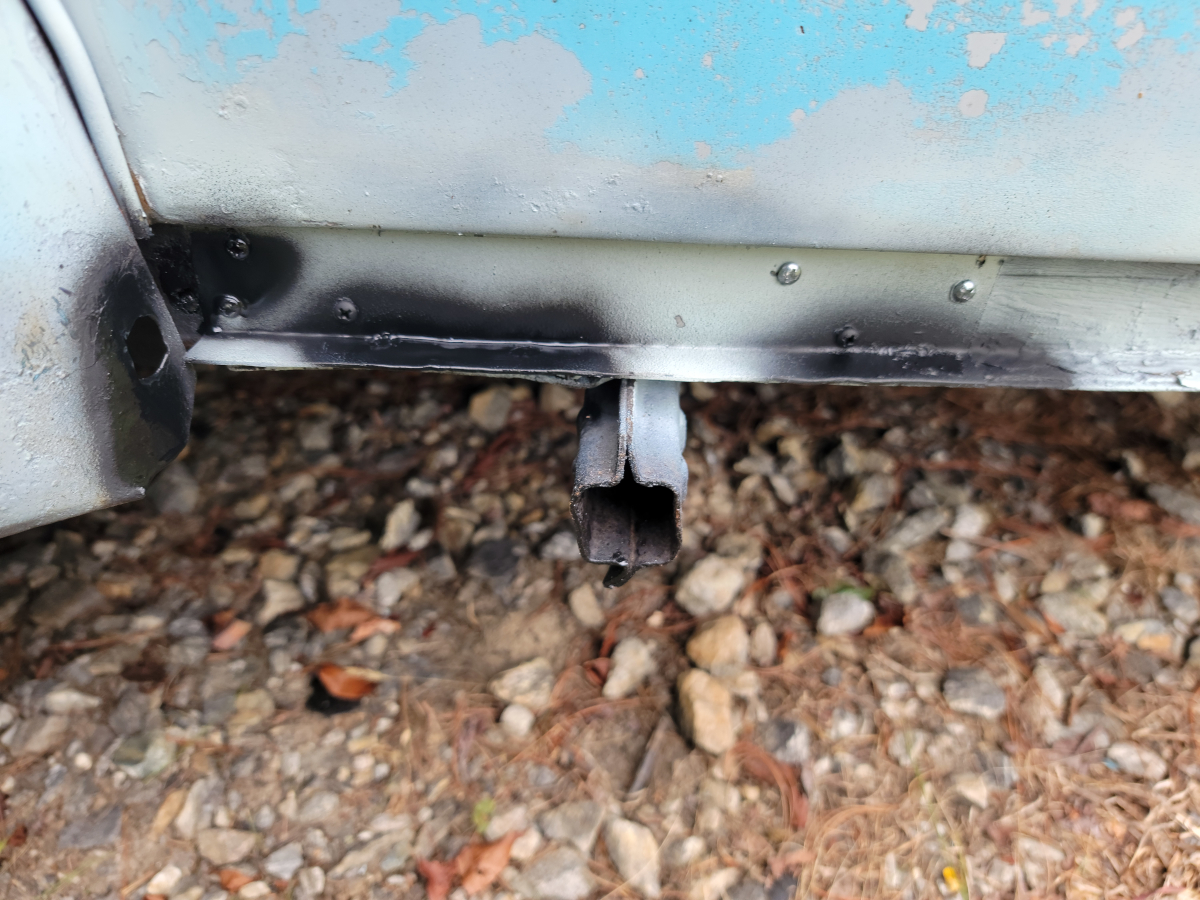
Next, I drilled a couple of holes through the bottom leg of the L and shot some rivets through. My chintzy hand riveter was barely up to the task and the largest rivets I have were barely long enough the reach through the layers of steel.
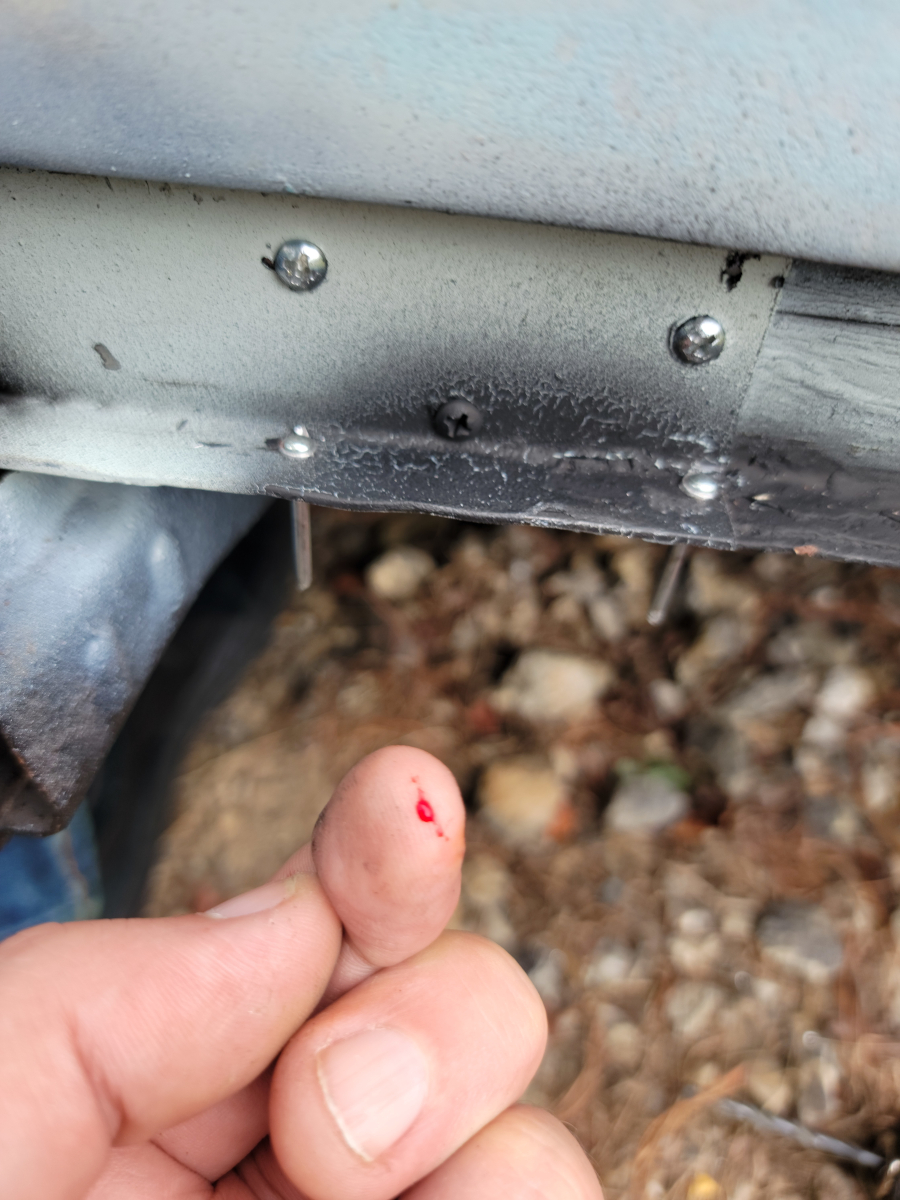
Of course there’s blood. And that’s a really inconvenient place for it. I didn’t feel when it happened. Instead, I just noticed that everything was getting smeared with blood.
Now, moving further back to drill holes for more rivets. Whoops. Too far in. The rivet isn’t long enough to go through at an angle, so that will need to be filled…
And whoops again! But at least there was enough room for a rivet this time.
Yeah, that’s proper fixed real good like.
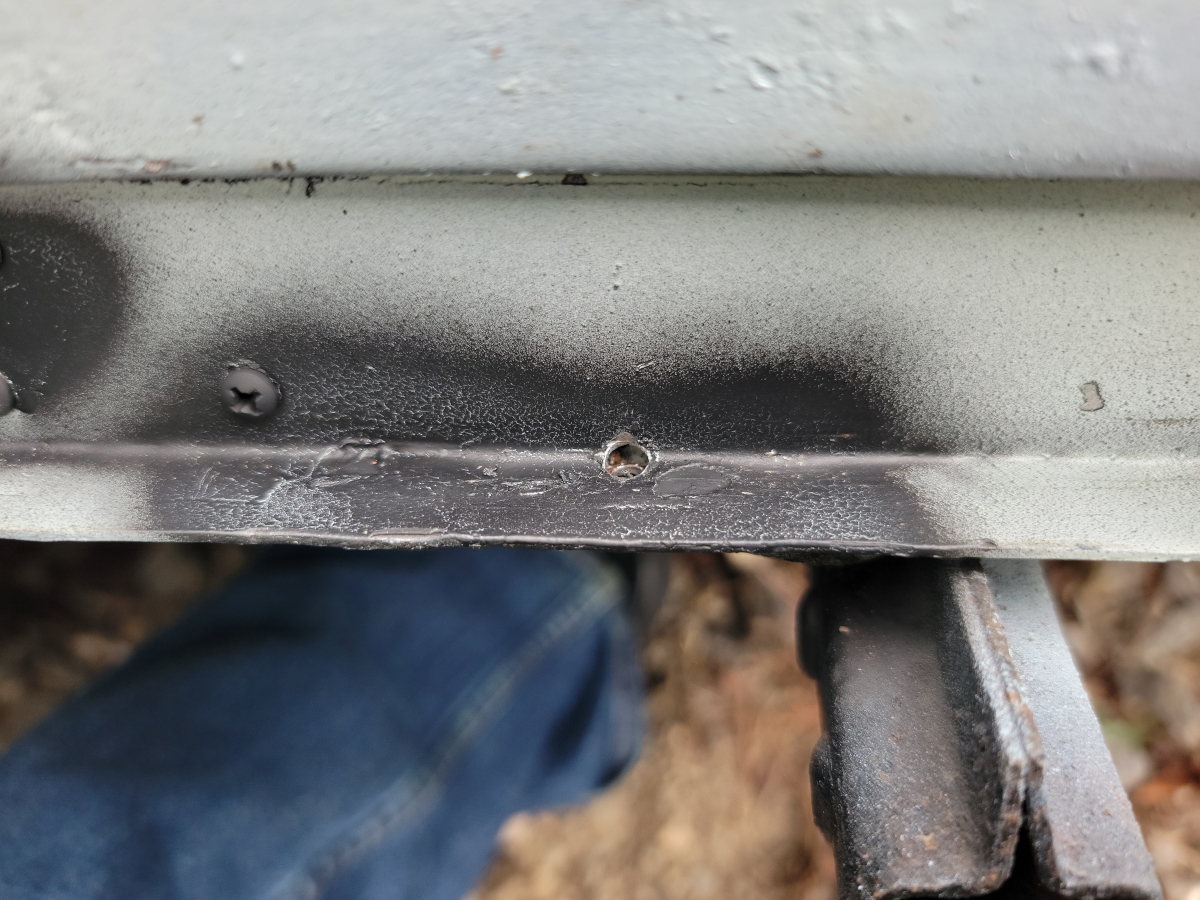
And boom, like it never happened…
Nothing to see here.
Expert over-spray on the rear tire there. Good job, man. Real proud of ya.
In the previous post, I got started trying to replace the running boards, with only moderate success. It was a complete failure at replacing the actual running board. But, I was able to get all of the broken body bolts drilled out, tapped, and replaced.
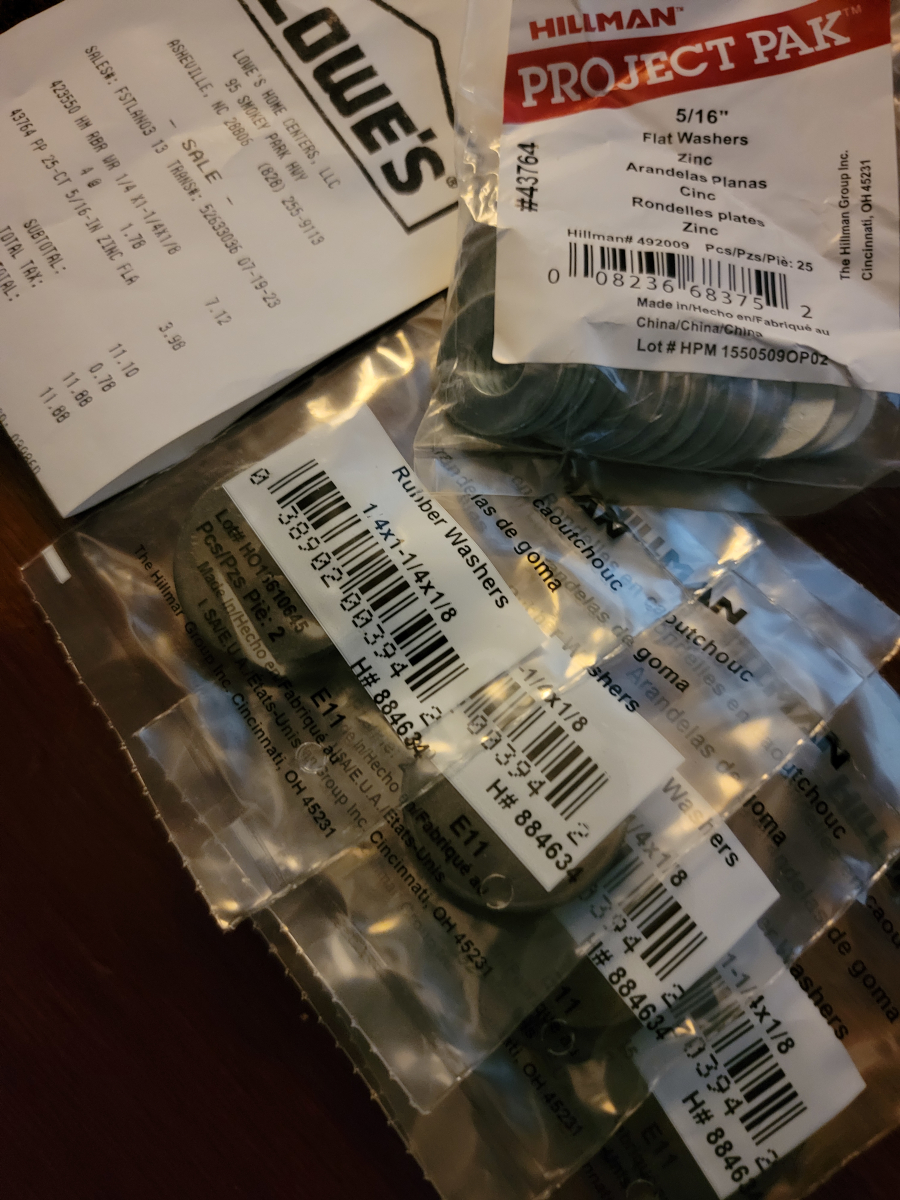
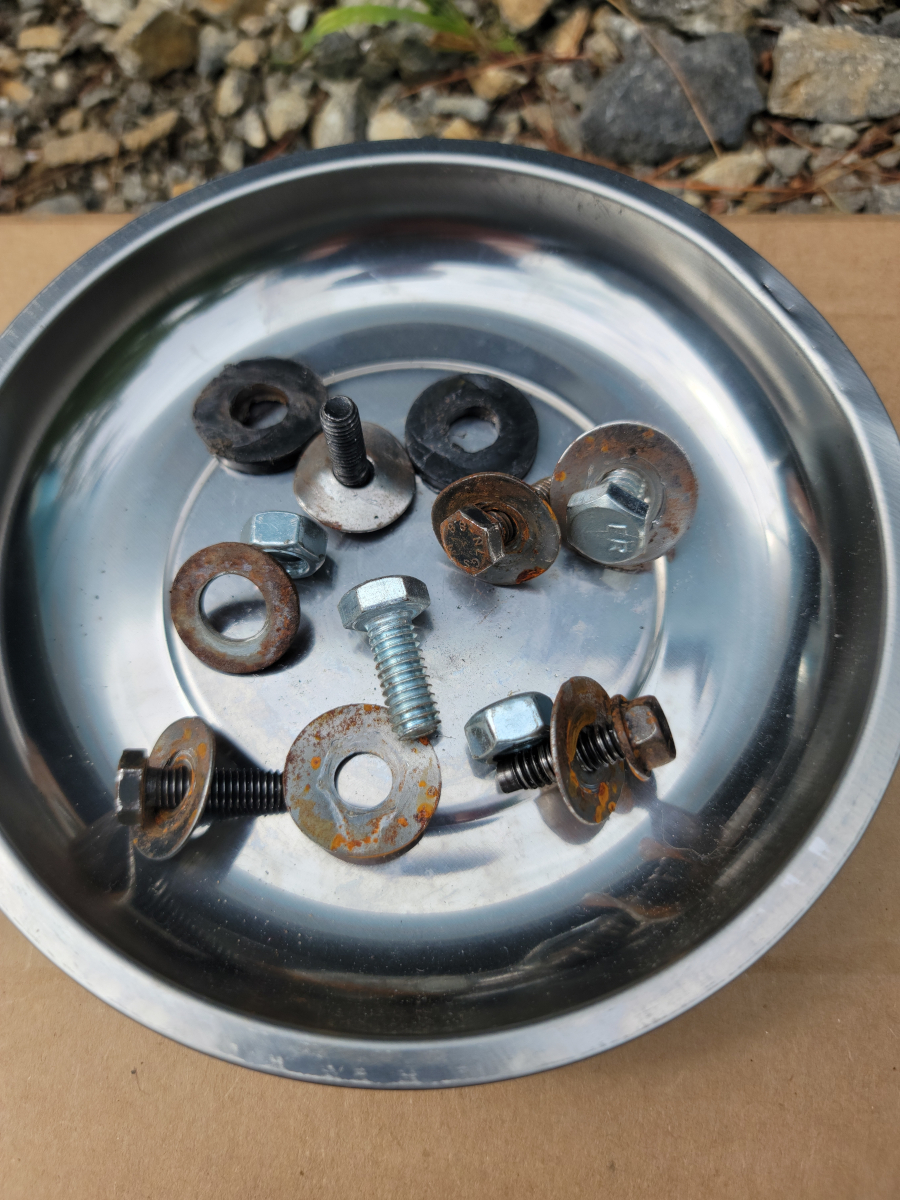
The hardware that came with the new running boards was really chintzy. I have come to expect that. So, I picked up some new hardware at Lowe’s a couple of days ago.
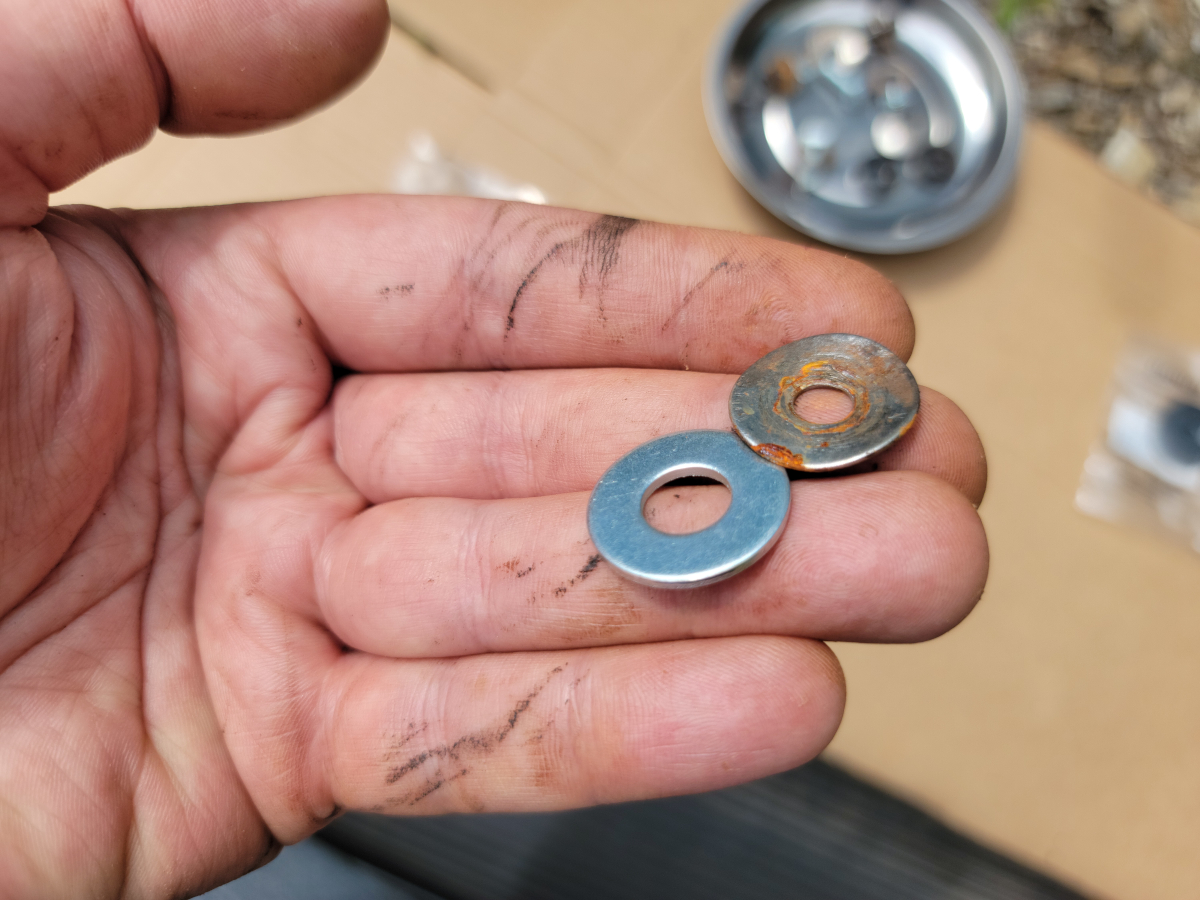
I removed the driver side running board again, to replace the washers. What I found was that after one week, the flimsy metal washers were already starting to rust.
You don’t always get what you pay for. Yeah, I may have mentioned that before.
I decided to spend some more time trying to straighten out the jack point and channel. Jamming the end of a breaker bar in there, it easily straightened back out.
Then I hammered on the end of a ratchet, because the right tool for the job, or whatever.
And then sprayed another obligatory coat of Rust Barrier and Matte Vintage Blue.
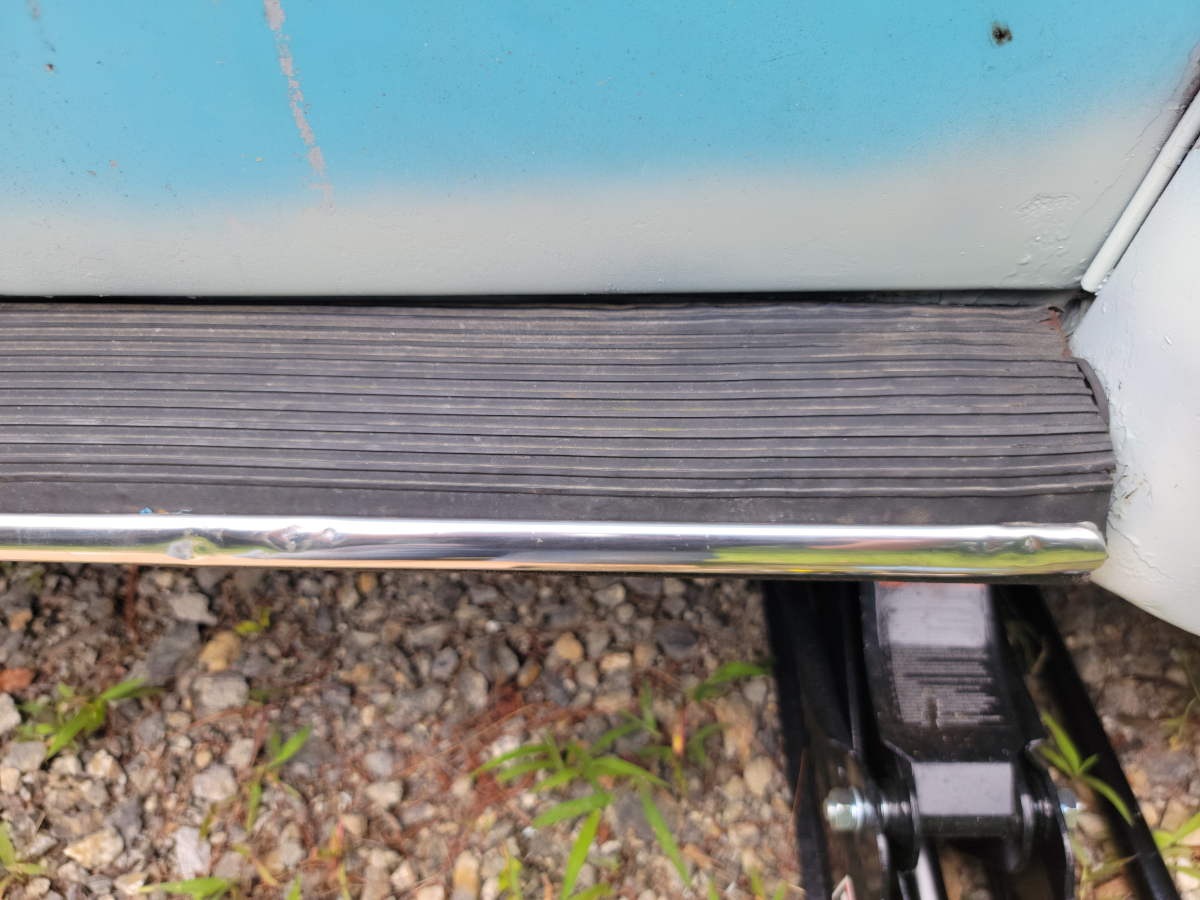
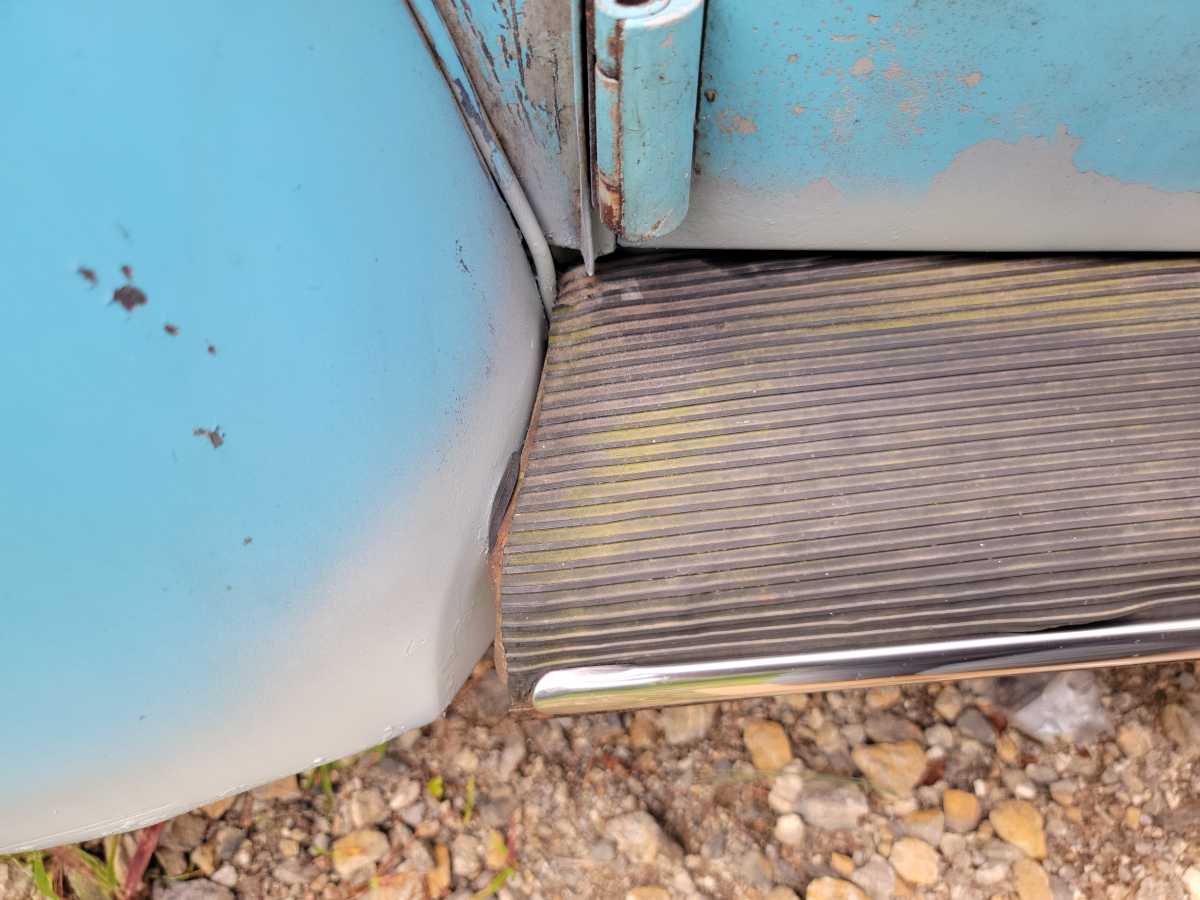
That channel is now perfectly restored and ready for the Concours d’Elegance. Next, I tried fitting the new running board again, but it’s still way too tall. My next brilliant idea was to swap the rubber cover over from the new one onto the old running board.
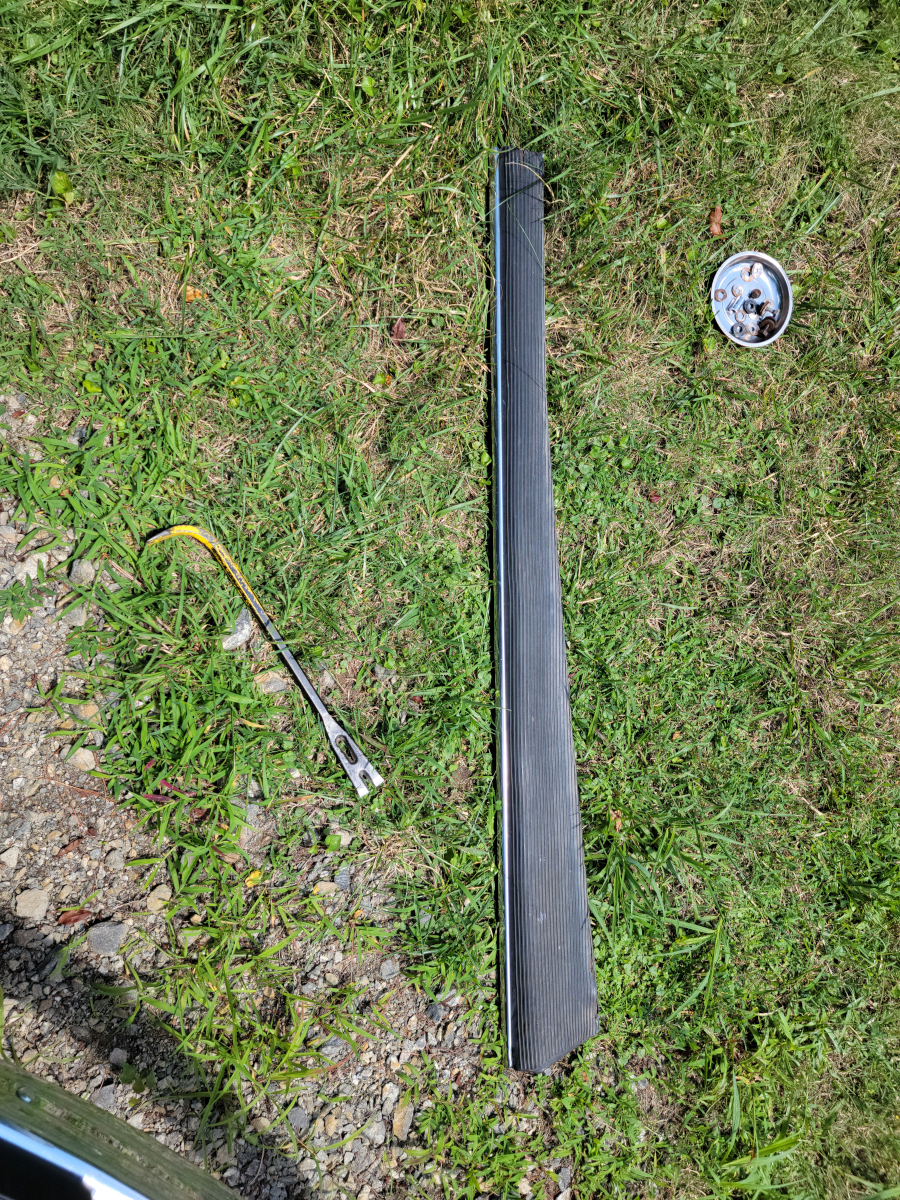
There is a groove across the back side that clips onto the edge of the sheet metal. That peeled back without issue. It’s a rusty mess under there.
On the front edge, the sheet metal is rolled and crimped over the rubber cover to hold it in place. I was able to get that pried open easily enough with a putty knife. However, the brittle, old rubber cover was just shredding.
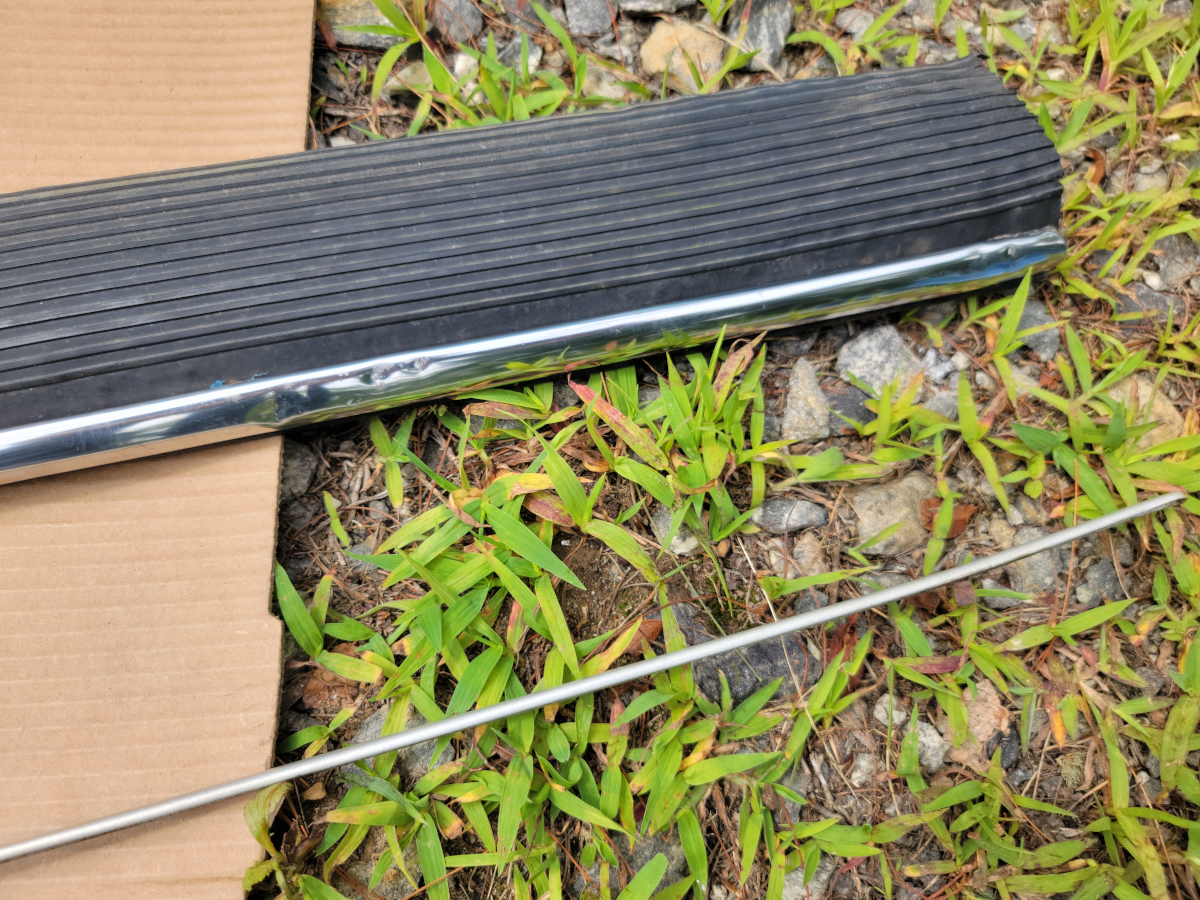
I decided to just put it back together. I would have been out there all day trying to get all of the shrapnel picked out of the channel. At least I can swap the metal trim strip over from the new running board. The ones on the car were from newer 70s model Beetles with the narrow trim strip. The new ones are supposedly the right size.
Once mounted, I peeled back the blue plastic protective cover. I found the new trim was made of the same stuff as the washers that came in the hardware pack. Ridiculous.
Old vs. new. I think the new trim pieces might be for the first generation. They are significantly larger than the one that was on there originally.
In any case, more brand new, shiny, dented, cheap crap mounted up!
The soft rubber fender washers did their job well.
Moving on to the passenger side, I got the new trim piece moved over to the old running board. The pry bar was not involved in this, it just happened to be laying there from before.
And I moved the old trim piece onto the new running board for safe keeping.
Oh hey, great news!
That’s going to take more than a Steel Stik to fix. I started to drill out one of the broken body bolts in that big rust hole. The whole thing started folding up under the pressure, so I left it alone.
So yeah, nothing to see here.
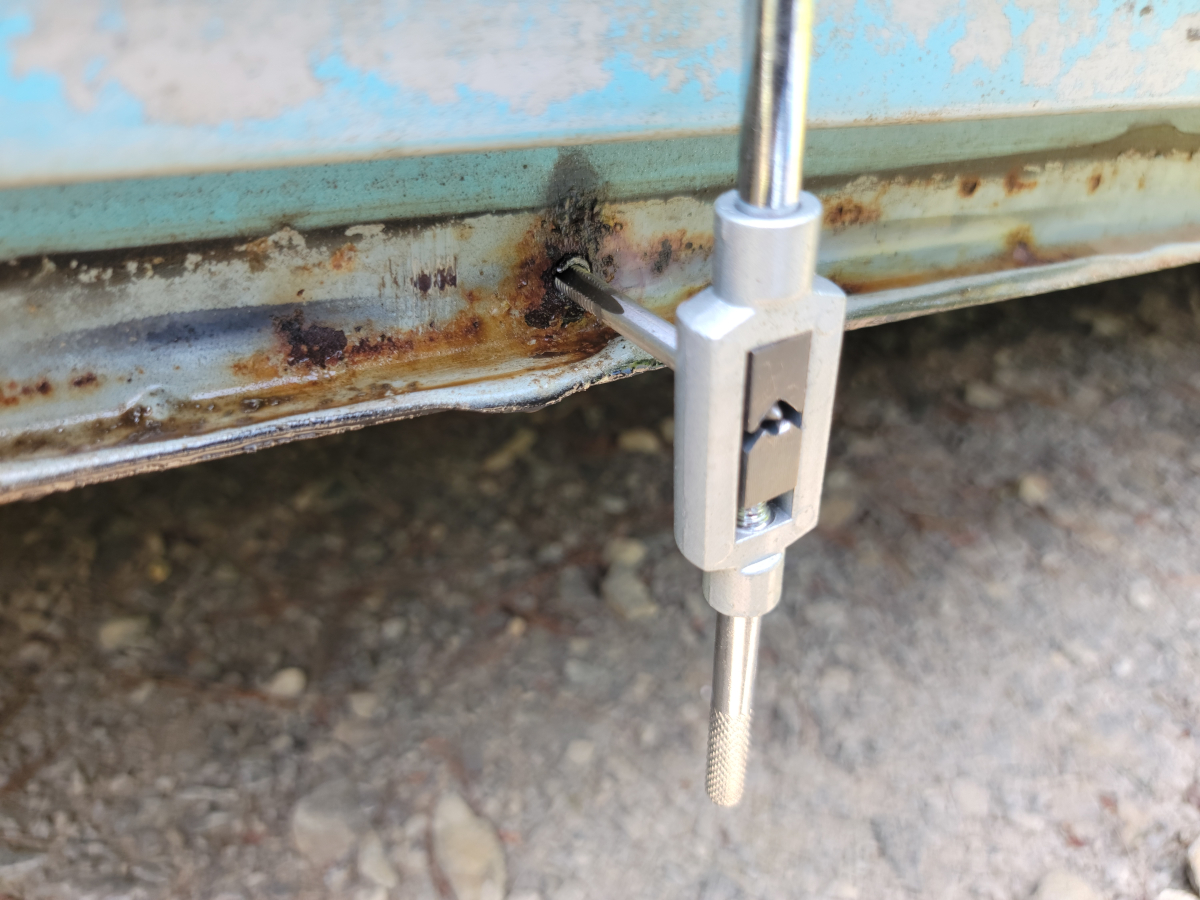
Moving on, I chased threads on the next rusty bolt hole, which had been missing a bolt.
The next one had a broken bolt, which I drilled and tapped. I clearly got off to a bad start at first… I did eventually get the hole drilled in the right place.
The last one had a bolt in it, but was still very crusty. I chased the threads on that one as well.
Rust Barrier engaged. I can rest easy now that the giant rust hole above the jack point is now fully reinforced!
Buttoning this all up for now, but that is going to require some serious attention sooner rather than later.
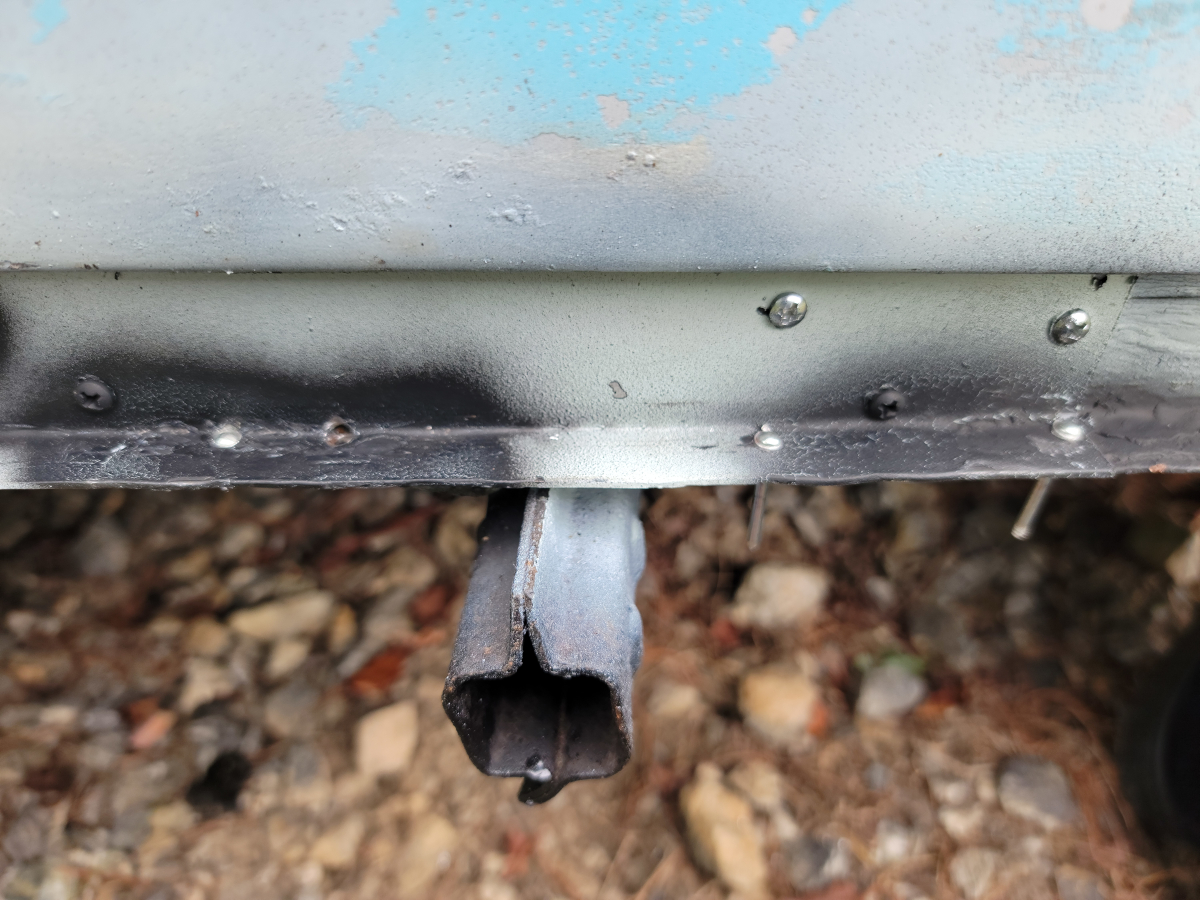
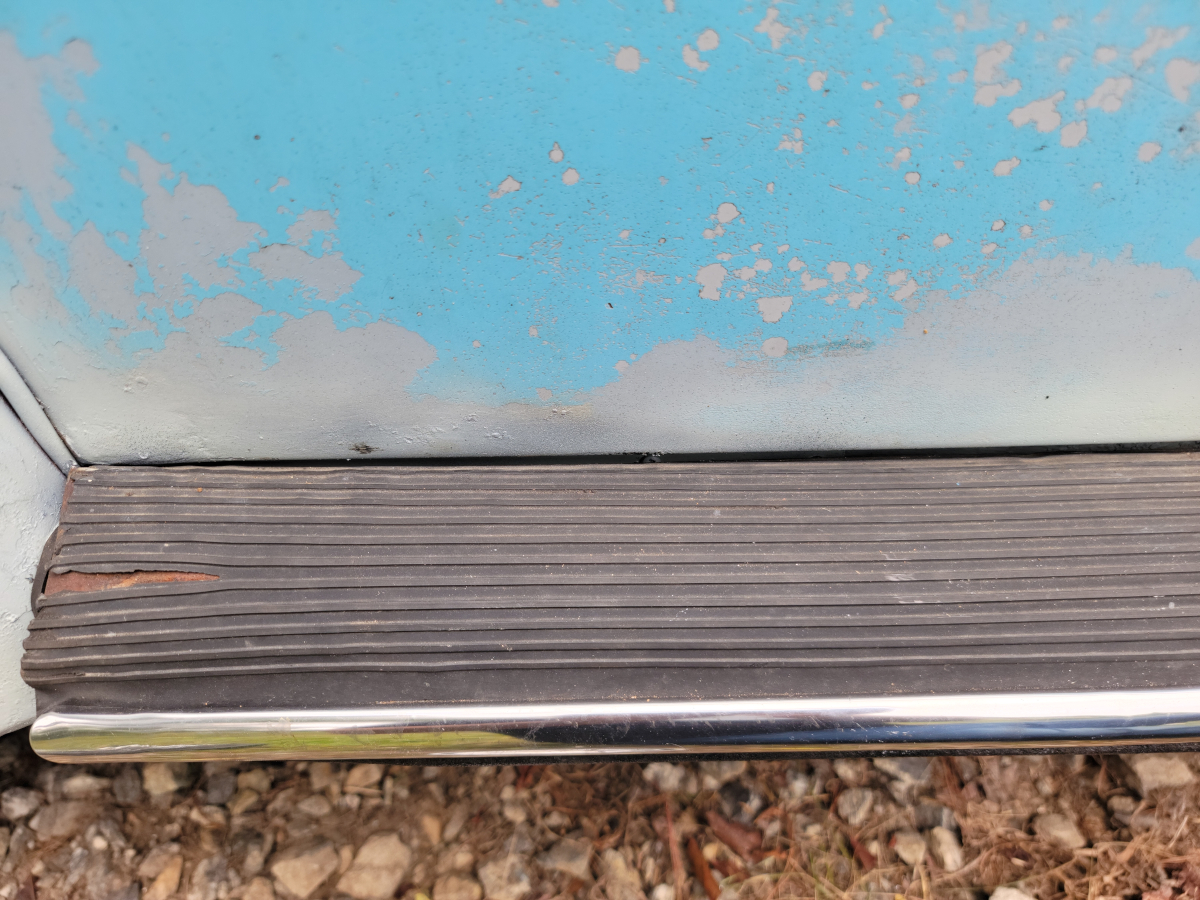
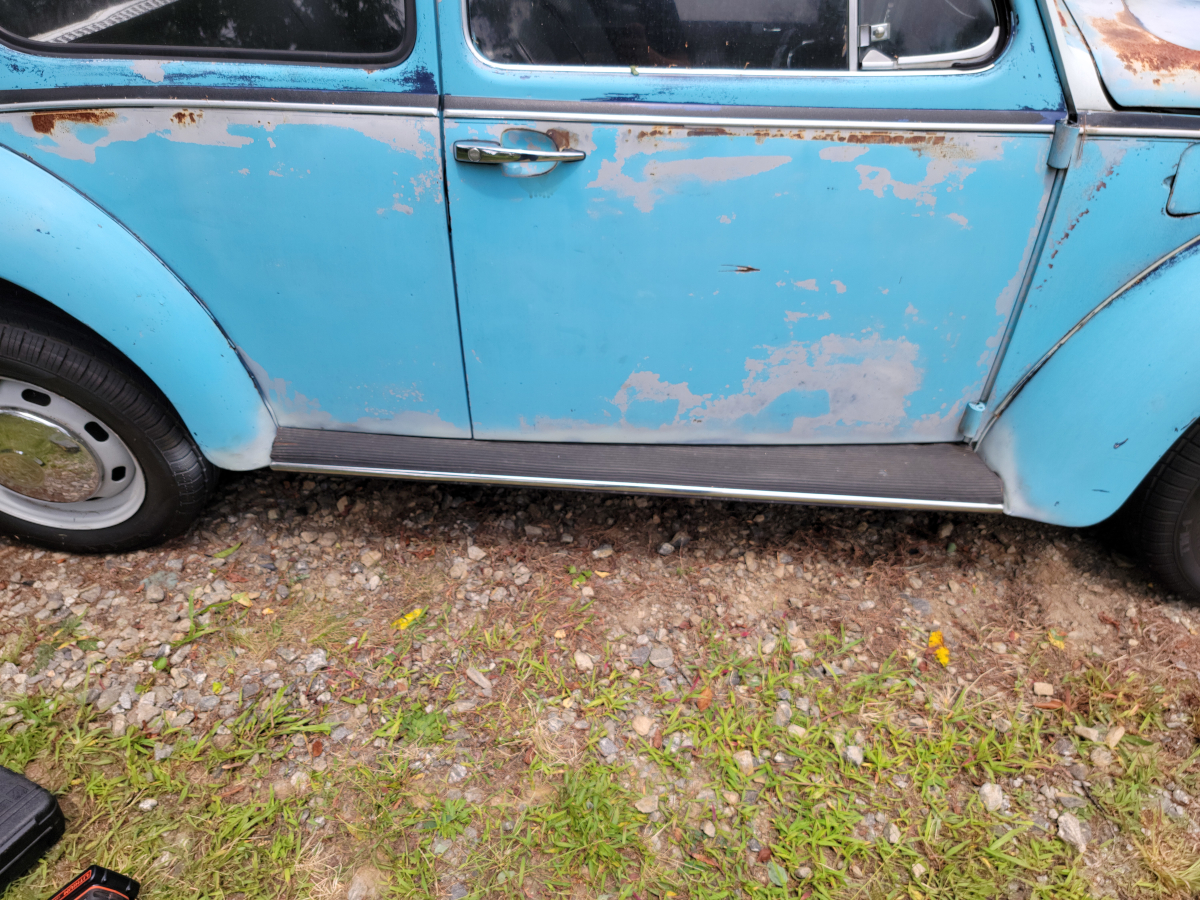
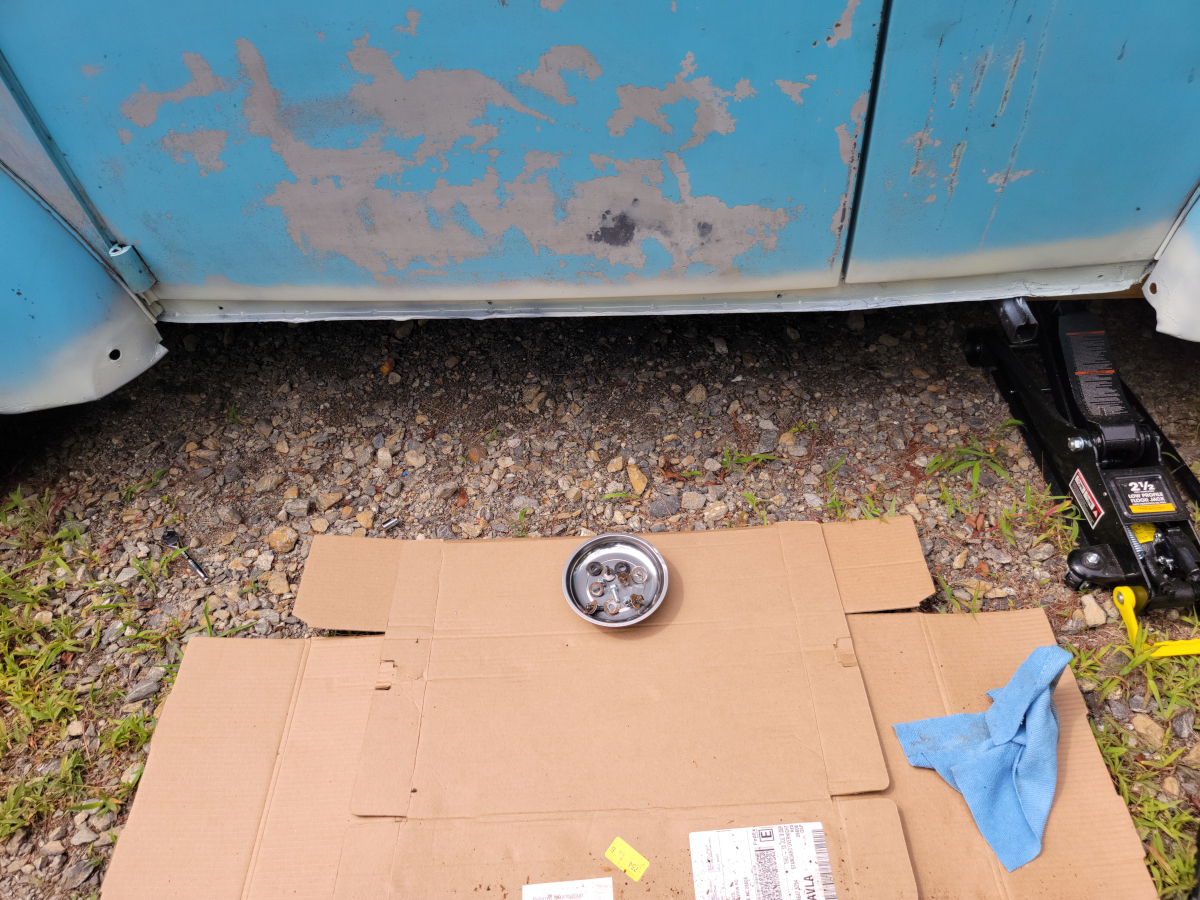
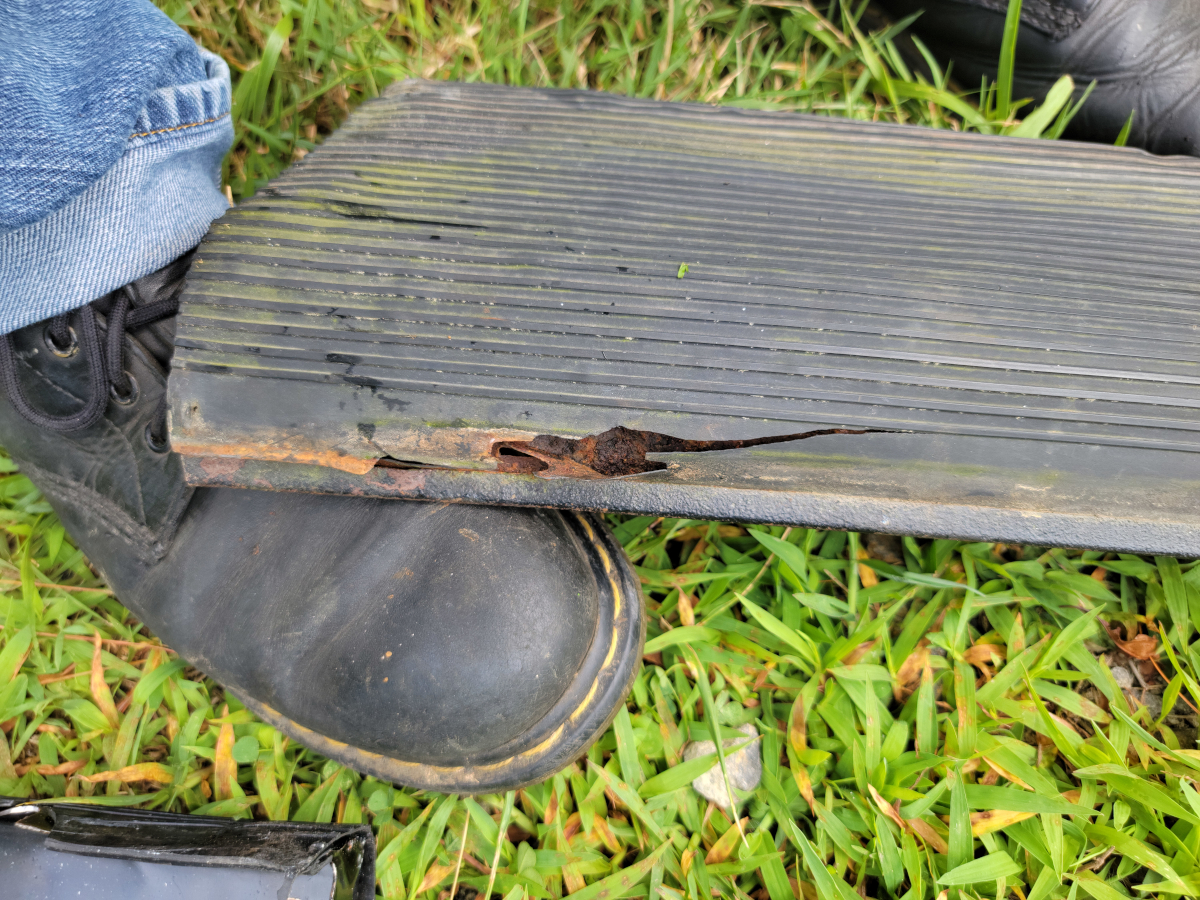
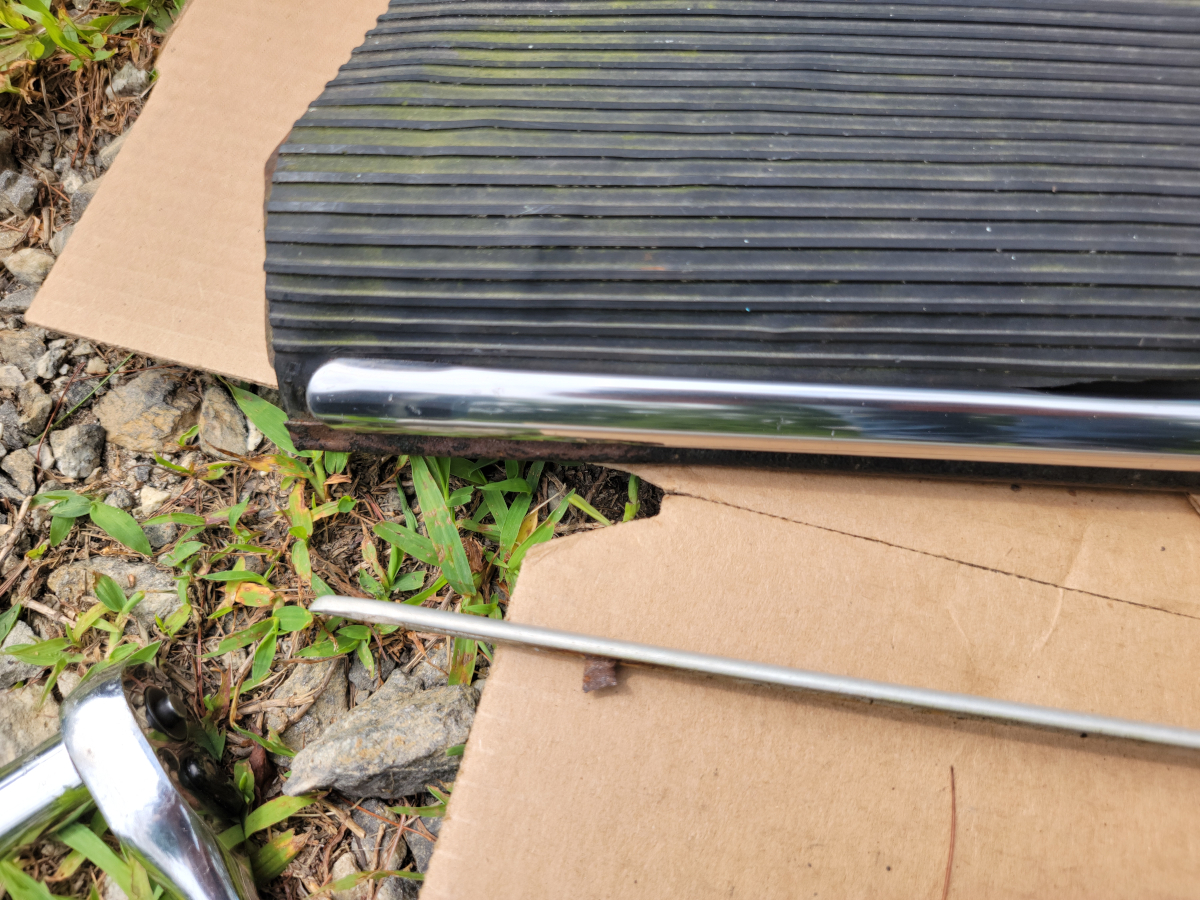
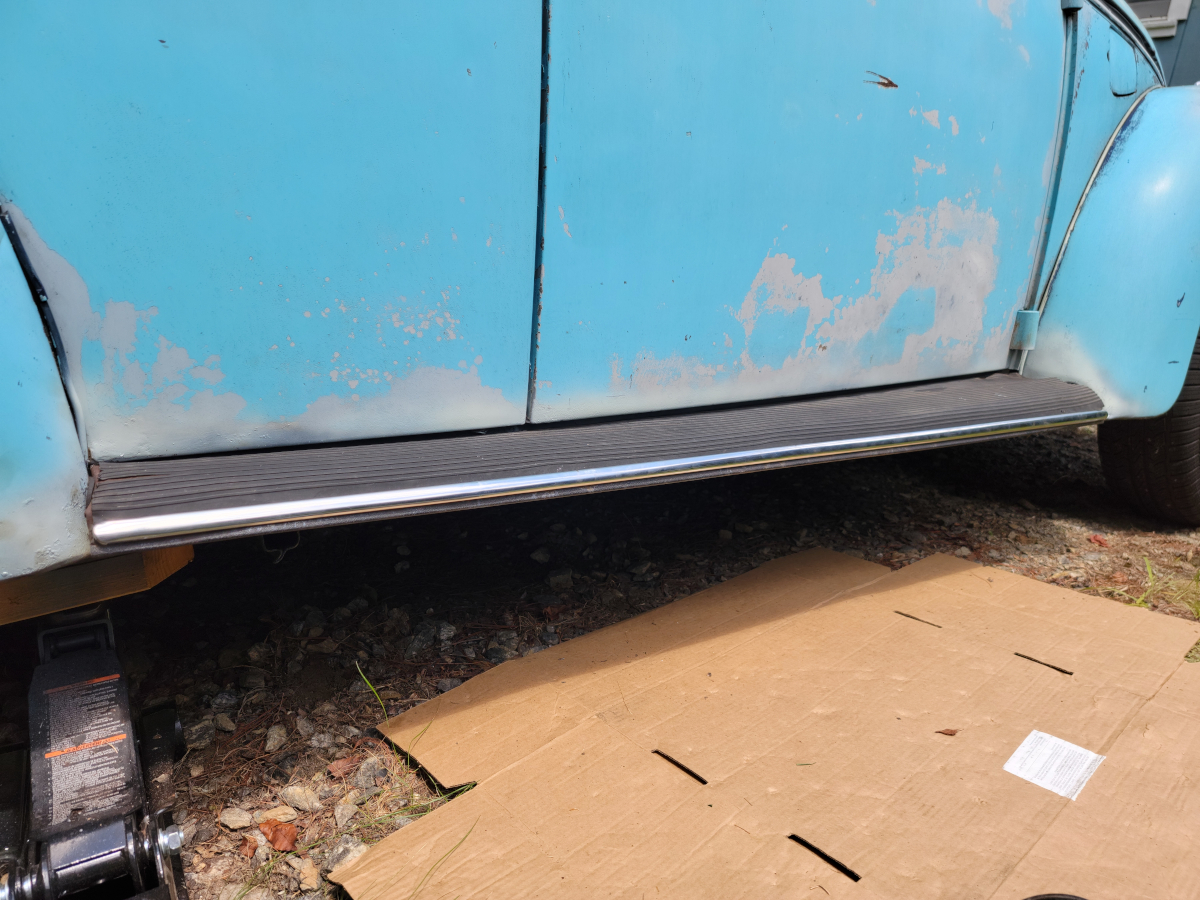
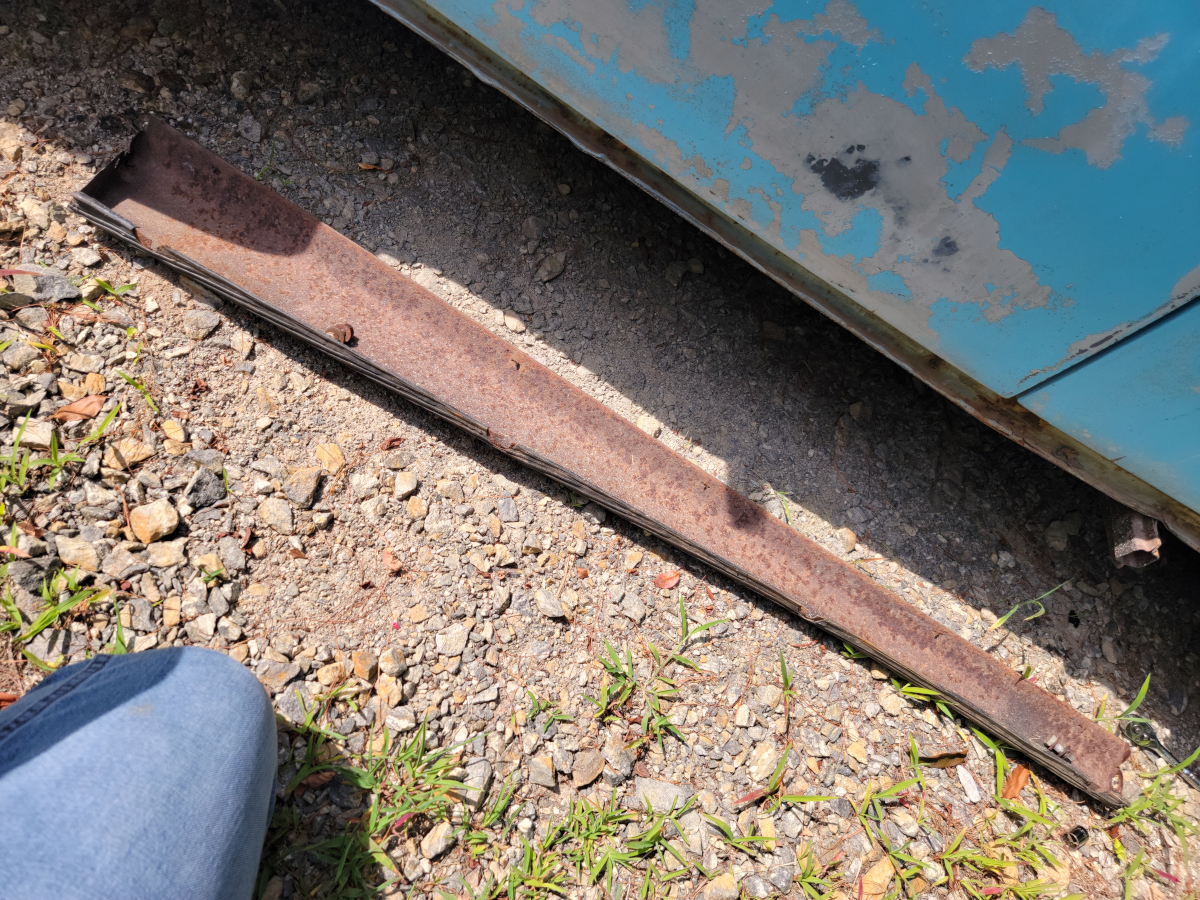
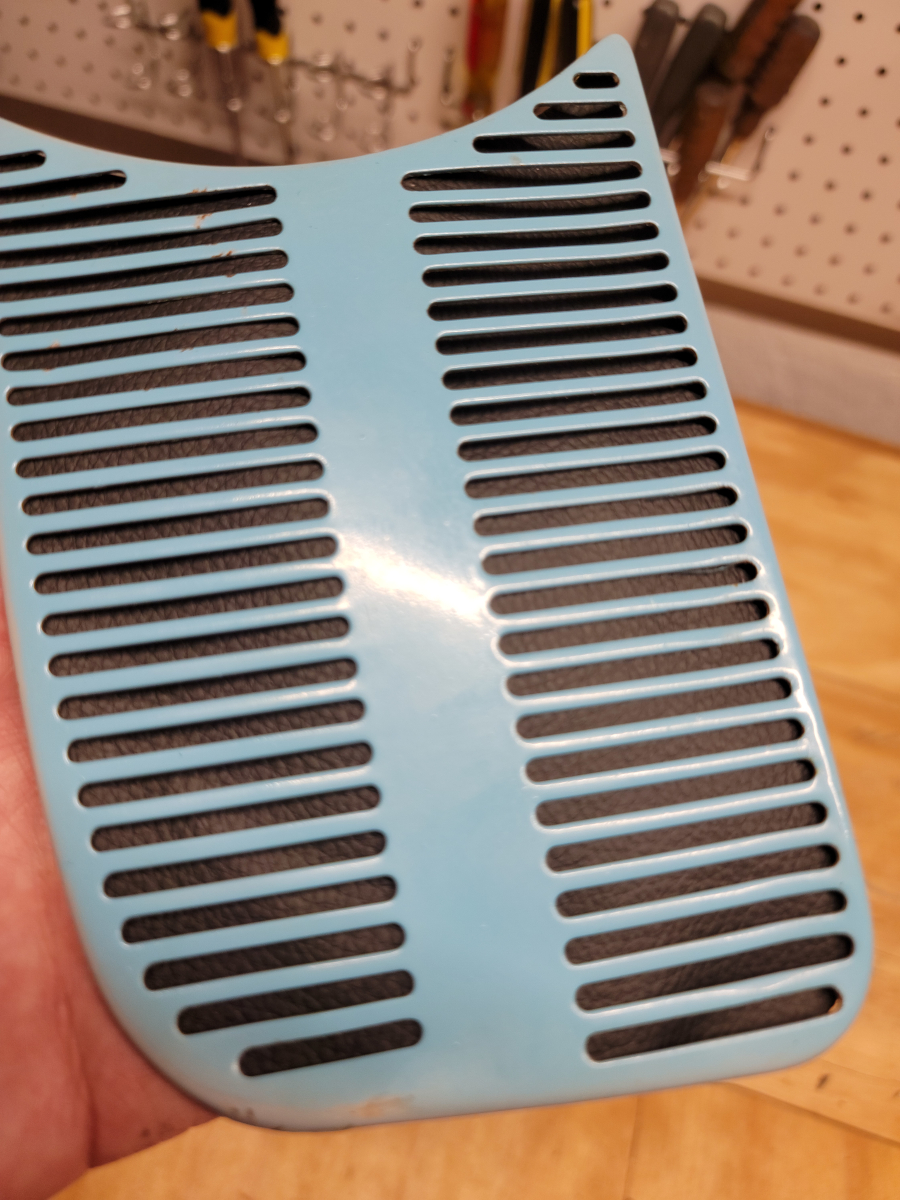
One of the first things I noticed when checking out this car before I bought it was the running boards were rusty and made crunching sounds when I pressed on them. I recently bought a new pair of running boards from jbugs (jbugs link).
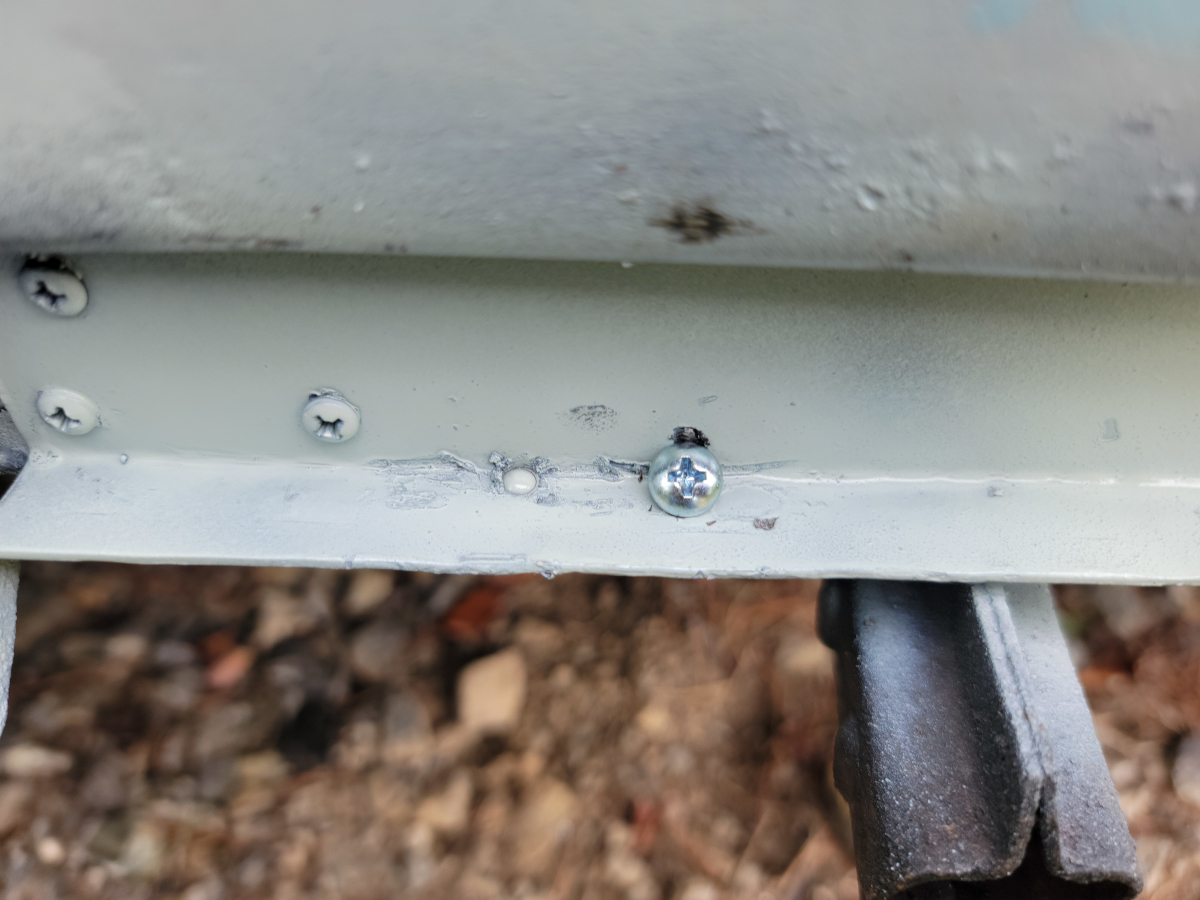
I started on the driver side. Removing the bolt first from the front fender:
And then the rear fender:
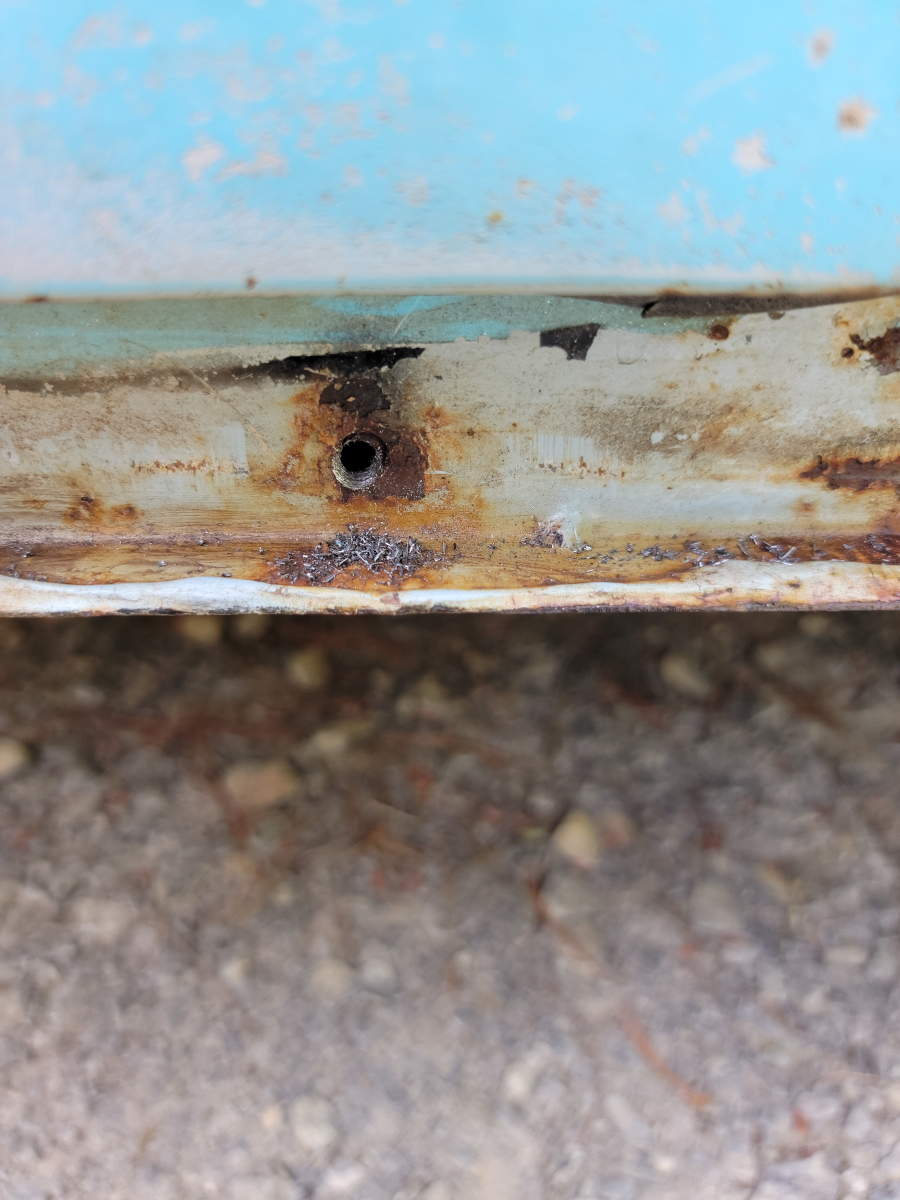
Whoopsy daisy… There are supposed to be four bolts in the body channel below the door. Three were broken off and one was just missing.
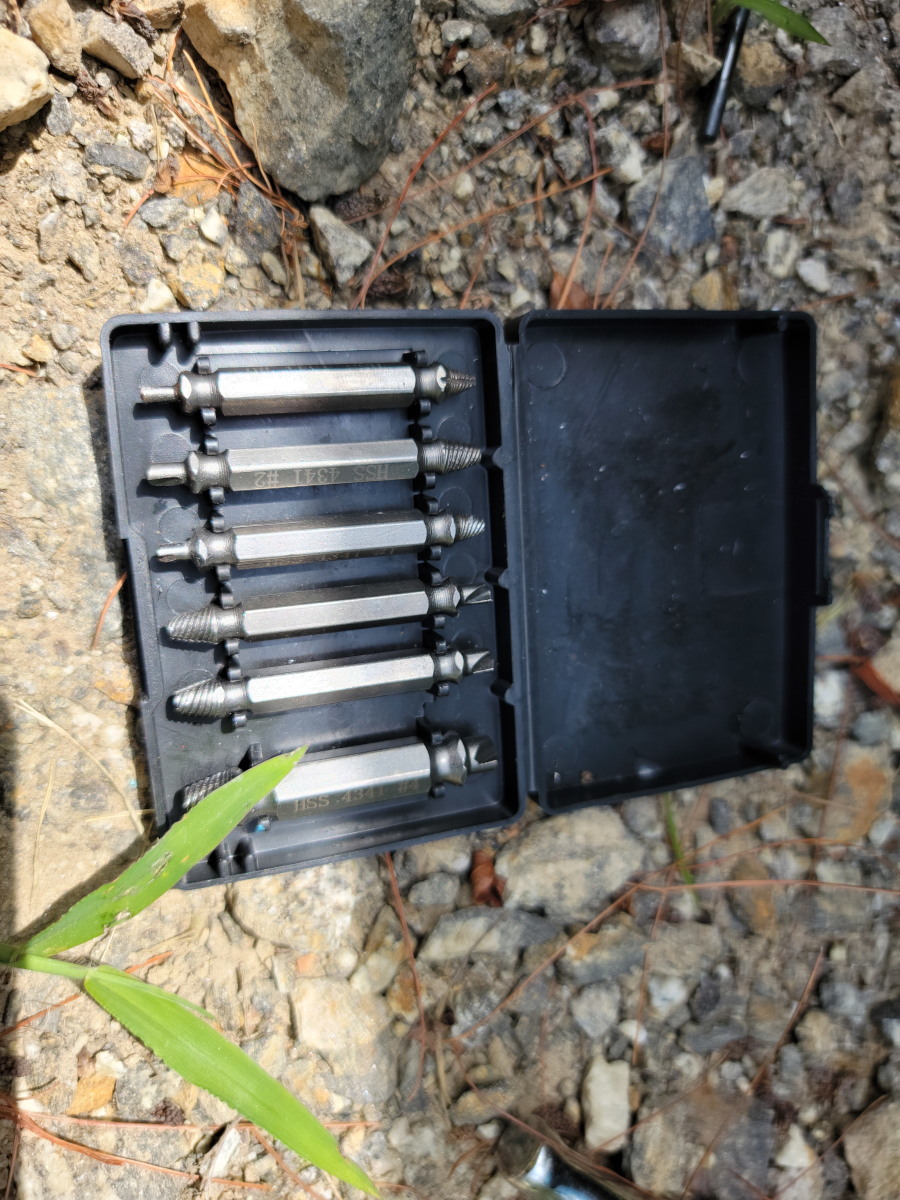
I hosed them down with PB Blaster in hopes of getting the broken bolts out. A few days ago, I ordered a little set of screw/bolt extractors (Amazon link)…
I didn’t hold out a lot of hope, but gave them a try. They didn’t work. I was able to get a good bite on one of the bolts. However, my drill was smoking a little by the time I gave up on that.
I think it was trying to pick up and rotate the whole car. I would have preferred that the bolt would have given up and broken loose.
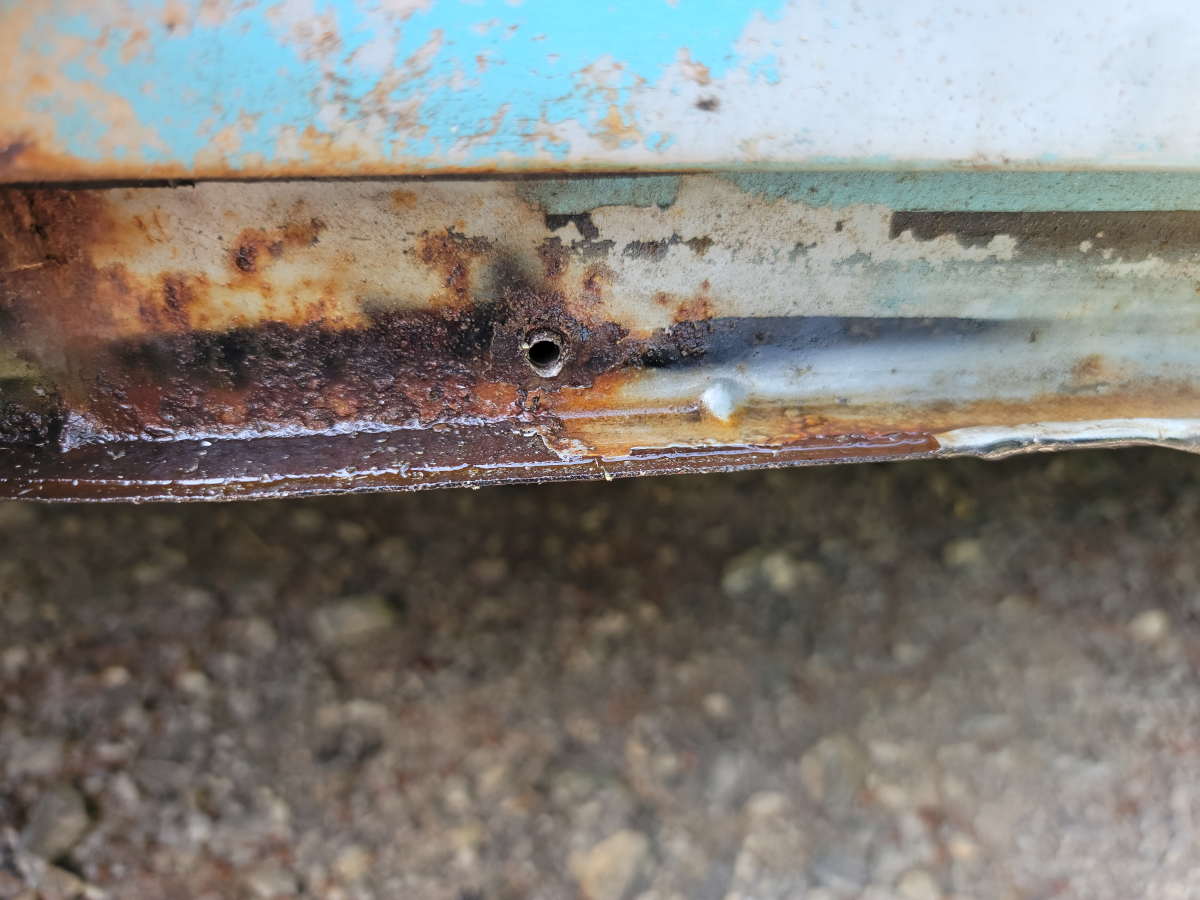
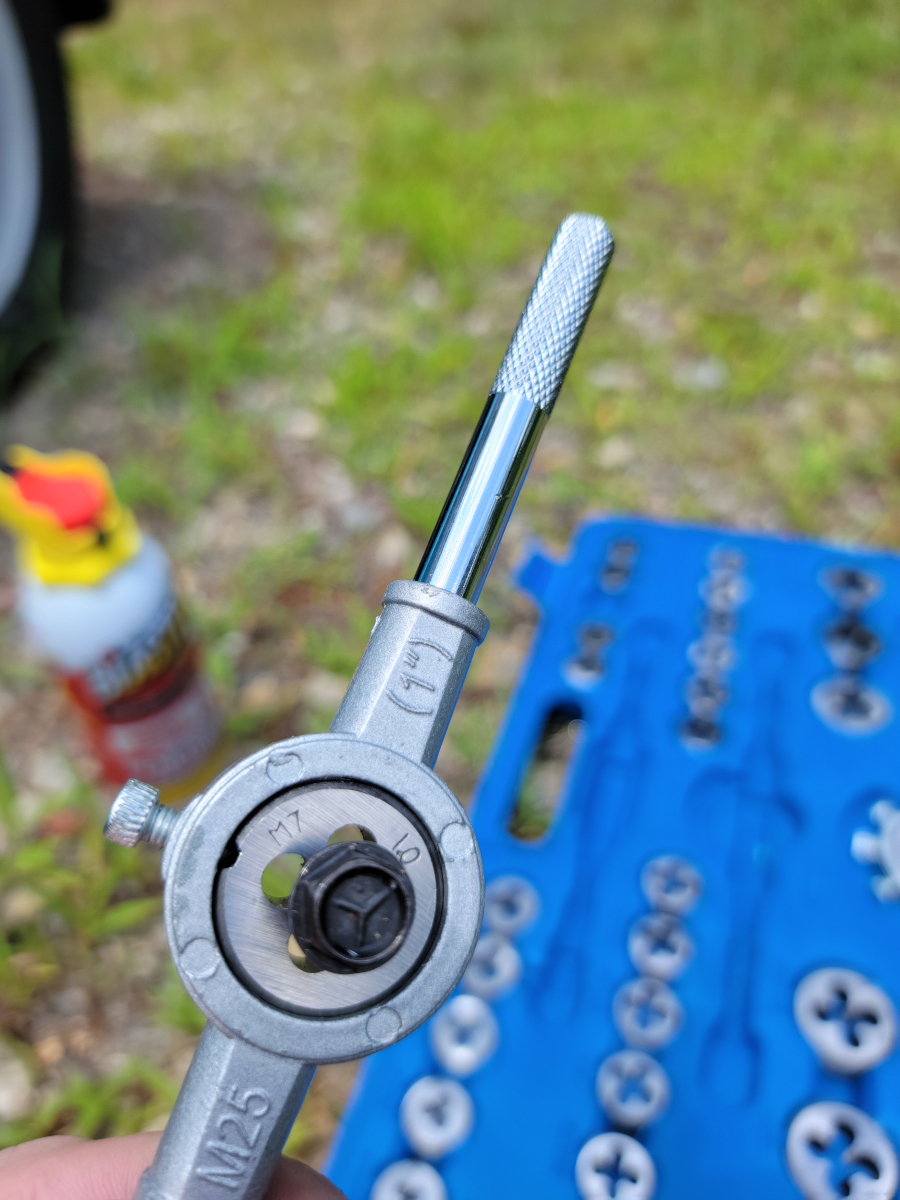
So, I got out the drill bits and just drilled it through. I was a little off-center drilling the original hole. That meant I ended up having to “upgrade” that to a 7mm bolt. The rest of them are 6mm.
After drilling out the bolts, I went back through and threaded the new holes. I used the original 6mm x 1 size.
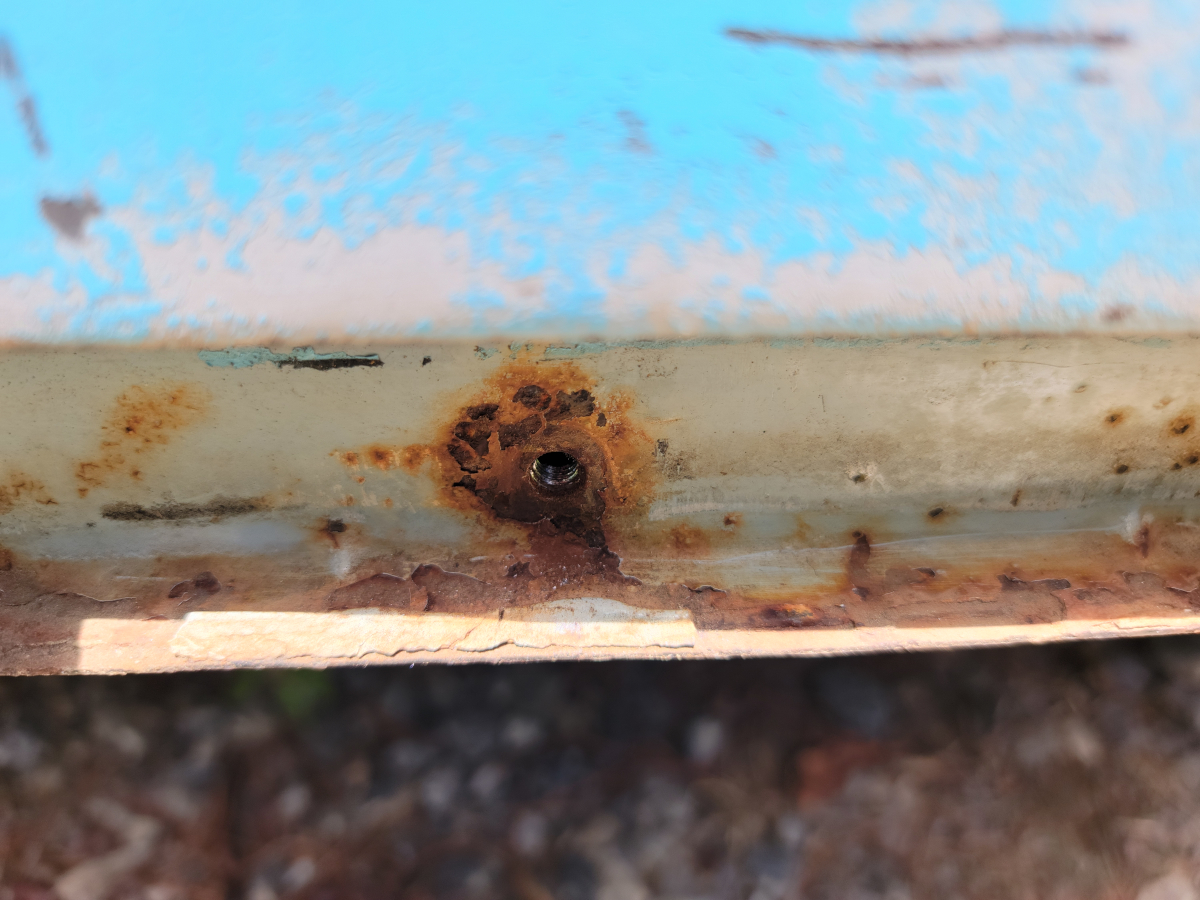
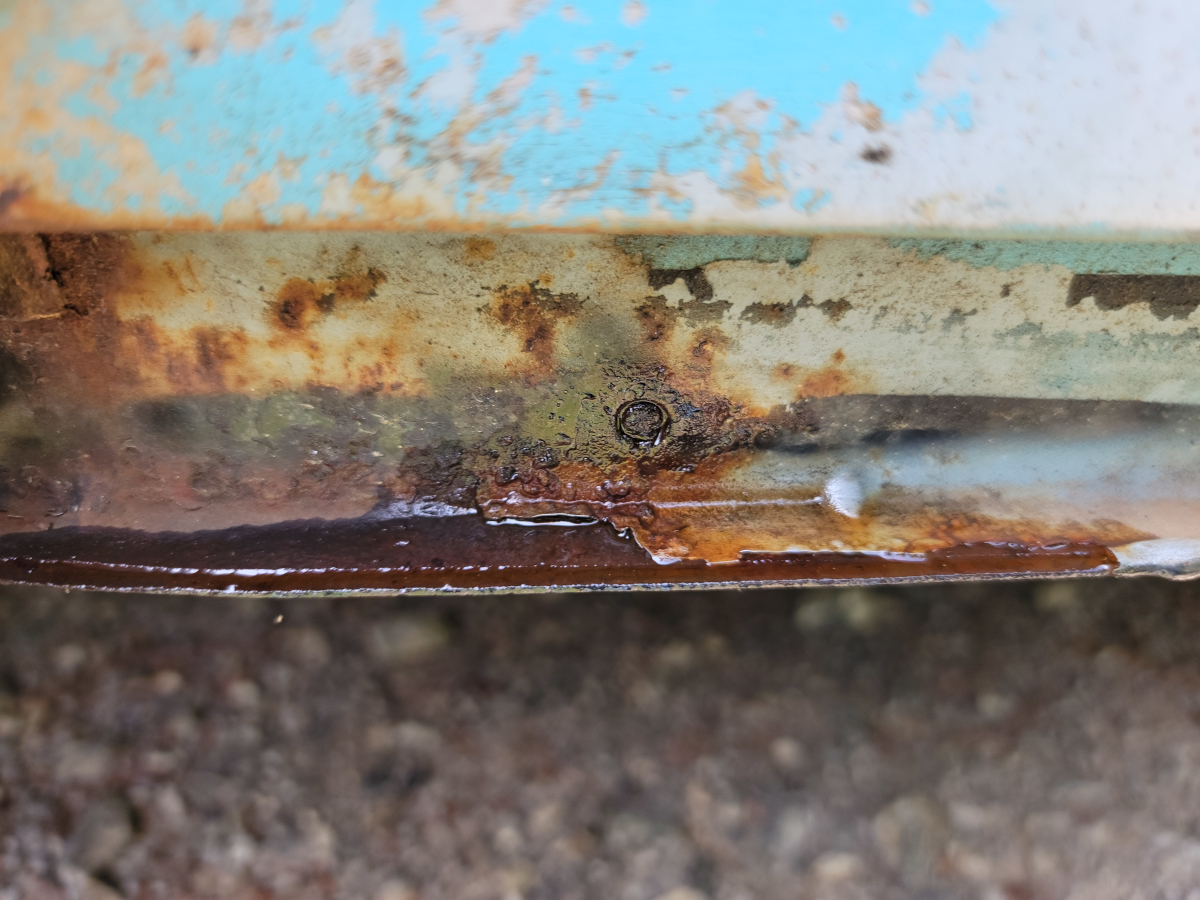
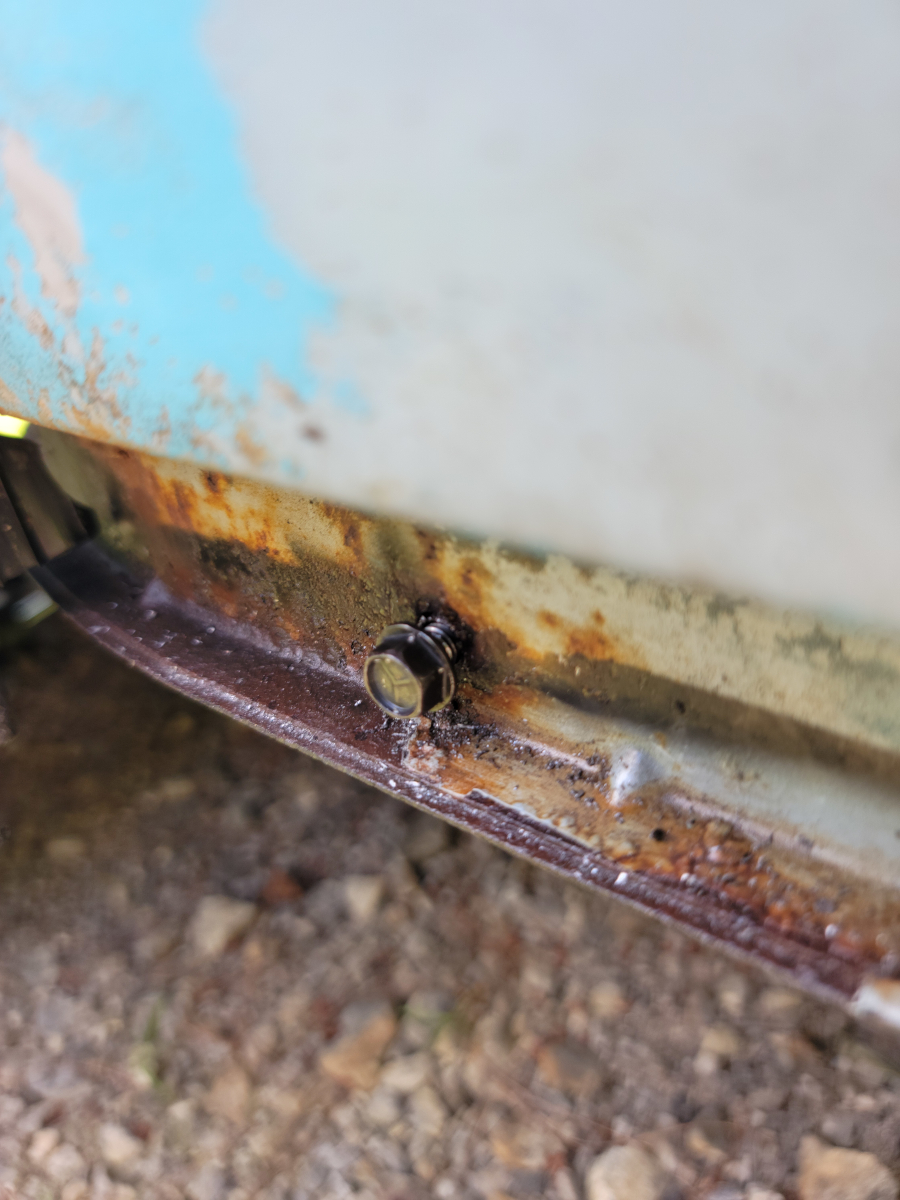
The last bolt hole in the rear had been left empty, but the threads were heavily rusted.
Like I said…
That picture also shows another problem. Above the factory jack point, the body channel is bent up. I tried pounding it back down flat, but there isn’t a lot of room in there. I just ended up knocking a little surface rust loose.
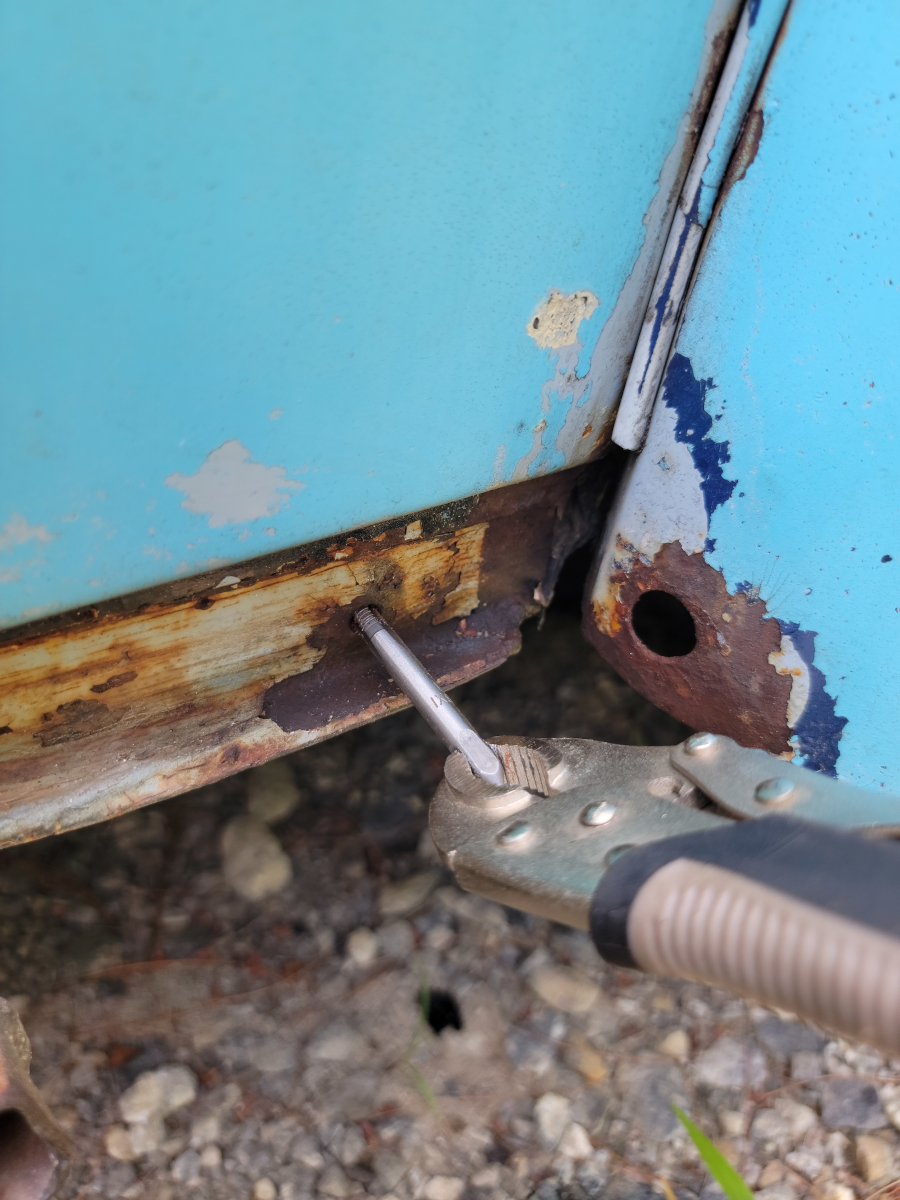
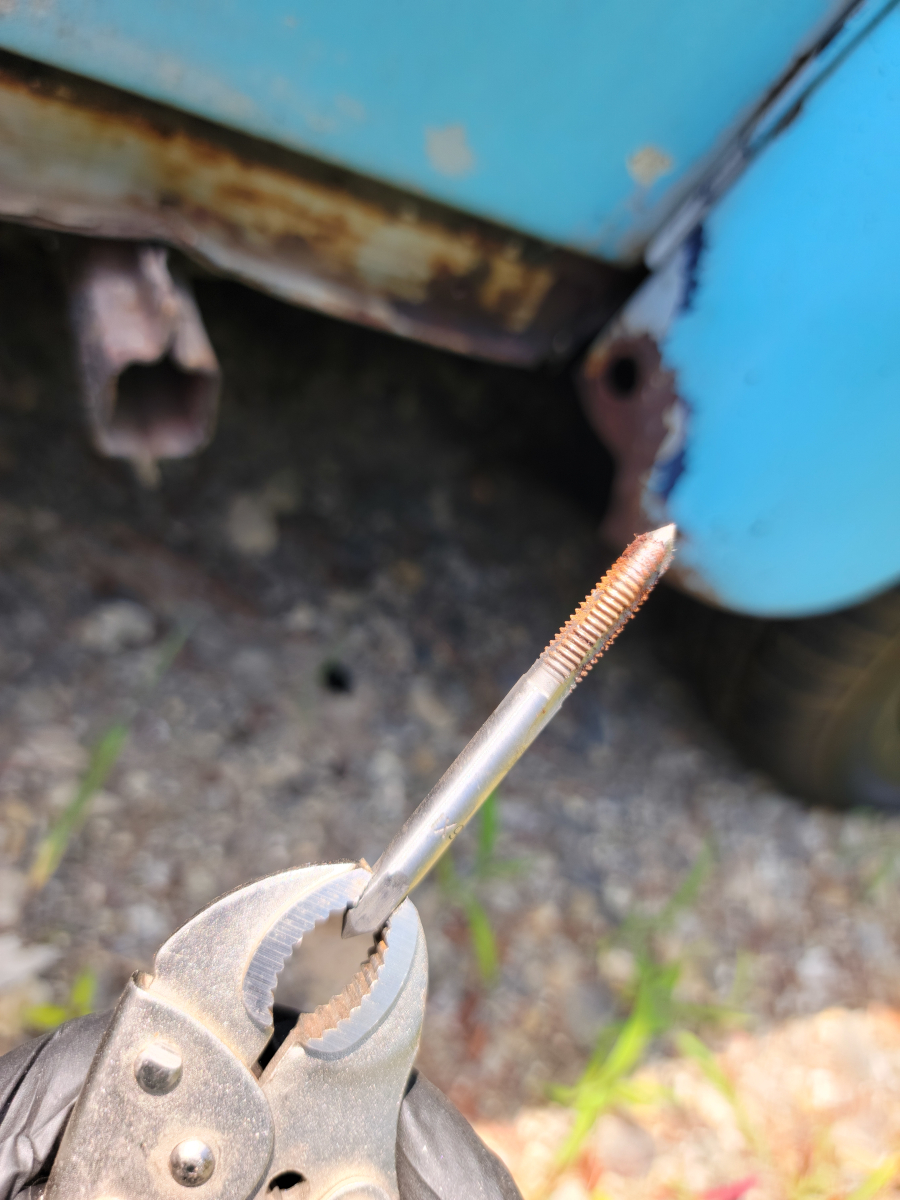
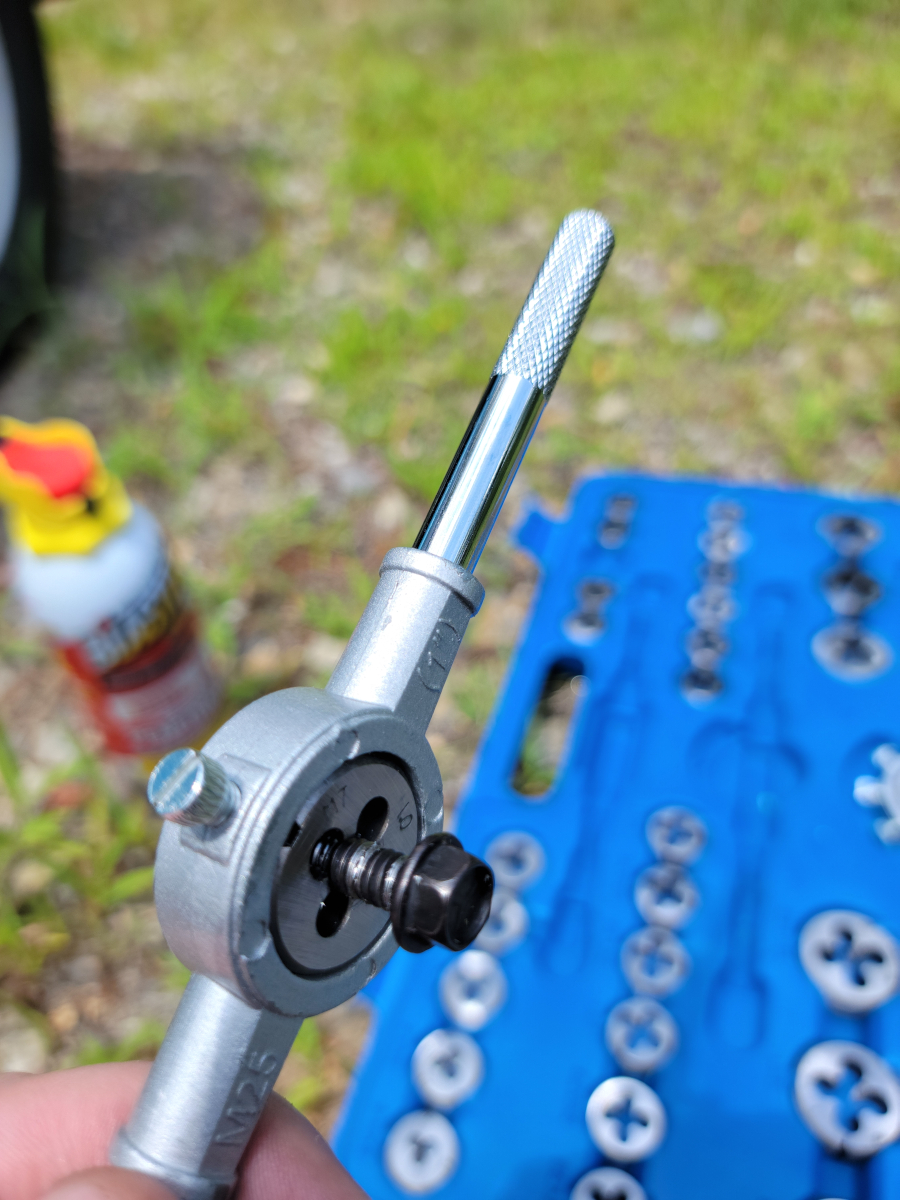
So, now I had one bolt hole threaded for 7mm x 1 and the rest 6mm x 1. I was able to find a 7mm bolt, but the threads weren’t 1 or .75. Those are the two options that I have in my set. So, I decided to cut new threads into it.
And hey, surprise, it actually worked.
It’s clearly a mess, but the bolt threads tightly into the new bolt hole in the body.
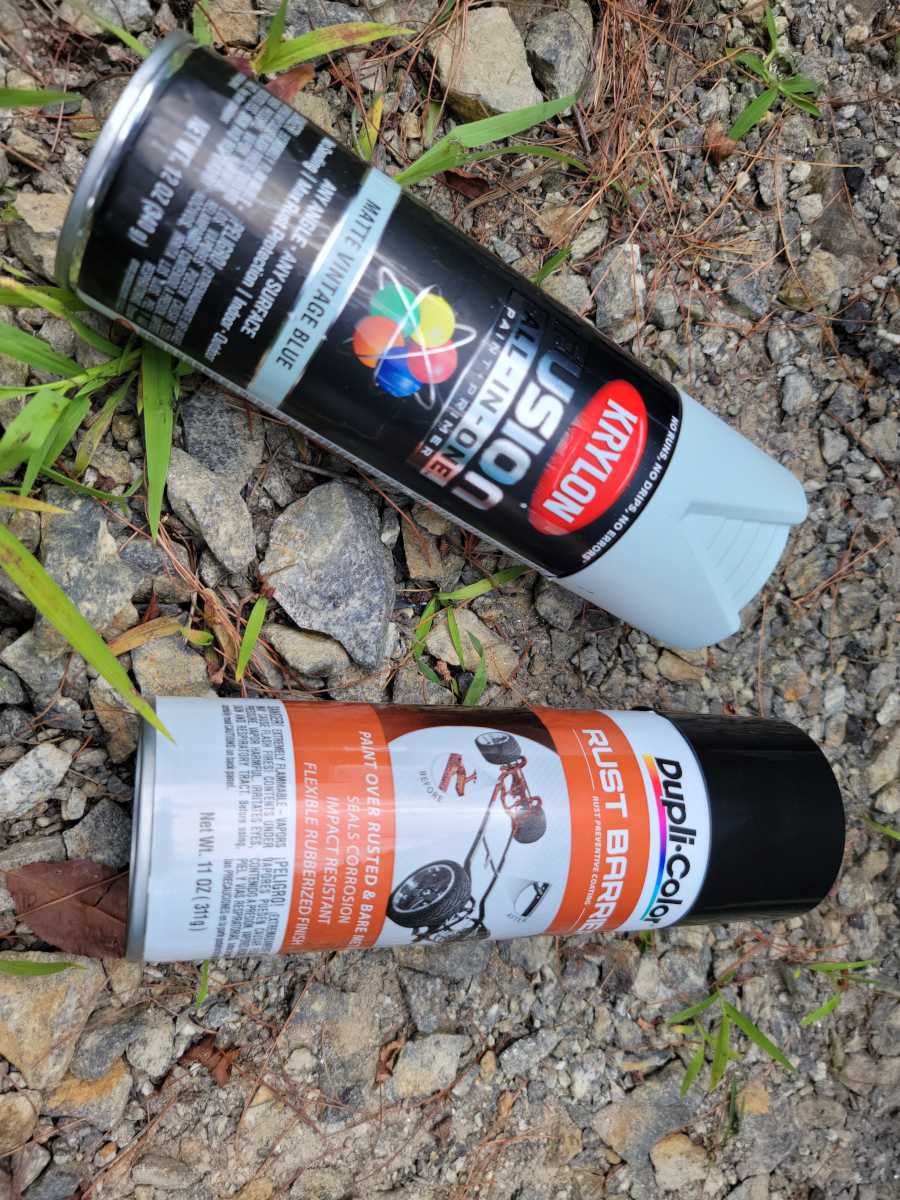
I hosed that side of the car down with brake parts cleaner, then wiped it all down and prepared to do some “rustproofing”.
There are lots of negative reviews of those MIM running boards not fitting correctly. I had read the warning in the description saying to expect to have to trim them. That’s fine. However, the height of the running boards on the back side, the mating face, is too tall to fit in the channel. Also, with that place above the jack point being bent up, that doesn’t help.
I could use the death wheel to cut off 1/4 of an inch across the whole length of the running board. Easy enough, but the rubber mat cover “clips” over the bottom edge in front and back. If I cut off a strip across the bottom, I would have loose rubber back there, not clipped to anything. Maybe glue…
By this time, I had been outside in the sun four hours. I used the new hardware to mount the old running board. I will get back to address that in the future.
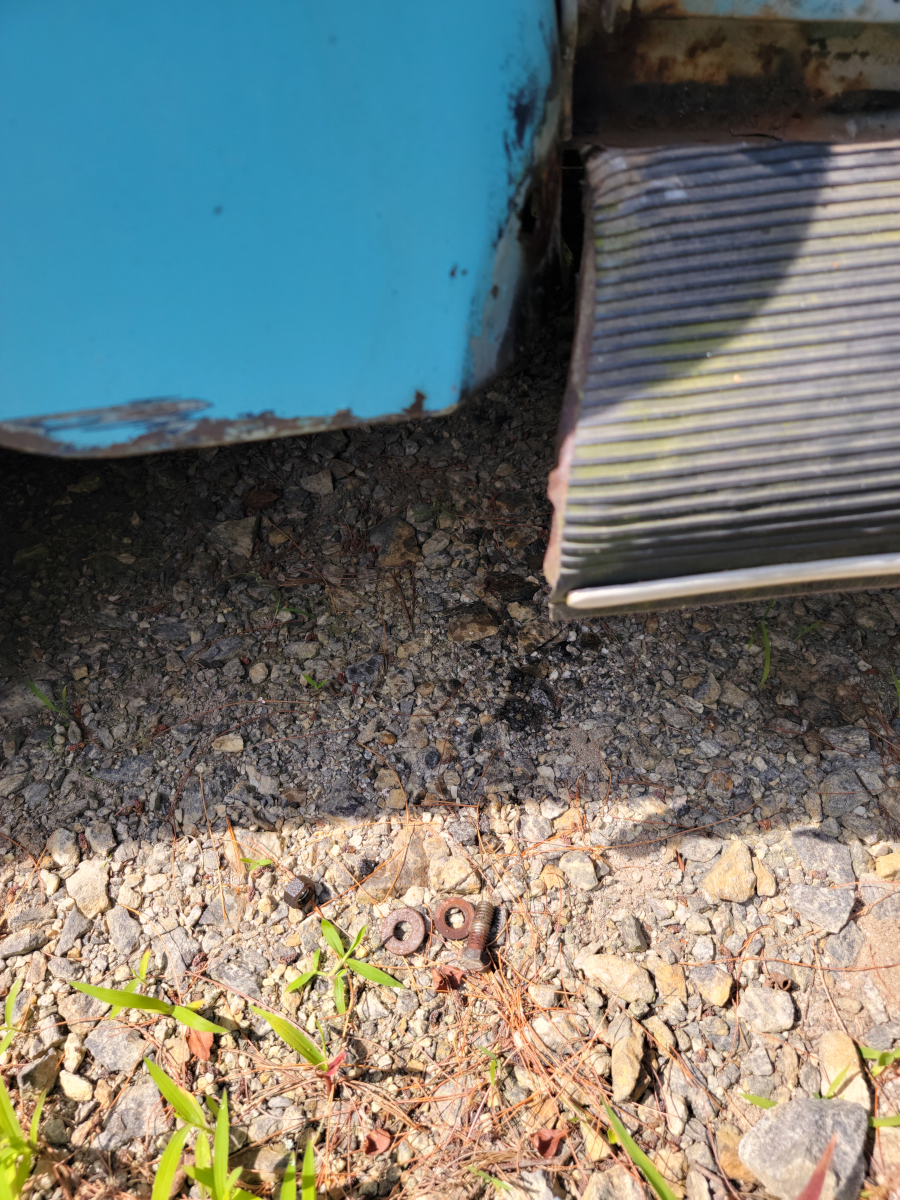
In the picture below, you can see one of the body washers is warped and bent through the opening in the running board. This hardware is garbage. The washers are about as thick as a paper clip and are super soft.
These black washers are hard plastic, the kind that will have split and gone missing by next year. Criminal.
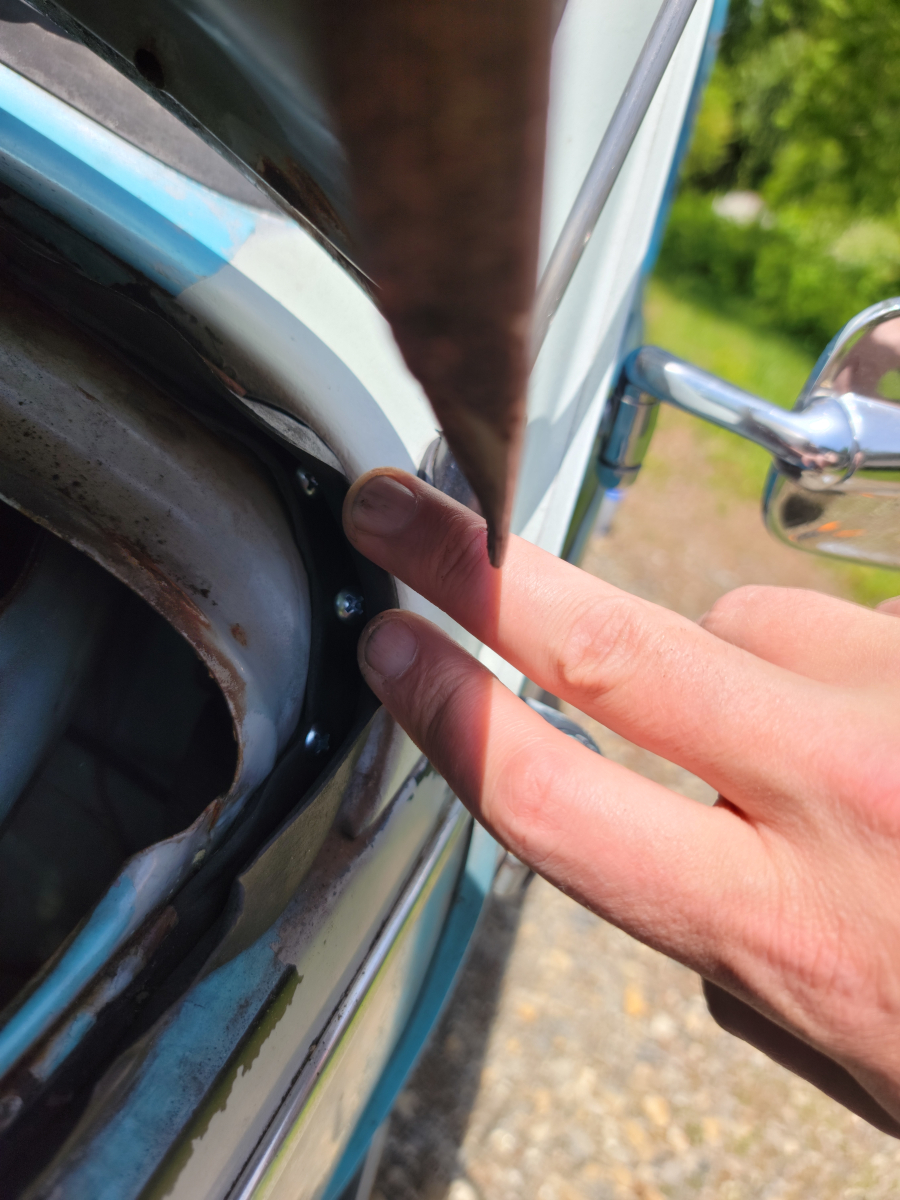
A couple of evenings ago, I replaced the front hood seal. That process went so well, I decided to replace the rear deck lid seal as well. As with the front hood seal, I have had the new seal laying around since I purchased the car. After reading posts on the samba, I was scared off by the complexity of the install process.
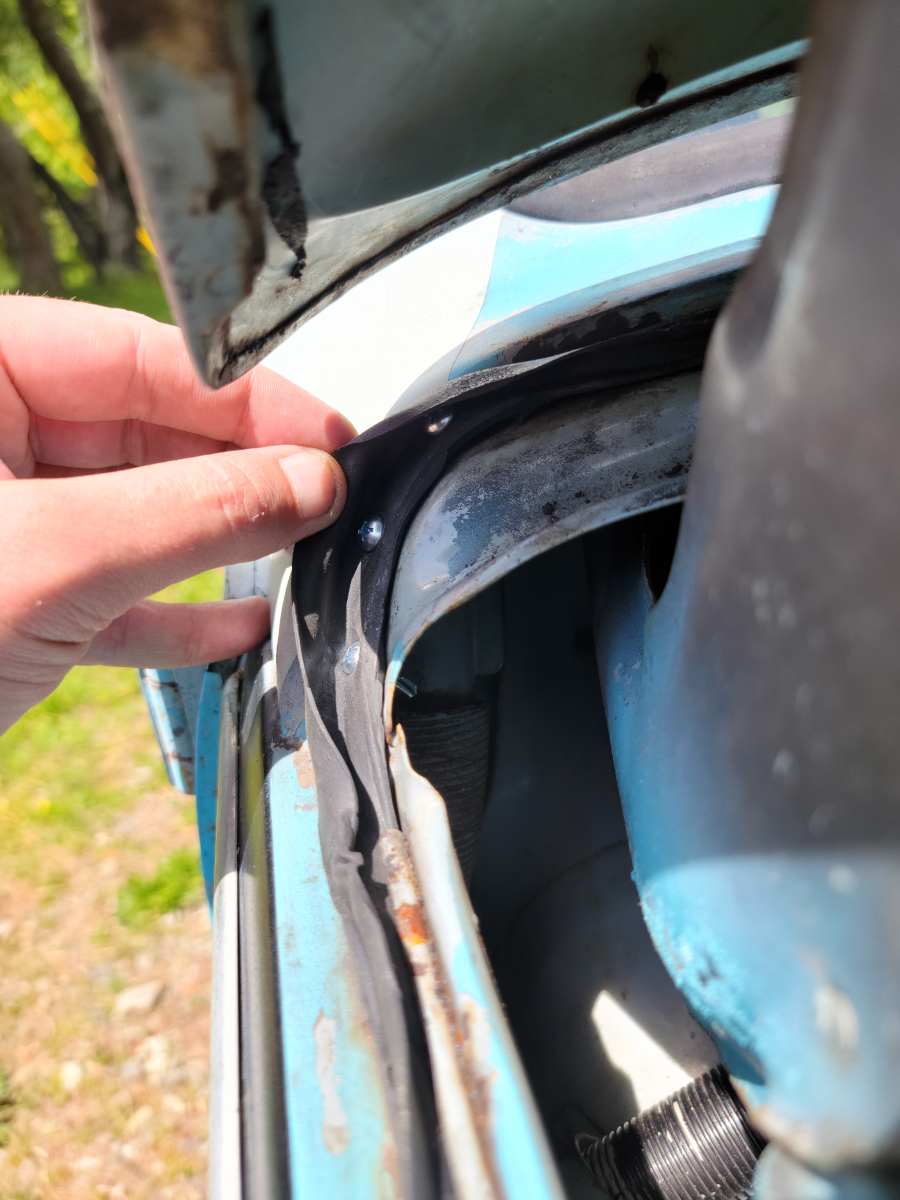
So anyway here I go. Starting at the driver side top, I used the same approach as before. I used a putty knife to pry the lip on the channel up a little. The side came out very easily.
Around the bottom, I ran into a little more problems. The channel had been bent in and out multiple times. It was very rusty and didn’t just pry up as cleanly as the sides.
I was able to remove it cleanly eventually. Moving on to the passenger side, that came out with no dramas.
I grabbed a stiff nylon brush and cleaned off all of the loose rust and debris. Then I sprayed a quick coat of rust treatment.
The old seal in the rear was much more pliable than the one in the front. However, it did still crumble to pieces as I was removing it.
Back to the front…
This time, I decided to give the rust treatment some more time to dry. My fingers are still black from that mess before. So, I moved back to the front to finish up with those top corners.
My original plan was to use the black push tabs that are found all over the place on my Ranger. But after closer inspection, the holes in the beetlebug shell are much smaller. I decided to rivet them on instead. After a couple of attempts, the rivets that I had weren’t deep enough to actually grab.
Being lazy and wanting to cross this off the list, I just used some self tapping screws instead. It is a very loose fit, but there is a bit of thread that will grab. The fit is loose enough that I could pull them out by hand if I tried. But they’re tight enough they won’t come out on their own. I didn’t check, but I’m pretty sure these screws are stainless or at least zinc coated or something.
The passenger side went on easily as well.
Back to the back…
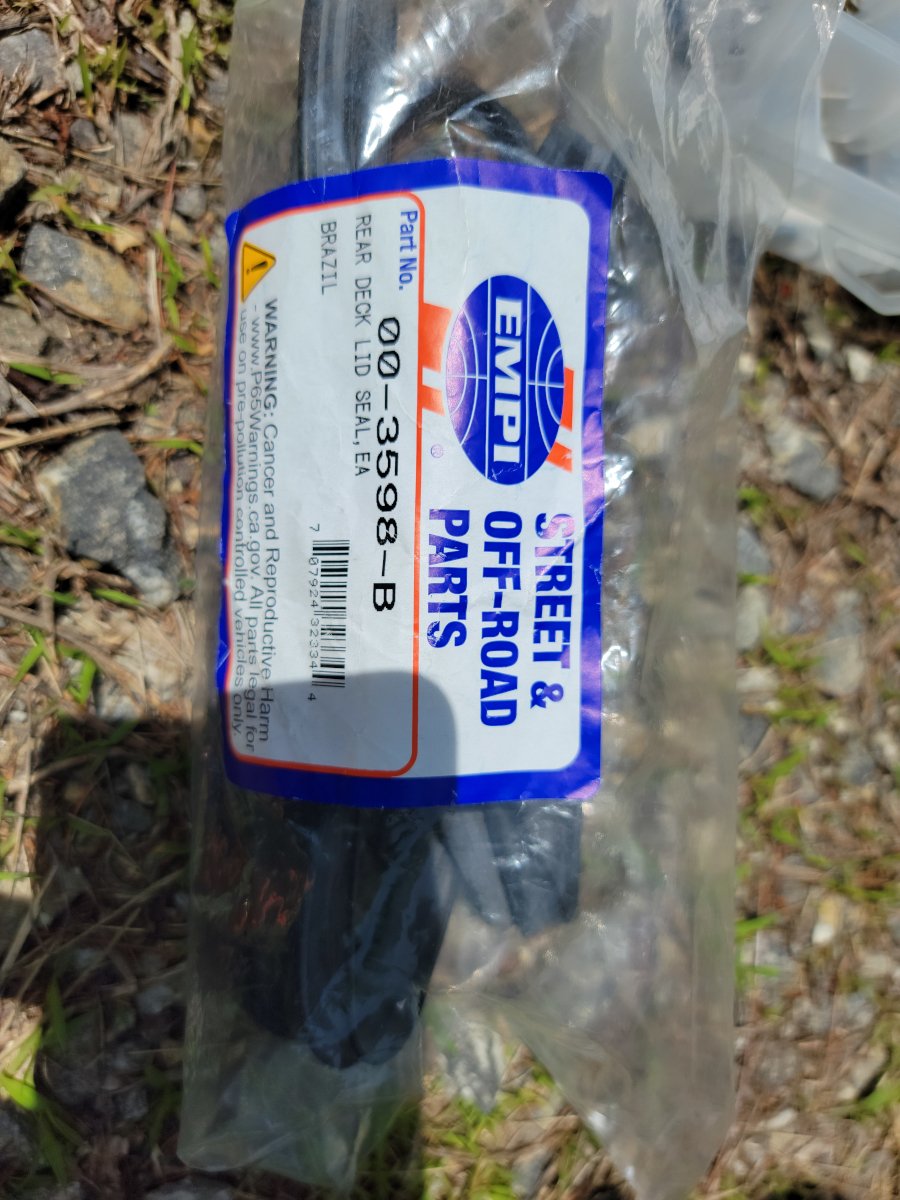
The rear deck lid seal I bought was also made in Brazil, but this one was an Empi brand (Amazon link).
It installed without issue. There were a few extra inches at the end that I snipped off.
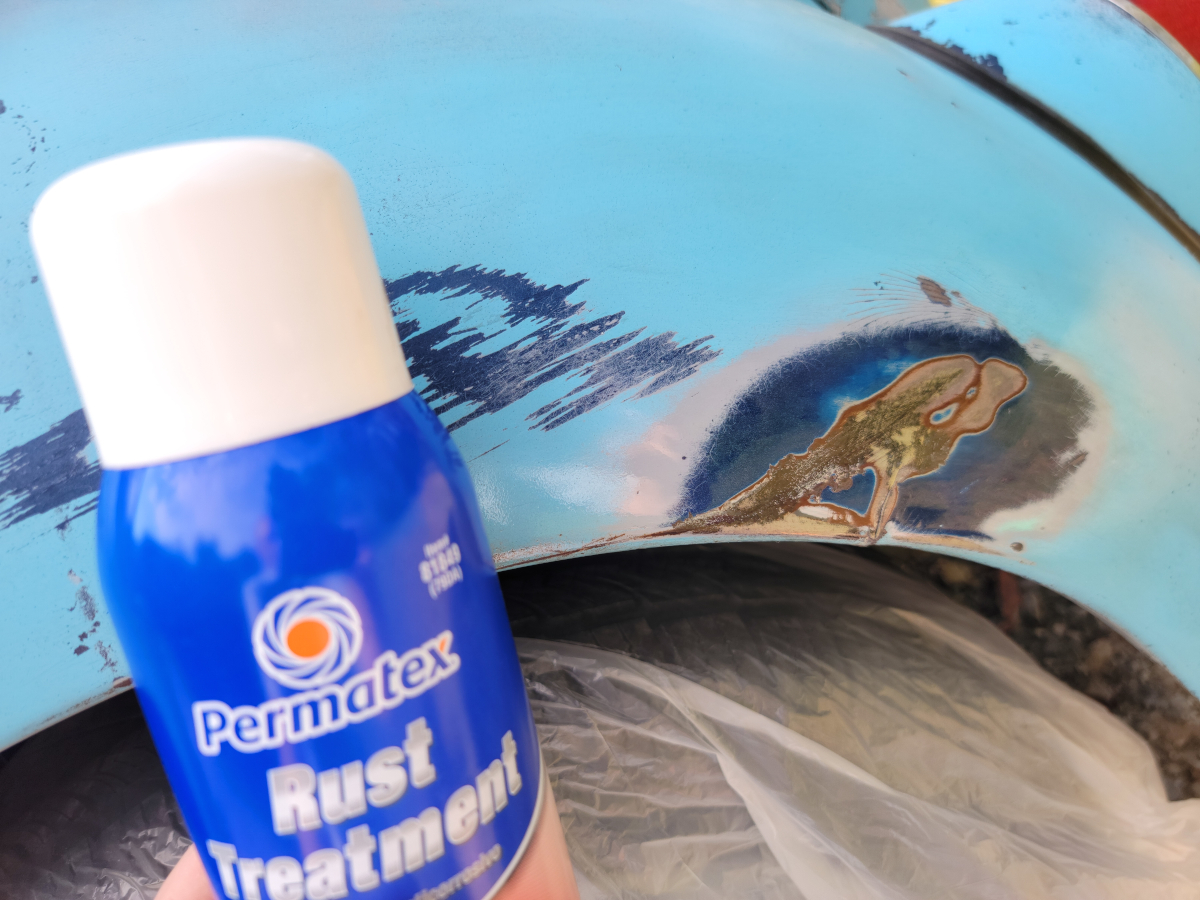
With the deck lid up in my teeth, I noticed some deep rust and bubbling paint down around the bottom. I scraped off the loose rust and then gave it a coat of rust treatment. Once that dried, I added a coat of primer, then a coat of matte vintage blue.
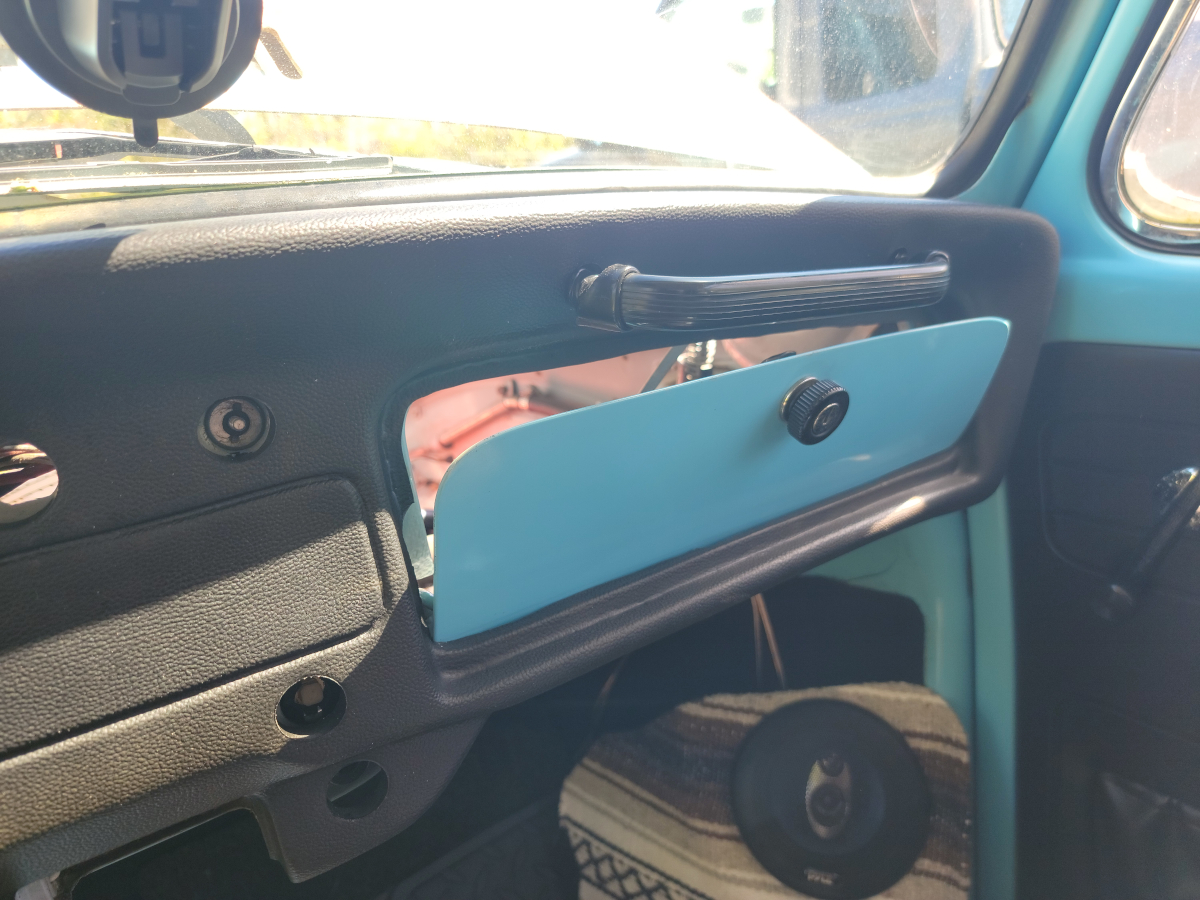
Back out in the car, it’s time to mount this monstrosity and try to put the end result into perspective. It’s hard to tell how it looks when it’s on its own. You need to see it in context. So, off we go.
First, I mounted those long bolts in the corners.
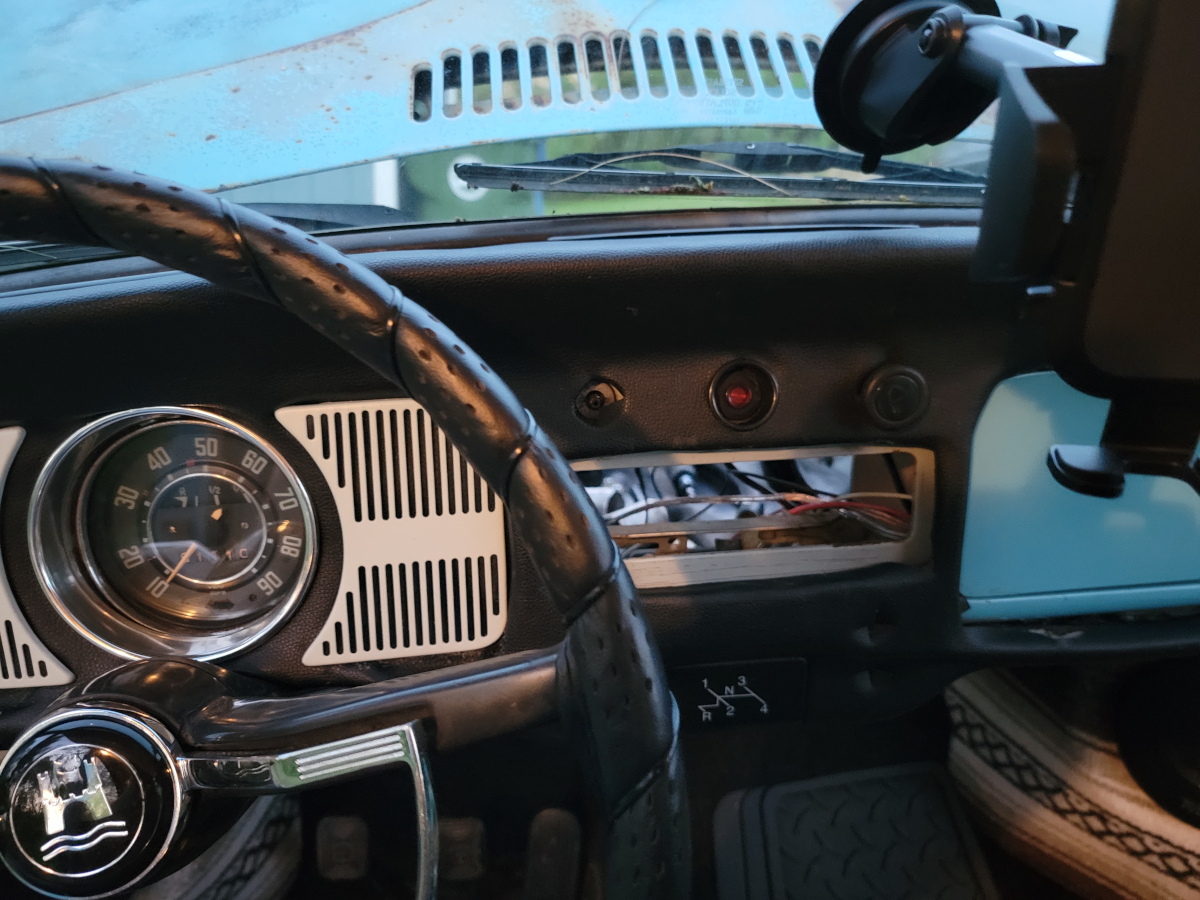
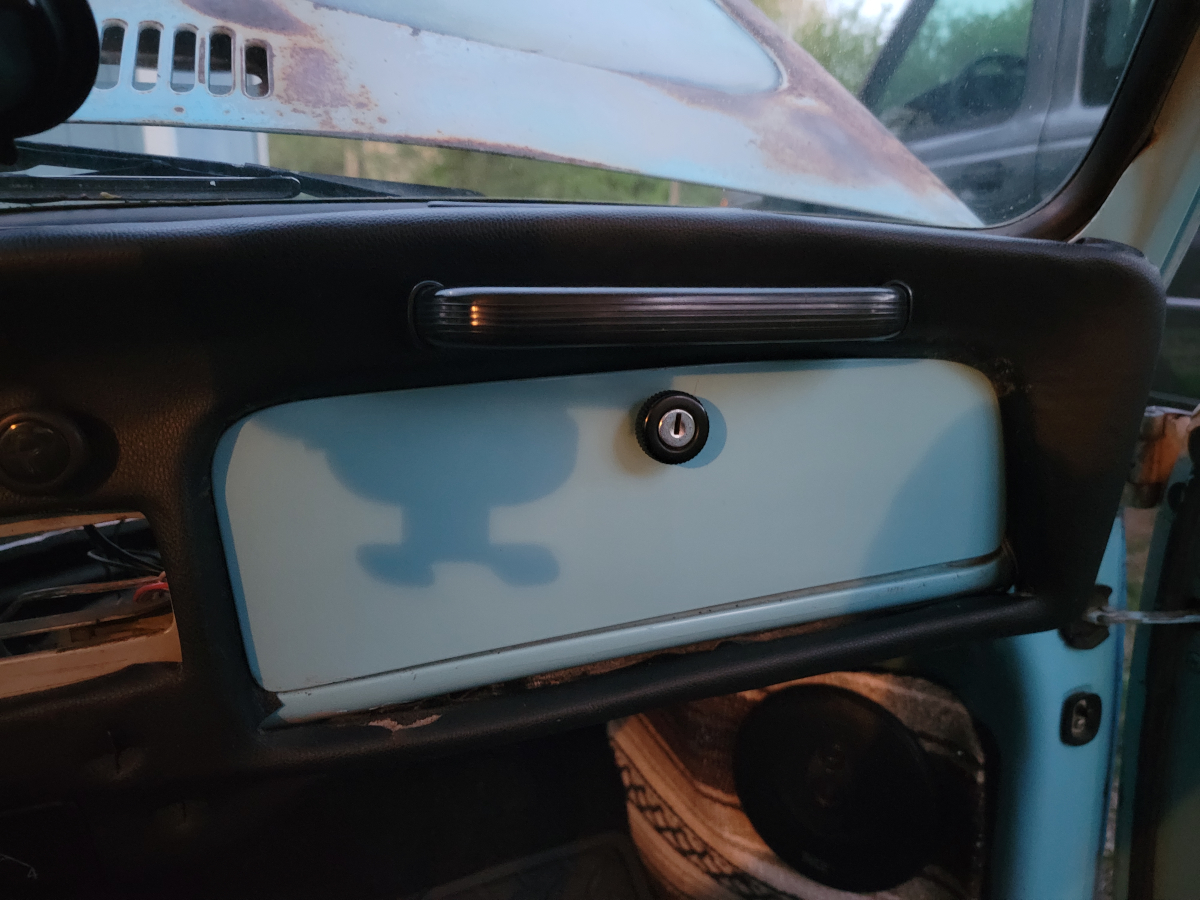
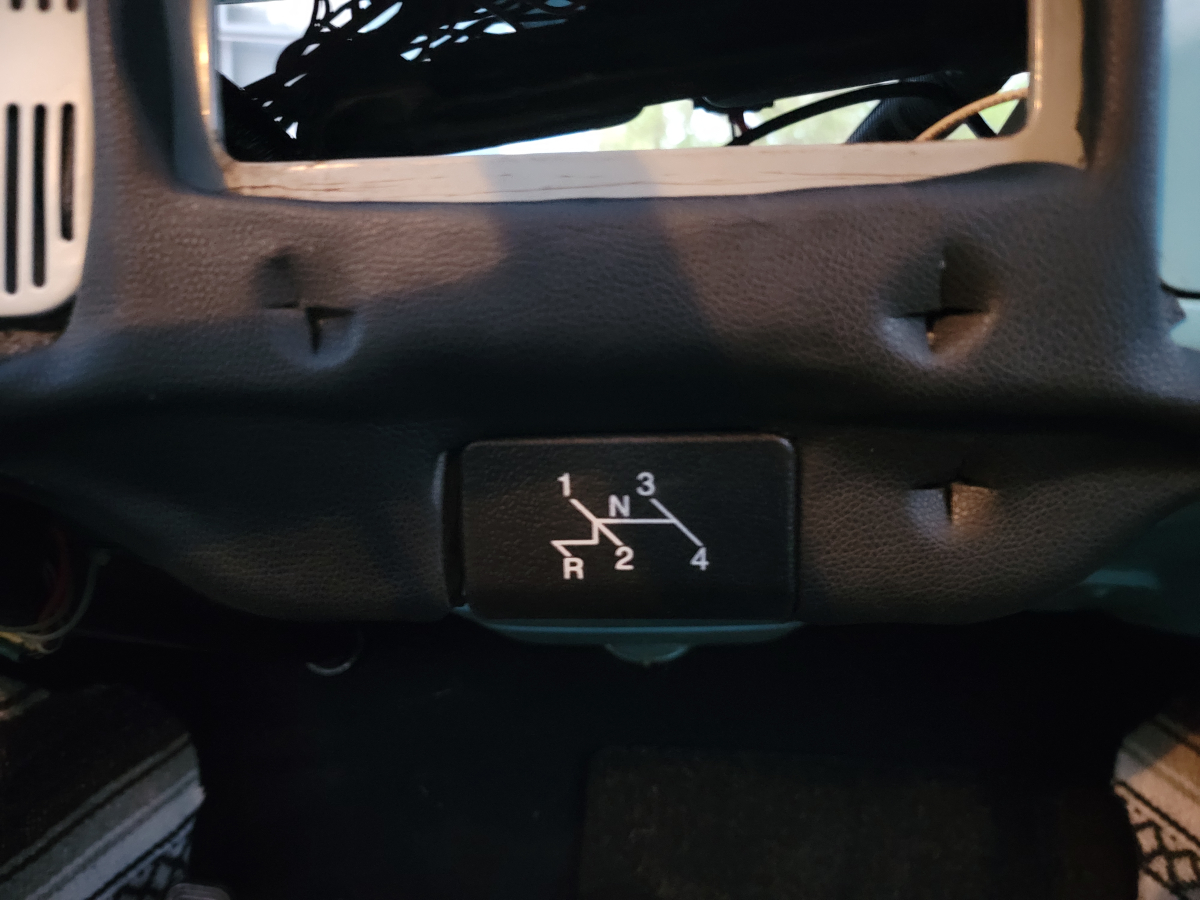
I put all of the knobs and ash tray back in place.
Some of the knobs didn’t fit properly through the new holes with the additional vinyl pushed down through.
I mounted the grab handle and soon realized some of the cuts I had made in the vinyl below the glove box were too close. That’s a job for another day.
My goal has always been not to have visible patches, where I had to add vinyl after the fact, but that looks really bad. It’s a job for another day.
I don’t remember the ash tray being difficult to open before, but it’s really stiff. Like really stiff. The dash pad and extra layer of vinyl aren’t making contact with it, it’s just super tight.
I had stopped at Lowe’s earlier today and bought some new stainless sheet metal screws and washers. All of those that I removed from the dash pad before were mismatched, some were flat head, some were Phillips, some were shorter and longer.
The screw holes along the bottom weren’t lining up properly as I tried to screw them in and I was quickly losing light, so we’ll call it a day and call that a job for another day.
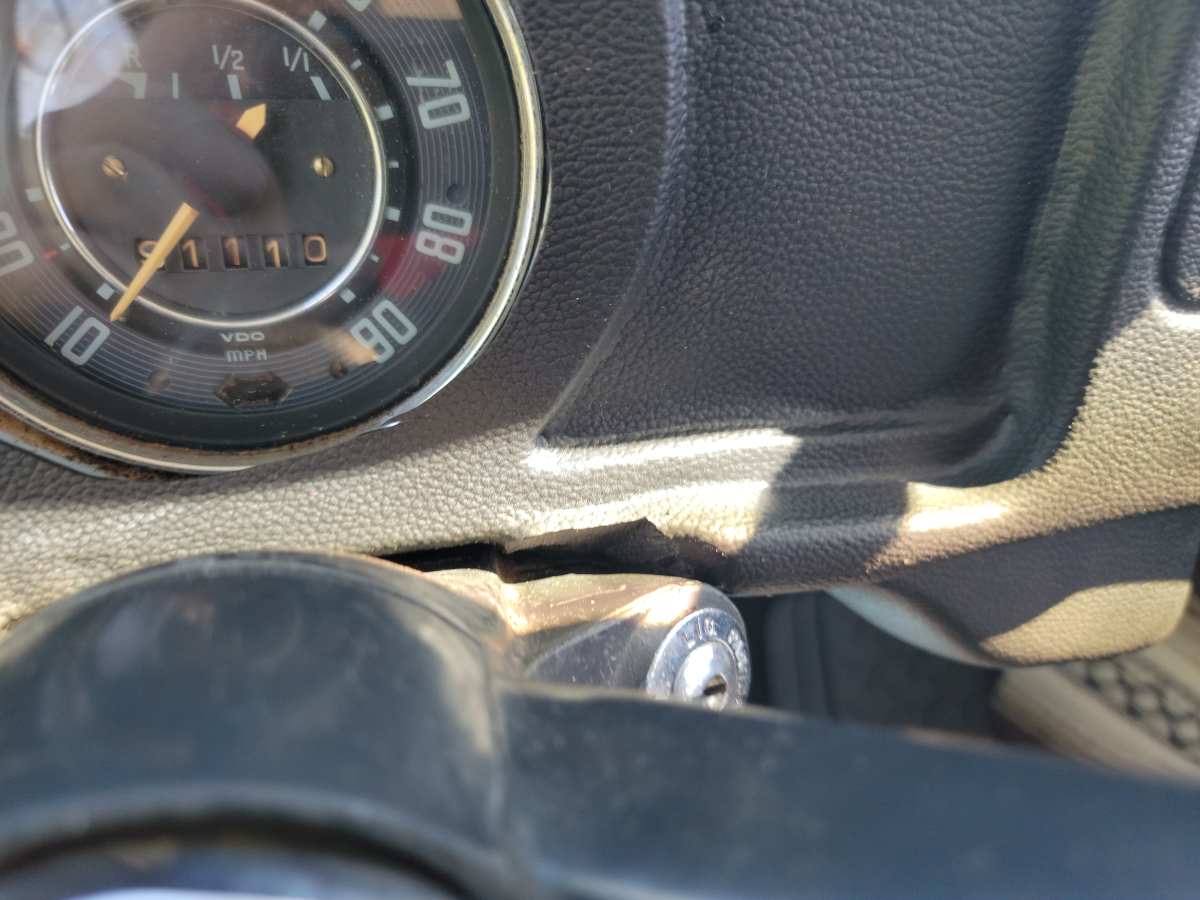
As I mentioned previously, the new dash pad appears to be very high quality, but at a glance, you can see it’s not an exact match to the old one.
When I got started installing it today, it became very apparent this was not going to be plug and play. First, I had to cut off a big section to fit around the ignition switch in the steering column.
Next, the glove box door was bound up and would need a heavy trim.
The kick panel speaker looks pretty good hanging out all casual over there.
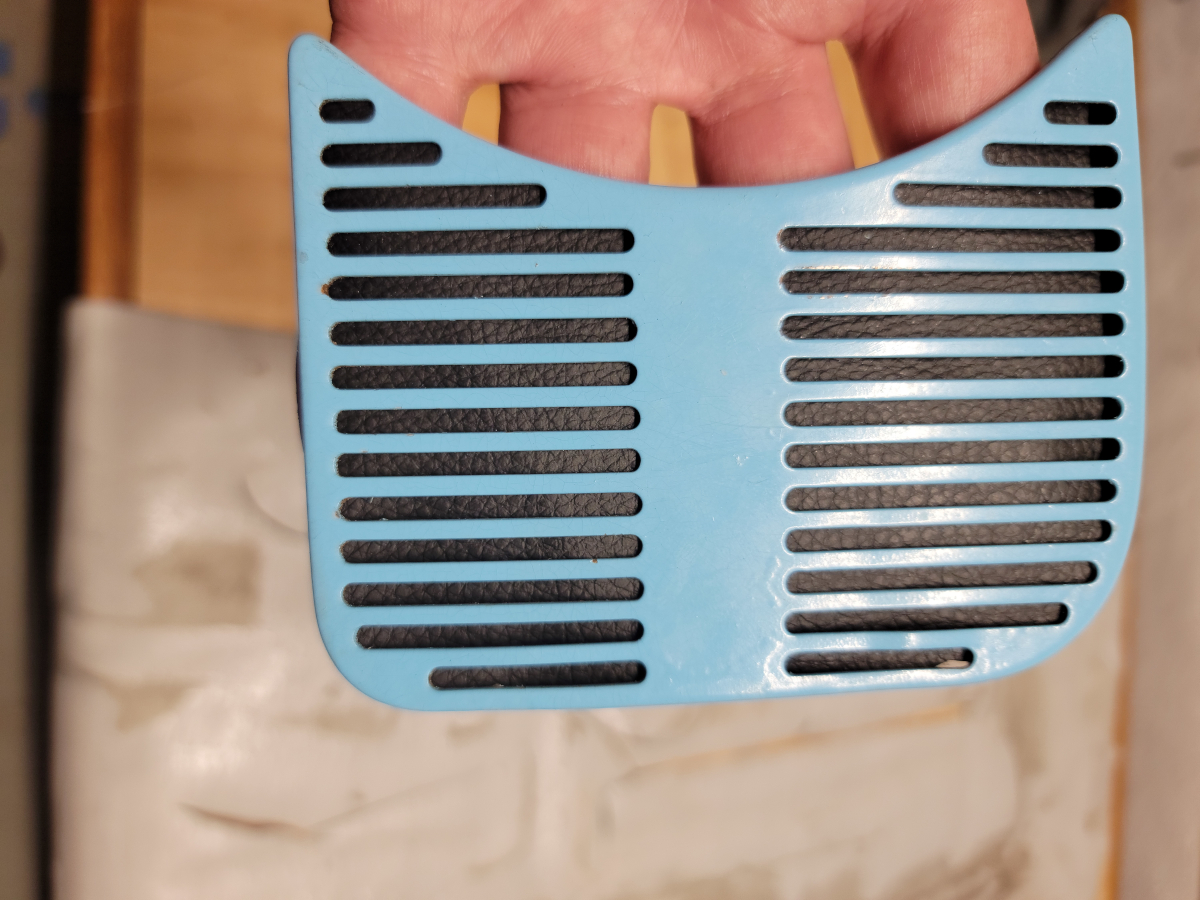
In preparing to re-mount the decorative grill plates around the speedometer, I decided to use some of that black vinyl as a backing. The benefit is two-fold. It looks pretty nice, but will also block some air coming in from the poorly sealed front end.
The new dash pad has a speaker hole cut in it and there won’t be a speaker in there anymore.
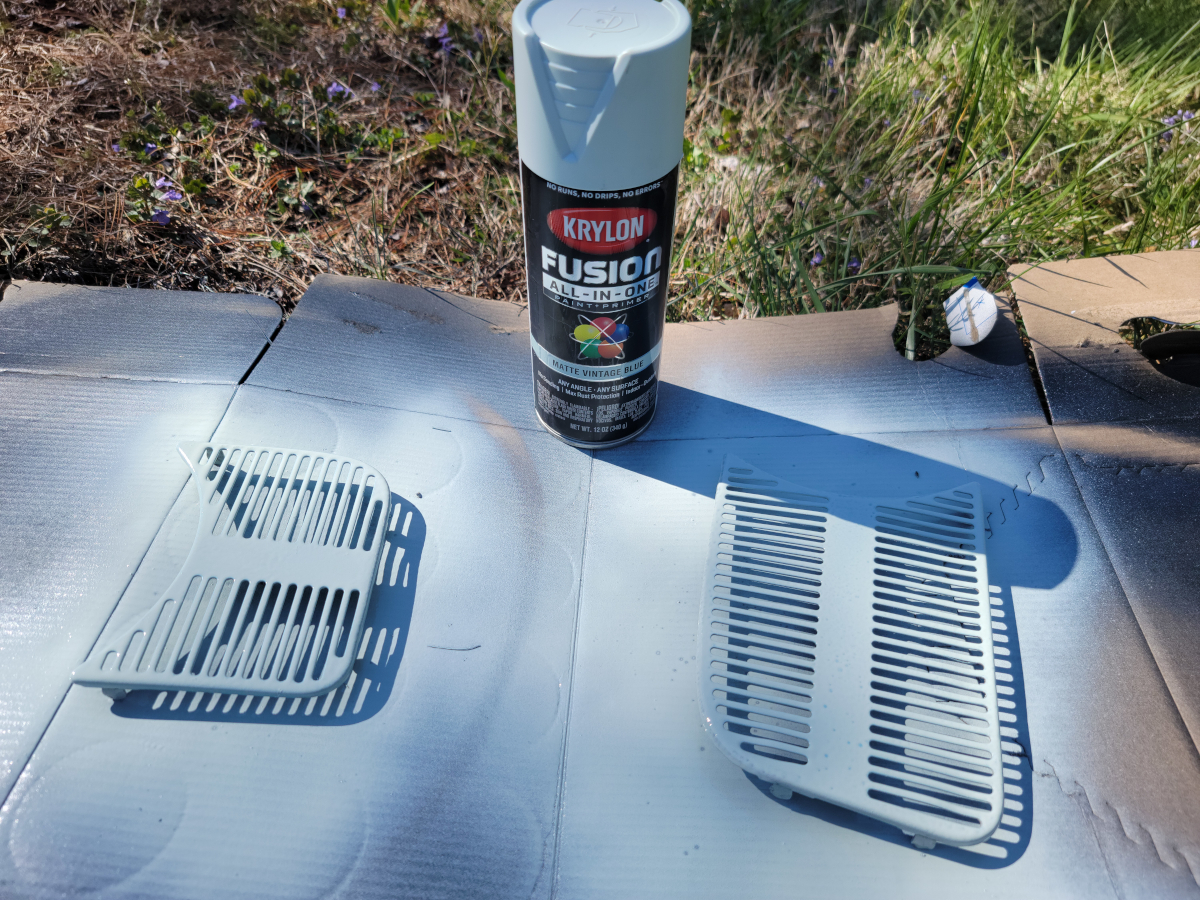
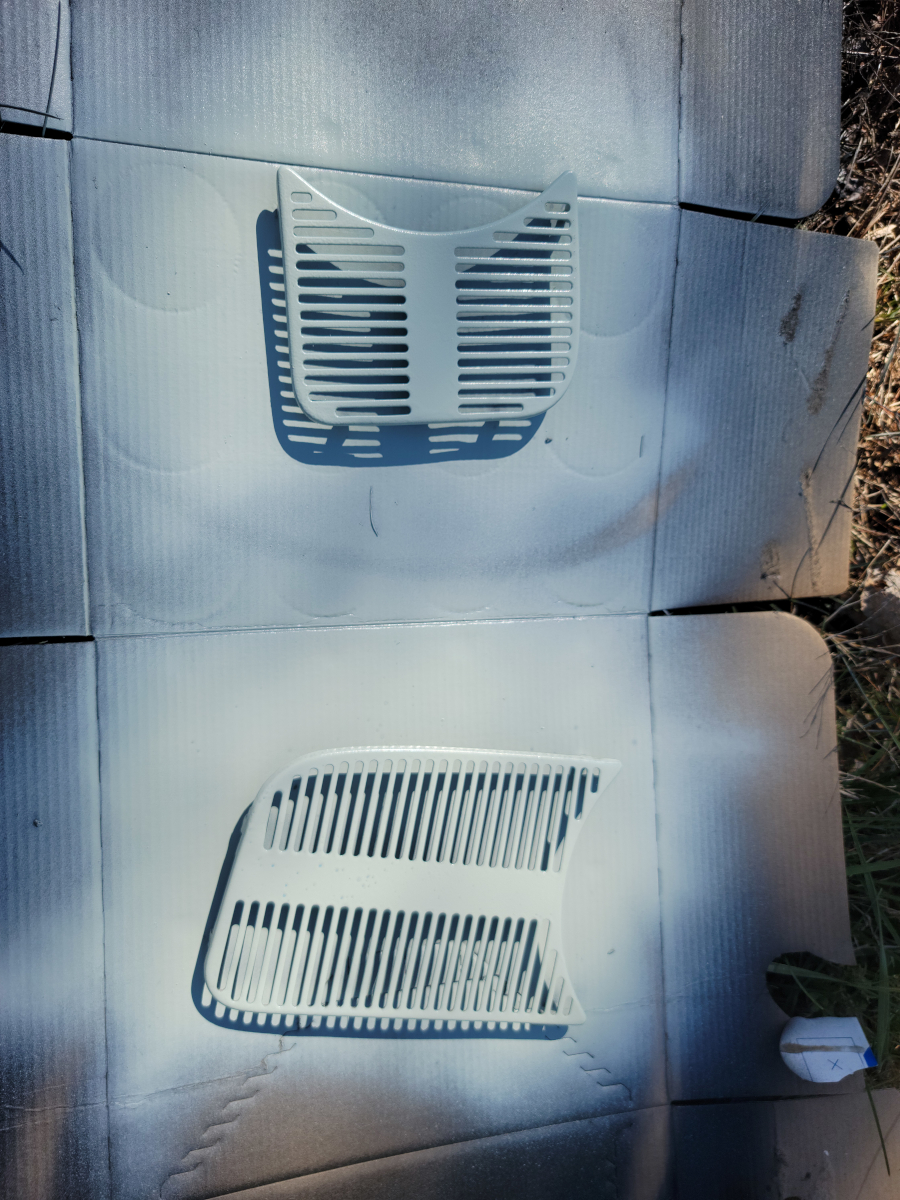
Time to bring the Matte Vintage Blue out of retirement!
Apparently, I didn’t get them clean enough before spraying the first coat. There are lots of bubbles.
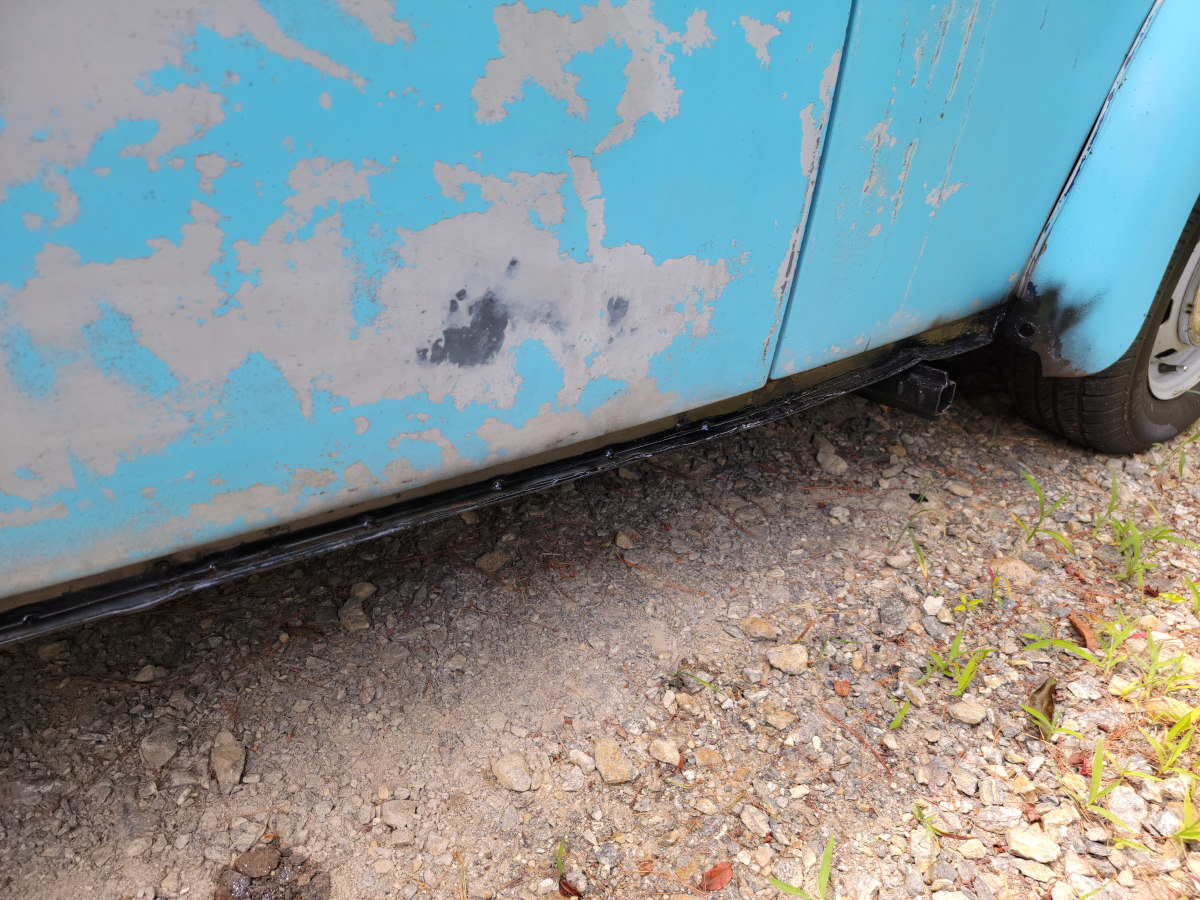
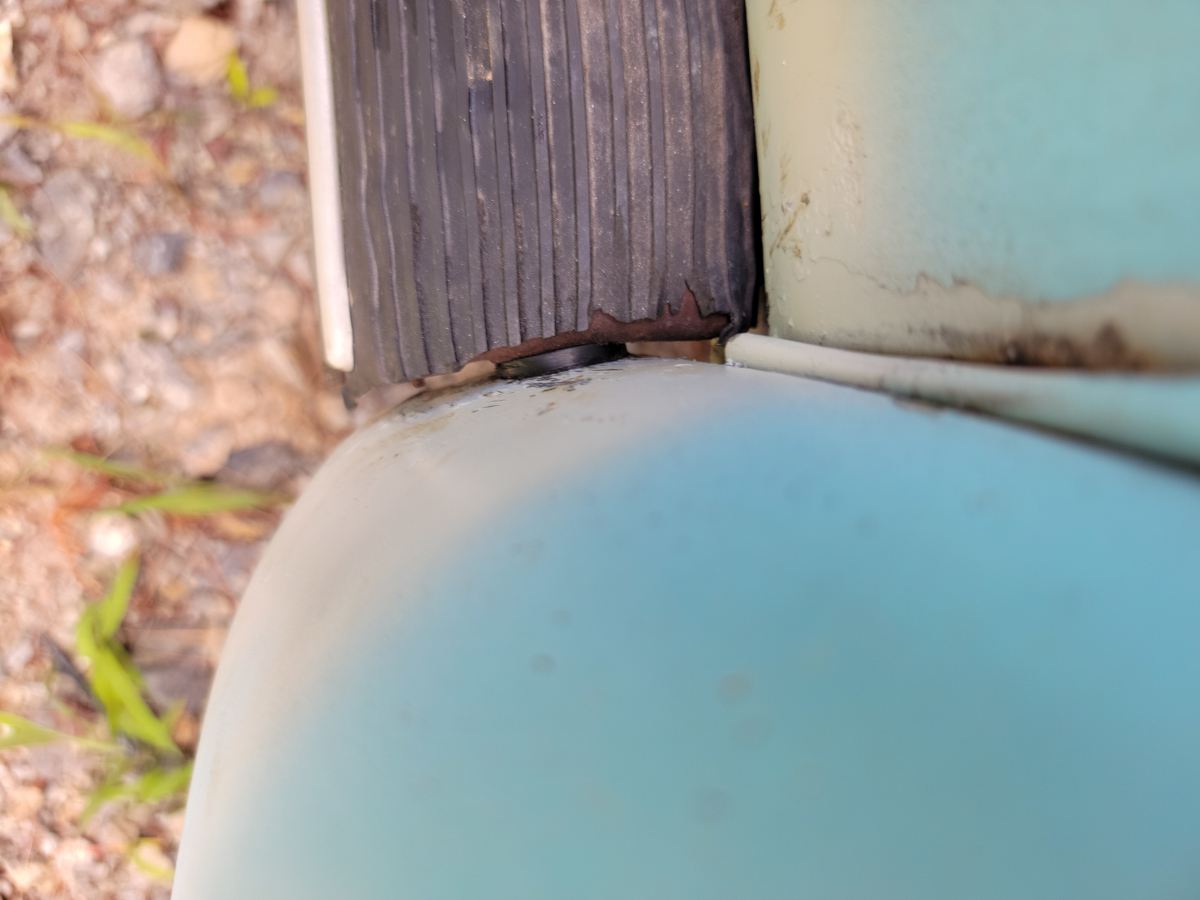
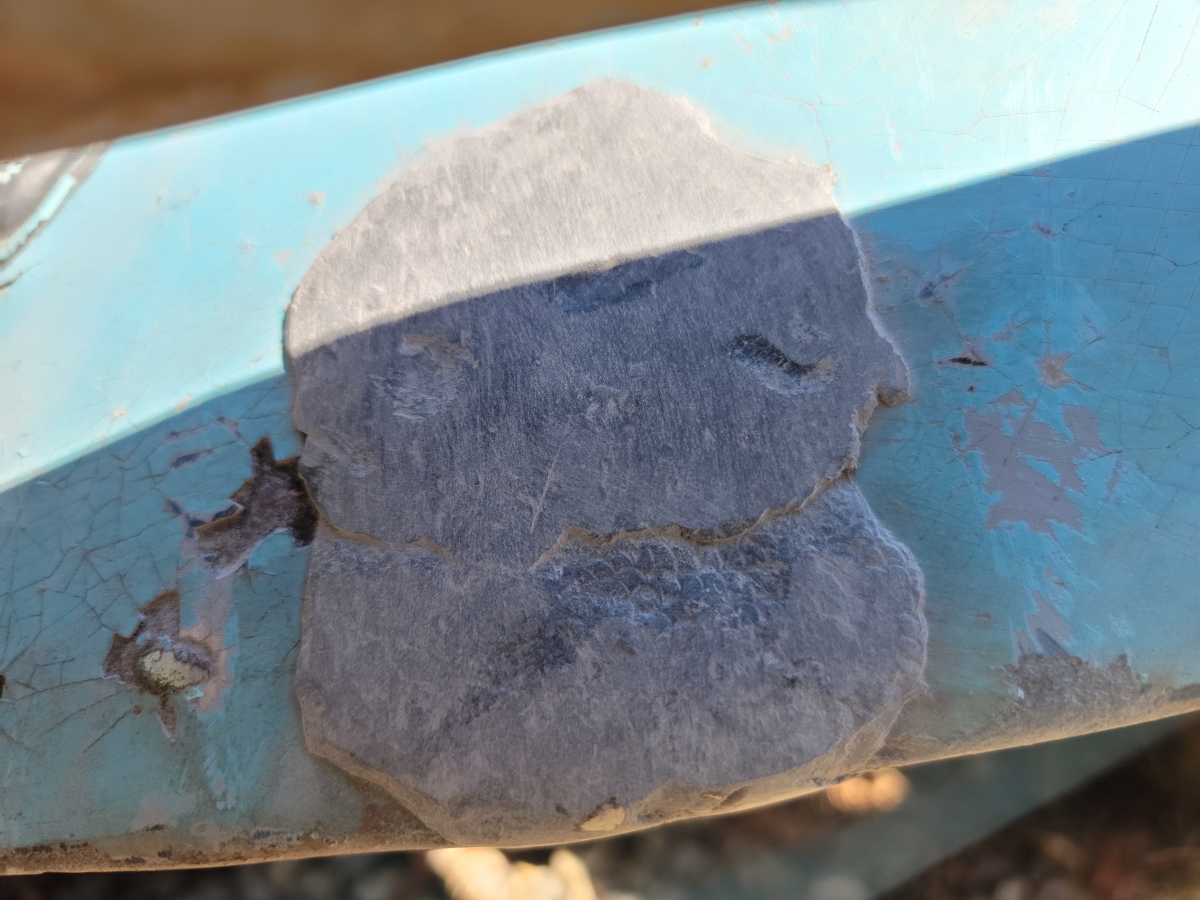
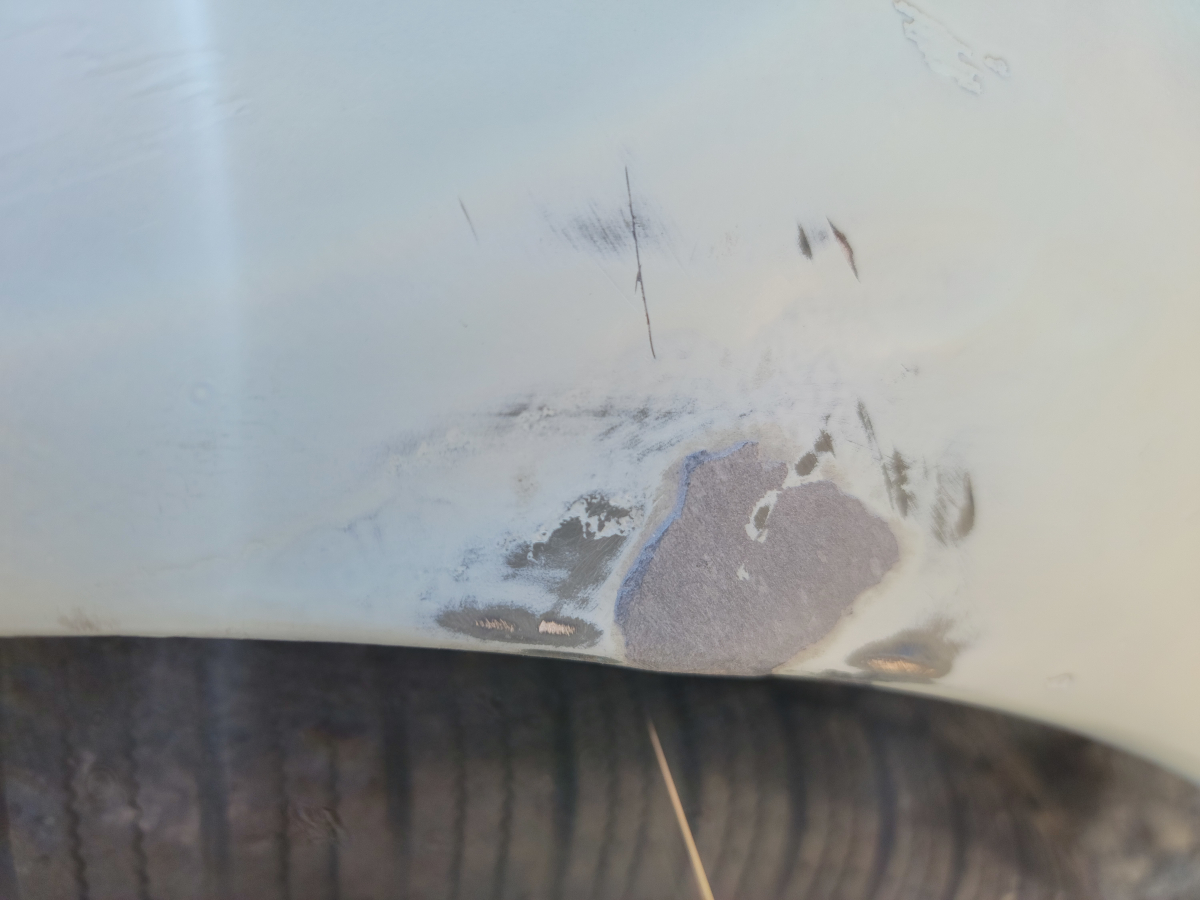
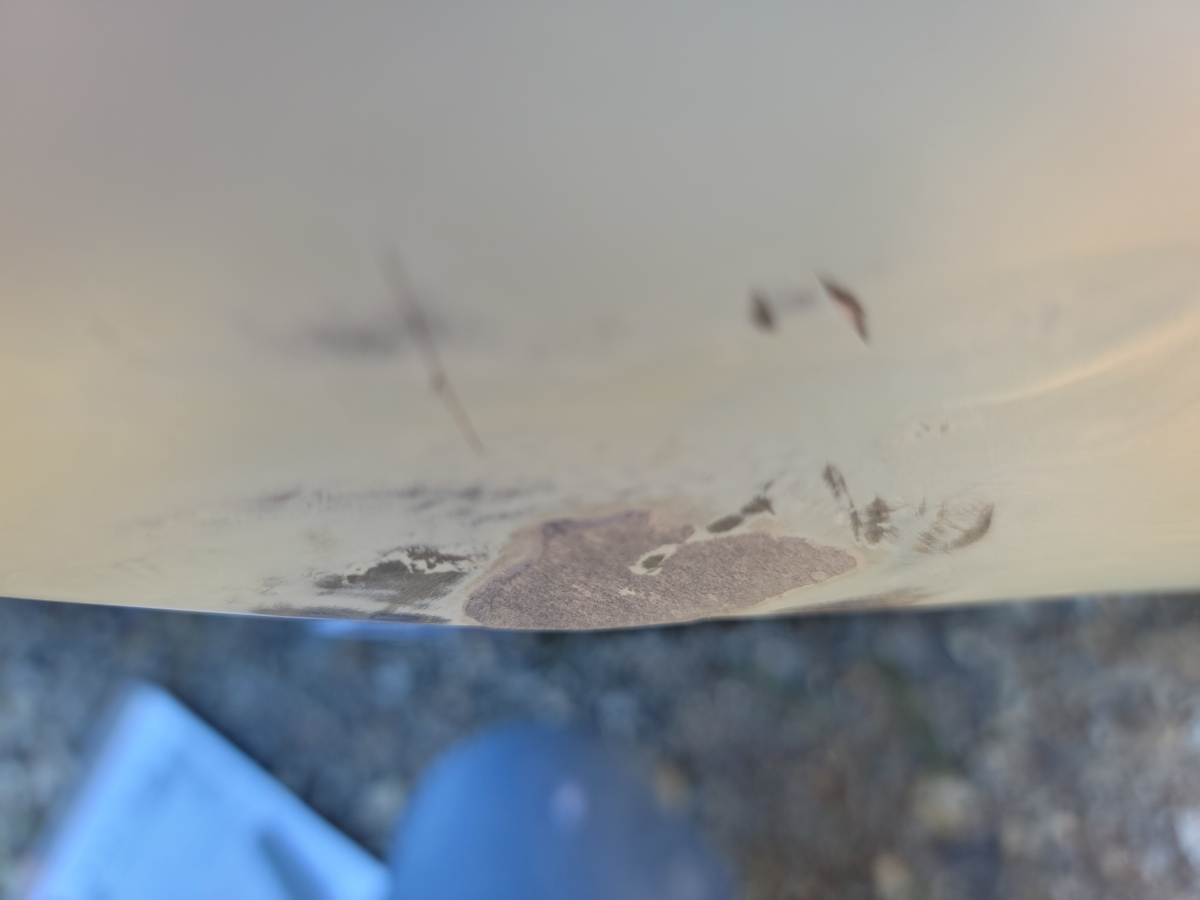
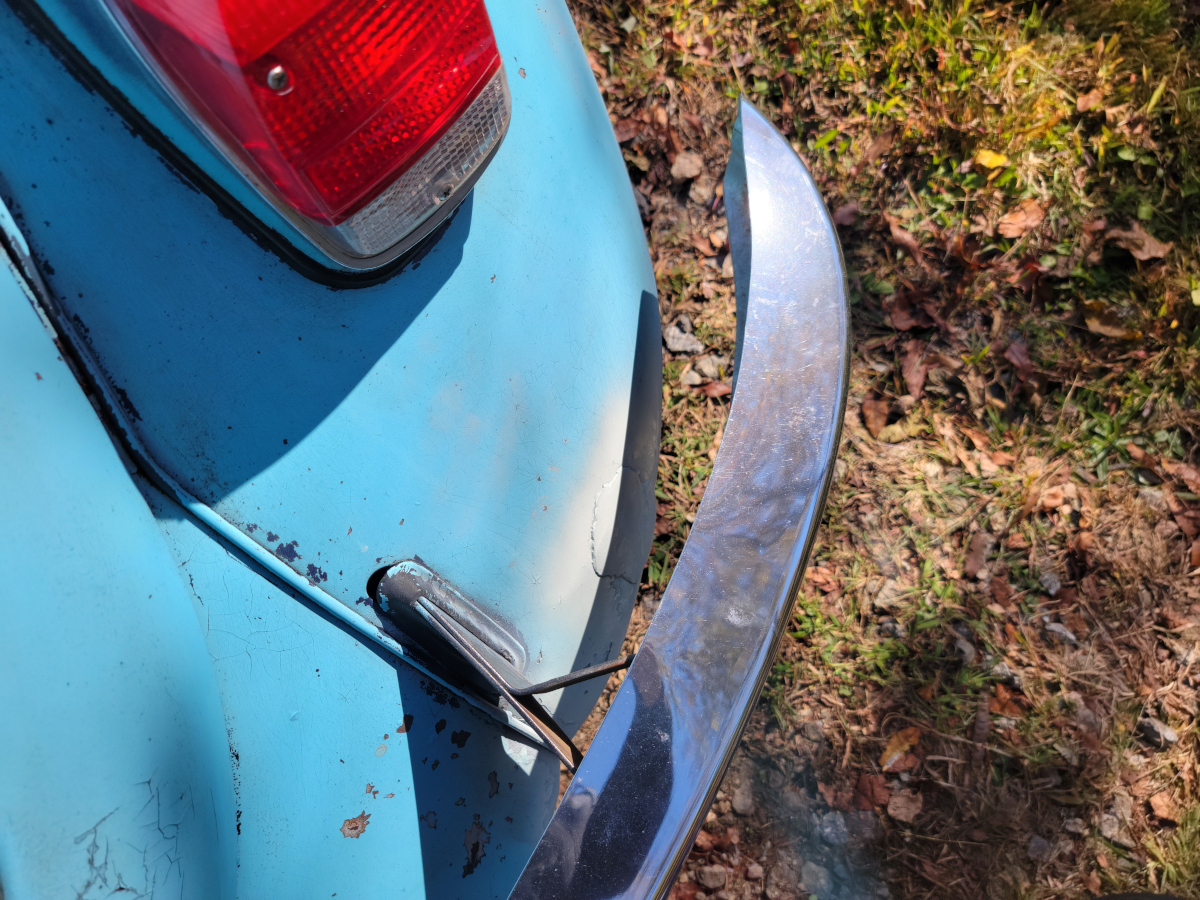
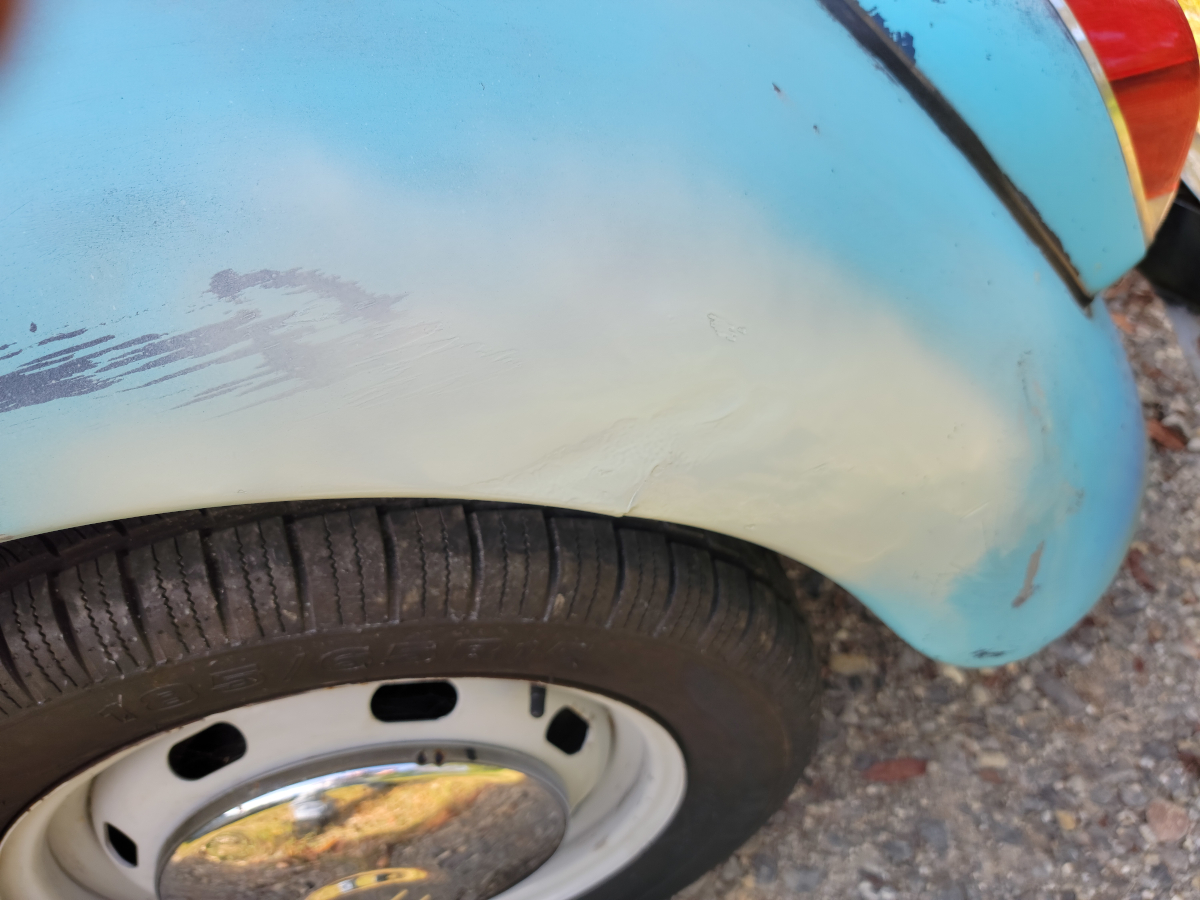
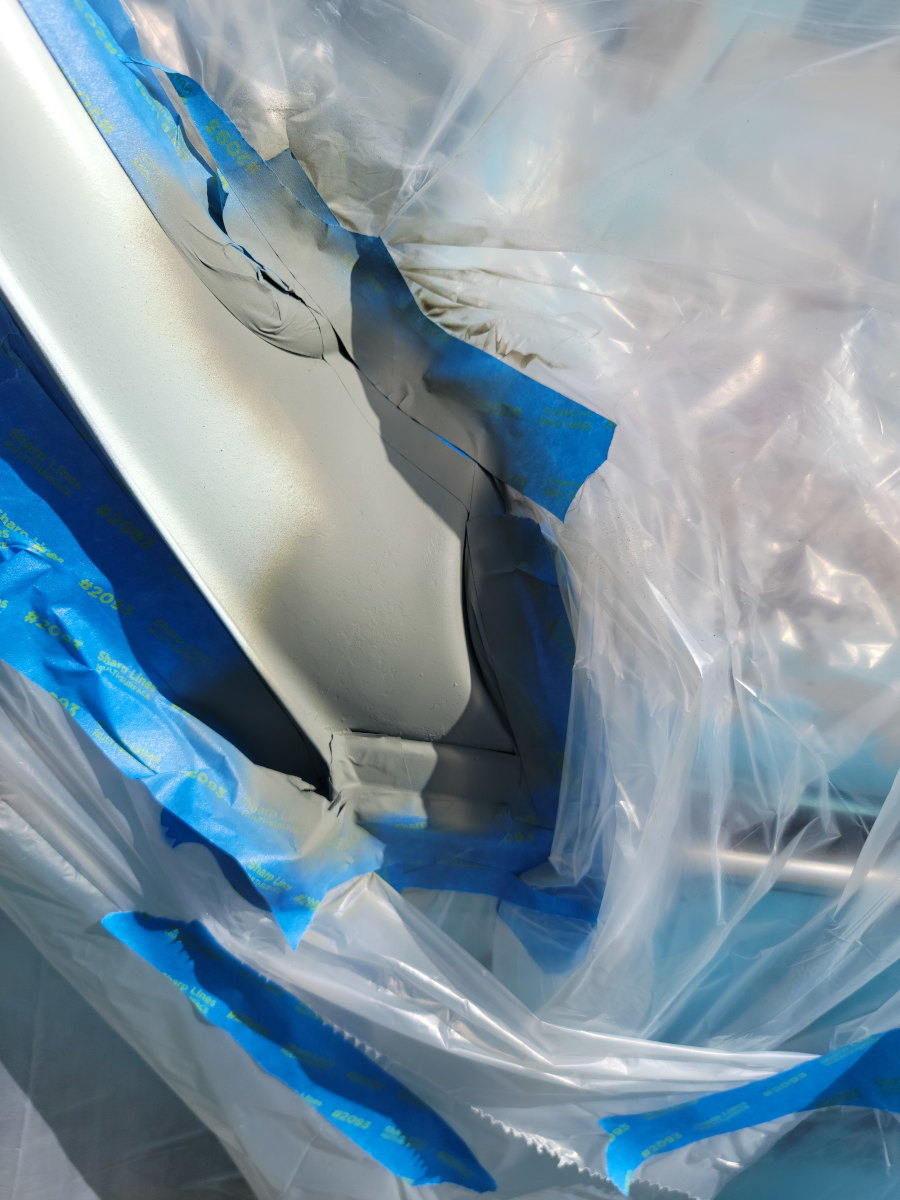
I had such good luck with the patches in the fenders last time, I decided to see how it would work on the outside. I couldn’t get it as thin as I would have liked, but I knew I would be filing and sanding it down anyway.
Since a little goes a long way with this stuff, I rolled some up and reinforced inside the rolled lip of both fenders behind the cracks. I also filled the underside of that smoosh on the rear to try and reshape the bottom edge of the lip.
Letting those sit overnight, I went back with the highest grit sandpaper I had and it barely left a mark on that epoxy putty. It really is hard stuff once it has set. So, I after them with a coarse metal file.
They are still wayyyy too thick, especially on the passenger’s side rear. I will have to eventually go back with an electric sander to get that the rest of the way down. For the time being, it’s better than it was, being untreated rusty metal exposed.
Shot a quick coat of matte vintage blue and called it a day.
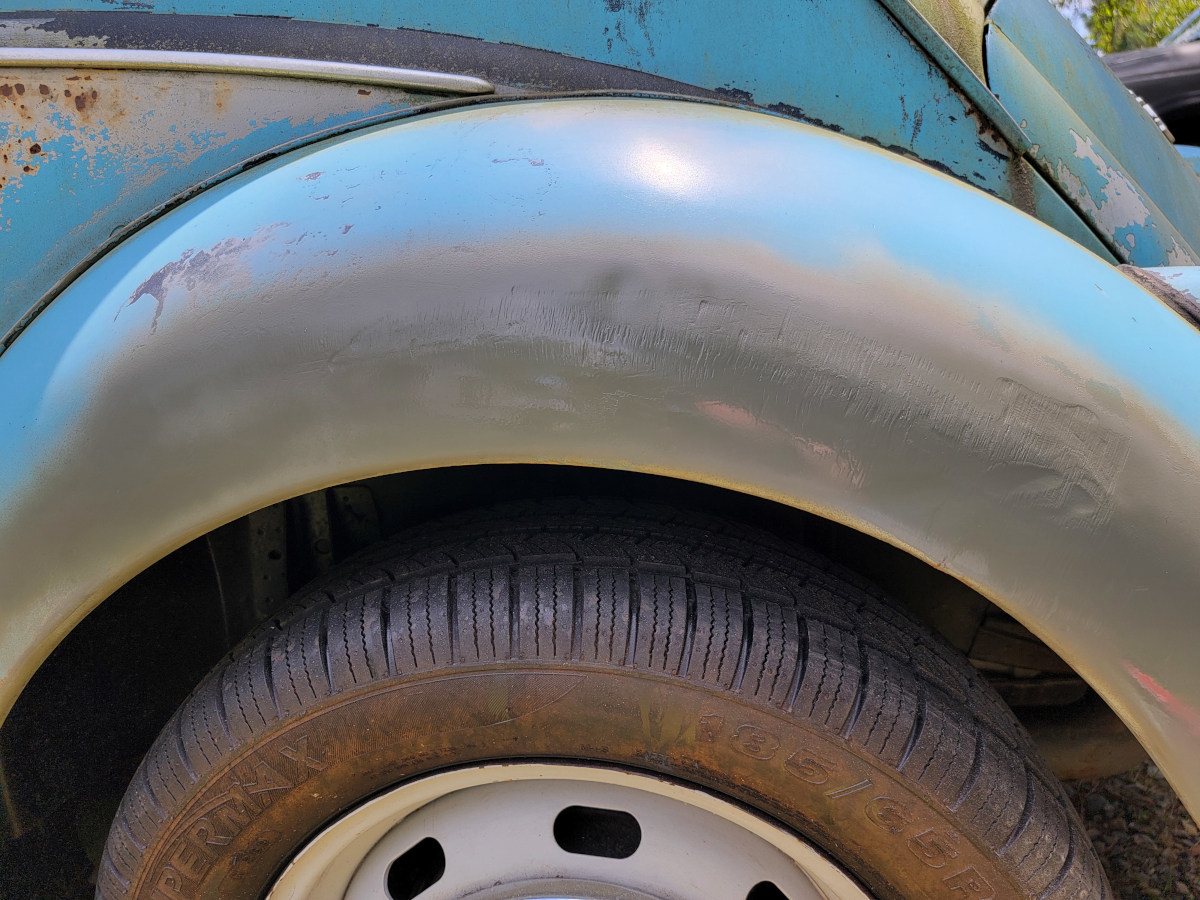
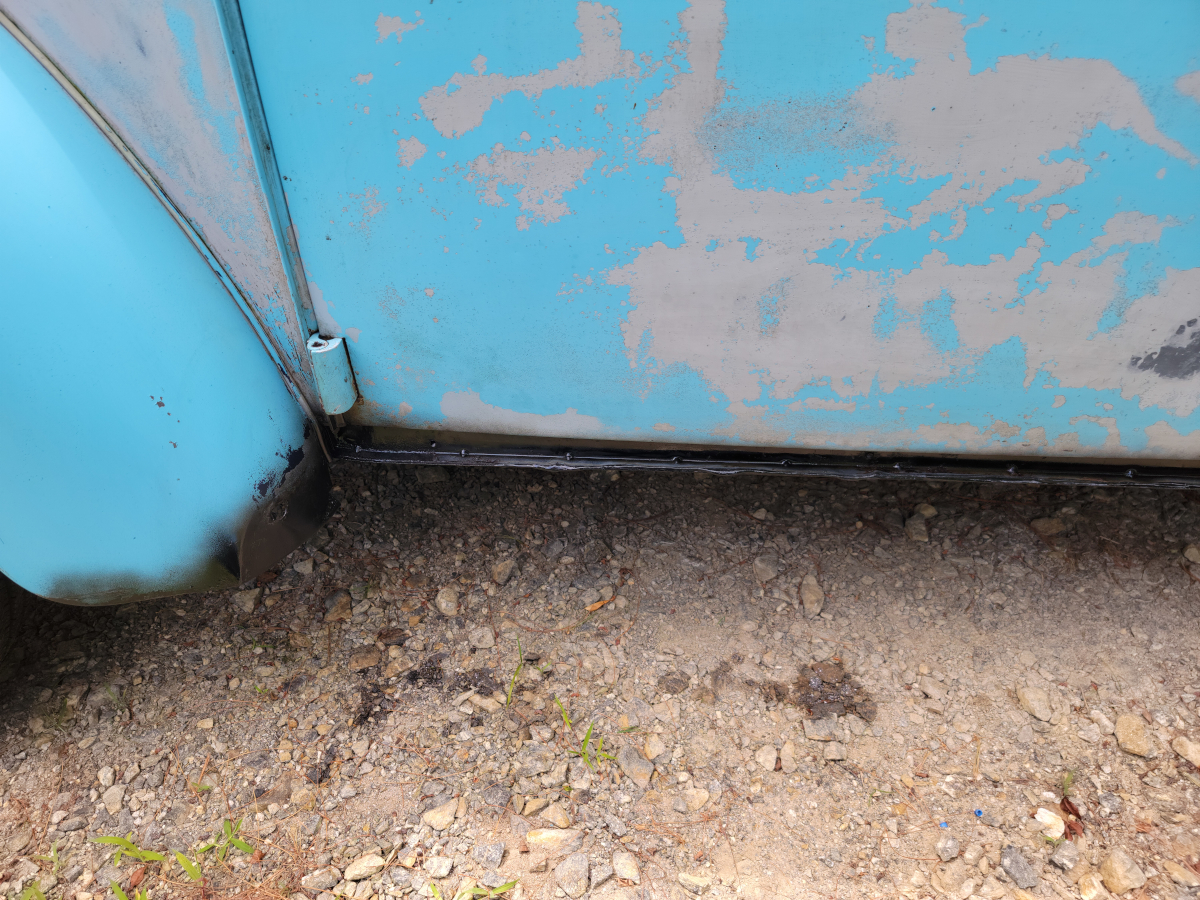
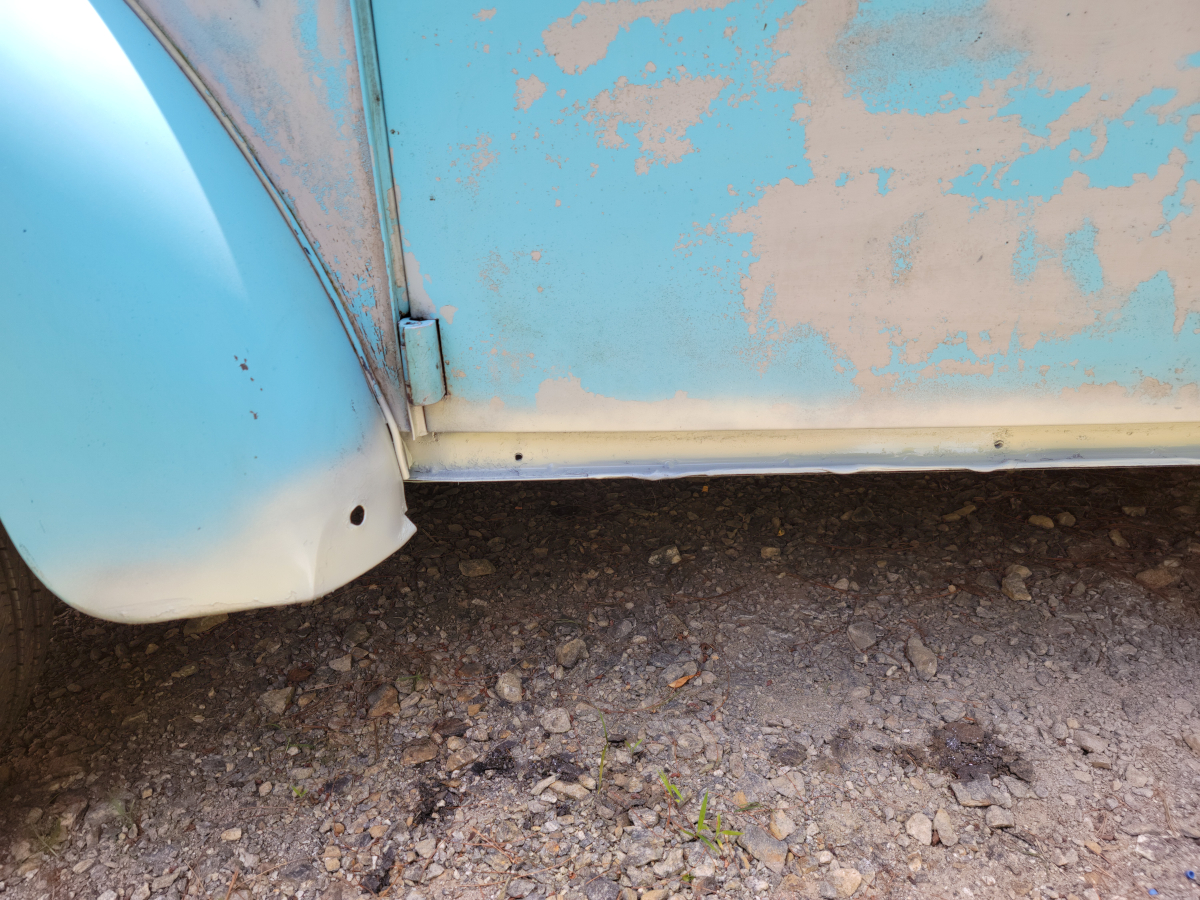
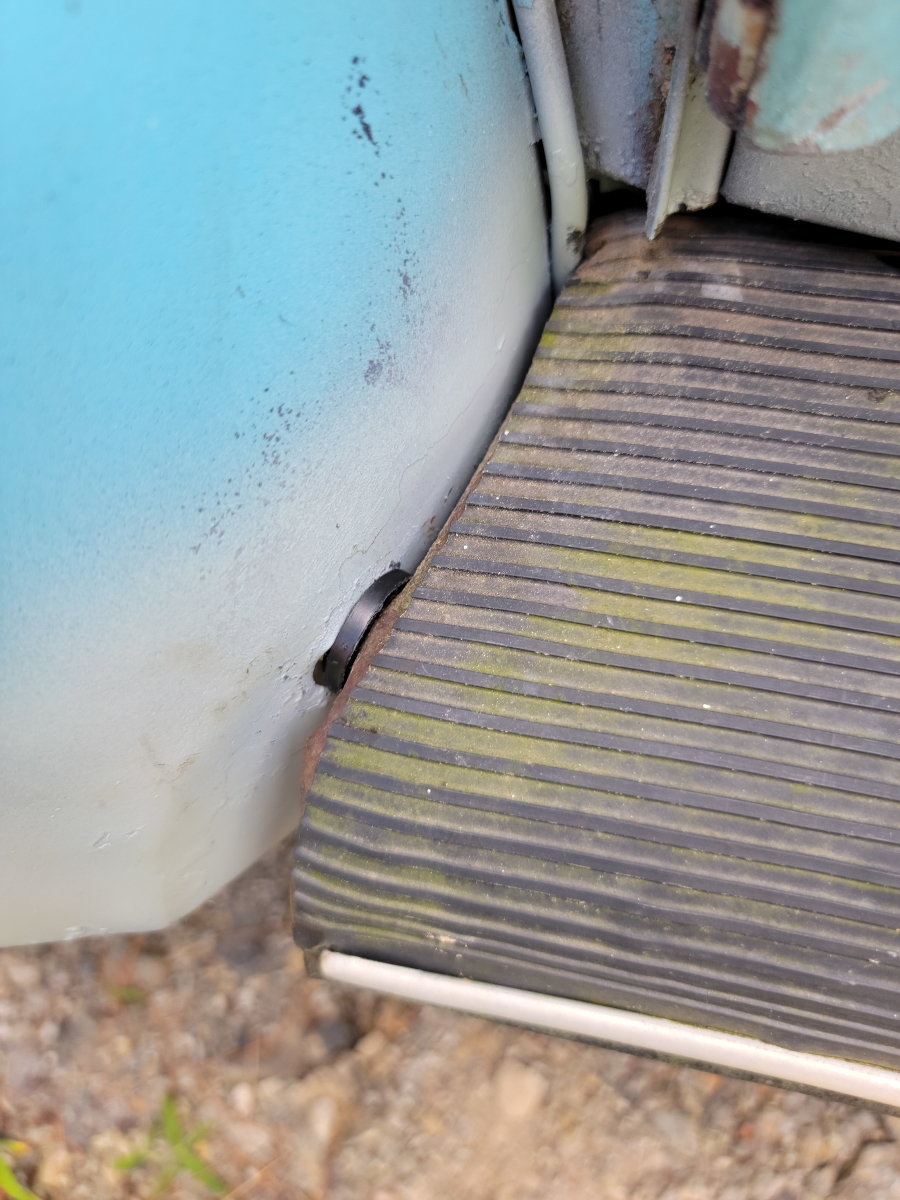
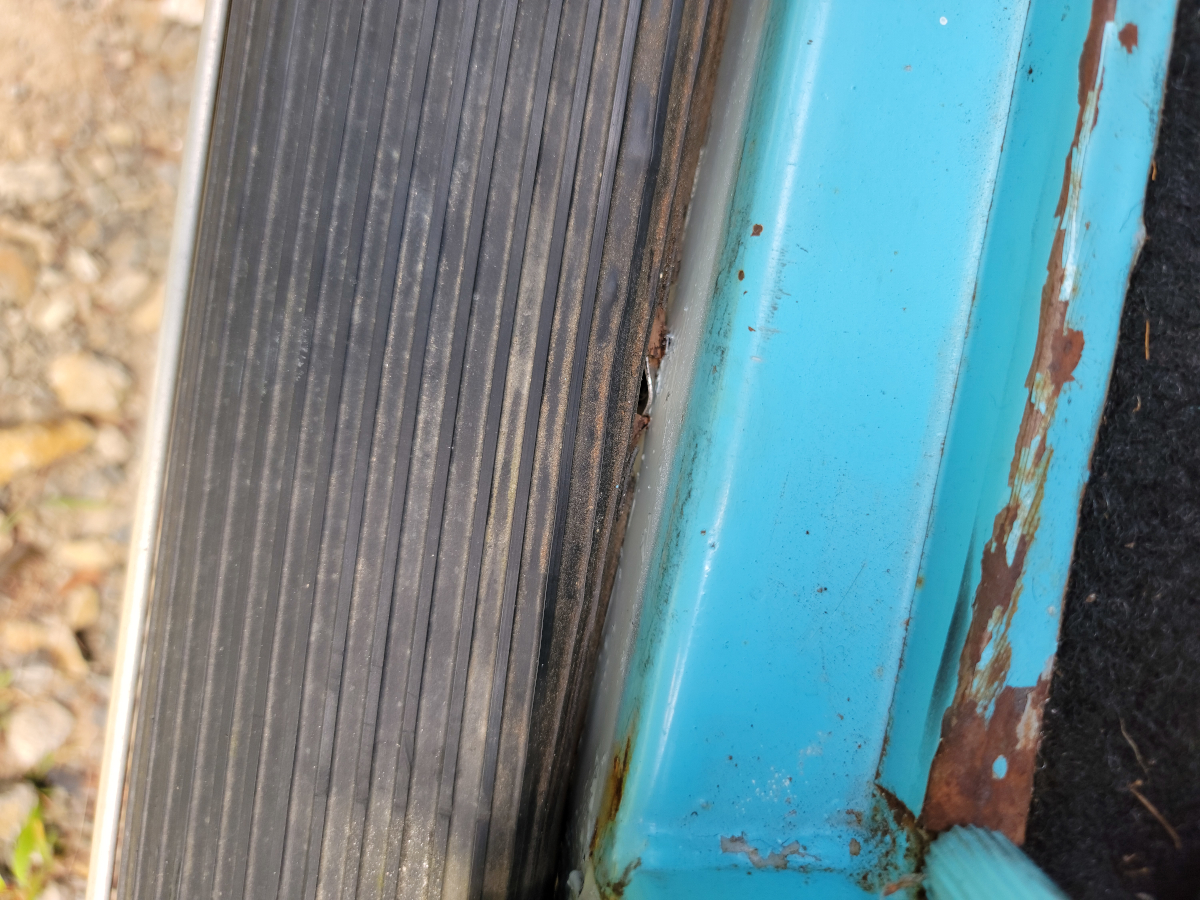
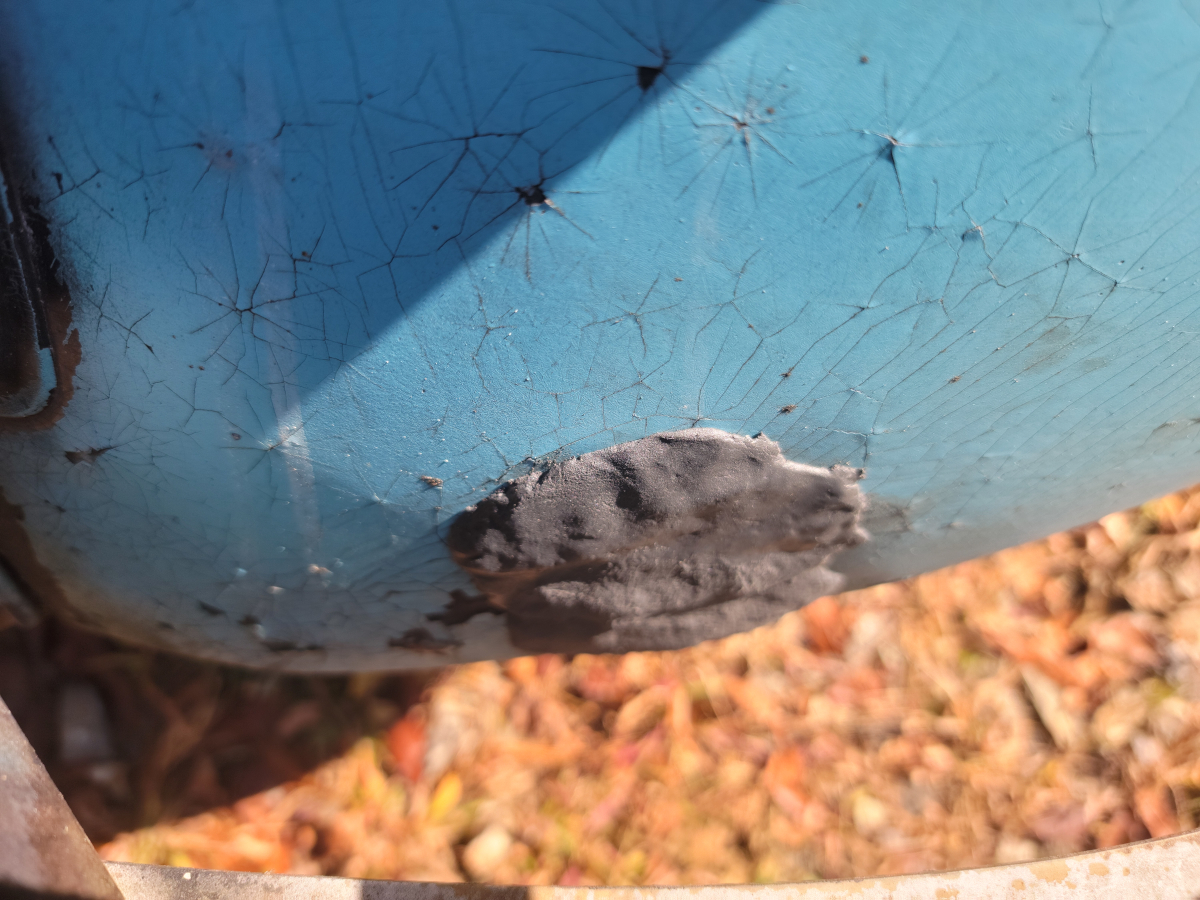
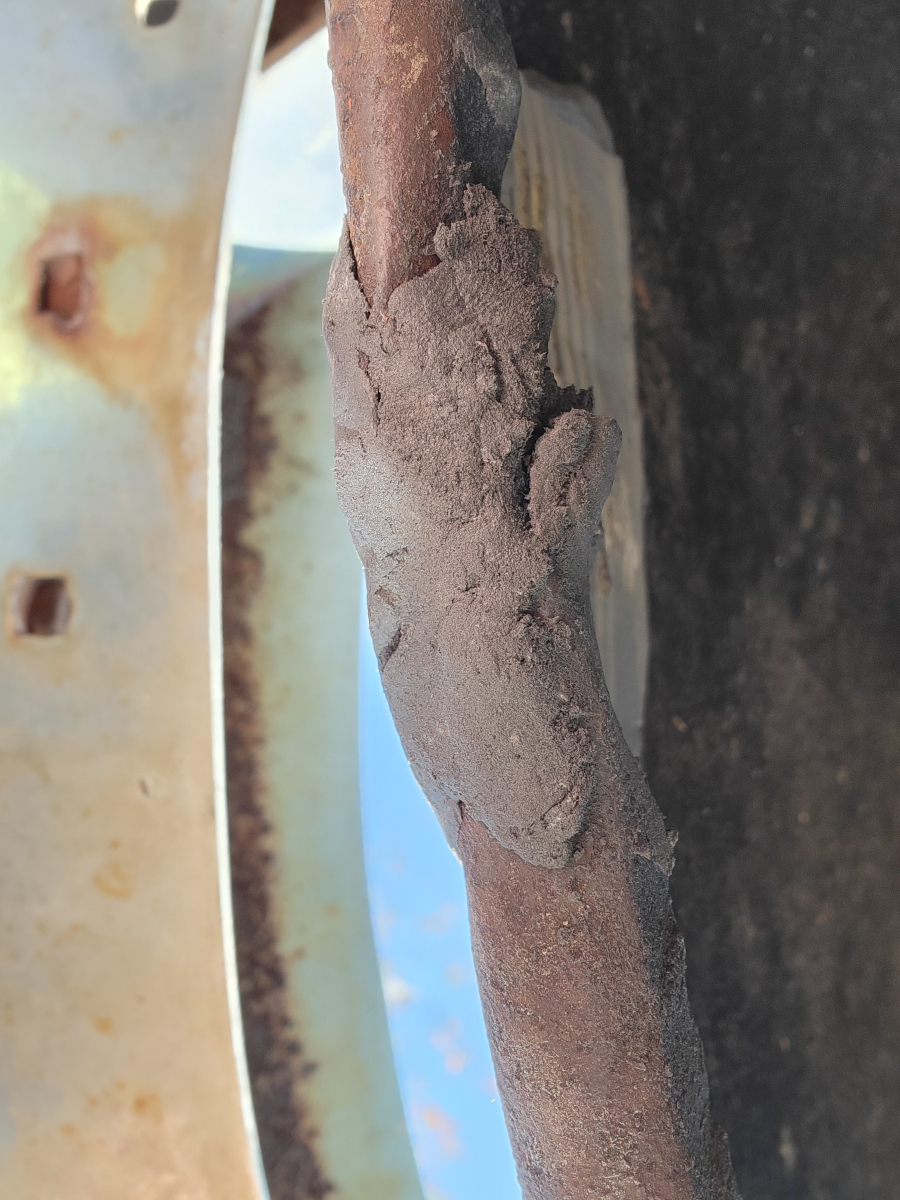
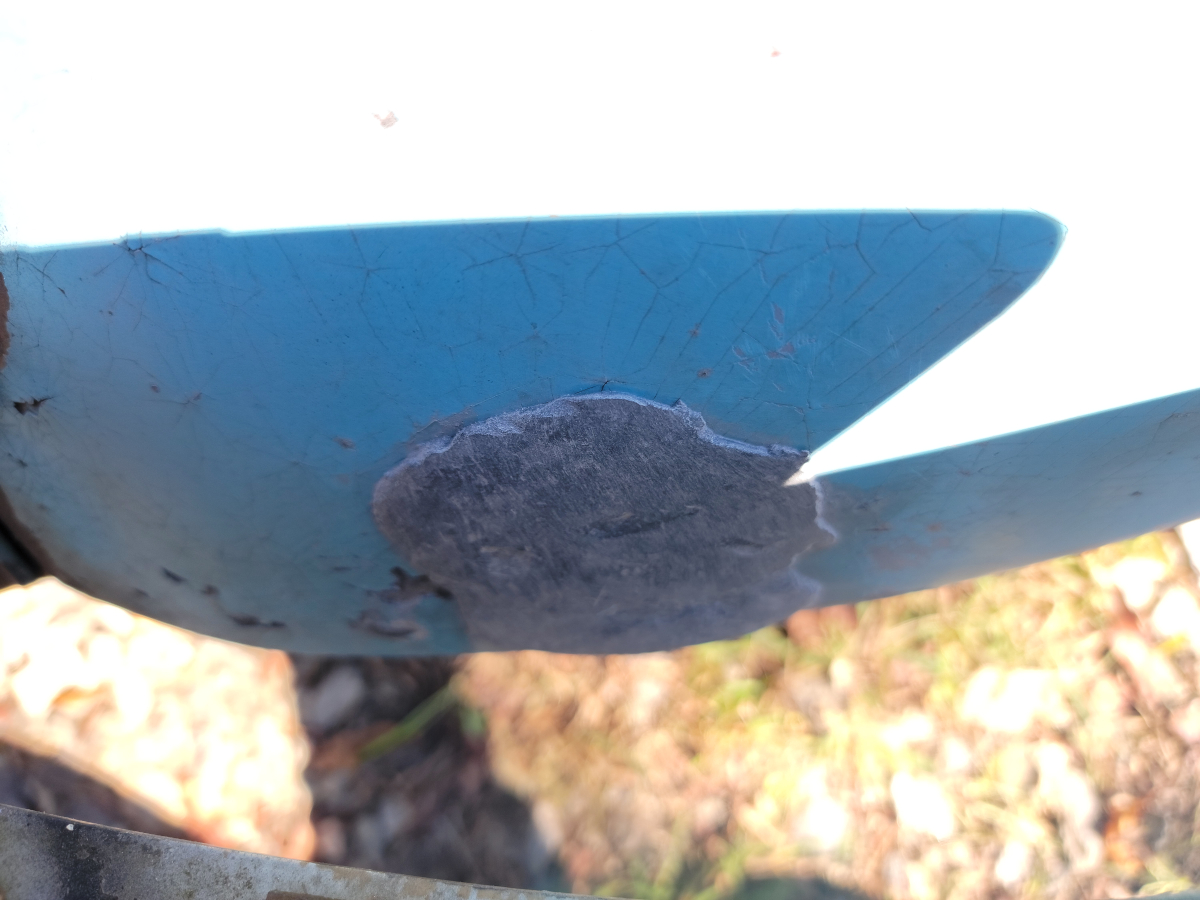
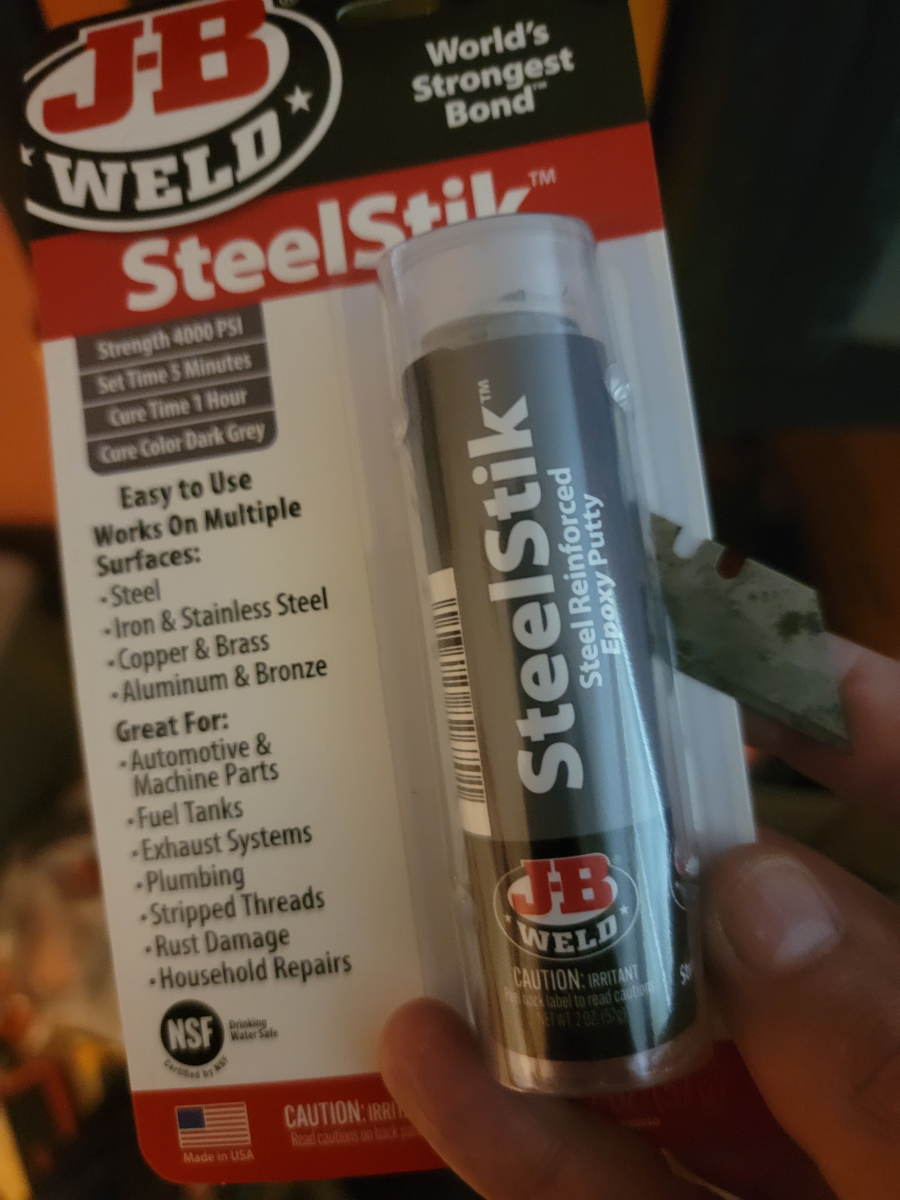
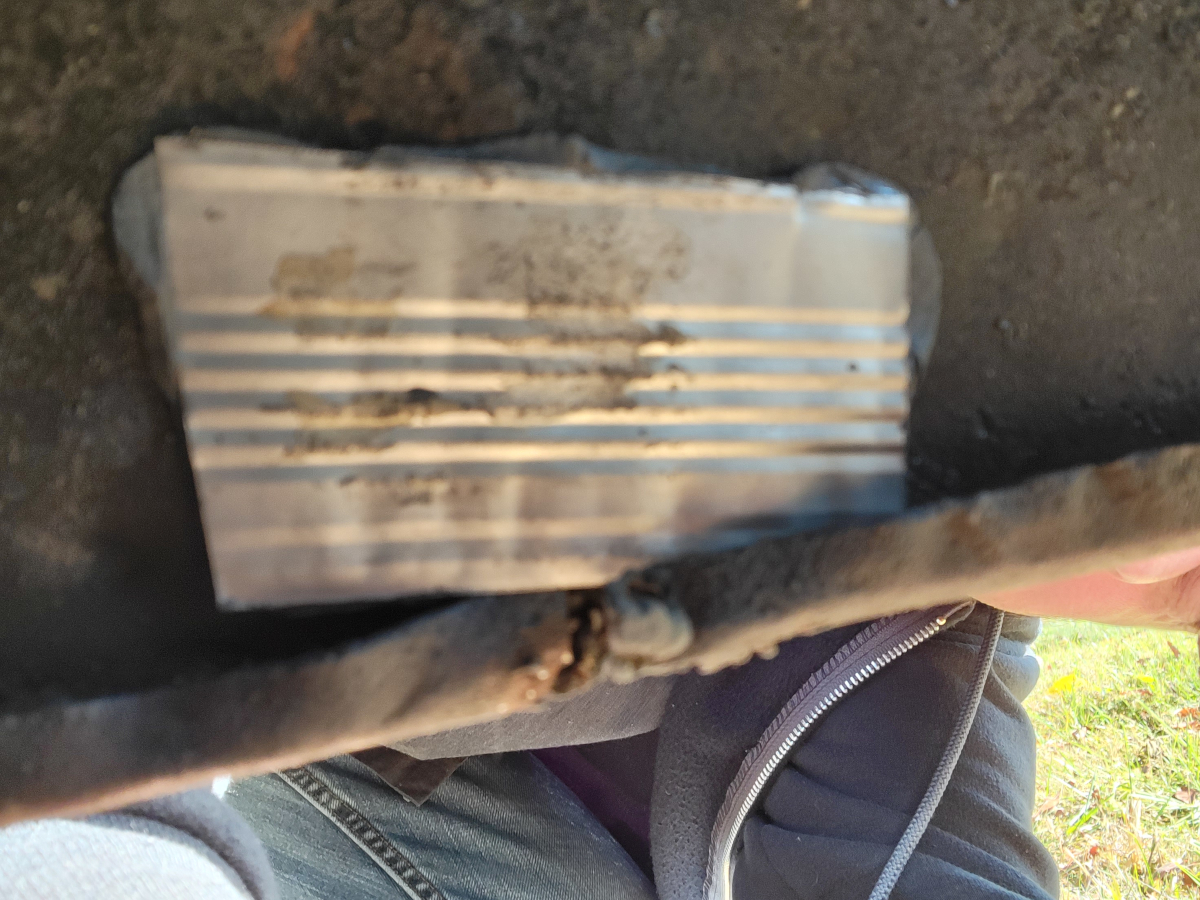
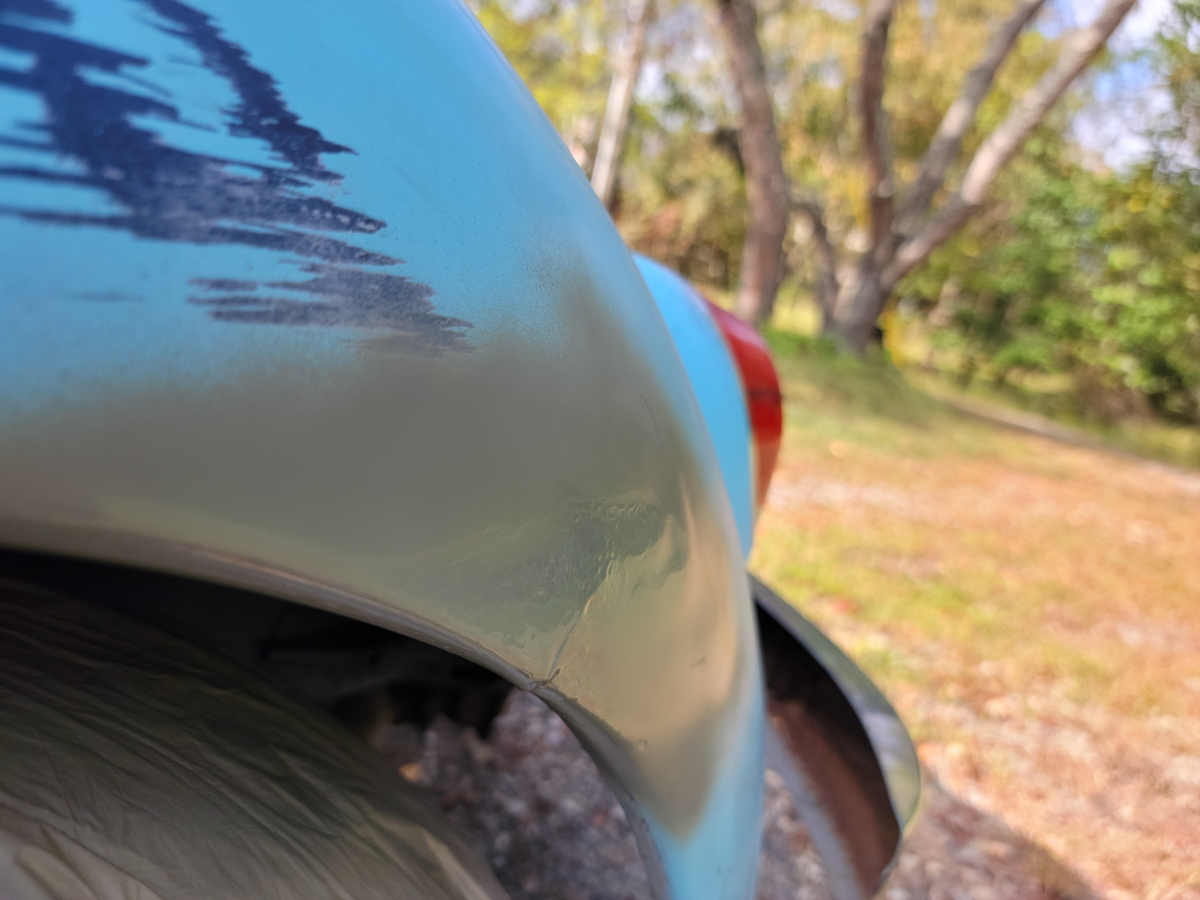
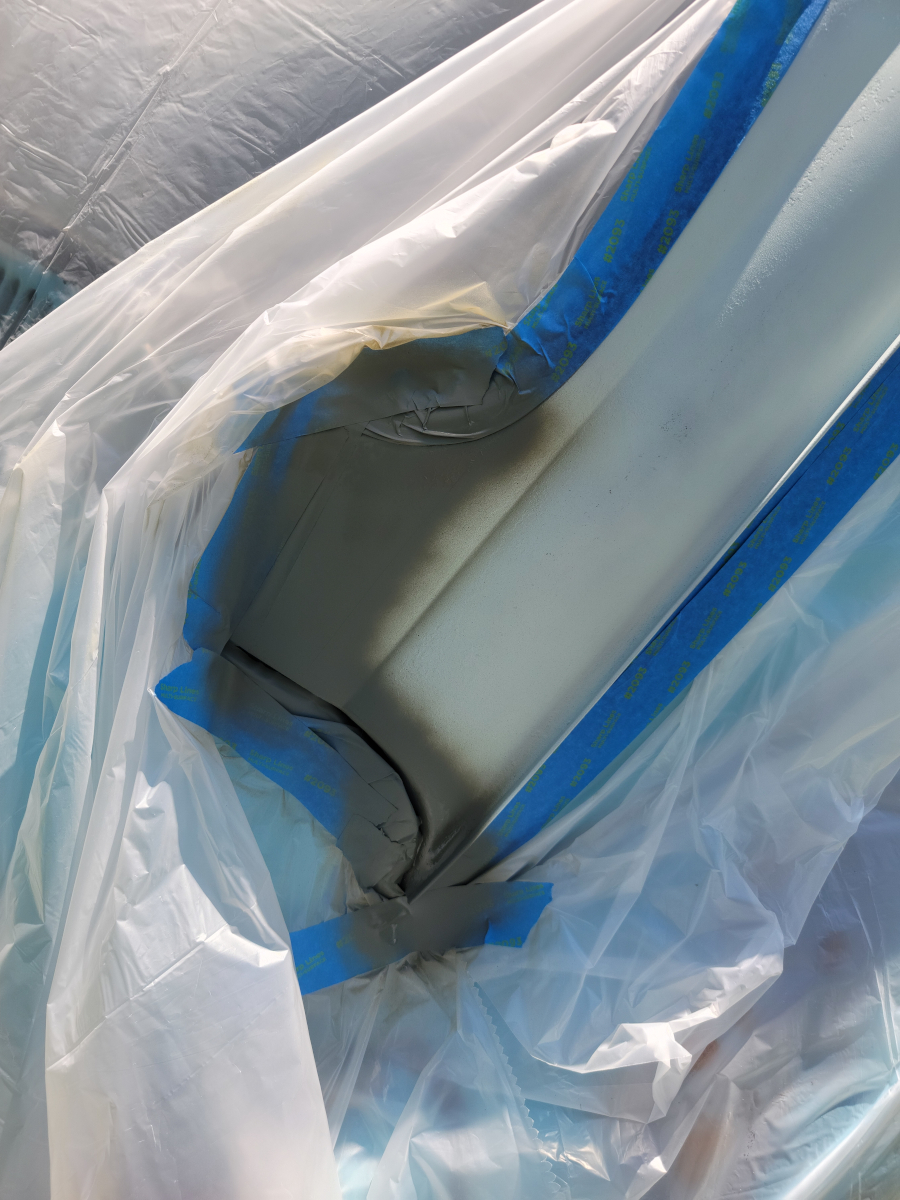
I bought a tube of JB Weld SteelStik (Amazon link), which is steel reinforced epoxy putty. When dried, it is hard enough to drill and tap, so I figured it would work well to reinforce the back side of the fenders, behind the cracks.
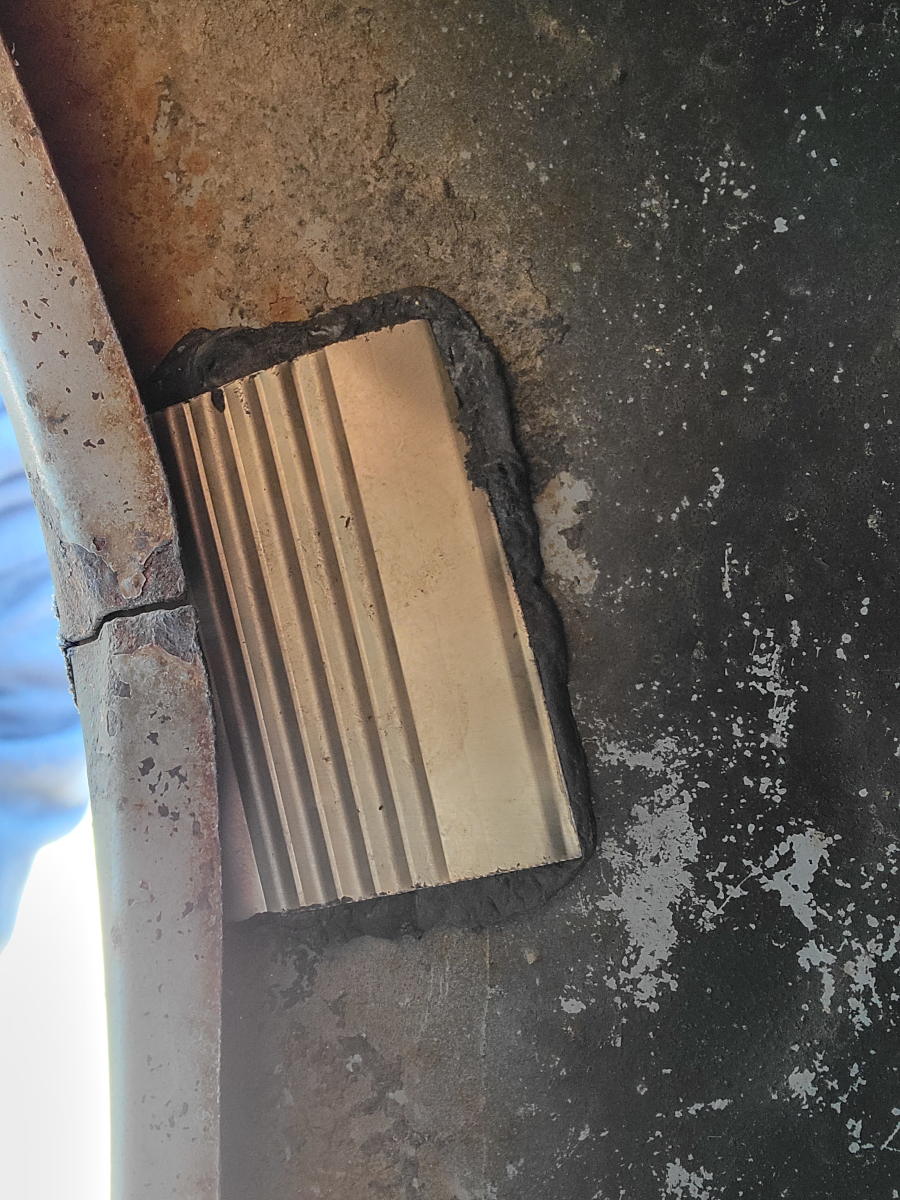
I had a can of bean dip from the previous Sunday’s football watching festivities. I cut patches out of the ribbed aluminum can with tin snips, covered them with epoxy putty, and sandwiched them on the back side of the fenders.
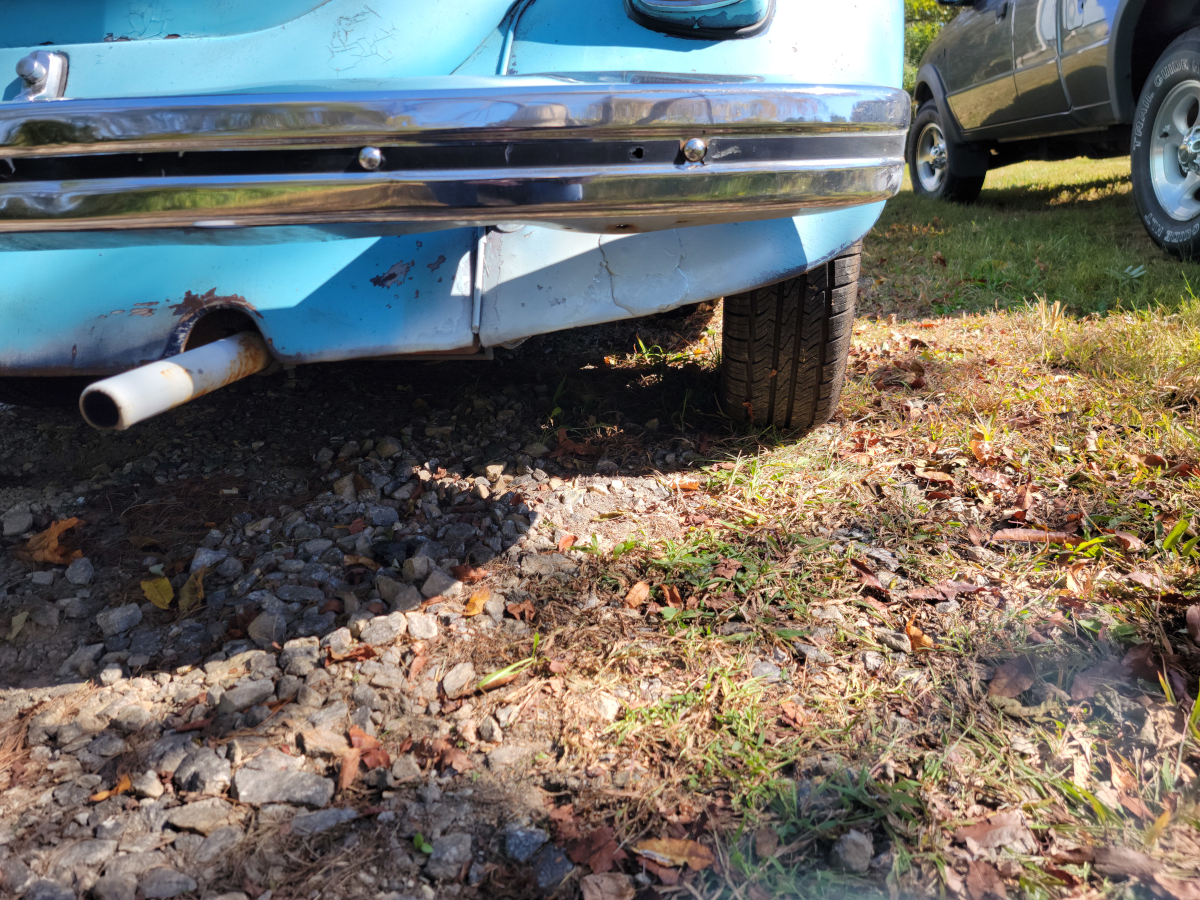
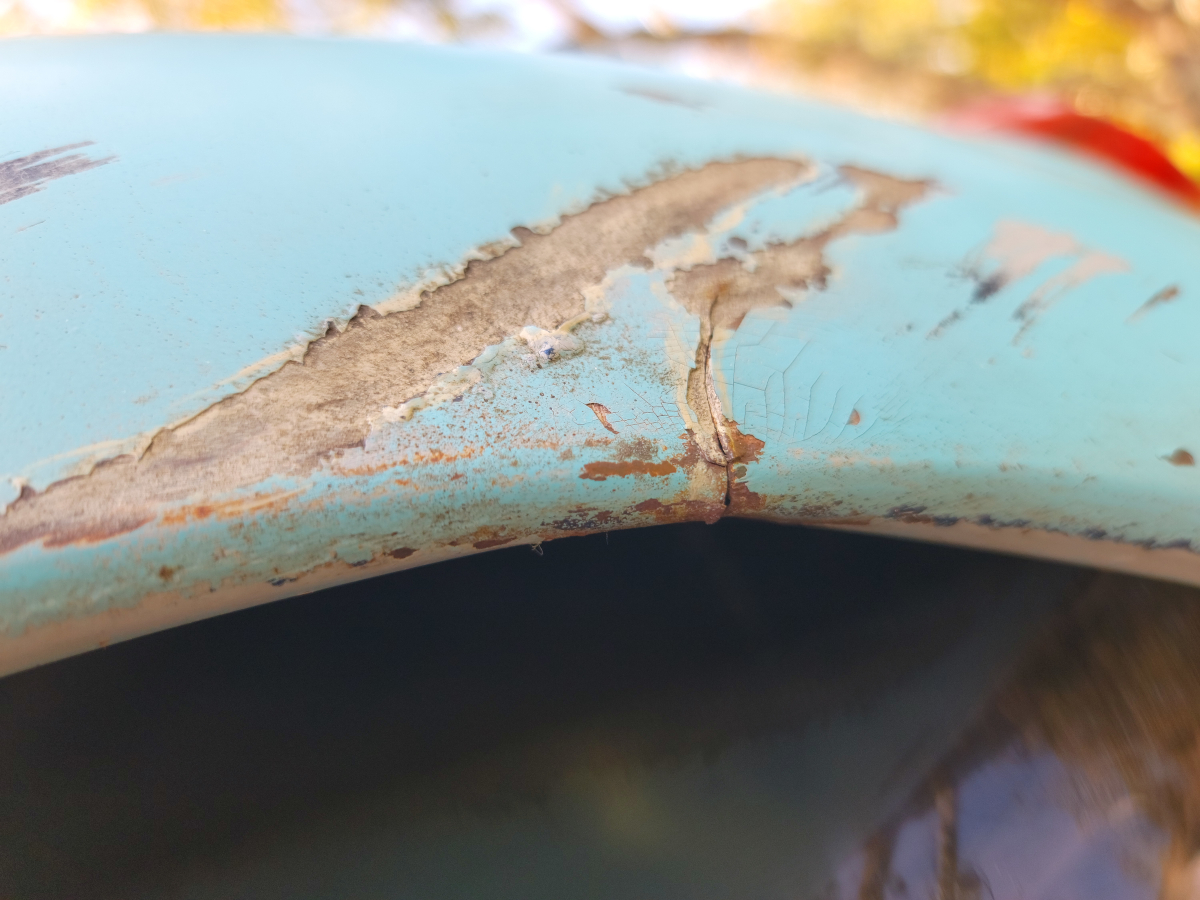
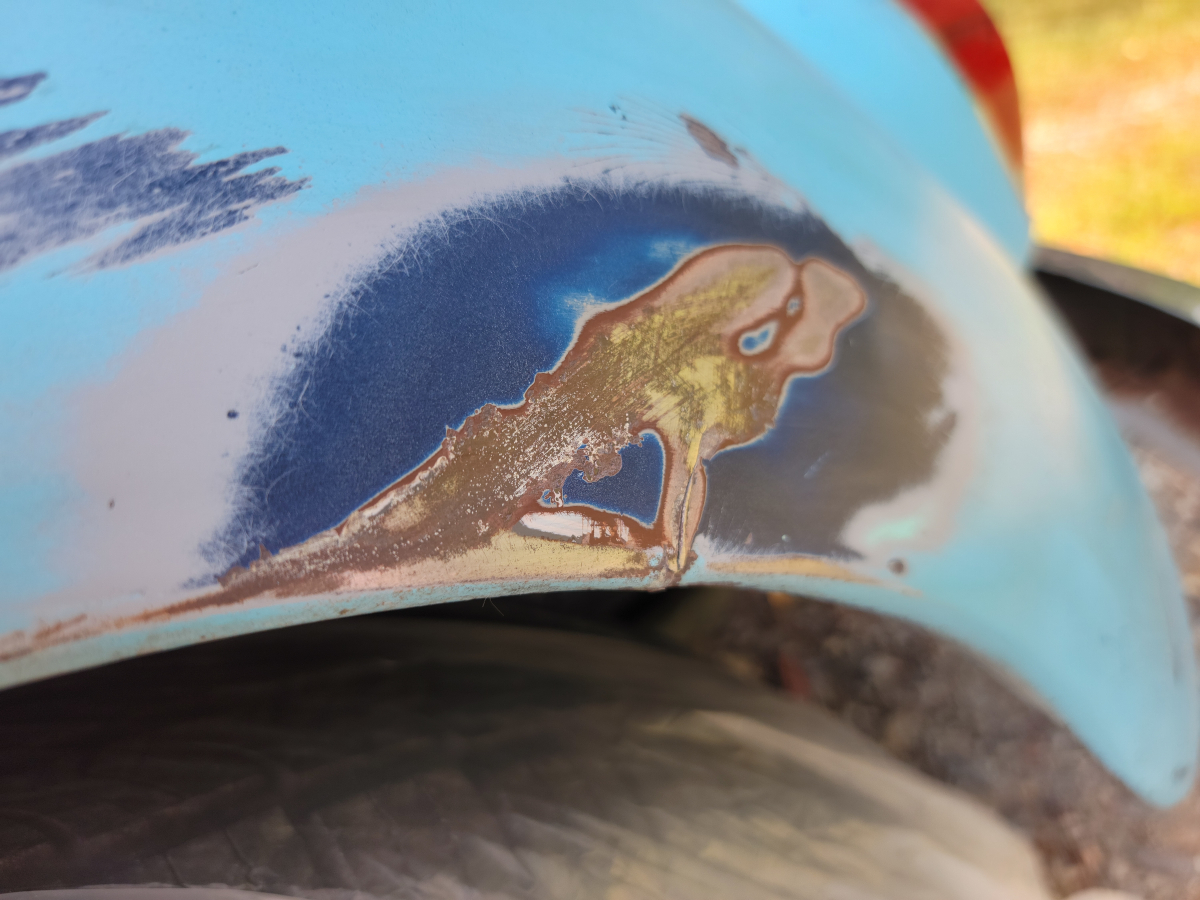
The picture on the left is the driver’s side fender. The crack there is very thin, a clean break, but wraps all the way around the lip. The one on the right is the passenger’s side. The crack there is much worse – not even really a crack. It’s very old damage, below the bumper, with flaps of deeply rusted metal. I bent everything back in shape as well as I could, to get a flat surface for the patch.
After the epoxy set up, the fenders are now solid and the cracks don’t flex. So, that was a success. At least in the short term. We’ll see after some weather cycles if that epoxy holds up.
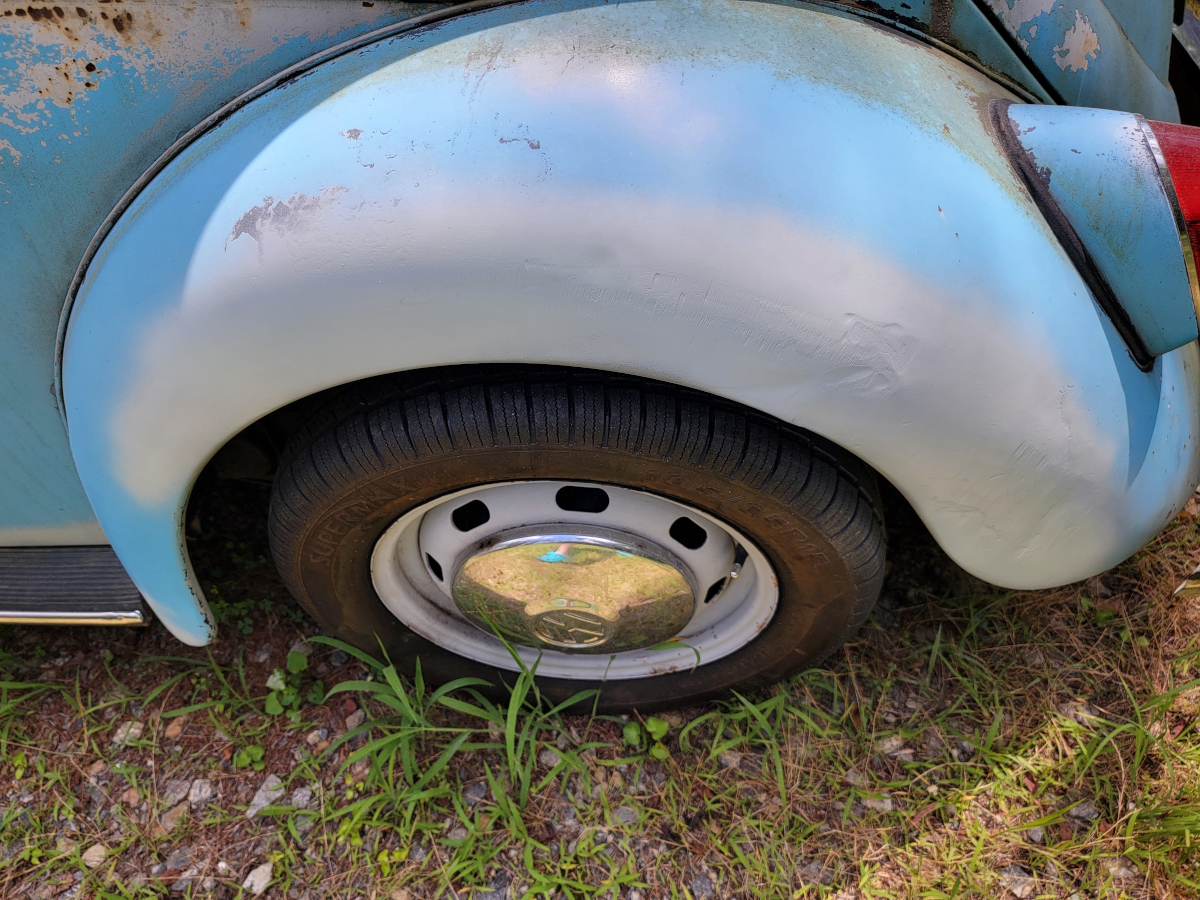
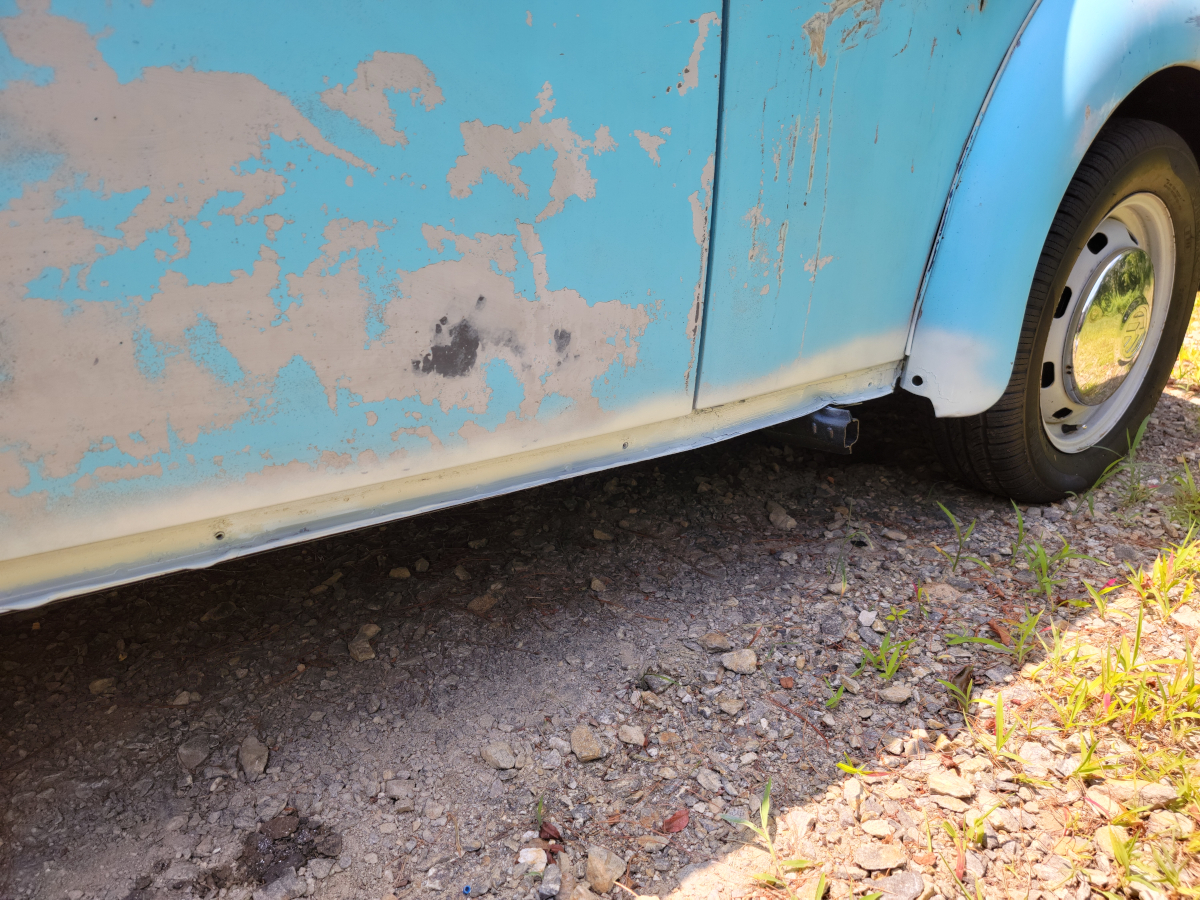
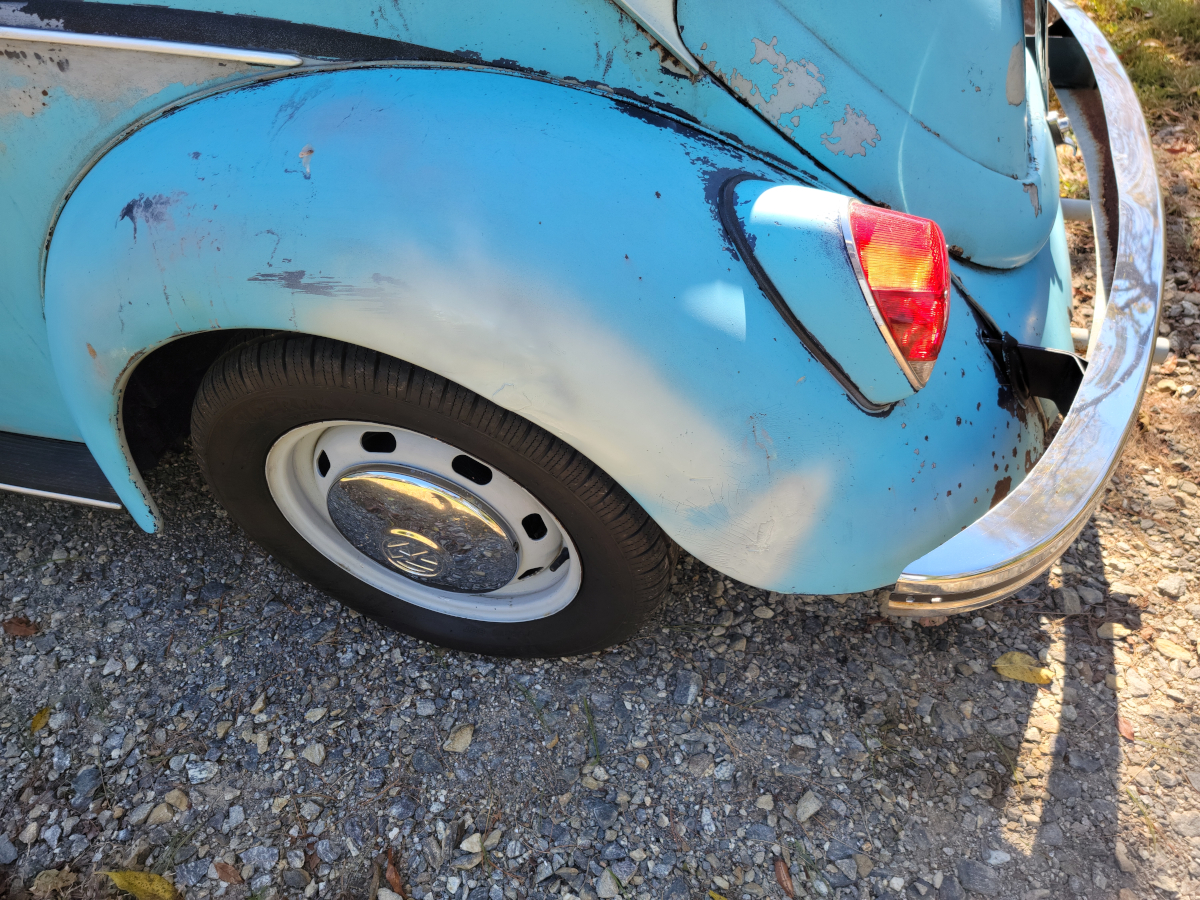
On that driver’s side fender there were old, bad repairs and it looked nasty. I sanded around the area, then rust treated, primed, and painted.
After the first couple of coats of primer and paint went down, there was a lot of texture to the paint. Mainly over-spray dust. I tried going over it first with the blue Scotch-Brite pad, which is the one safe for non-stick pans. That took some dust off, but not the texture.
I then stepped it up to the regular old green Scotch-Brite pad, which also removed some more dust, but not the texture. I found 3M makes a prep pad specifically for in-between coats. I bought a pack of those and tried them out, but same deal – removed some dust, but not the texture. And honestly, those pads seemed to be somewhere in between the blue and green Scotch-Brite pads, so I didn’t put much faith in them working.
So, I had to wet sand again. This time, I had some leftover 1500 grit sheets from a variety pack I bought at Harbor Freight a while back. The sheets are really thin and wear through immediately. They also smear black across whatever you’re sanding, so I was concerned about that.
I did a little area with the 1500 grit and as per usual, the sheet immediately blew out and made a mess, so I went and bought some 3M 1000 grit sheets. This did a nice job and was proper quality sandpaper. I went over the whole roof and pillars with a roughly 2 1/2″ x 5″ sanding block.
There were still some low spots, where the roof is pretty dented up, so I cut a dish sponge in half, making a more flexible, roughly 2 1/2″ by 2 1/2″ block to wrap the sandpaper around. With that, I went over the low spots and for the most part got them smoothed out.
My masking job the first time around was pretty questionable. I had some over-spray on window rubbers here and there and for whatever reason (likely because I’m an idiot) at the bottom of the pillars, I didn’t follow any sort of body lines. Instead, I just squared off the bottom of each pillar, not realizing how ridiculous that was going to look once the masking was peeled off.
So, first step was properly masking around the bottom of the pillars and getting the rust converter and primer down.
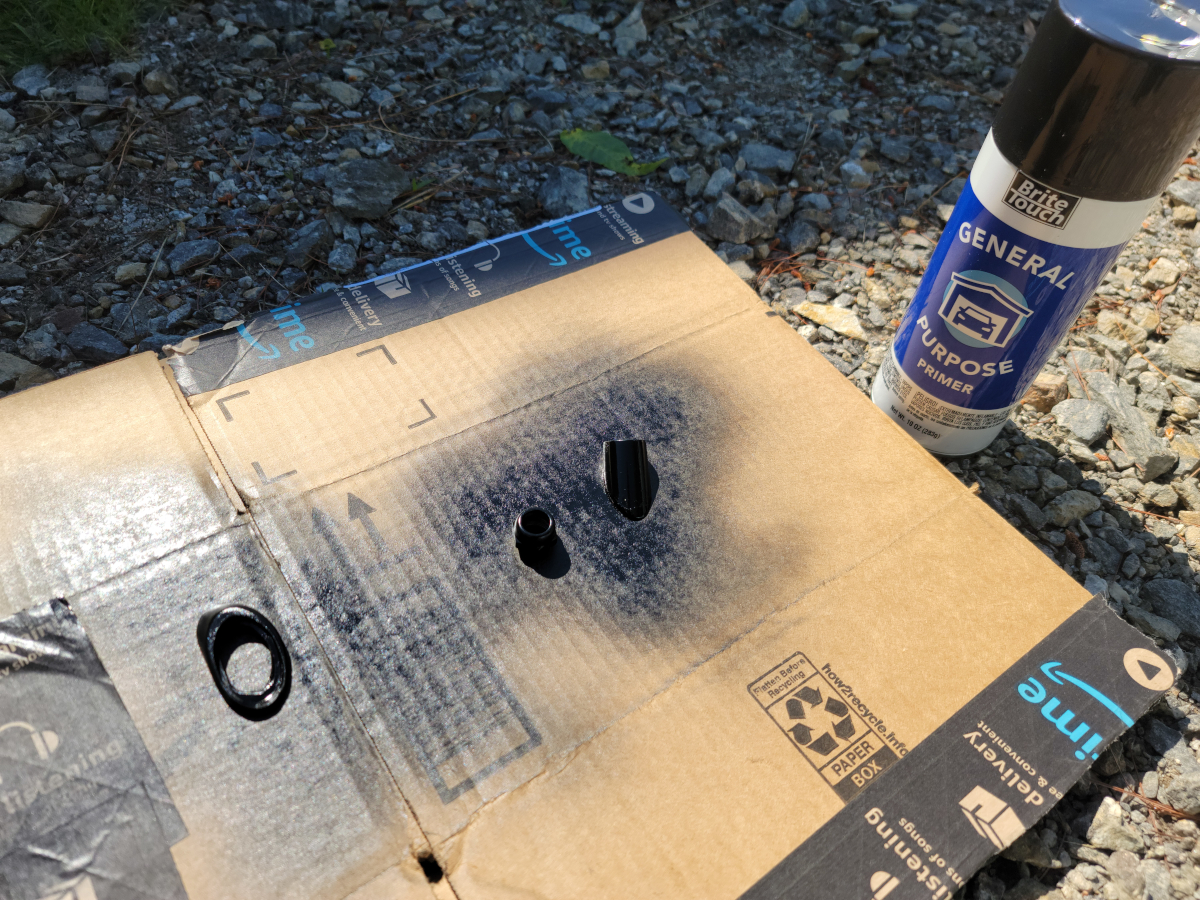
I took the antenna off and rather than trying to clean off the over-spray from the first time around, I just painted the pieces with some cheap black primer.
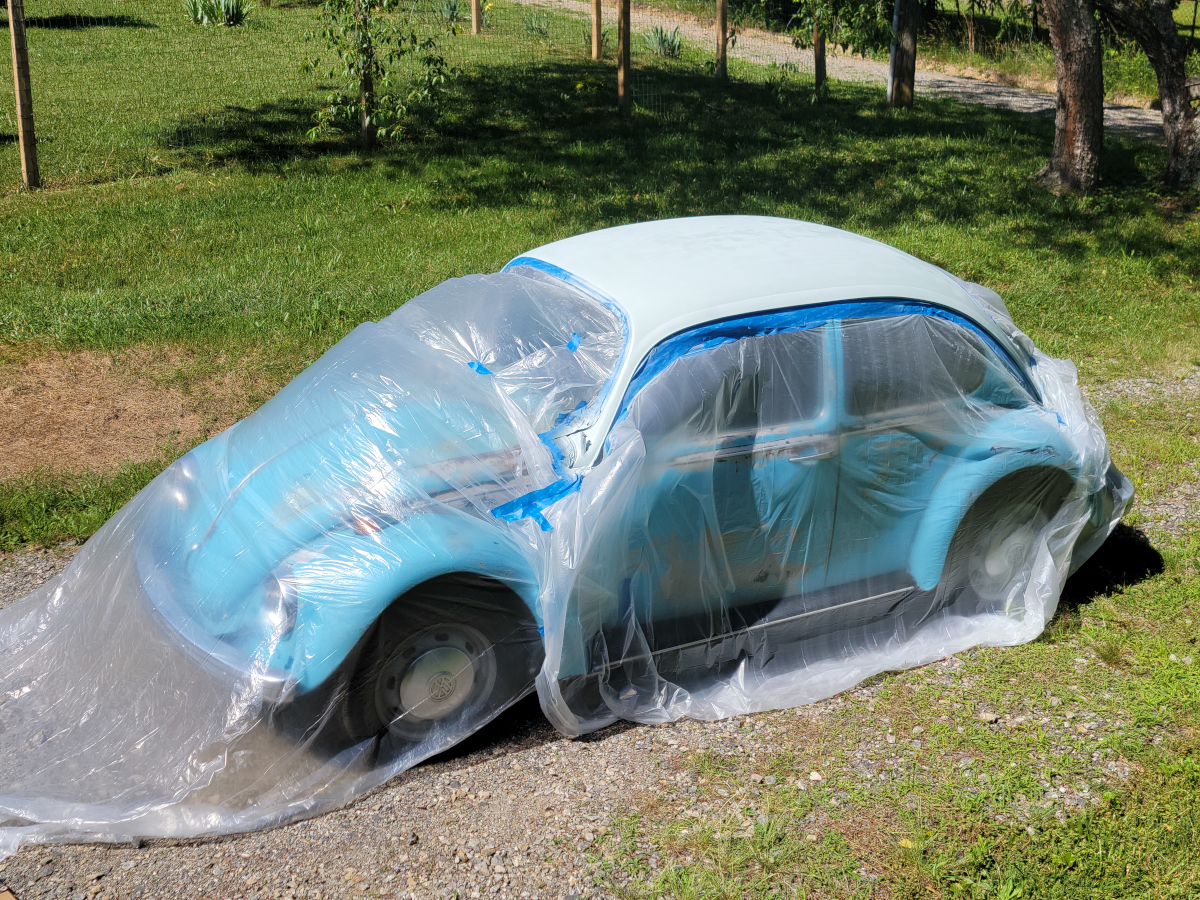
I used plastic drop cloths for masking this time. I had problems with the blue painters tape not sticking well last time, so I tried a different variety. This time, it was much worse. The tape only stuck to the plastic sheet – not to the car or itself. So, I was having to restick the tape all around the car before each coat.
After two more coats of paint:
And then after wet-sanding with 1000 grit again:
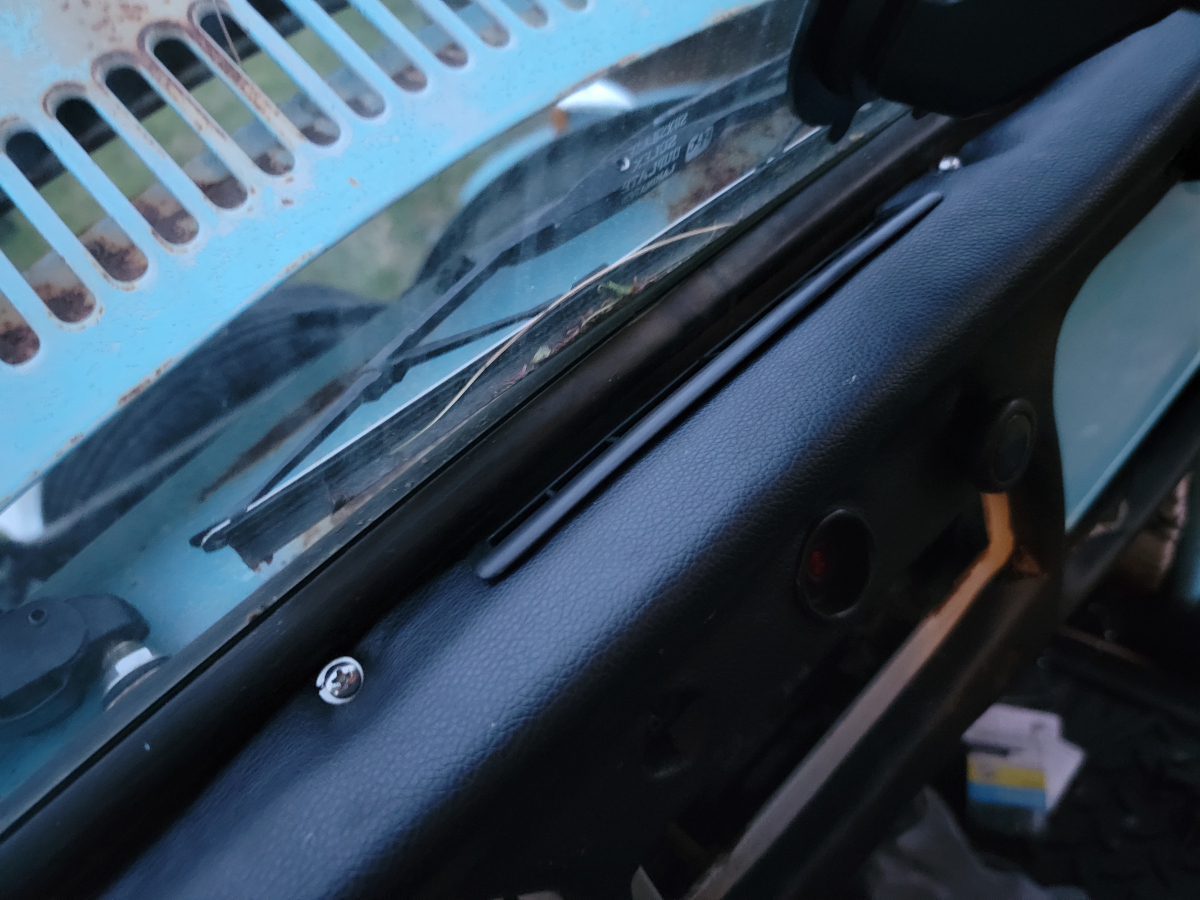
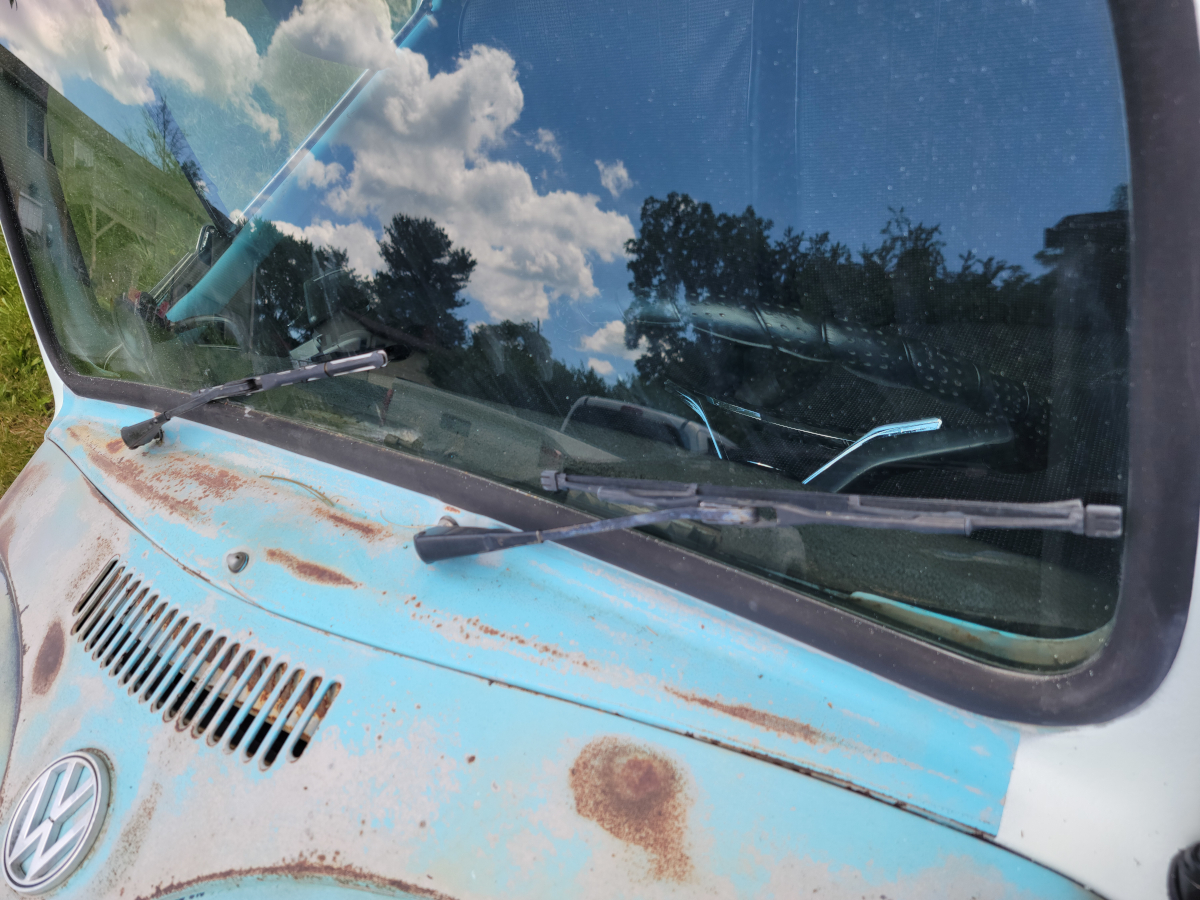
While I was there, I also adjusted the windshield wipers up a little (too much). They were flopping down over the bottom of the window rubber and the one on the driver side was overlapping the left side of the window rubber as well. Likely, they just aren’t the right size wiper blades. I’ll have to check that out later.
I have to plan my next steps carefully, since I now have “only” six cans of that paint left. As mentioned in the Goodbye Matte Vintage Blue post, this paint has been discontinued and I have bought all that is available in the county.
That’s not going to be enough to do the whole car, but I only got started painting this because of the rust pitting. Following that logic, I should finish the space below the windshield and then do the front trunk lid. Those are the next most rusty places.
Then on to the rear, finishing up the space below the rear window and then the engine cover. We’ll see what’s left after that.
As an Amazon Associate I earn from qualifying purchases. I also often provide links to products on other sites that do not provide affiliate income.