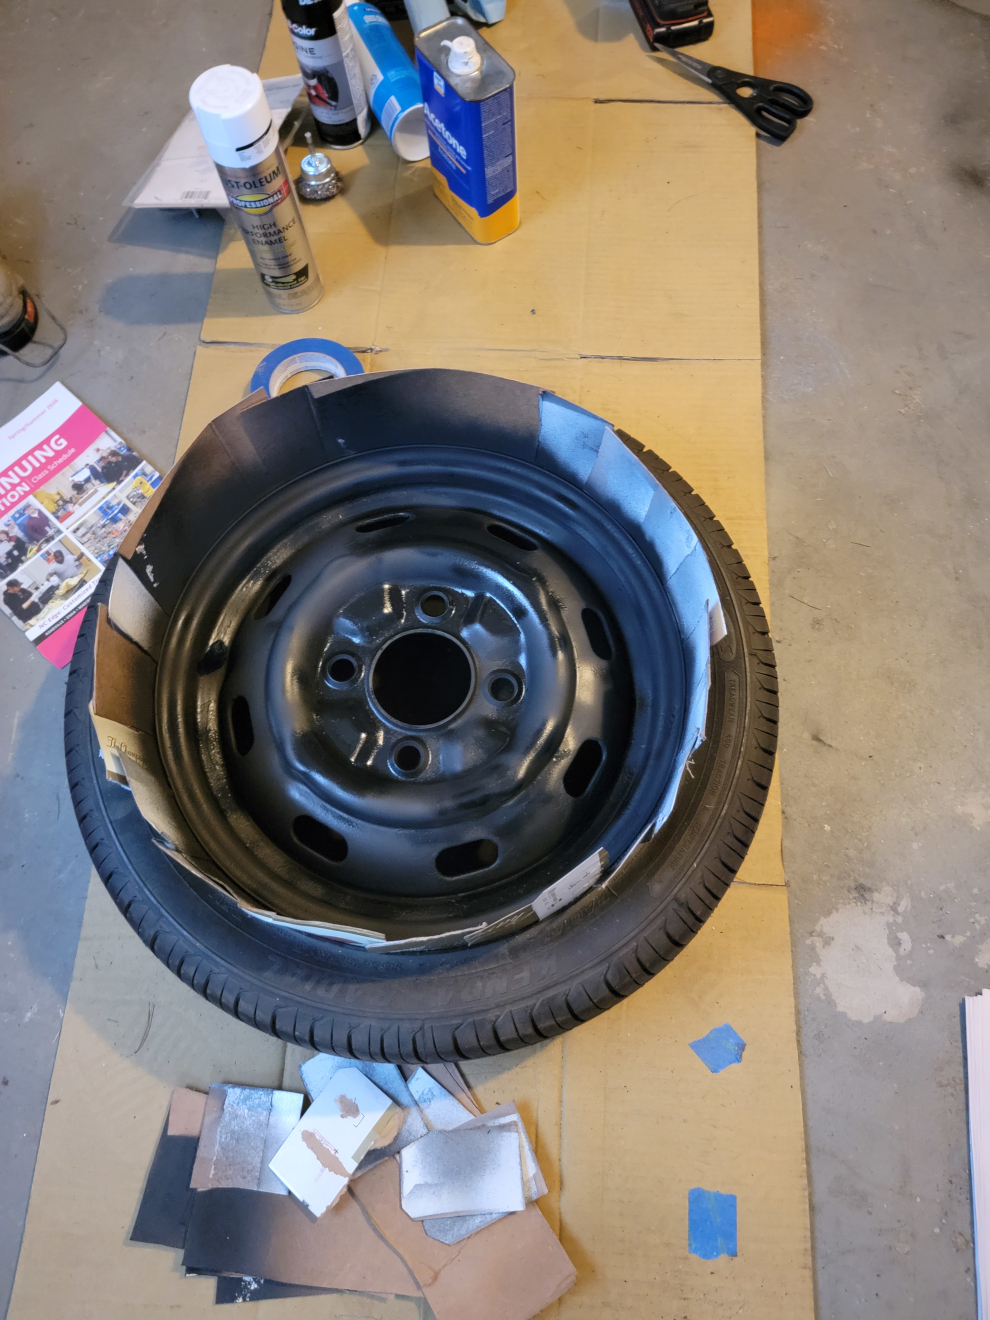
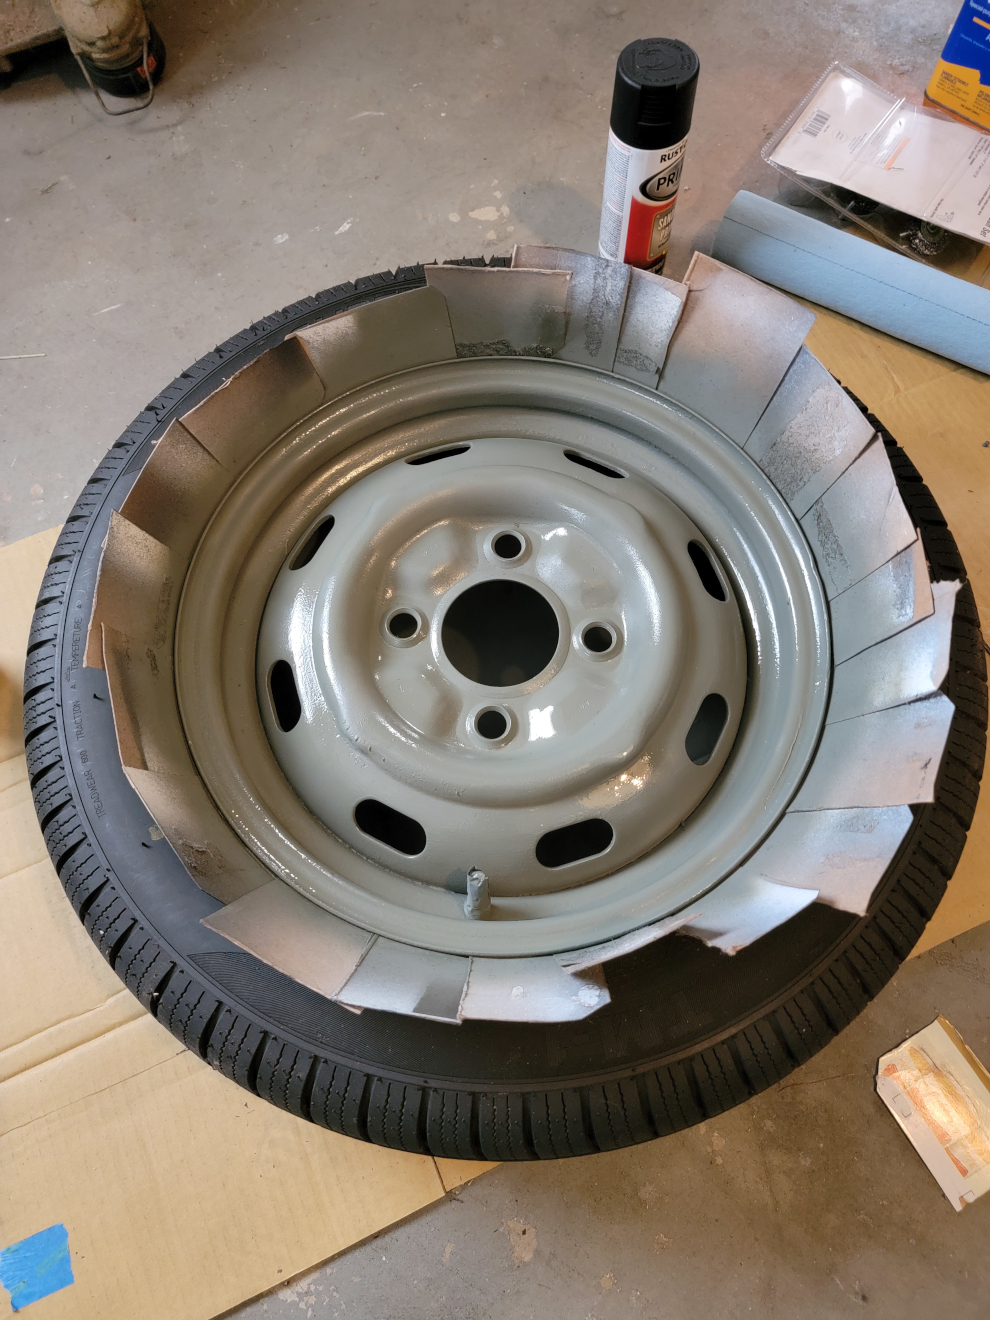
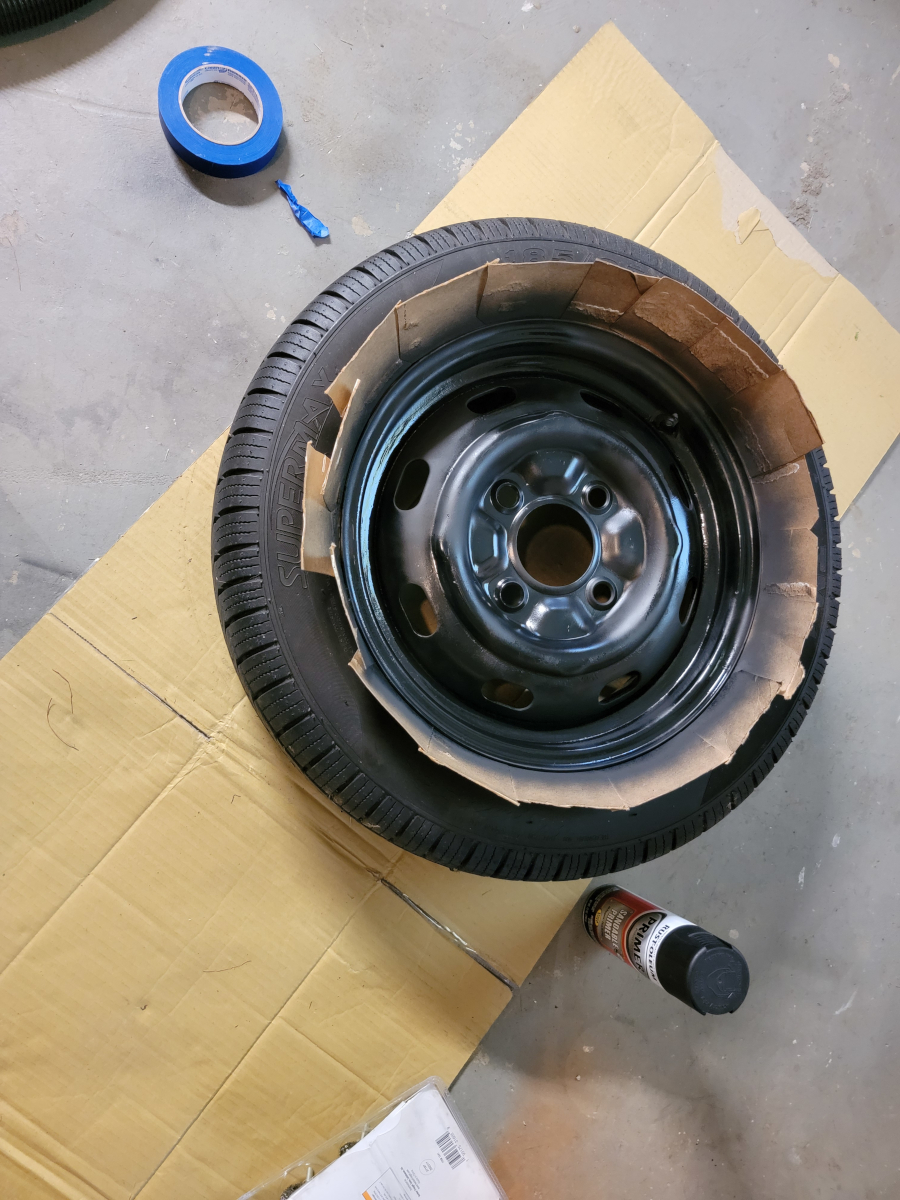
It has been a long, cold winter, but we made it through. Back onto that last wheel now. I brought the spare inside and prepped it for paint. It’s important that I don’t get overspray on the tire, since it is a good tire and goes back in the car.
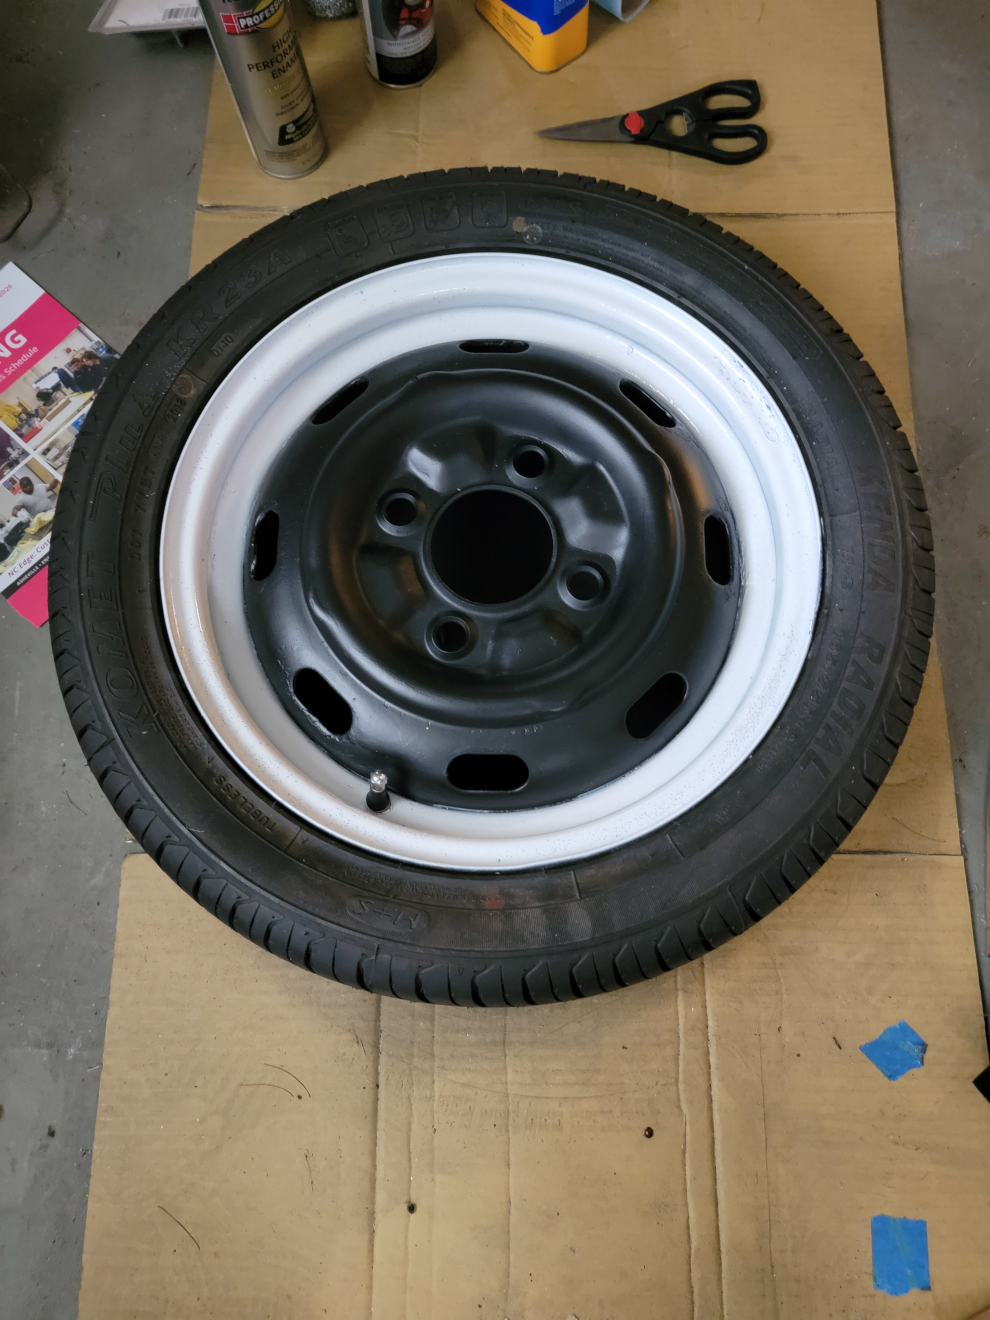
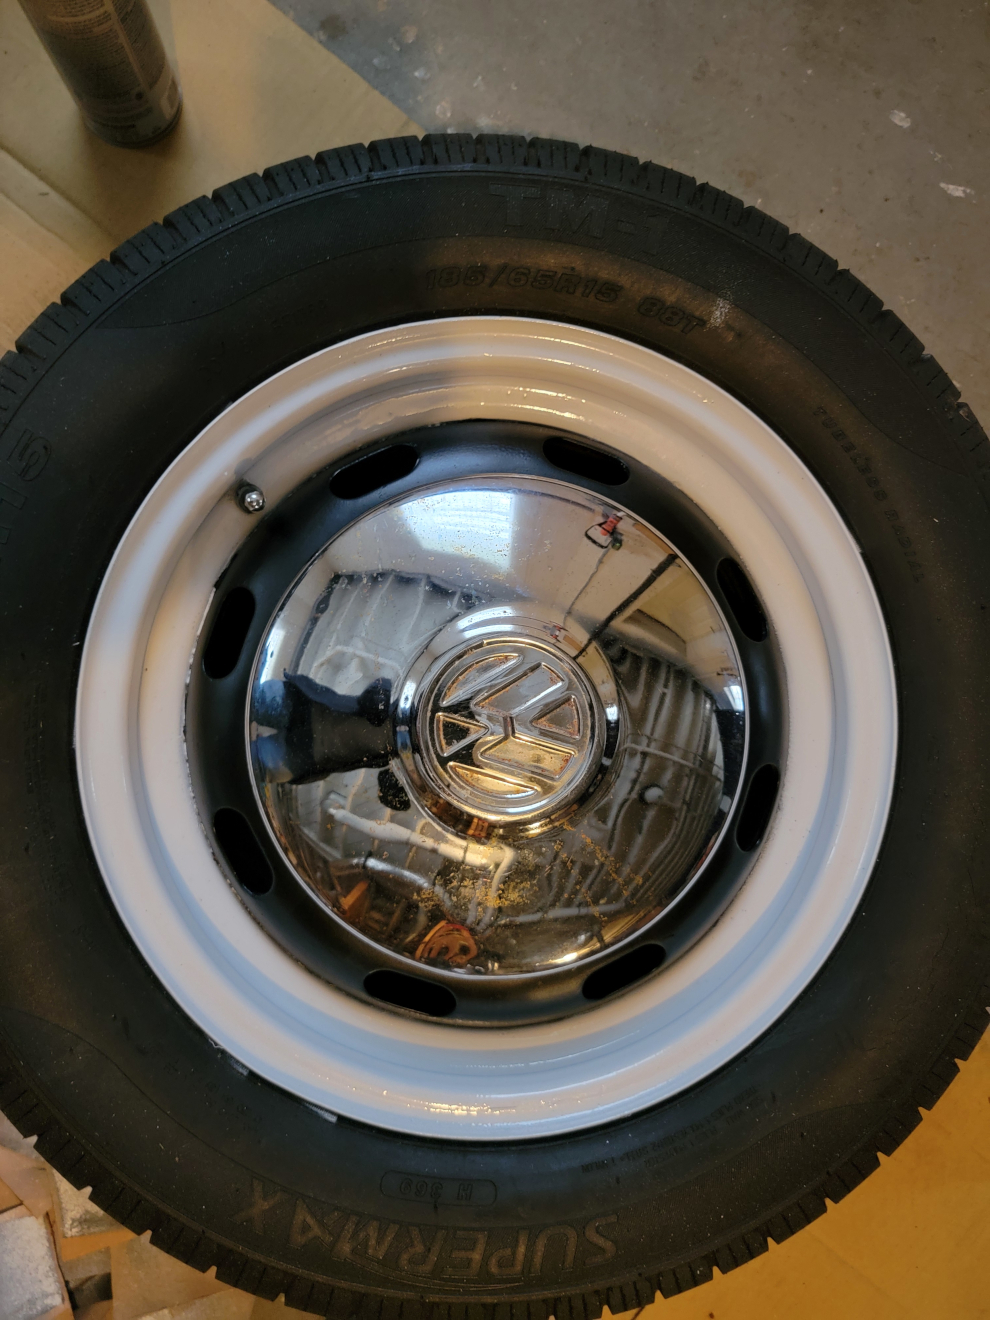
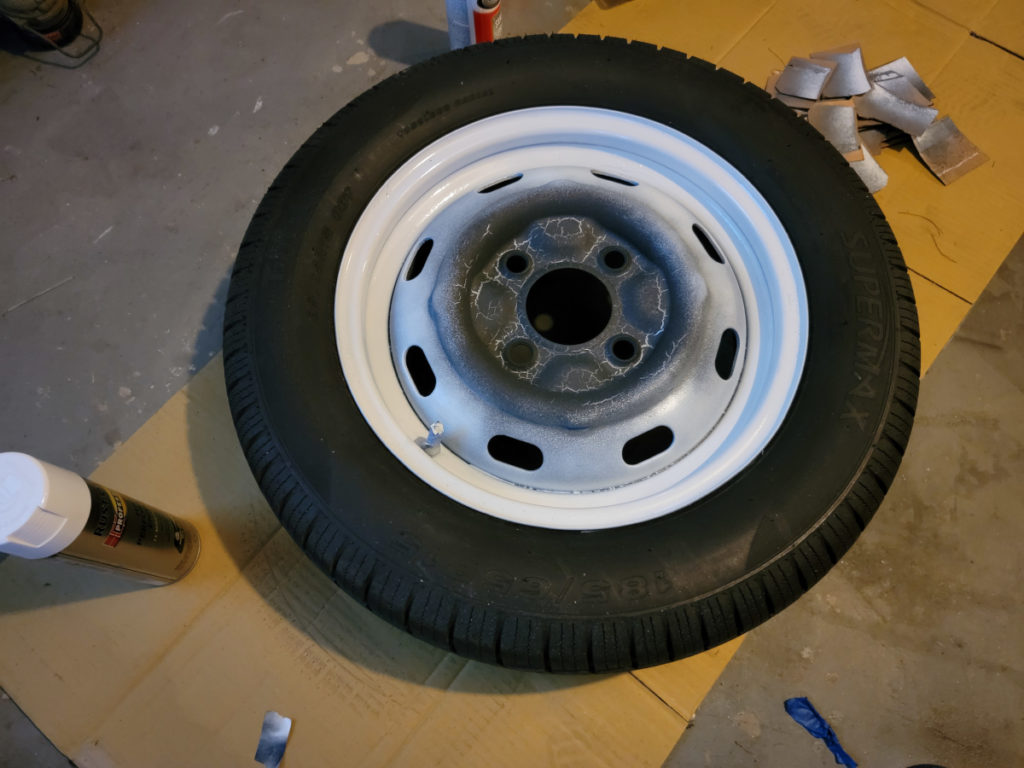
Not bad. Not bad at all.
I think if I painted another 20 or 30 of these, I would have the process down!
Back in Part 1, I painted the first wheel, but apparently didn’t remember to take pictures or document the process. Apparently, I did a little better at that part in this installment.
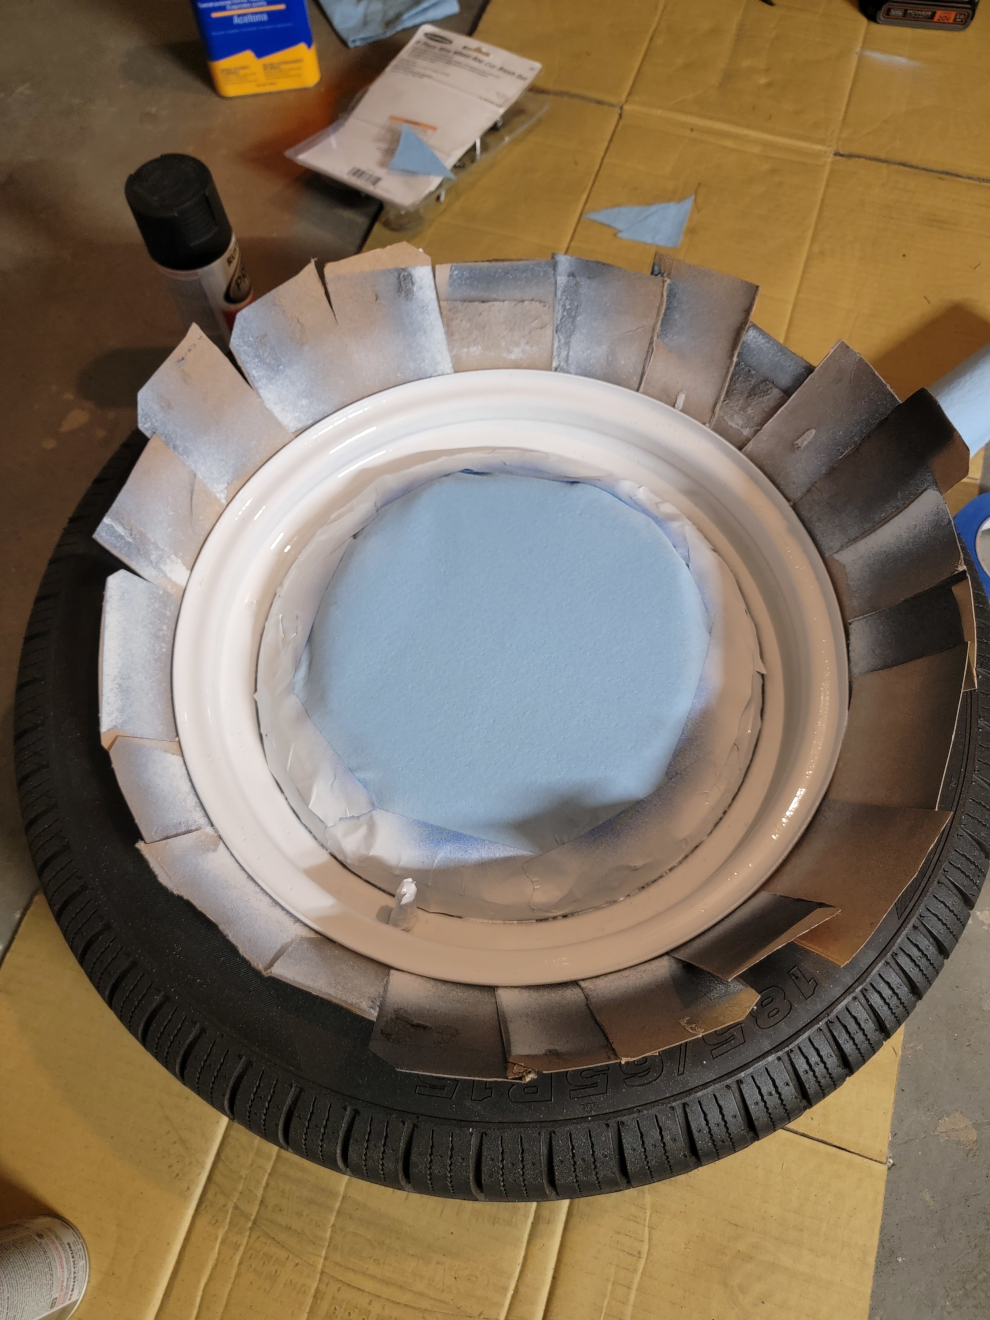
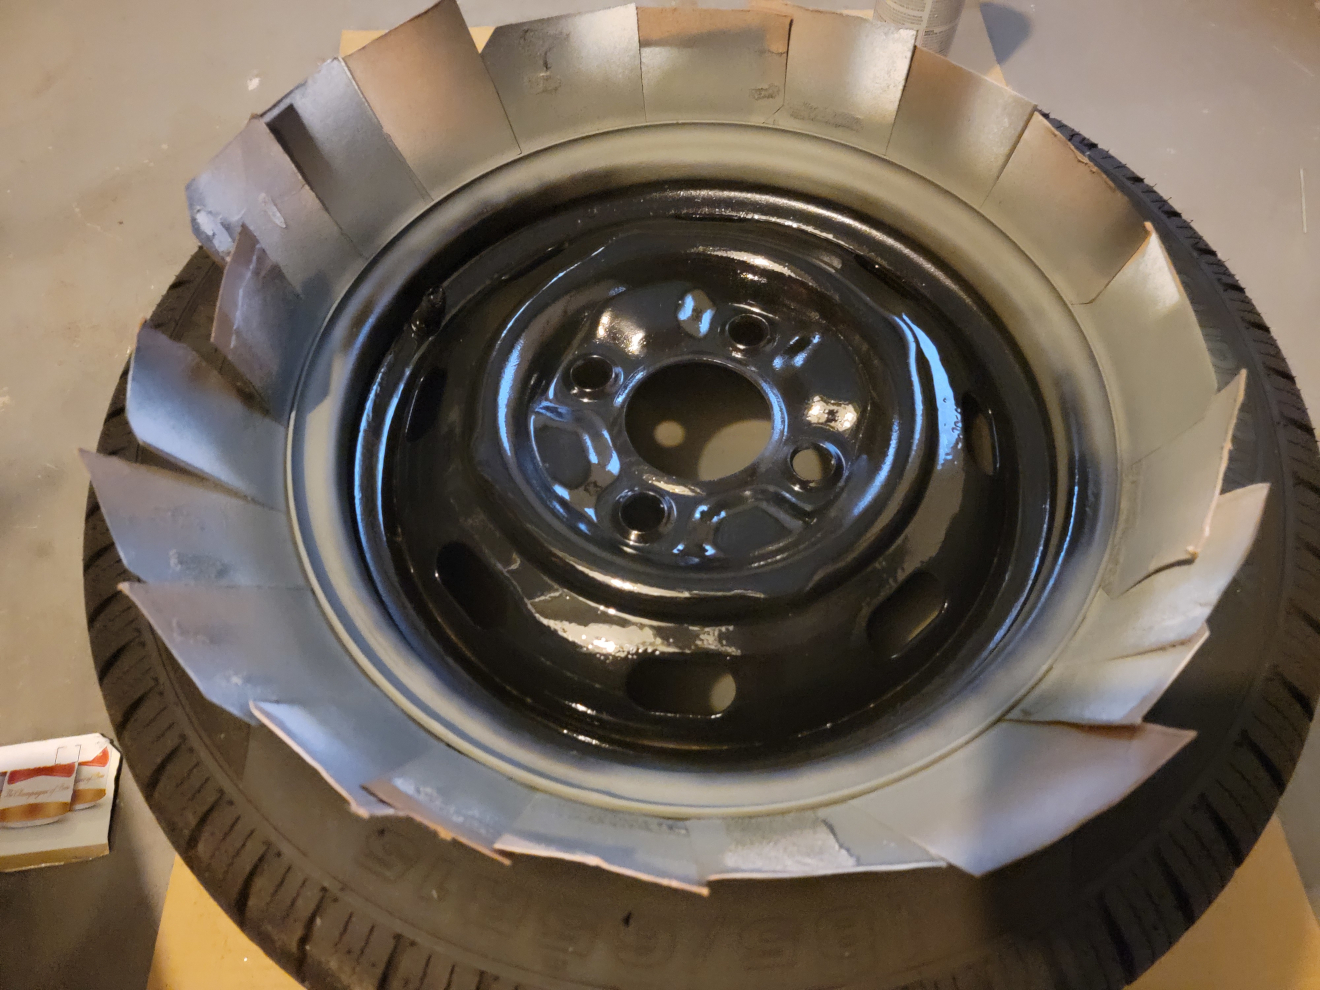
After the first one, I reversed the process. After wire brushing and cleaning up with acetone, I sprayed primer, then black paint, then masked the middle and sprayed the white paint.
Probably works out to the same number of steps, but this way made more sense.
I’m not worried about any overspray that gets on the tires, since these are the dry rotted ones I replaced. It was nice of the tire shop to mount them and send them home with me, rather than disposing of them. At least I didn’t have to pay disposal fees. That’s the next guy’s problem, I guess.
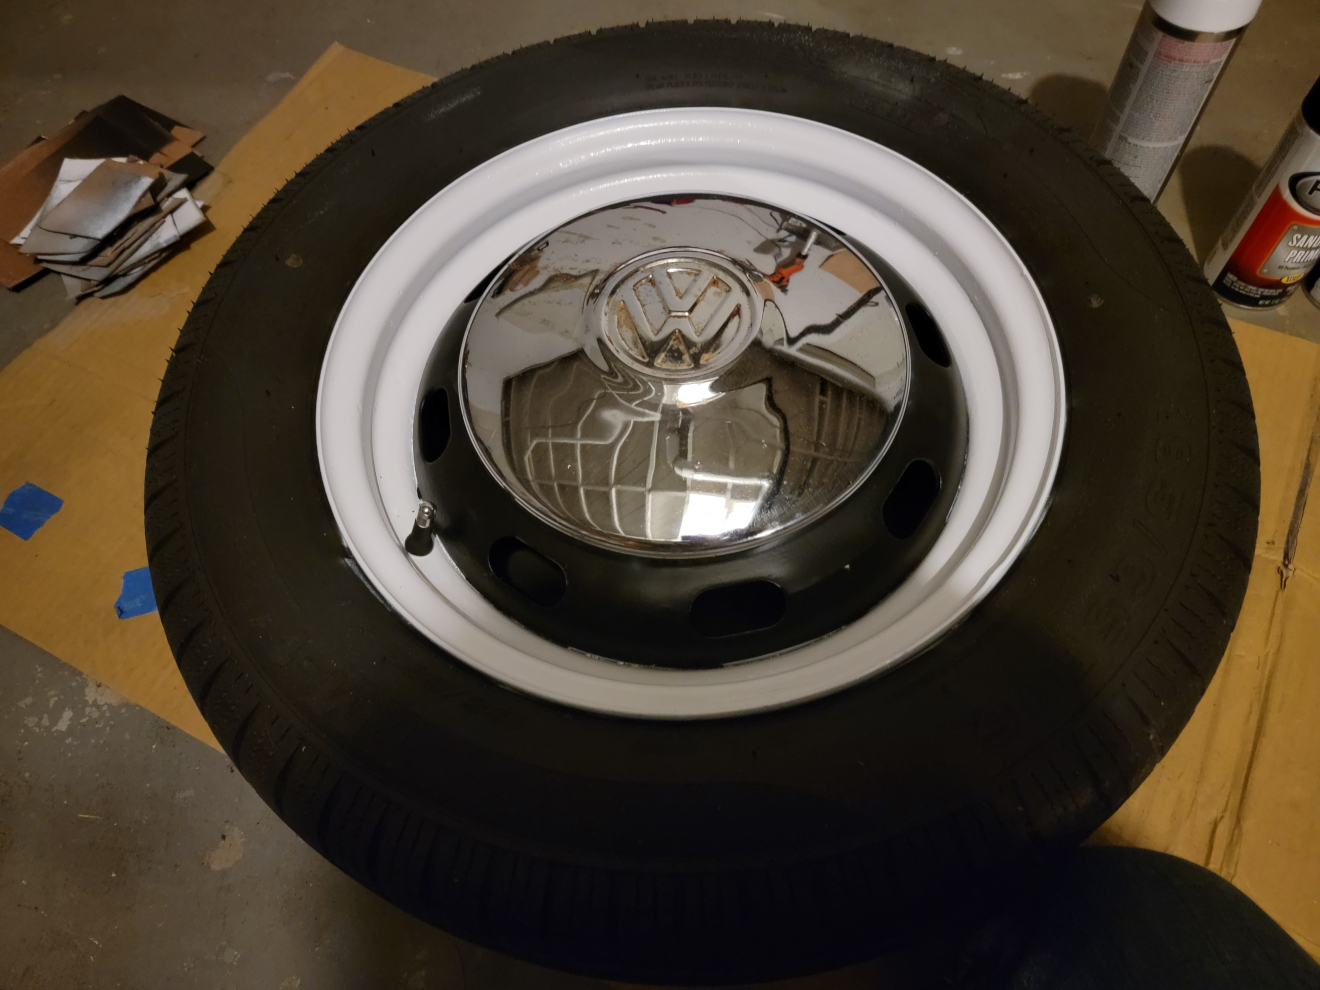
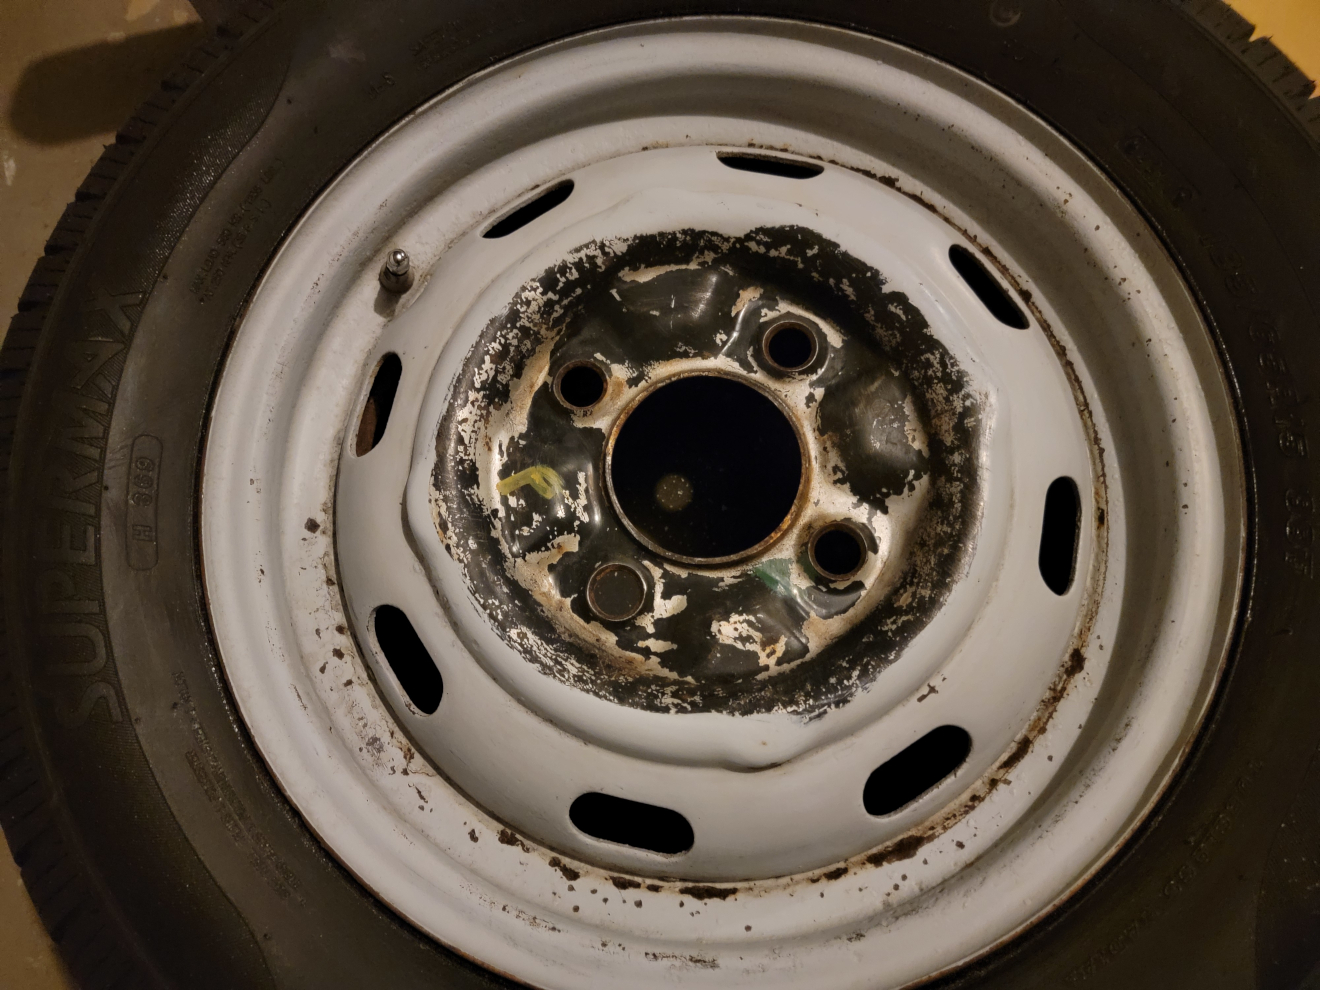
Again, the paint and masking isn’t perfect, but from ten feet away, it’s an improvement over what was there before. Speaking of which, I’m down to the last wheel (aside from the one that’s in the car as a spare). I put this one off til last, because it is the roughest and rustiest. I’m going to have to spend some more time prepping this one.
That title is probably over-selling it. Whatever the end result is, it will probably be a lateral promotion.
The steel wheels are pretty rusty, so needed quite a bit of cleanup. They had also apparently been roughly painted with brushed on gray house paint at some point. They looked good from ten feet away, which is the best I can hope for, I suppose.
I wire brushed the first wheel, chipping off any loose paint and rust, then cleaned it with acetone. I don’t play cards, so did the next best thing and cut up a beer case into playing card sized pieces. I jammed them in the crack, separating the tire from the rim, before spraying rust treatment and primer.
Then white paint around the outside.
I didn’t bother masking the middle, since that’s going to be a whole separate step whenever I get back to it.
With a truck load of tires and wheels, I drove down to my local tire shop and waited three hours while they got everything mounted up. Back home, the Empi wheels went straight on.
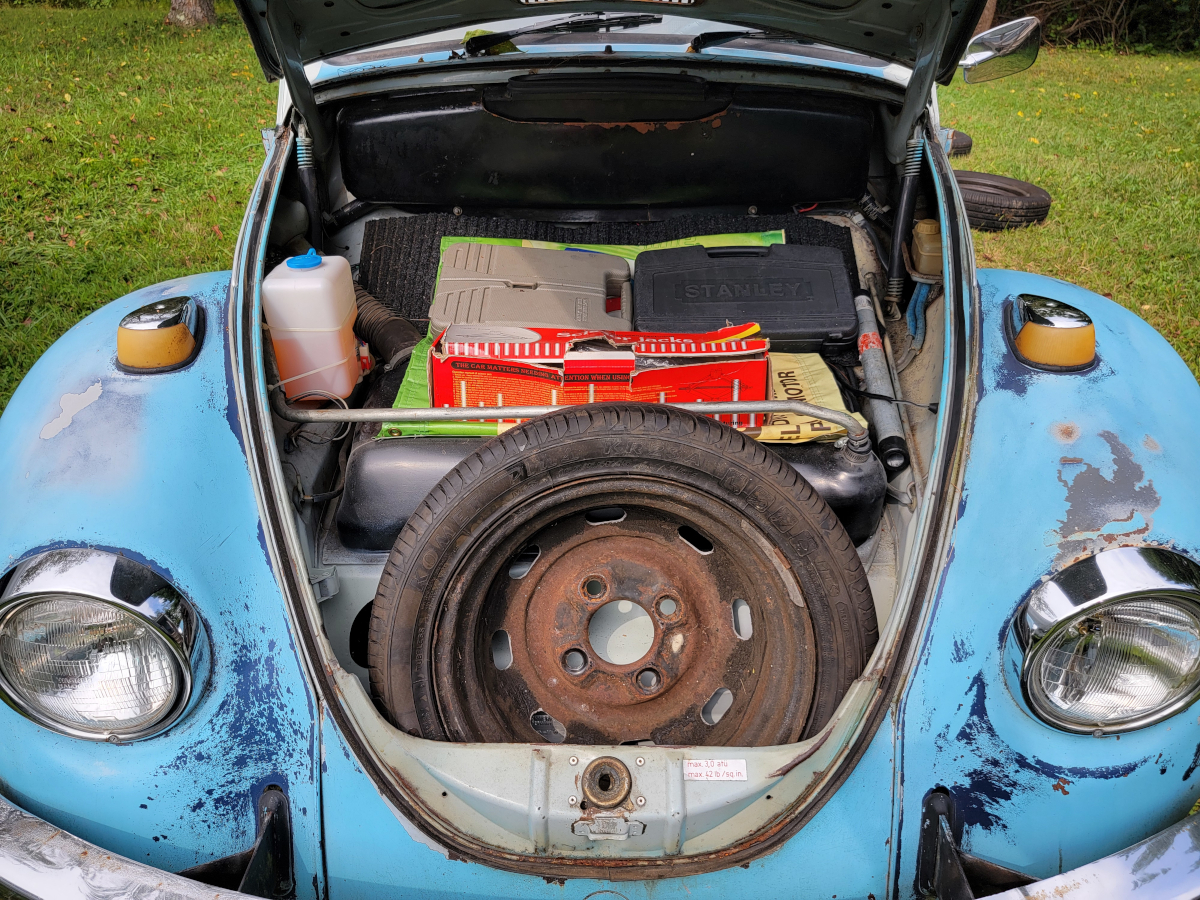
They spent far too long stacked up in the basement. I love them. The offset is super-tough lookin’. Oh yeah, and don’t forget the steelie spare…
So, I never listed the beetlebug for sale. I still have mixed feelings about it.
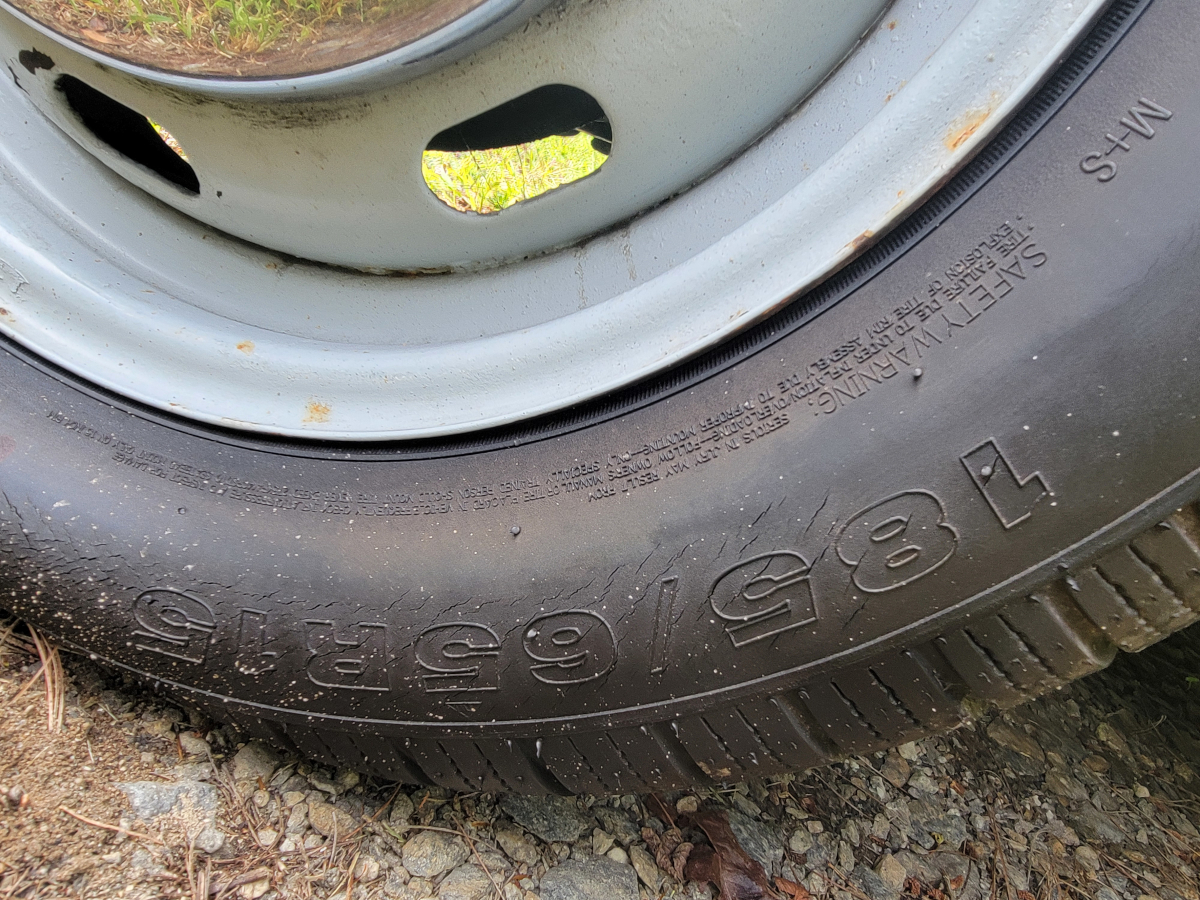
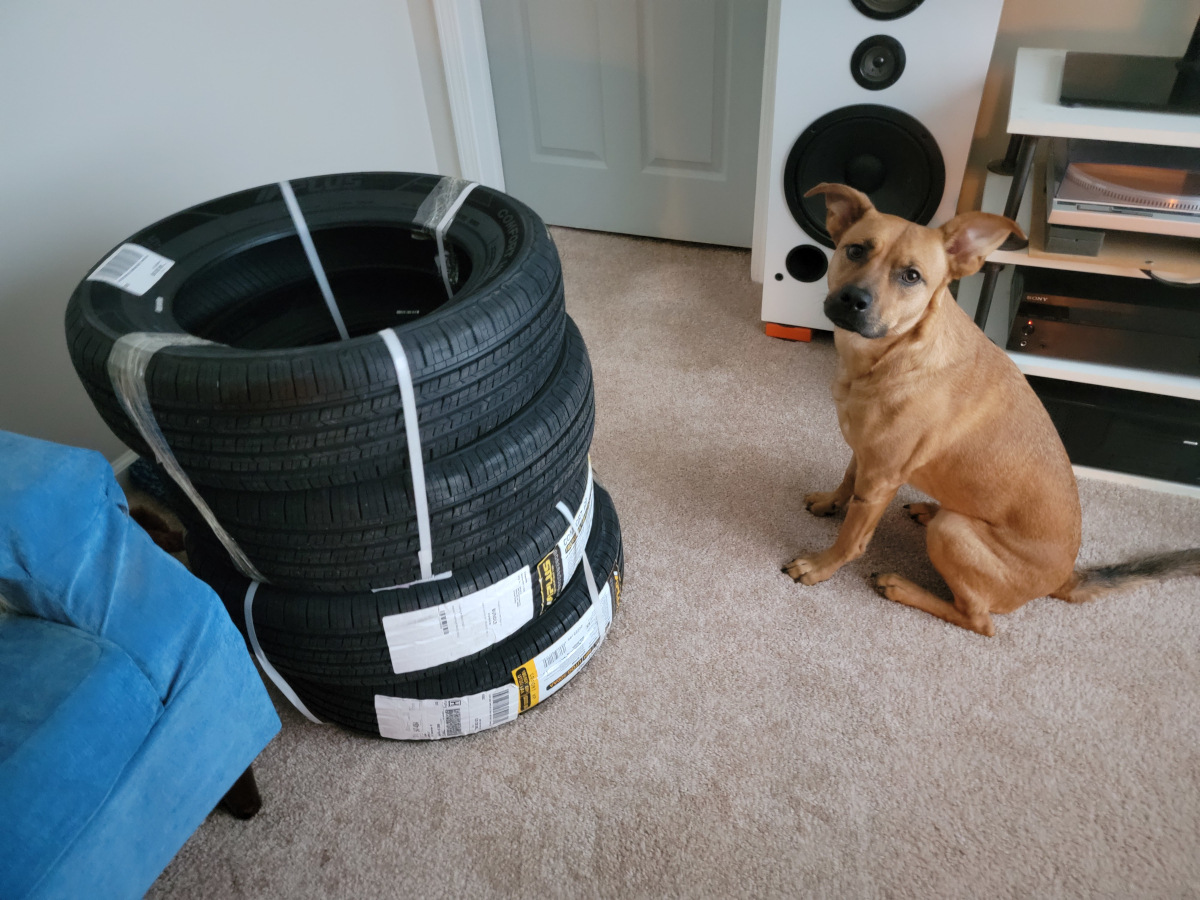
But, here we are… The car came with two sets of “new” tires when I bought it. The ones on the Empi wheels, I’m pretty sure had about 100 miles on them, but were eight or ten years old and had dry rot cracks on the tread face. The tires on the steel wheels were the “good” ones that I have been driving on for three years.
Or NOT driving is more the issue…
This was the pic I snapped on my phone to get the tire size to order new rubber. Which were quickly delivered.
That’s Sunny Orla/Nancy/Drue enjoying the dankness. She’s a good girl.
I’m going to have the new rubber put on the Empi wheels and roll with those skates on for a while. I had purchased a tire to use as a spare, which is now on an Empi wheel in the frunk. That will need to be swapped over onto one of the steelies, too.
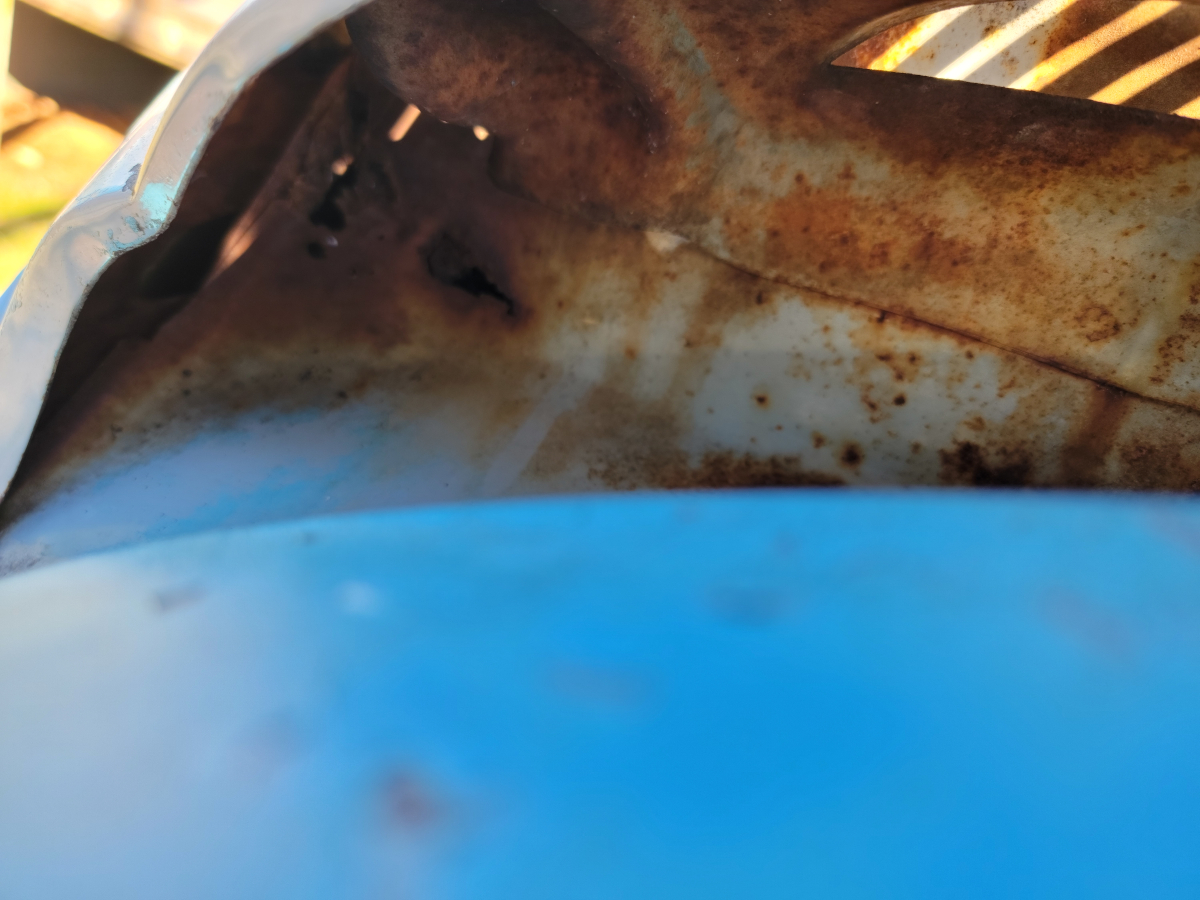
As I was poking around, I finally found an actual rust hole. If this is as bad as it gets, then the old girl is doing pretty OK.
This is at the top left corner above the engine bay, behind the air vent louvers. Not even sure how you would get up in there to fix it.
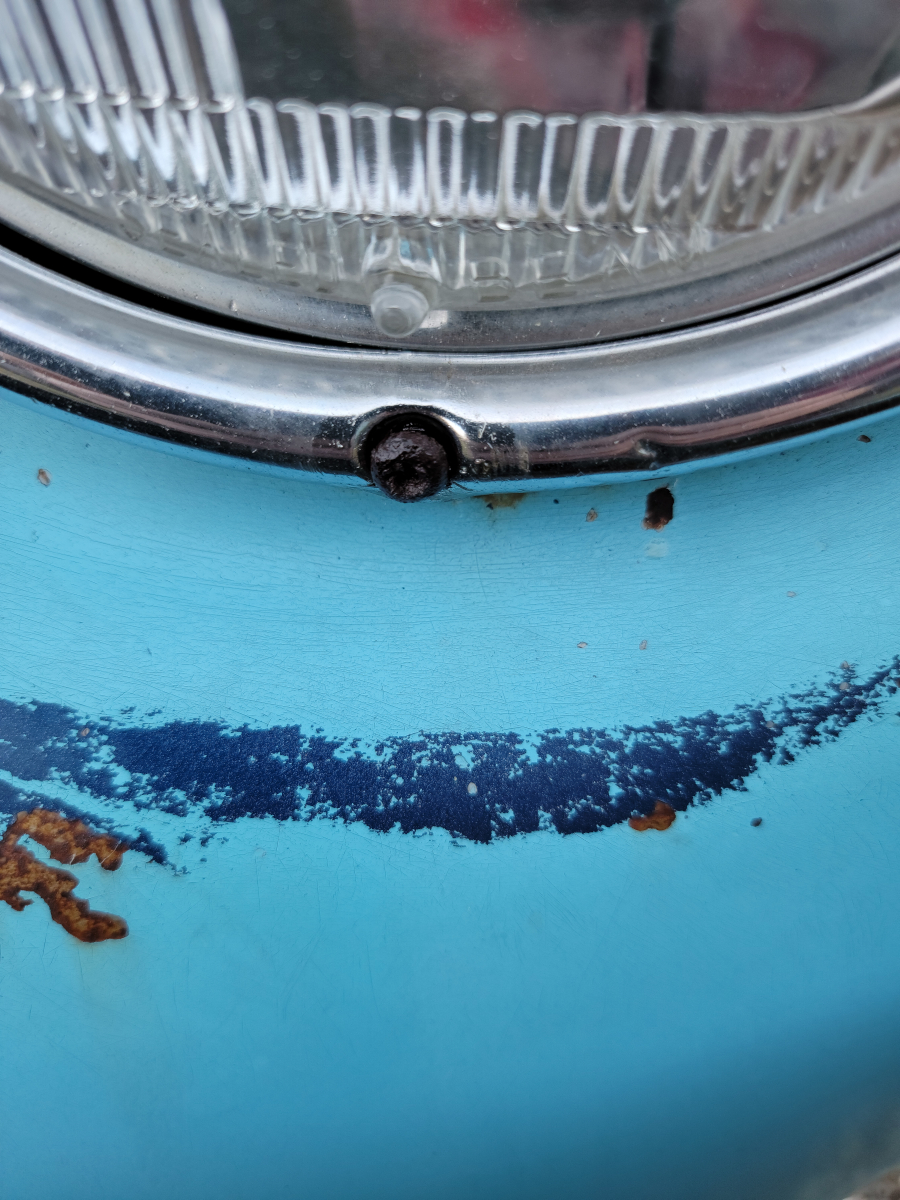
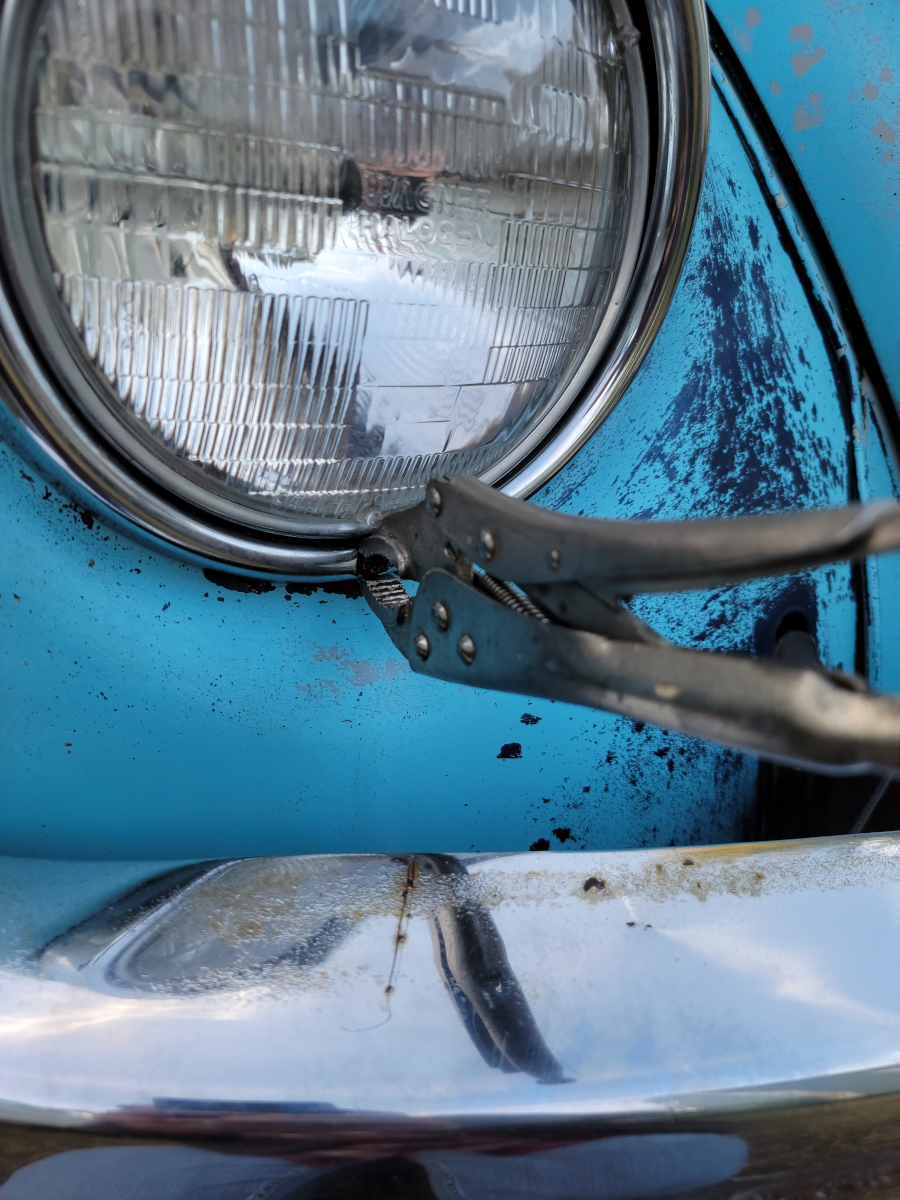
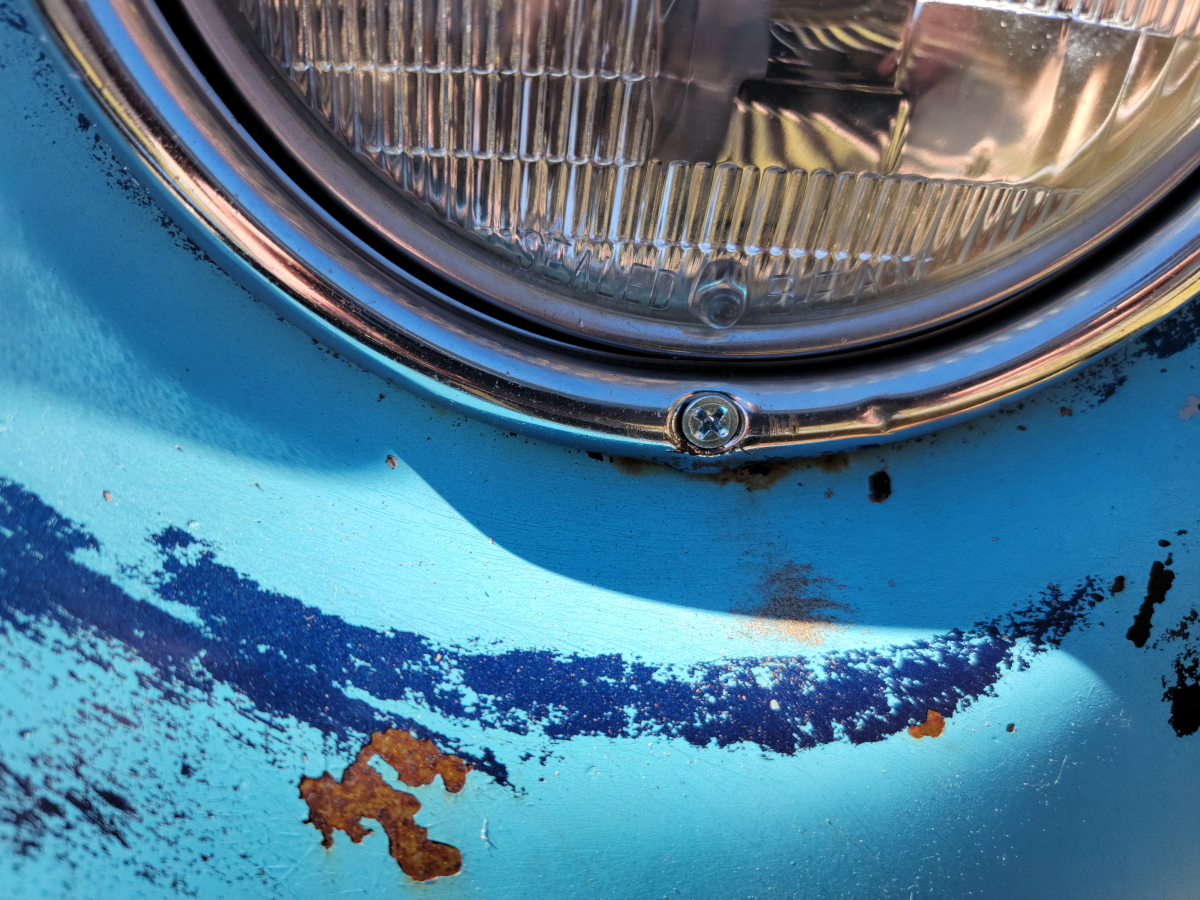
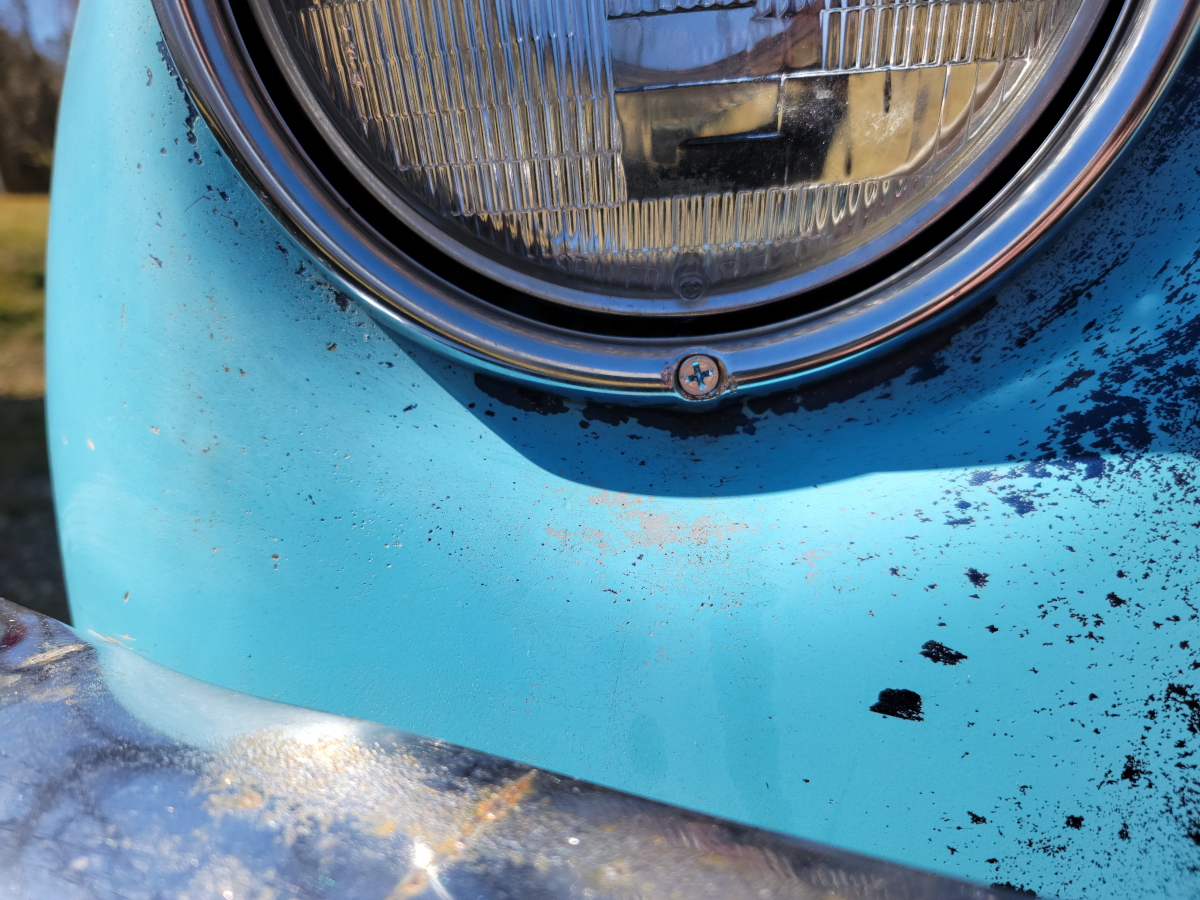
Next, the headlights were both aimed in crazy directions. Derp eyes for real. The screws to remove the chrome bezels to get back into the headlight buckets where the aiming screws are located was not going to be easy, on account of these rusted screws that wouldn’t turn with a screwdriver. Soaked them in PB Blaster for a couple of days.
There is some of that purplish blue paint I mentioned in an earlier post.
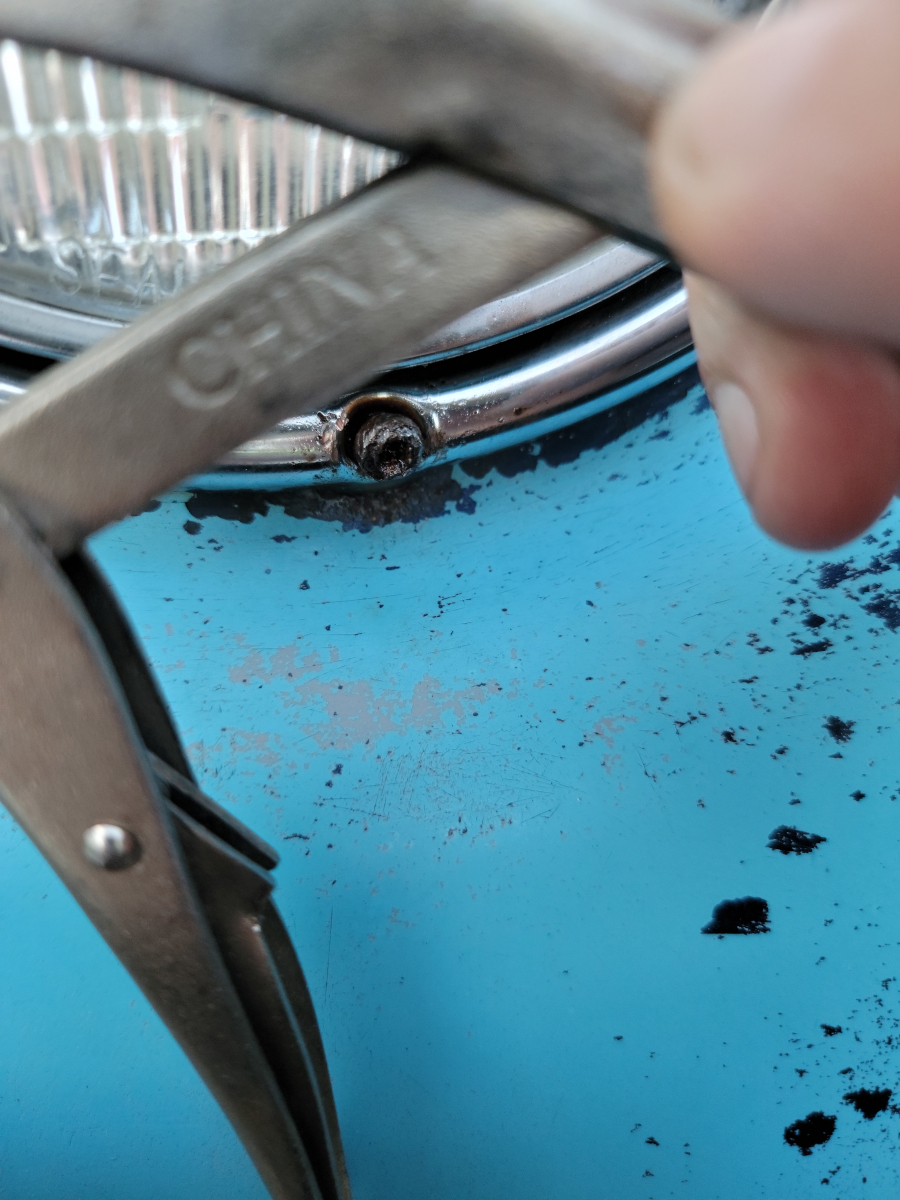
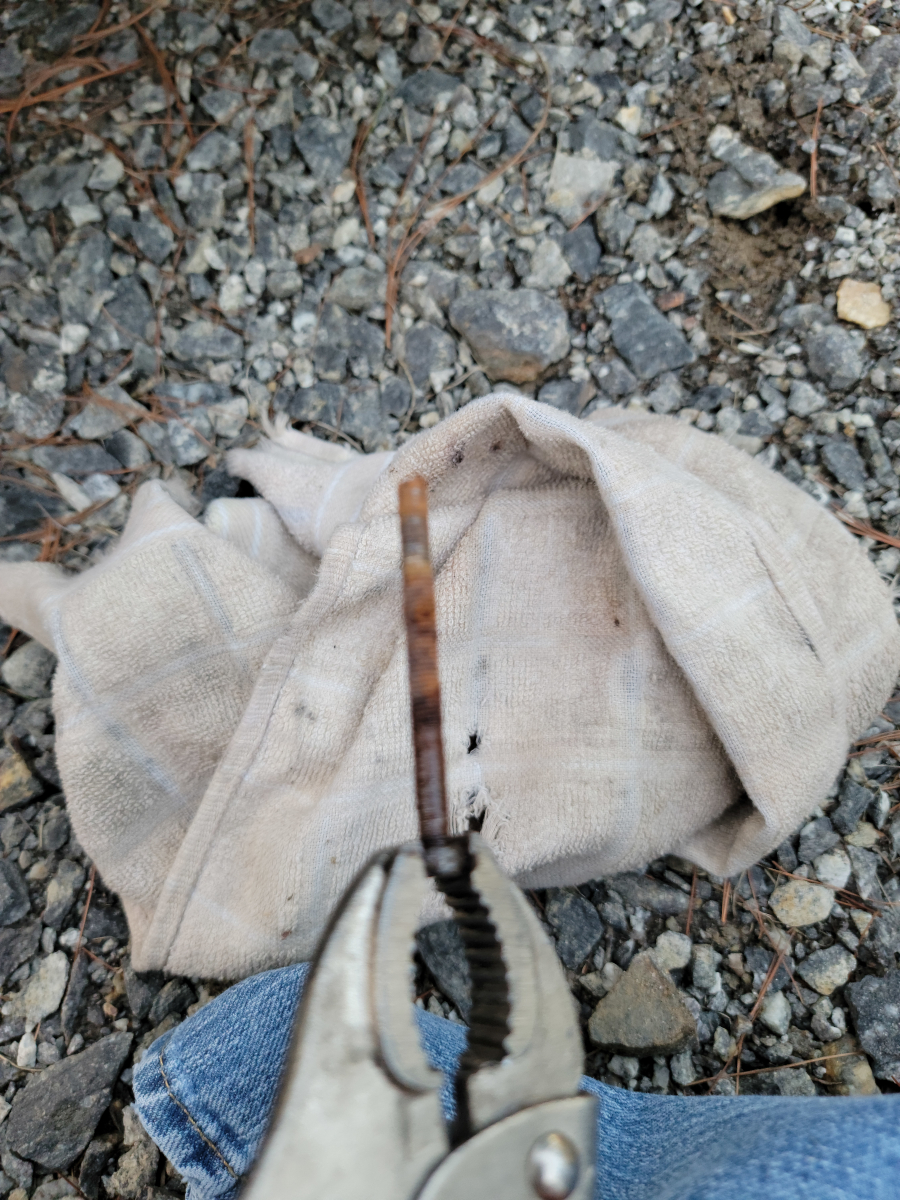
Harbor Freight sells the best screwdriver for the job.
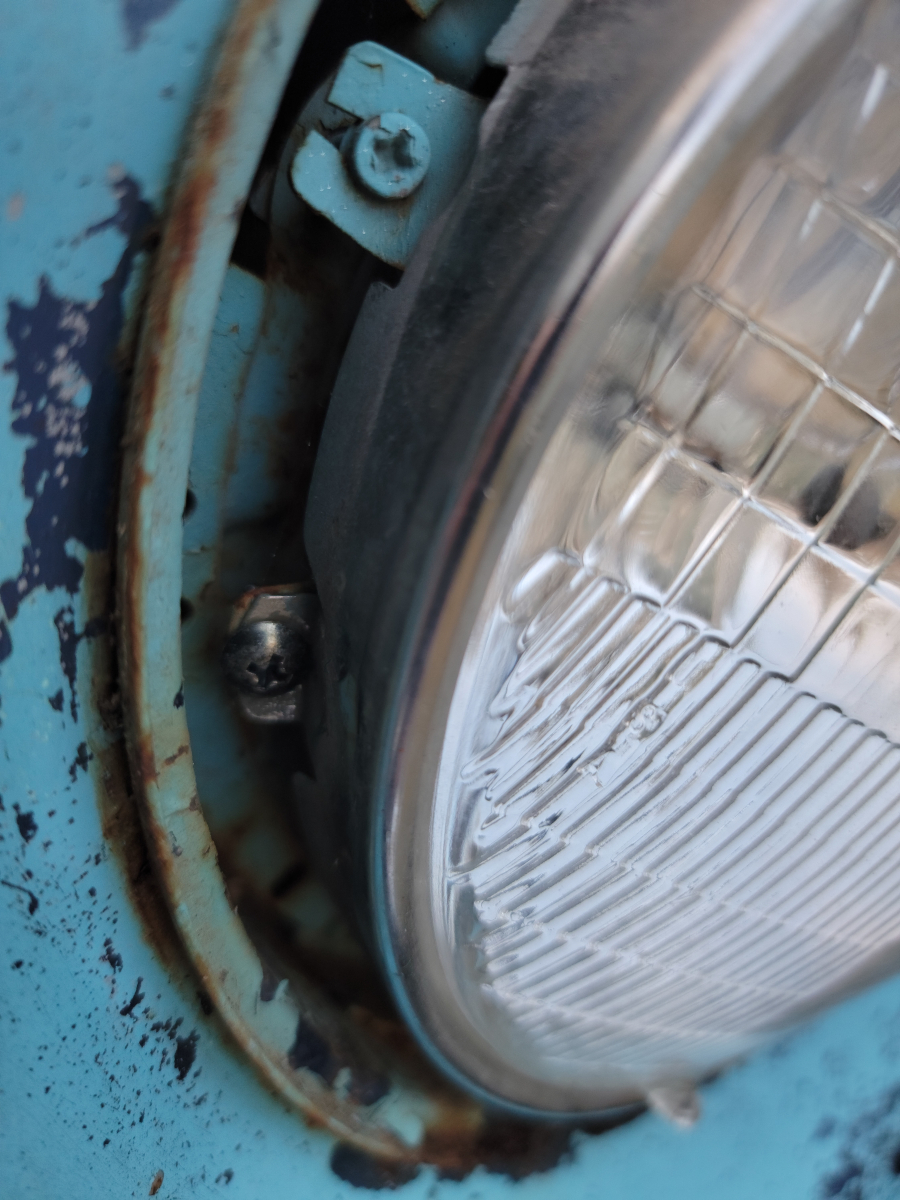
With the headlight bezels removed, I could finally get at the headlight aiming screws.
There were broken and missing screws, more rusty metal, and alas… The nylon blocks that the headlight aiming screws screw into are split and just spin without moving the headlight.
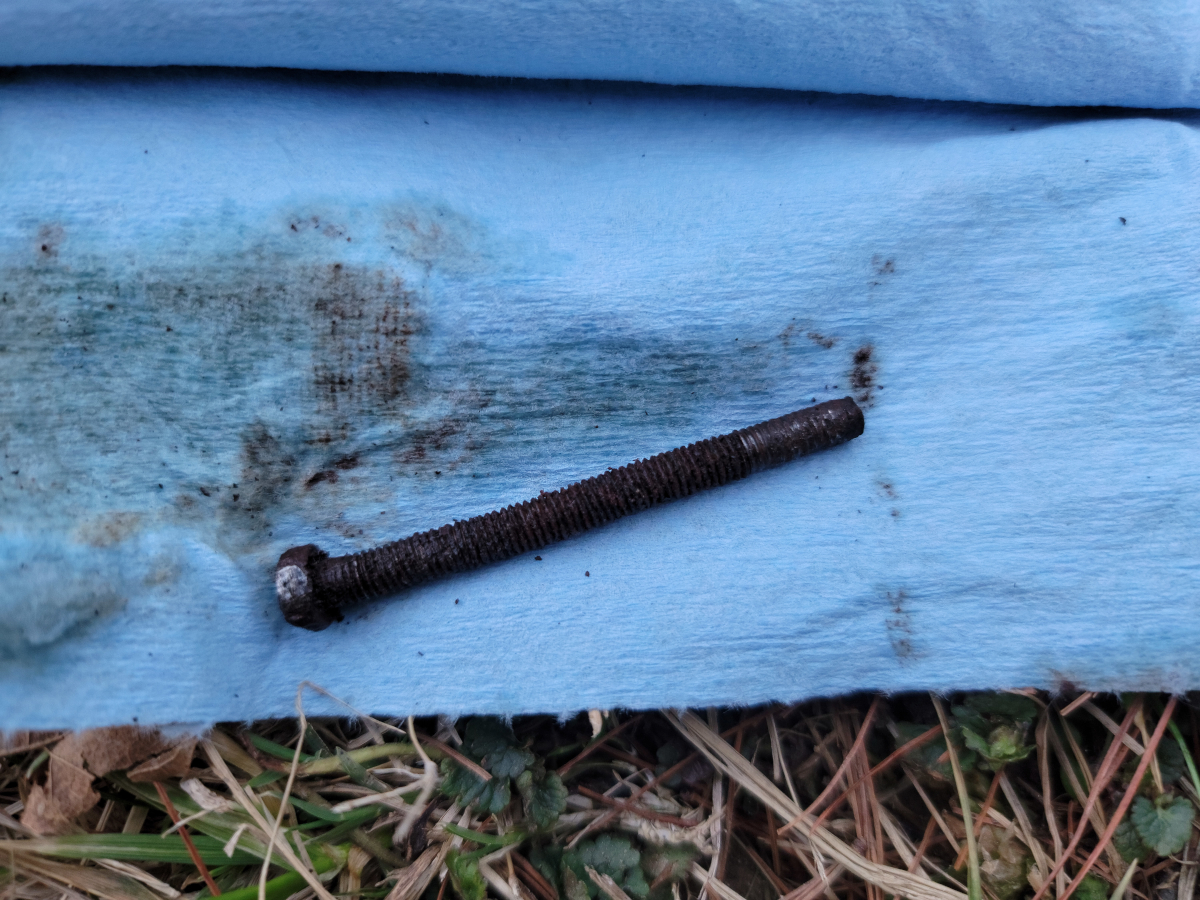
Well, at least I was able to find the right screws to replace the rusty chrome bezel screws. I took the better of the two that I had removed to Napa and they were able to identify the size and thread pattern for me, though they didn’t have any in stock. They are #10-32 machine screws. I bought some at a little Ace Hardware down the road that were 2 and 2 1/2 inches long. The ones that came out of it look like 2 1/4″ which they didn’t have in stock. The 2 inch ones worked fine.
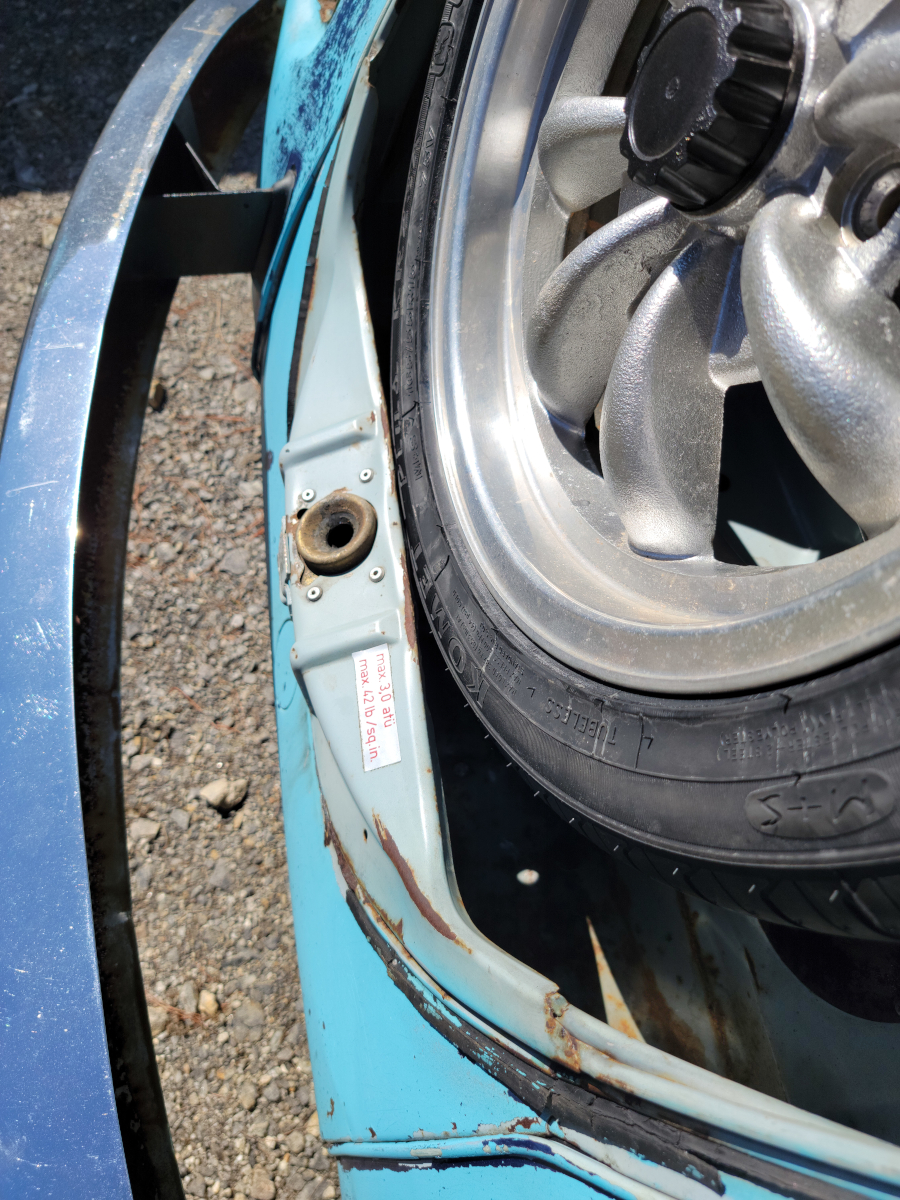
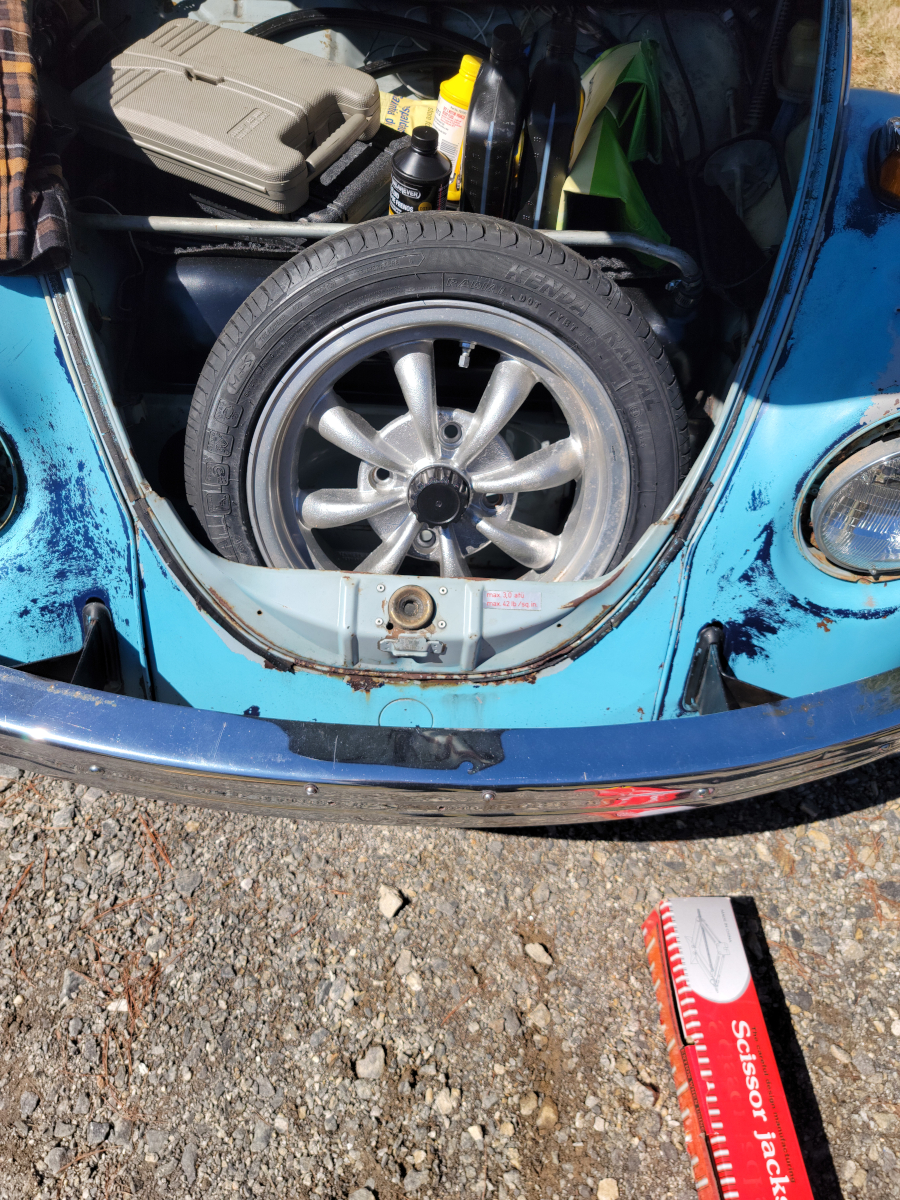
I also made a trip to a little tire shop down the street from my house and got the new tire mounted on the Empi wheel. When I got home with it and tried to put it in the spare tire well, it had apparently shrunken back into the old smooshed position.
Metal memory.
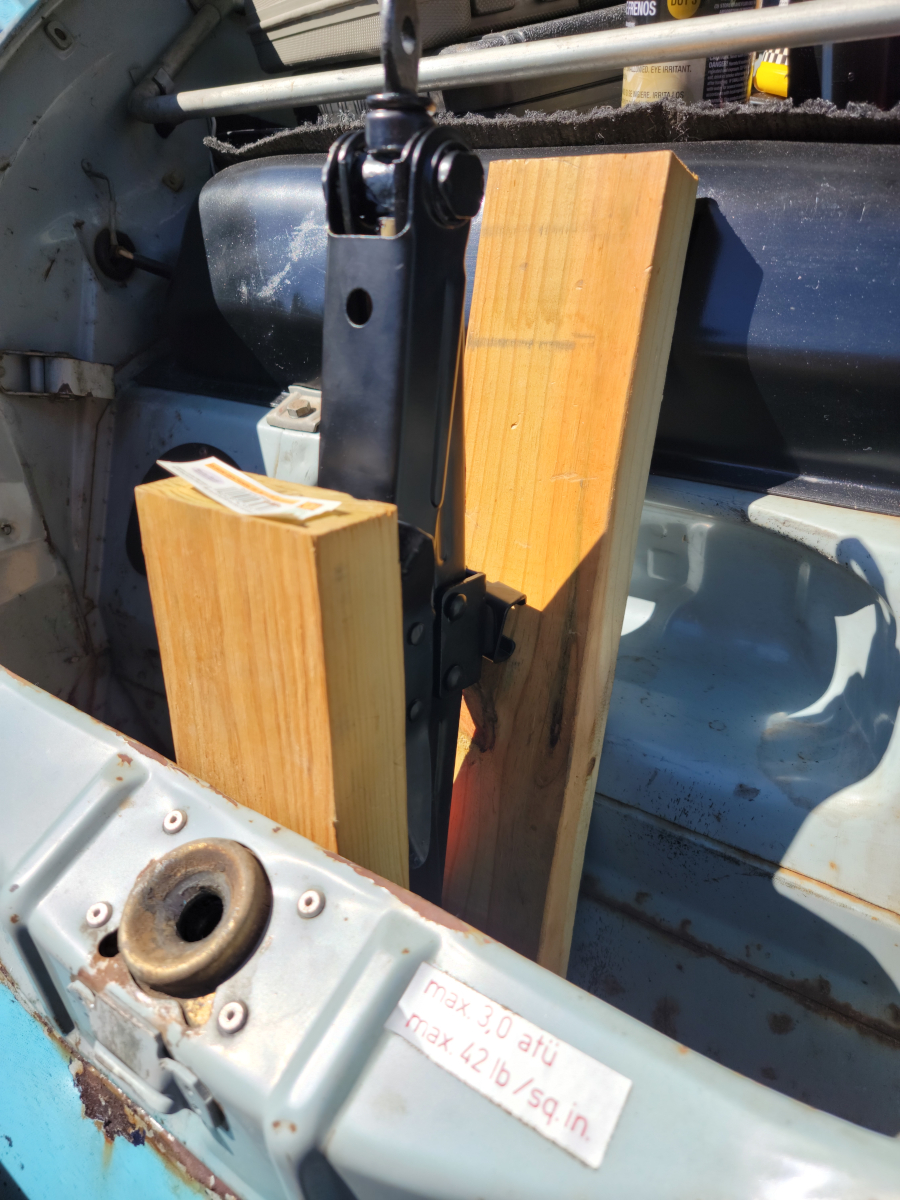
So I got the scissor jack and scrap wood out again and made it fit.
As an Amazon Associate I earn from qualifying purchases. I also often provide links to products on other sites that do not provide affiliate income.