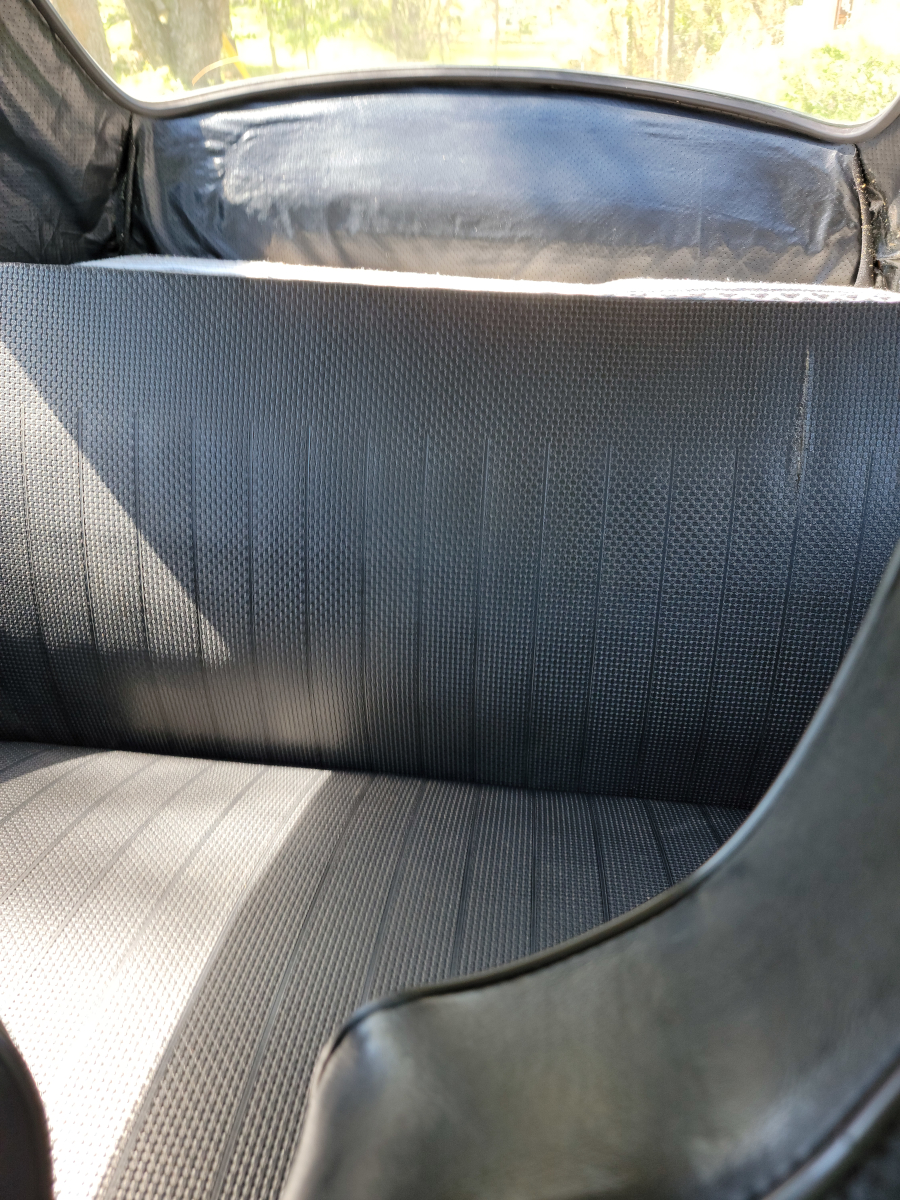
After refurbishing the seat frames a couple of years ago, I was amazed at the price of these replacement chintzy vinyl seat covers. So, I slapped the old covers back on, hosed them down with some vinyl lube, and called it a day.
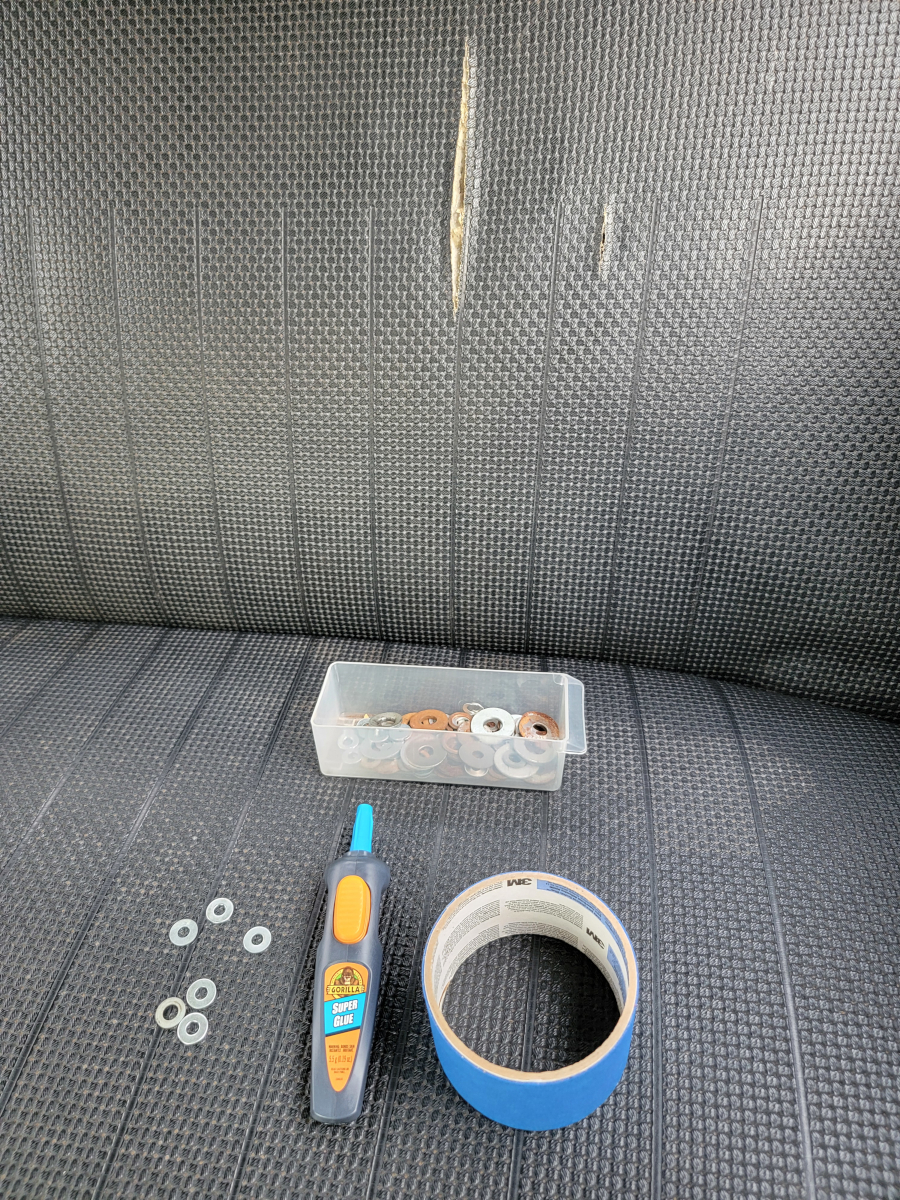
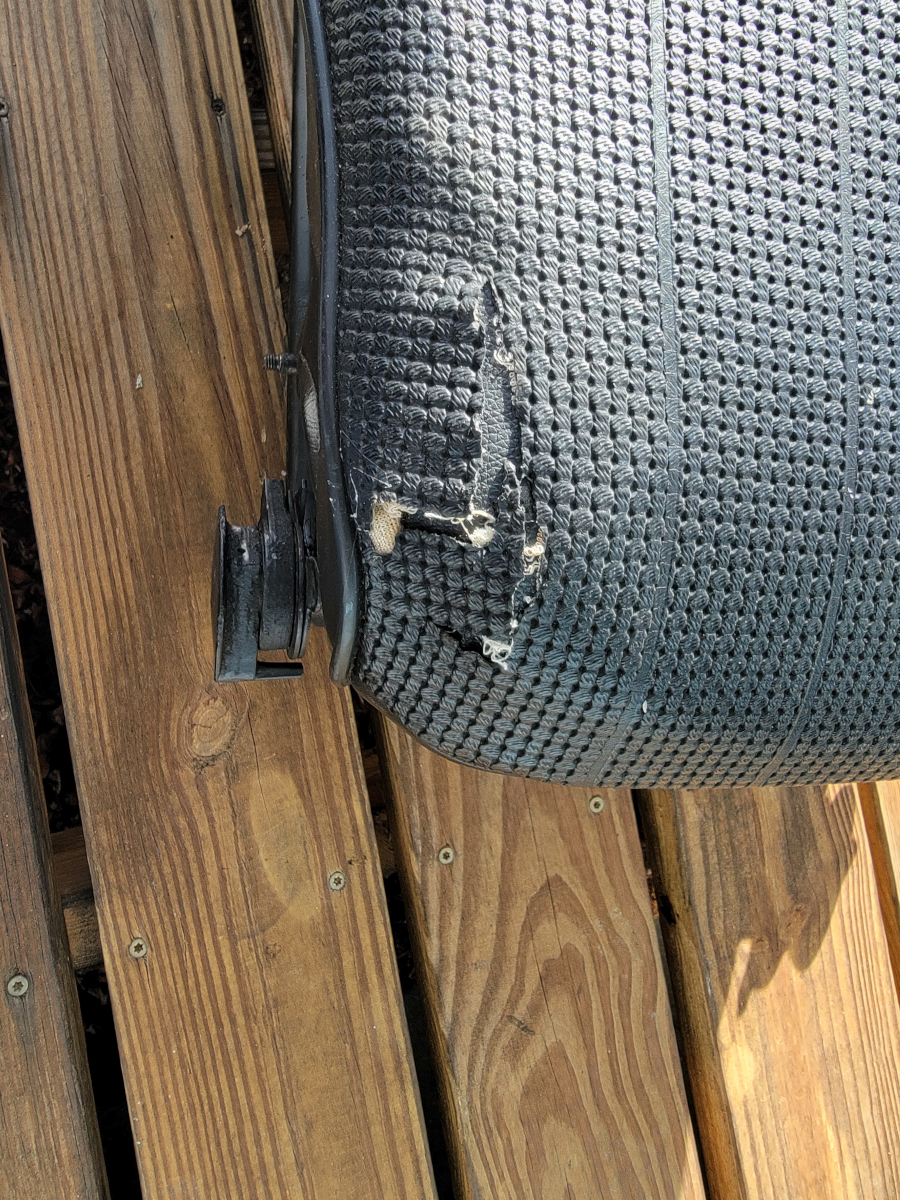
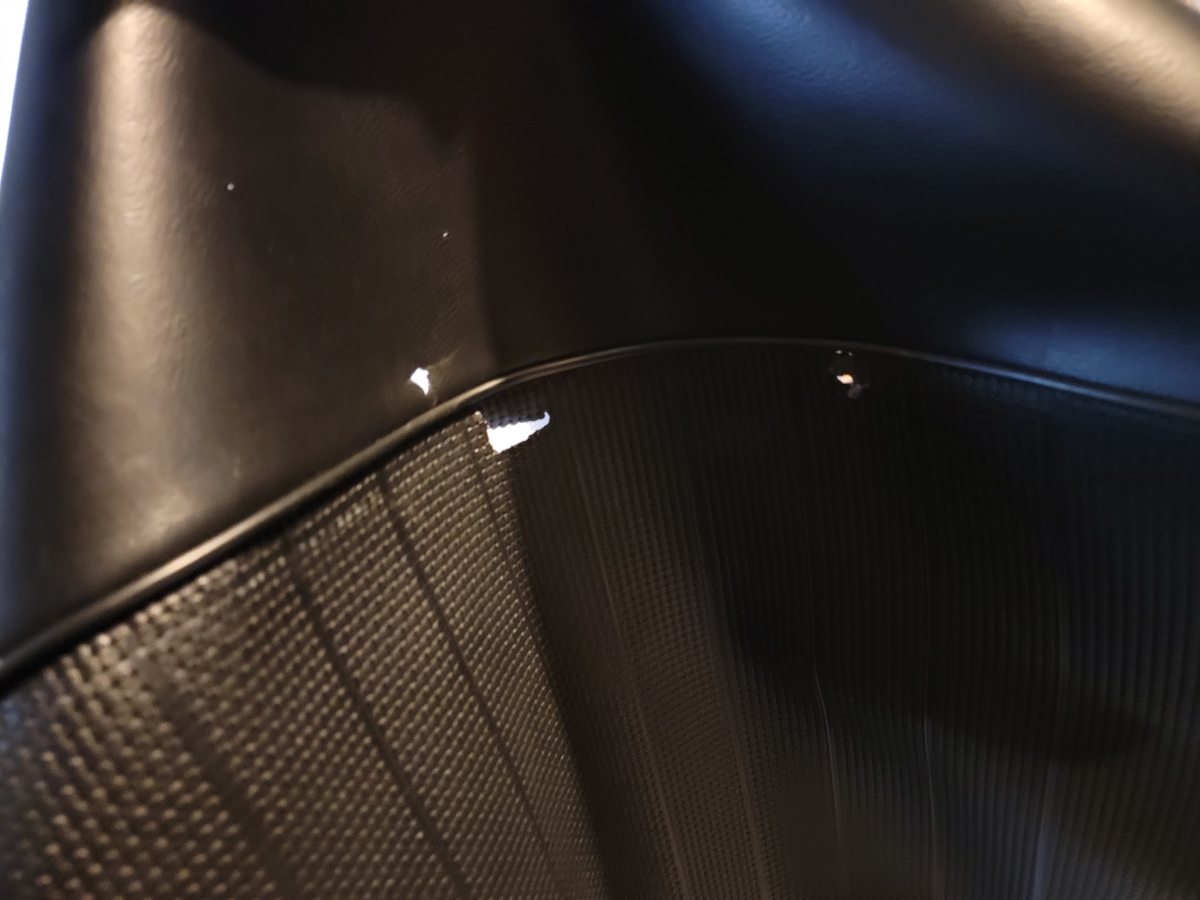
Here we are, with past problems announcing their presence louder than ever. The edges of the cracked and torn spots are now starting to curl up, looking worse than ever. Continuing down my path of using the wrong tool for the job, but having the best intentions, I whipped out a tube of super glue, some washers, and a roll of painter’s tape.
My experience with every other type of glue I have used – rubber cement, upholstery spray adhesive, E6000, Clear Gel Gorilla Glue, among others I’m forgetting – is nothing sticks for more than a season. So, now we try the absolute wrong thing. But hey, the thought was to get the top vinyl to stick to the mesh/fabric backing, which is still intact.
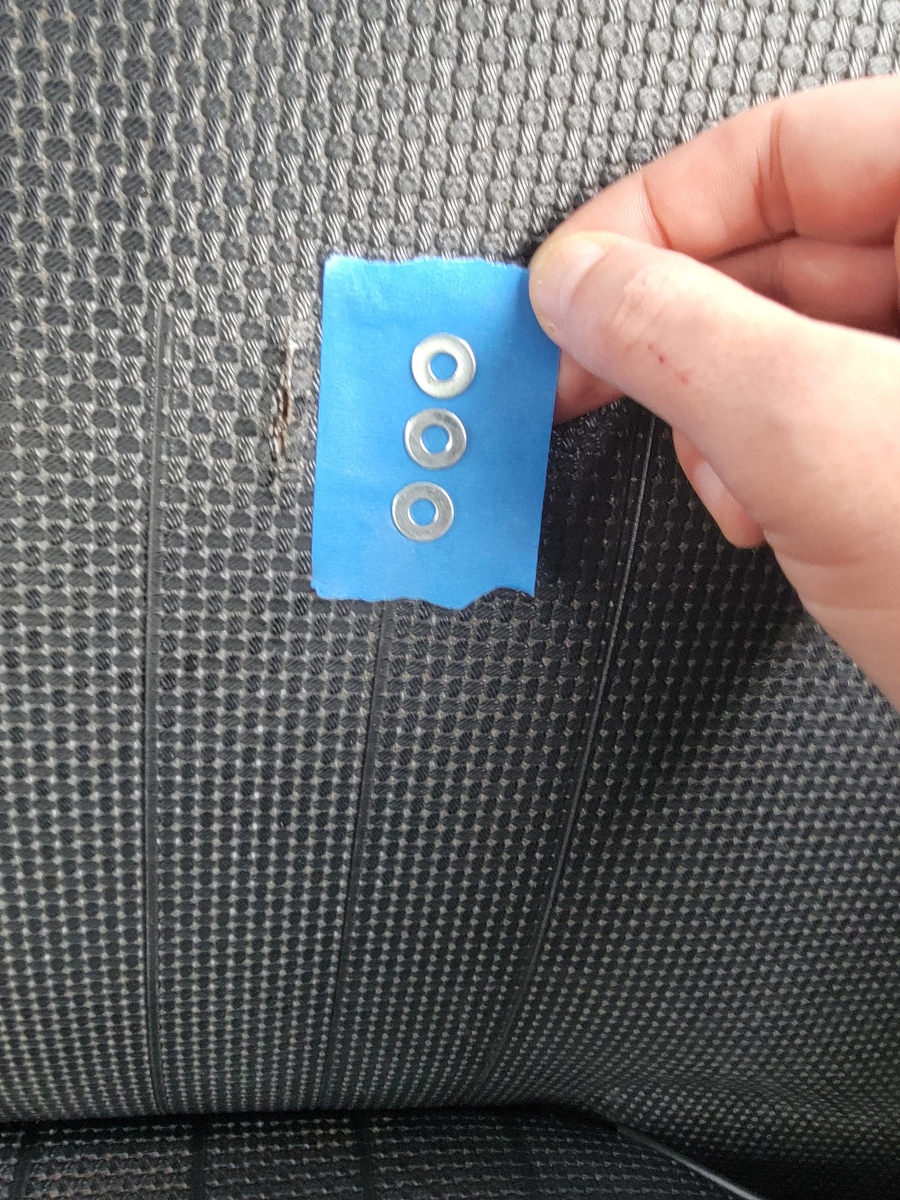
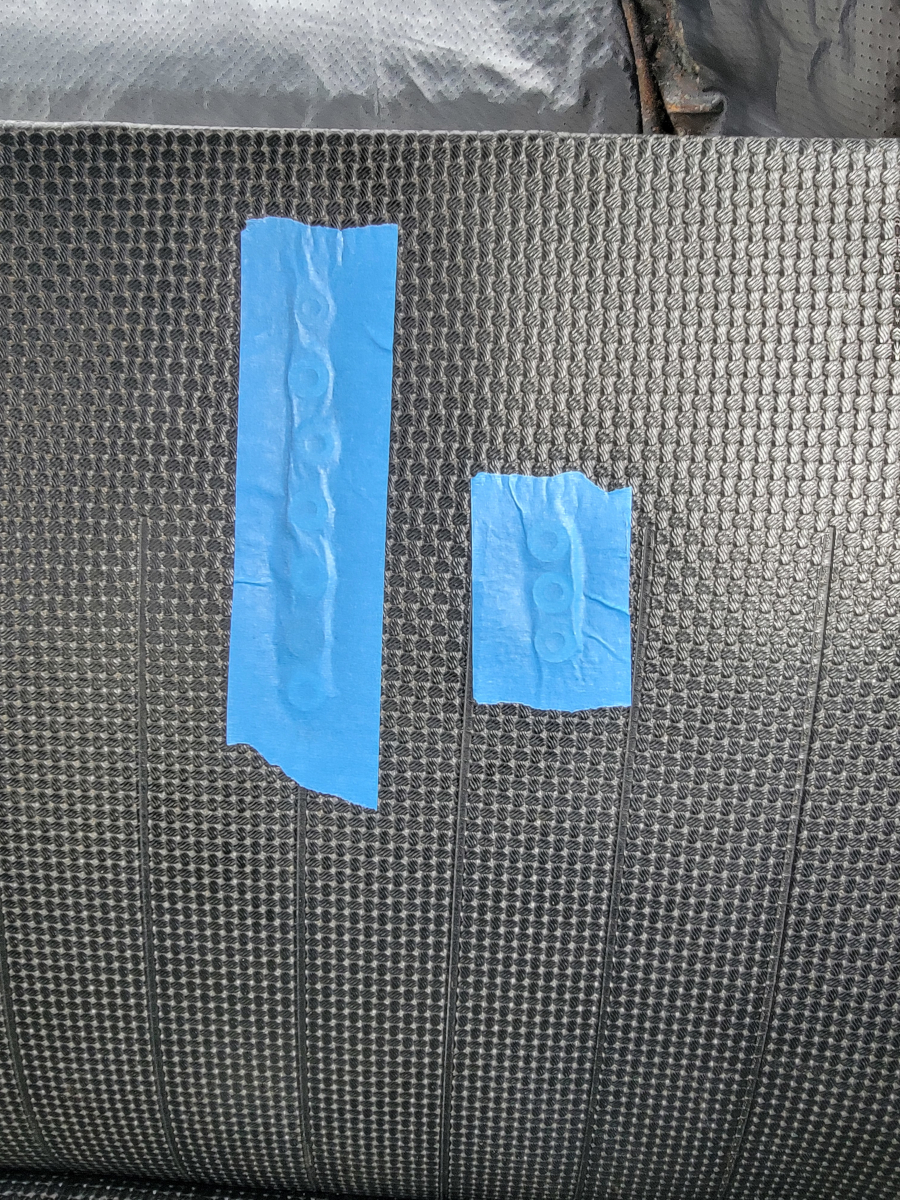
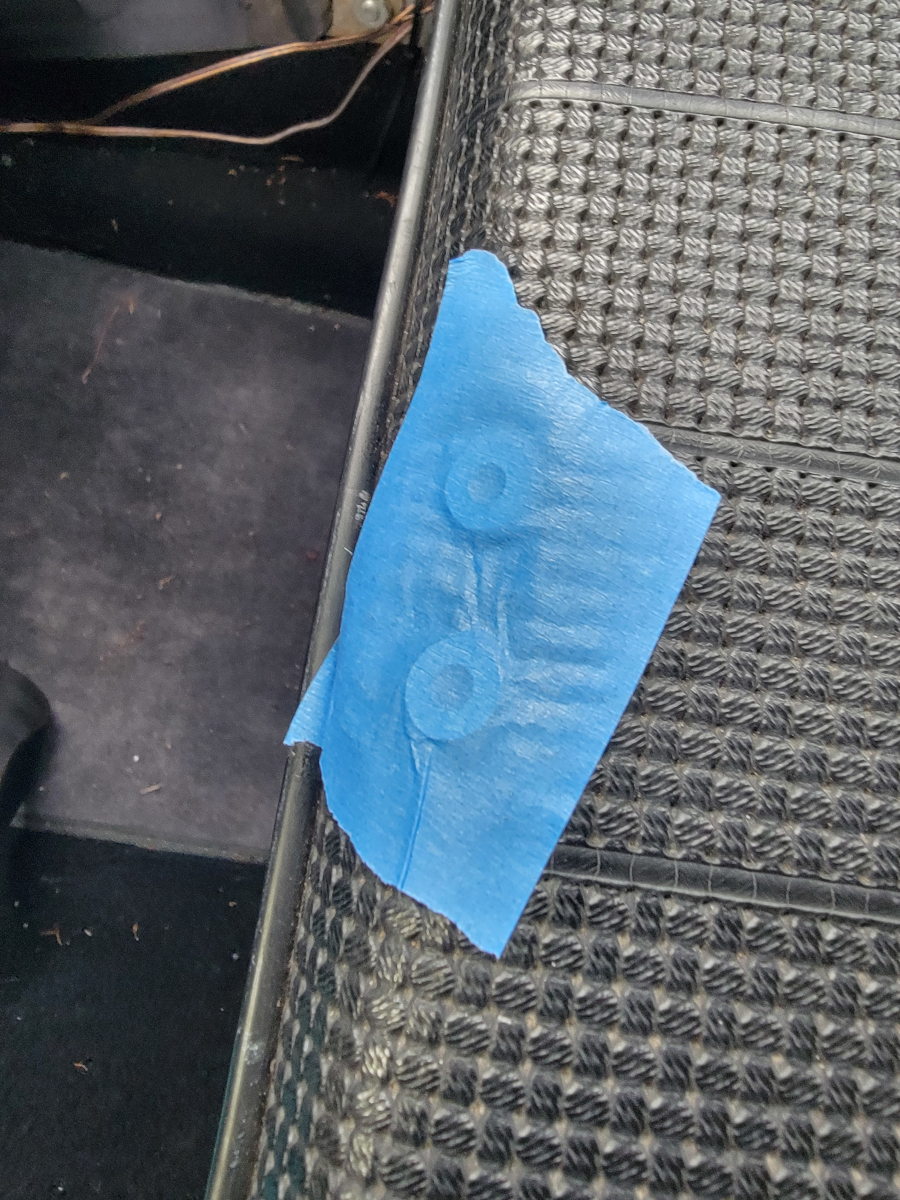
I figured those little washers could help entice the curling edges to lay flat and the painter’s tape would hold it all in place long enough for the glue to set.
And, of course, this doozy, which I added a backing vinyl patch, glued in with one or more of the aforementioned non-sticking glue.
I glue it real super-good and tried again.
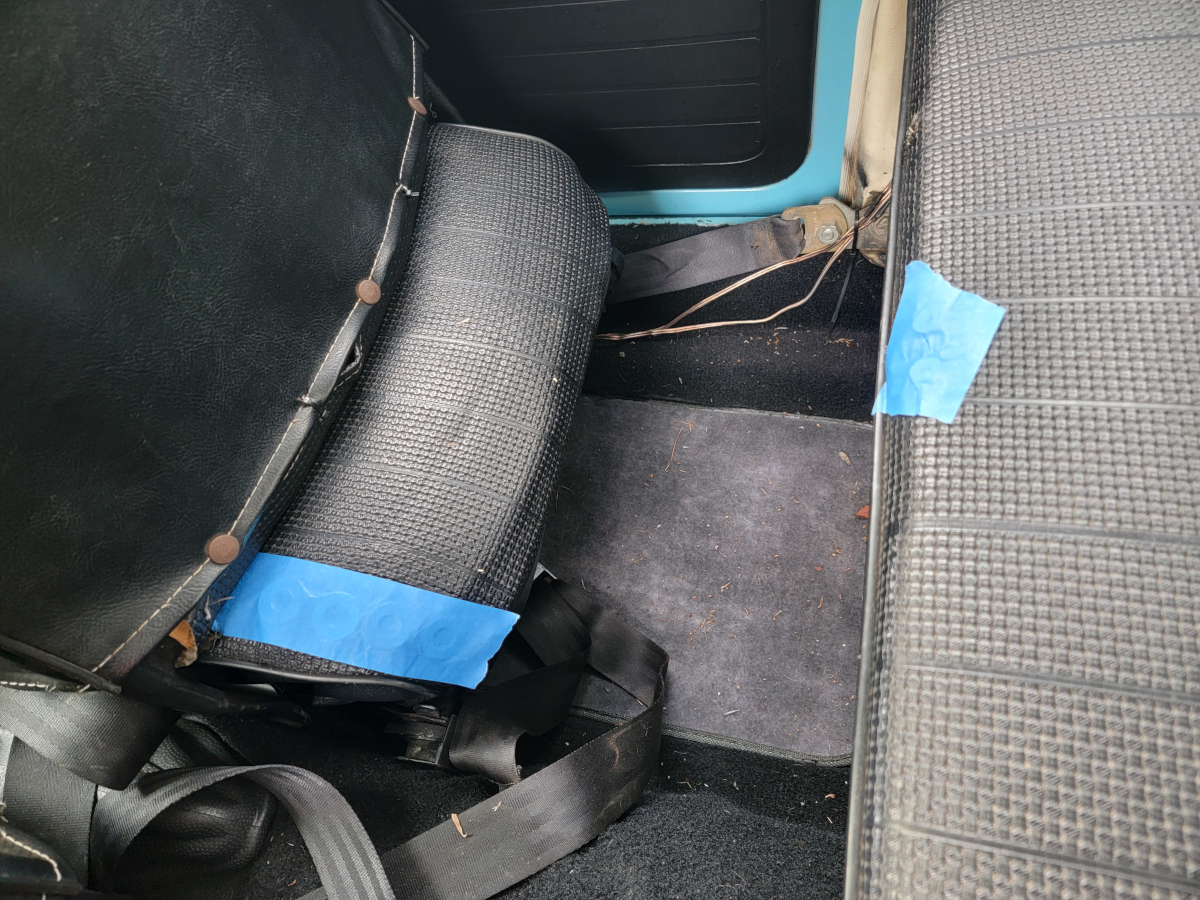
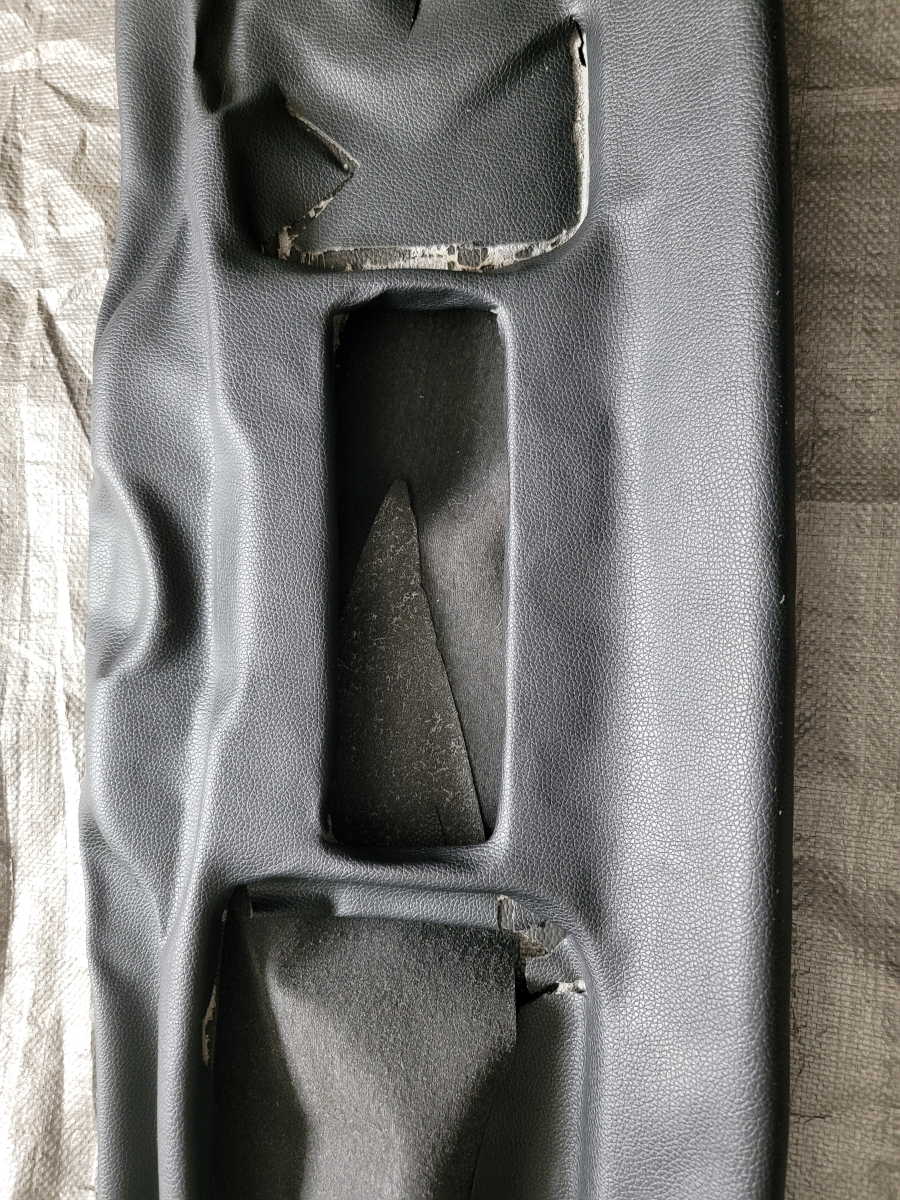
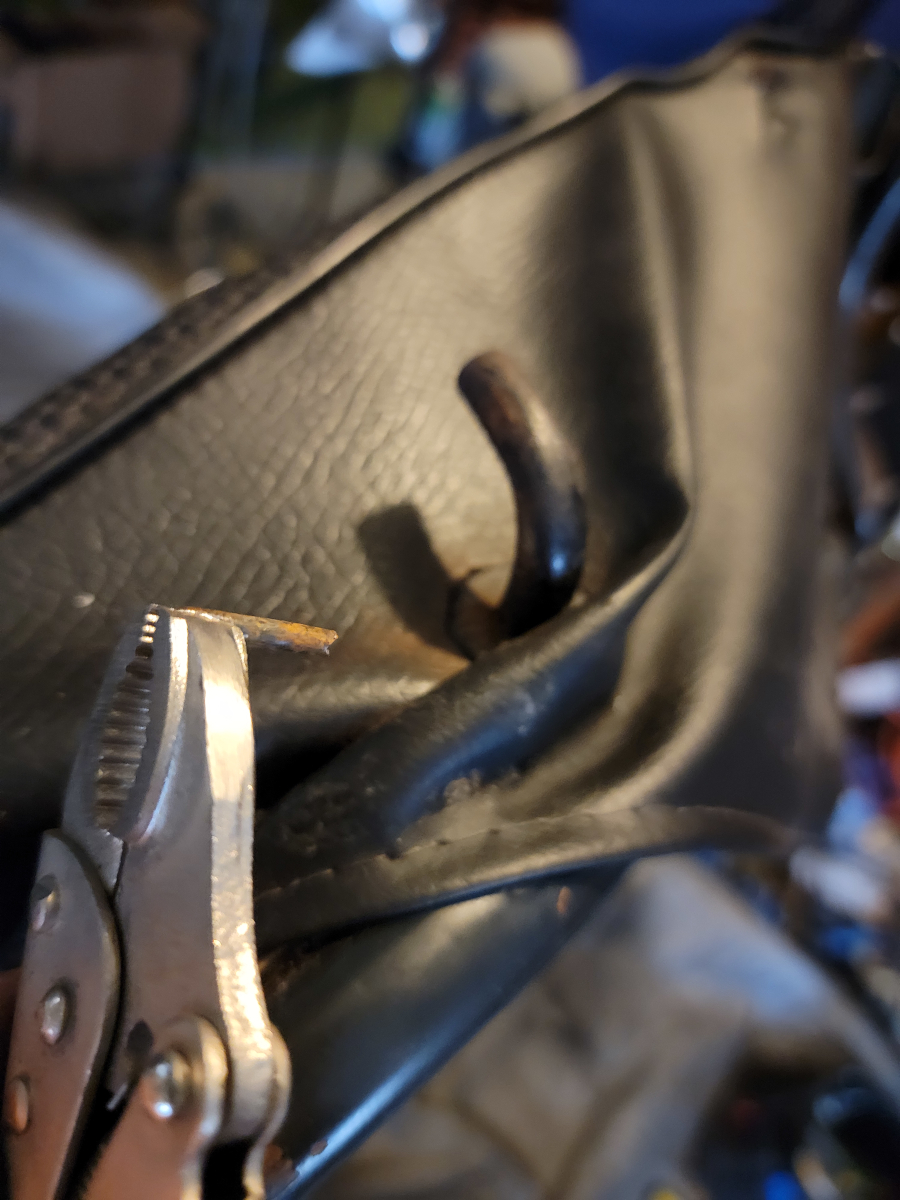
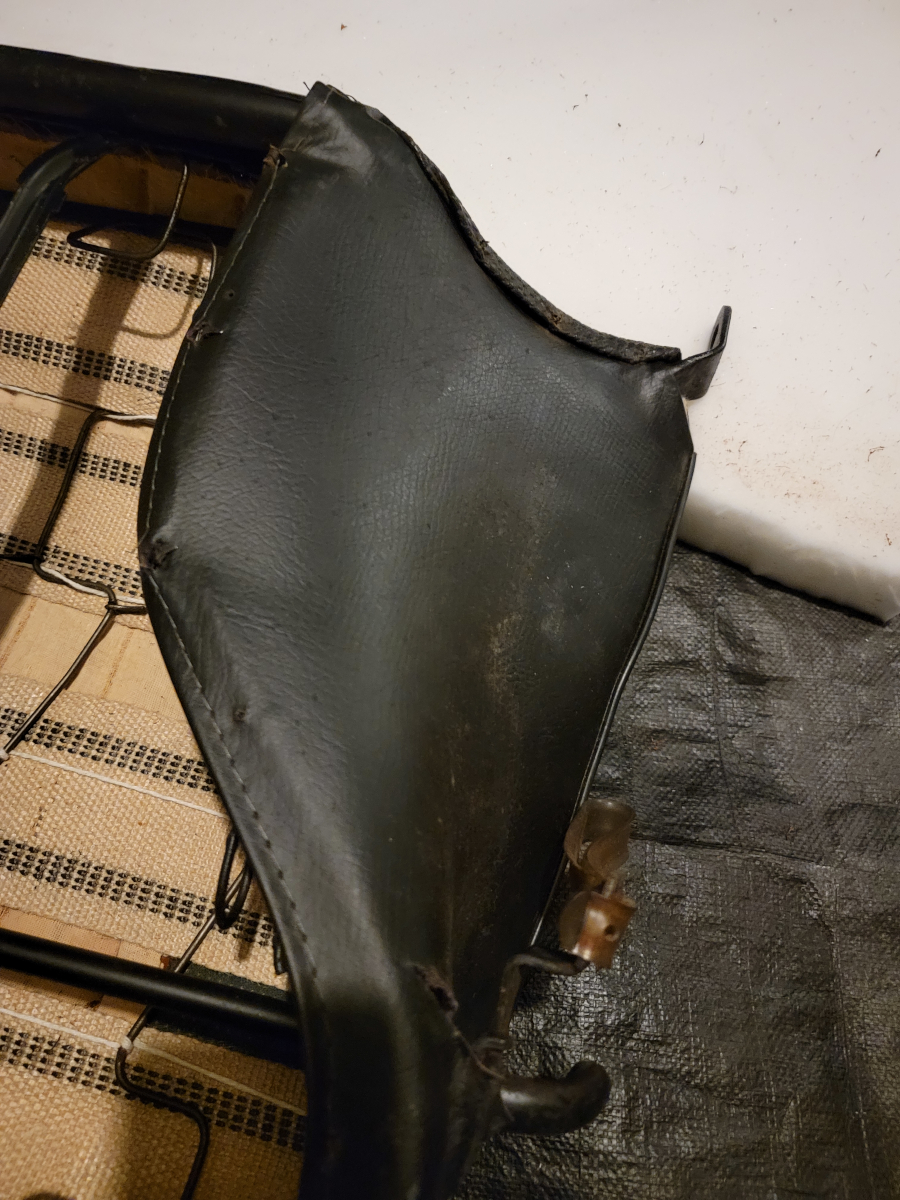
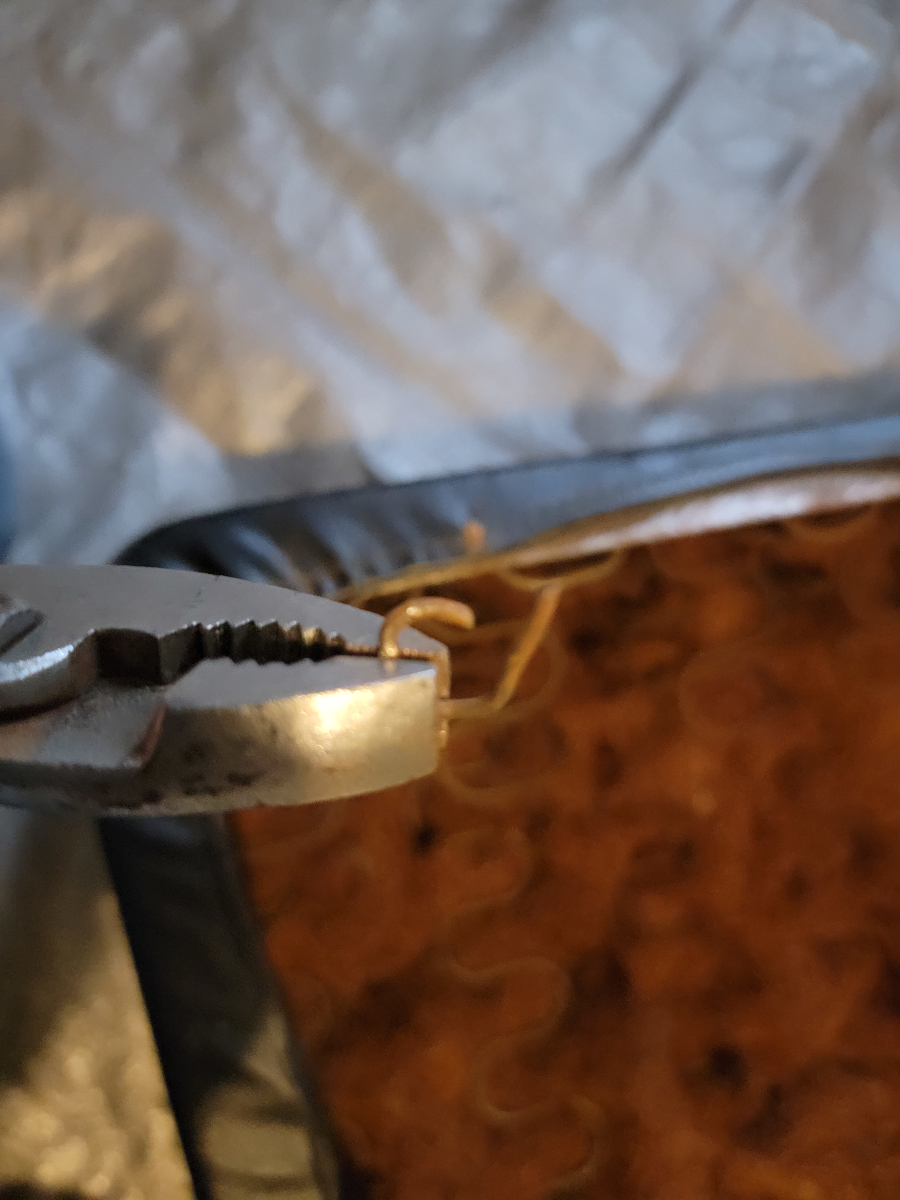
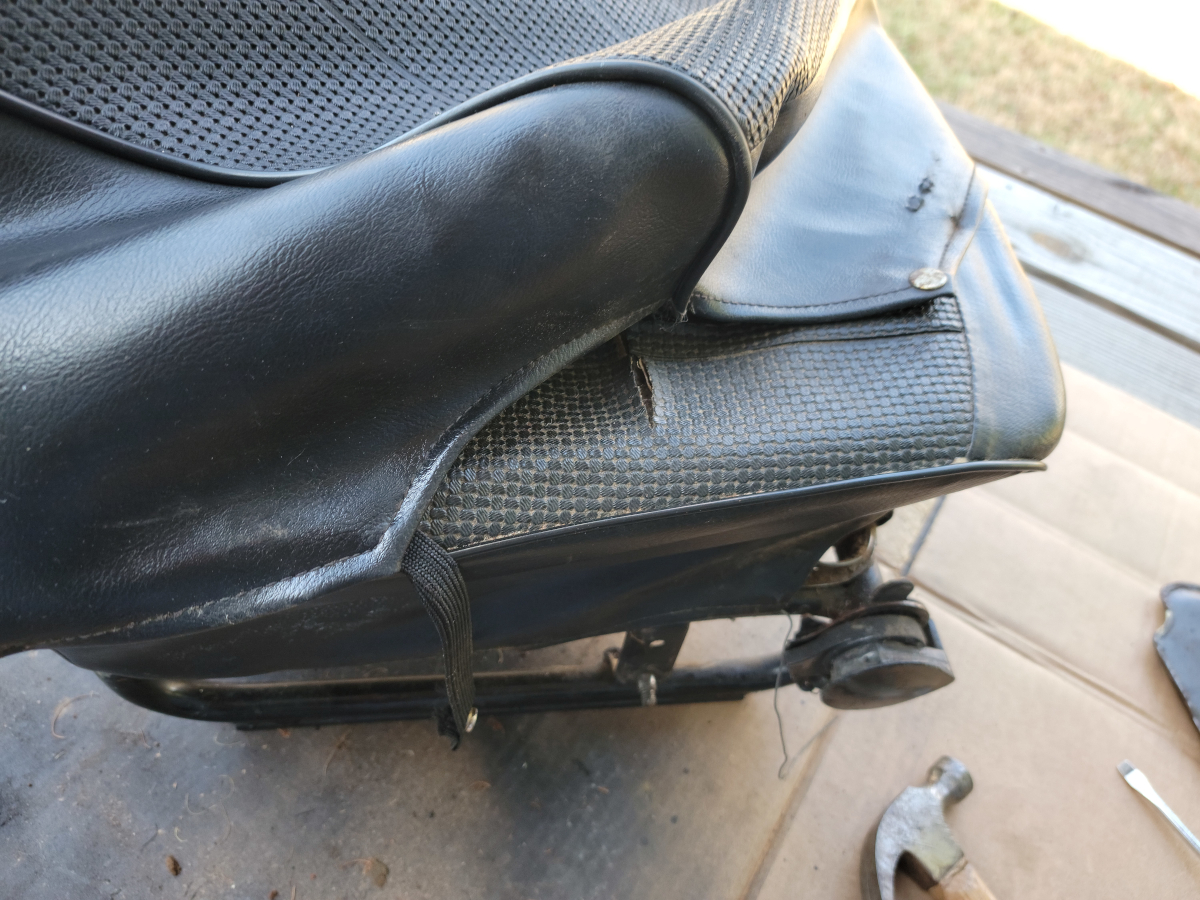
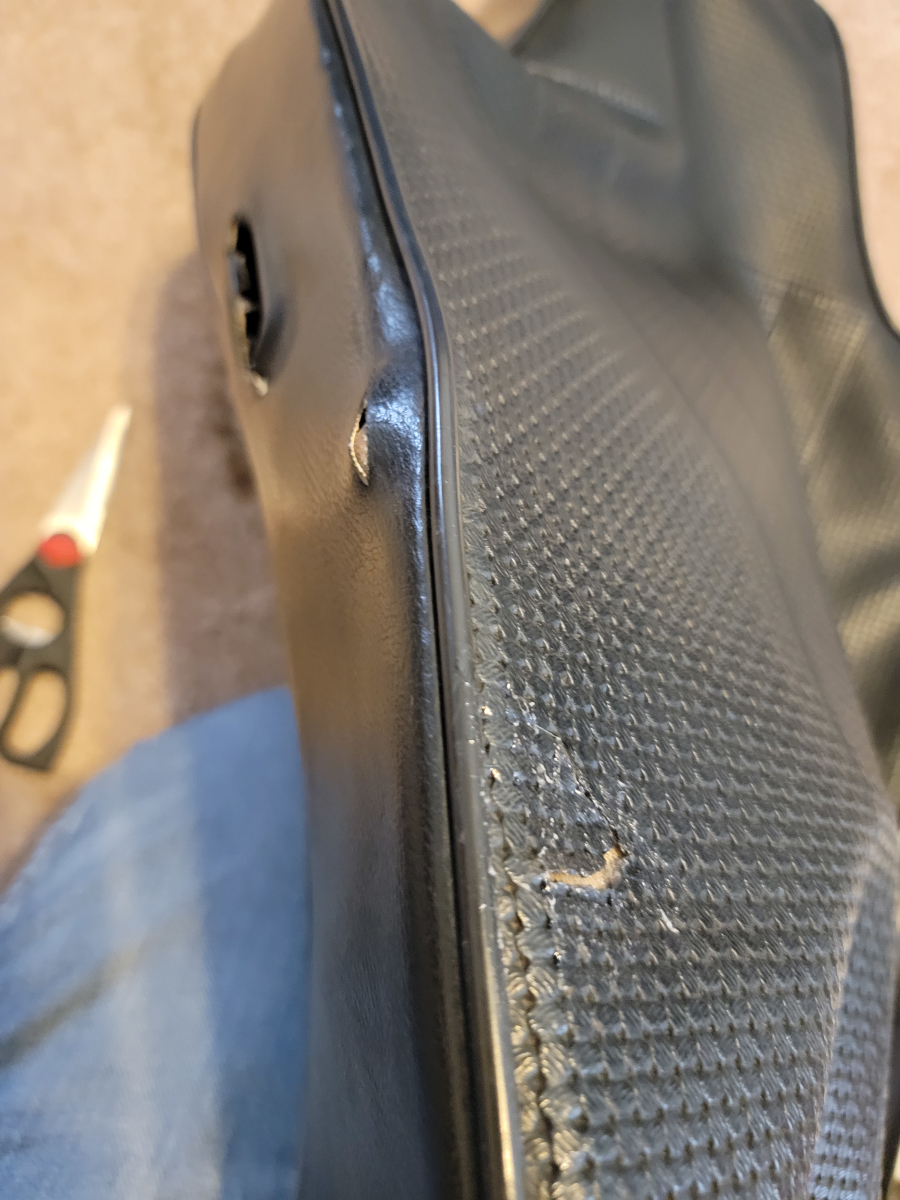
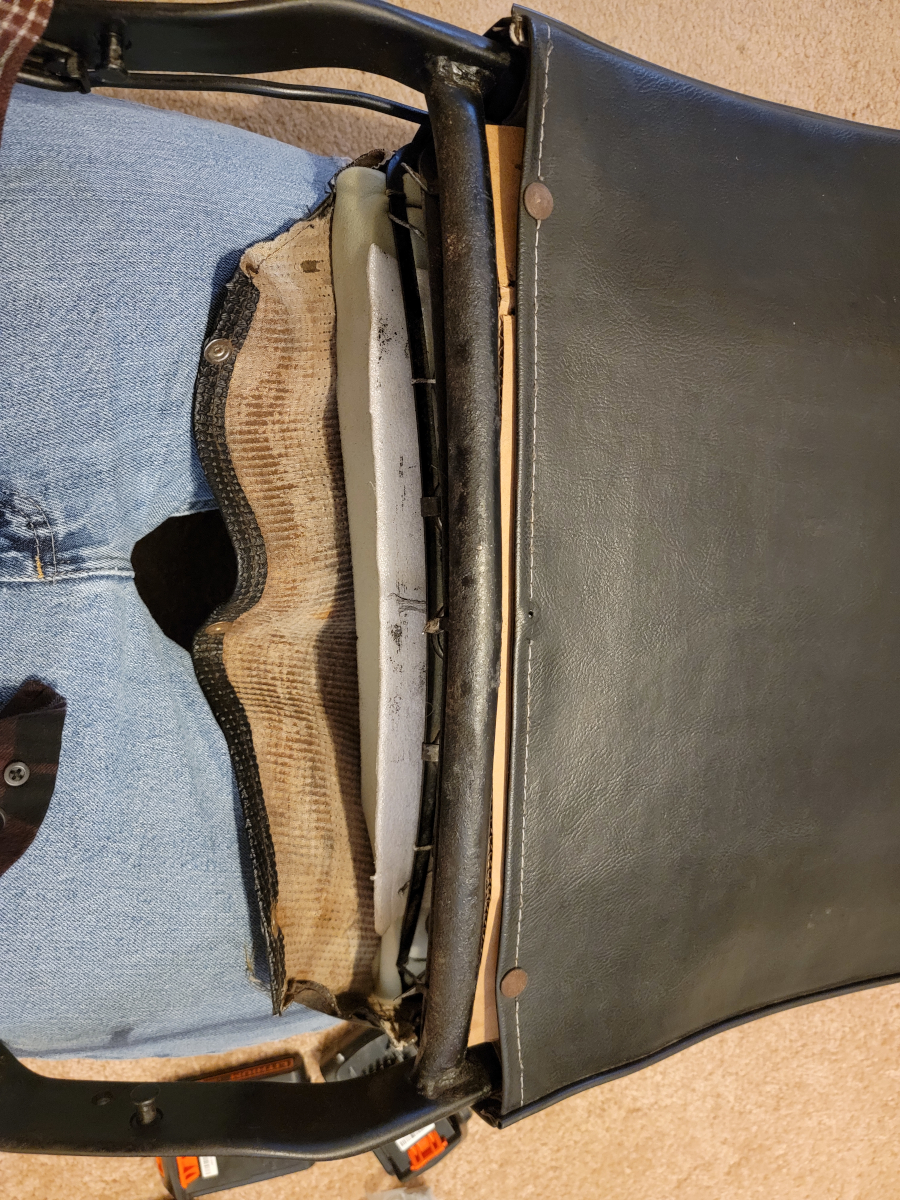
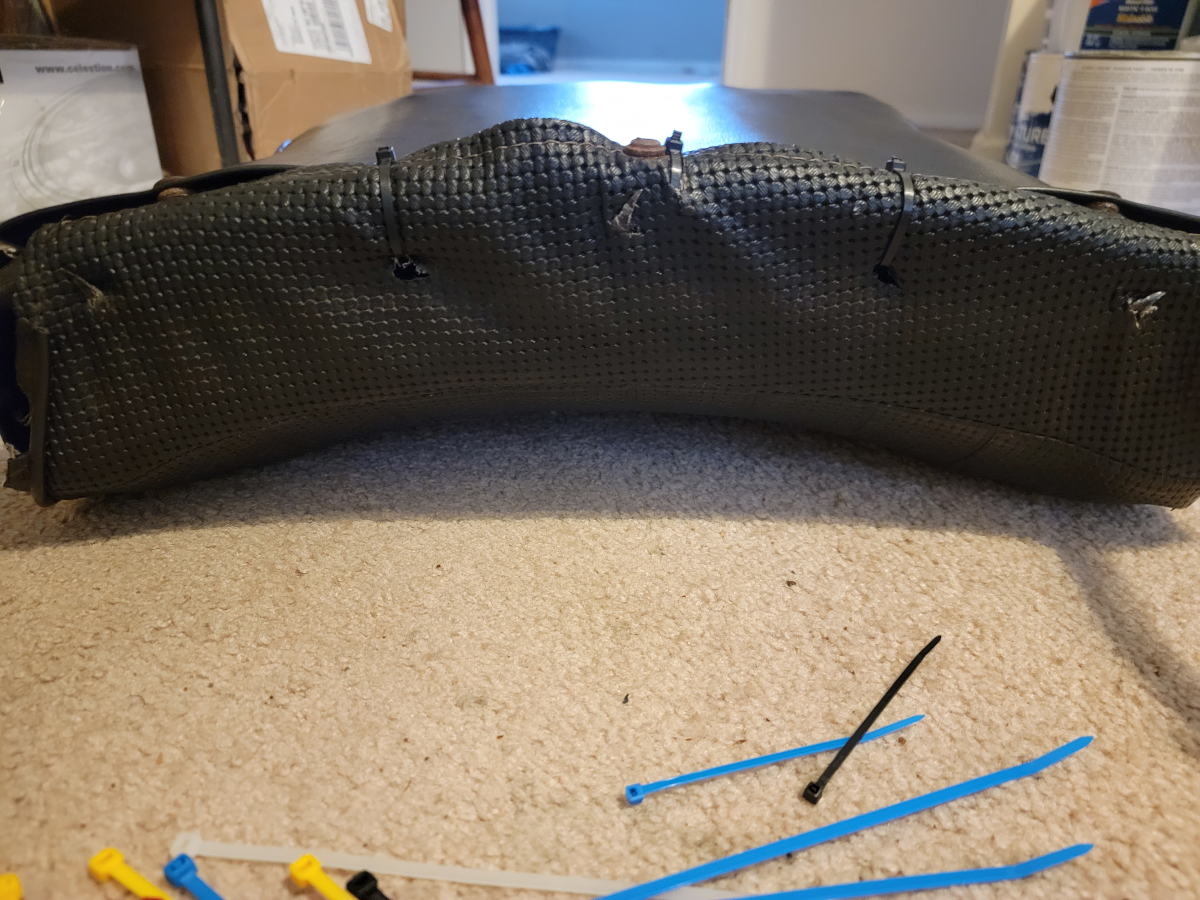
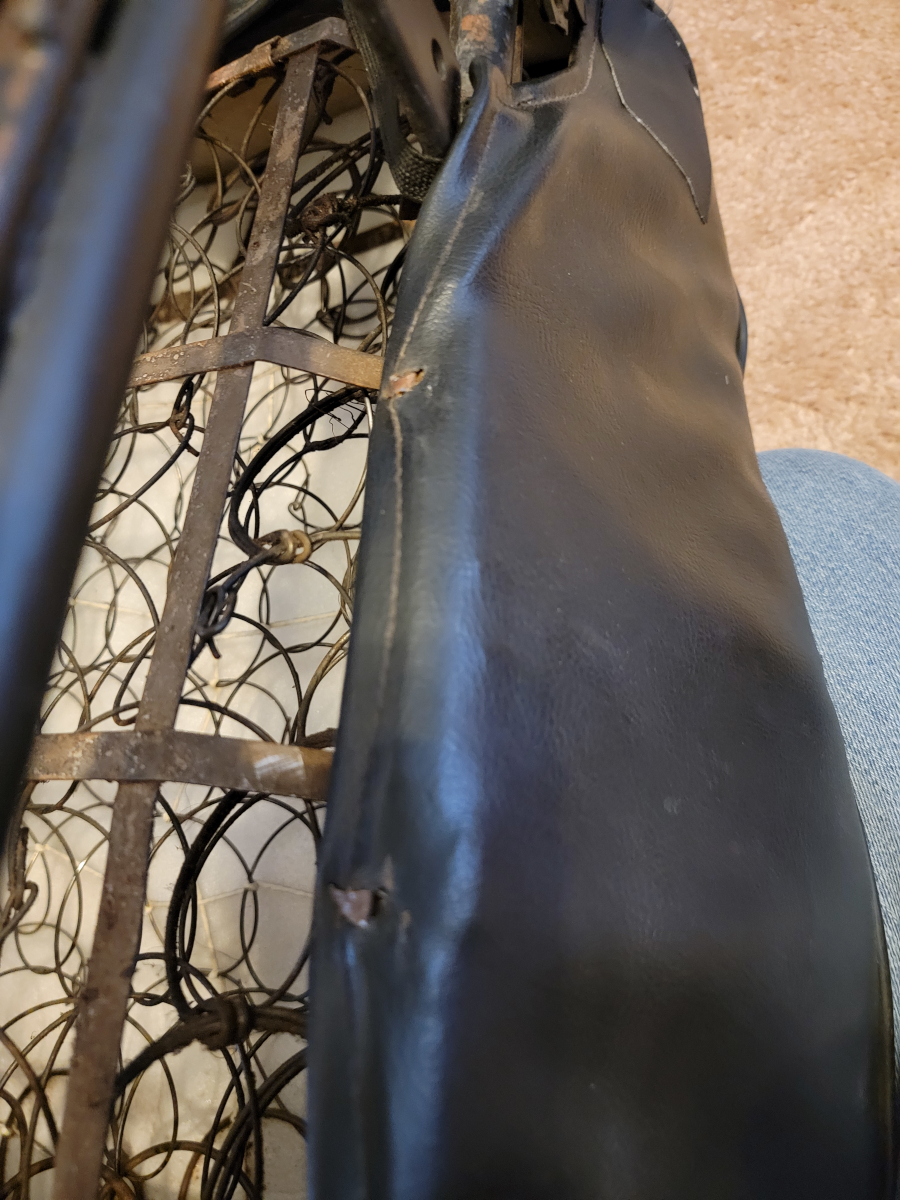
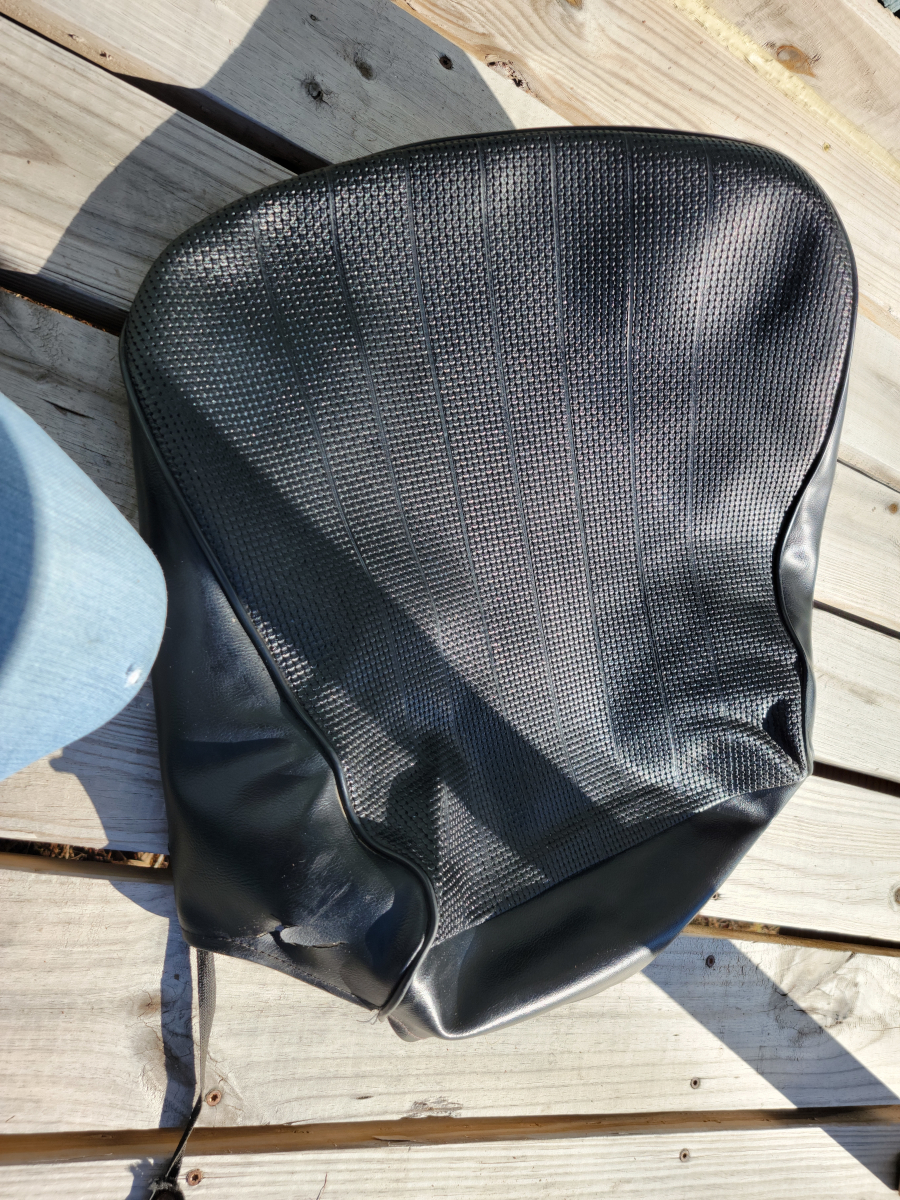
Back when I put the covers back on the front passenger seat, I apparently missed one of the bend-over-stabby-keep-it-in-place tabs… First time I rocked the seat back forward, it tore a big hole in the seat cover and new padding below. So here we are, couple years later, cleaning up an old mess…
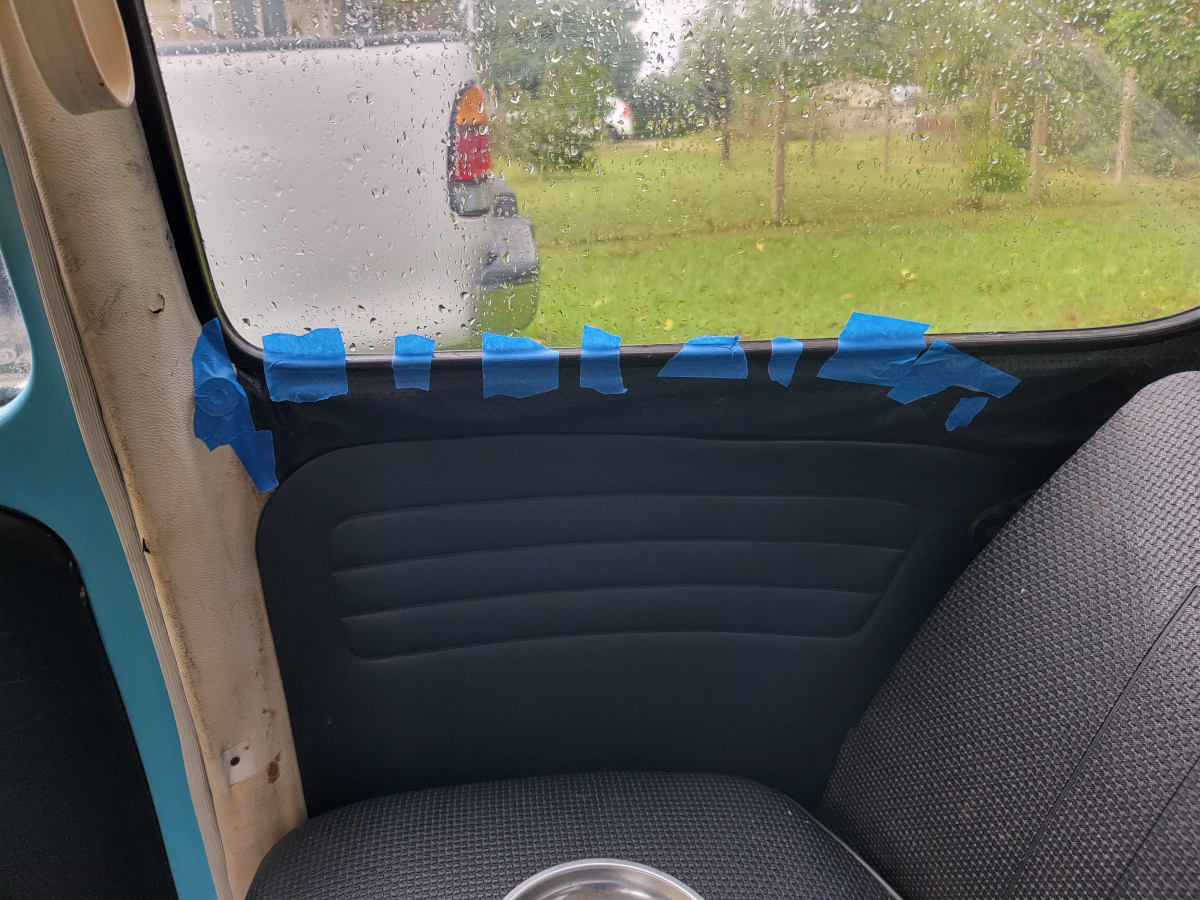
You know what? While we’re here, let’s see if we can’t make that vinyl wrap stick once and for all below the rear passenger window…
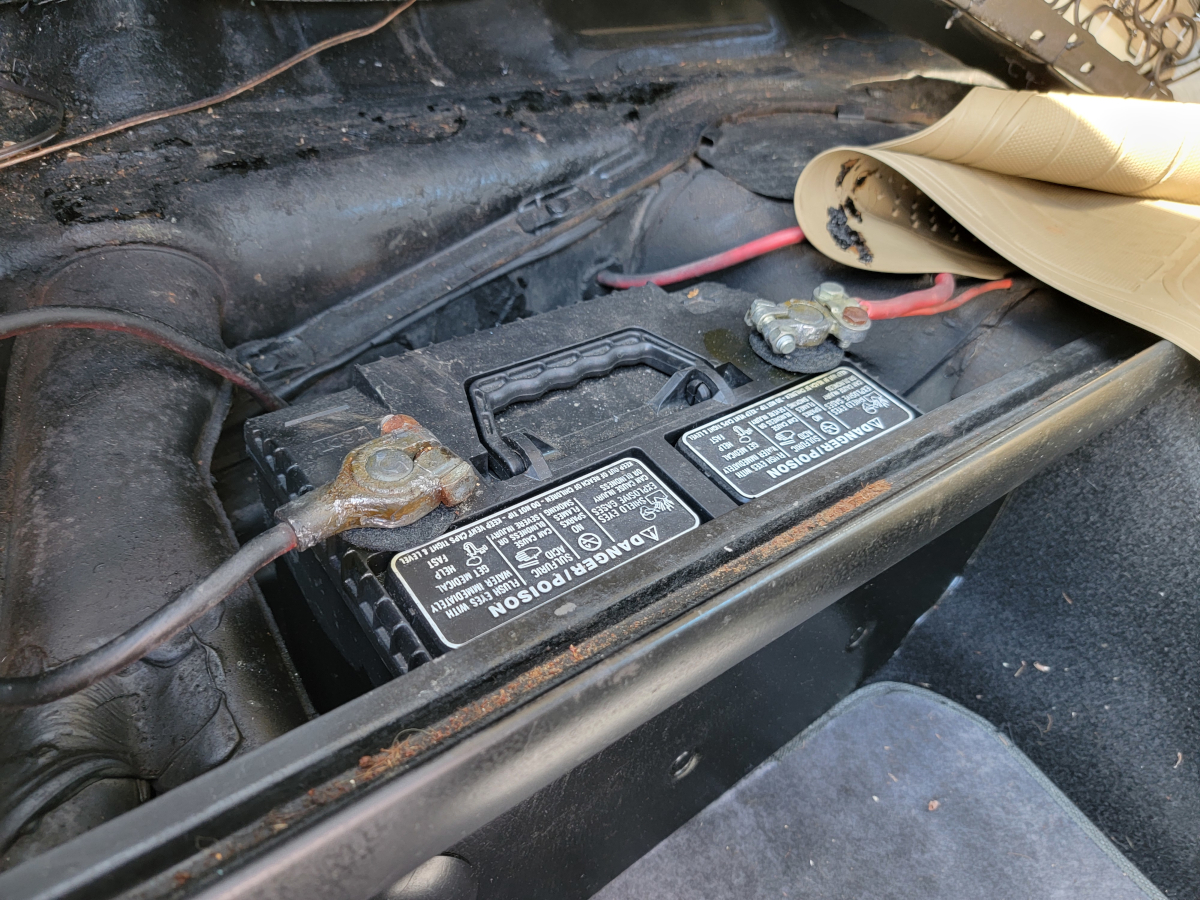
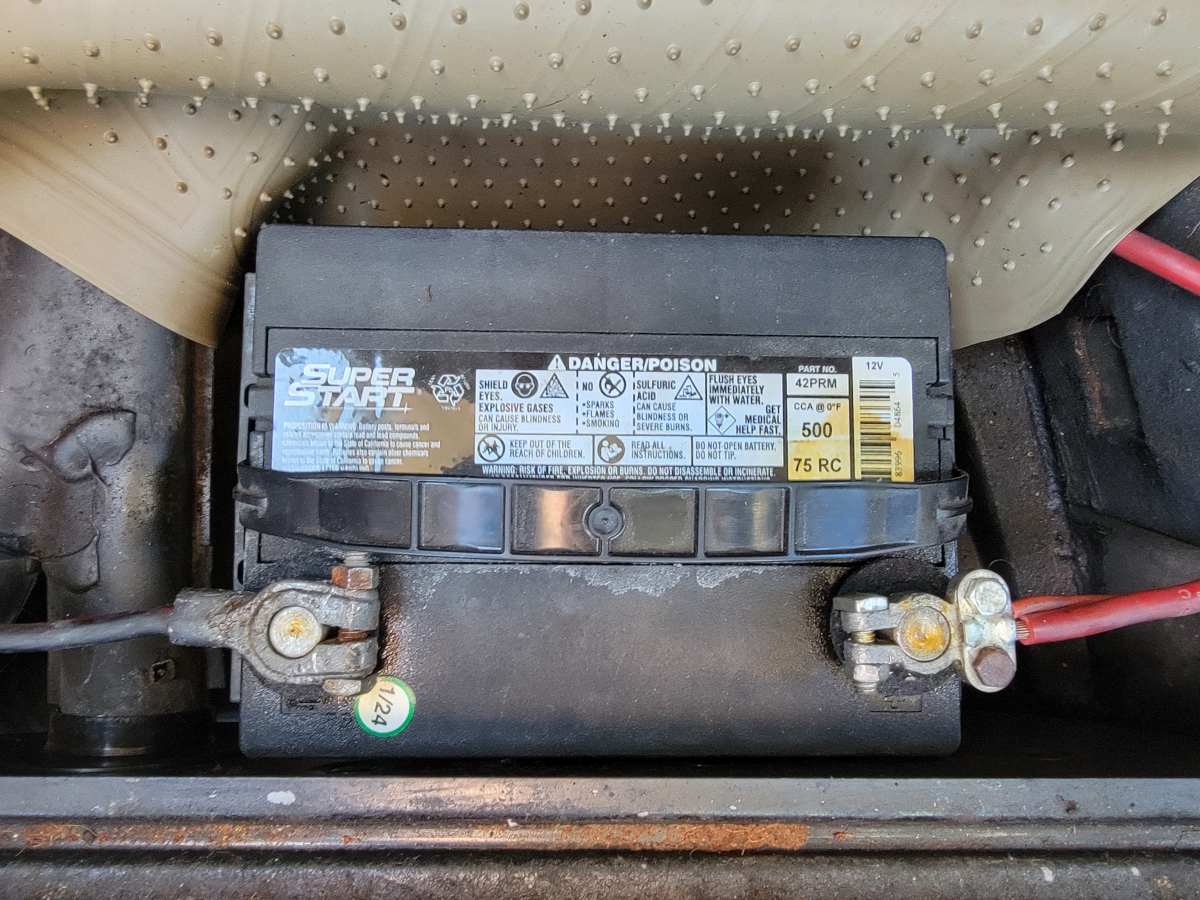
After sitting through the winter, the battery in the beetlebug was dead. After having the car for two years, this is only the third time the battery has gone flat. The first time was actually not from a lack of use at all. I was in the habit of starting the car up and letting it run every couple of weeks. I would let it heat up, then drive it back and forth in the driveway a few times to keep all the moving parts lubricated.
After one of those sessions, I found the battery was dead a couple of days later. It turns out the old style generators don’t charge at idle like more modern alternators. Letting the car sit and idle will actually run the battery down.
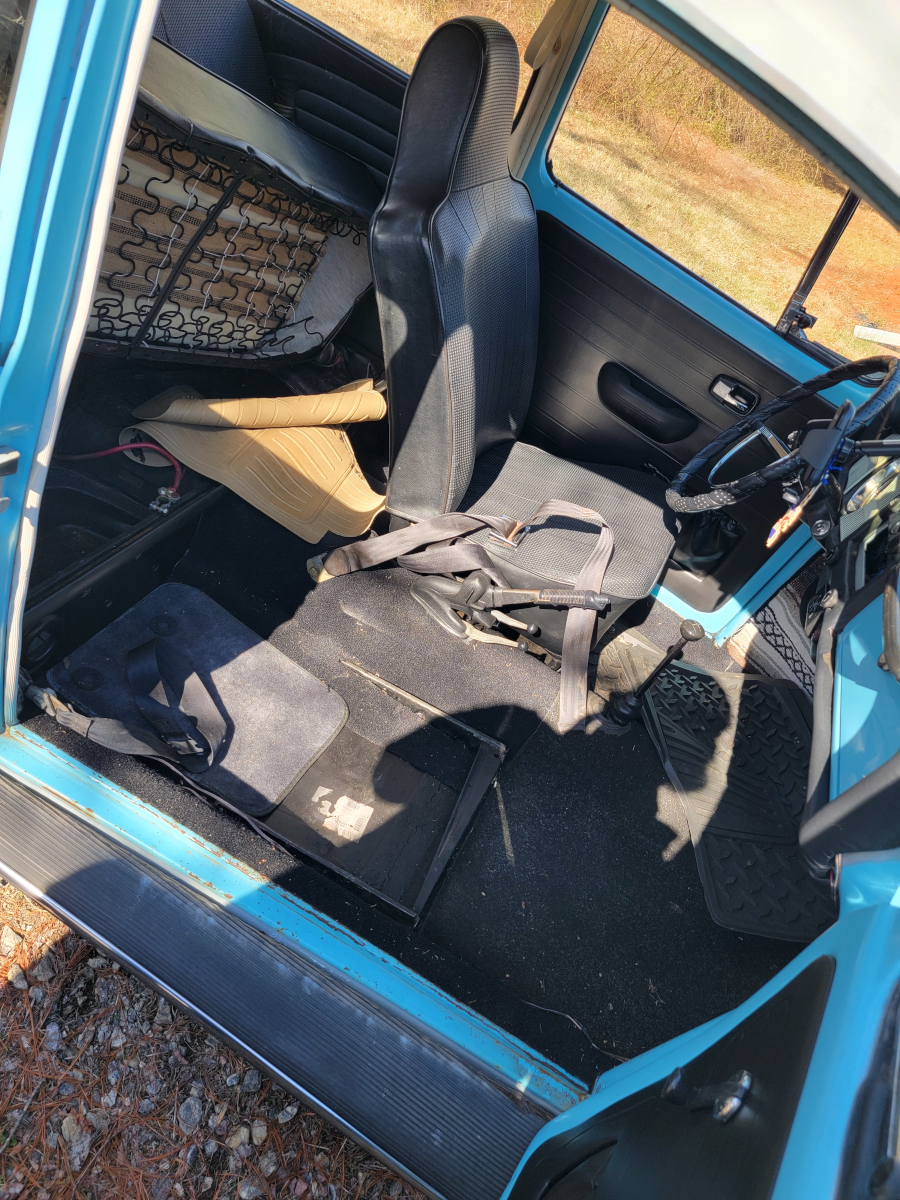
The battery is under the back seat. So, I flipped the passenger seat back forward and heard the terrible sound of seat cover ripping. One of the upholstery spikes on the bottom rail was fully extended. It tore a long gouge in the seat cover and new foam padding I installed last spring.
I connected jumper cables to my truck and started the car. I left the cables connected, hoping to get a better charge off the truck’s alternator. After letting it run for ten or fifteen minutes, I disconnected the jumper cables and turned off the car. When I turned the key, the battery was still completely dead.
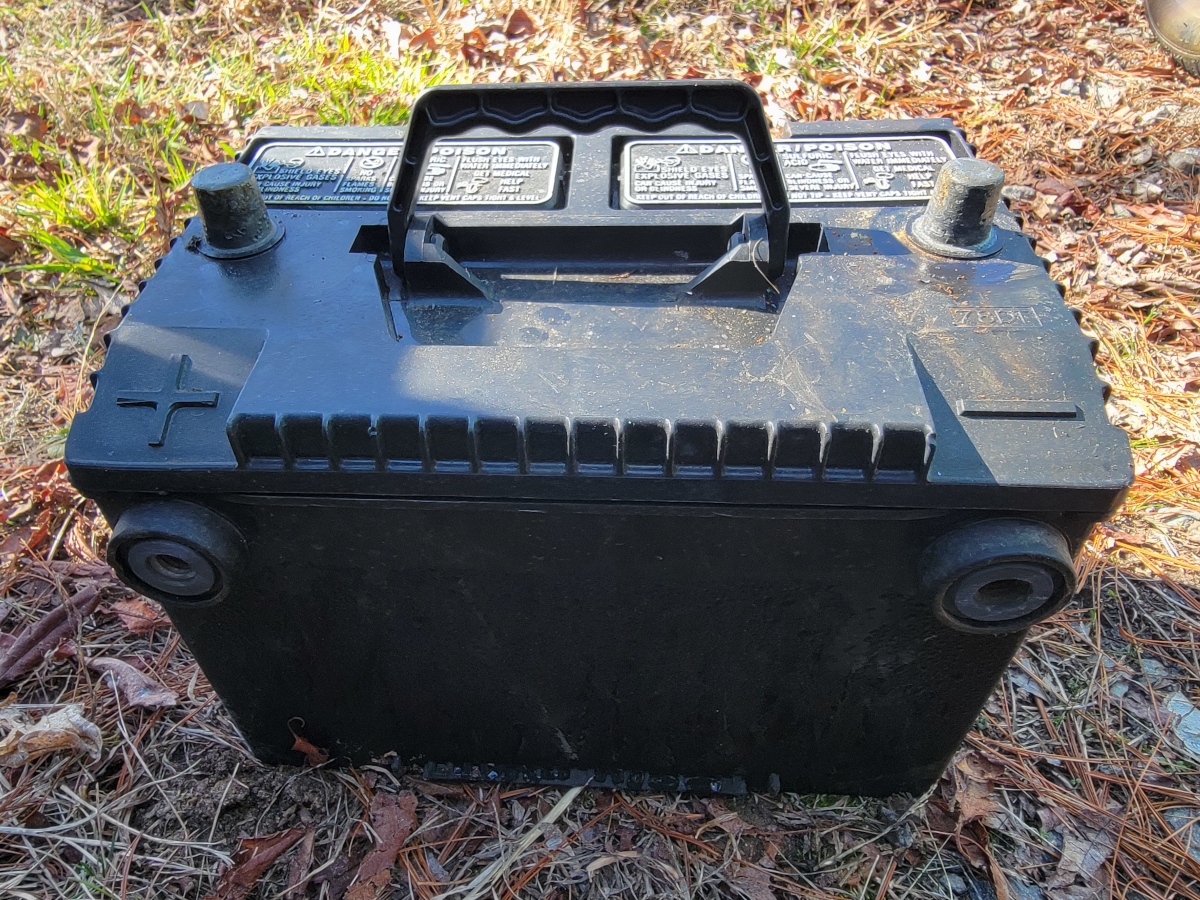
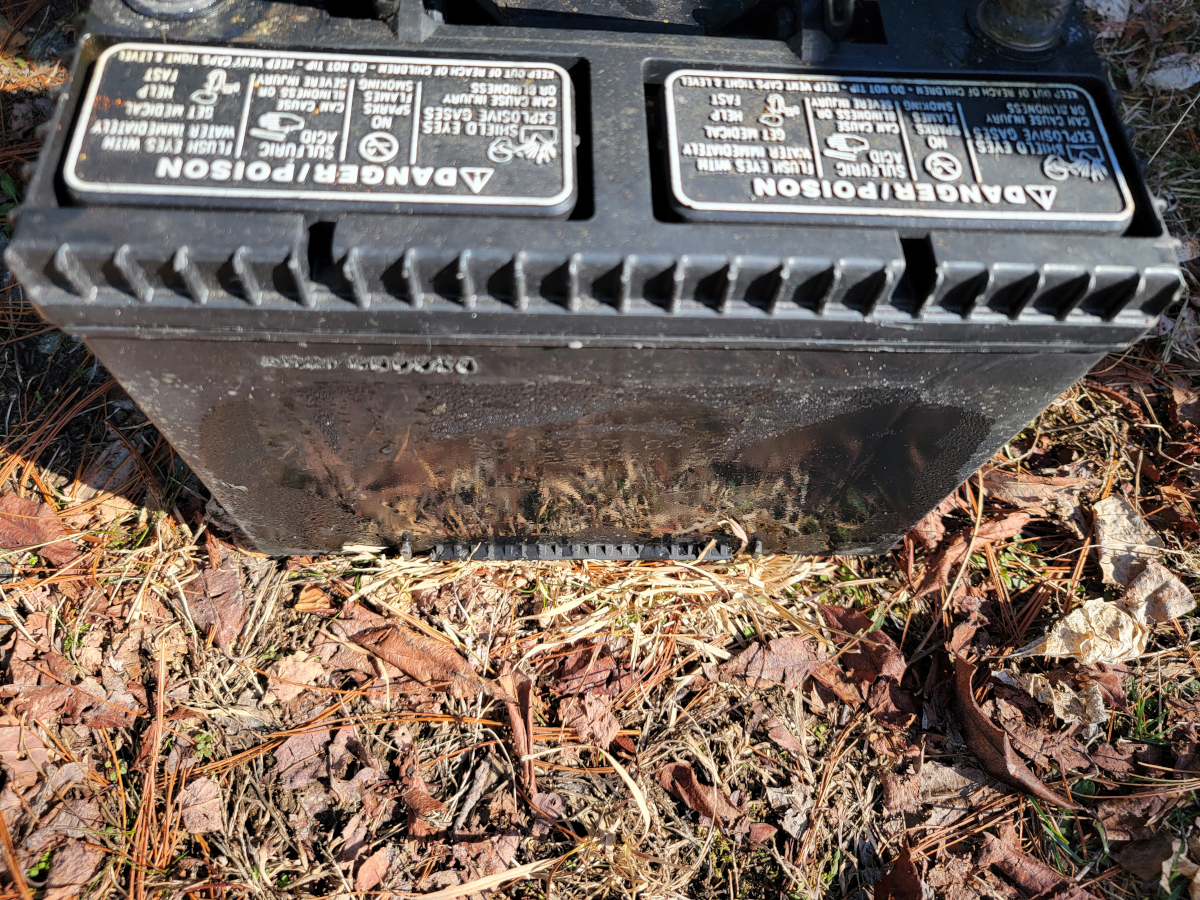
I was curious about the old battery. When I pulled it out, I noticed all of the labels/stickers/branding was gone. It has top and side posts and a handle, which is convenient.
Something else caught my eye, it had condensation all over. I’m assuming that’s what happened to all the stickers.
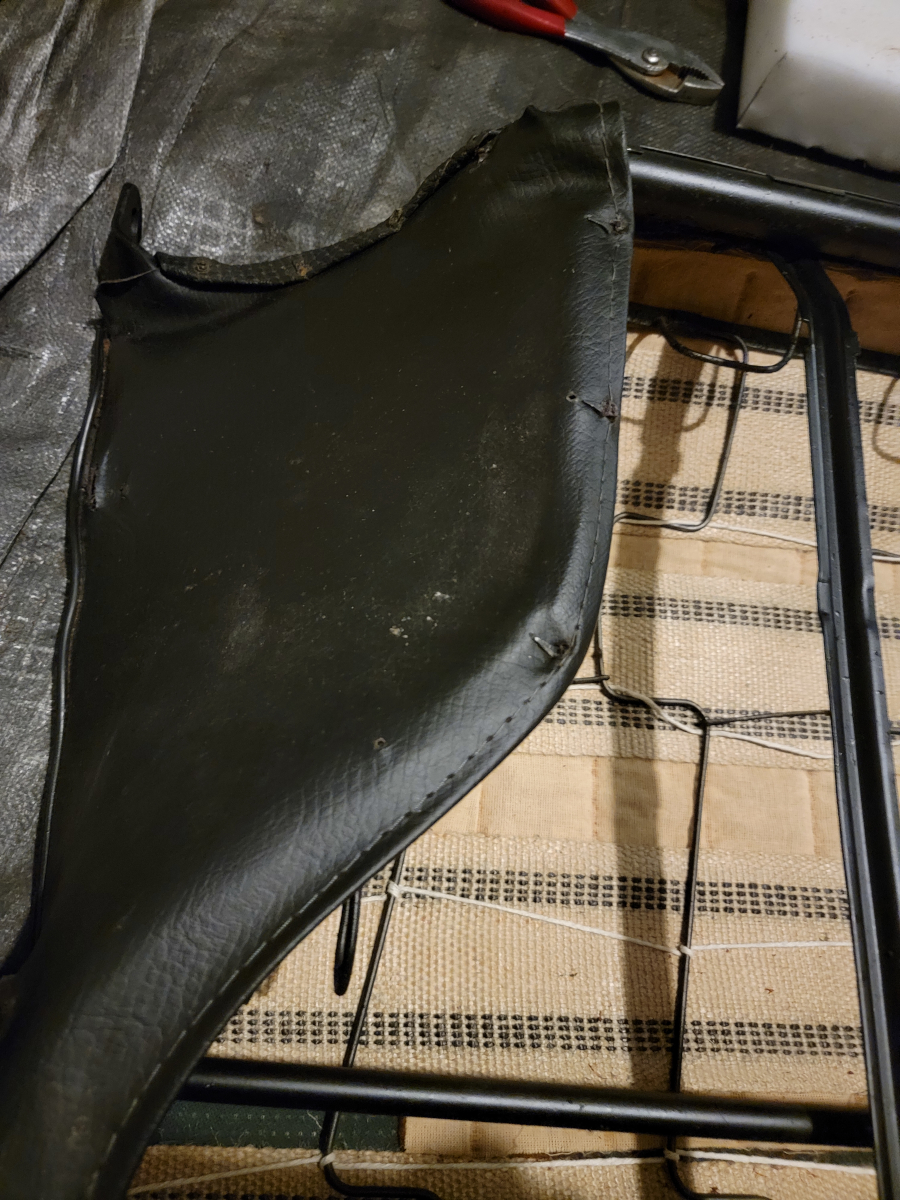
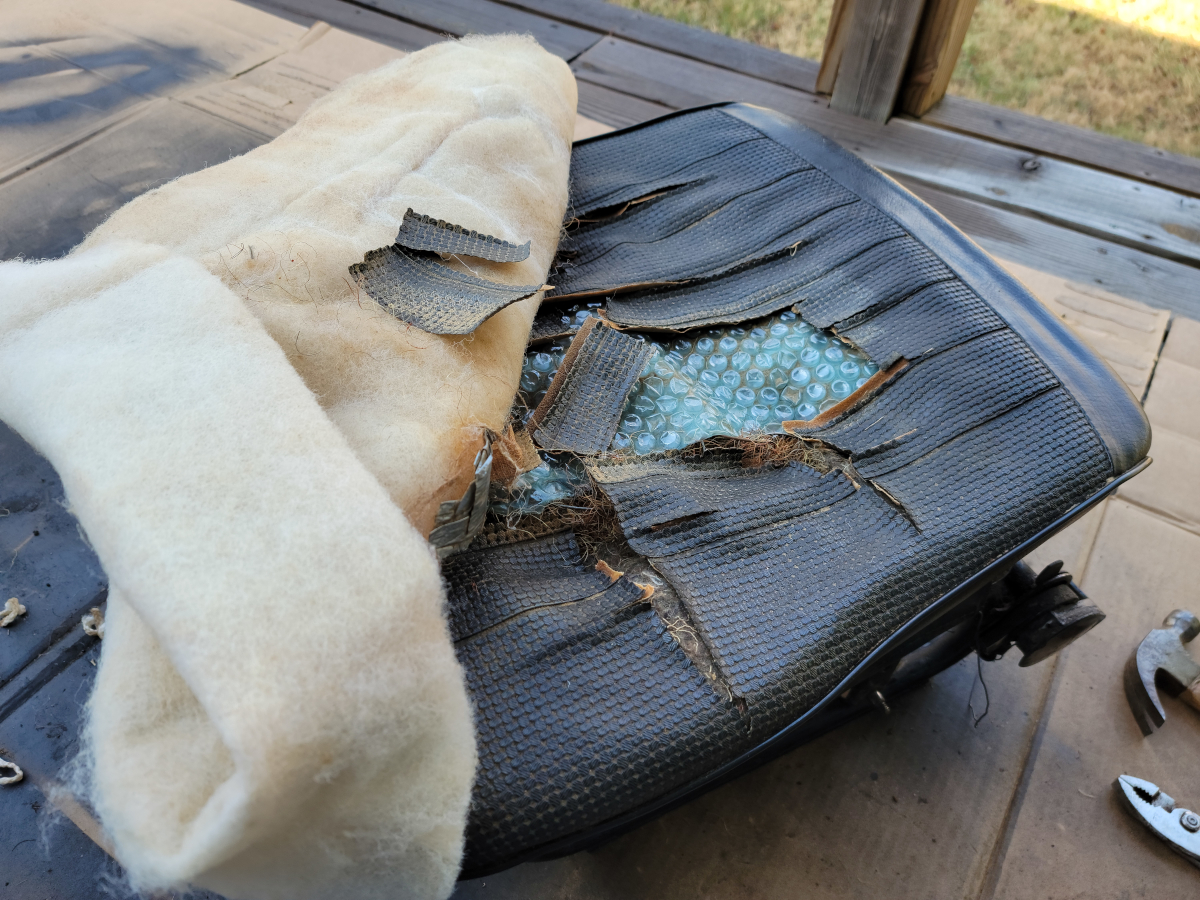
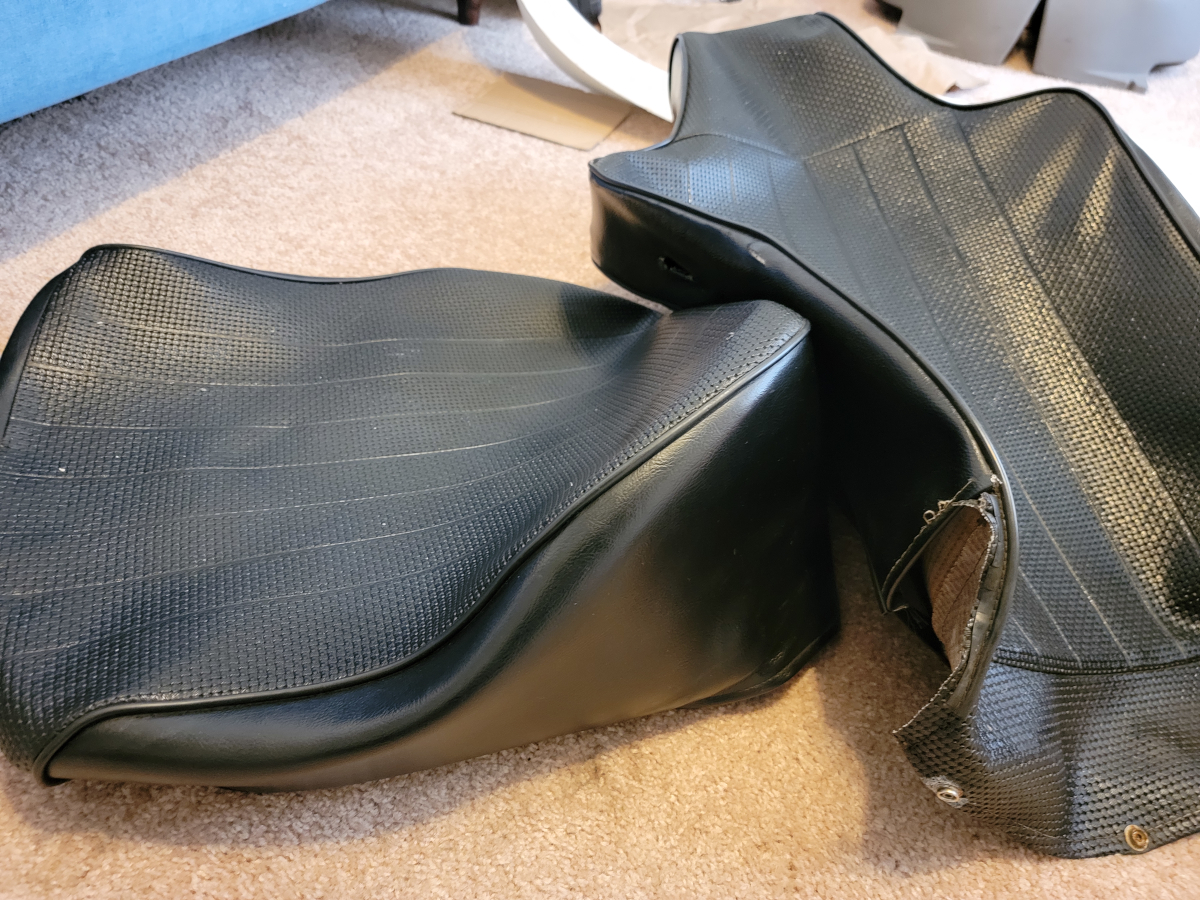
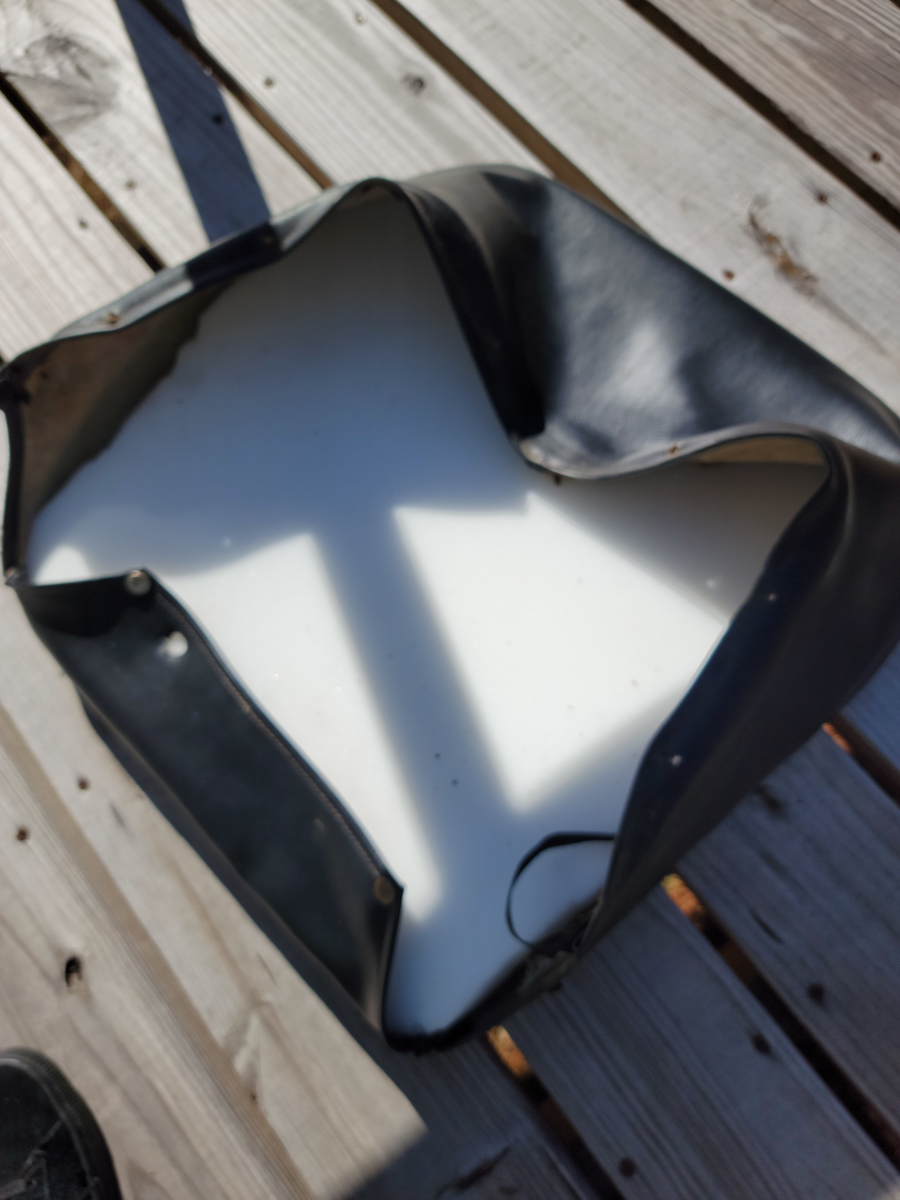
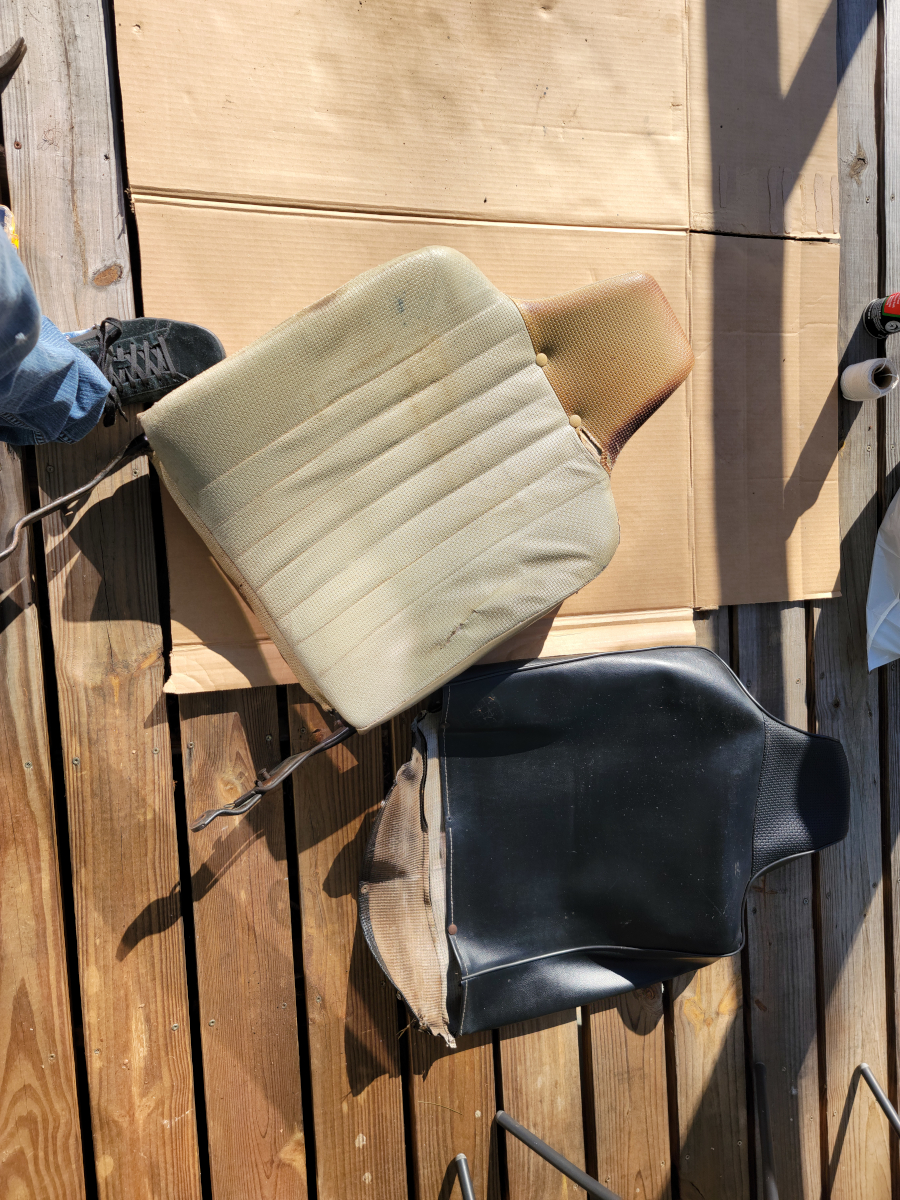
Next, I took the passenger seat out to repair the seat cover.
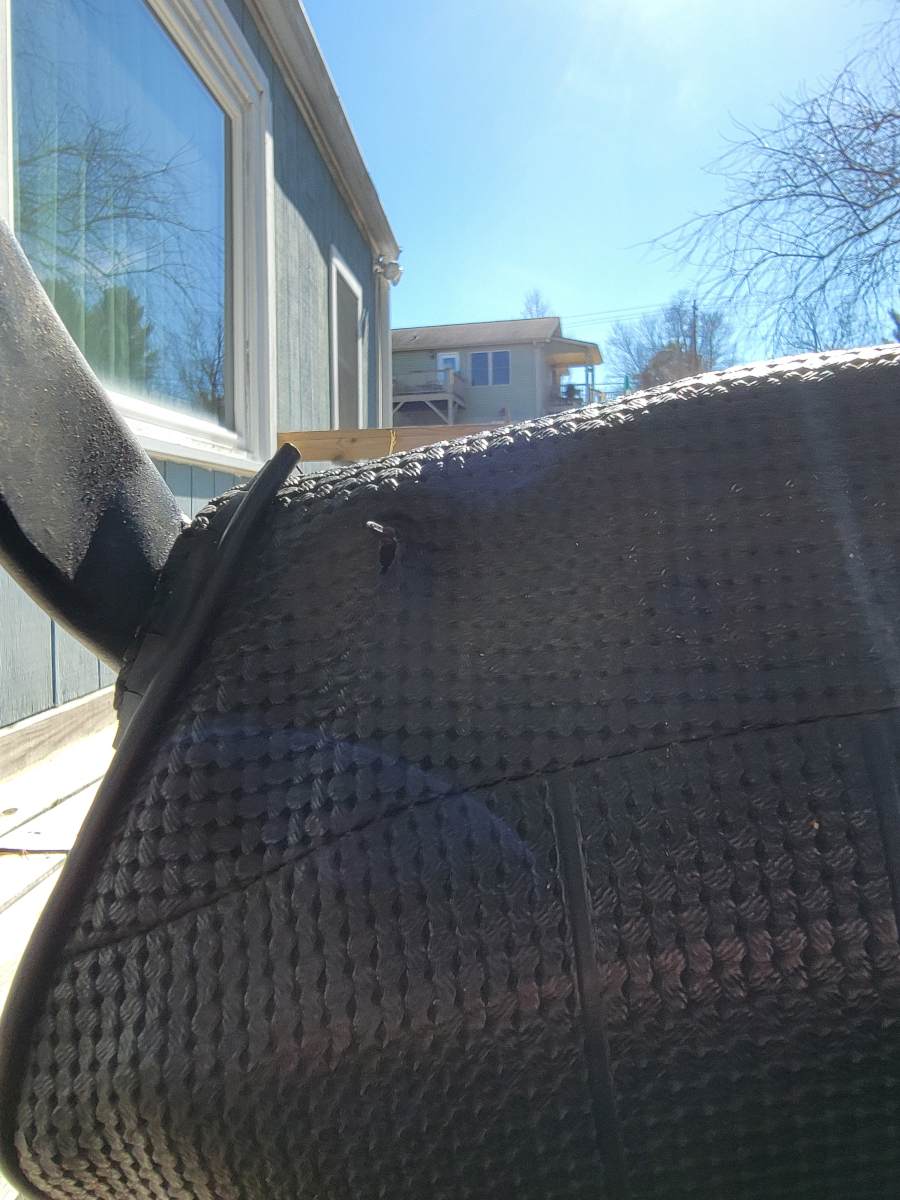
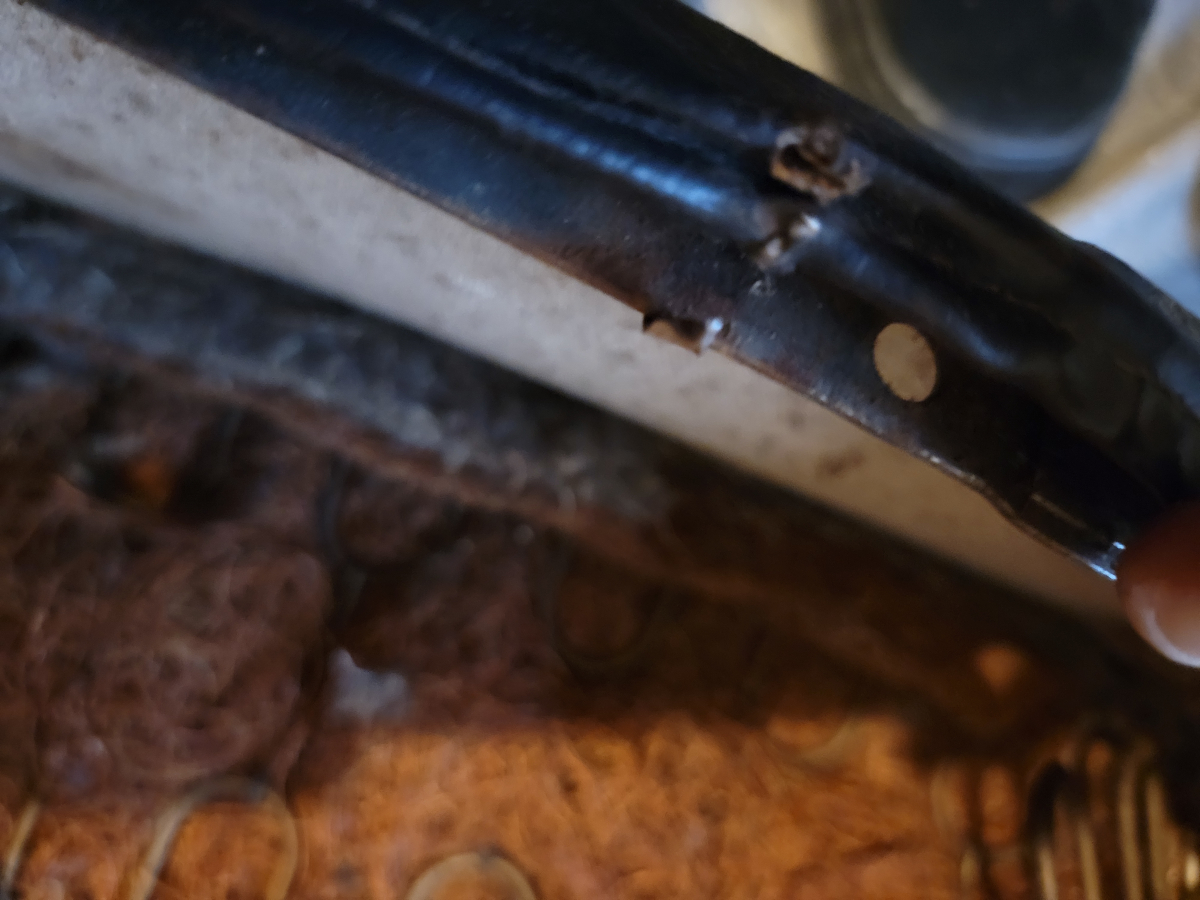
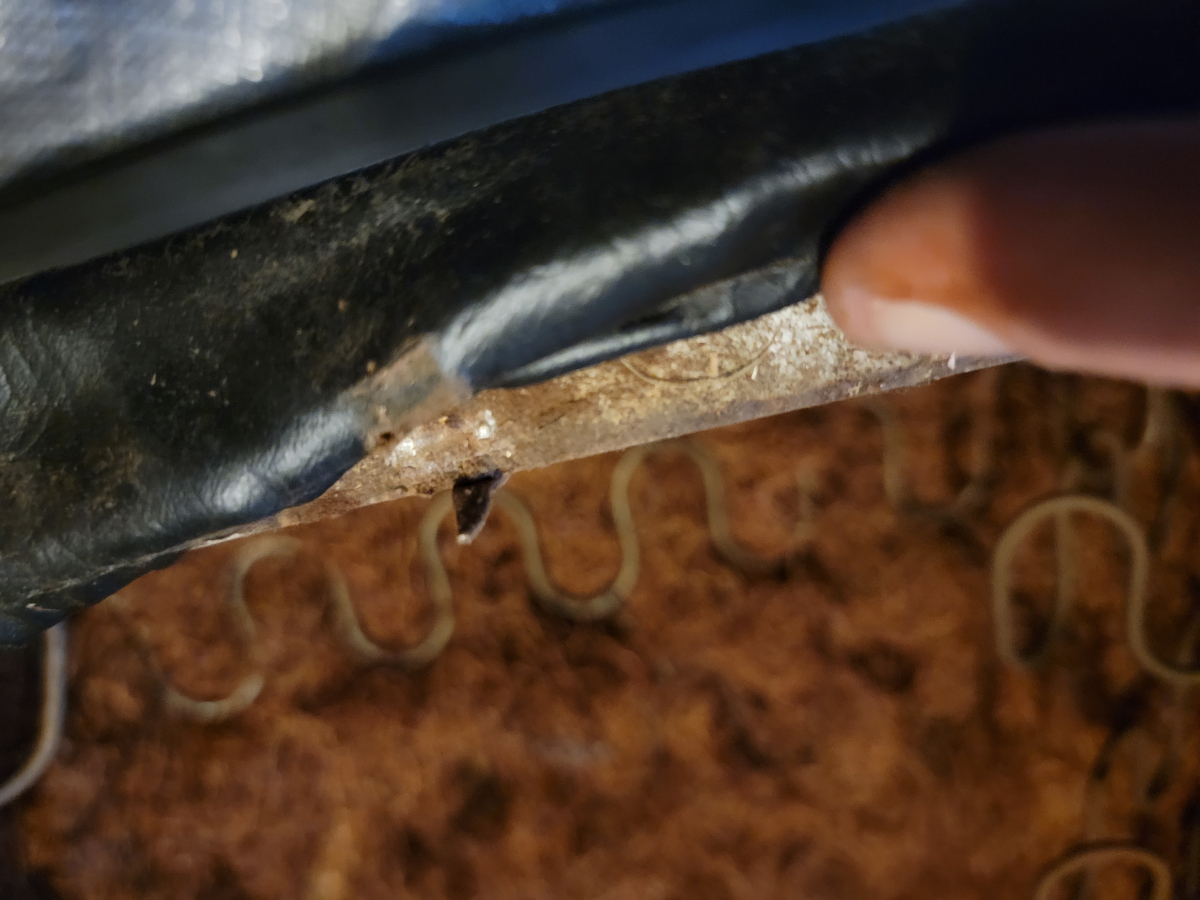
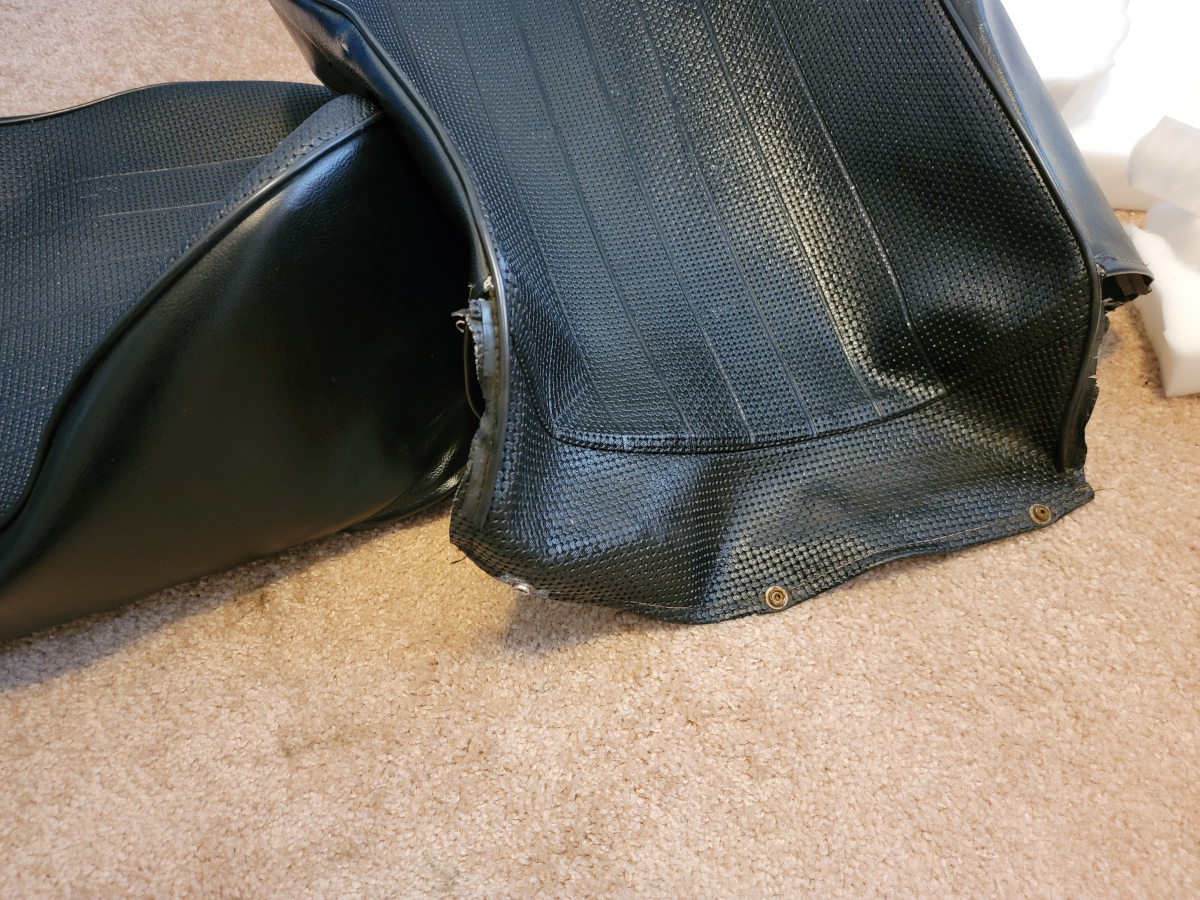
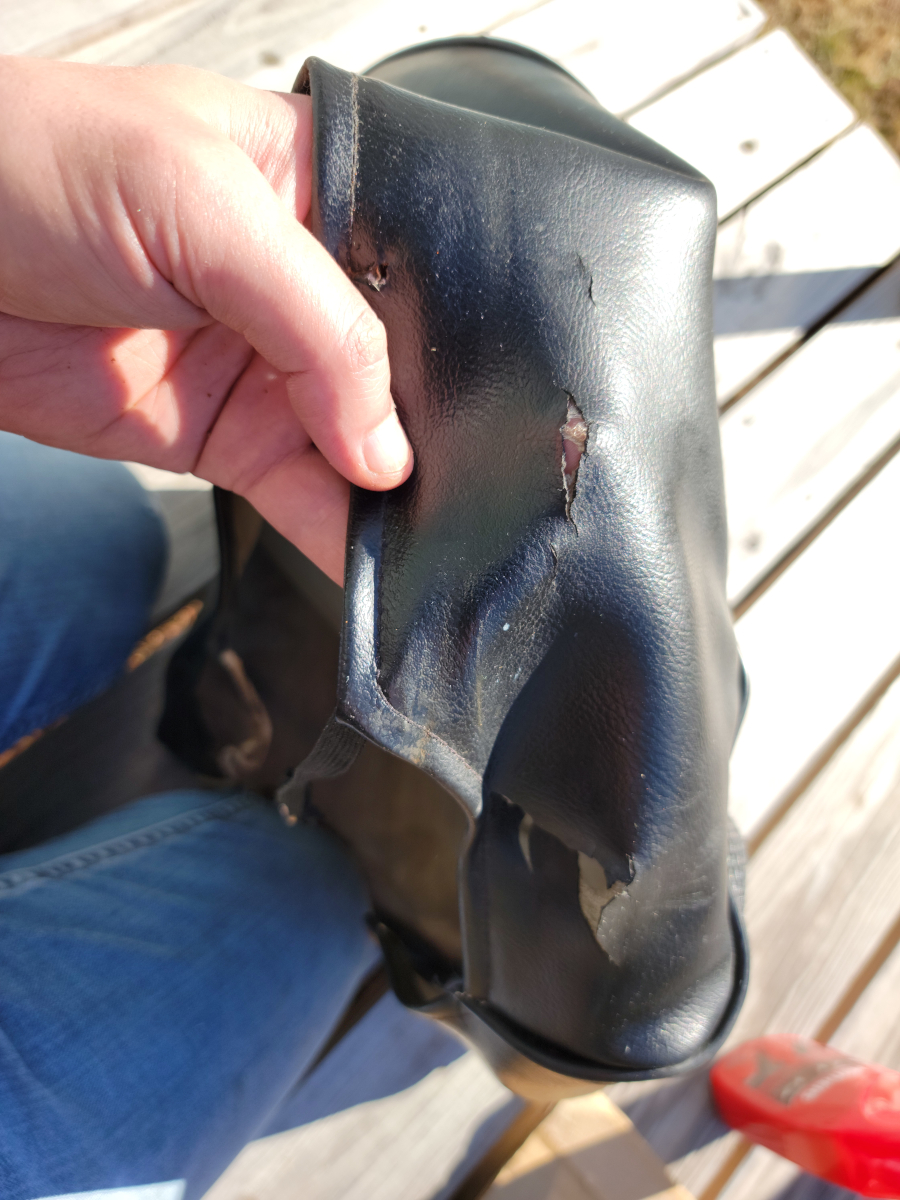
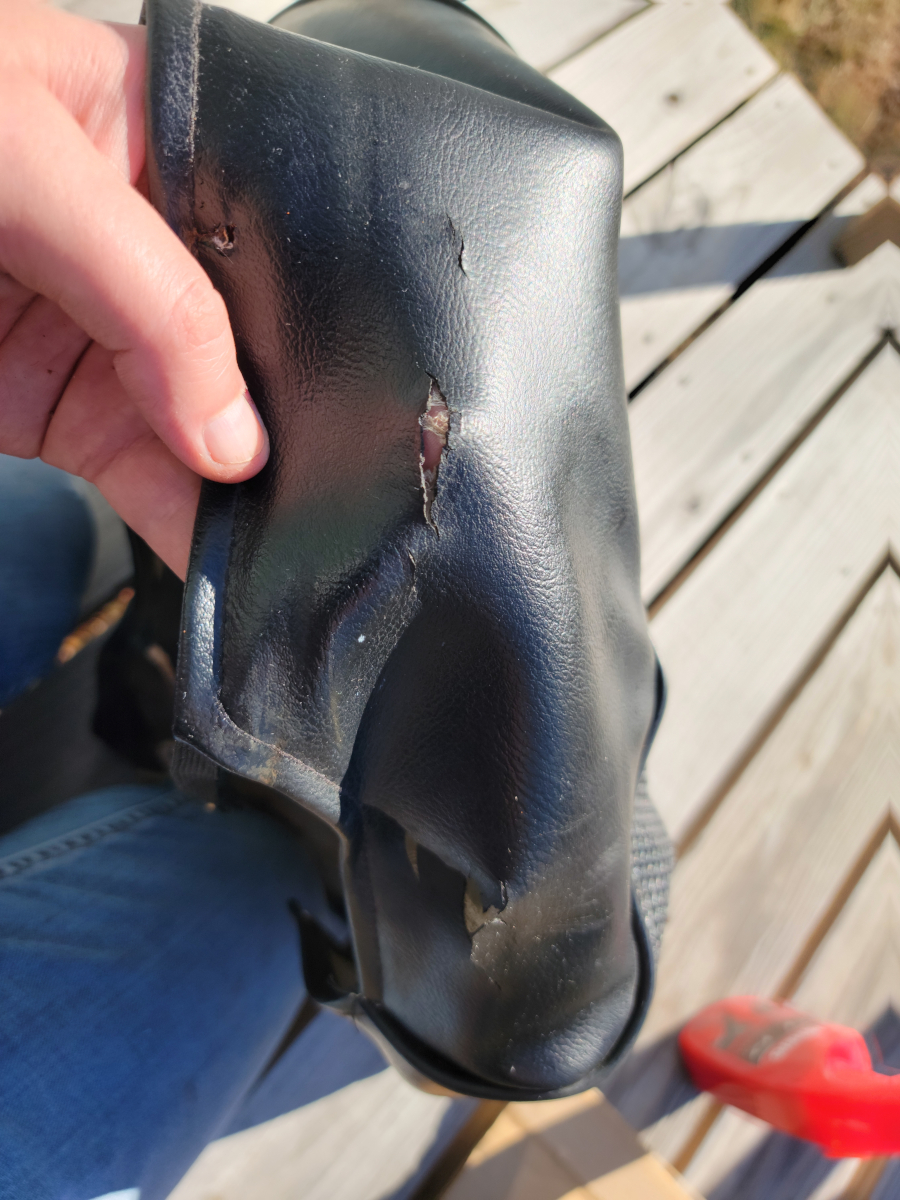
I carried the seat up to the porch to have a more stable place to work on it. I separated the two halves of the seat and found the offending article.
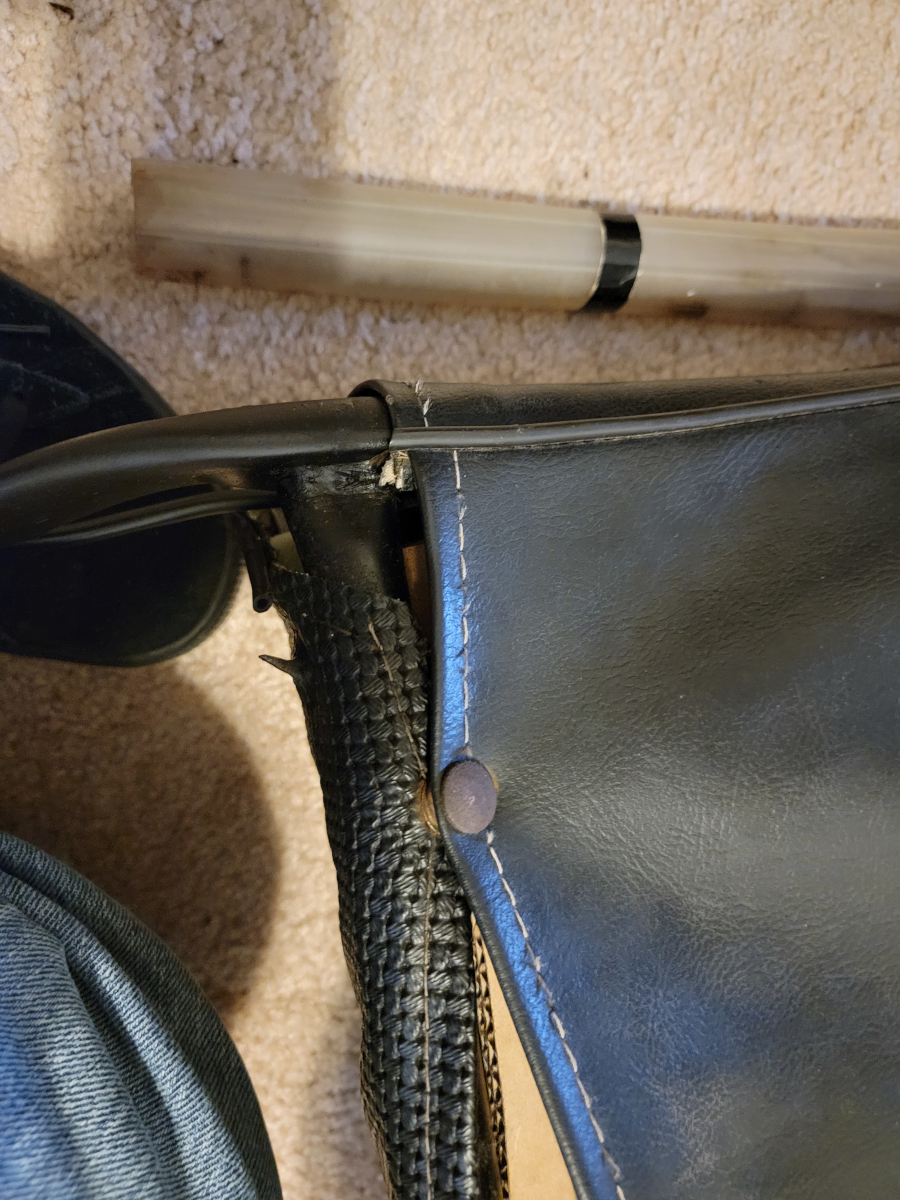
So, I pounded that one flat. The others in the area hadn’t found daylight through the seat cover, but they weren’t exactly out of harm’s way, so I flattened them as well.
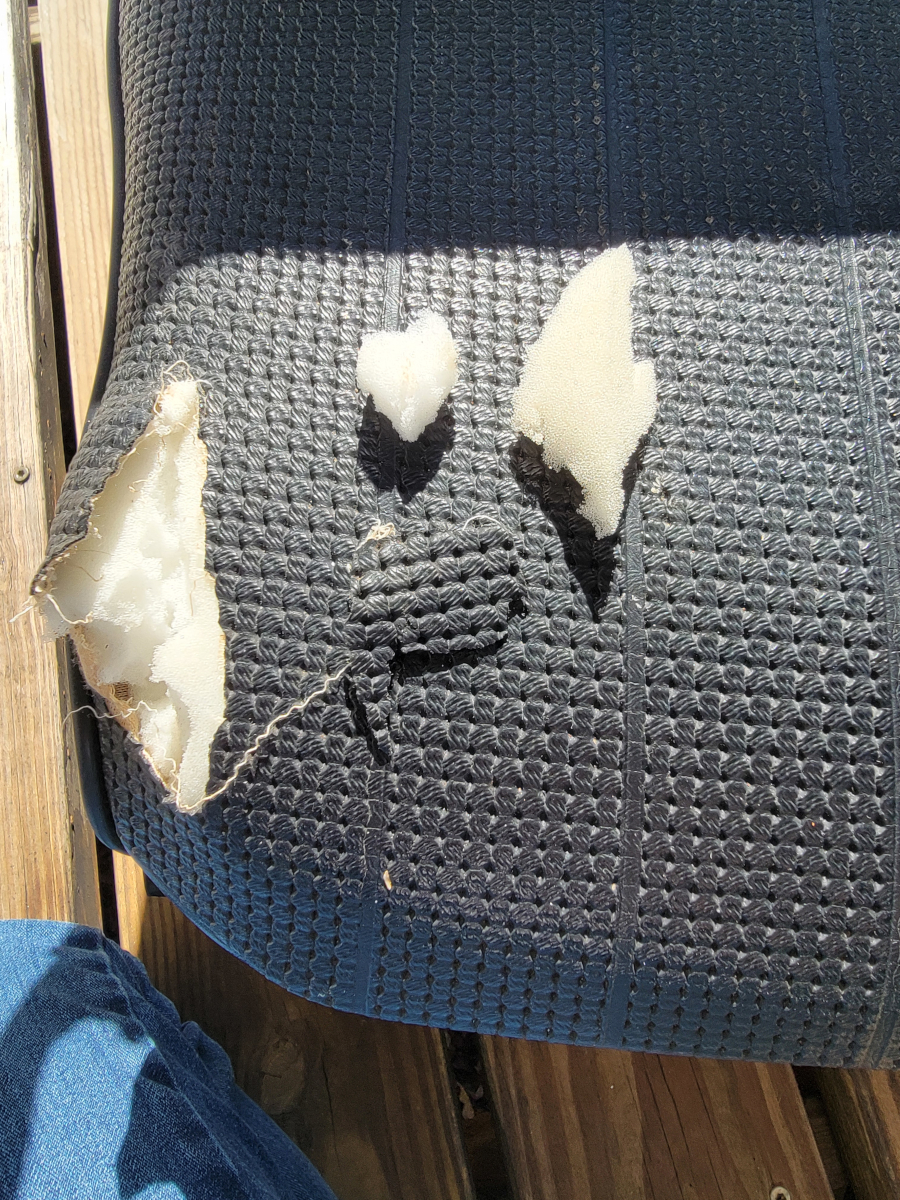
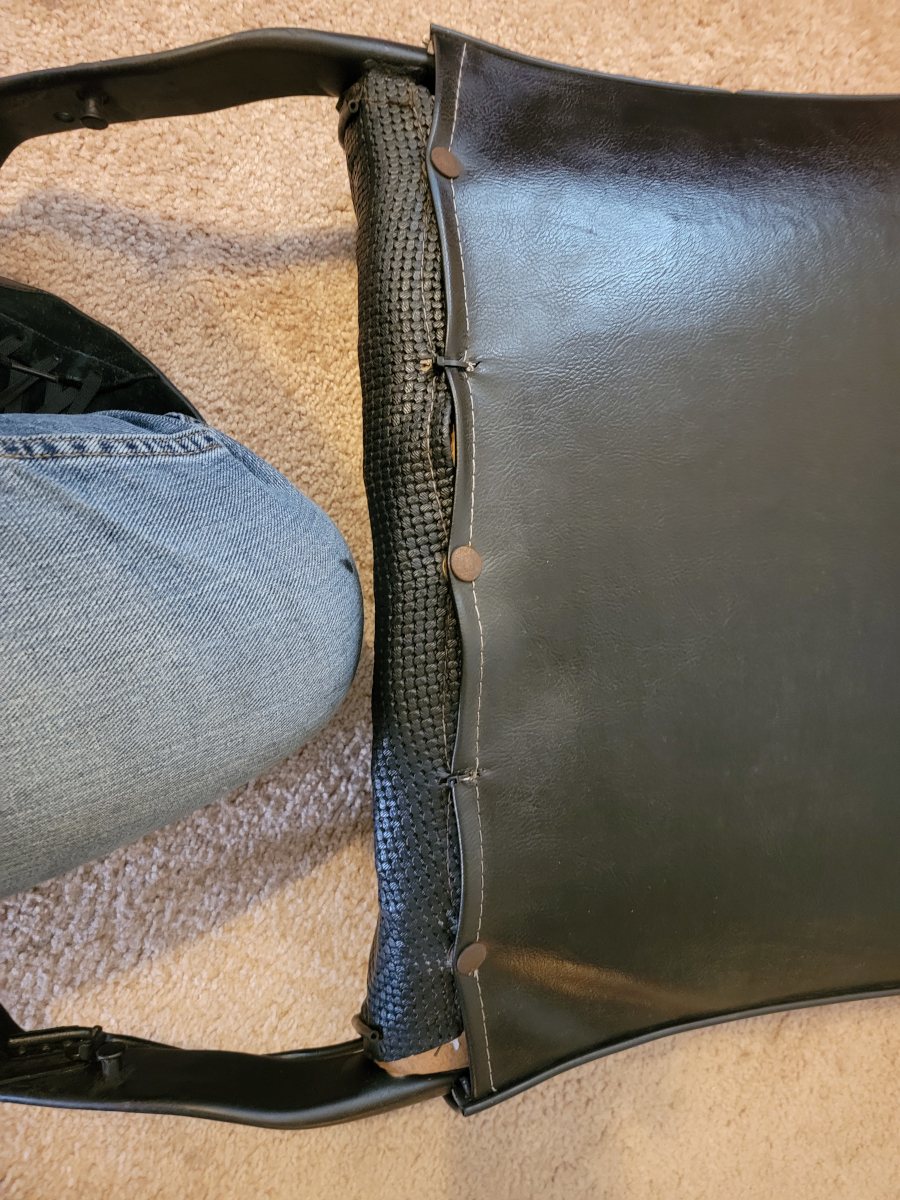
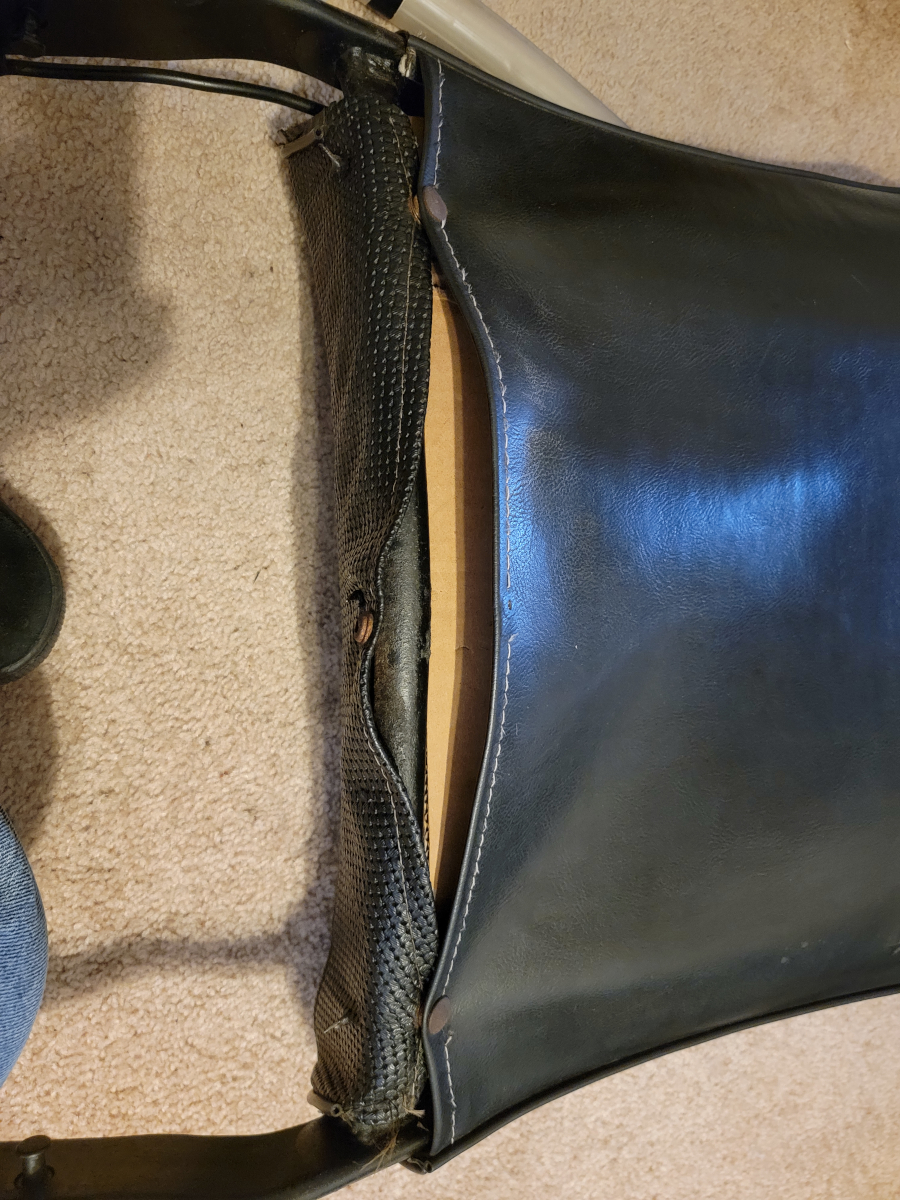
Taking inventory of the situation…
First, I glued the chunks of foam back into place with some Scotch Maximum Strength Adhesive I had laying around. In my experience, this stuff doesn’t hold up well over time. To be fair, none of the others that I have tried to either. Also, the nozzle broke in half, glued to the cap, so at least it sticks to its own packaging.
While I let that dry in the sun, I headed out to the parts store.
I haven’t purchased a battery in a few years and was surprised to find that prices have doubled. It was $194.99 for a Super Start Size 42 T5 – 42PRM (O’Reilly link).
I sprayed the anti-corrosion stuff on the terminals and installed the new battery.
Back to the front (YOU WILL DO WHAT I SAY WHEN I SAY). Sorry.
Back to the front (YOU COWARD, YOU SERVANT, YOU BLIND MAN, BACK TO THE FRONT)
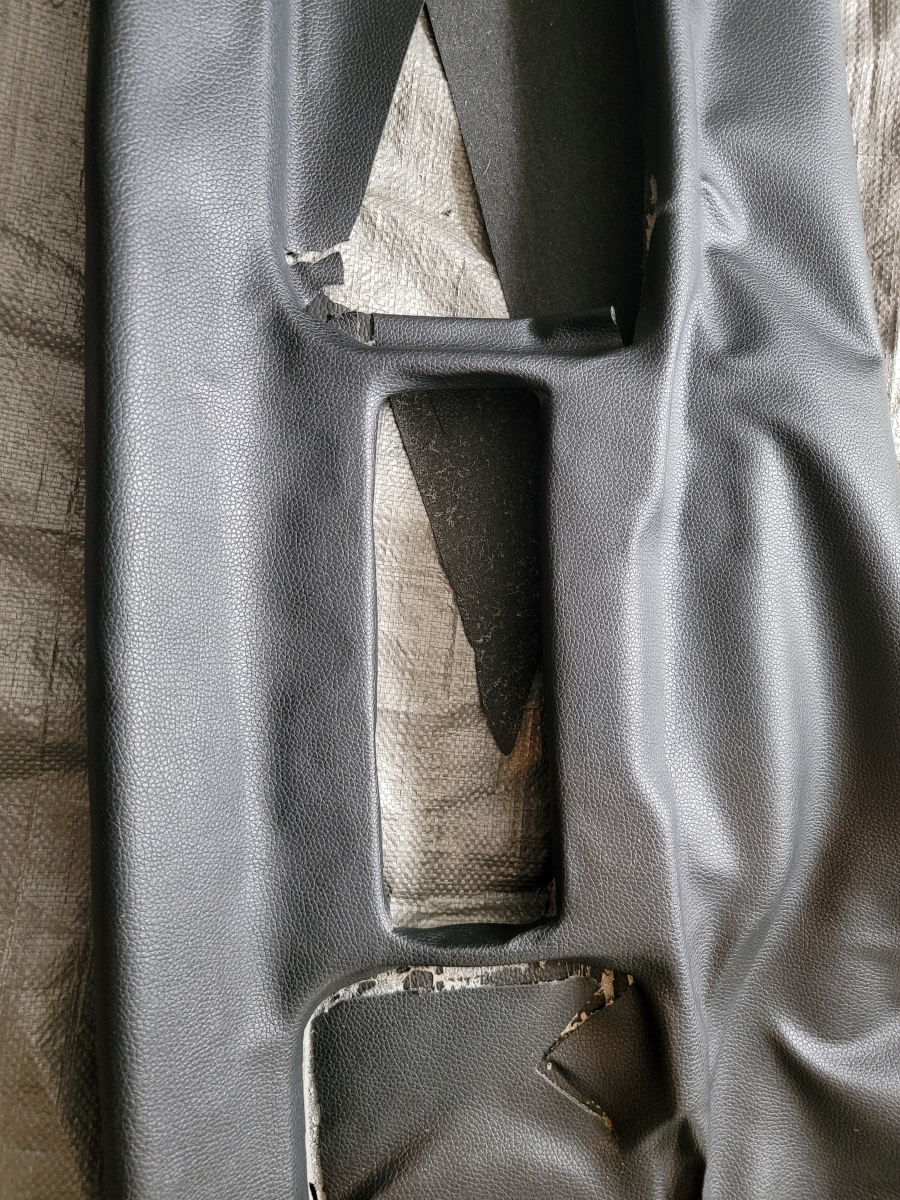
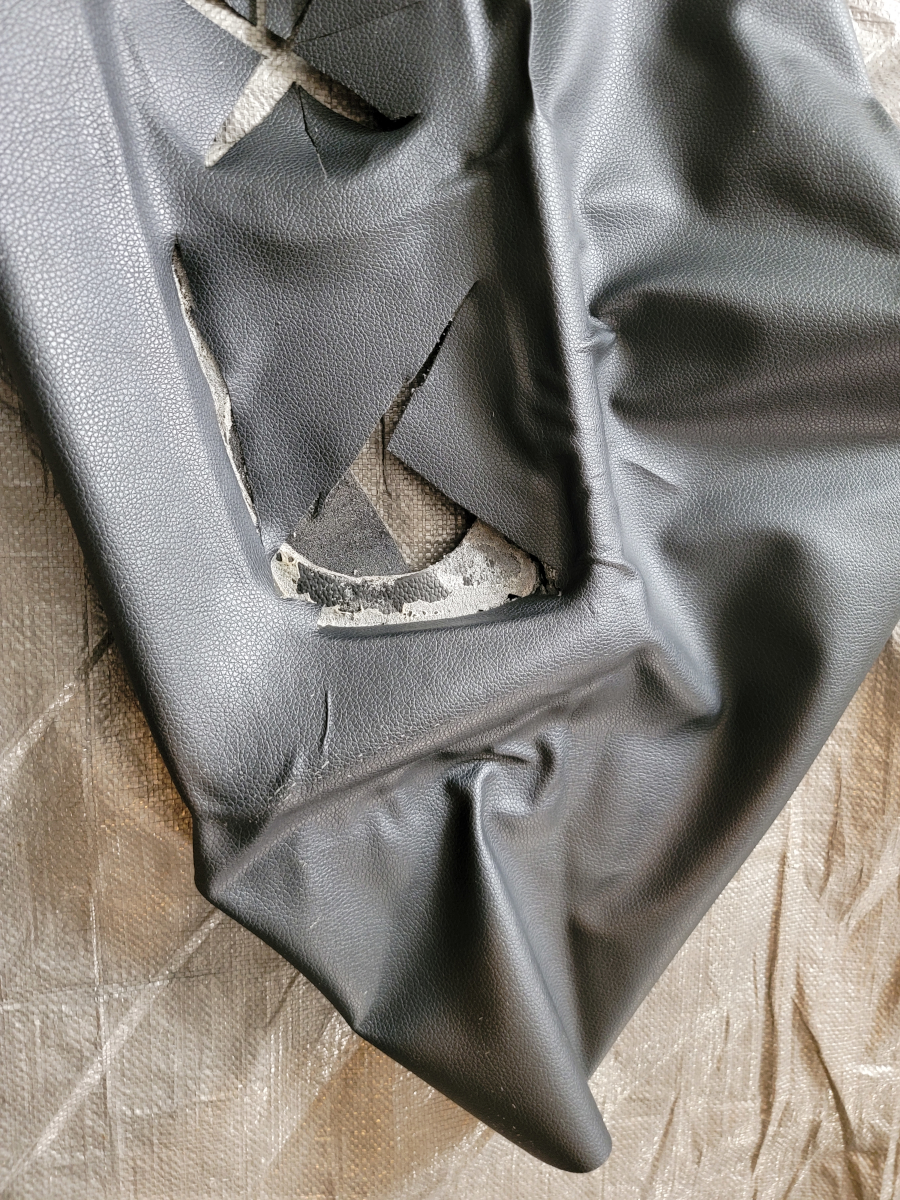
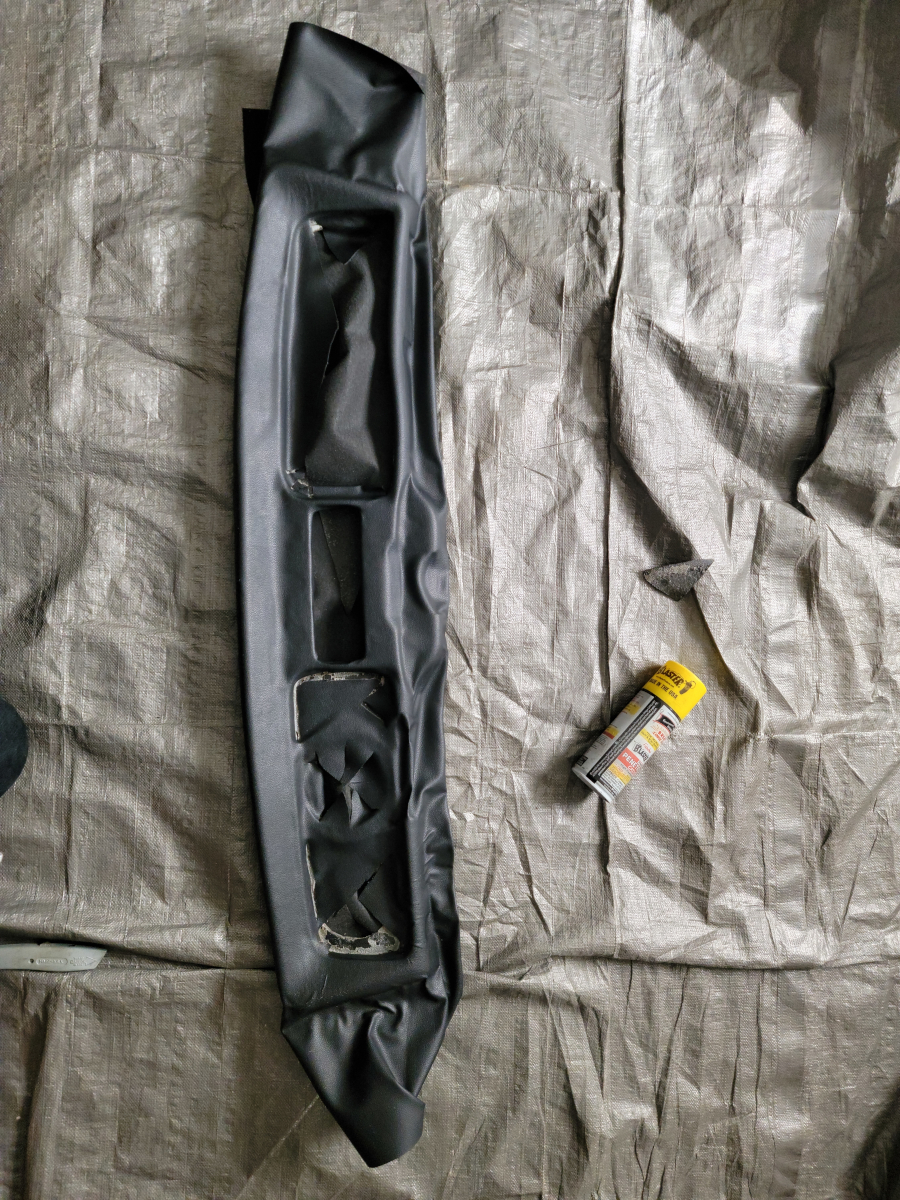
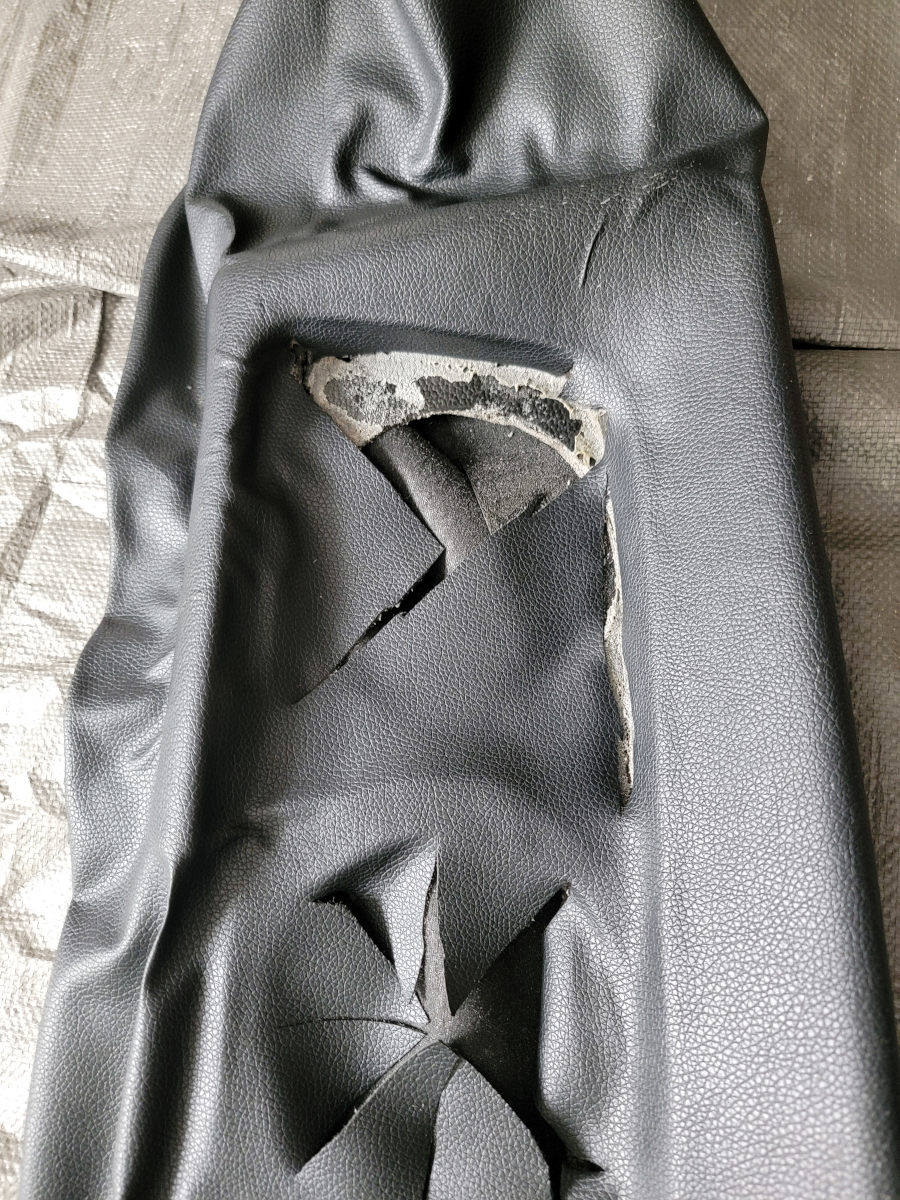
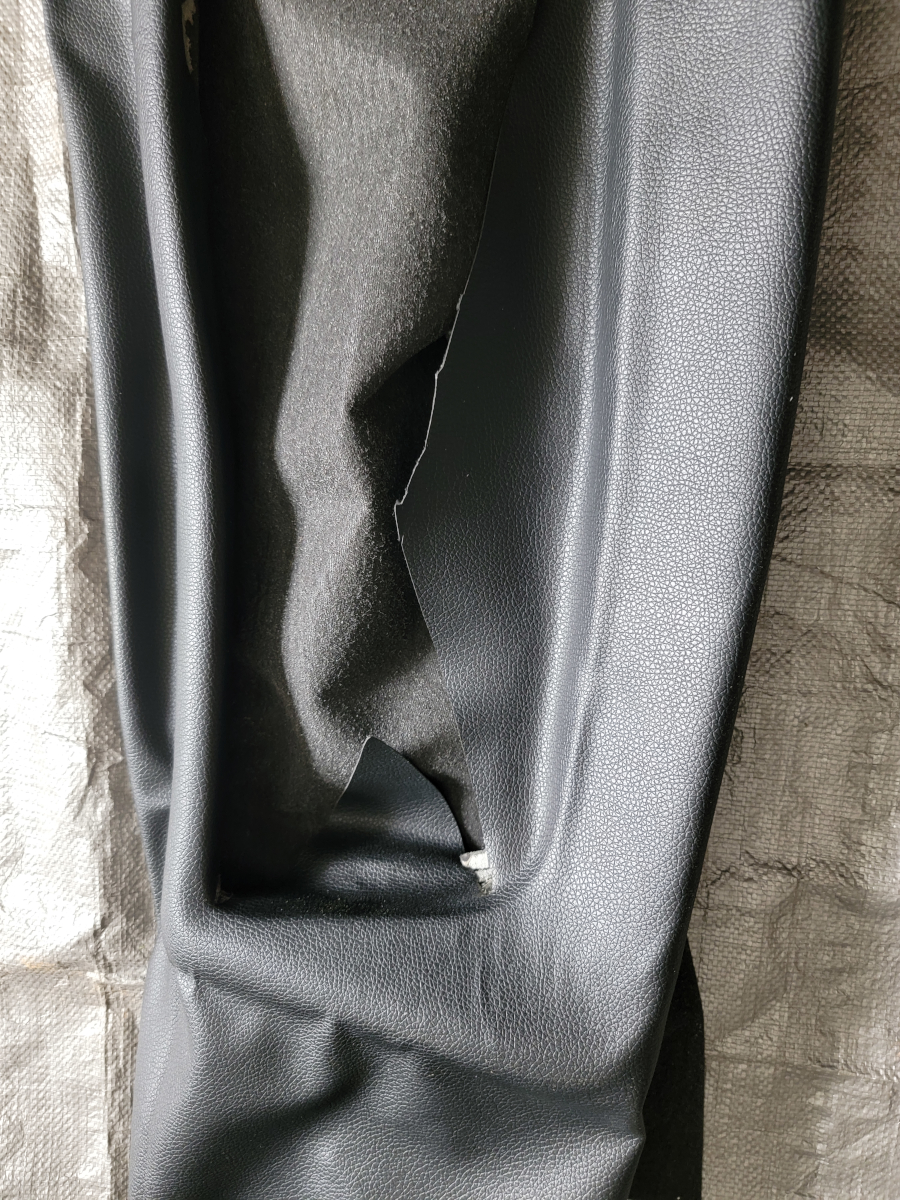
…seat, I cut an oversized piece of the black vinyl that I used to recover the dash pad last year. Because the patch piece was so much bigger than the hole in the seat cover, it took some creative contortion and origami to get it in there and laying flat.
I used the rest of the tube of glue in between the vinyl patch and the shreds of seat cover to hold it in place. I thought about trying to stitch those edges together, pulling them tight. However, these old seat covers are so brittle, I knew the upholstery thread would have just pulled through.
It doesn’t look great as is, but luckily, the damage is at the back of the seat pad, right below the seat back. It’s not noticeable until you flip the seat back forward.
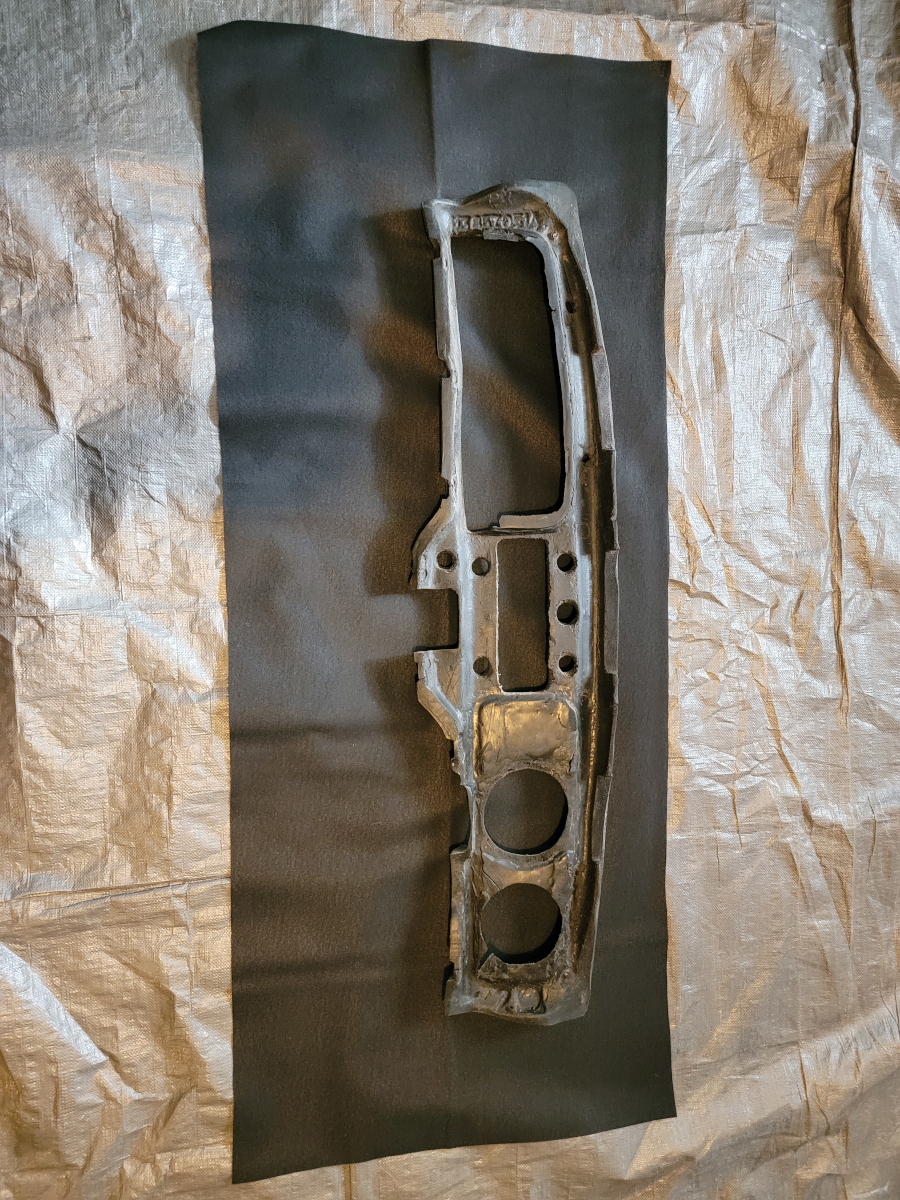
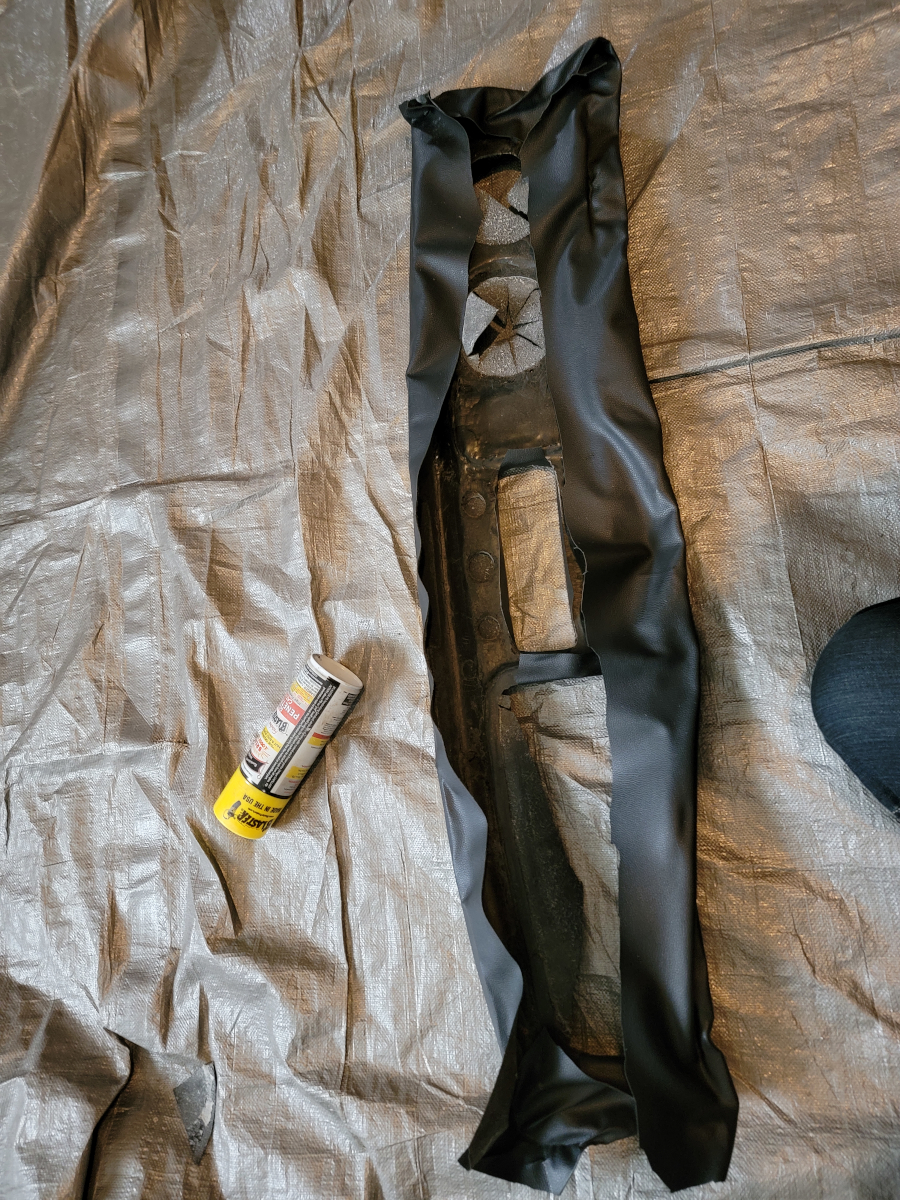
After failing to vinyl wrap the old dash pad the first time, I ordered a new dash pad, which didn’t fit. So… Plan B was always to try wrapping the vinyl again. There’s lots of leftover glue on there.
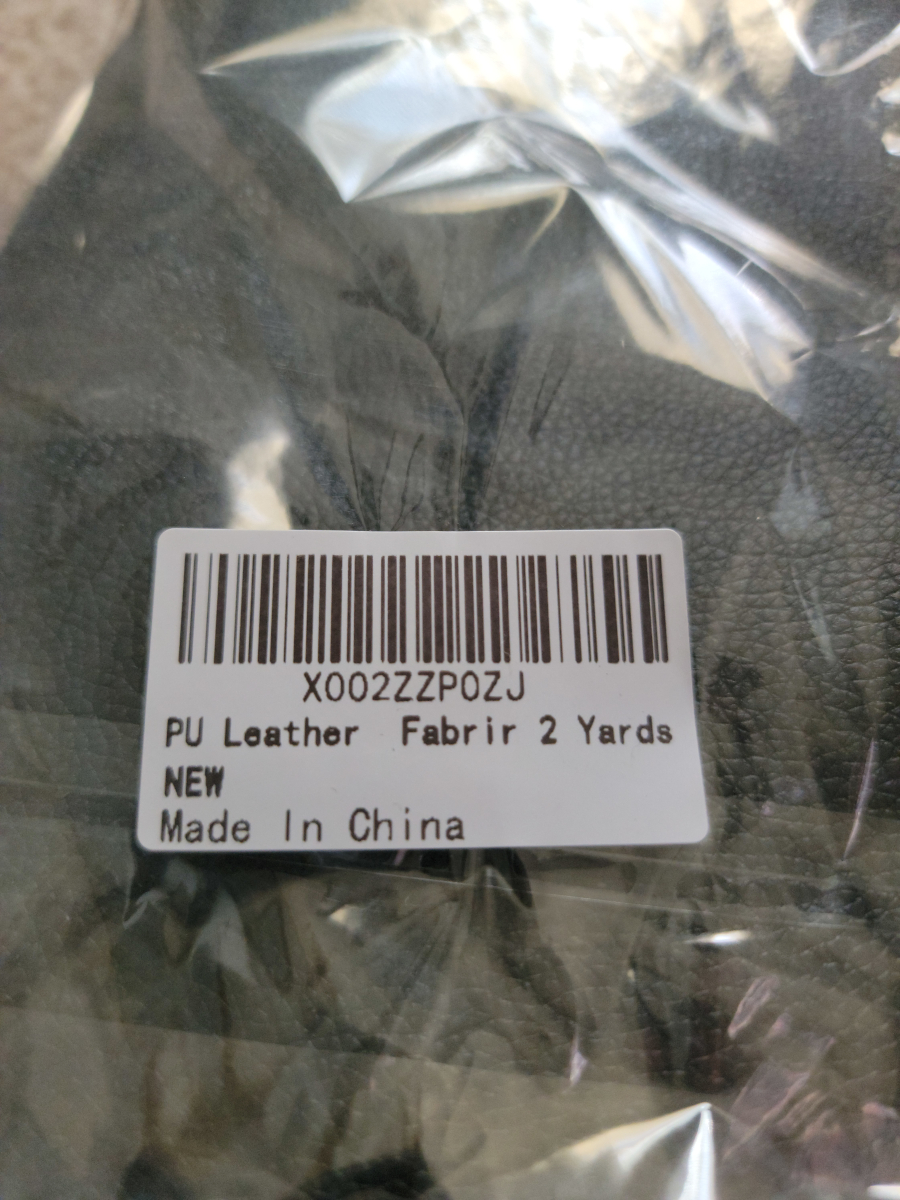
I ordered some new vinyl (Amazon link), which took a while to get here and is different than what I bought before.
This is some very nice PU Leather Fabrir 2 Yards NEW.
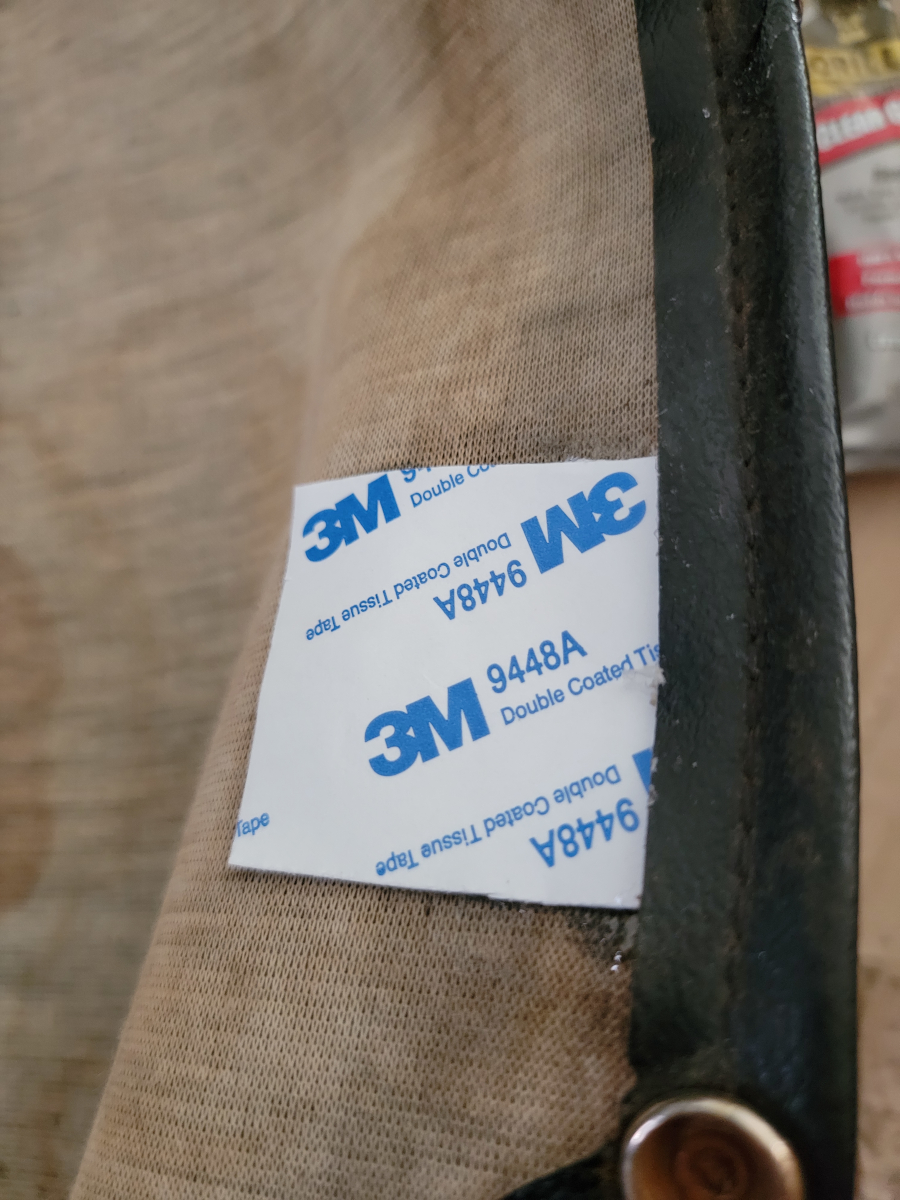
It has a kind of fabric backing instead of the thick 3M adhesive that the previous vinyl (Amazon link) had.
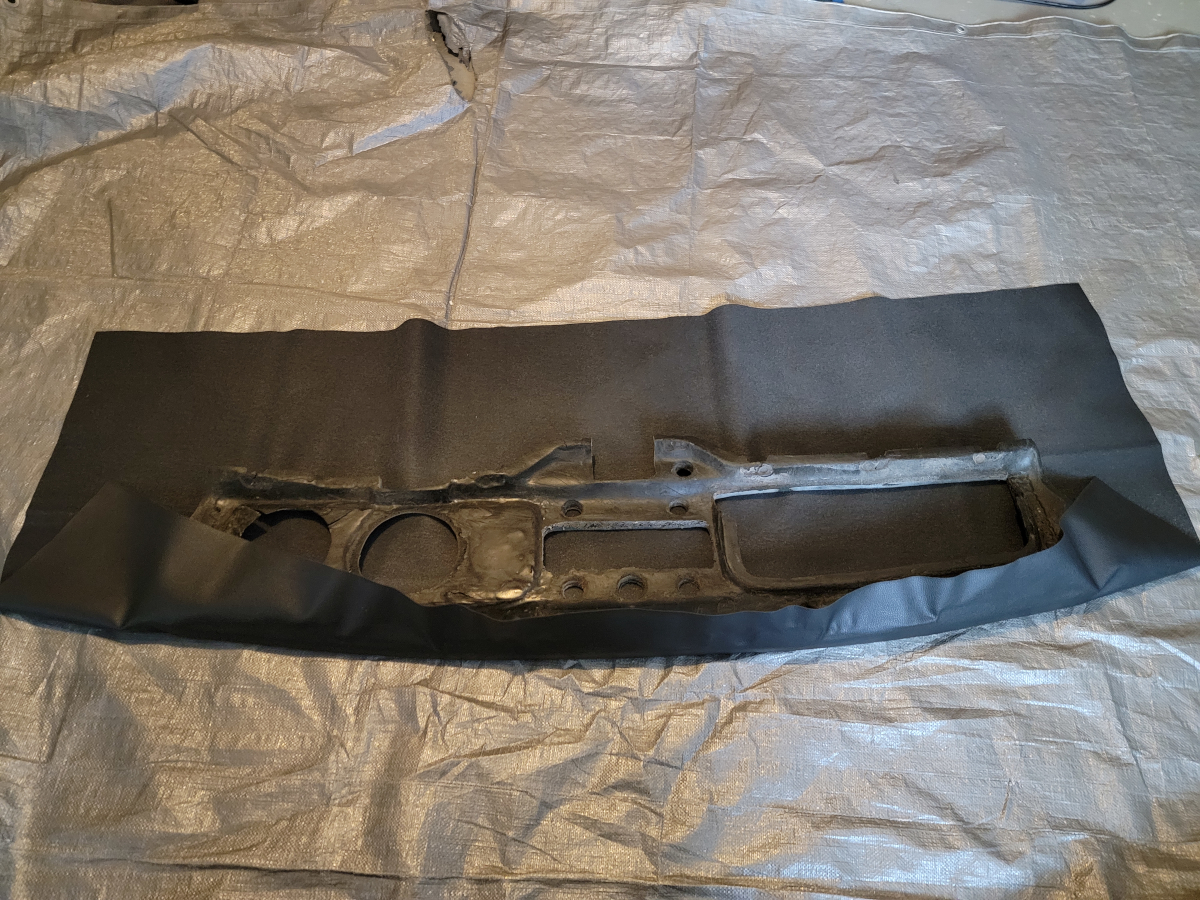
I found that rubbing the dried glue made some of it flake off around the edges. To give my thumbs a rest, I whipped out a little nylon brush that came in a Harbor Freight set (Harbor Freight link). It did a better job than my thumbs.
What I didn’t think of was that is still glue. It’s stuck all over the new vinyl. Luckily, there are 2 Yards NEW and I can just use the other end for today’s project.
Cut to size…
Now SPRAY GLUE ROUND ONE (NEW)!
I sprayed a stripe of 3M Super 77 (Amazon link) three or four inches wide on both the fabric and the dash pad.
I waited for it to get tacky (you know how we do) and started smoothing the vinyl down all around the top edge. Try to leave no wrinkles.
Now SPRAY GLUE ROUND TWO (NEW)!
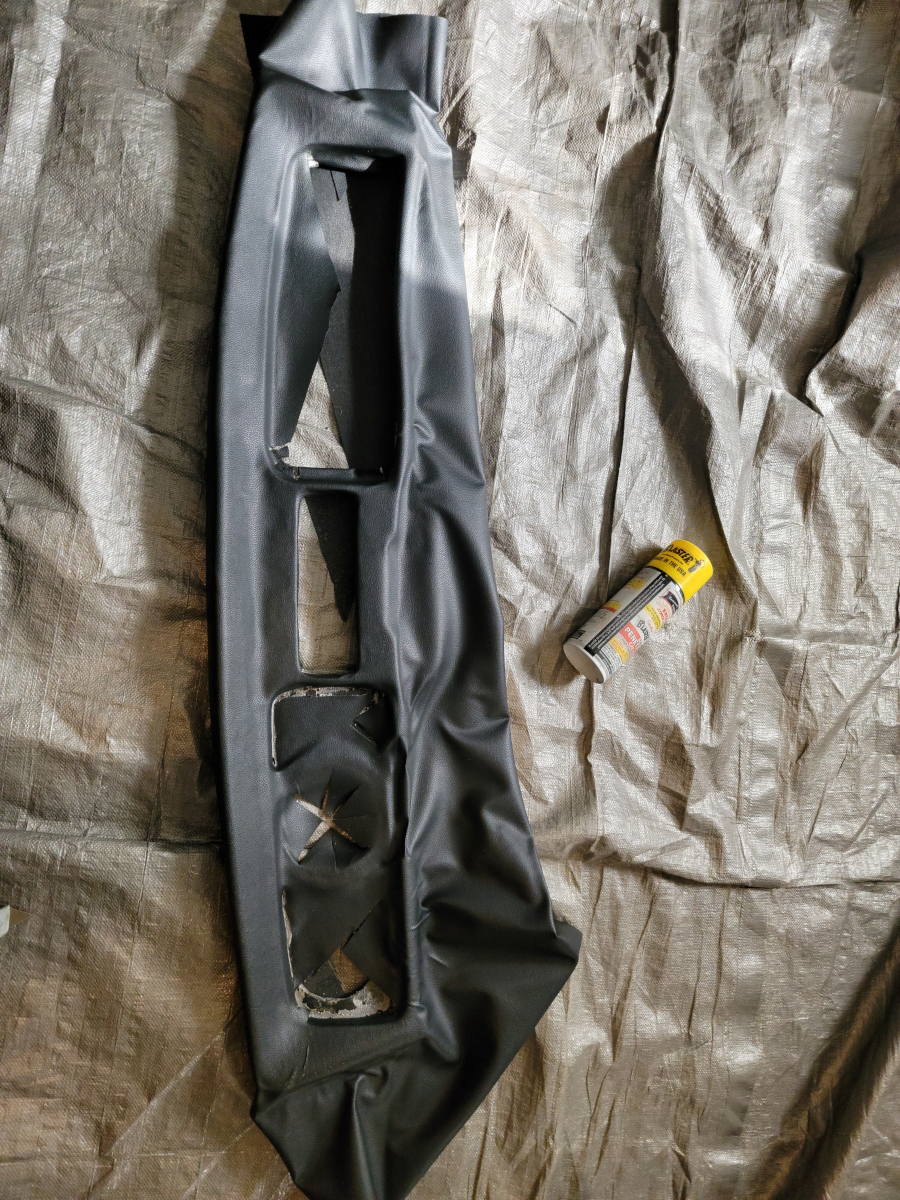
I flipped the dash pad over, so it was face down (you know how we do). I sprayed another few inches of glue to cover the face and underside, and then waited for it to get tacky.
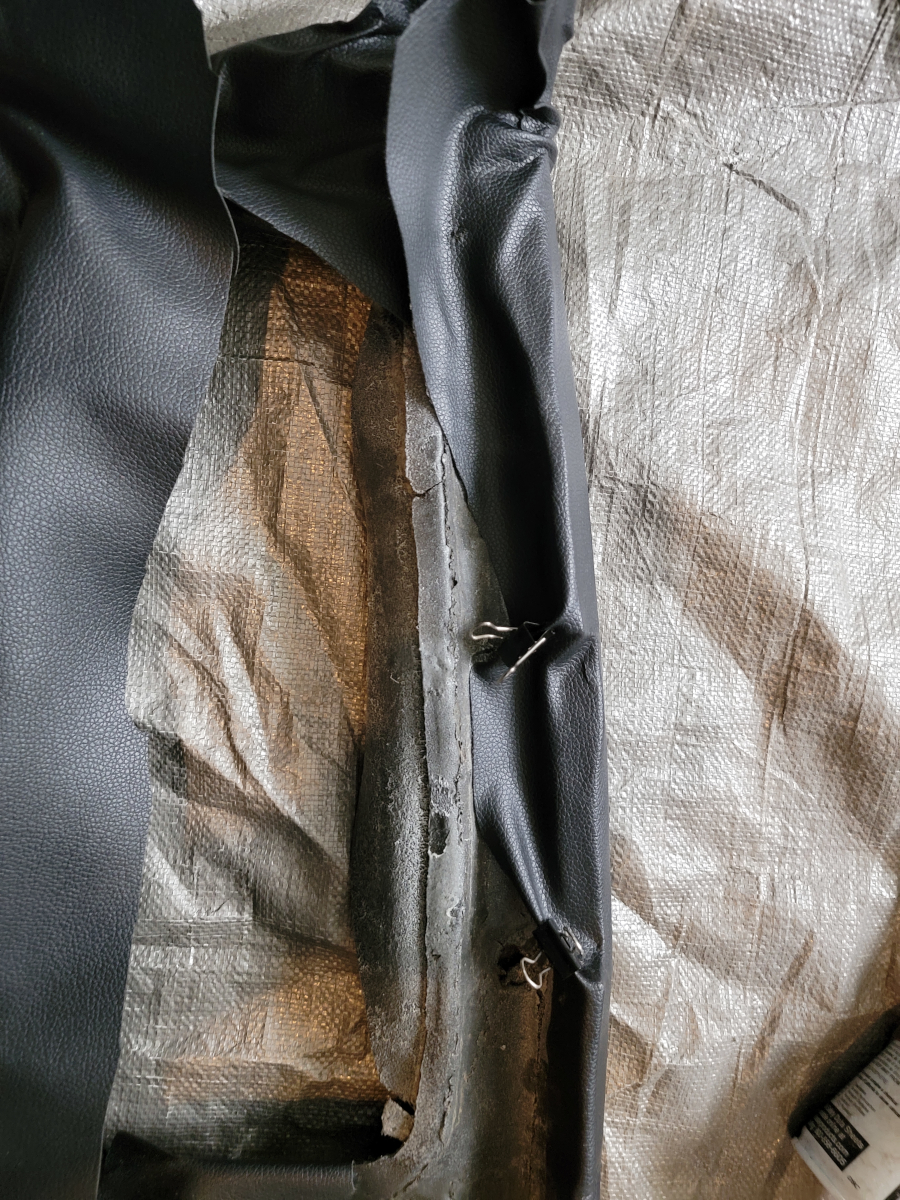
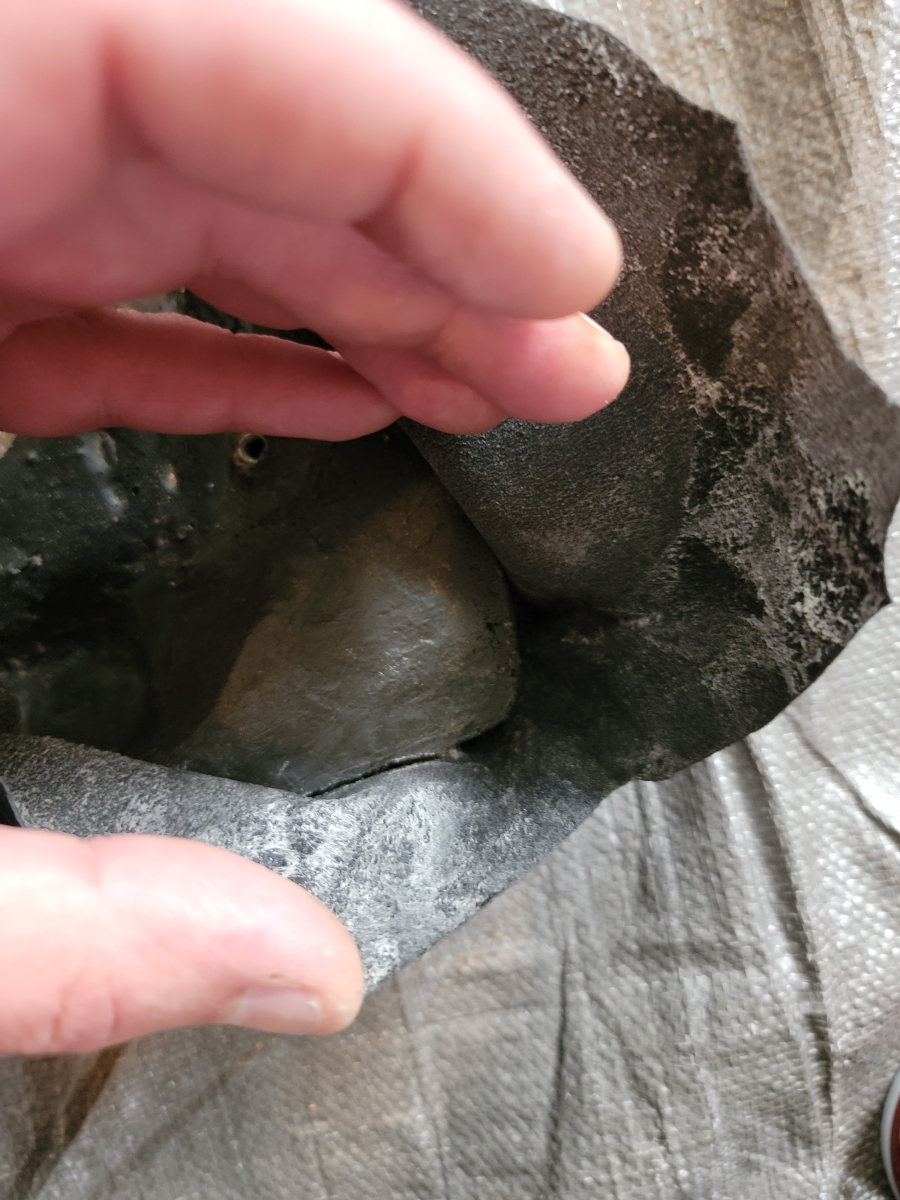
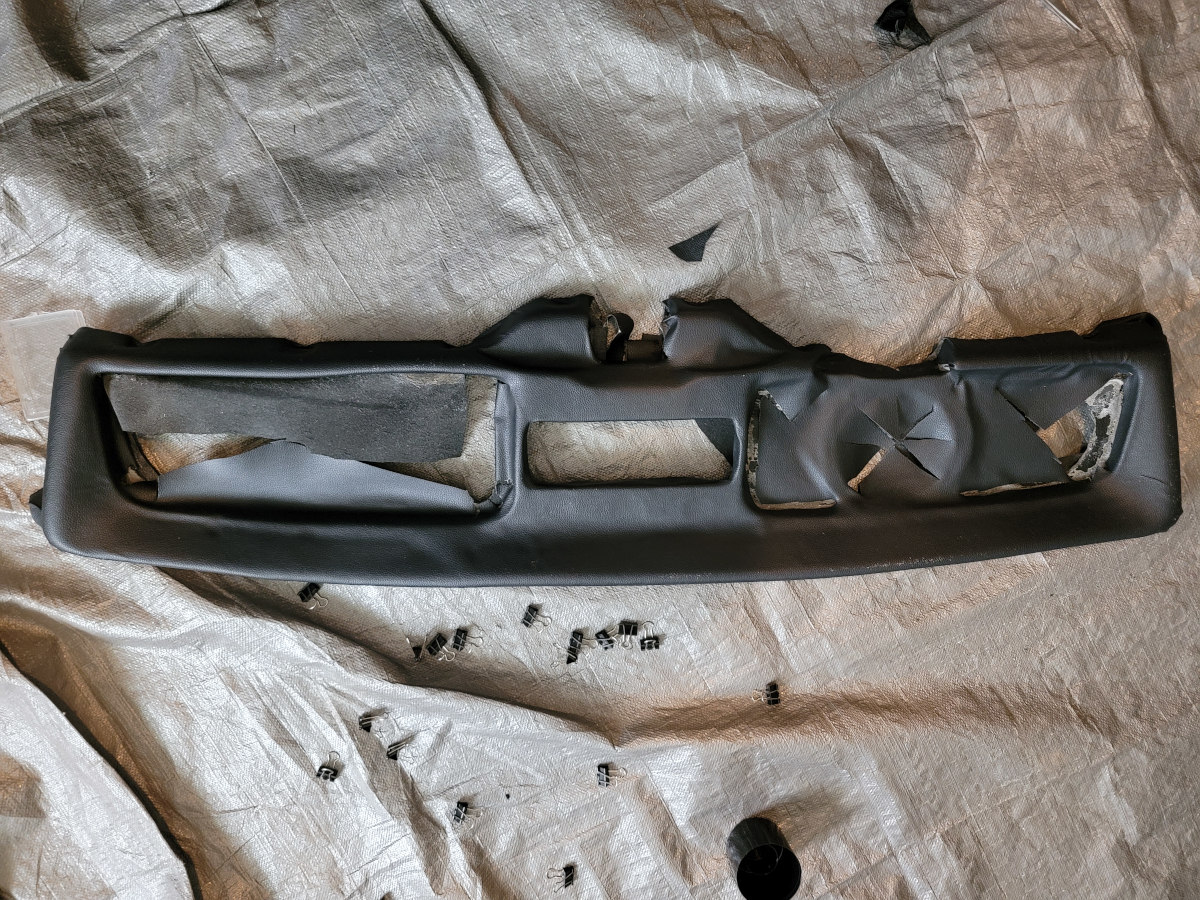
Apparently, I didn’t learn from dash pad covering part one, because I stretched the vinyl over the whole face, not accounting for the low spots. The glue is drying rapidly and I have to stop to cut holes for the dash and gauge area. I guess I moved quickly enough, because I got it wrapped up pretty well.
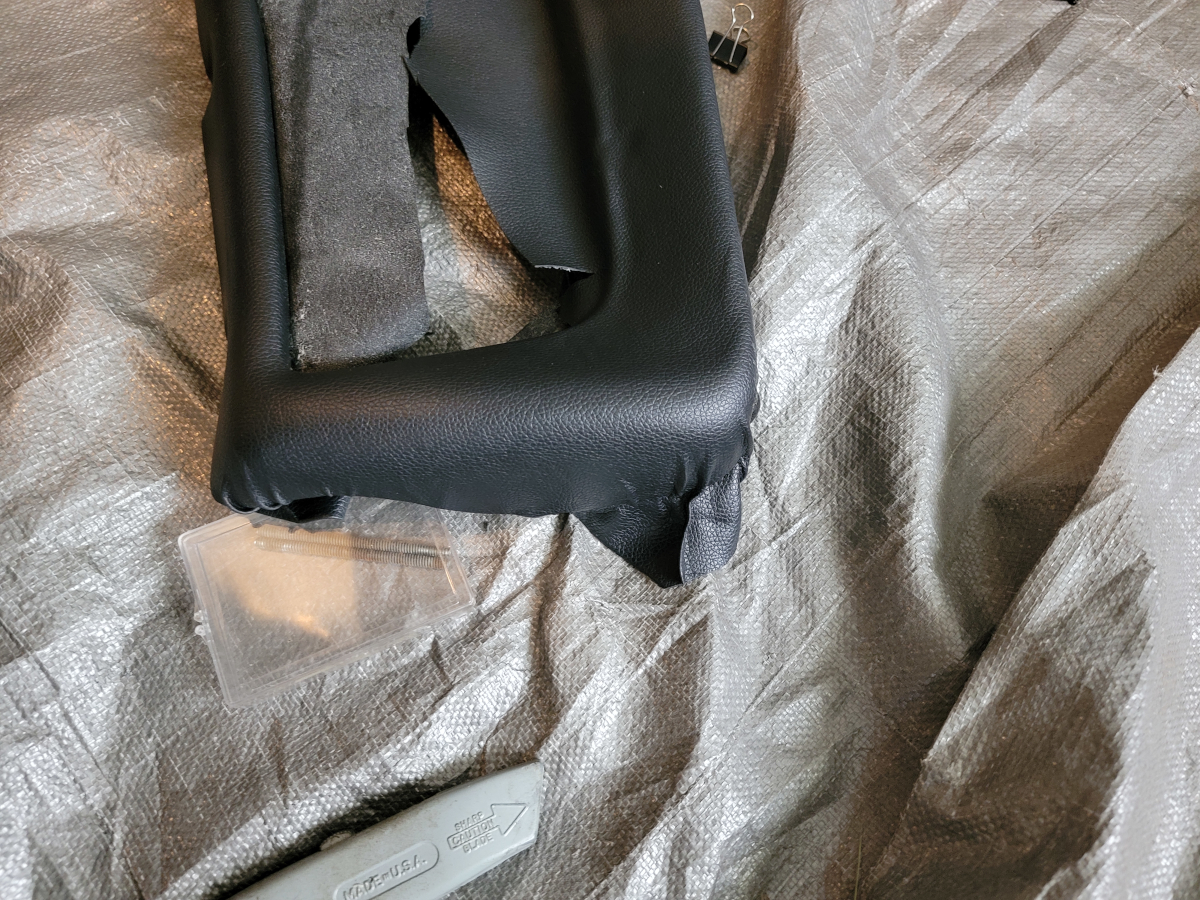
No PB Blaster was harmed in the wrapping of this dash pad. It was only there as a prop to stand the dash pad up while the glue was drying. There’s a teeny-tiny wrinkle here that I spent a lot of time working on.
The radio area is not too bad.
Now the first corner wrinkle doesn’t look so bad.
Overall, not too bad.
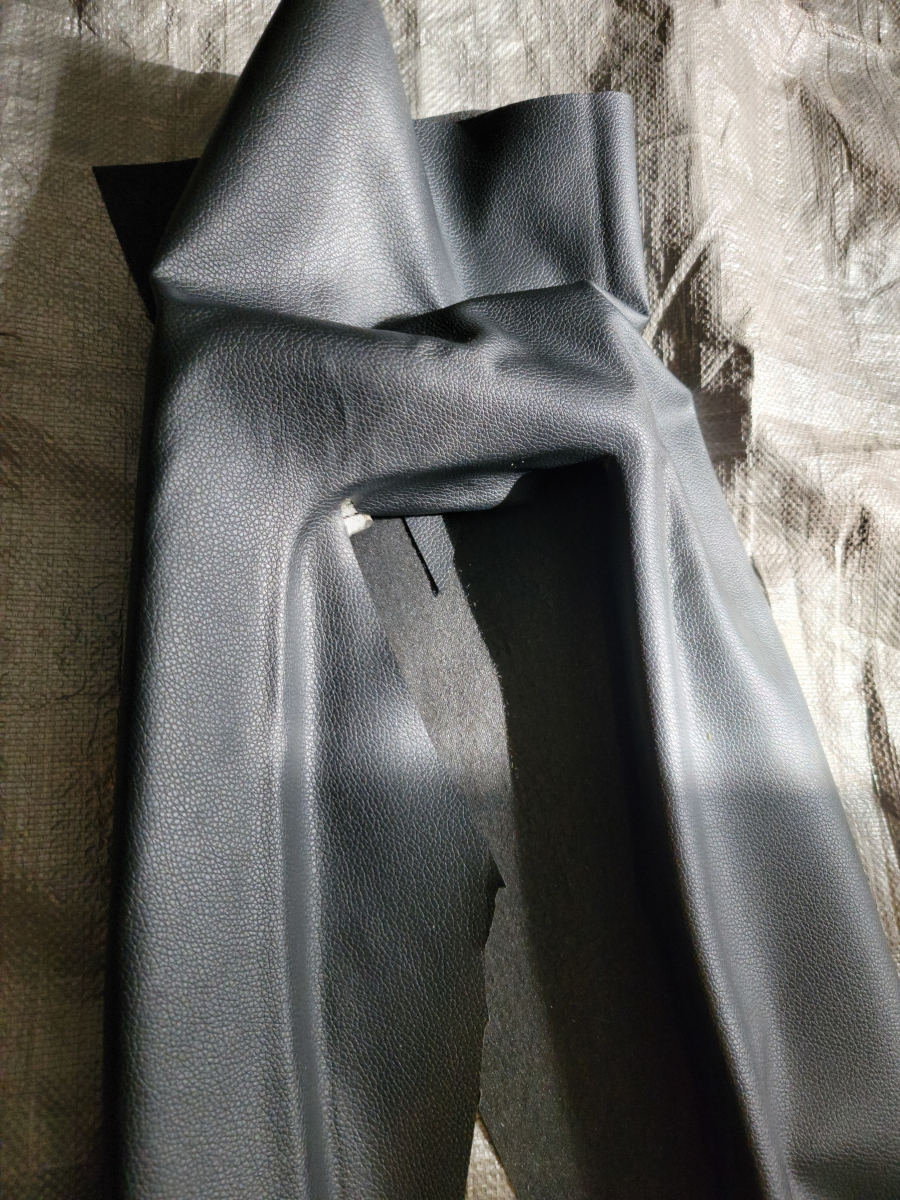
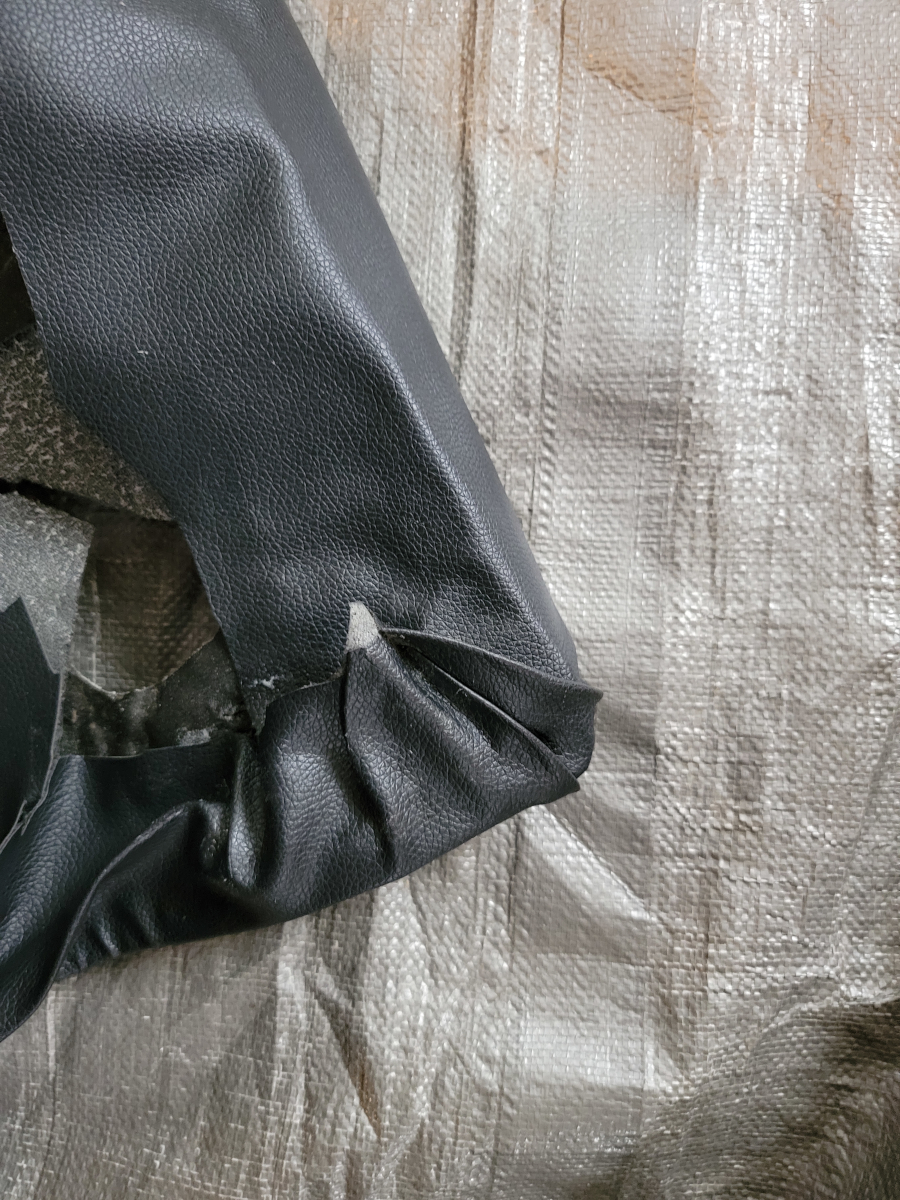
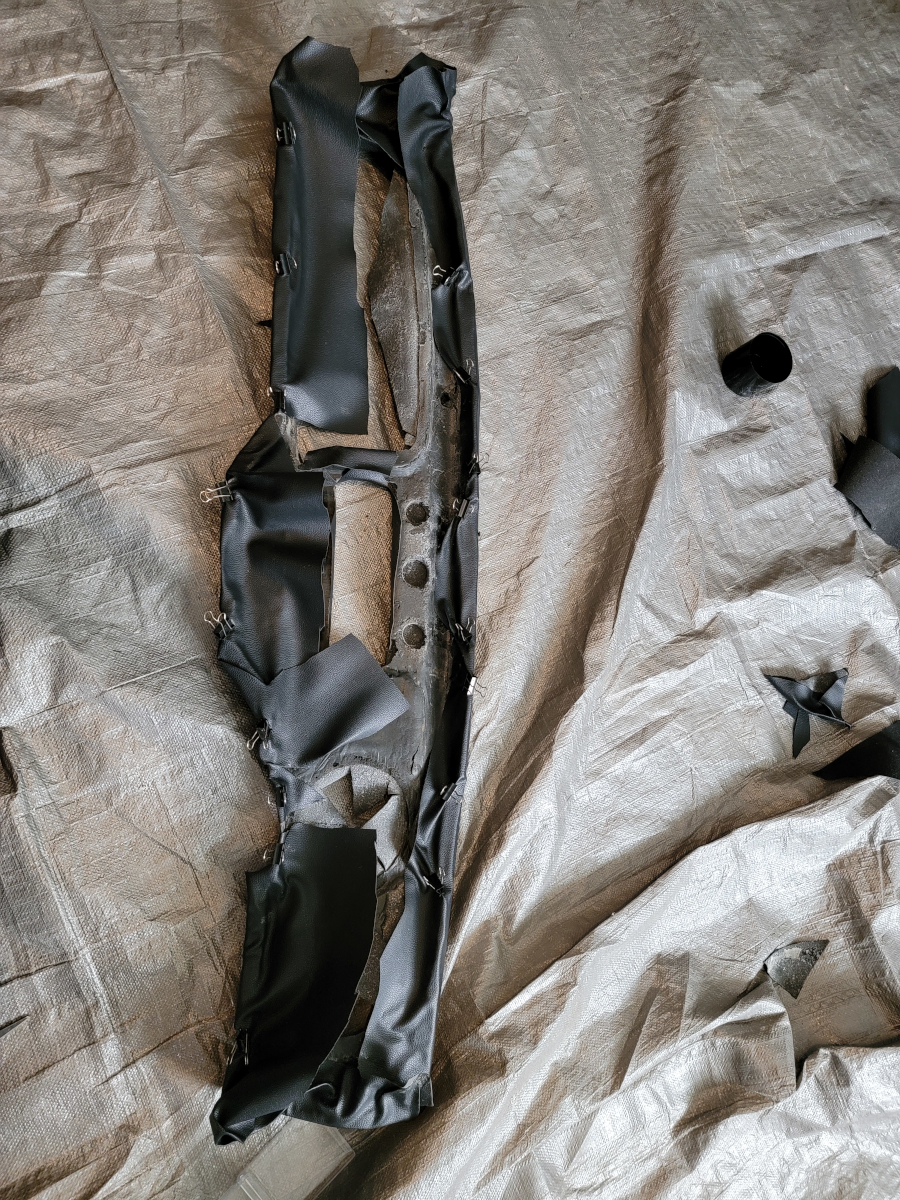
Now it’s time to start digging into that detail work. Cutting in the edges, another shot of glue – this time the Gorilla Clear Grip (Amazon link).
Loads of wrinkles around the outside edges now.
I need to trim all of the excess to give myself some room to work in there.
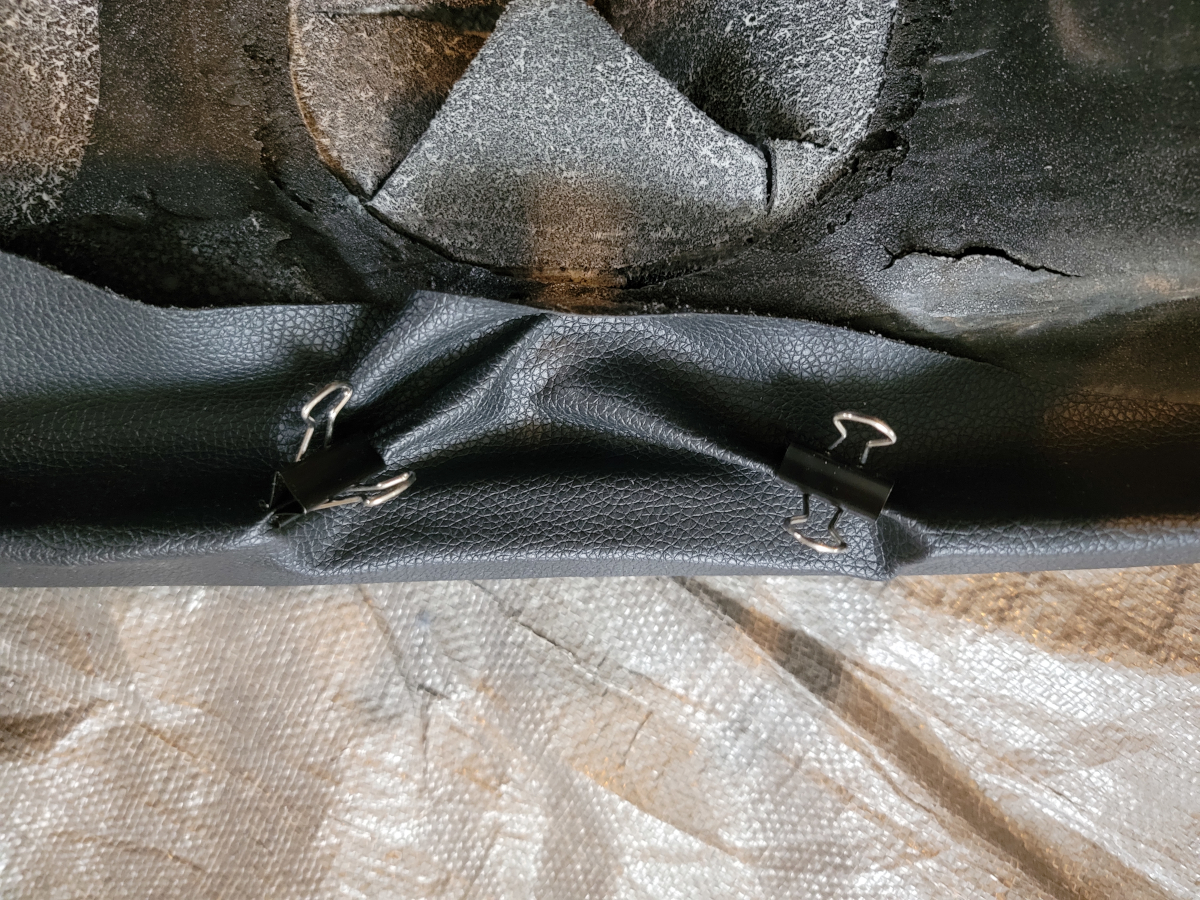
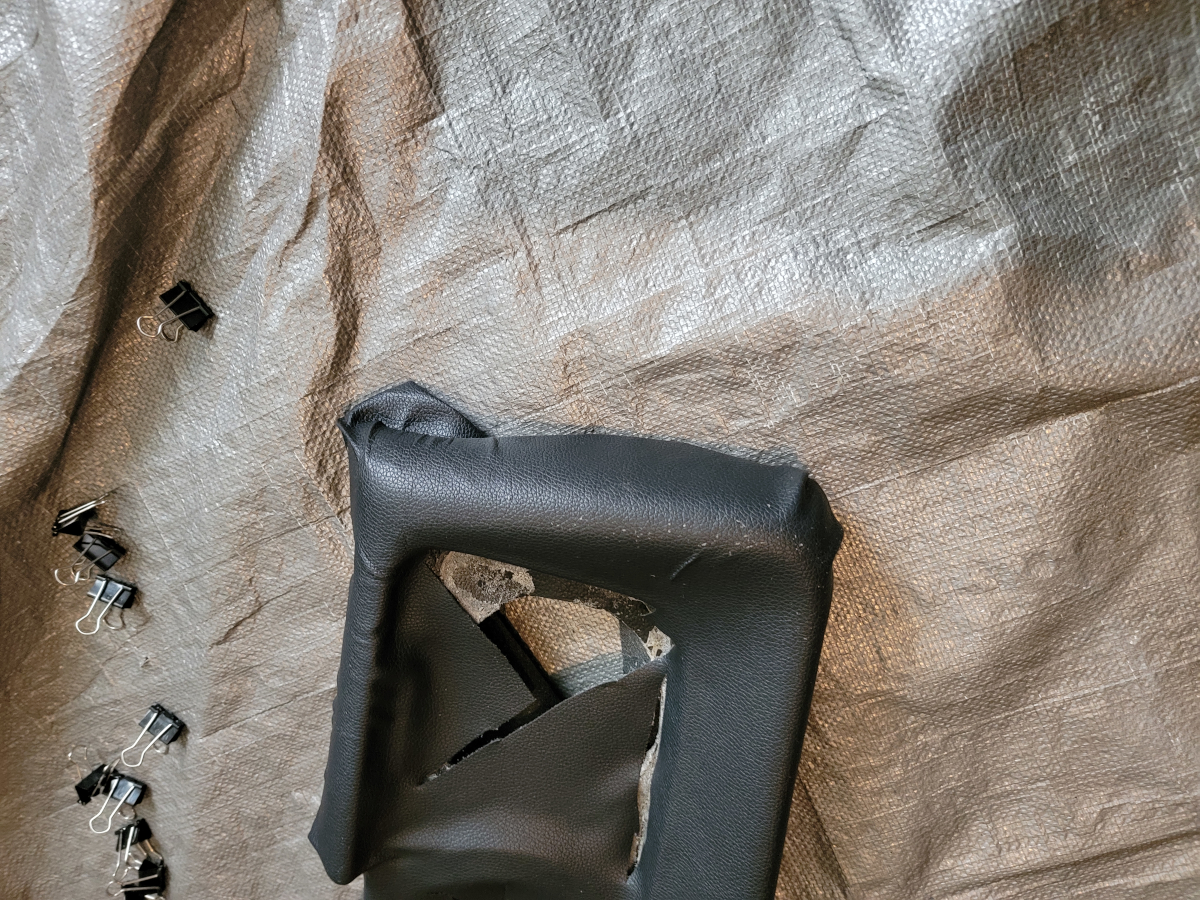
Binder clips around one of the side vent openings.
There’s a wide-open corner here, from all of the excess vinyl that was wrapped up in there.
Loaded all the edges up with glue and folded them in.
Binder clips are great for these vent openings.
And all the flat tabs where there are screw holes.
I have soooo many binder clips. I love them.
We’re getting more and more presentable over here. I like it.
The other top corner was as mess as well and needed to be dealt with.
I’ll give it six out of ten. F PLUS.
I needed to get out in the sunlight after being hunched over on the basement floor all day.
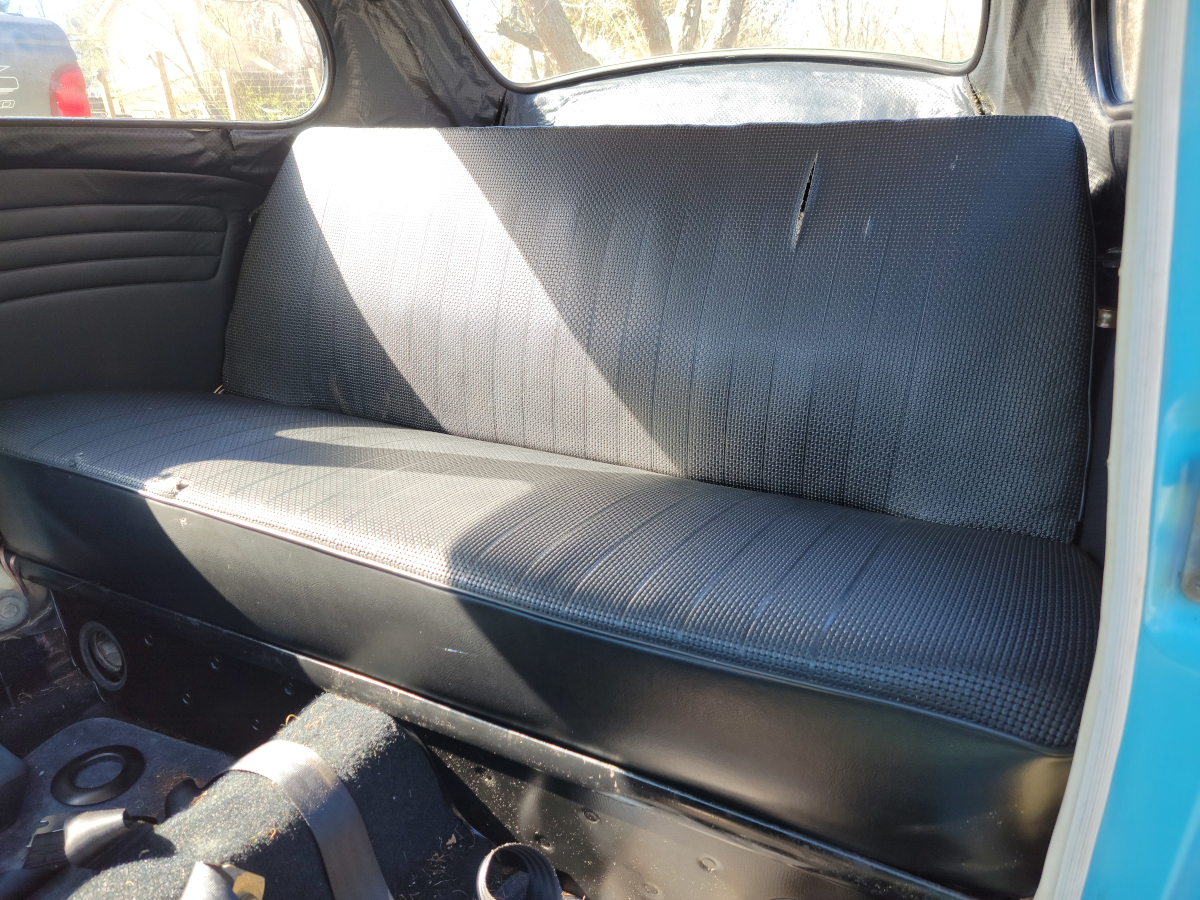
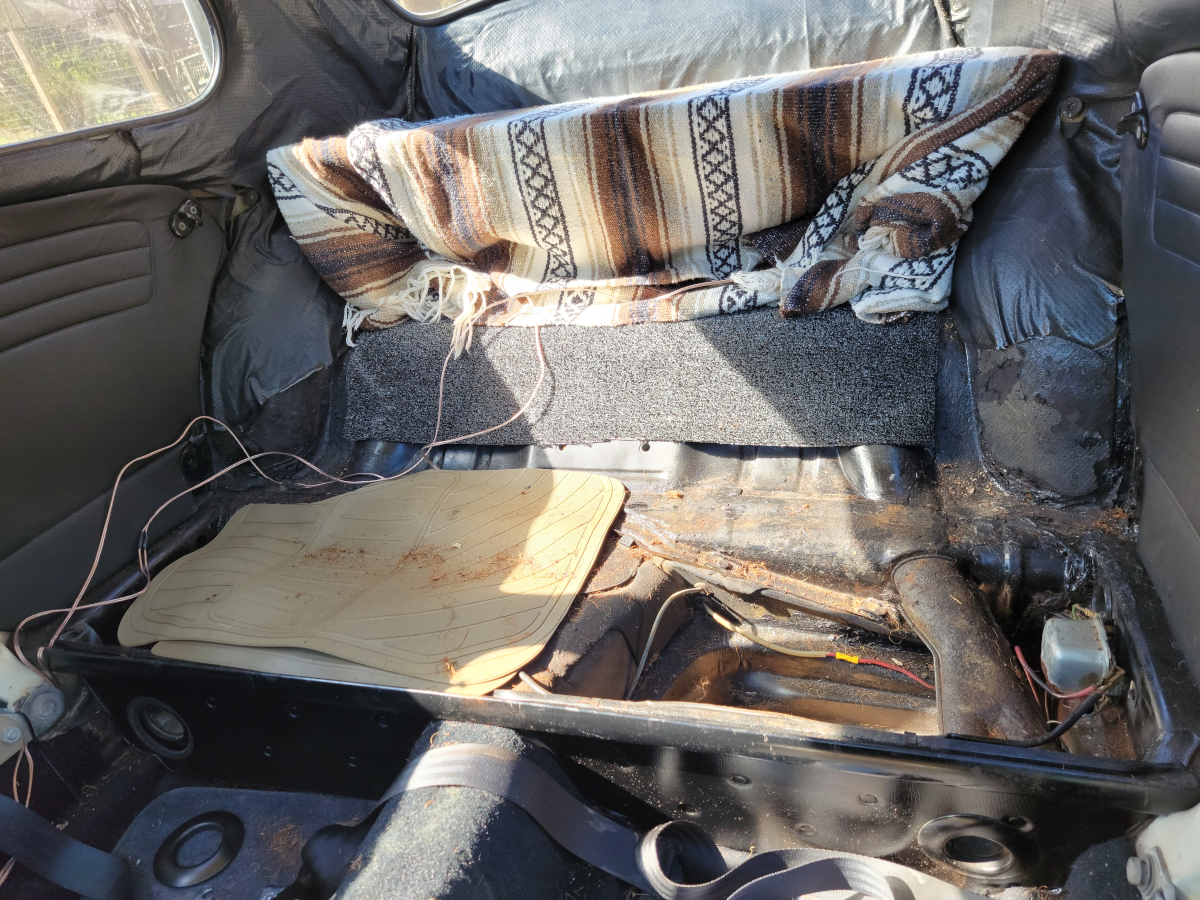
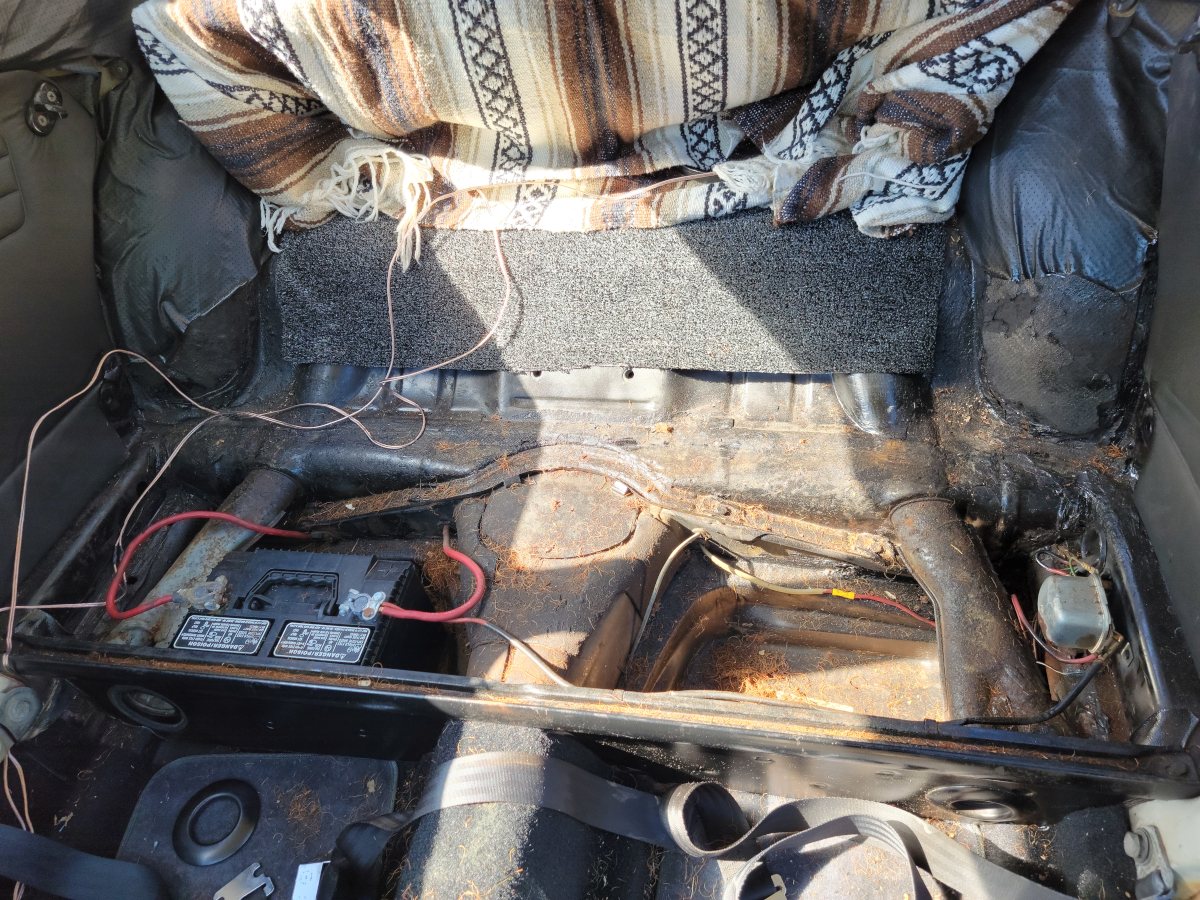
So, I headed out and put my big ass to work, getting the rear seat, well, seated. It’s a tighter fit now with all of that padding.
I hope I don’t have to jump start or charge the battery any time soon. Getting underneath that rear seat, then putting it back in place is just about my least favorite thing. Other than dealing with drum brakes.
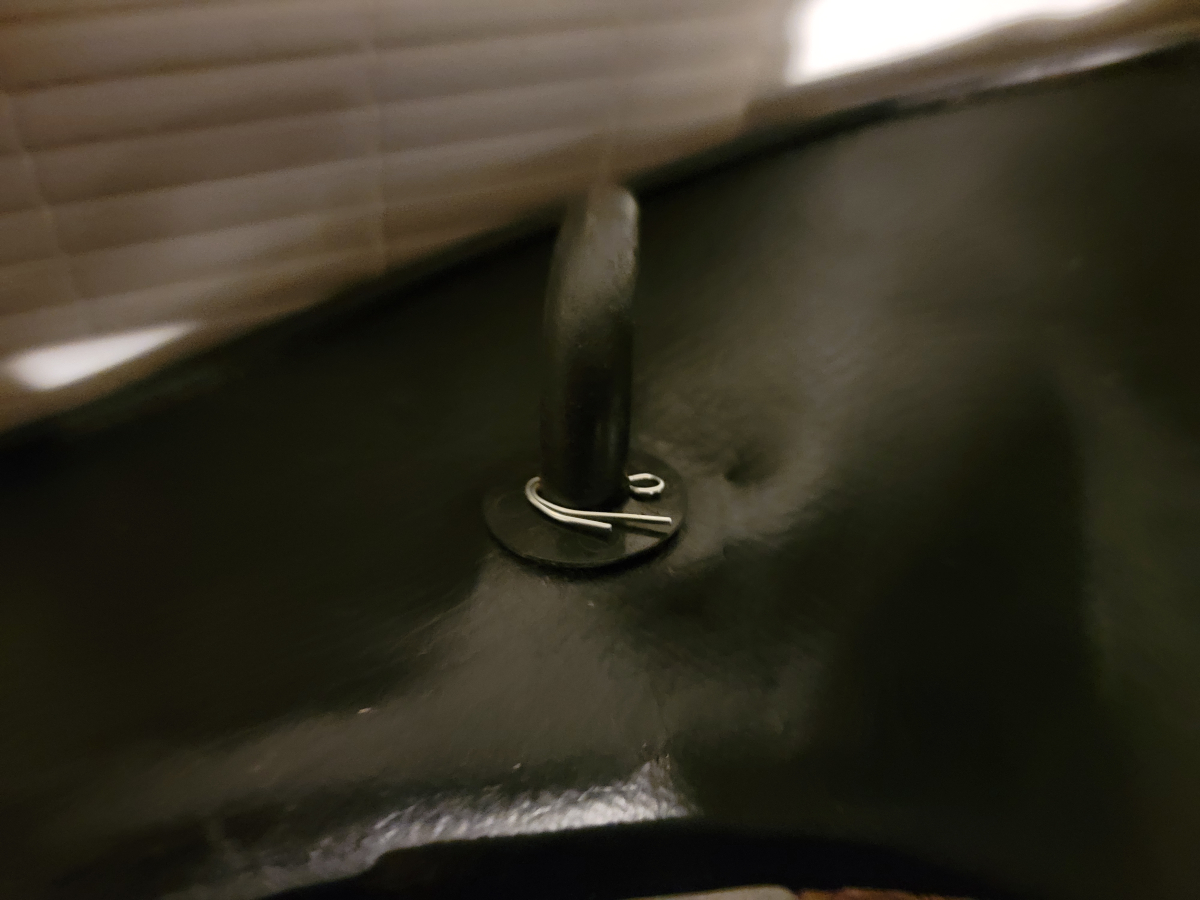
So I previously spray painted the spring lever on top of the ash tray. The 1634 was shooting silly string and apparently didn’t adhere to this metal, either.
Bummer. So I moved on to trying to lock that other tab in place. I had several pieces of metal, the little clip that speakers mount into. Kind of a washer with a split in it to catch the threads. Anyway, whatever those are called, I had a handful of them (had) and made a few attempts at bending them into shape to grip that little knob (you know how we do). But, nothing held firm for long.
Another job for another day another job for another day another job for another day another job for another day
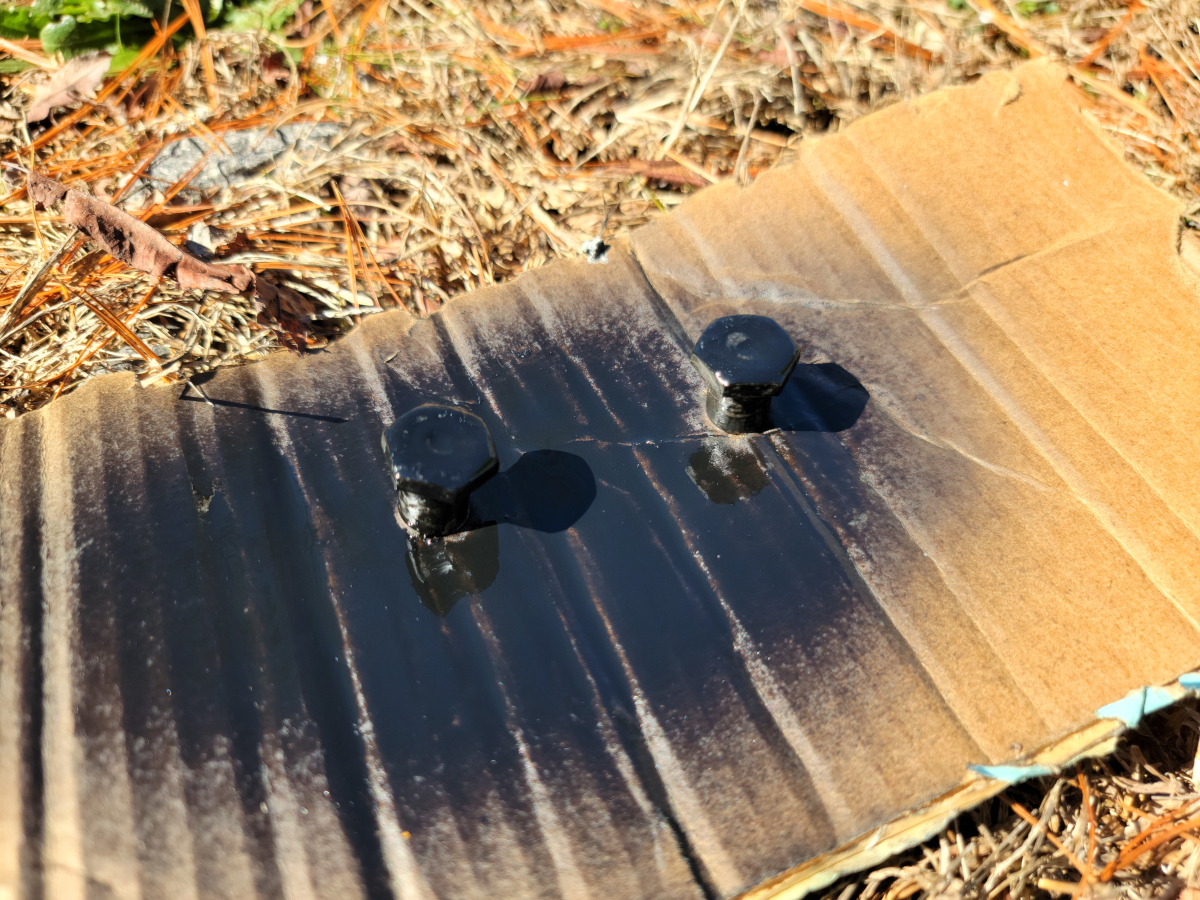
I ordered a license plate housing gasket to replace the old, dry, cracked, and broken unit. Let’s add that to the “Easy Wins” list.
And then replaced it.
As I was trying to unscrew the nuts from underneath the engine cover, every one of them just unscrewed the stud from the cover itself. Either way, they all came out easily.
I didn’t think the gasket was going to fit. Using a flat blade screw driver helped stretch it around the edges of the license plate light housing. I was then able to tighten everything down.
Next, I carried both halves of the back seat from the basement and reinstalled them.
Kinda…
I have added a lot of additional padding in the seat base. The additional thickness against the bottom edge of the seat back is too much to fit once the seat back is bolted in place. It will take muscle that I don’t have available at the moment.
Let’s move on to the front.
More effort:
– Jam the drill with self-drilling sheet metal screws through the saddle blanket – Through the fiberglass kick panels – Through the actual sheet metal of the car.
Three days later, something inside my wrist-guts still feels out of sorts from the effort.
Anyway, job done.
Aaaaand done.
After the mess with the rear brakes was discovered, I got it all hosed down with brake parts cleaner. Then put it back together and tried adjusting the parking brake cable. Both sides would tighten all the way down without stopping the rear wheels.
Also, this is the first time I’ve had the car started up in around four months. That is by far the longest span it has sat. After four or five tries, she fired right up with no smoke, no warning lights. Ready to go.
She not stop, but will definitely go. I took a few trips back and forth in the driveway. Brakes suck. I’m tired.
Then I loosened the parking brake cables, just to make sure they wouldn’t decide to work at some point when I’m driving and lock up both rear wheels.
Now I move all the way back to the front and begin to reassemble the fresh air box. And packed everything neatly back up under the bonnet.
I’m half convinced that I am missing some parts. The center vent in the dash and the plumbing underneath doesn’t even closely resemble each other. Later, I read an off-topic statement in a post on the samba that said those parts don’t actually mate up.
As it sits right now, there’s no dash pad and no internal vents, so I just reassembled it without the center vent. If anyone has any insight into how this thing goes back together, I would appreciate a comment or a message here. Not that I plan to need the heater any time soon. It was together when I started and I apparently didn’t pay enough attention when disassembling.
Are those hoses that I replaced not actually drain hoses? Are they heater hoses after all? Is it safe to use the washing machine drain hose I purchased to push heat into the cab?
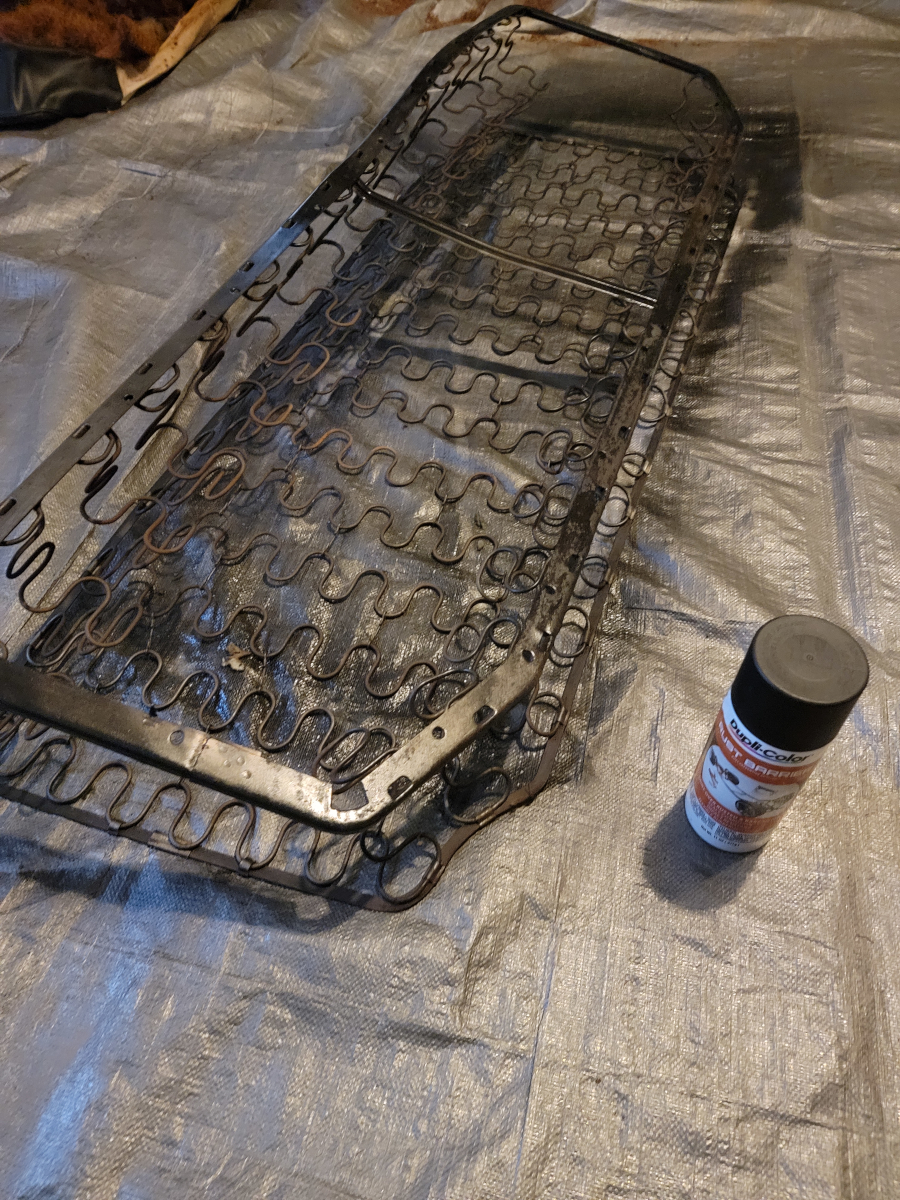
In what I promise is the last post about refinishing the seats, we move on to the rear seat back.
Disassembly
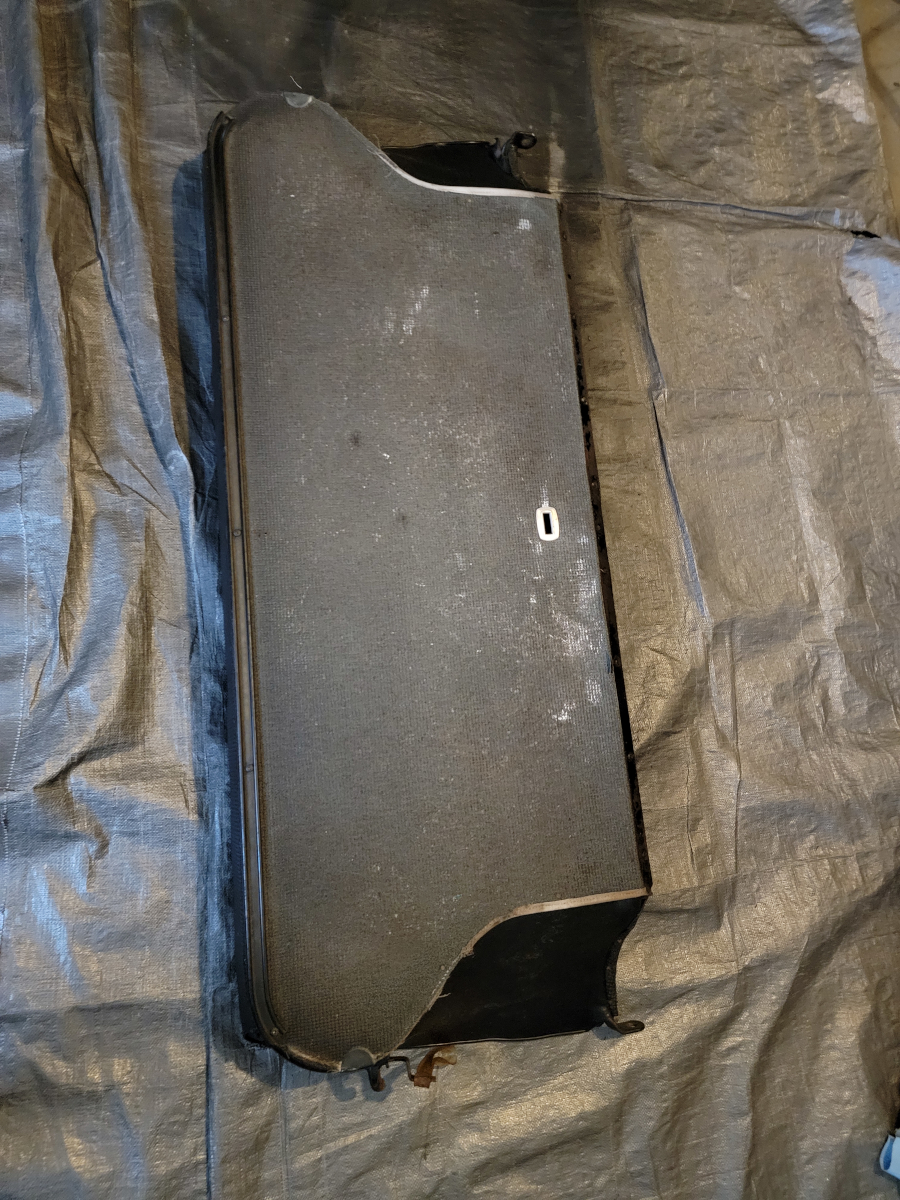
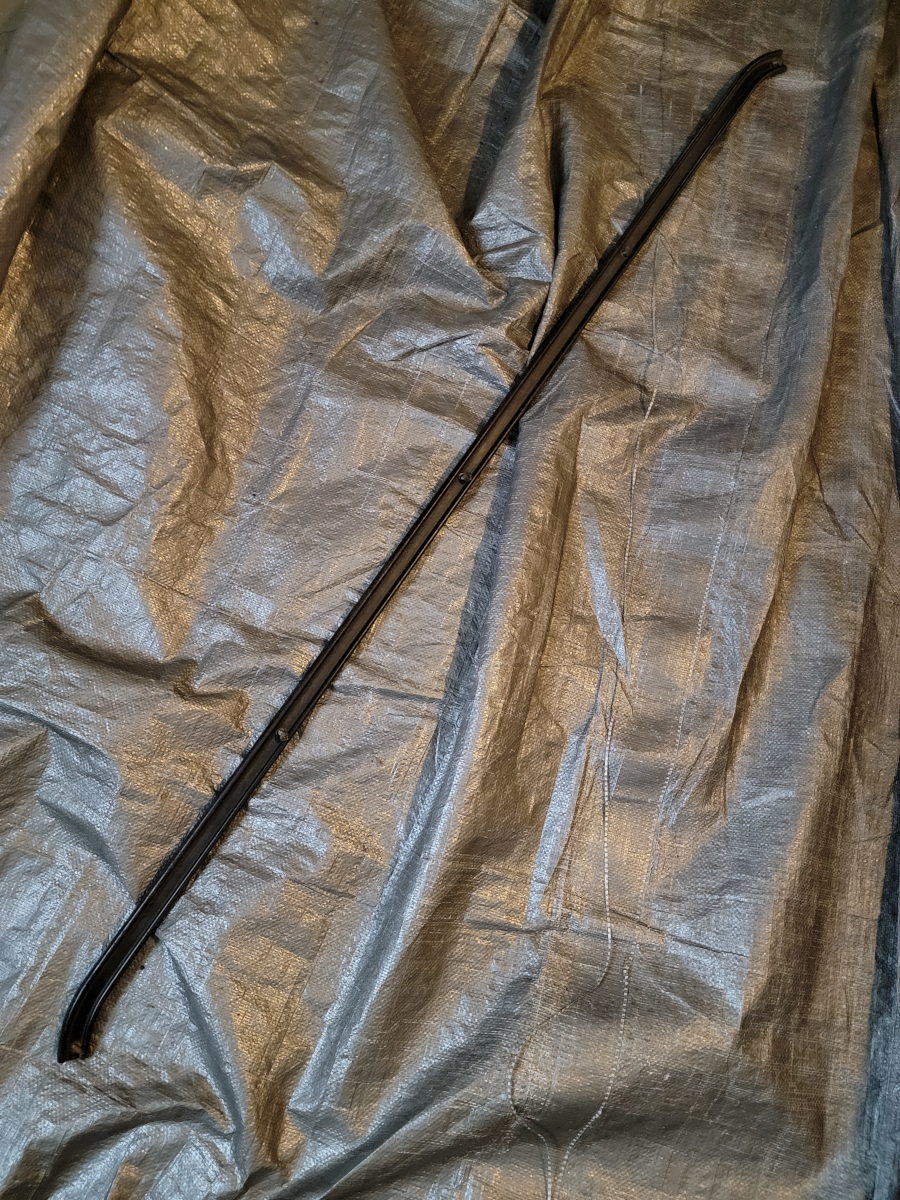
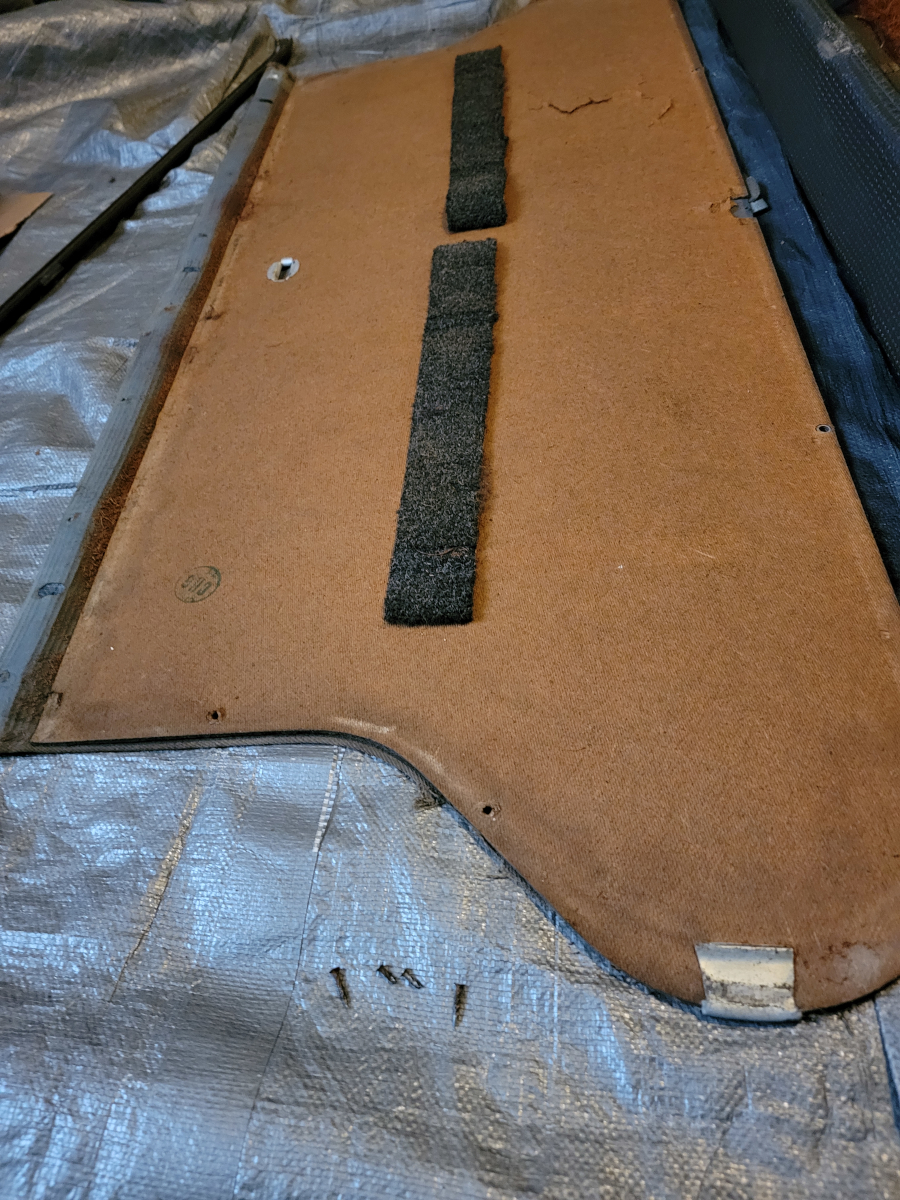
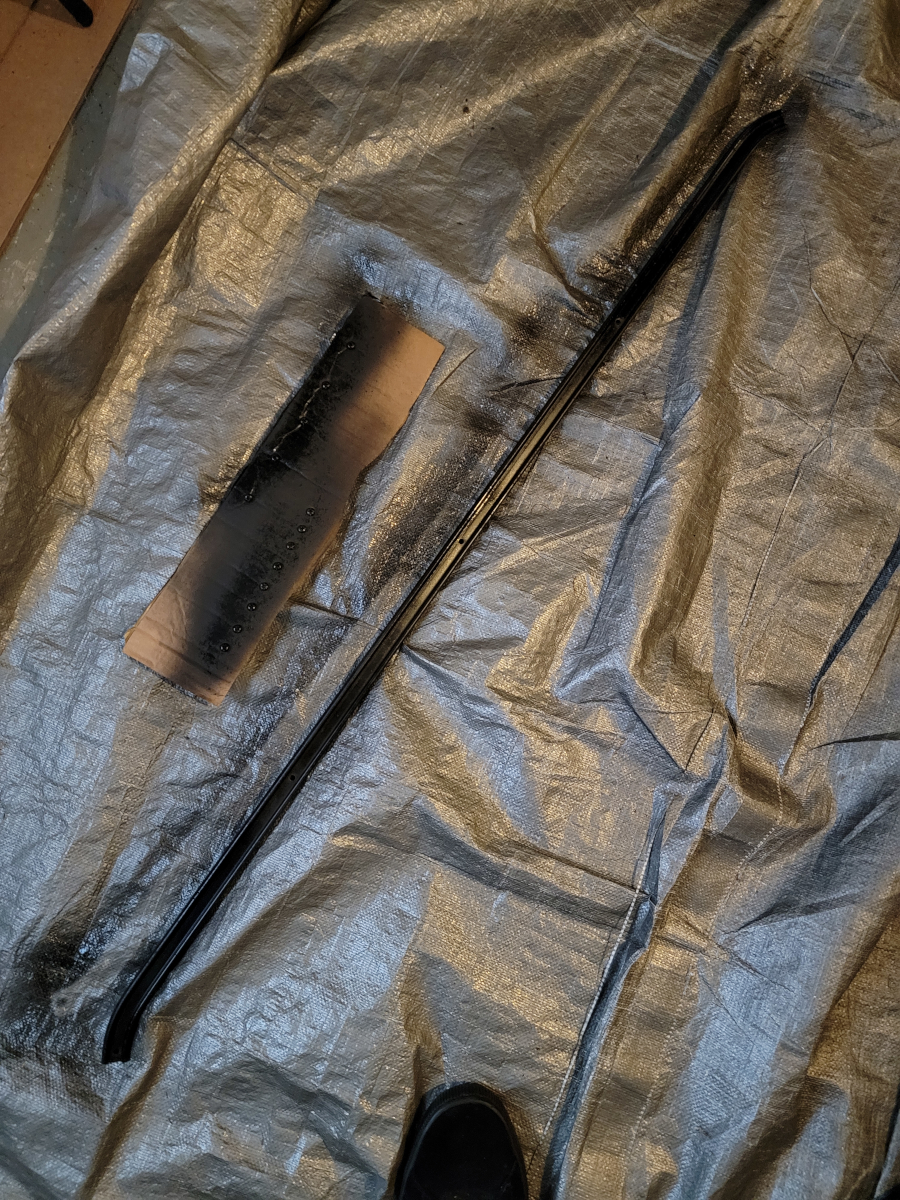
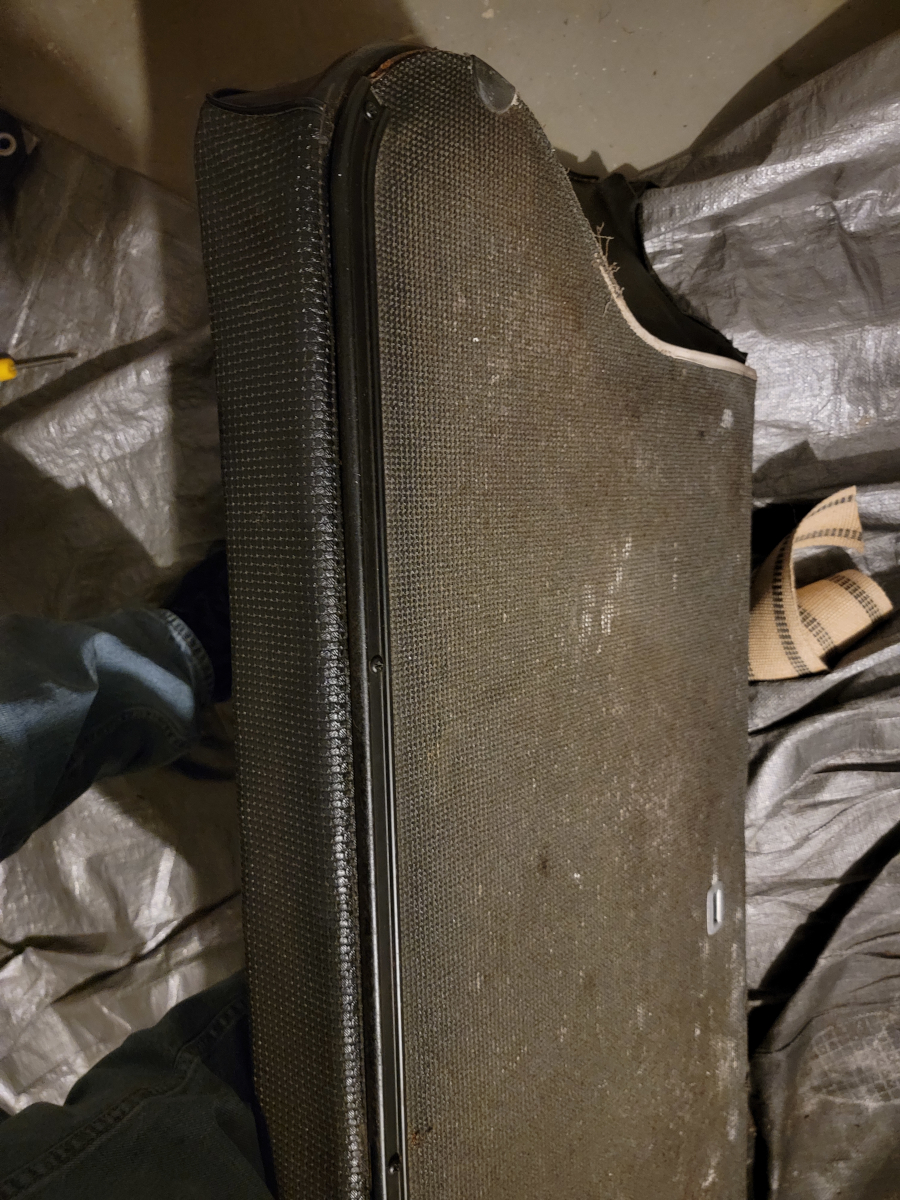
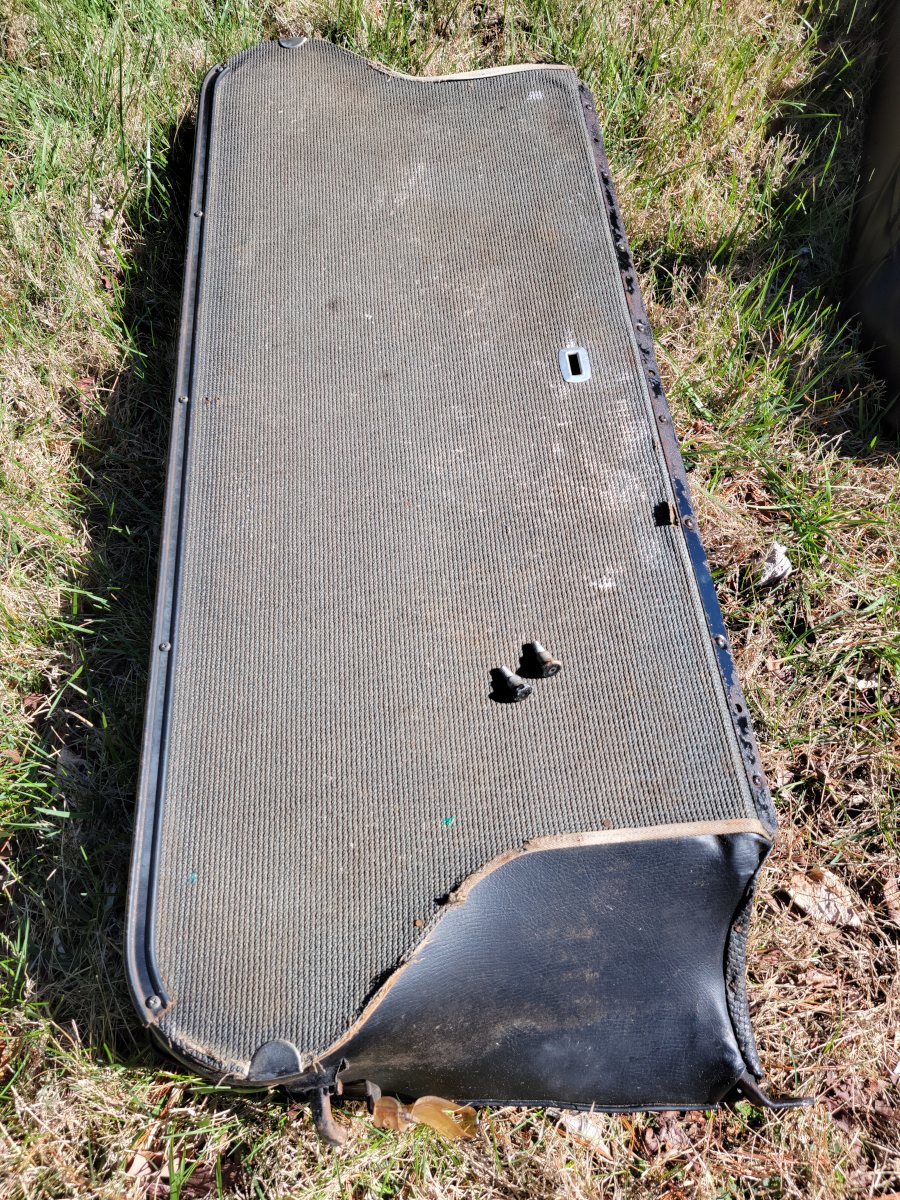
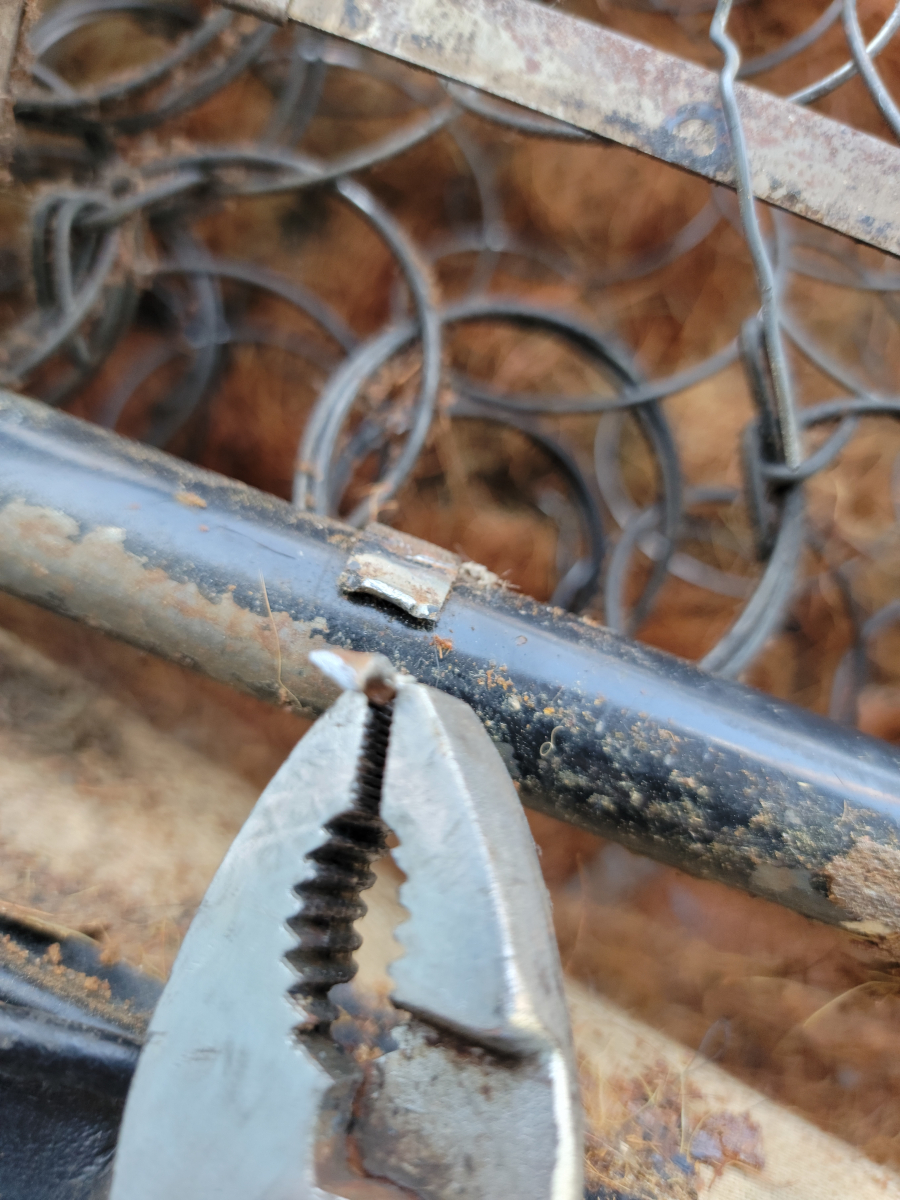
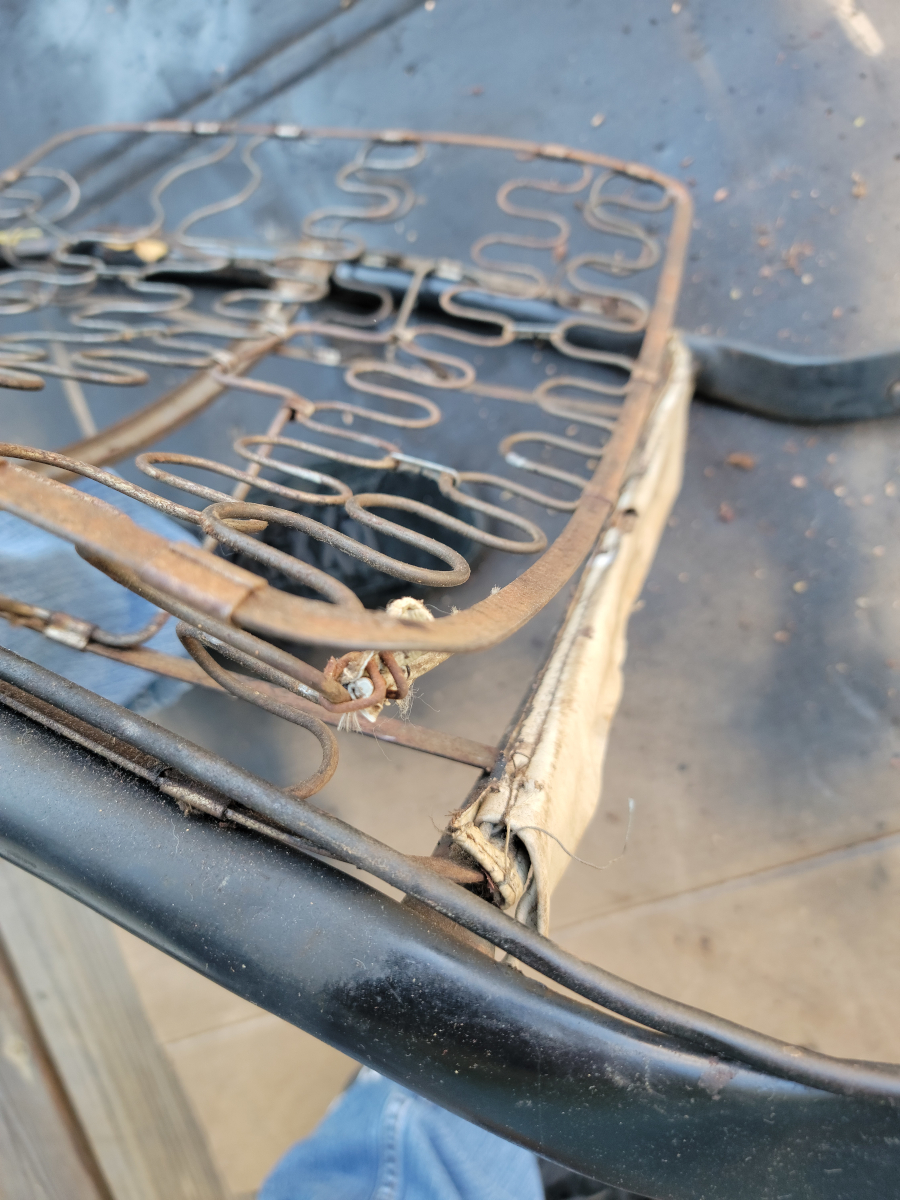
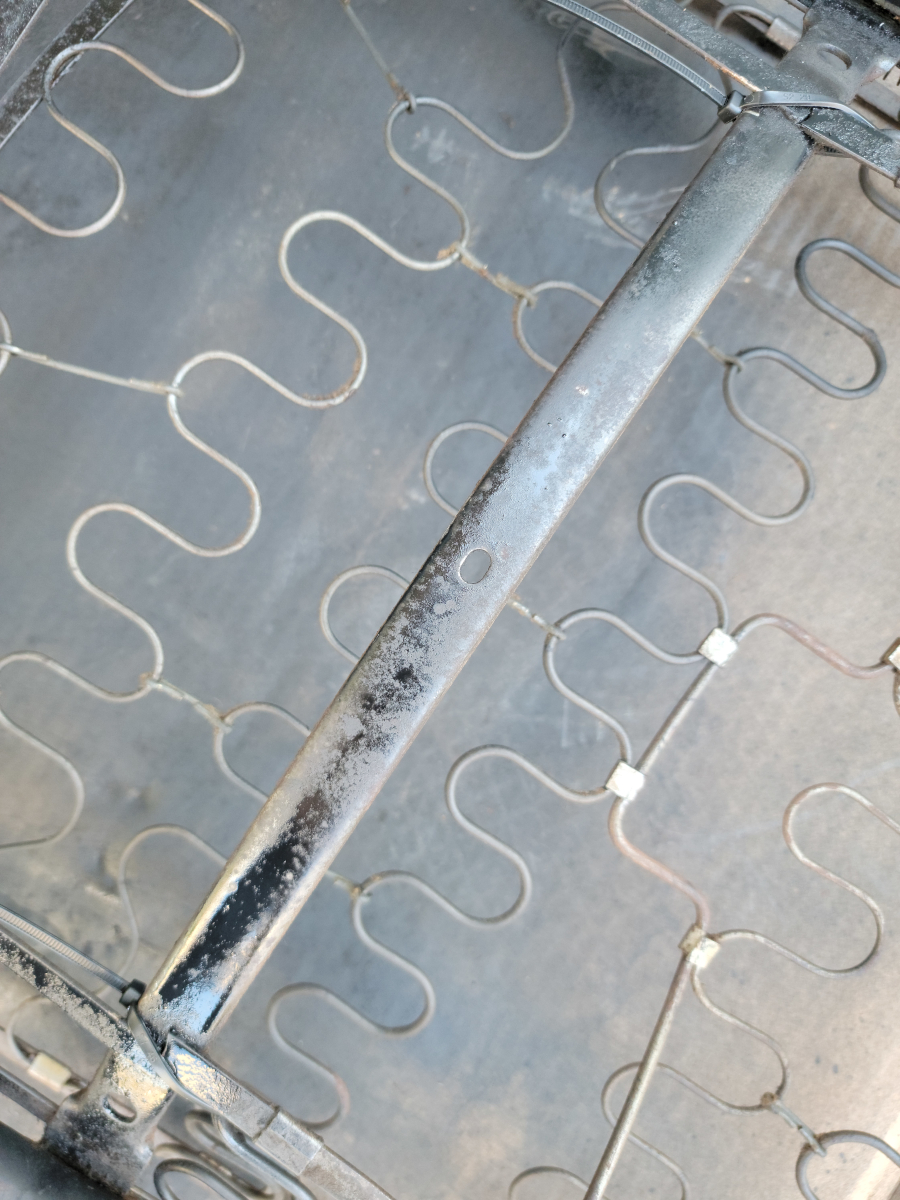
It is closed back, kind of a fiber board material with a vinyl coating on the outside. There are metal trim pieces screwed on to the top and bottom edges.
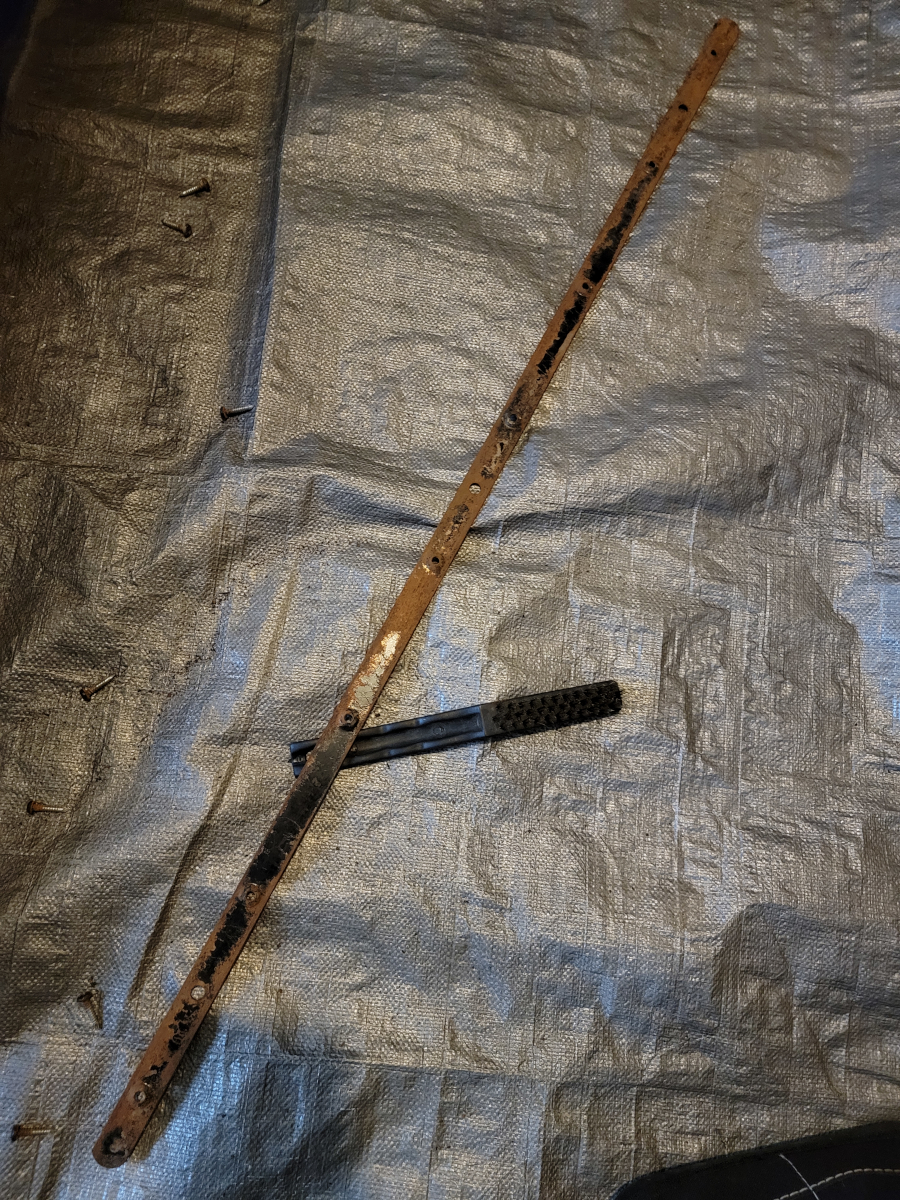
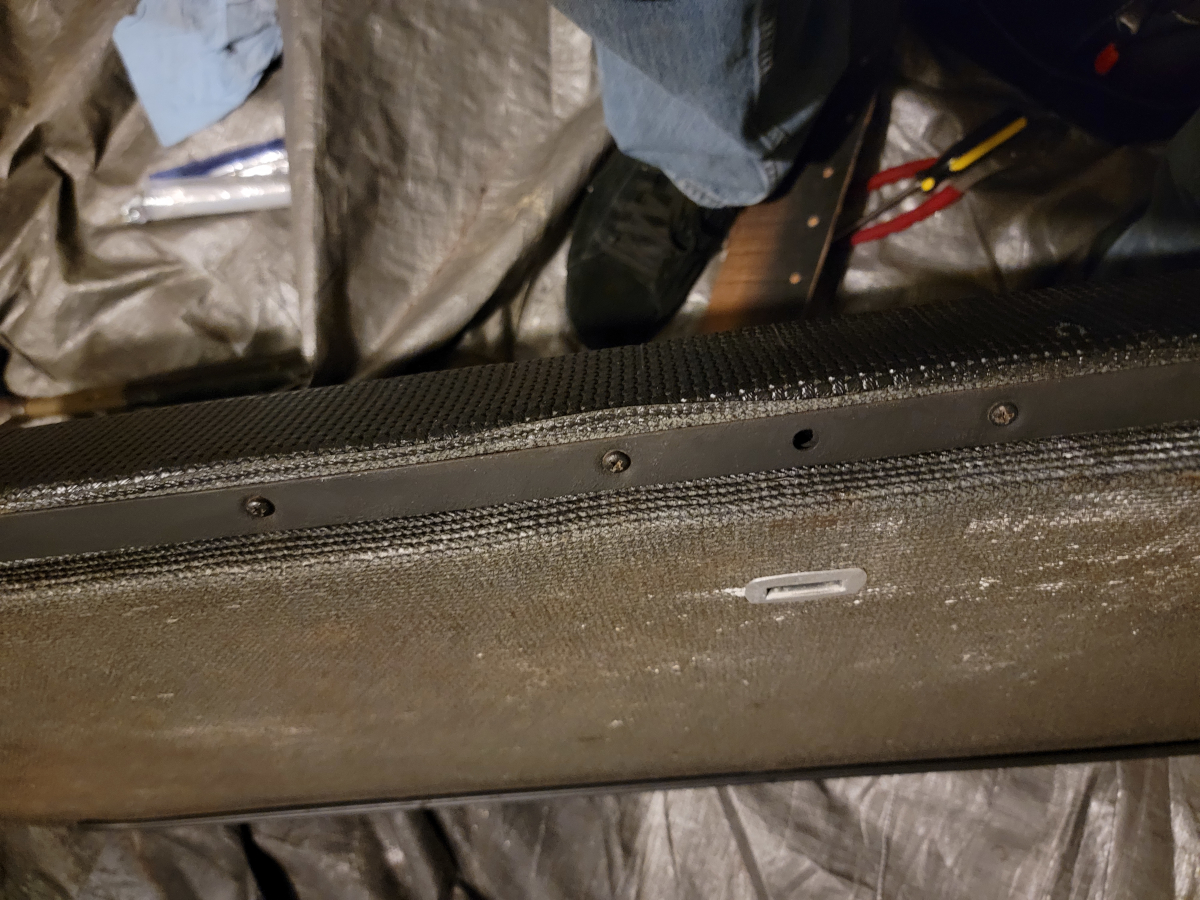
They unscrewed easily enough. The top one is clearly aluminum or some other non-rusting material…
While the bottom one… Not so much.
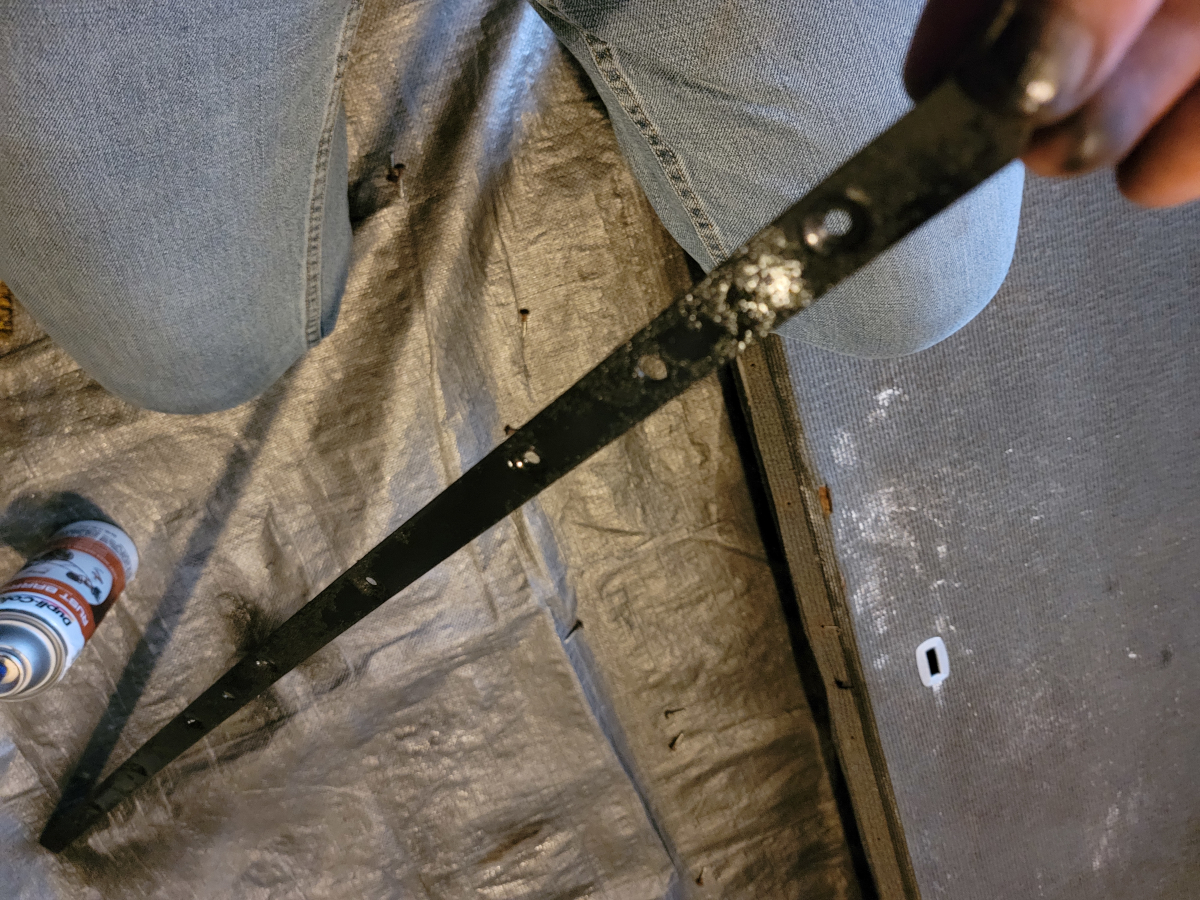
I scrubbed it with a wire brush, sprayed some brake parts cleaner, and wiped it down.
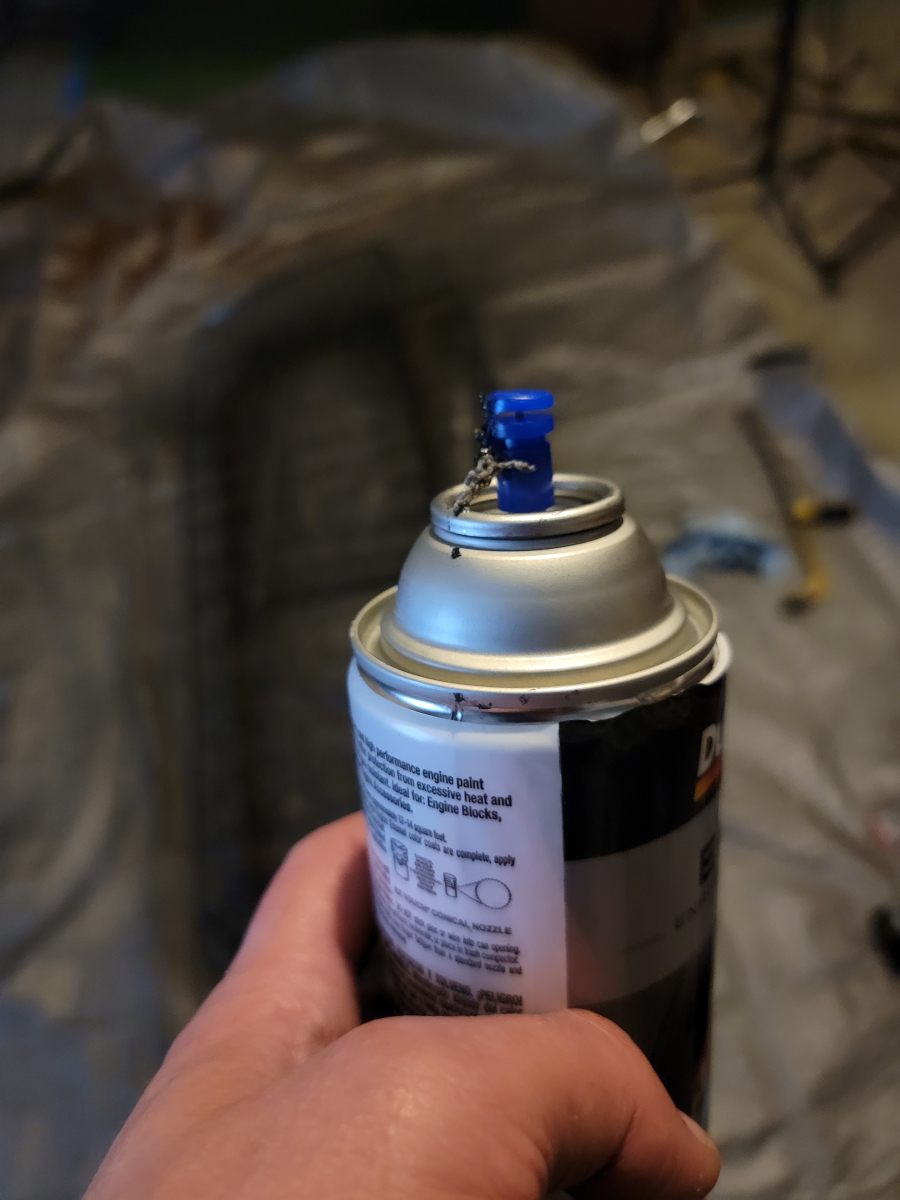
And sprayed it with some rust barrier, then engine enamel. The screws (and my thumbnail) were in really good shape, but could use a blackening.
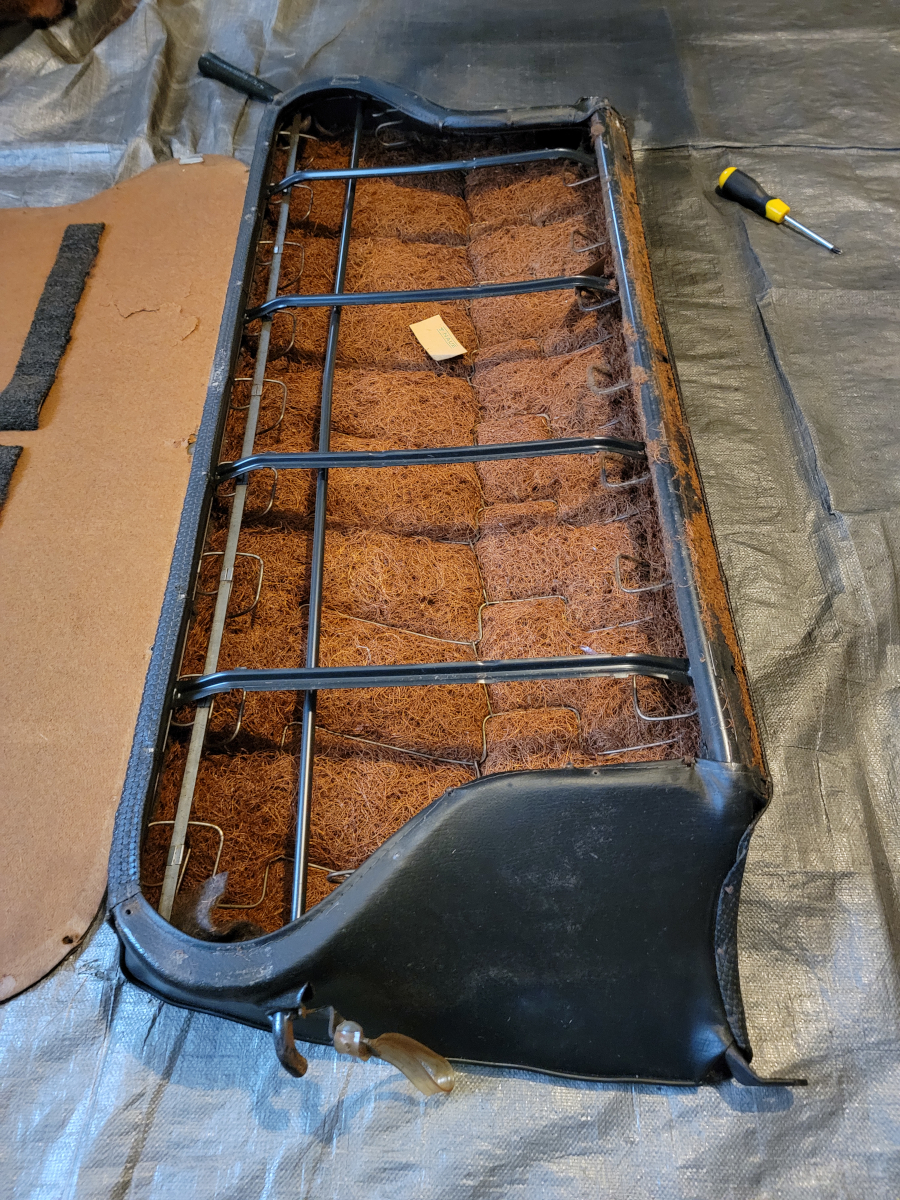
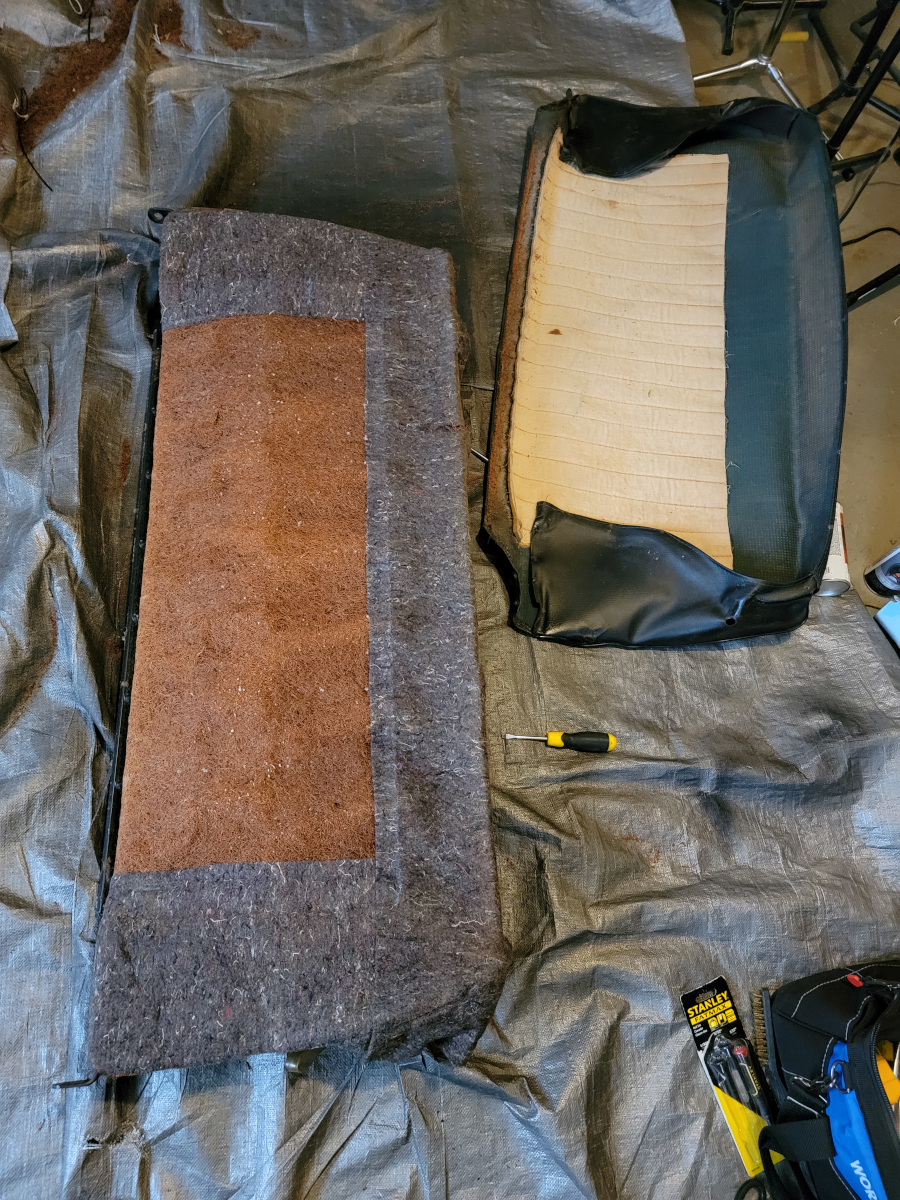
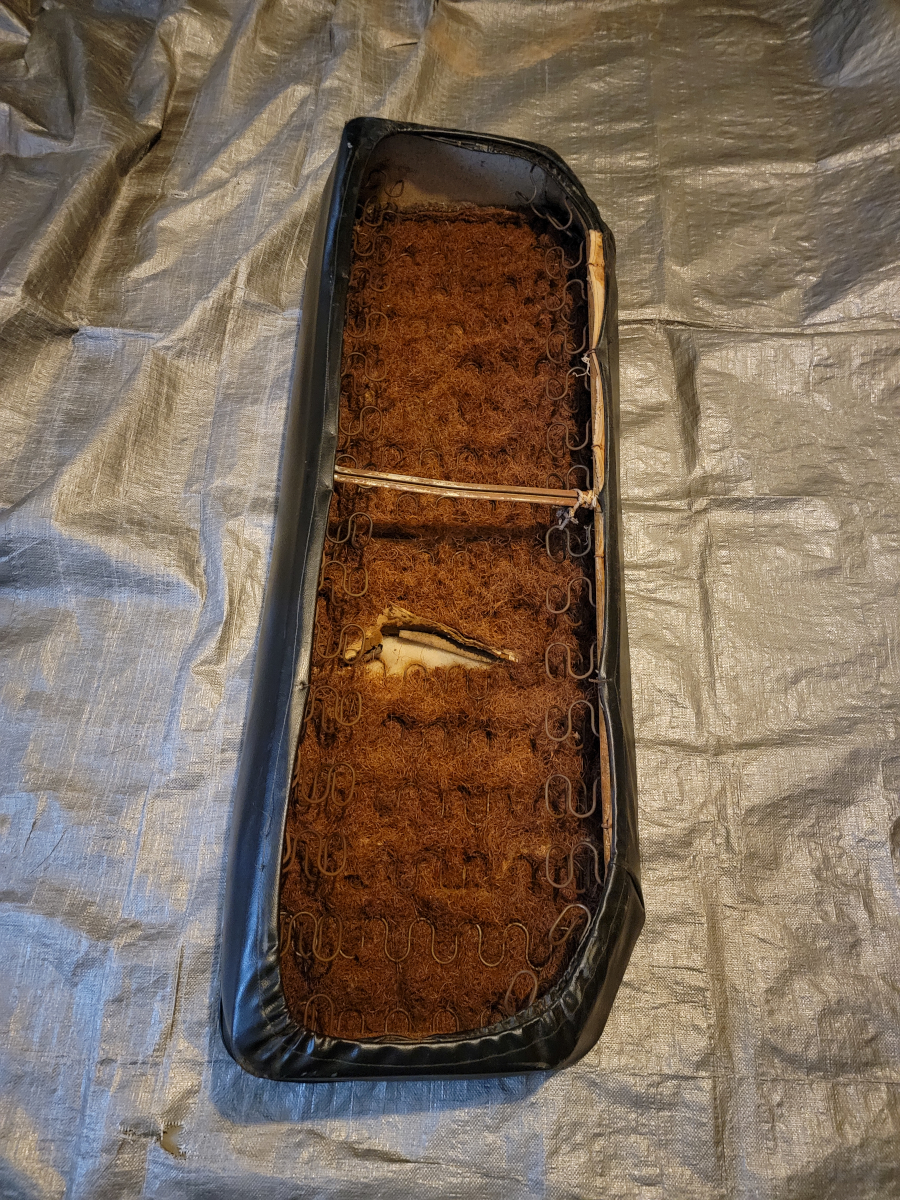
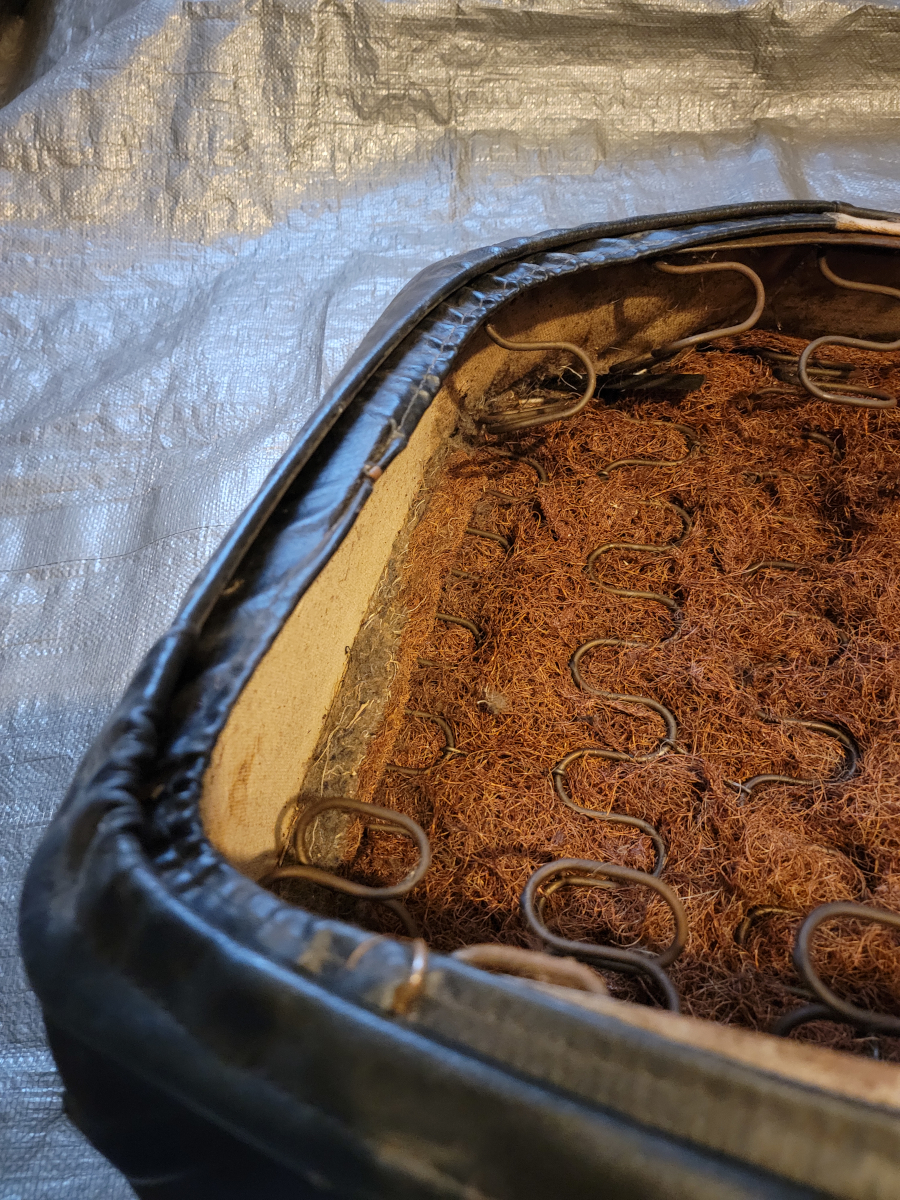
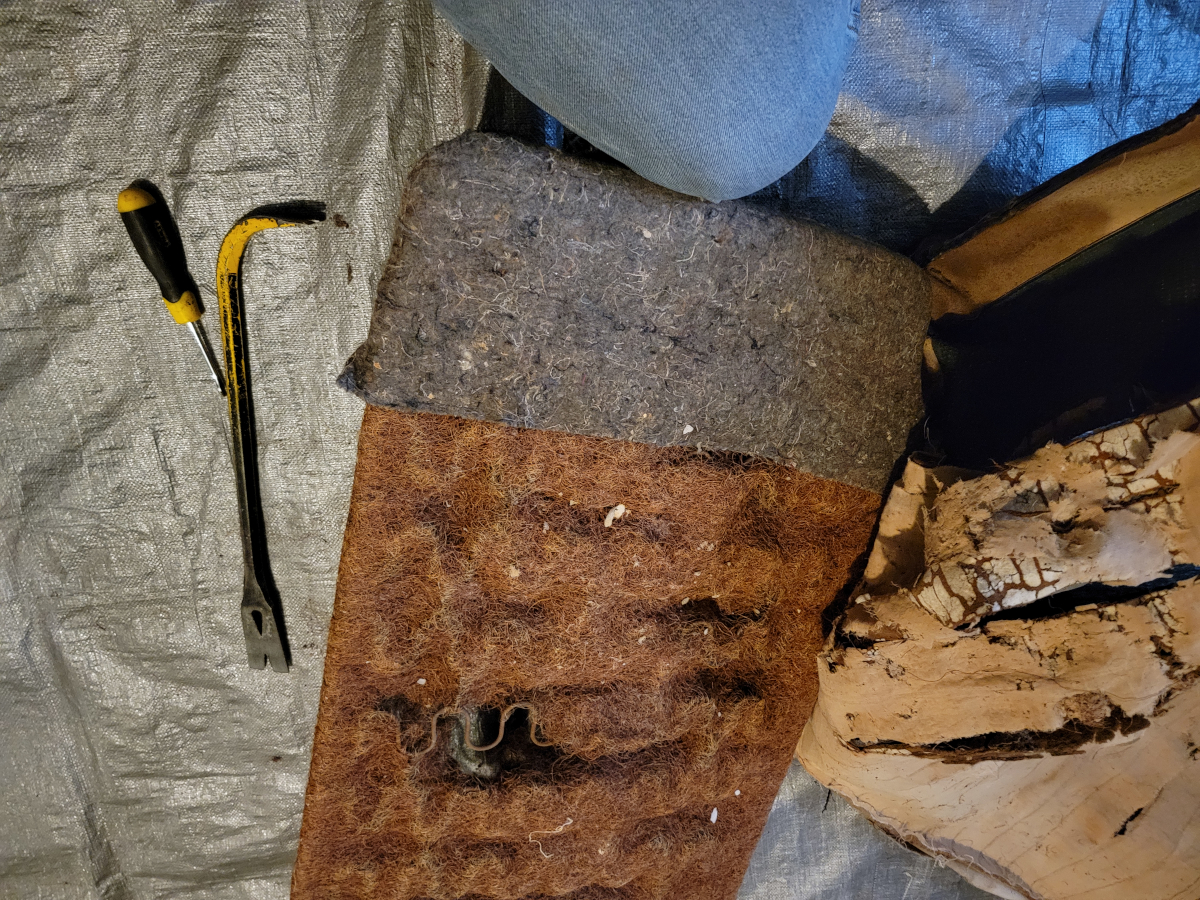
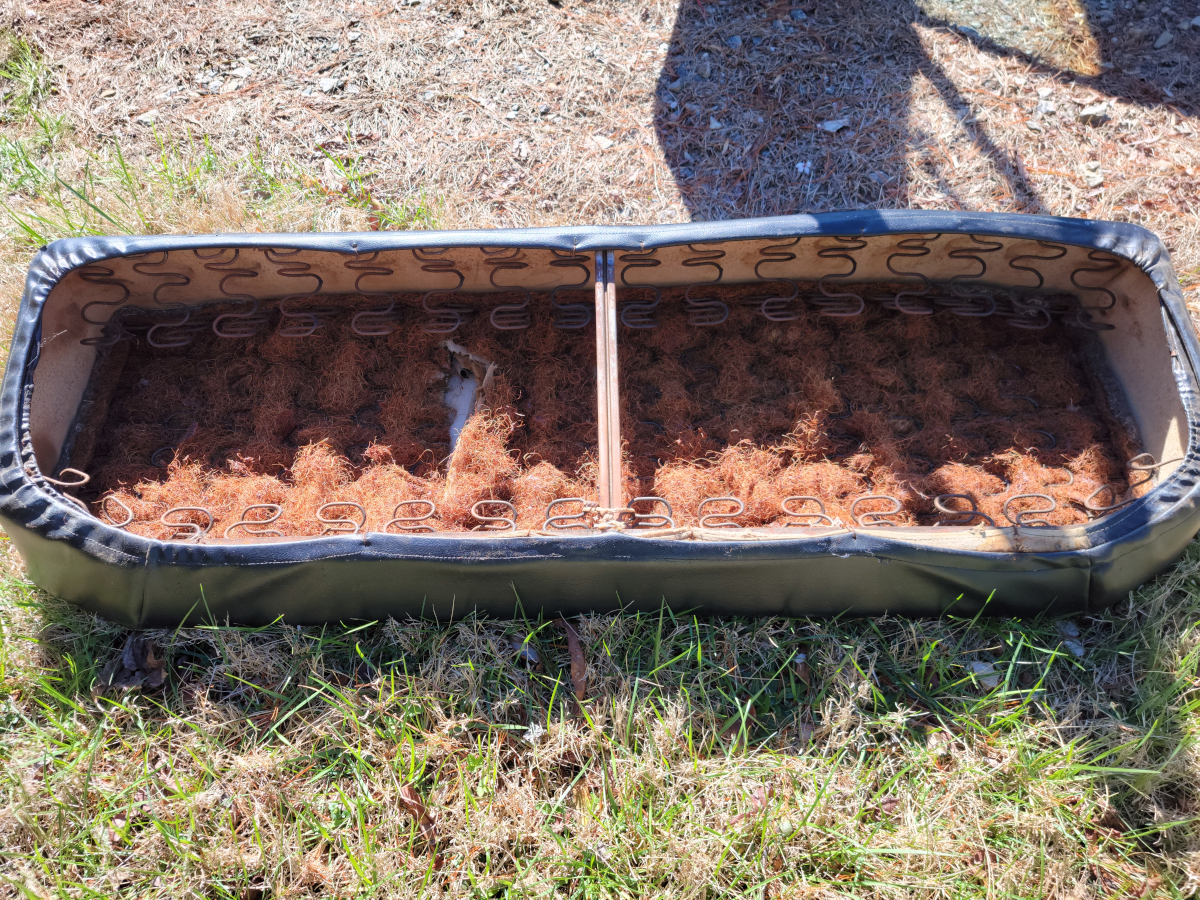
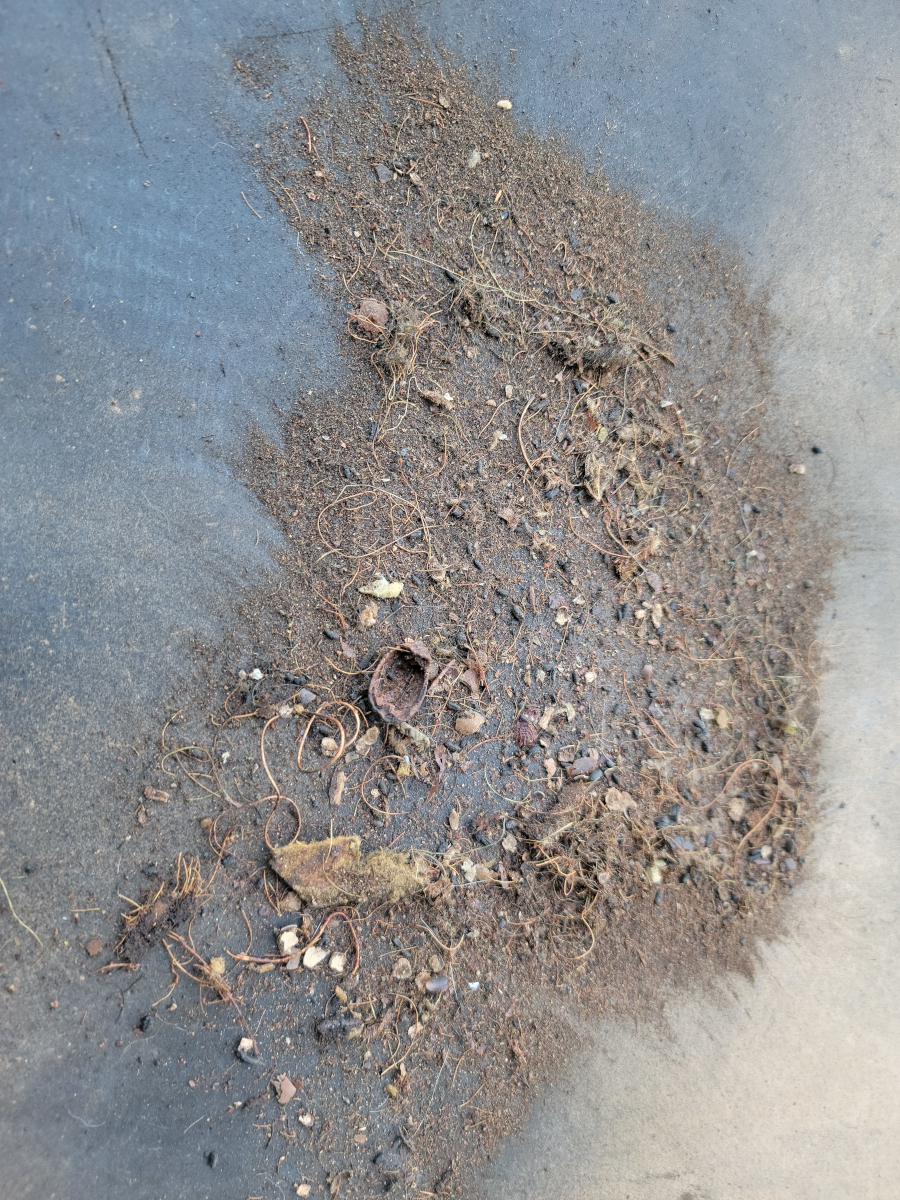
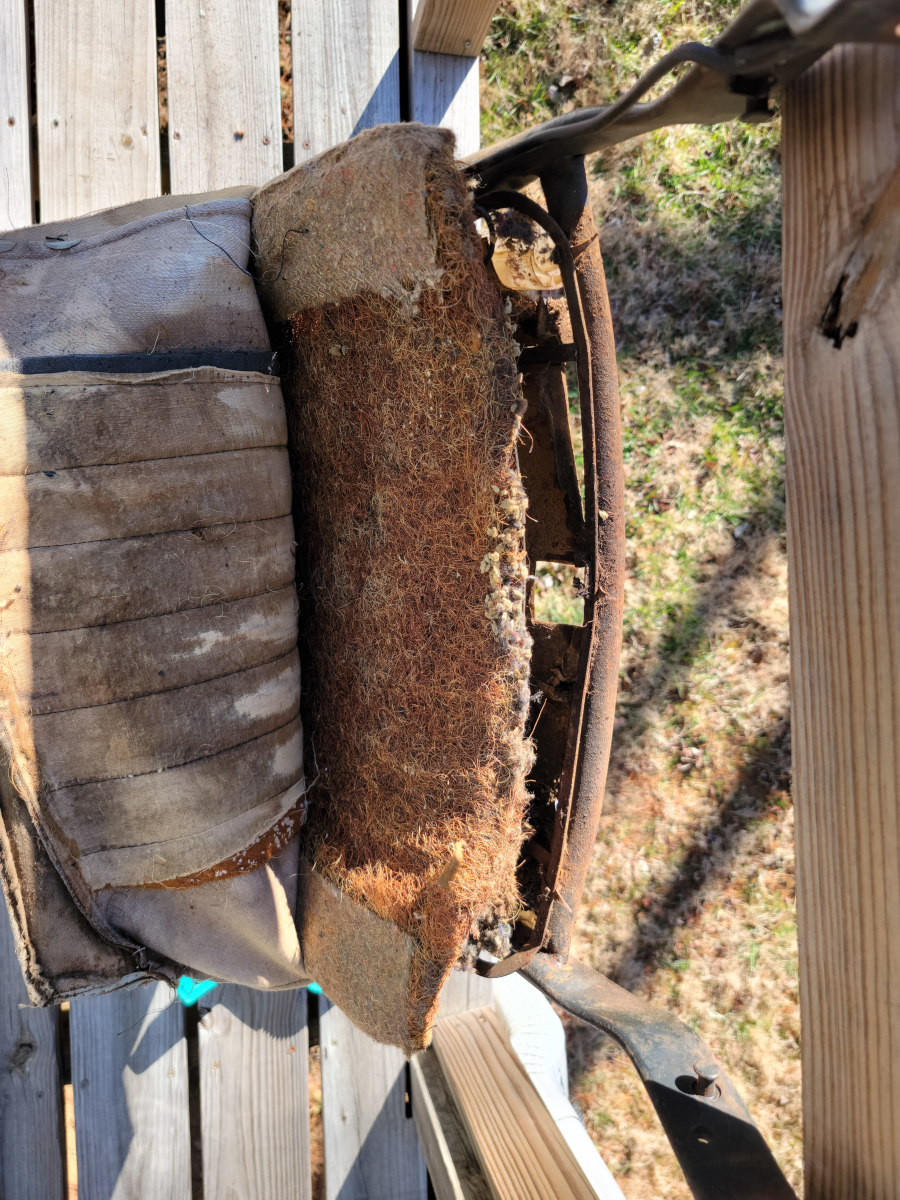
With the back of the seat back removed, we’re presented with a familiar site. More coconut hair.
The inside of the seat back shows it is in pretty rough shape, but not hopeless.
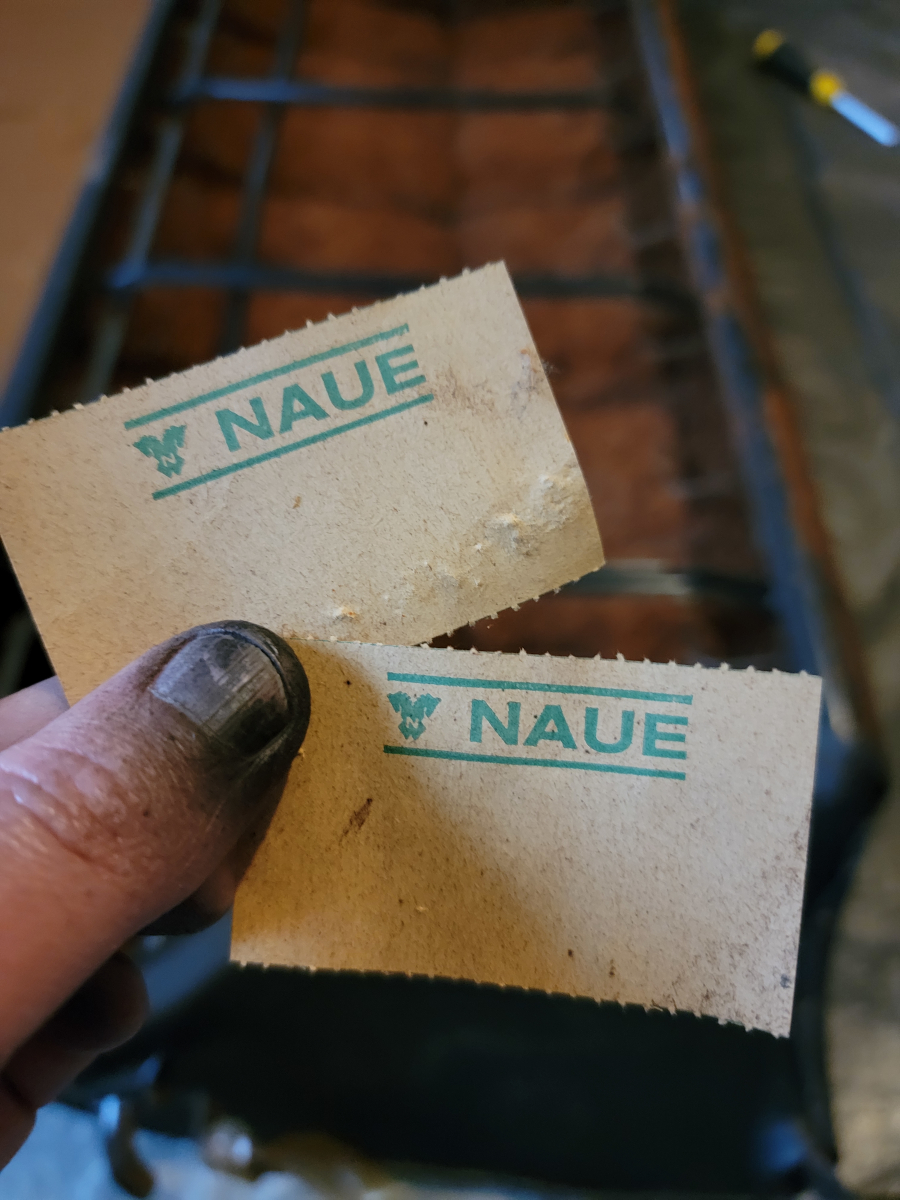
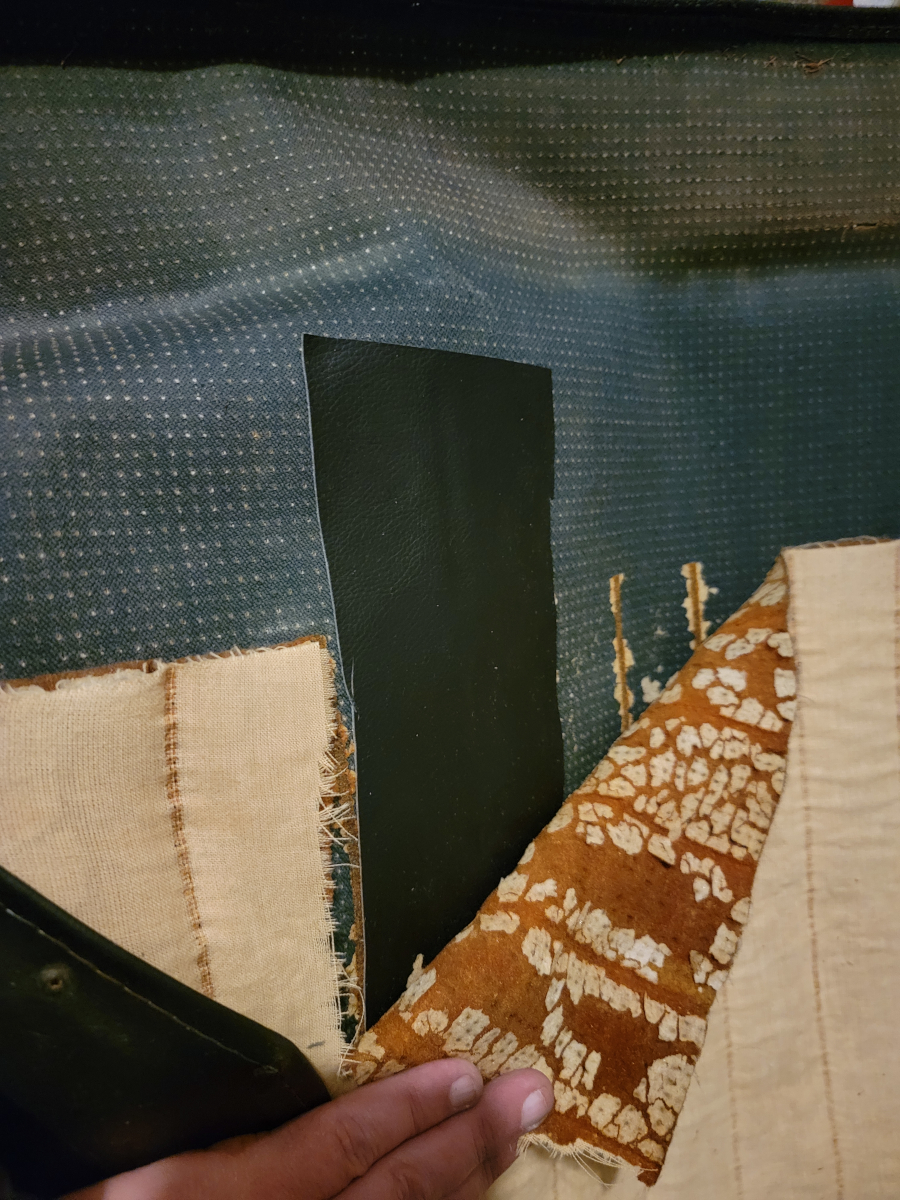
There were two perforated paper tickets I found inside the seat back. NAUE is German for NEW.
That seems like a redundant thing to put inside a seat as the car rolled off the factory floor, so I would imagine this has been replaced at some point? With a naue one, zu buten.
There were a lot of bendy prongs holding the seat cover on this time and there wasn’t evidence of the cover having ever been removed.
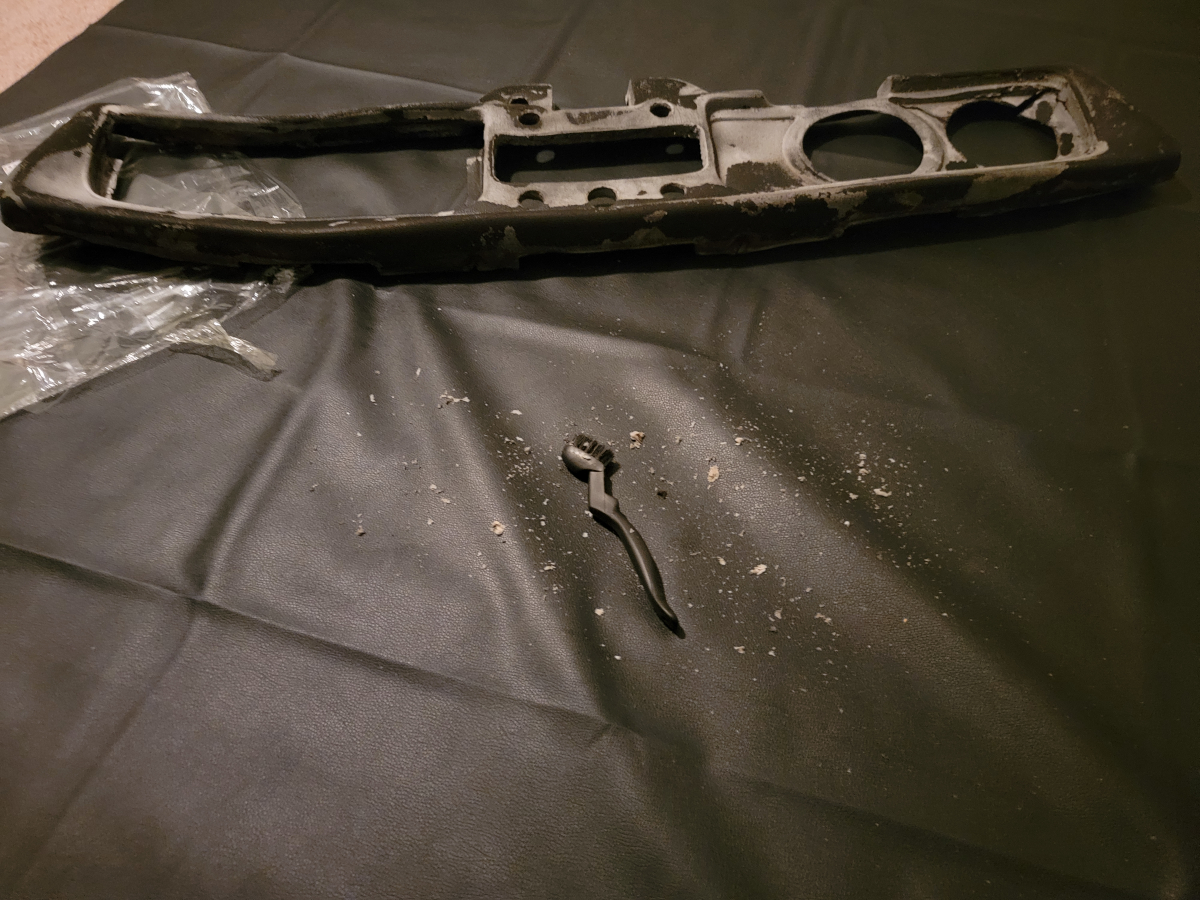
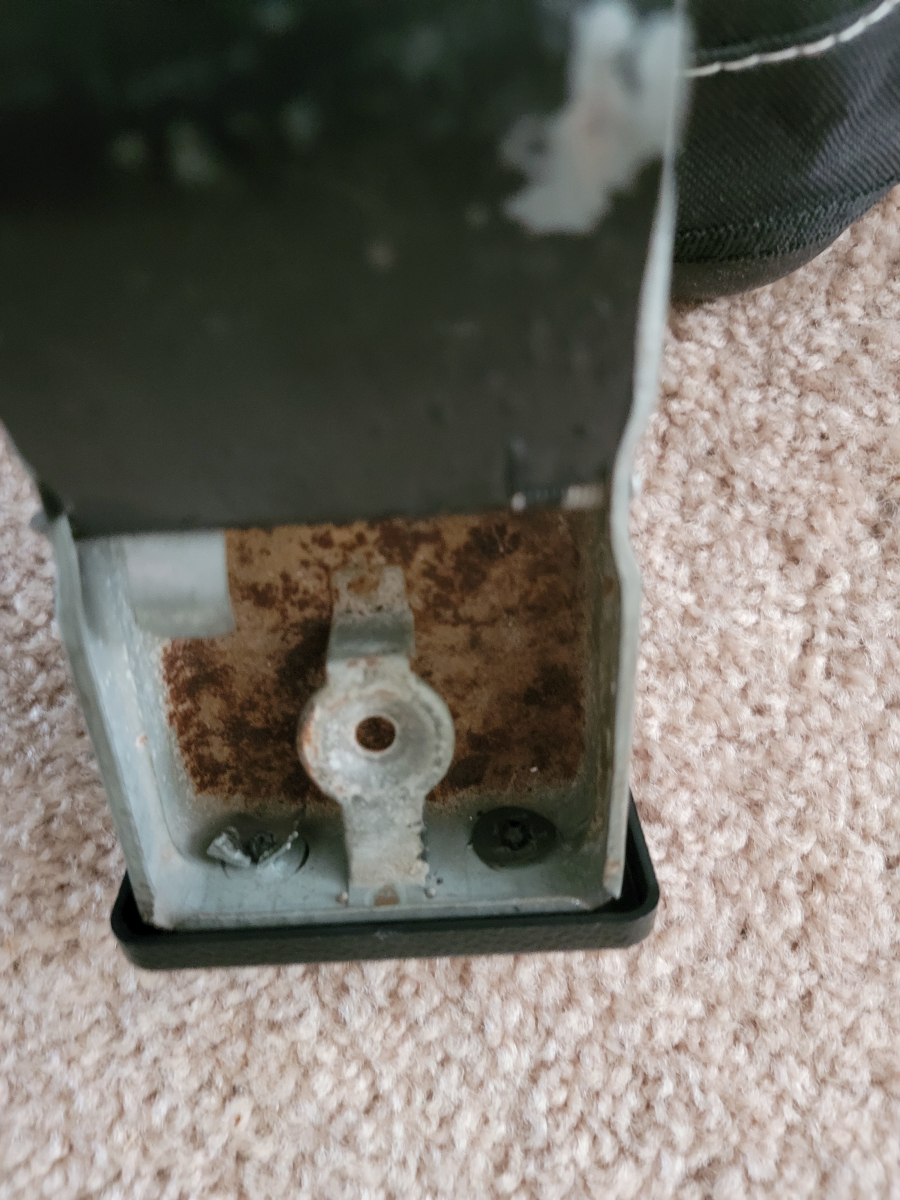
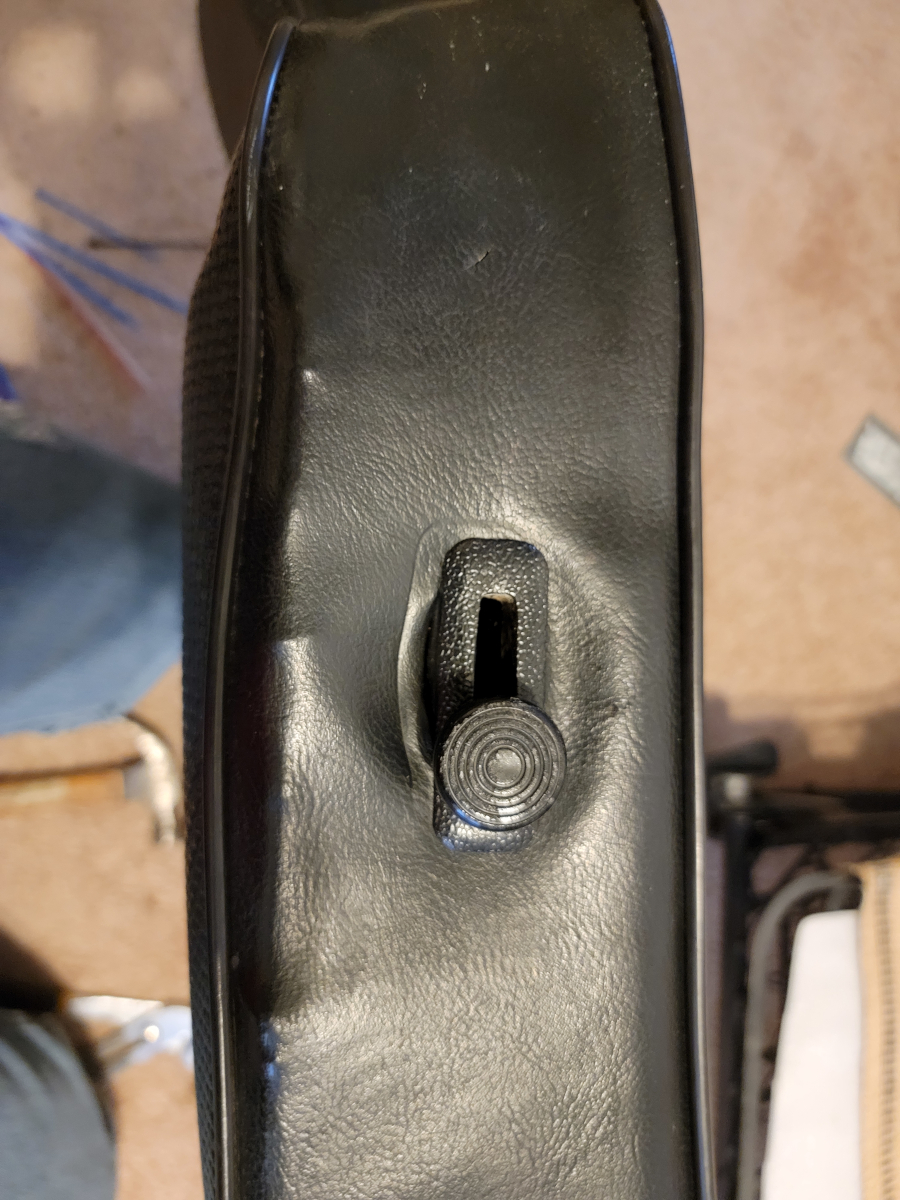
There is a small punch pin holding the plastic trim ring around the business end of the seat release lever. <foreshadowing>I definitely need to keep track of that part so as not to lose it!</foreshadowing>
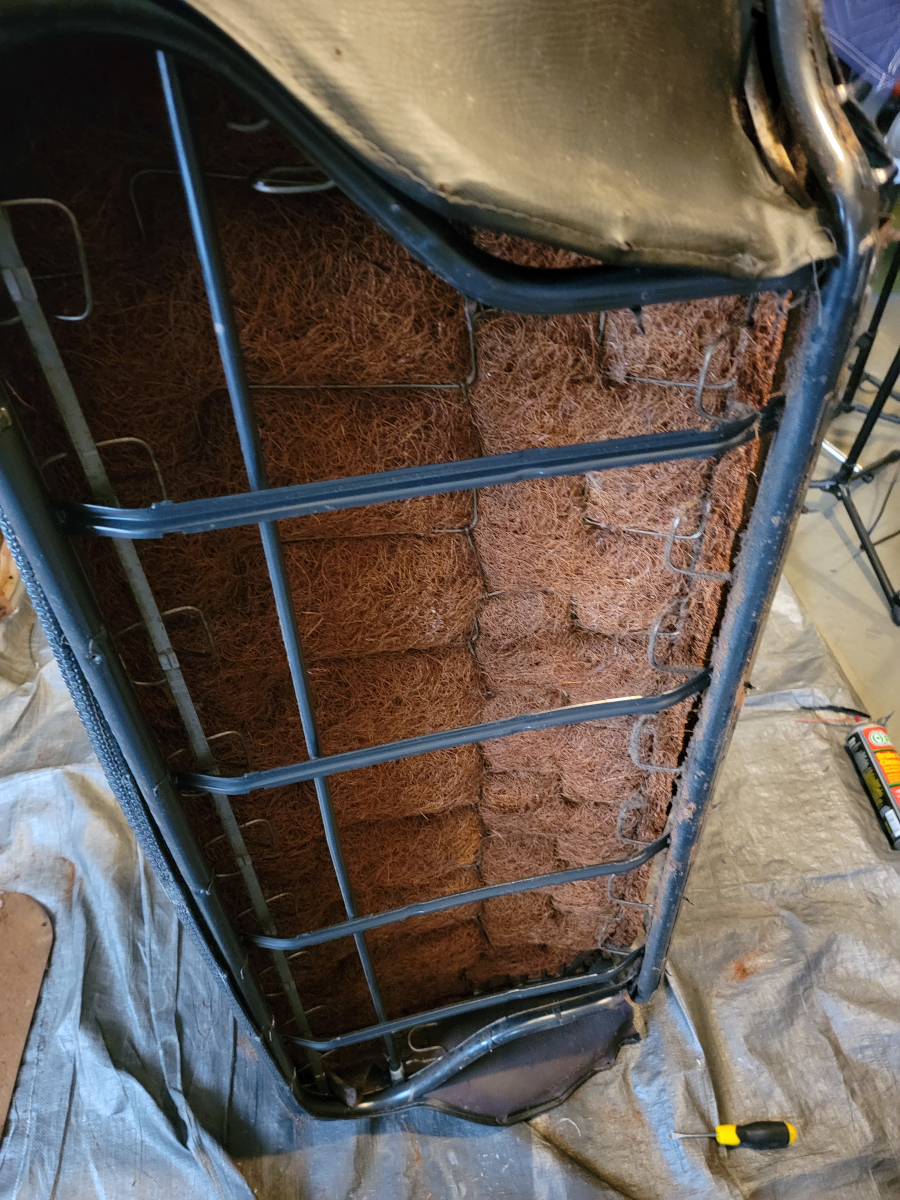
With the seat cover removed, I saw a familiar sight, the padding wrapped coconut hair cushion mat.
No extra layers of bubble wrap and random other packing materials, no second seat covers inside. This time it was a straightforward removal.
Cleanup
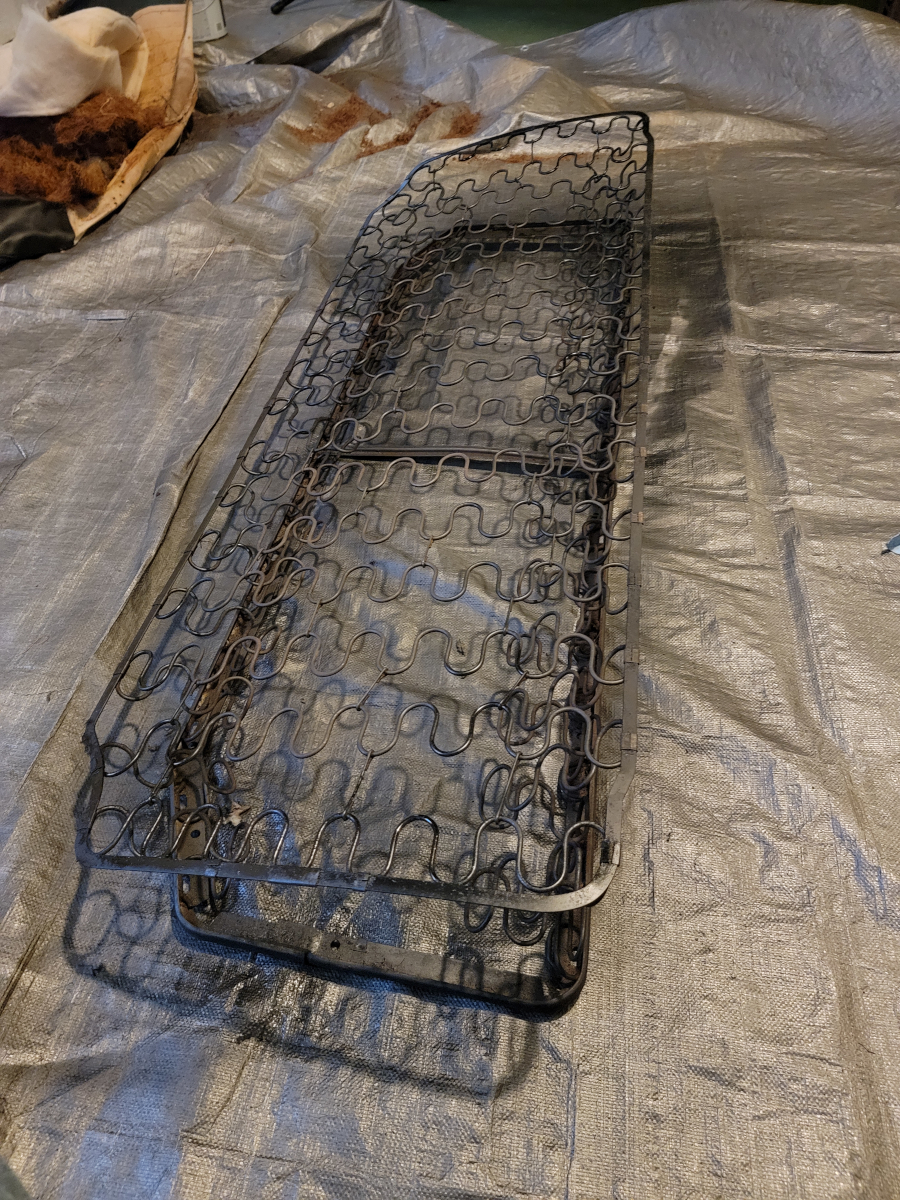
I hosed the frame down with brake parts cleaner, then wiped it dry. Then, of course, sprayed the rust barrier…
and engine enamel.
I resprayed that top aluminum (or whatever) trim piece as well, though it was in good shape already.
There was a chunk of fiber board that was broken and the vinyl backing was peeled up. I glued it up with Gorilla Clear Grip and clamped it in a vice grip to let it dry. The metal support plate on the opposite edge had also come loose. Glued and gripped.
Rebuilding
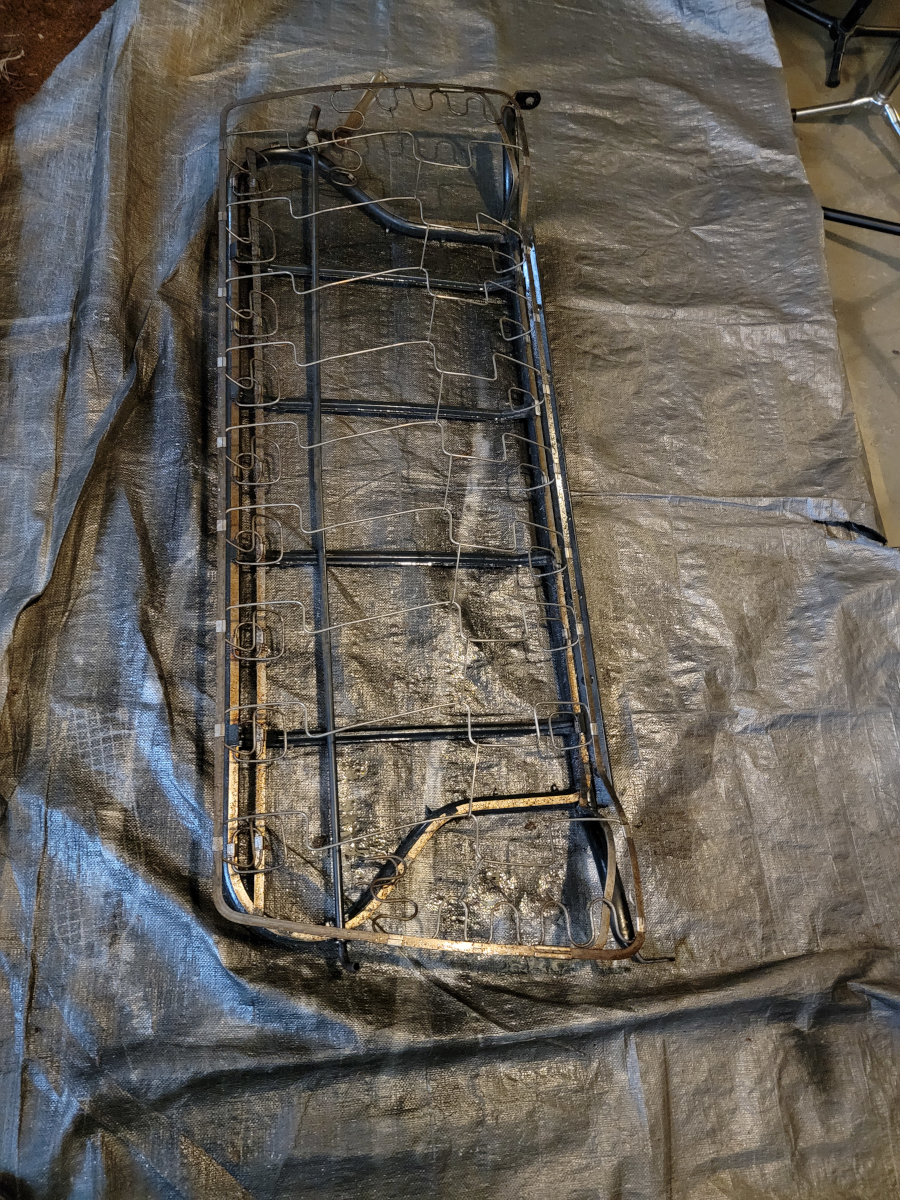
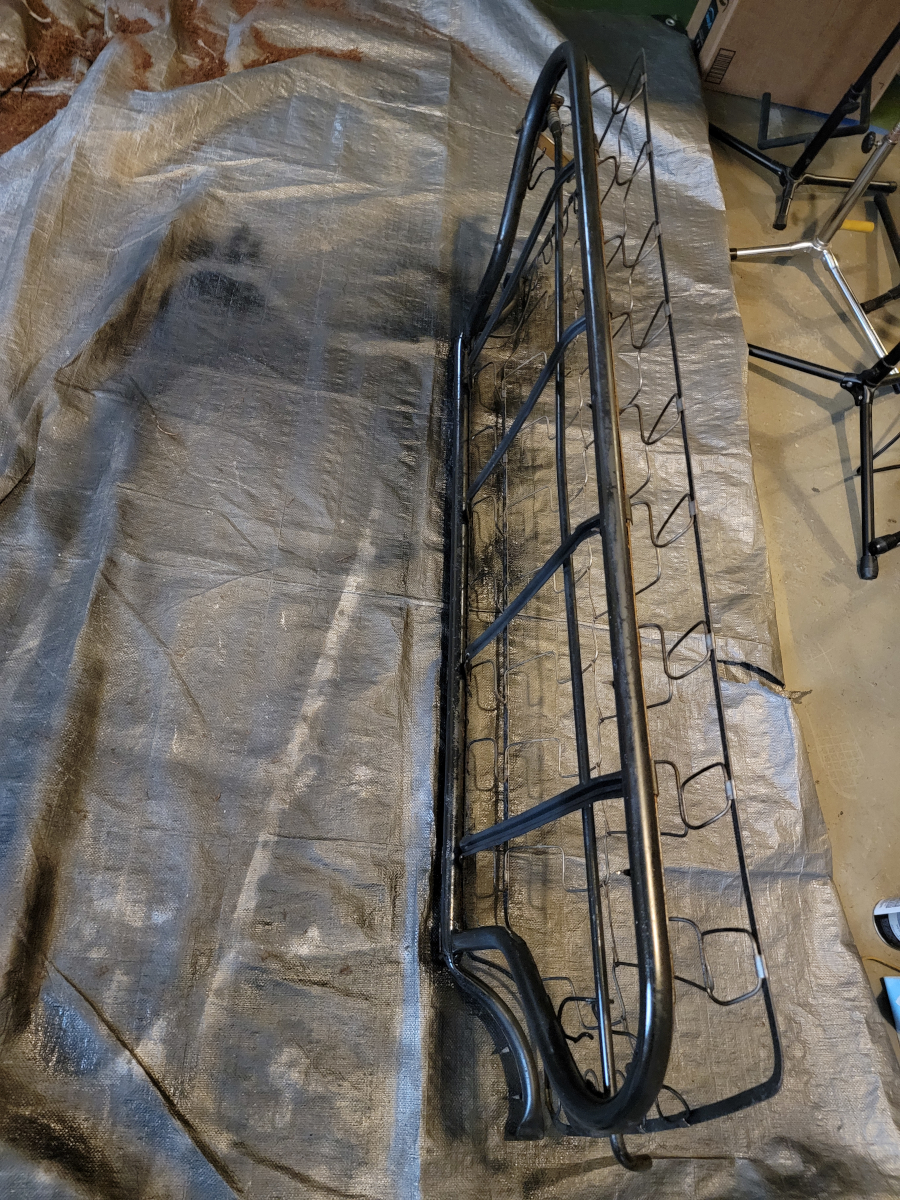
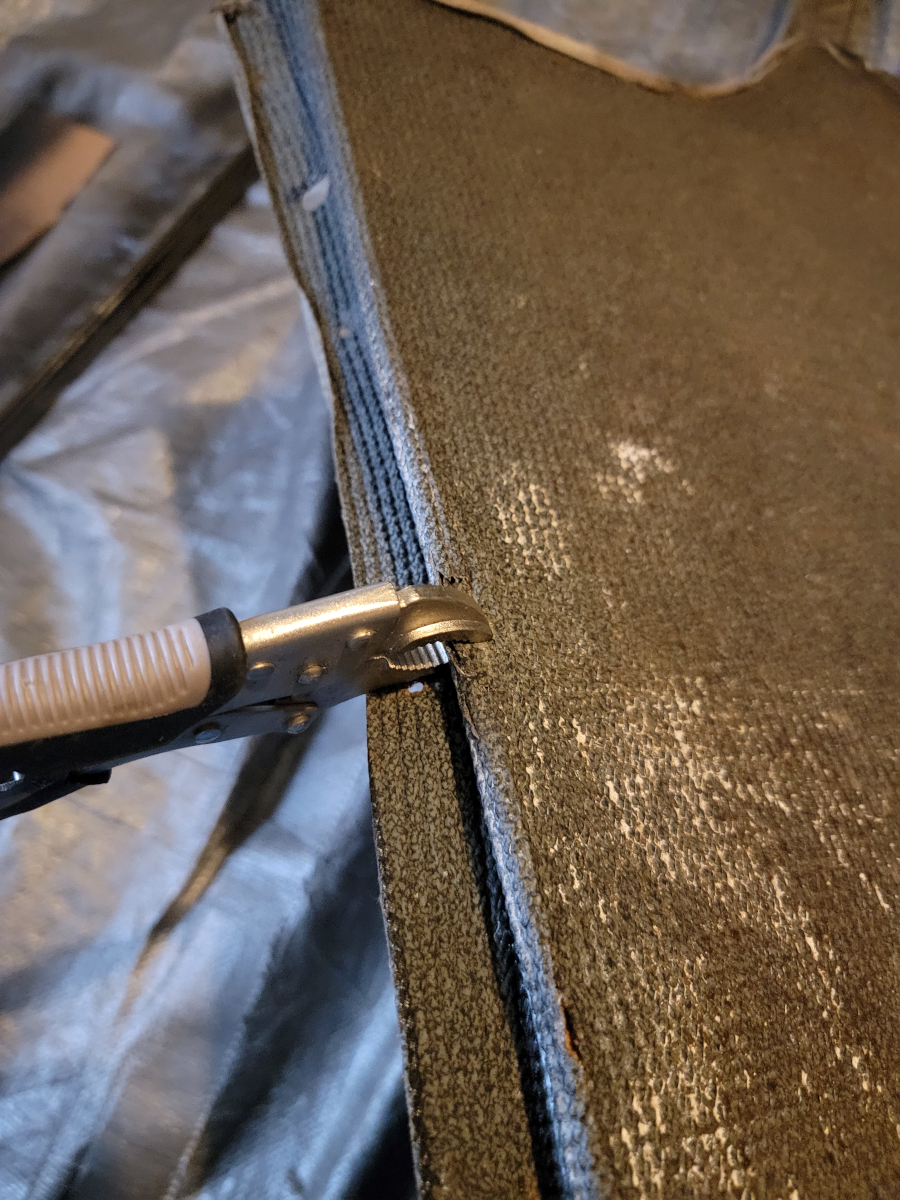
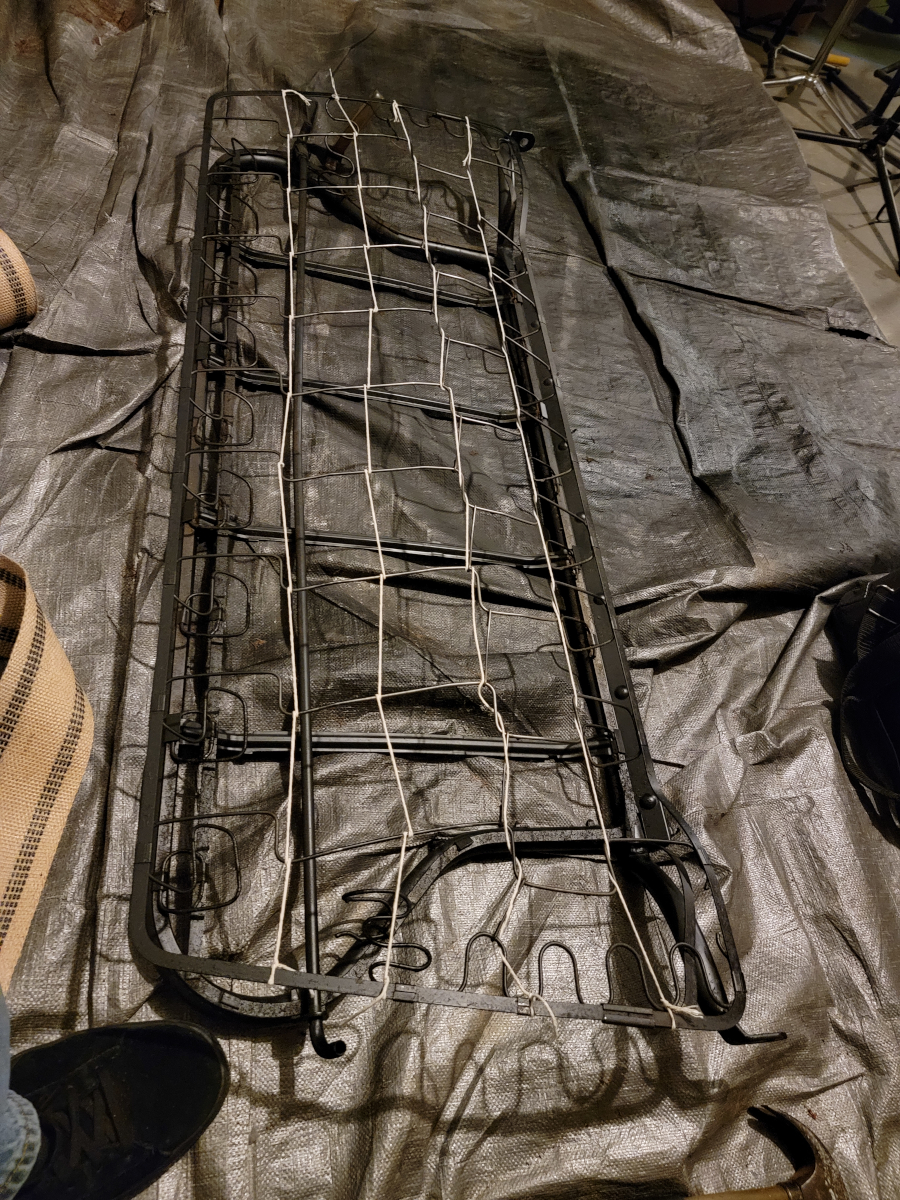
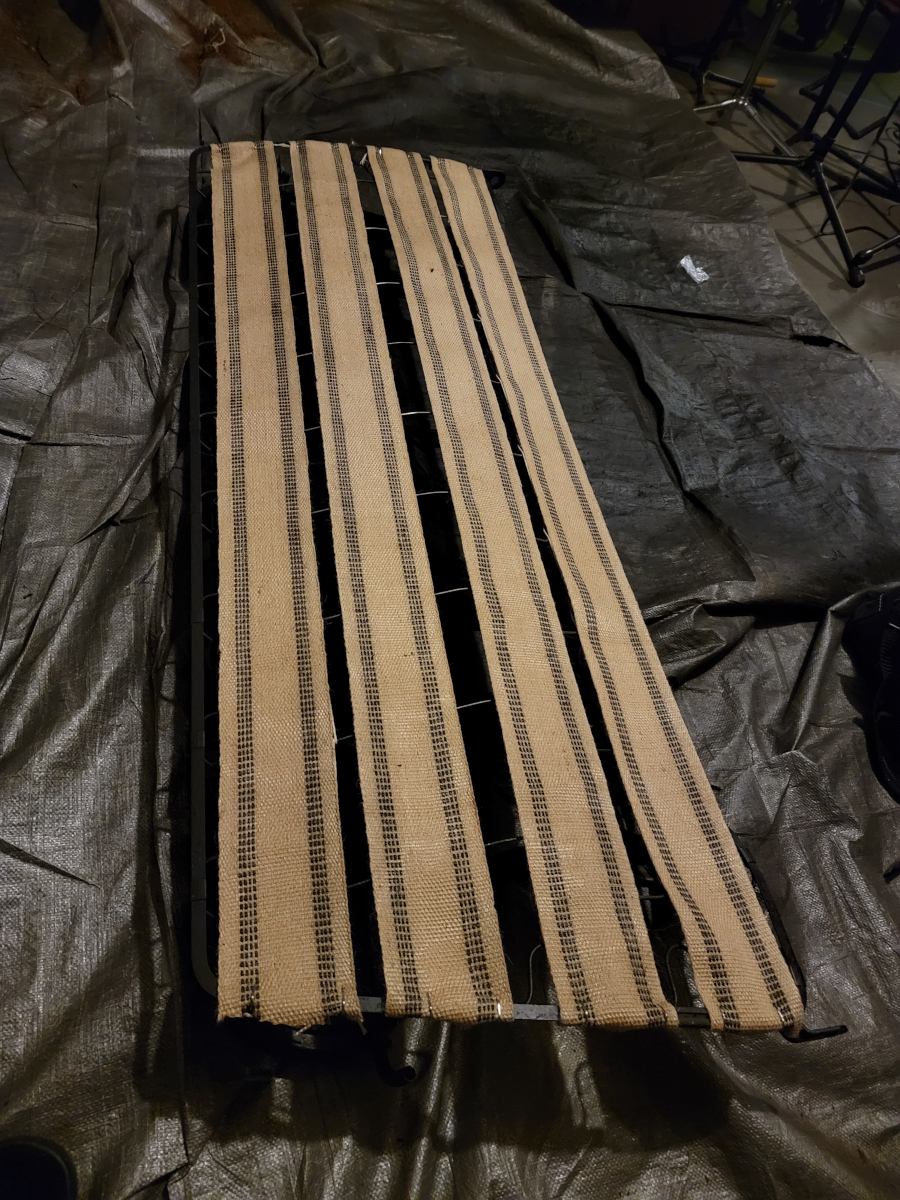
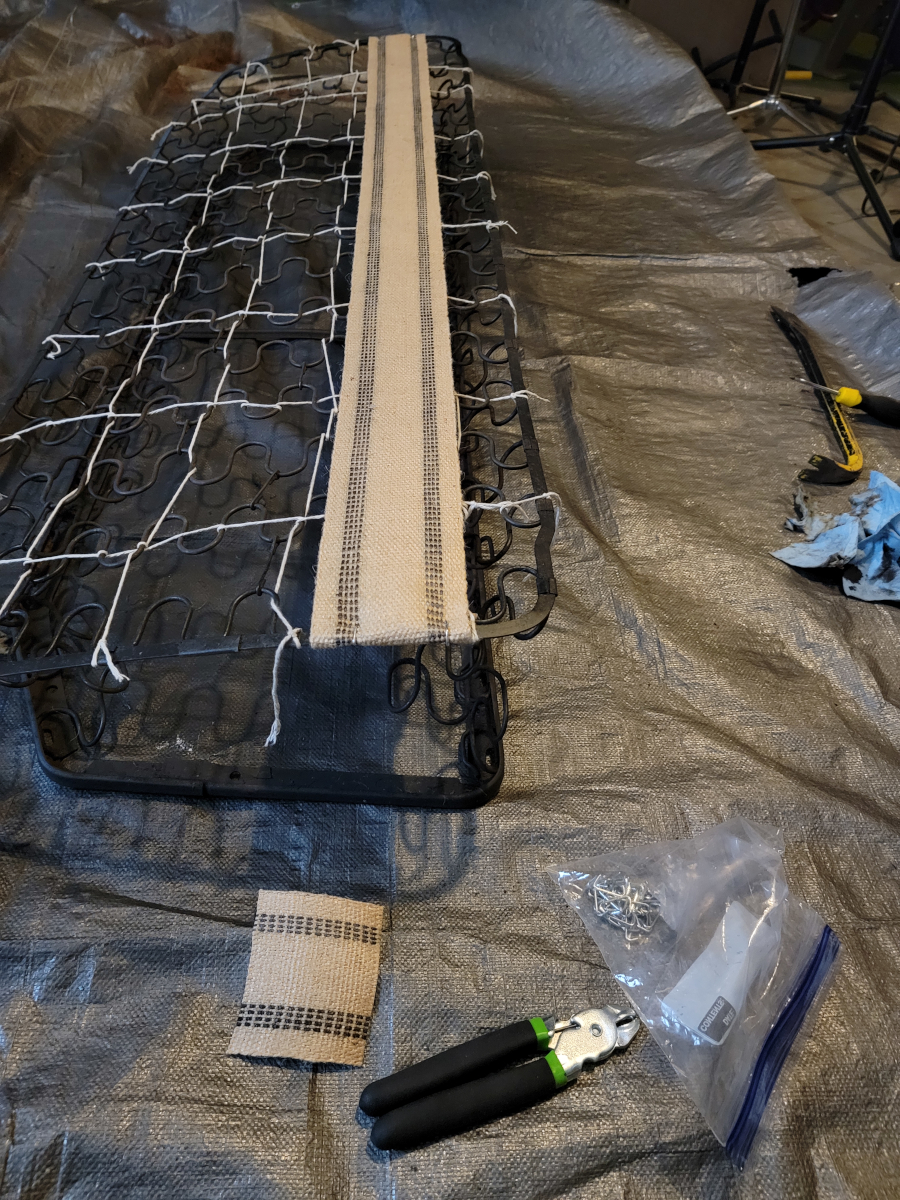
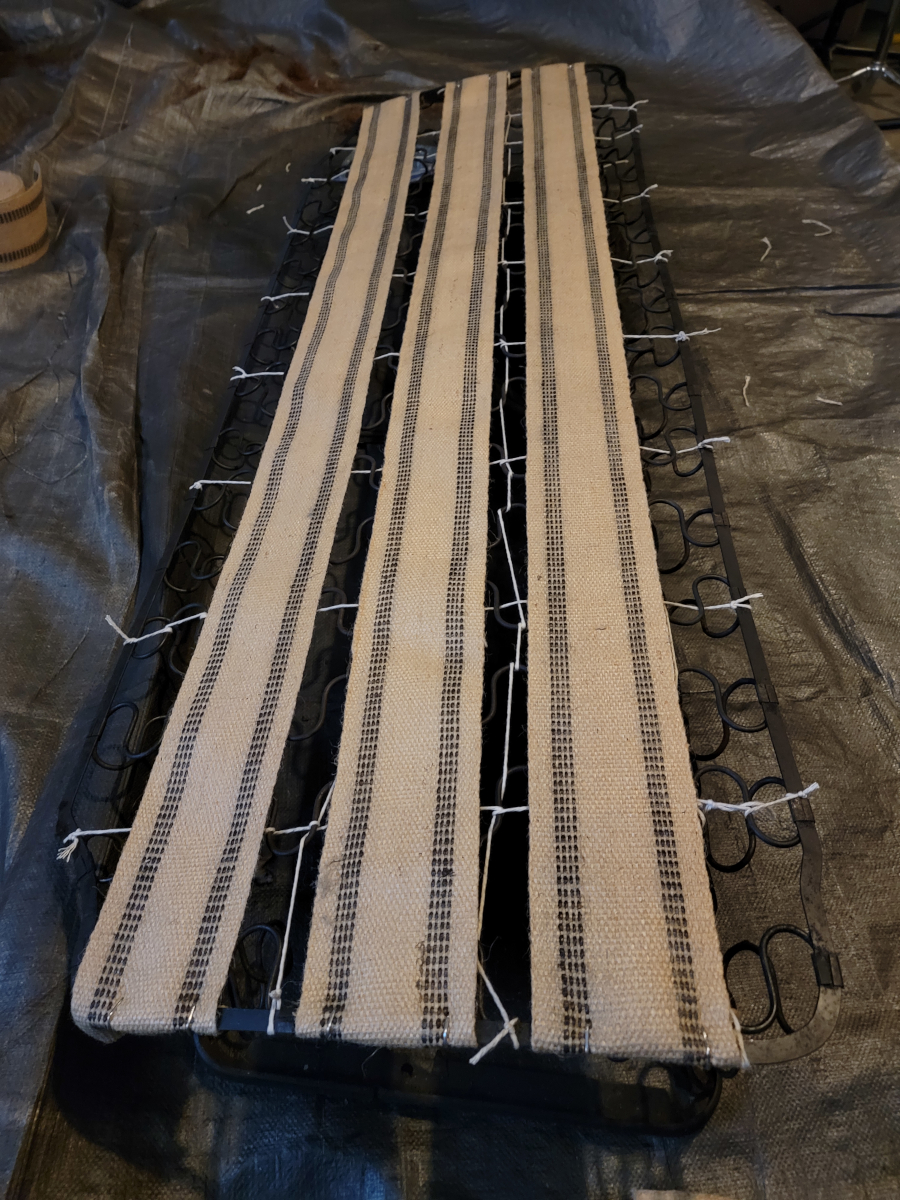
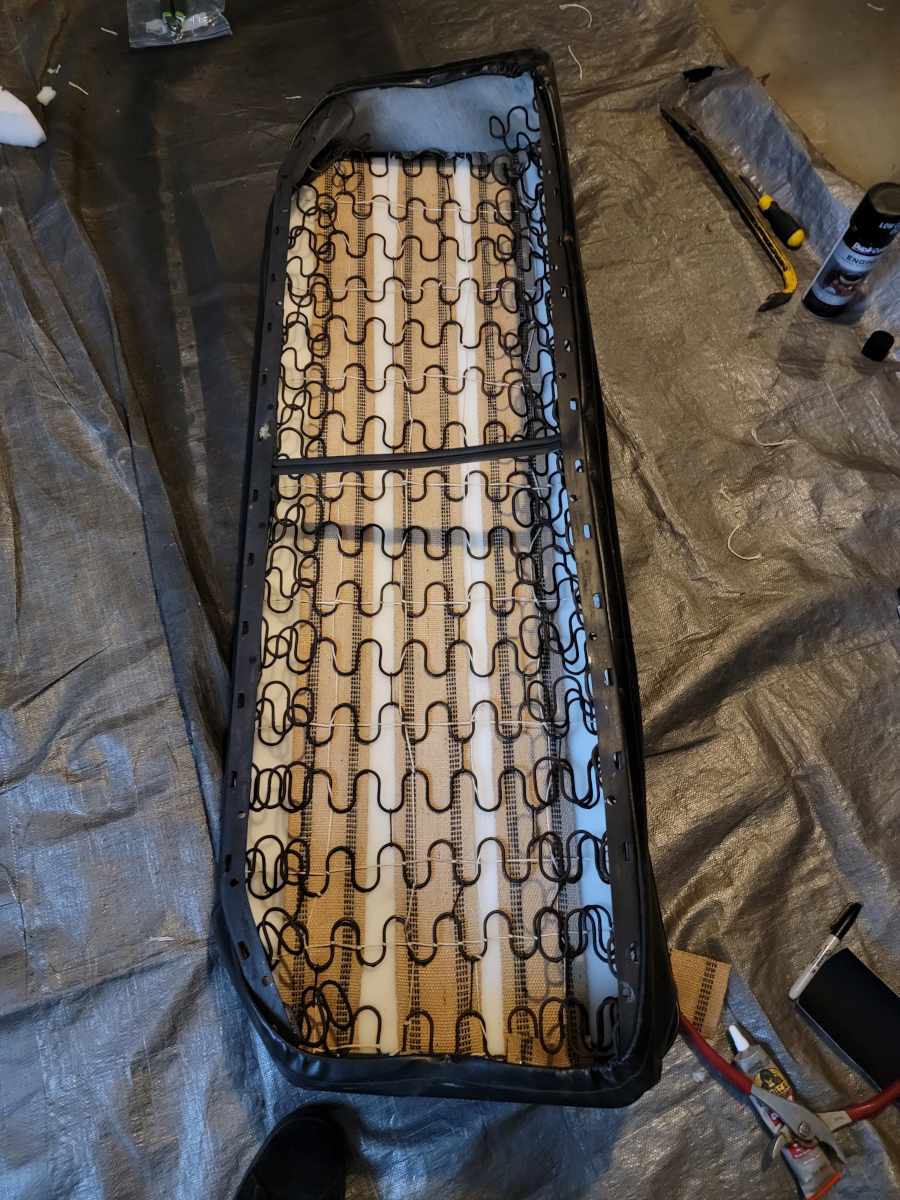
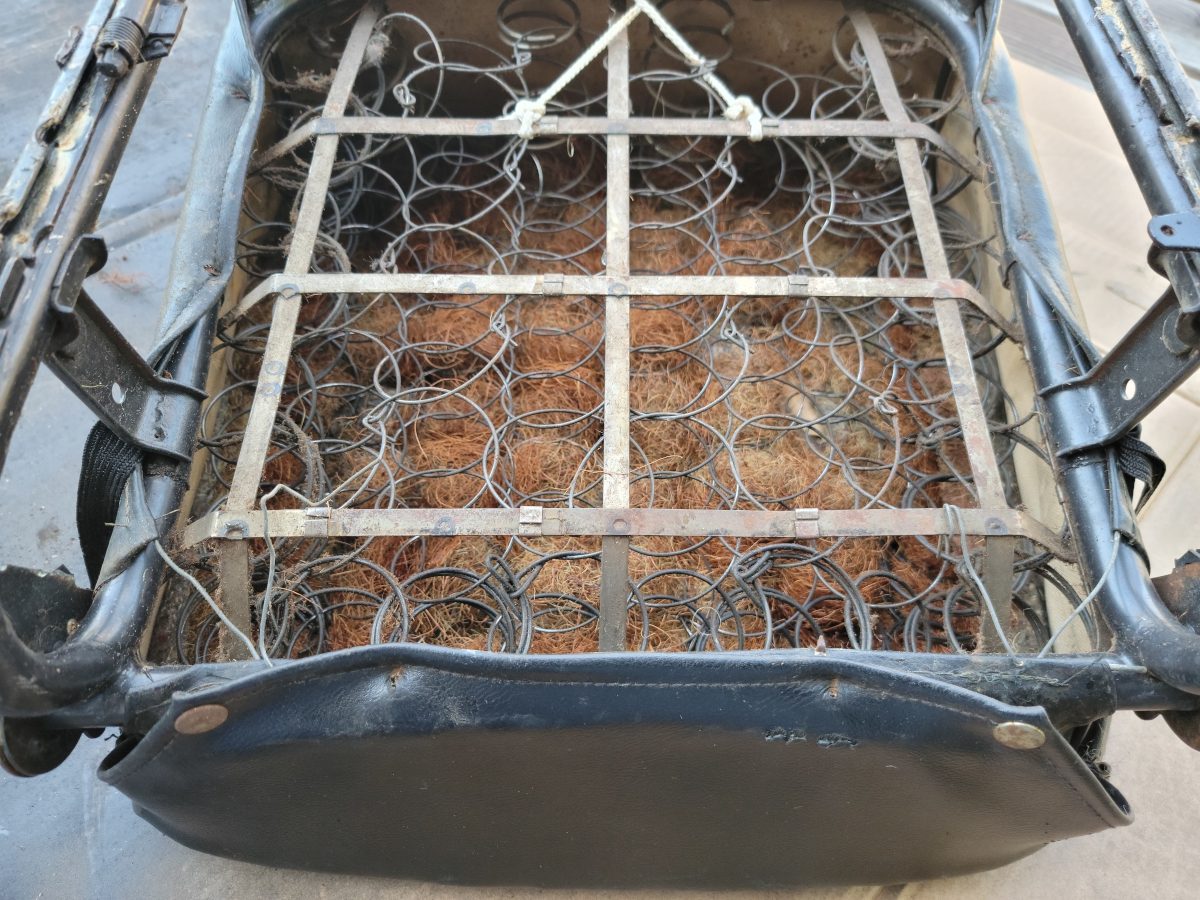
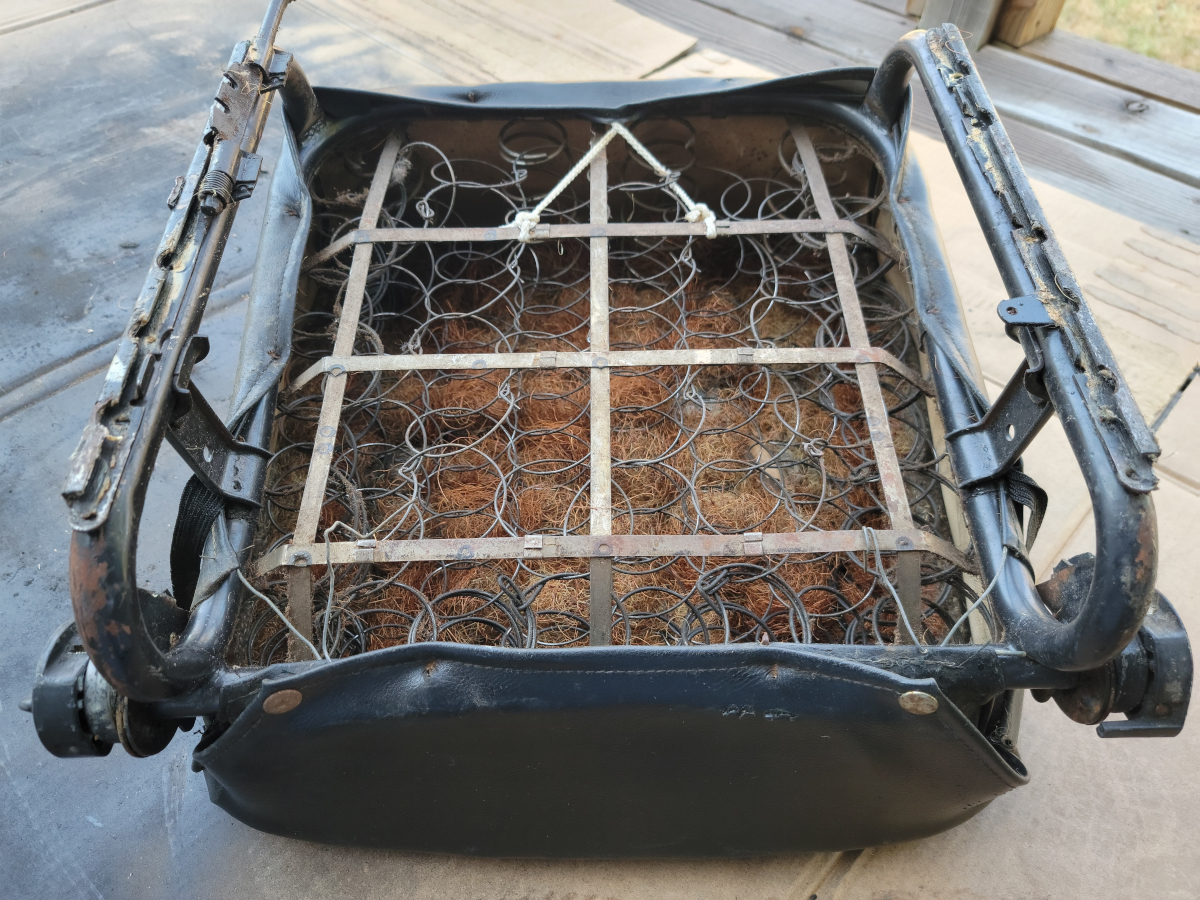
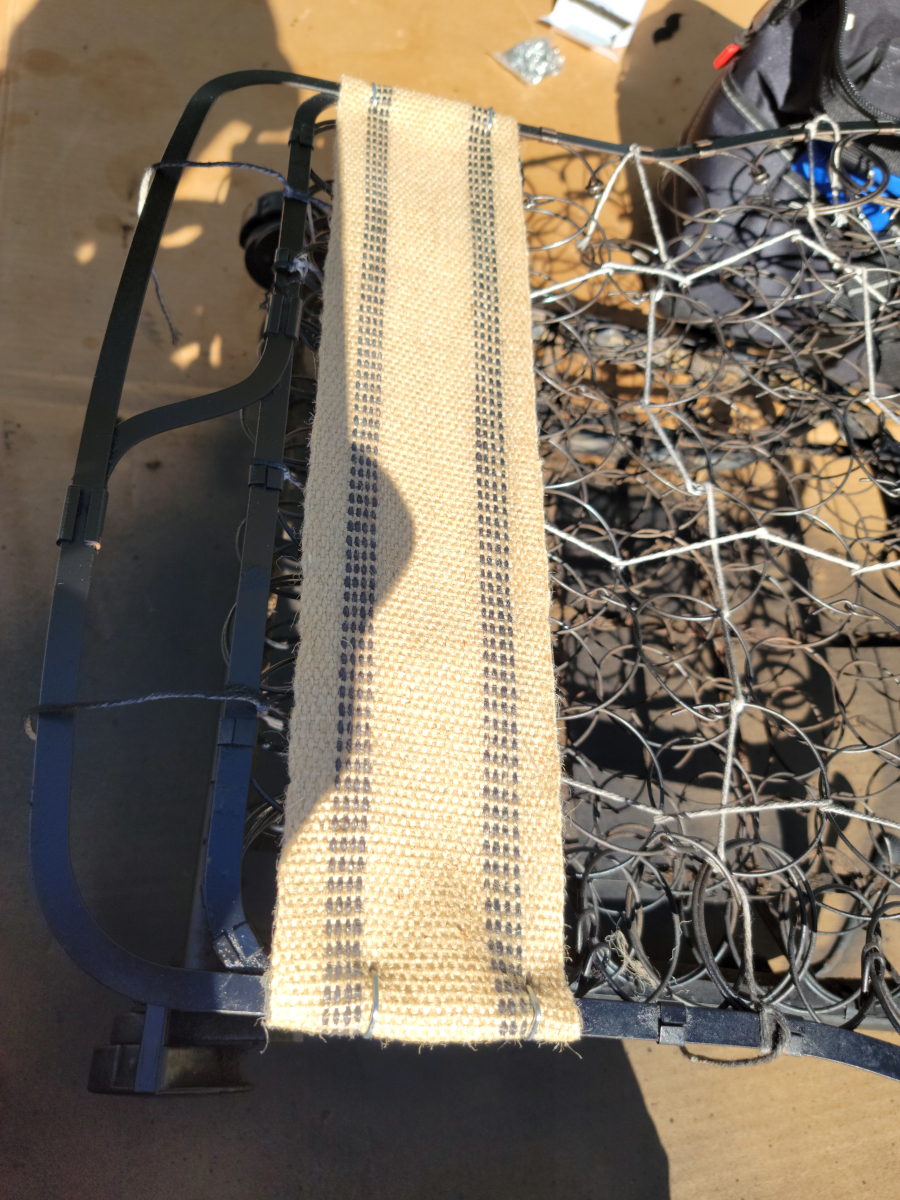
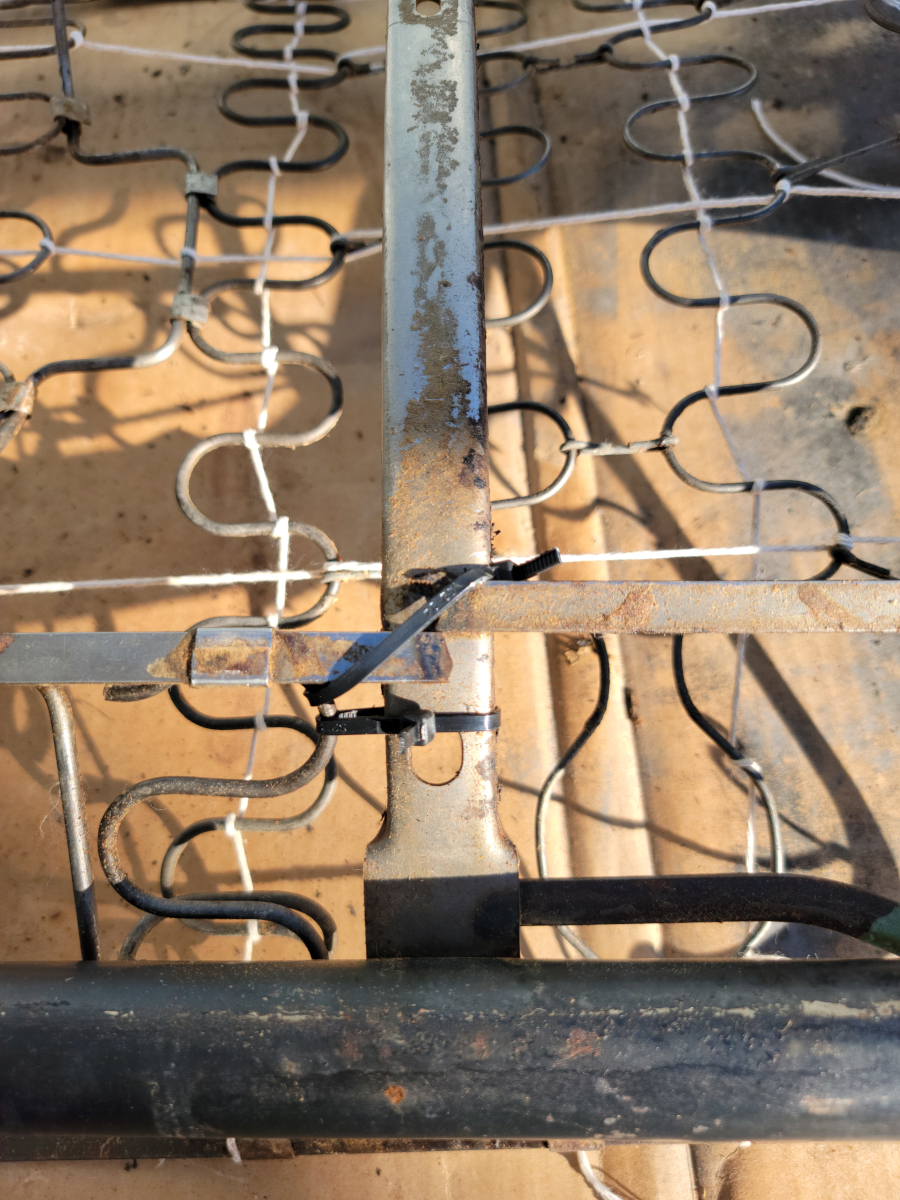
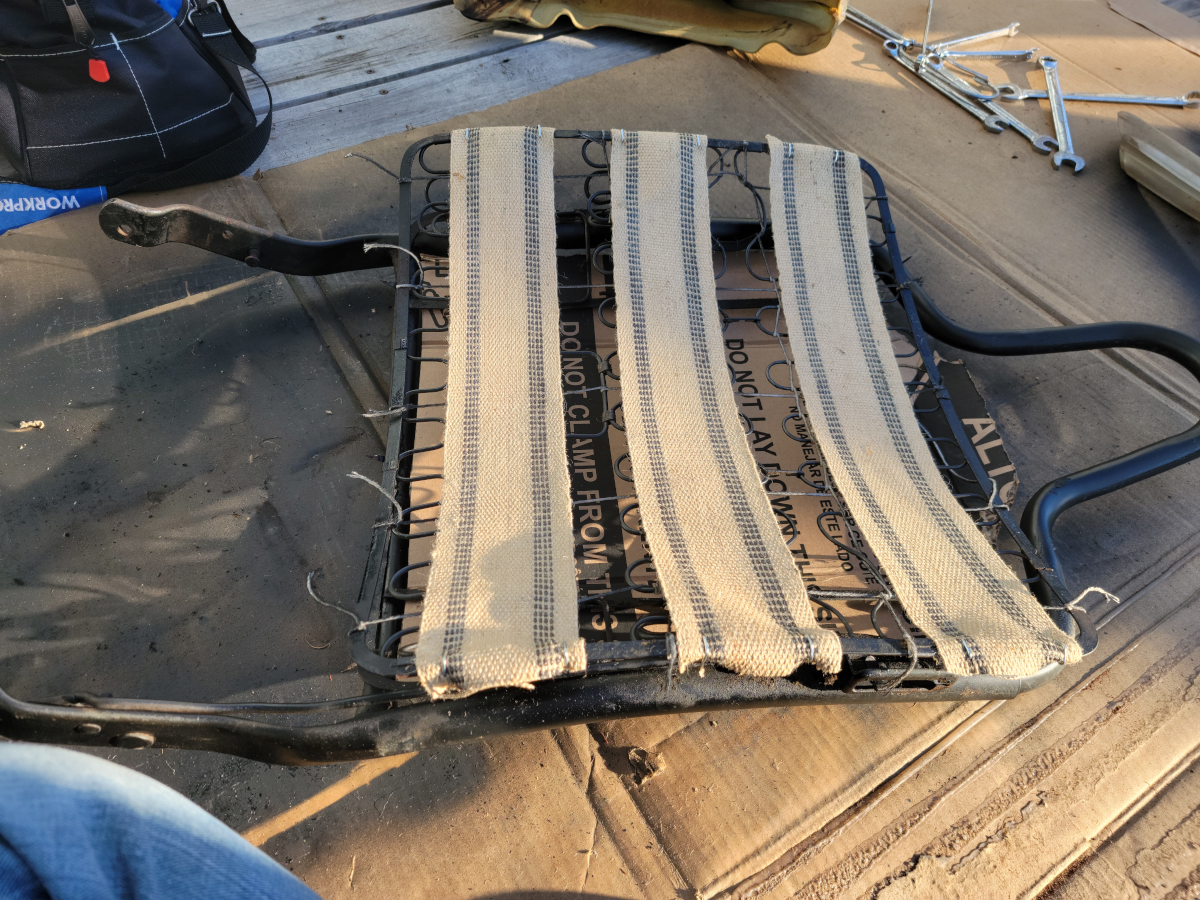
And then it was time for the twine tied grid-work.
And then jute webbing.
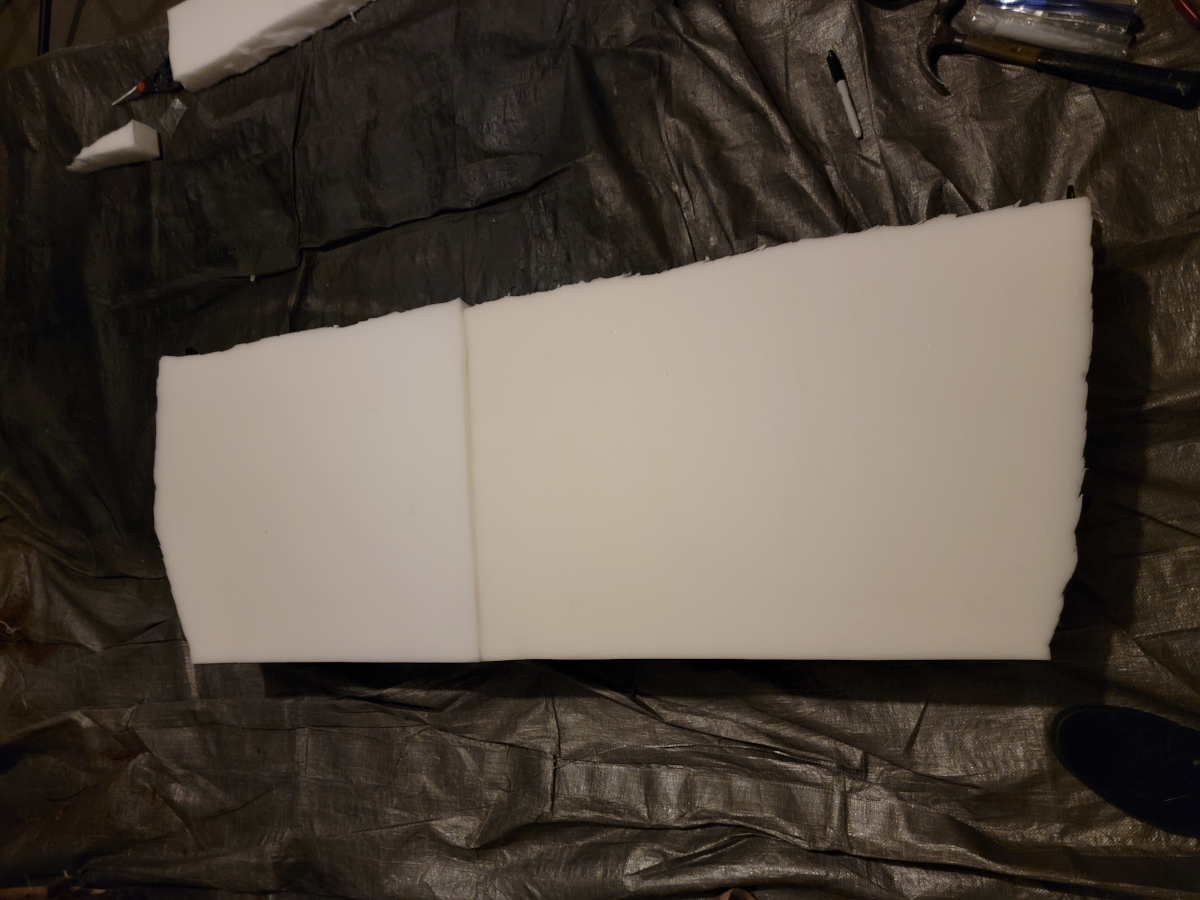
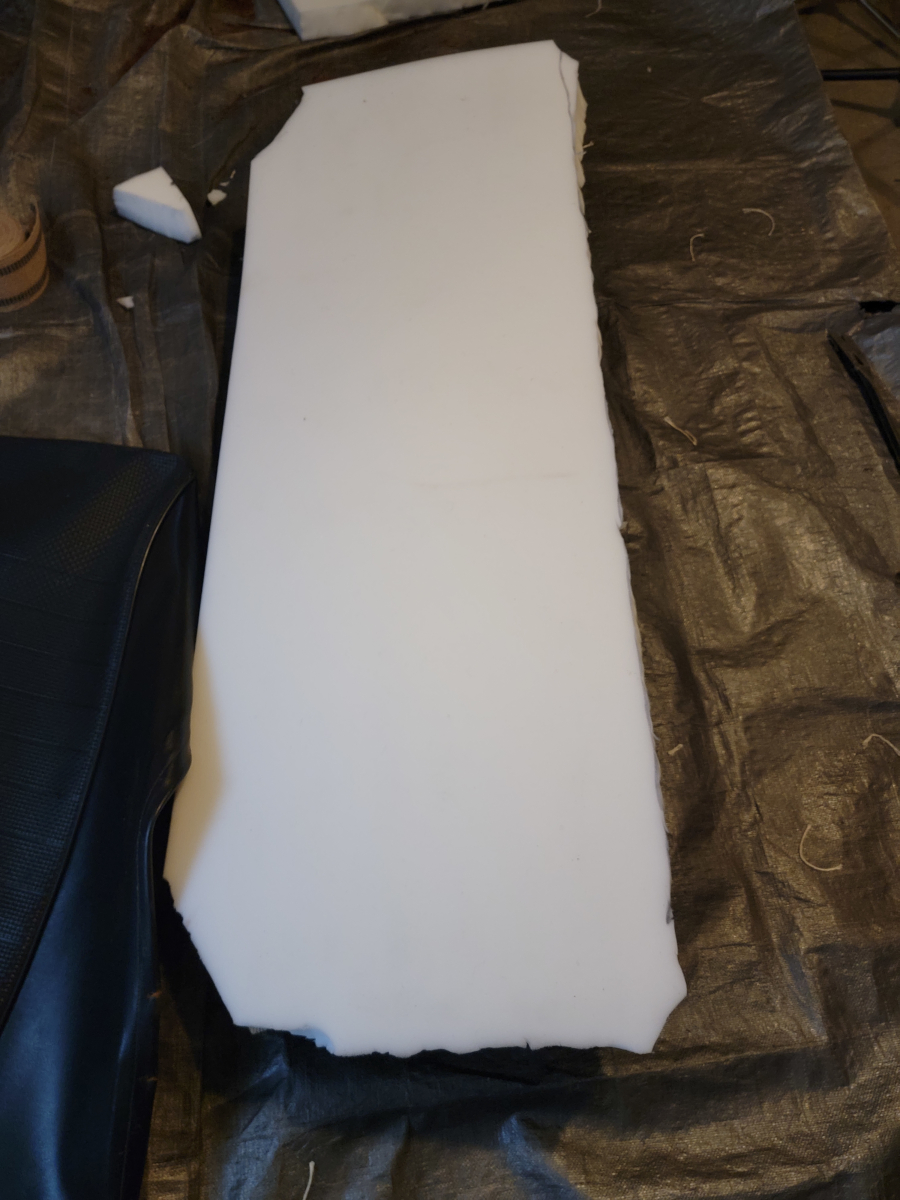
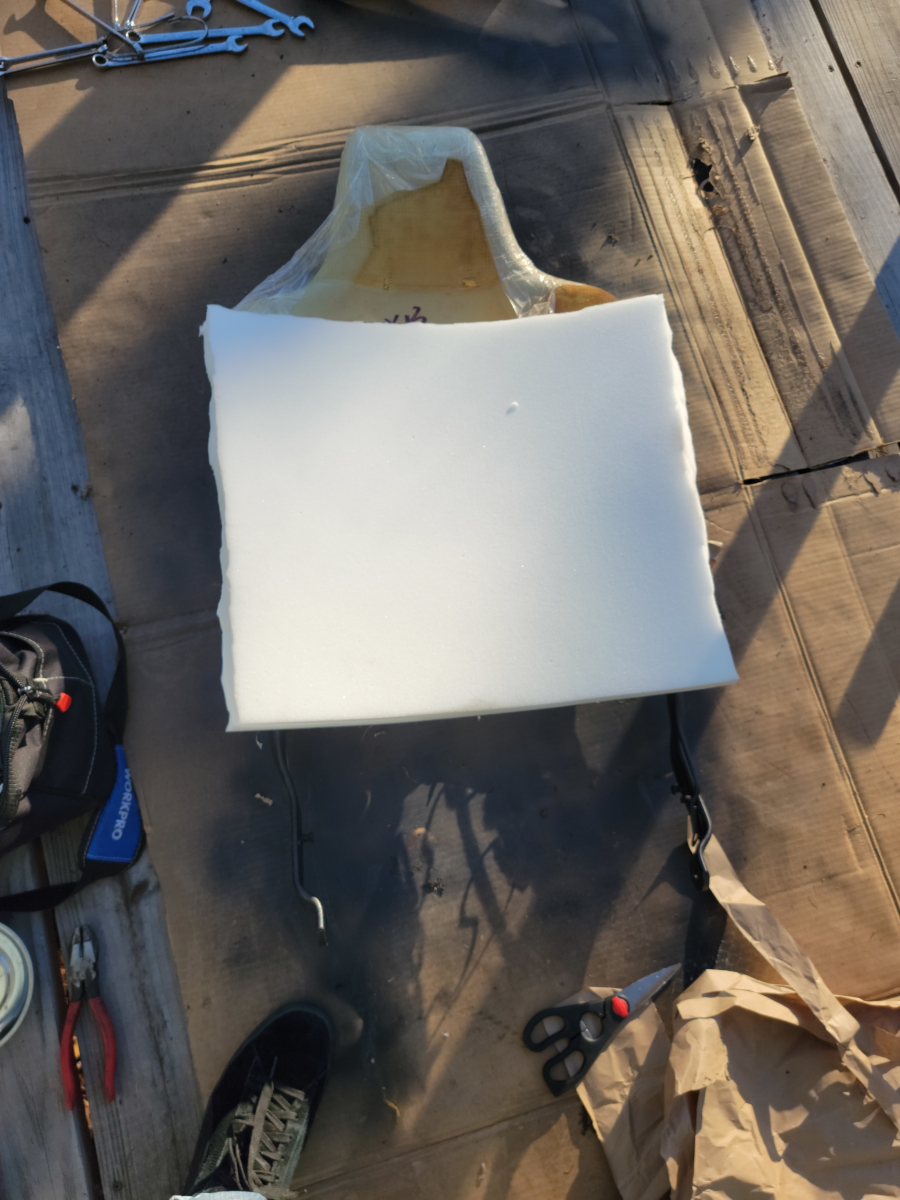
I had the two cut foam pieces from before and shaped them to fit the frame.
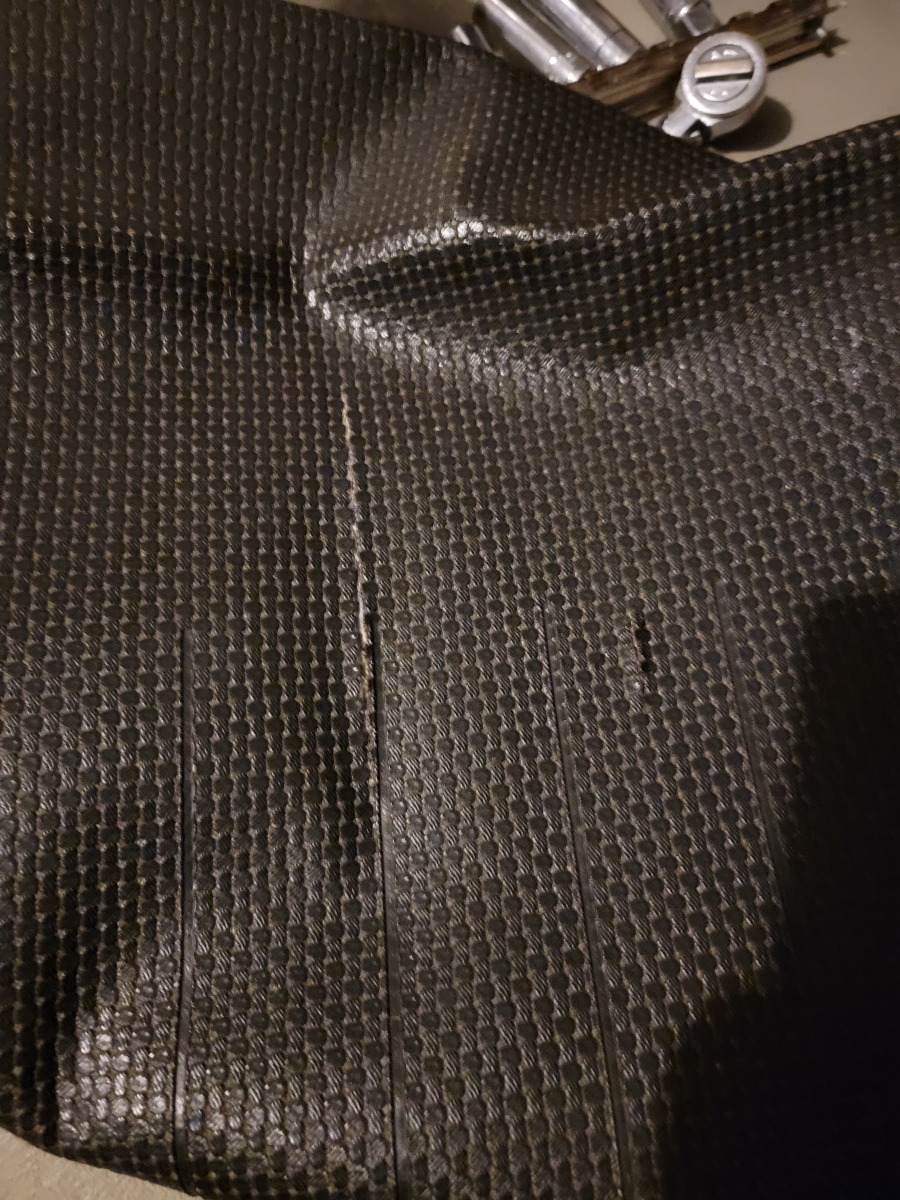
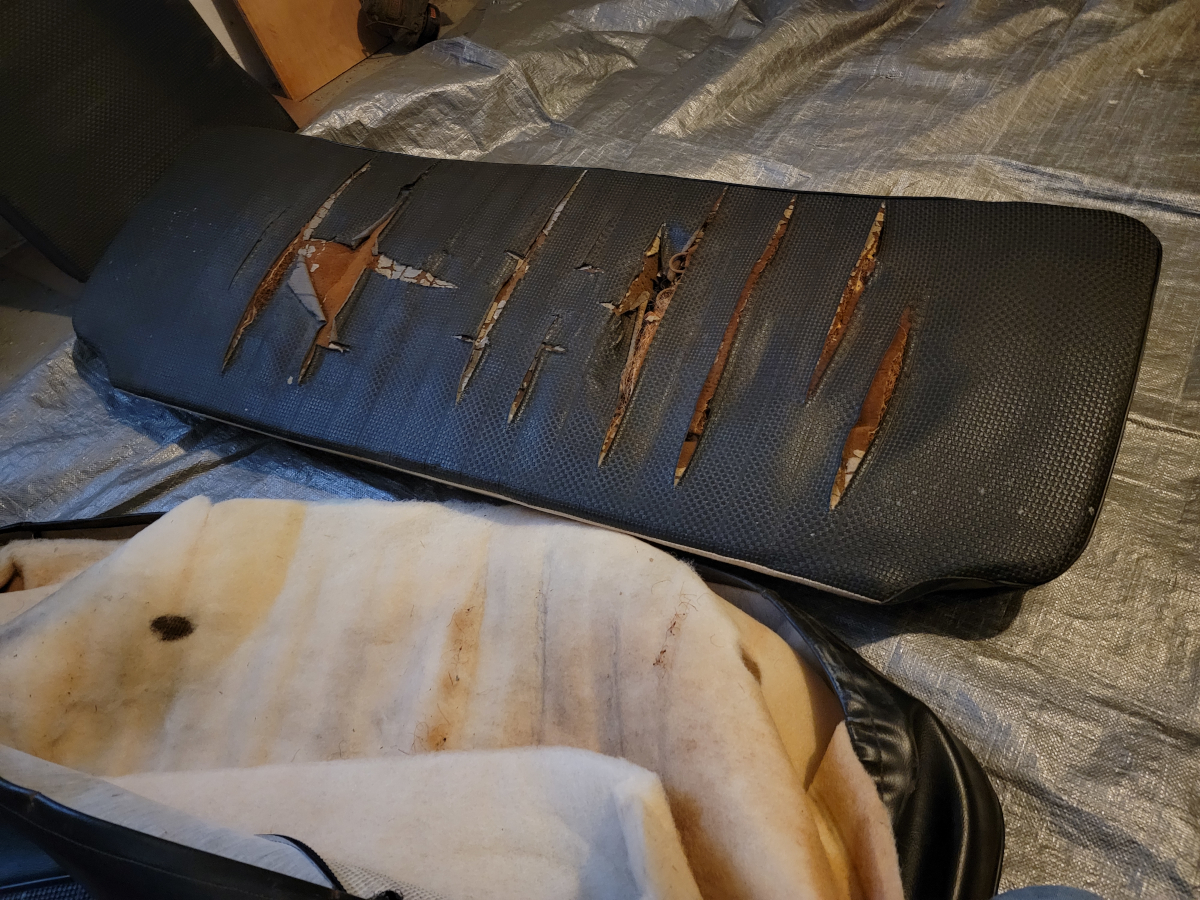
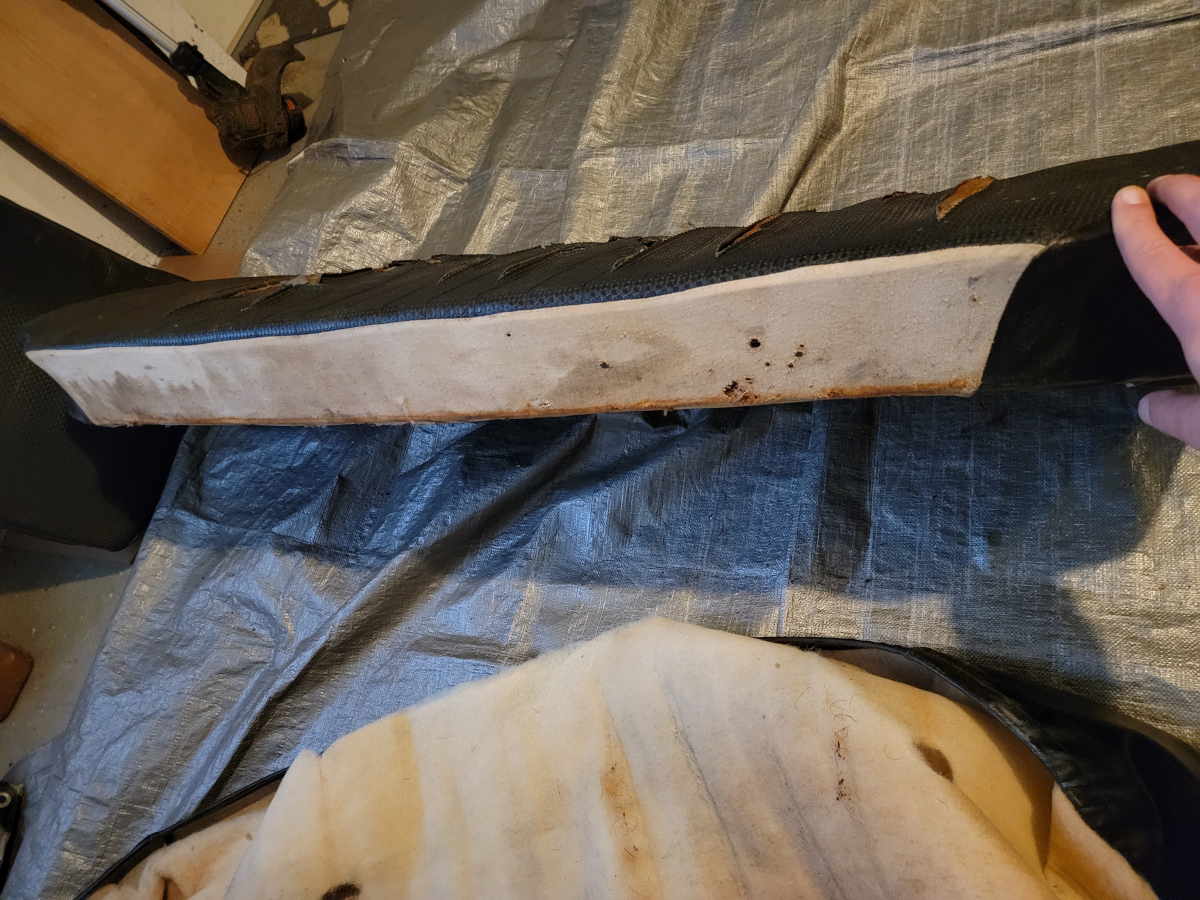
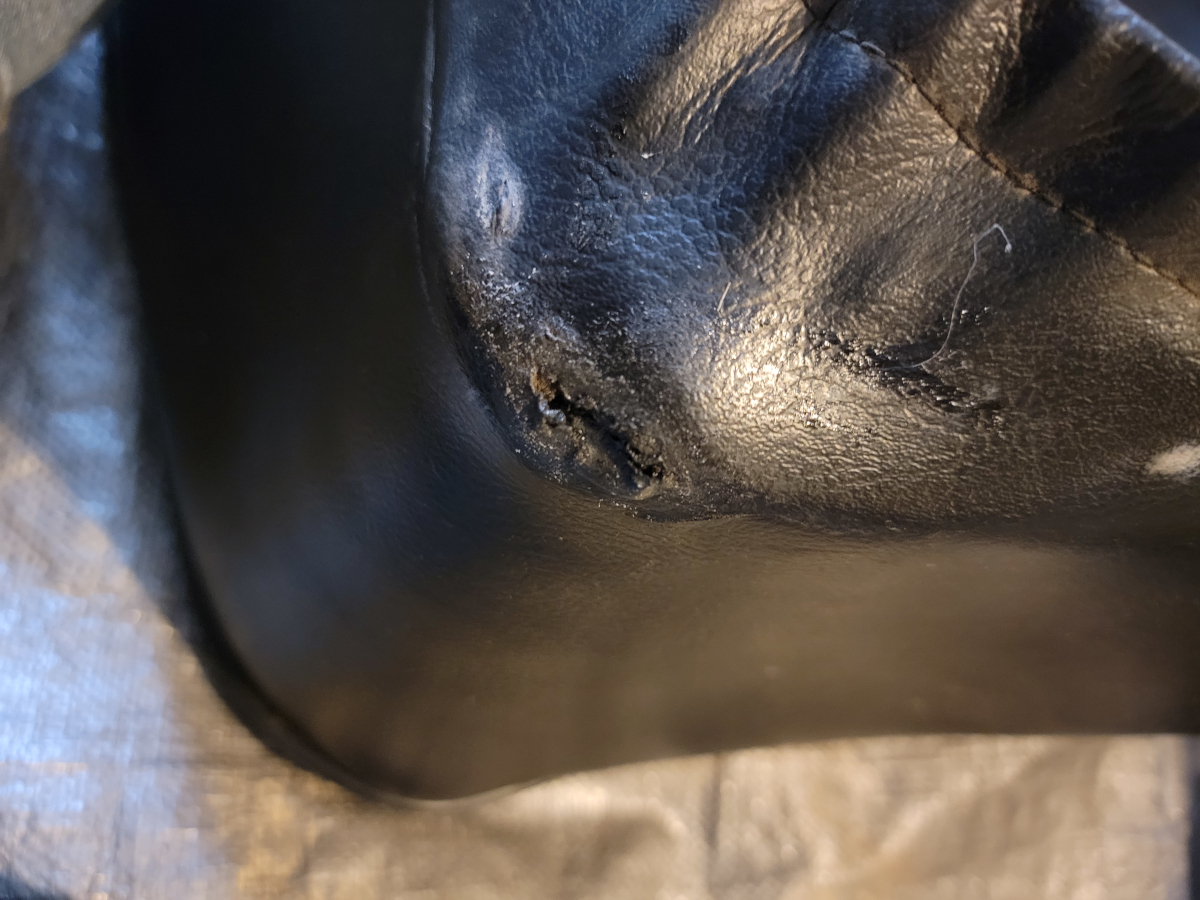
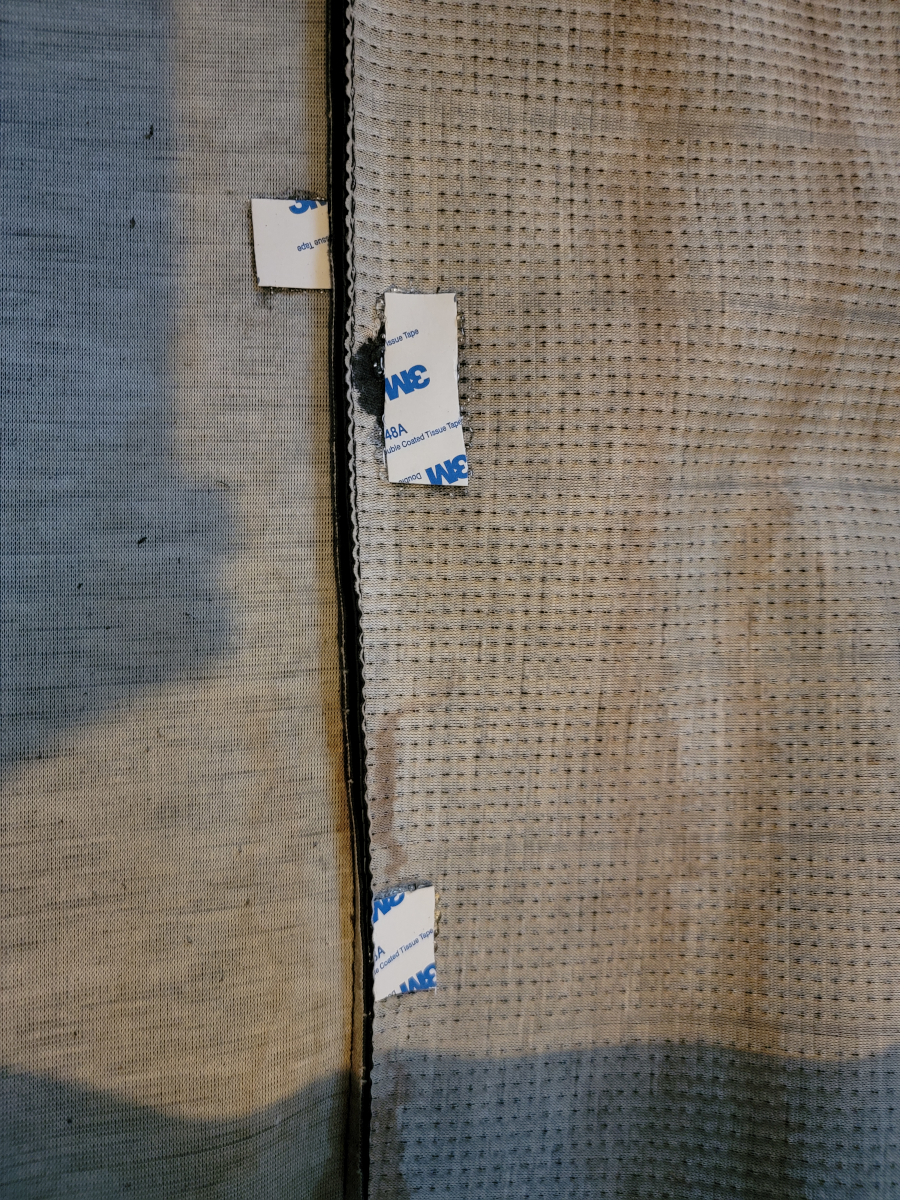
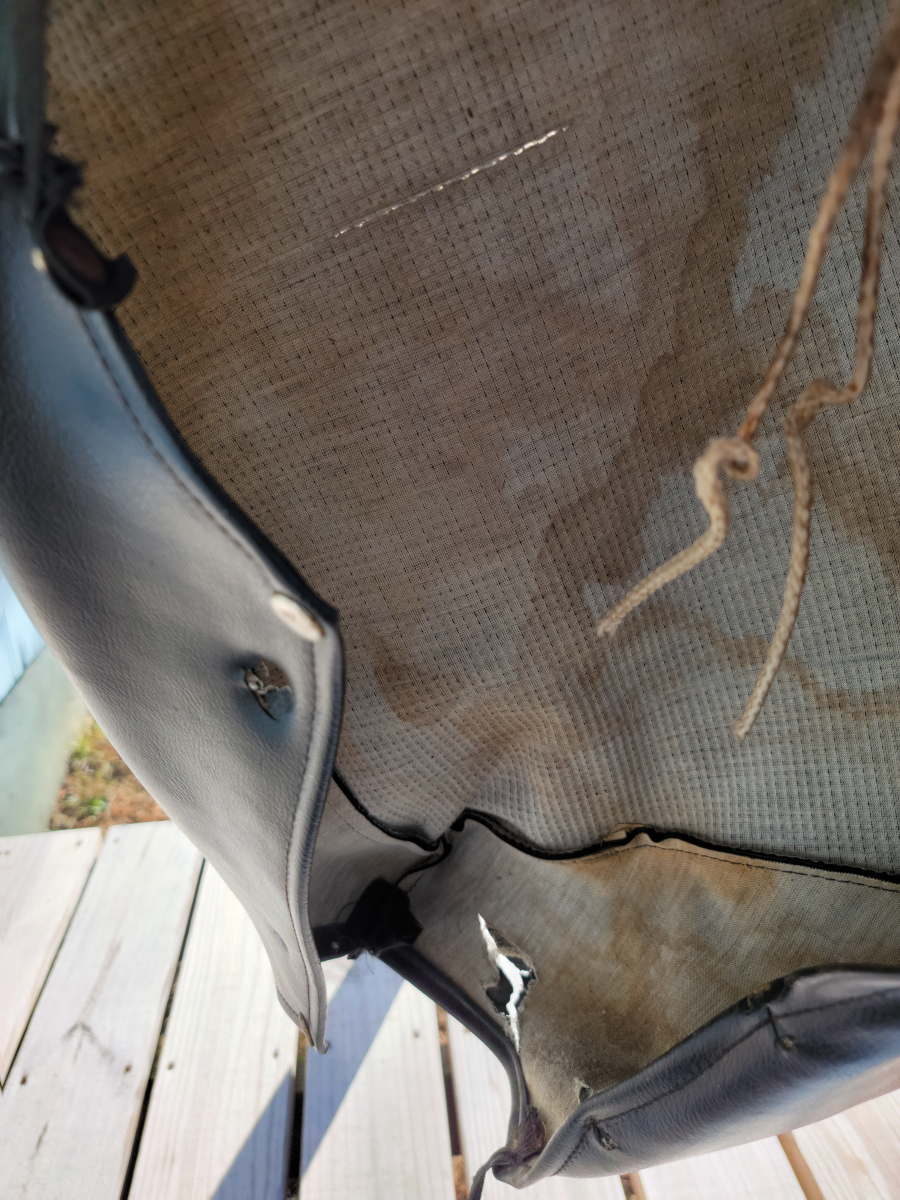
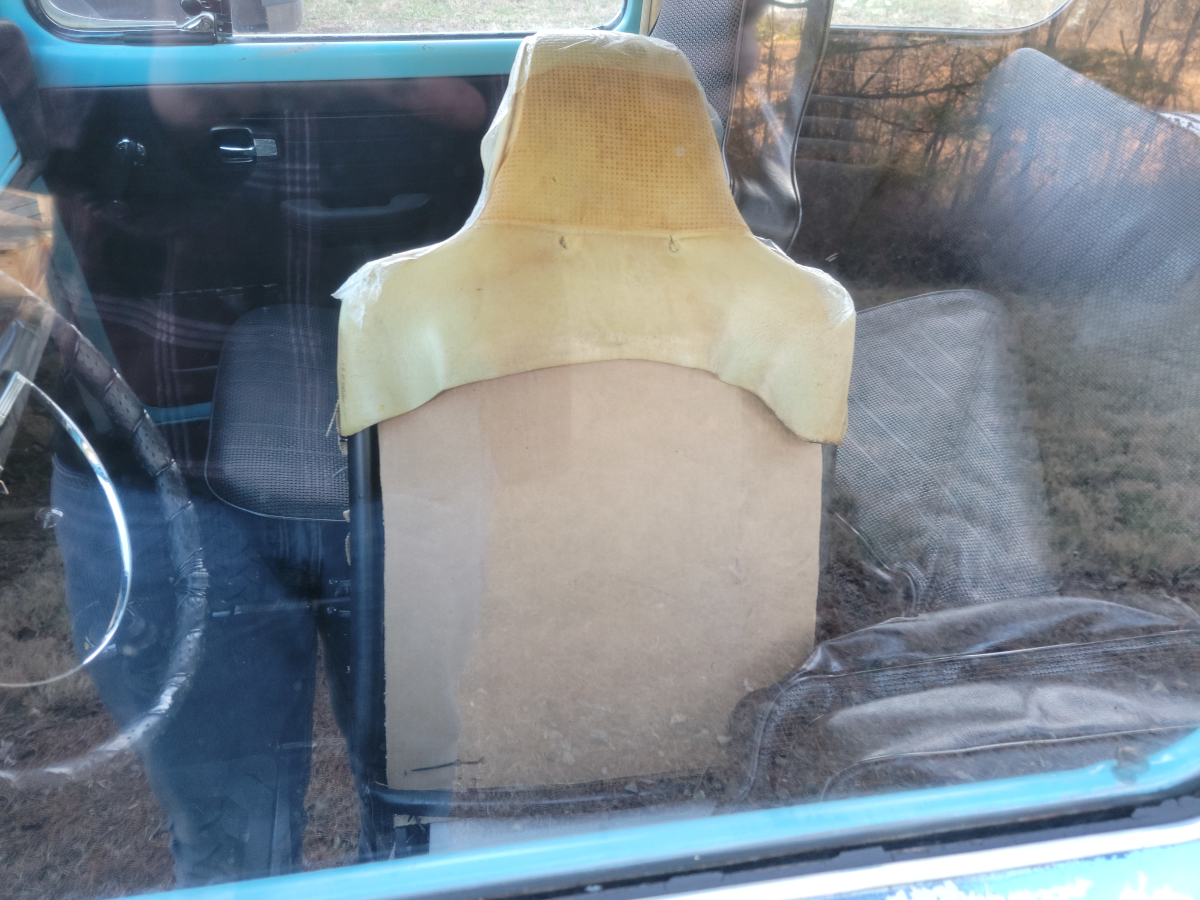
Now it’s time to try and do something about this dry, cracked vinyl. I leaned in once from the open driver’s door and my hand went right through the seat back cover.
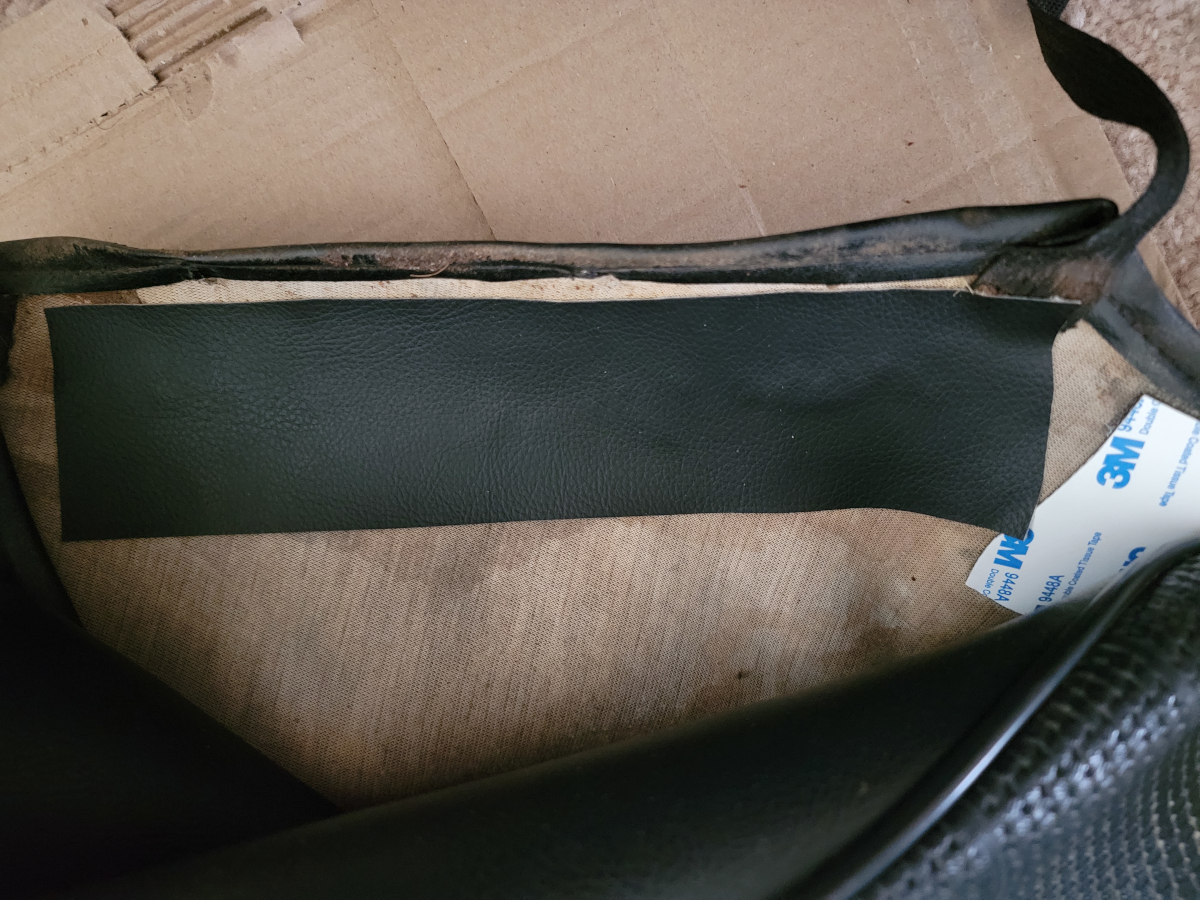
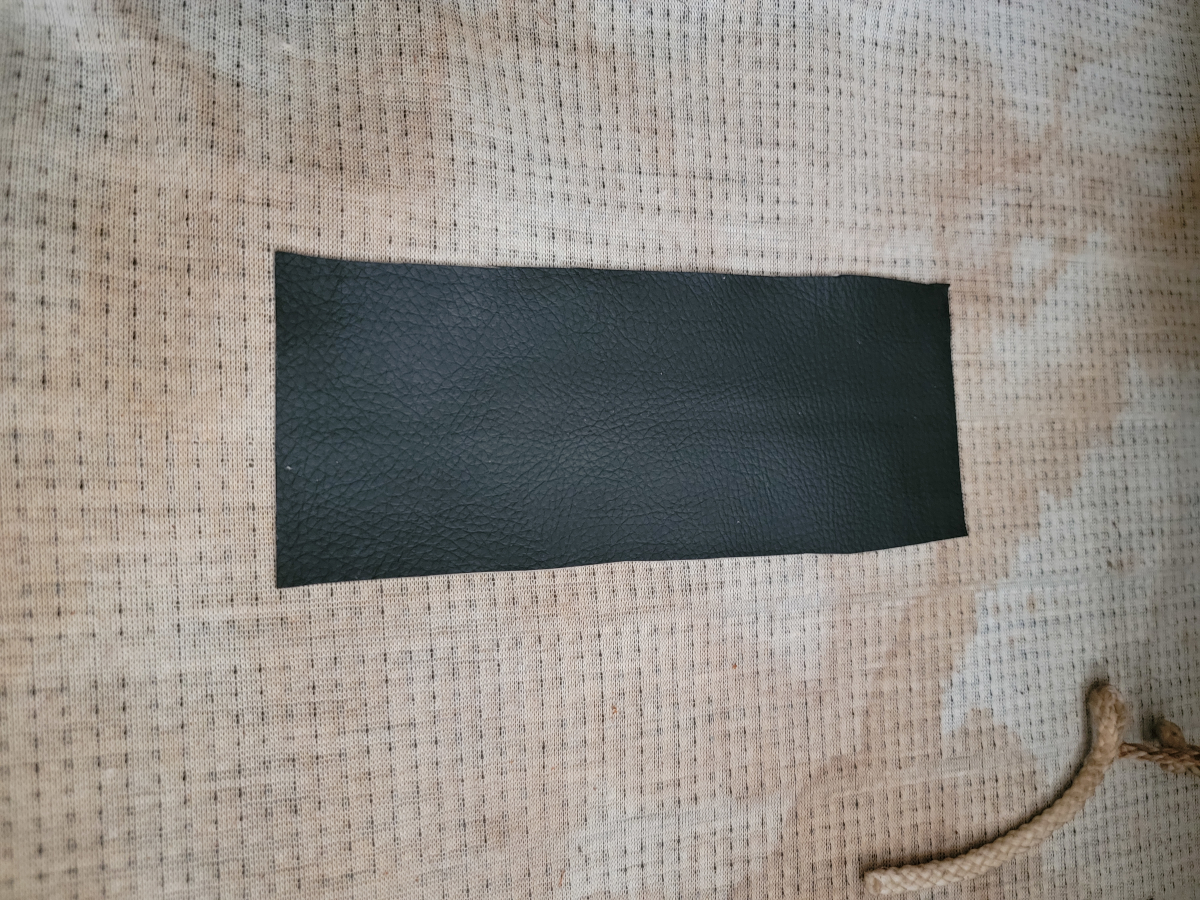
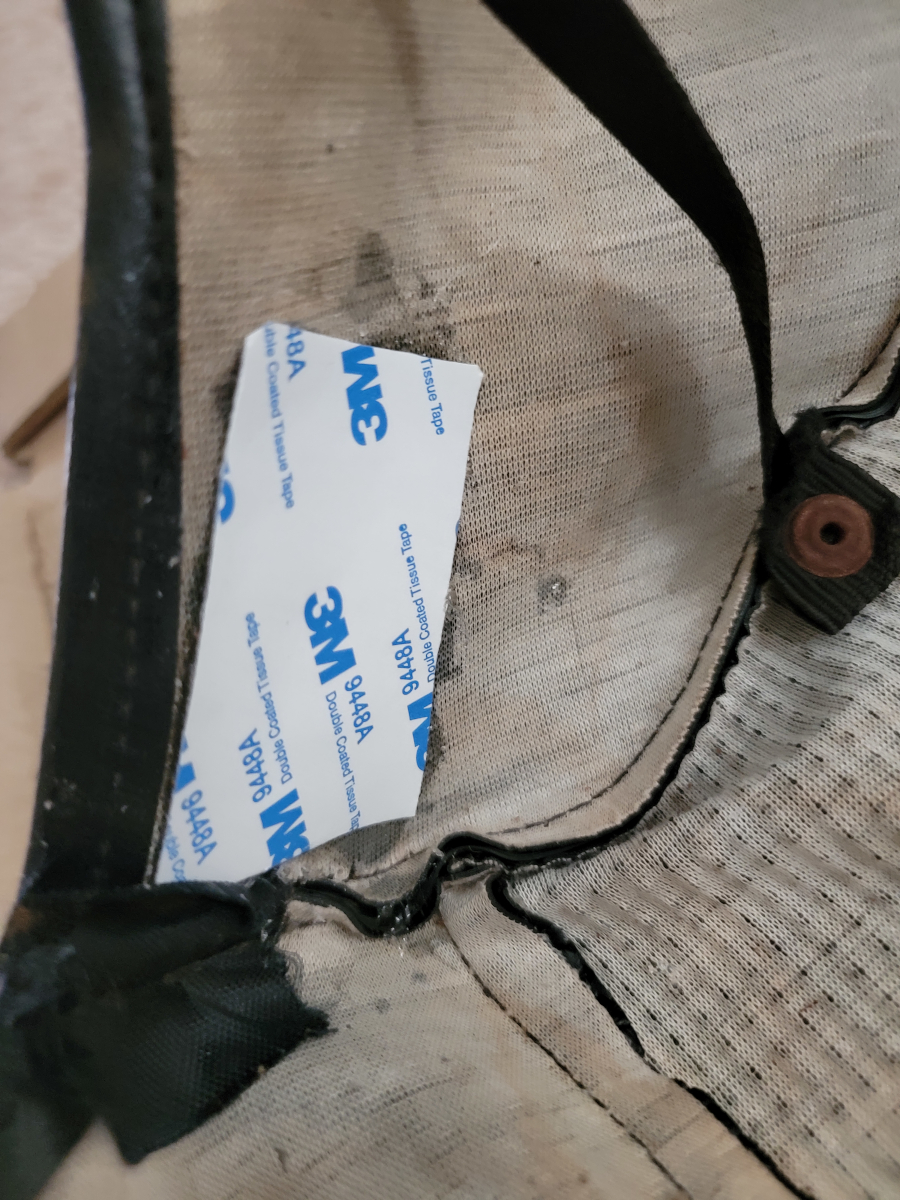
I took the last chunk of that self-adhesive vinyl repair roll and applied it across the whole area, hoping it would provide some kind of stability.
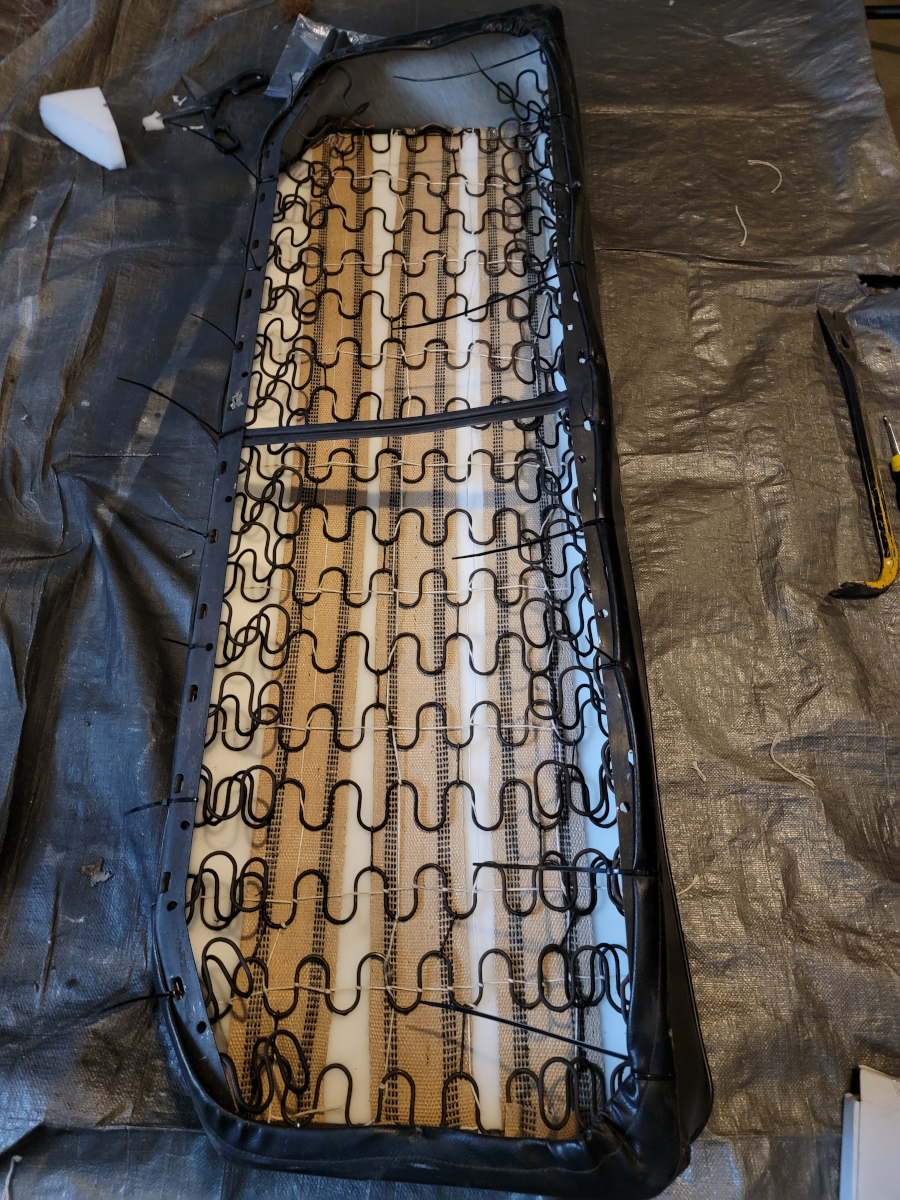
With the high density foam in place, it’s clear that this is going to be a tight fit.
And here we have the first prong bent in place, holding the seat cover on. The foam pad had to be removed. There was no chance it was ever going together. The rest of the seat covers fit nicely over the foam, but clearly, the seat back wasn’t used to that much volume underneath.
I worked my way around the first end of the seat, bending each prong over as I went.
And now it’s time to put the fiber board cover back in place to close it all up.
The top trim piece screwed on without issue…
…then the bottom one did as well. All of the rust was on the inside, so it looks nice from here. And I totally forgot to put the NAUE tickets back inside. I kept them in a safe place, though.
But, I did lose that push pin and had to replace it with a cotter pin.
Bonus
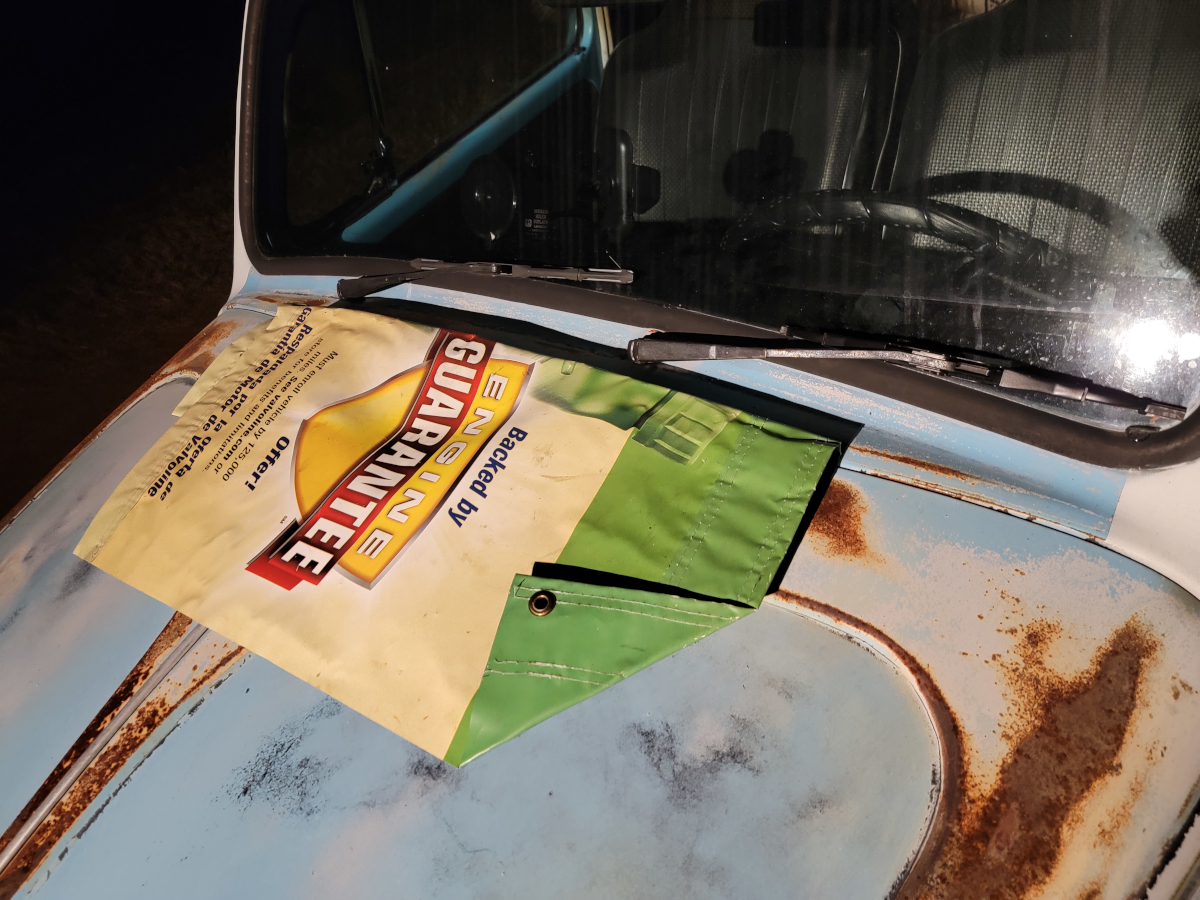
It had been raining for days and that night I just happened to remember that I had removed all the air vents and fresh air system under the bonnet, behind the dash. When I went out and checked on it, I could see straight down into my toolbox full of water. Luckily, it seems to have caught all the water that came in through the bonnet vents.
I grabbed the banner tarp my dad had given me for crawling around under the car. Folded it up and closed the bonnet lid over it. I’m still waiting for that backordered center vent to arrive and if I’m honest, I’m not looking forward to having to put all of that mess back together.
The Spring Tease has passed and we’re back into cold, wet weather, so I moved the seat refinishing operations from the front porch to the basement. I laid down a silver Harbor Freight tarp to catch some of the mess and over spray and began the process of refinishing the rear seat.
Disassembly
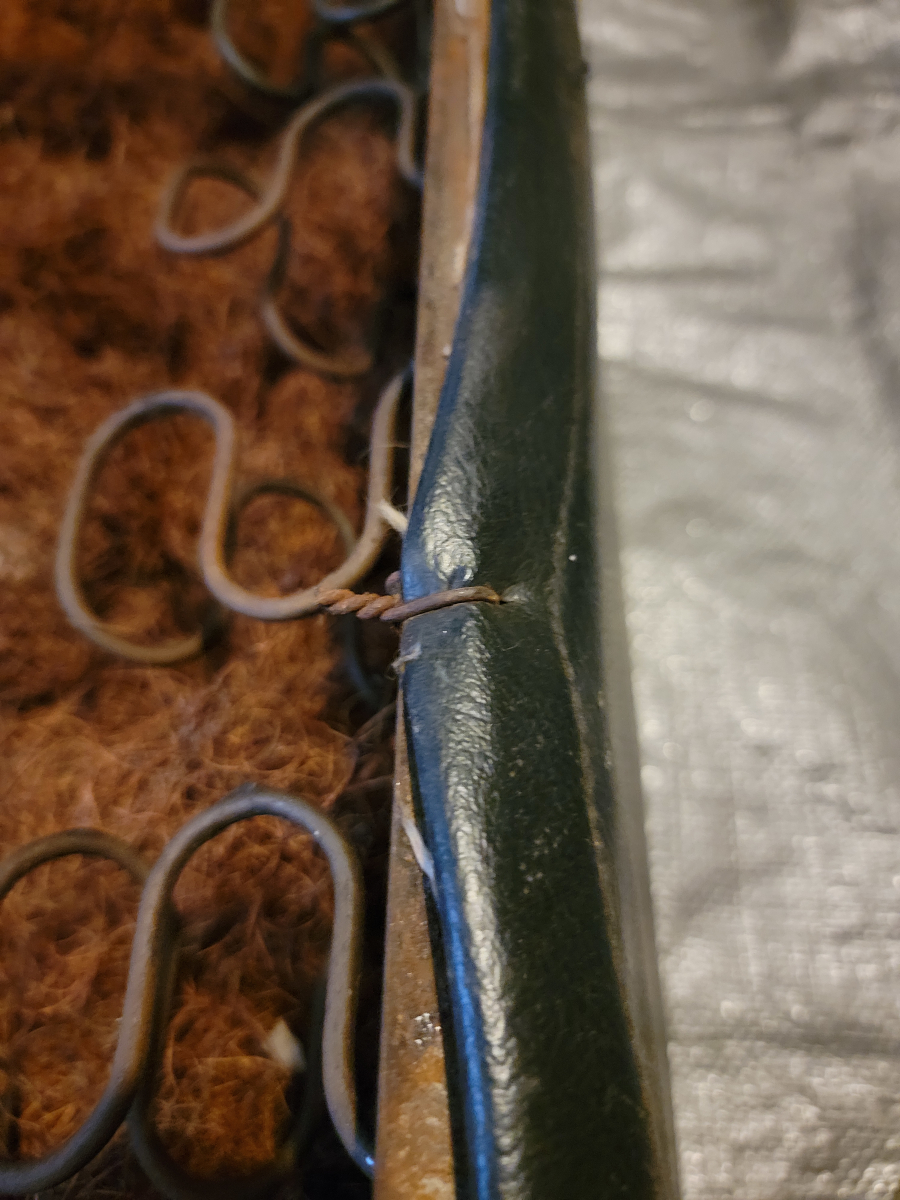
Instead of hog rings, this time, I found the seat cover held on with expertly twisted bits of mechanics wire. Lots of them.
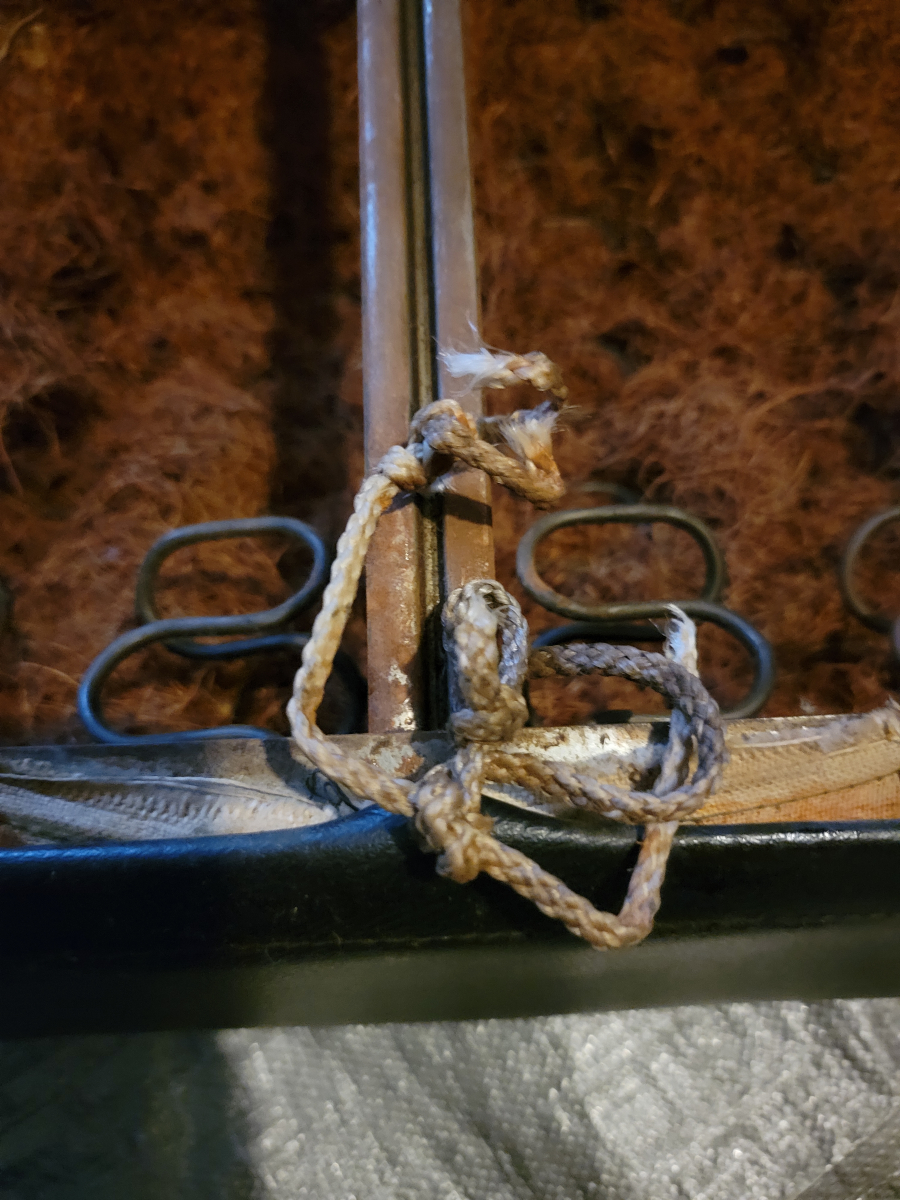
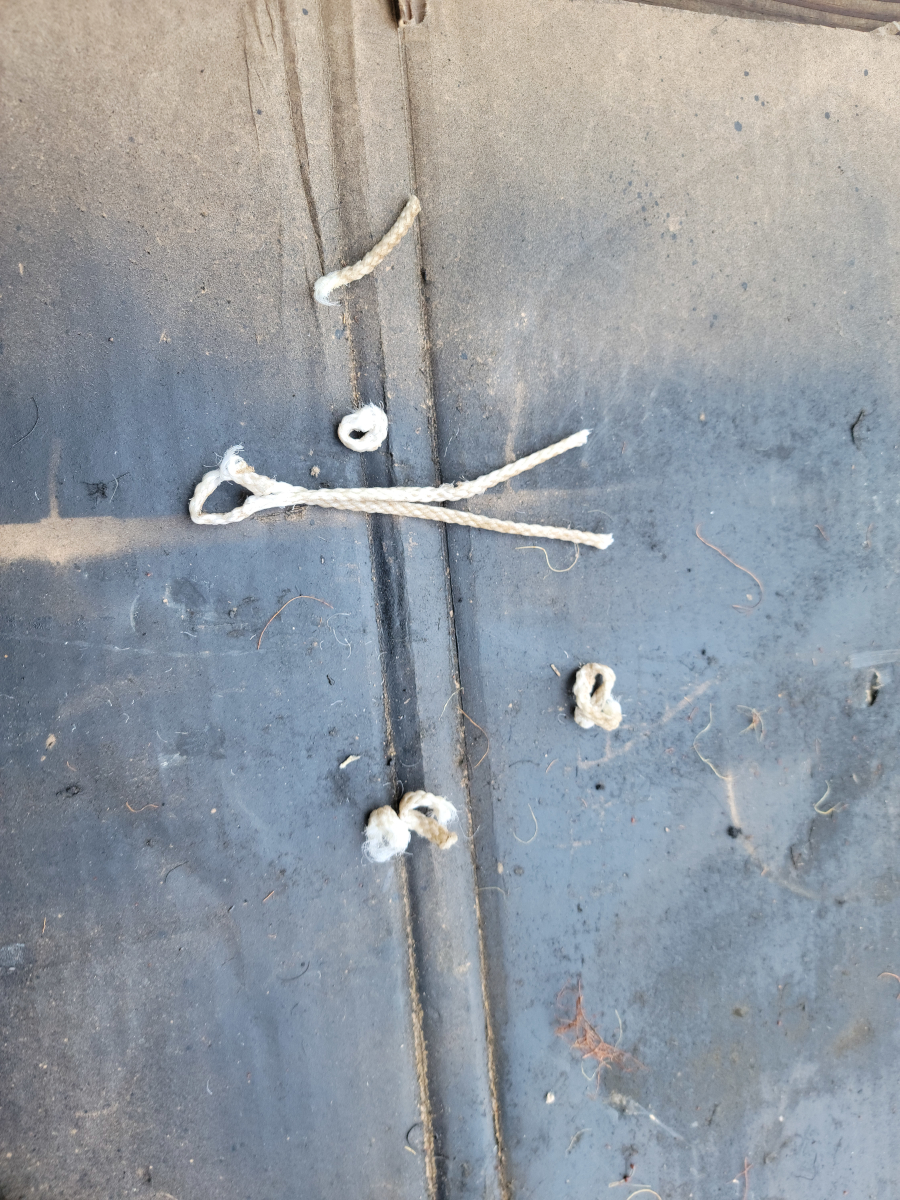
Here was another instance of that rotted rope, which pulled apart with ease. She’s nothing if not consistent.
What do we have here? Another hat on a hat!
This time, I believe the seat cover under the seat cover may have been the original. As you can see in the pic above, there are proper hog rings holding this one on.
A nice cushioned pad separated the two seat covers. It was thick and not too nasty. <foreshadowing>I need to remember to reuse that!</foreshadowing>
This seat cover had a white fabric back side edge. Almost linen-y feeling.
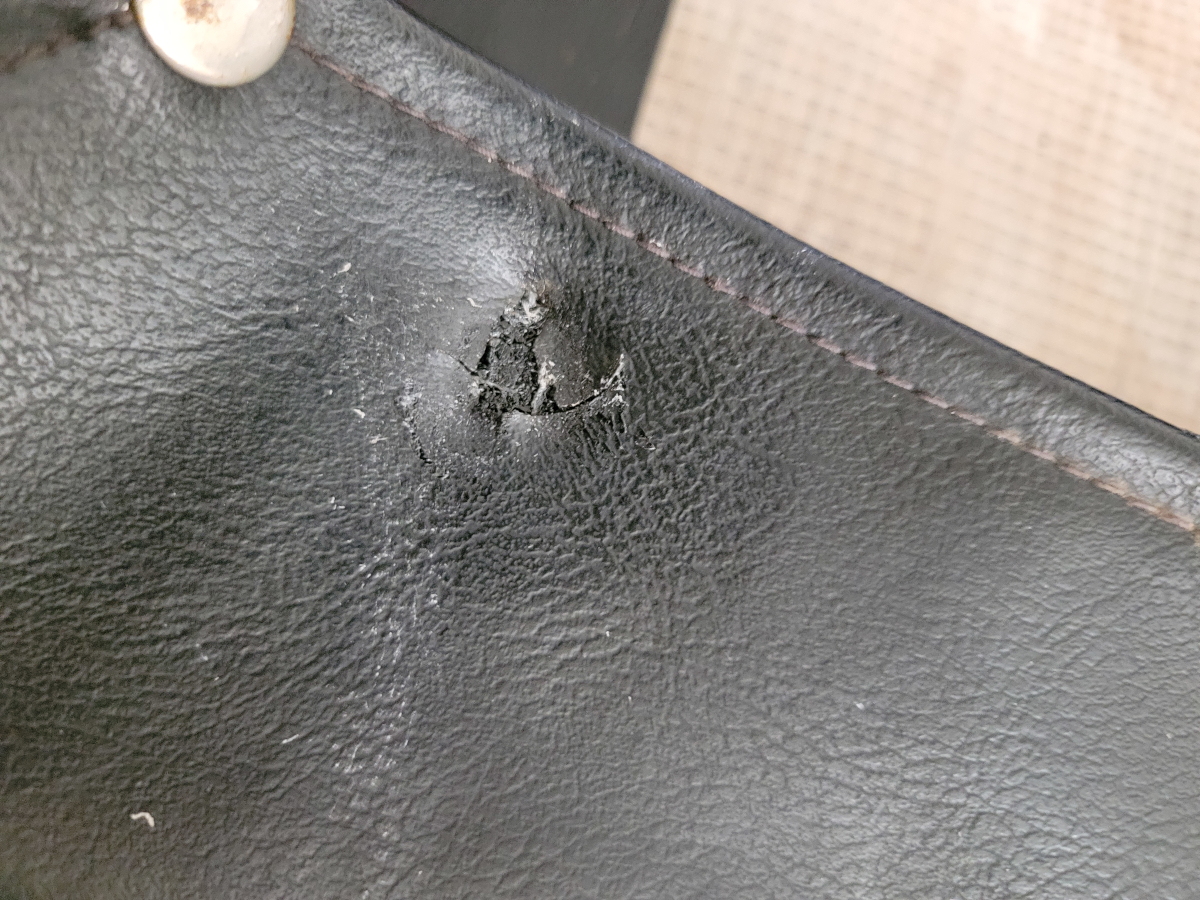
There are a couple of bad holes in the front edge of the outer seat base cover, which I plan to reuse.
Let the hog rings removal begin!
There are some more bendy spikes at each end of the seat base.
With the inner seat cover removed, it was clear to see the state of the coconut hair pad and exposed springs.
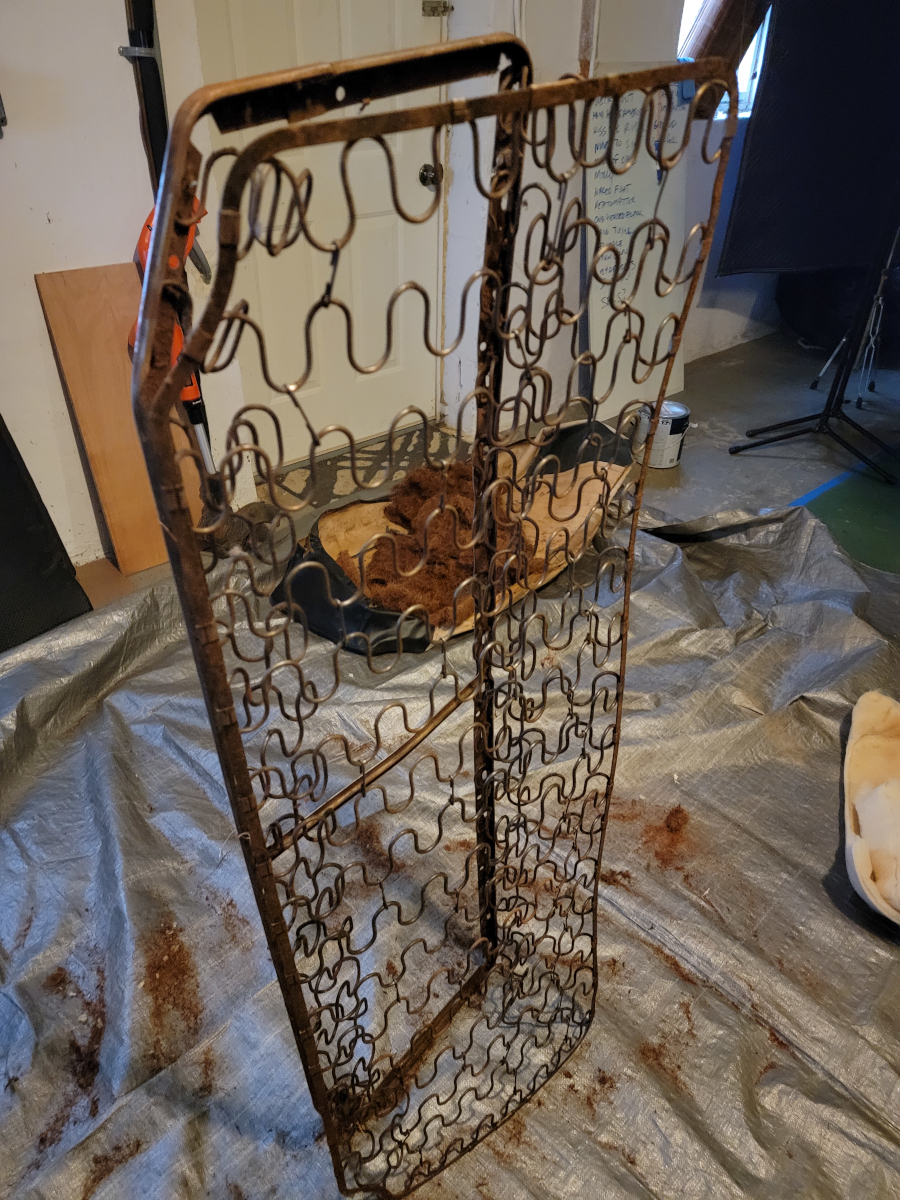
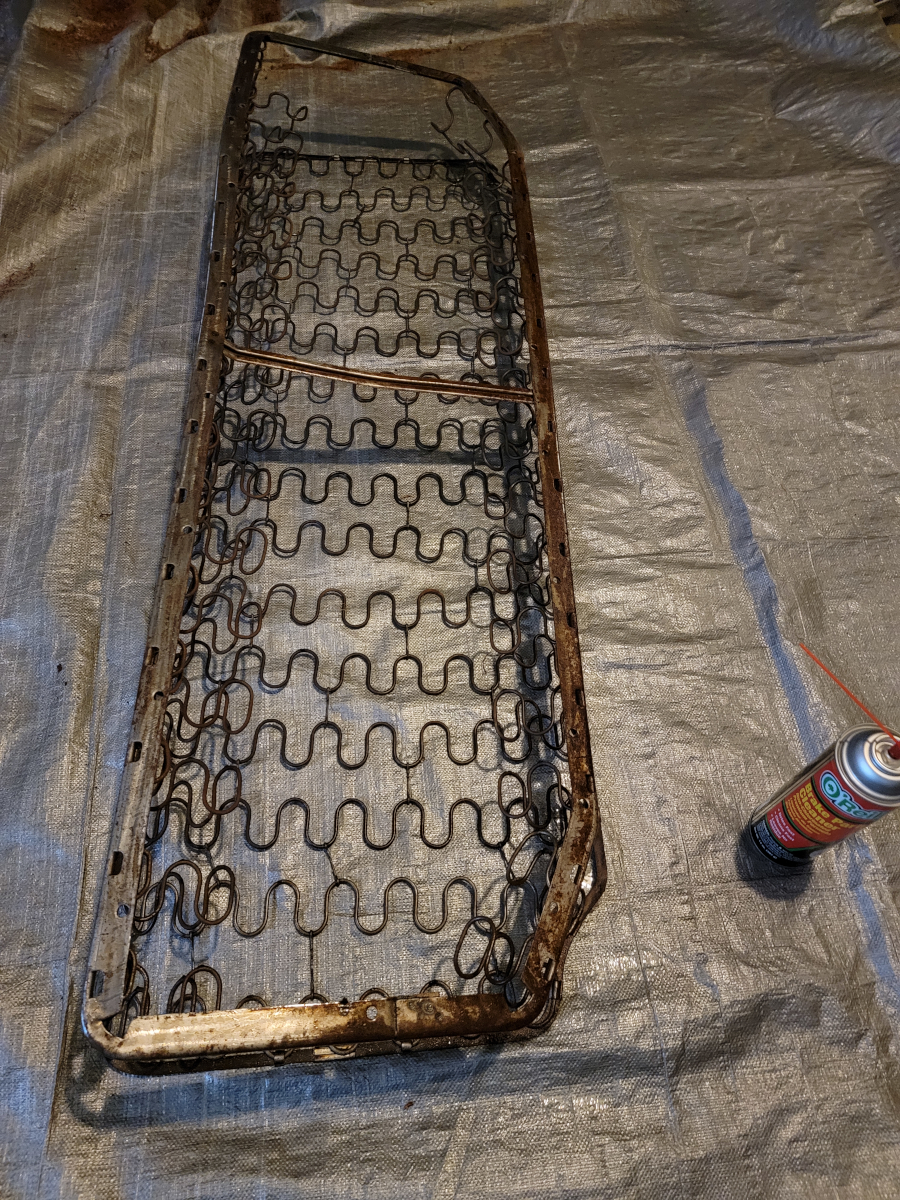
With everything removed, the seat base frame was in surprisingly good condition. A little dirty. A little surface rust. No problems.
Cleanup
Brake parts cleaner in an enclosed space is no joke. I opened the laundry room window to let in some fresh air for a couple of hours, but I could smell it throughout the house for a couple of days after.
I wiped it all down with a blue shop towel, which didn’t do a whole lot, aside from shredding the paper towel.
Rebuilding
Once the brake parts cleaner dried up or evaporated or whatever, I put a quick coat of rust barrier spray down.
Once that had a chance to dry, I went back over it lightly with some engine enamel and was quickly reminded about the silly string situation.
But it covered pretty well regardless.
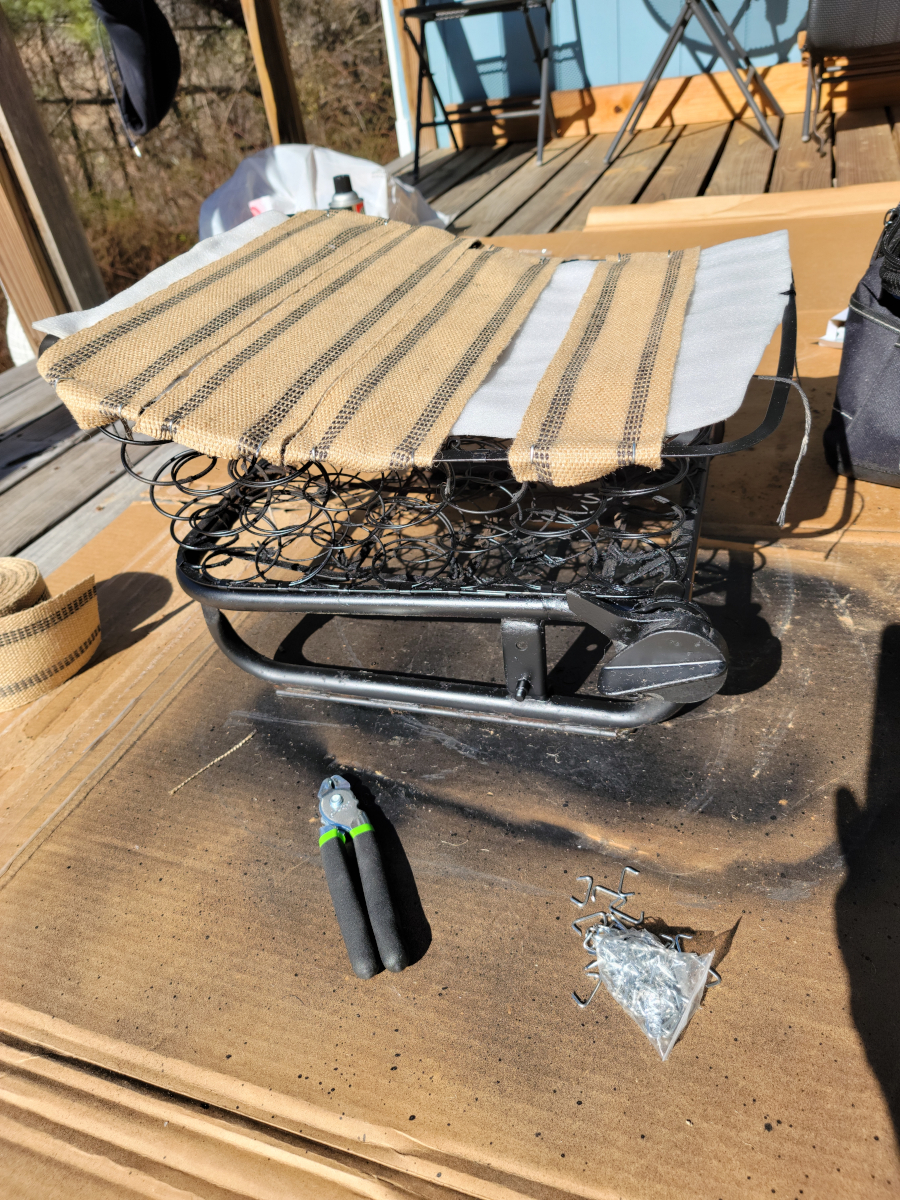
Now, it’s time to weave back through with the twine!
And then the jute webbing. The remainder of the first roll I bought was enough to cover the length once.
Second roll engaged!
Seat cover patching
Now, it’s time to move on to patching that holy seat cover. The bulk of my remaining vinyl roll has been dedicated to recovering the dash pad, but I do have enough left over to patch these bits up.
These front corners take a lot of abuse, since the rear seat base is just a friction-fit in the frame.
I squirted some more glue in between the layers from the front and smooshed it around.
There was only enough of the high density foam roll left to cover about a third of the seat base. I took the rest out of the new roll and they married up fairly well.
Reassembly
It was a bit of a stretch to get the seat cover on over the new foam, but I got it there eventually and pinned the end spikes over.
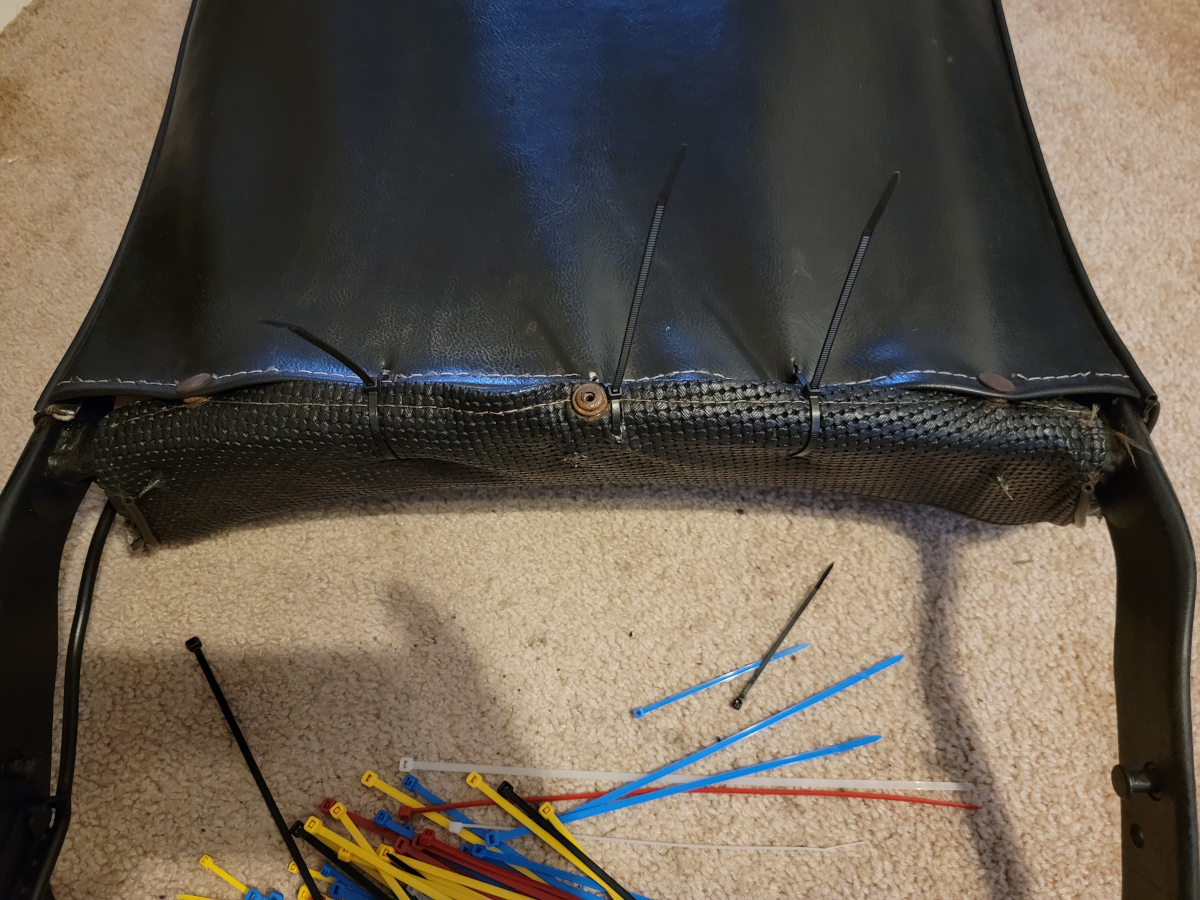
I didn’t have enough hog rings left over to do the front and back edges up properly and that would have taken all day anyway, so the next best solution is always zip-ties.
I even managed to use all black ones. Barrett-Jackson, here I come.
I’ll just leave this over here until Actual Spring has sprung.
Also, I completely forgot about that nice cushion pad I mentioned earlier.
I’m still waiting for the roll of high density foam (Amazon link) to arrive for the back seats, but it’s a beautiful day, so I decided to get some prep work done.
As you can see, the back seat covers have similar issues to the front. At one point in the past, I leaned in through the driver’s door and put my weight against the seat back. The seat cover ripped through, along one of the molded in, fake seams.
Disassembly
After removing the seat base, it’s easy to see from underneath that it appears to be in similar condition to the front seats.
Removing two bolts from the sides, the seat back was easily removed.
The seat back is closed in with a trim panel, so I won’t know the internal condition until I get that disassembled. I’m expecting more mouse house, based on what I saw in both front seats.
Cleaning up
The black paint was mostly flaked off of the bolts, so I took care of that while they were out.
With the seats removed, there’s clearly a mess that needs attention.
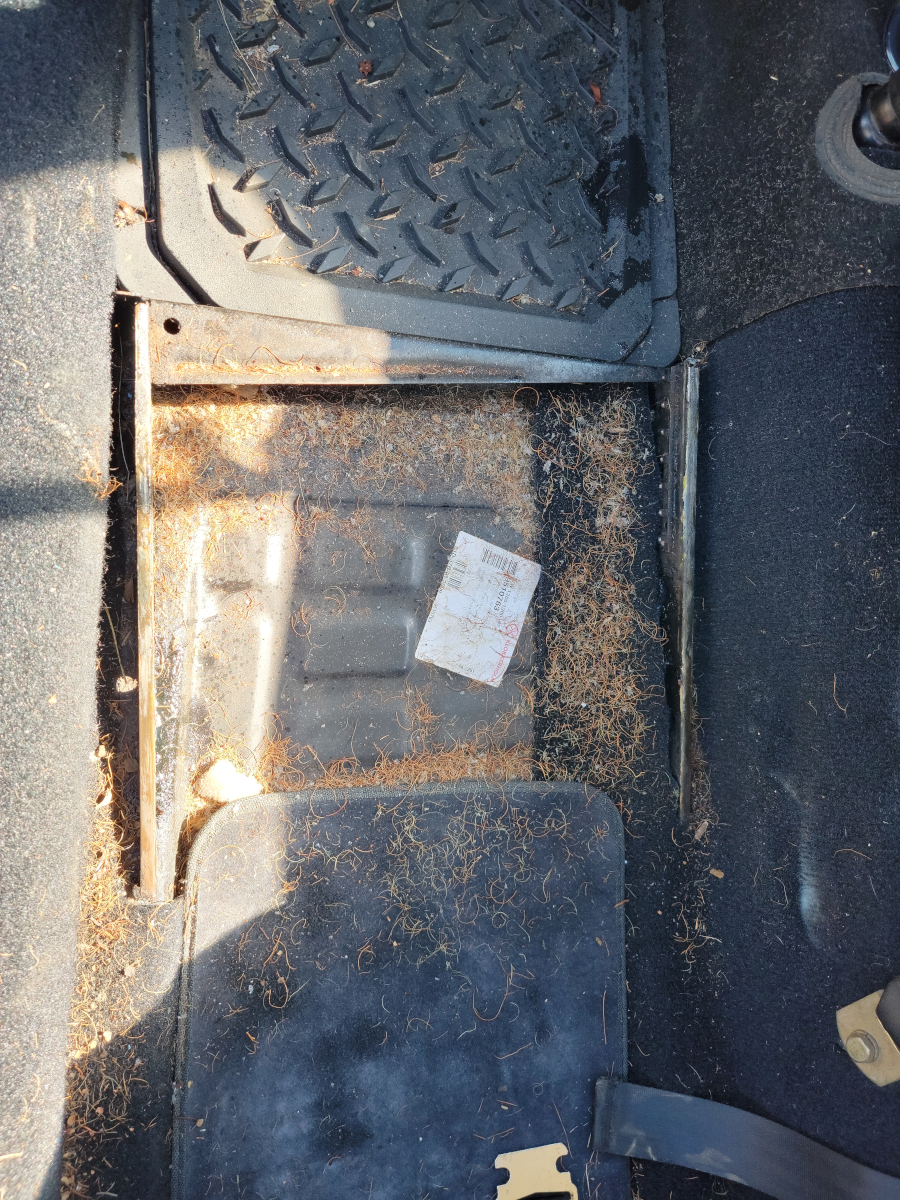
After removing the rear trim pieces in the foot well, I brought out the little shop vac and let it eat.
The plastic heater pipe grommet on the passenger’s side is always falling apart. I will need to take a look at that to see if the two halves need to be glued together or something. Otherwise, the panels are in good shape.
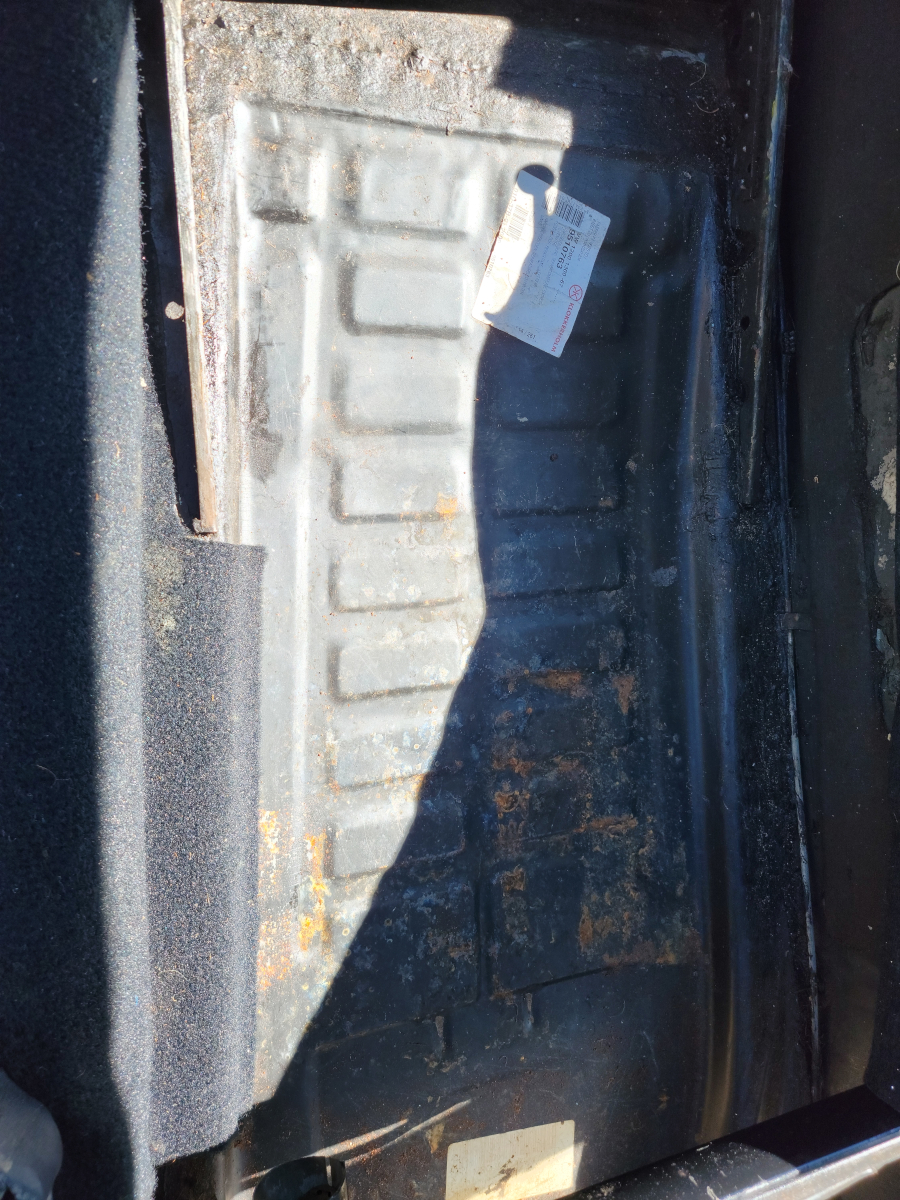
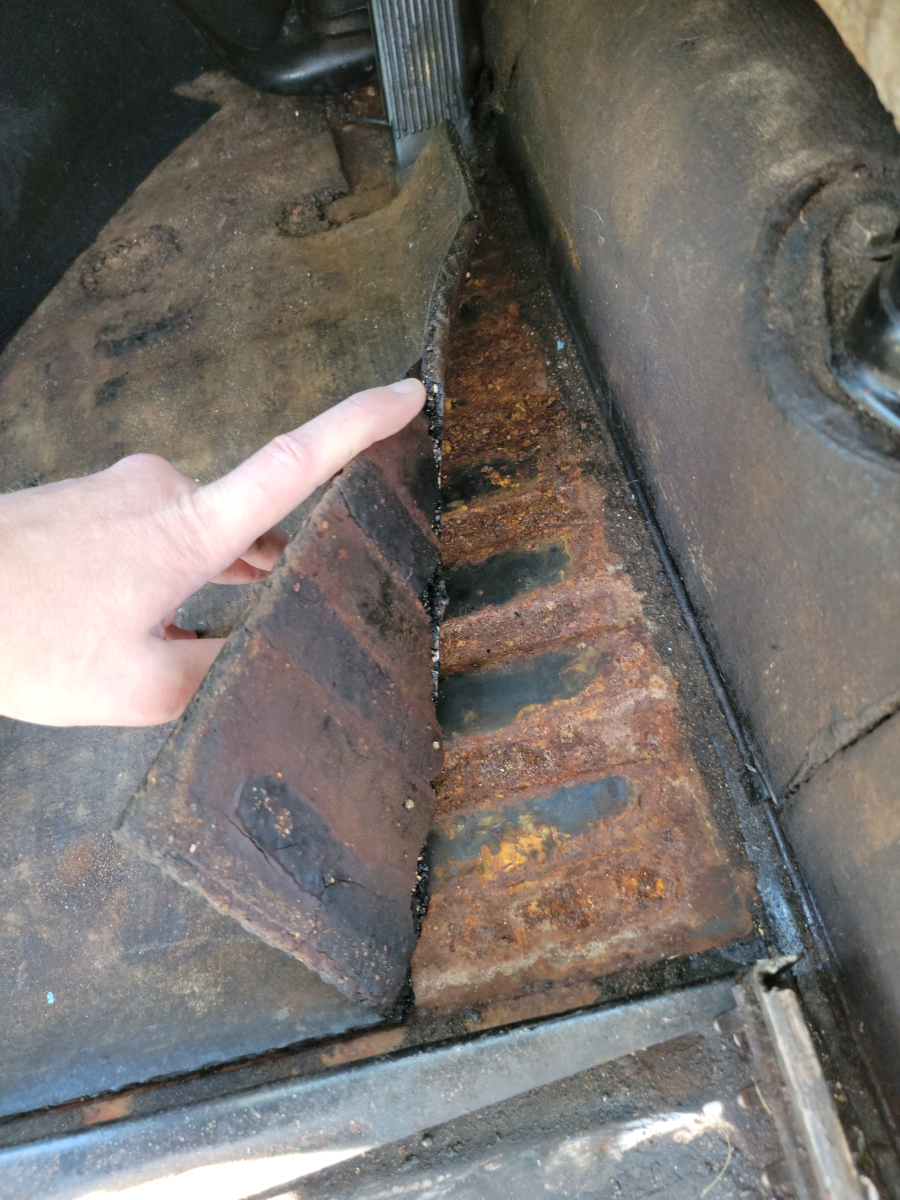
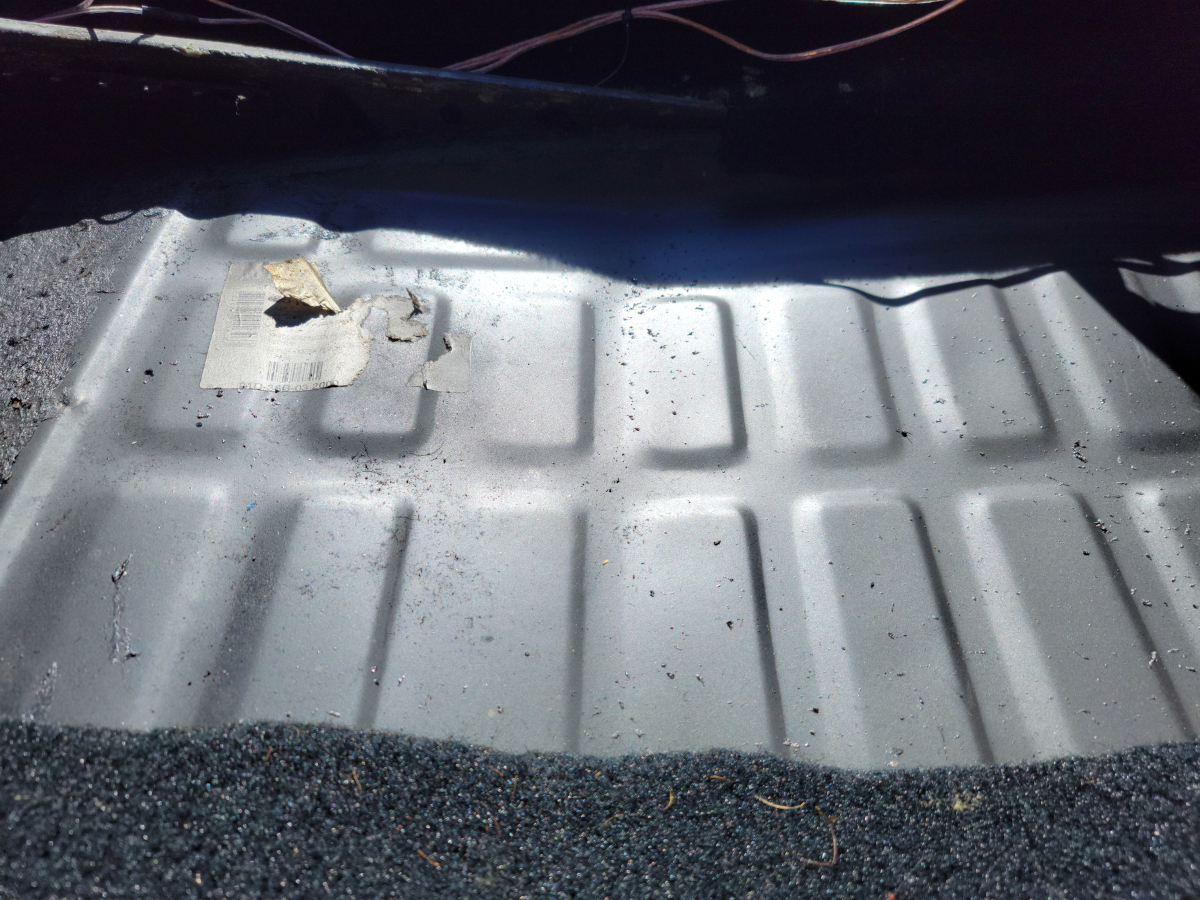
I noticed some surface rust on the “new” floor pan under the driver’s seat, which is concerning.
Also, in the driver’s side front foot well, there is a mat glued down, covering the floor board. Peeling back the corner of that, it’s clear why the rear half of the pans were replaced.
That mat felt to me like something that could be asbestos based and I wasn’t too keen on trying to get the rest of that peeled up, as crumbly as that first corner was. So that’s a job for another day.
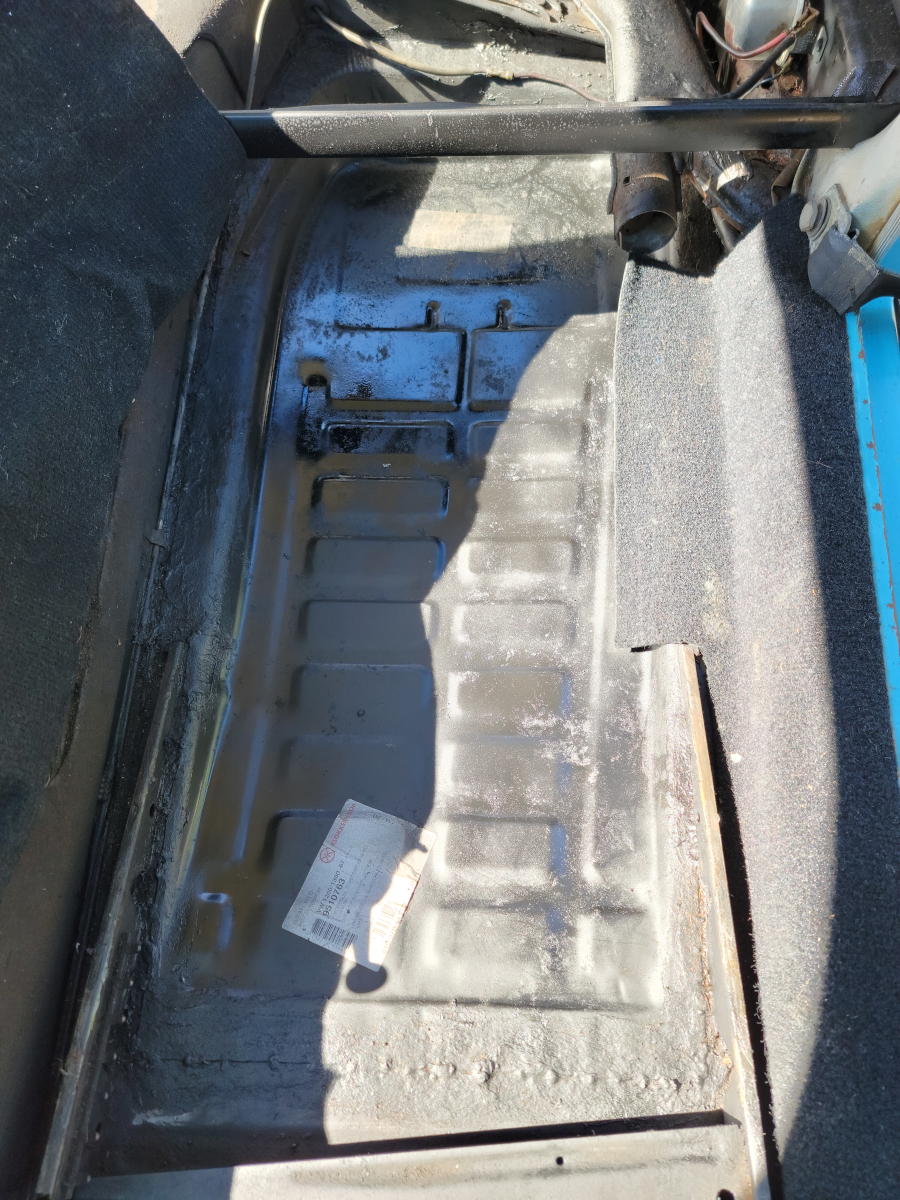
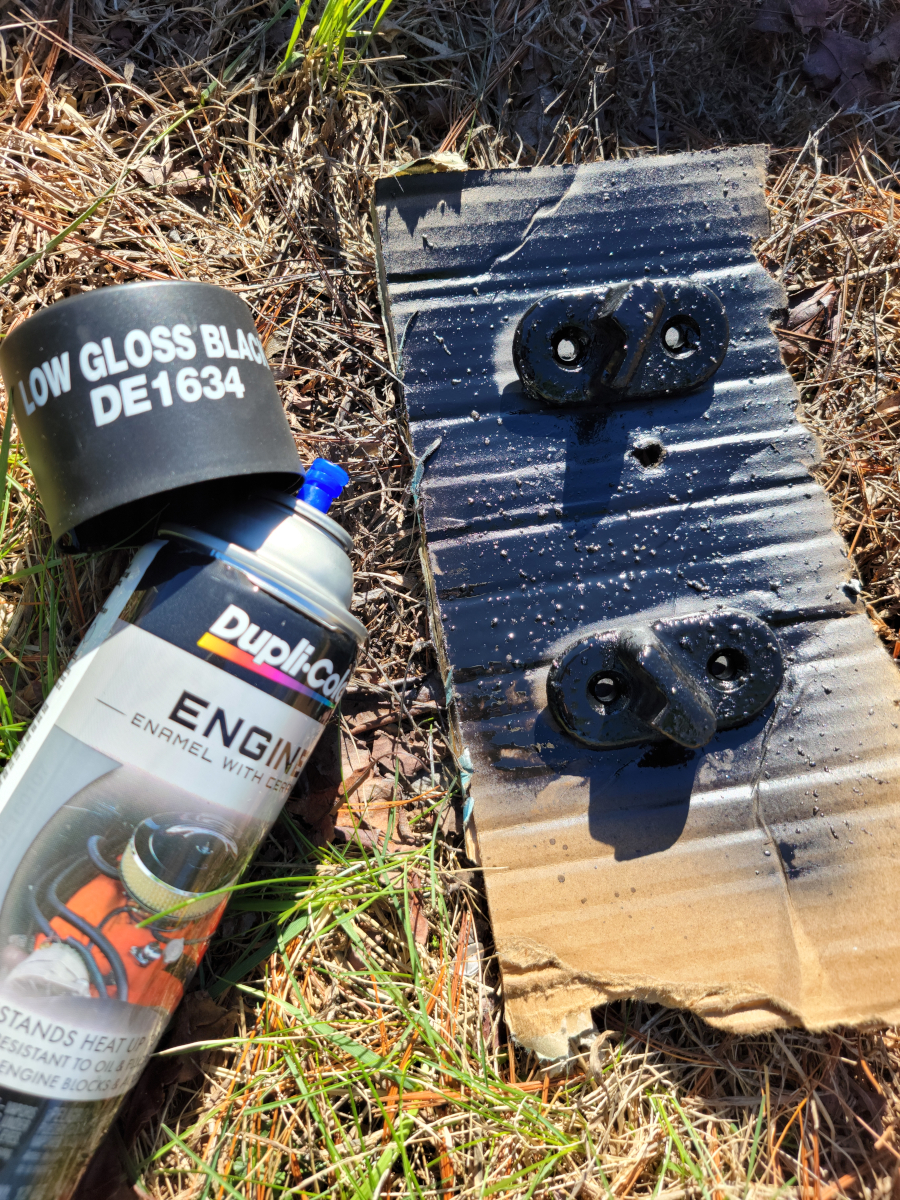
I vacuumed out the now empty interior and sprayed some rust inhibitor (Amazon link) and DE1634 (Amazon link) on the driver’s side floor board.
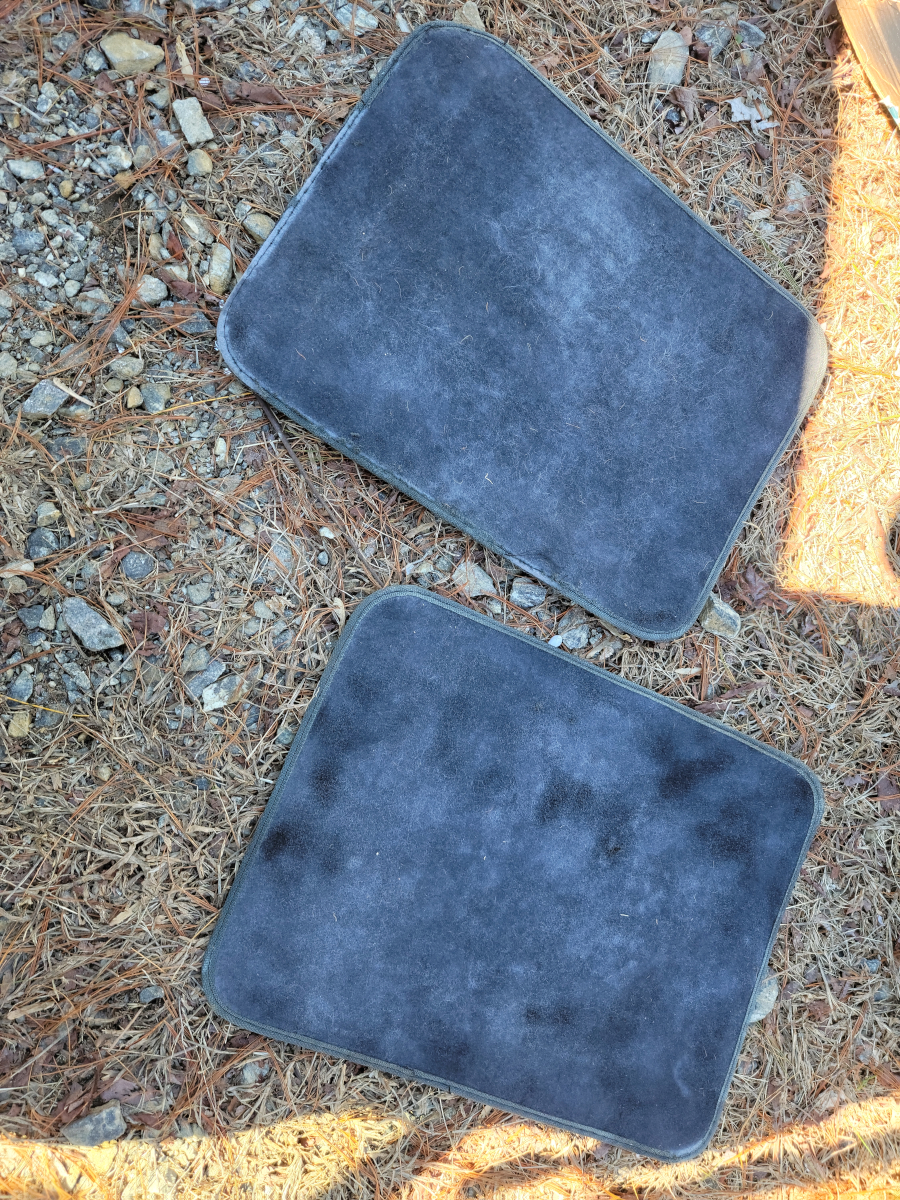
The rear floor mats are the only thing hiding the floor boards in the back. I’m surprised the carpet kit that was previously installed didn’t cover those areas. The floor mats are in OK condition, but were either not black to start with or are very sun faded.
The passenger side floor board didn’t have nearly as much surface rust as the driver’s side, but I went ahead and sprayed rust inhibitor and black paint on it as well.
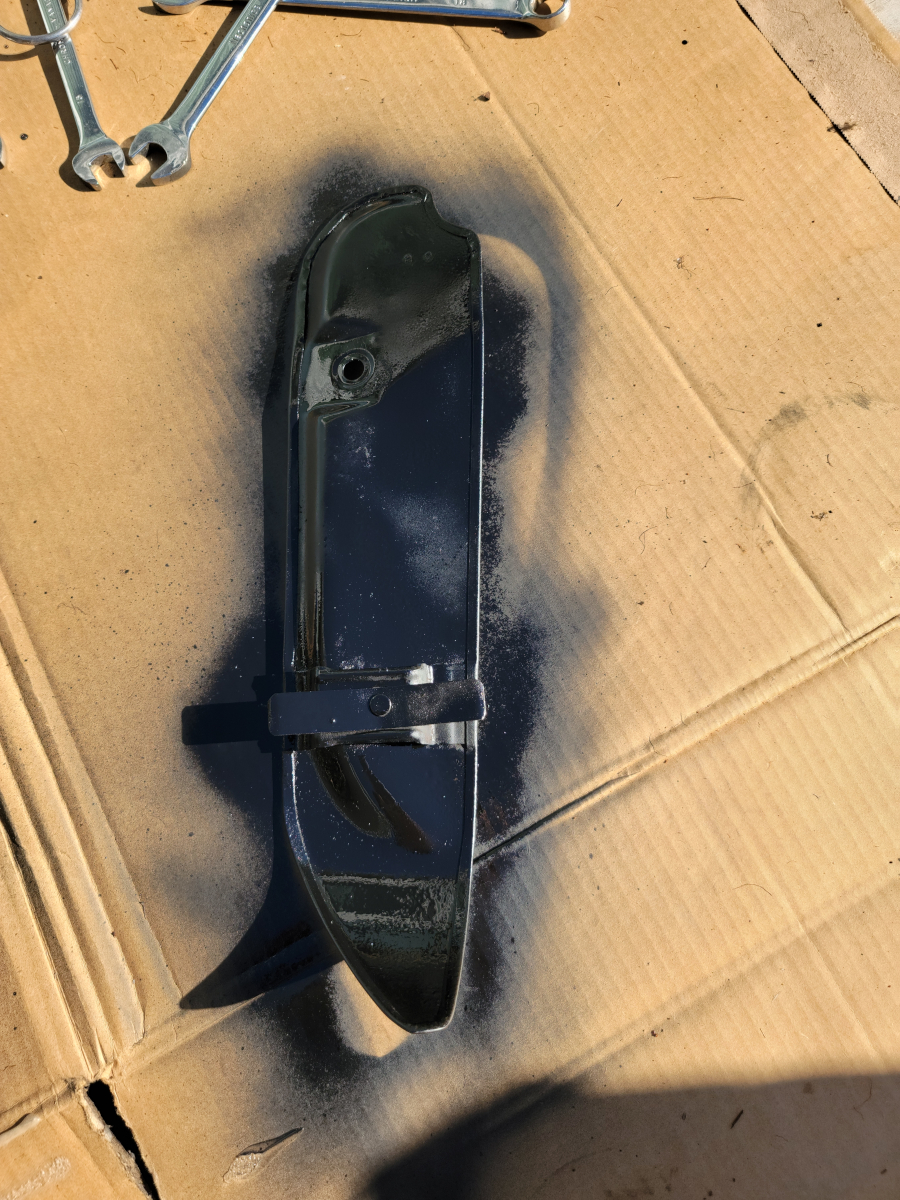
The nozzle of this new can of DE1634 started spitting out chunks, like silly string. You can see bits of it in the picture above. Thinking I must not have shaken the can well enough, which hasn’t ever been an issue with this paint in the past, I shook and shook and shook it some more.
I pulled the rear seat clips off of the pillars to paint them, as the black paint was very thin and chipping on them as well.
More cheese curds from the spray can. It’s actually getting worse over time. I flipped the can and cleared the nozzle multiple times, shook it some more, but it continued to make silly string.
Reassembly
I couldn’t find any real issue with that plastic heater pipe grommet on the passenger side foot well trim piece, so I snapped it back together and reinstalled them both.
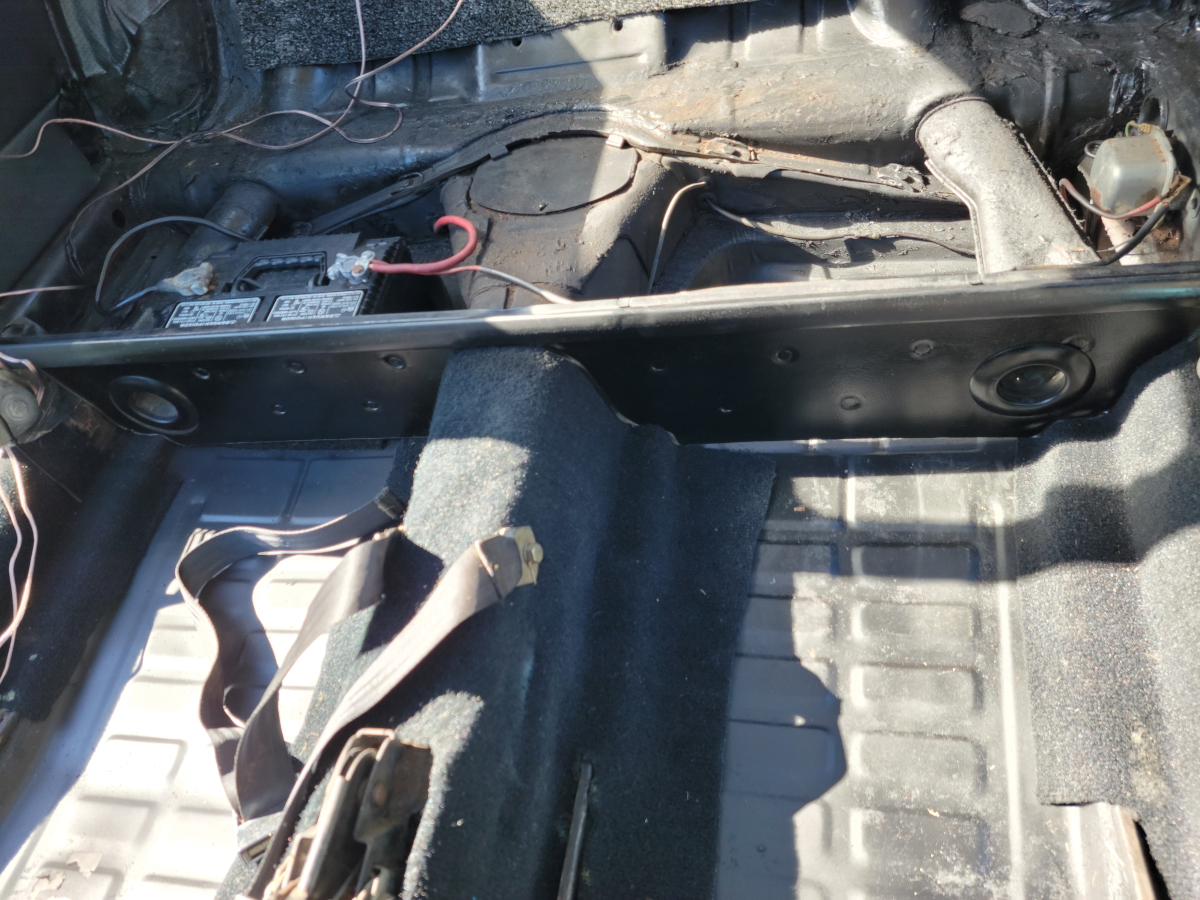
I soldiered on, spraying more rust inhibitor and low gloss black cottage cheese around the exposed interior.
While I was at it, I sprayed the negative battery cable black, since they were both red before. It was always easy to tell which was which. The negative cable goes directly to a body ground and the positive cable has another red wire joined in at the connector.
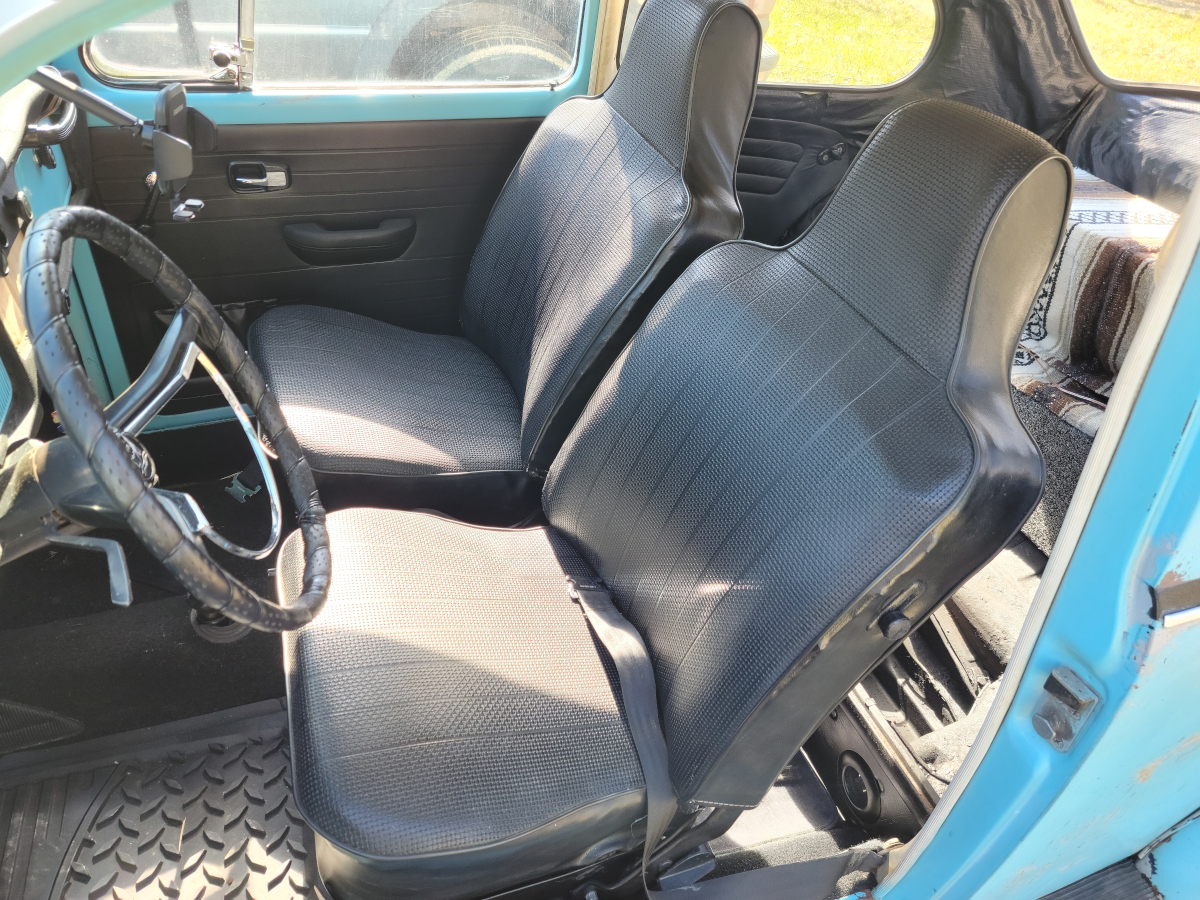
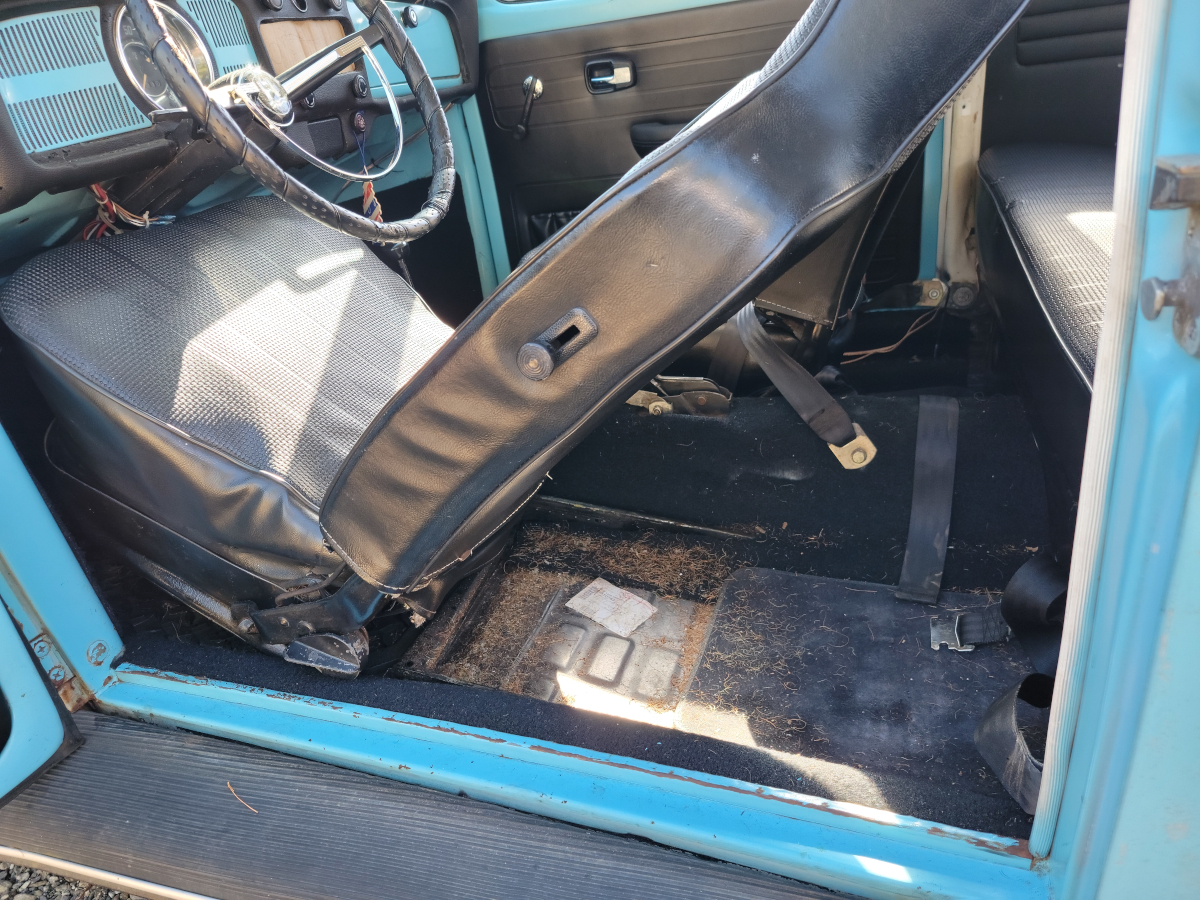
After removing the rear seats, I needed to make some room for them in the house, while I wait for the upholstery foam to arrive. So I went ahead and reinstalled the front seats.
As expected, I’m now sitting a couple of inches higher, but still have plenty of head room. Also, in the driver’s seat, I’ve no longer got to fight an outside lean toward the window.
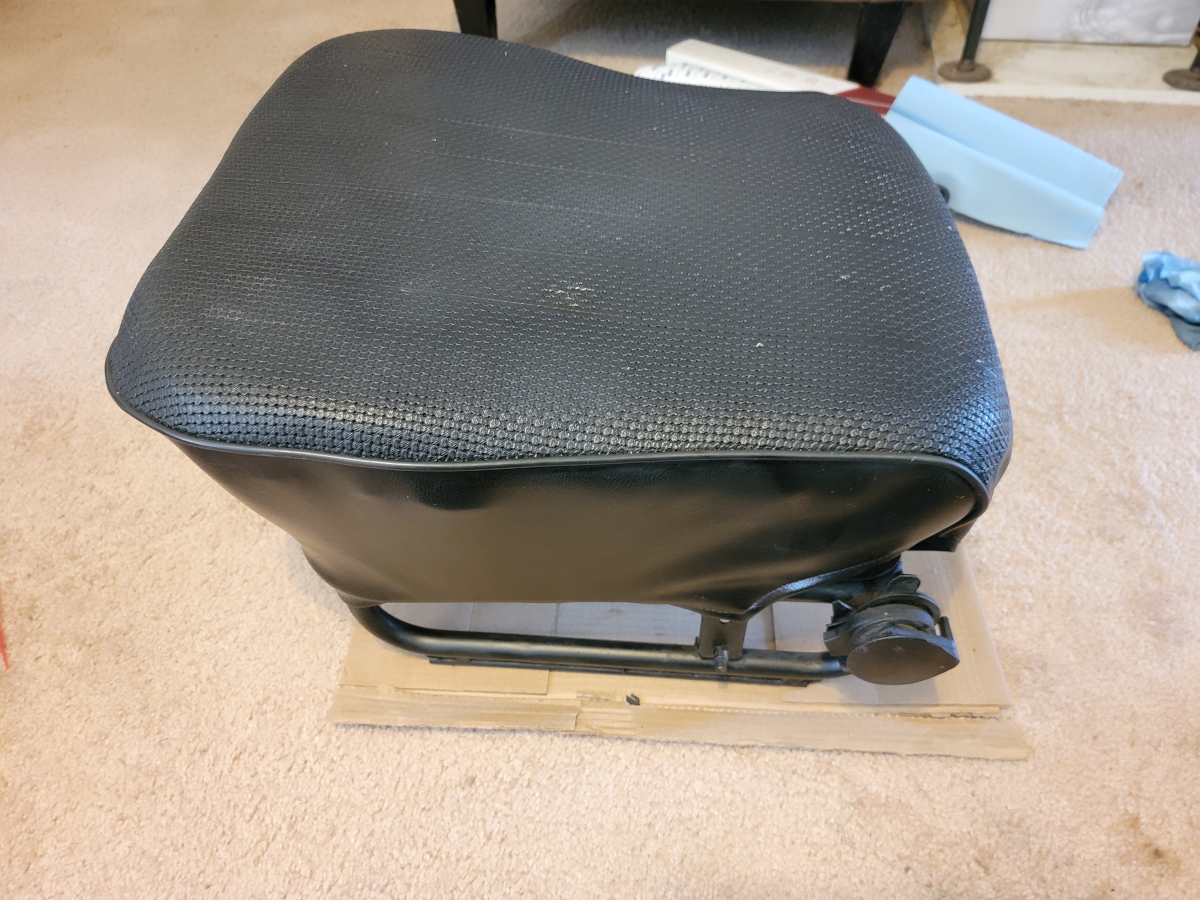
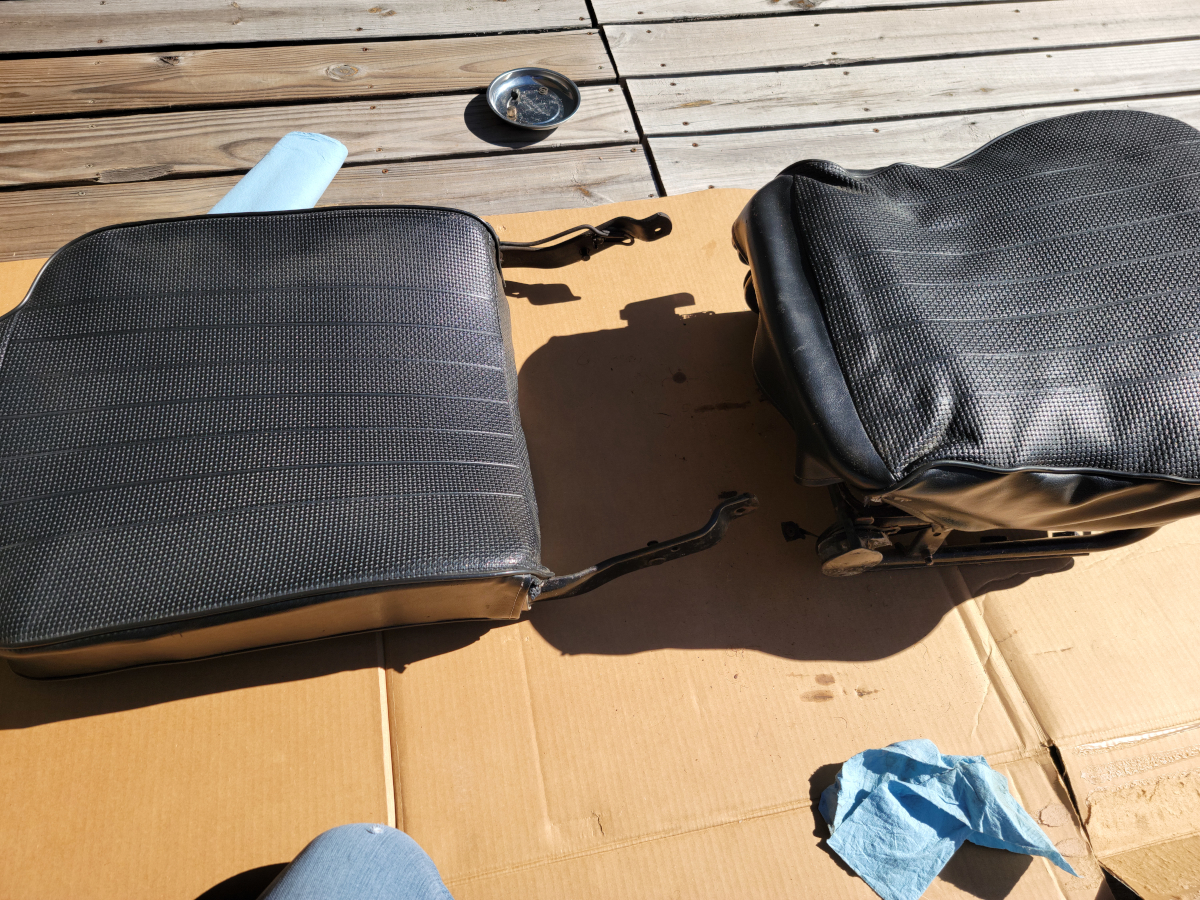
After last weekend’s front seat refinishing progress in Inside the Driver’s Seat and Driver’s Seat Part 2, I had been looking forward to the weekend, to be able to dig back in to refinishing the seats. Saturday was a rain out, but Sunday was a sunny treat. I pulled the front passenger seat out and started disassembling it on the front porch.
Deconstruction
I saw some green bubble wrap showing through from the underside of the seat. There also appeared to be some mechanic’s wire of a decent thickness twisted up, tying the seat cover on. That would require some more investigation.
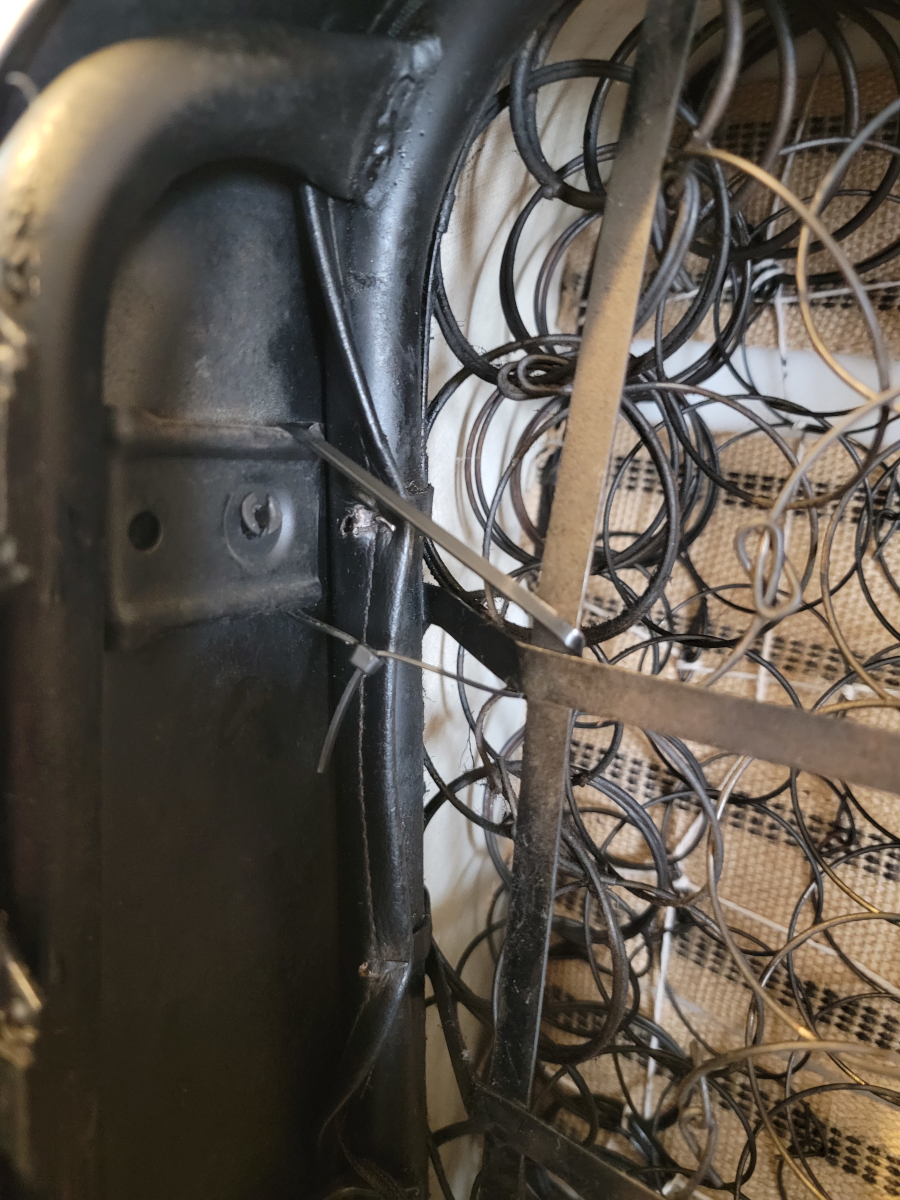
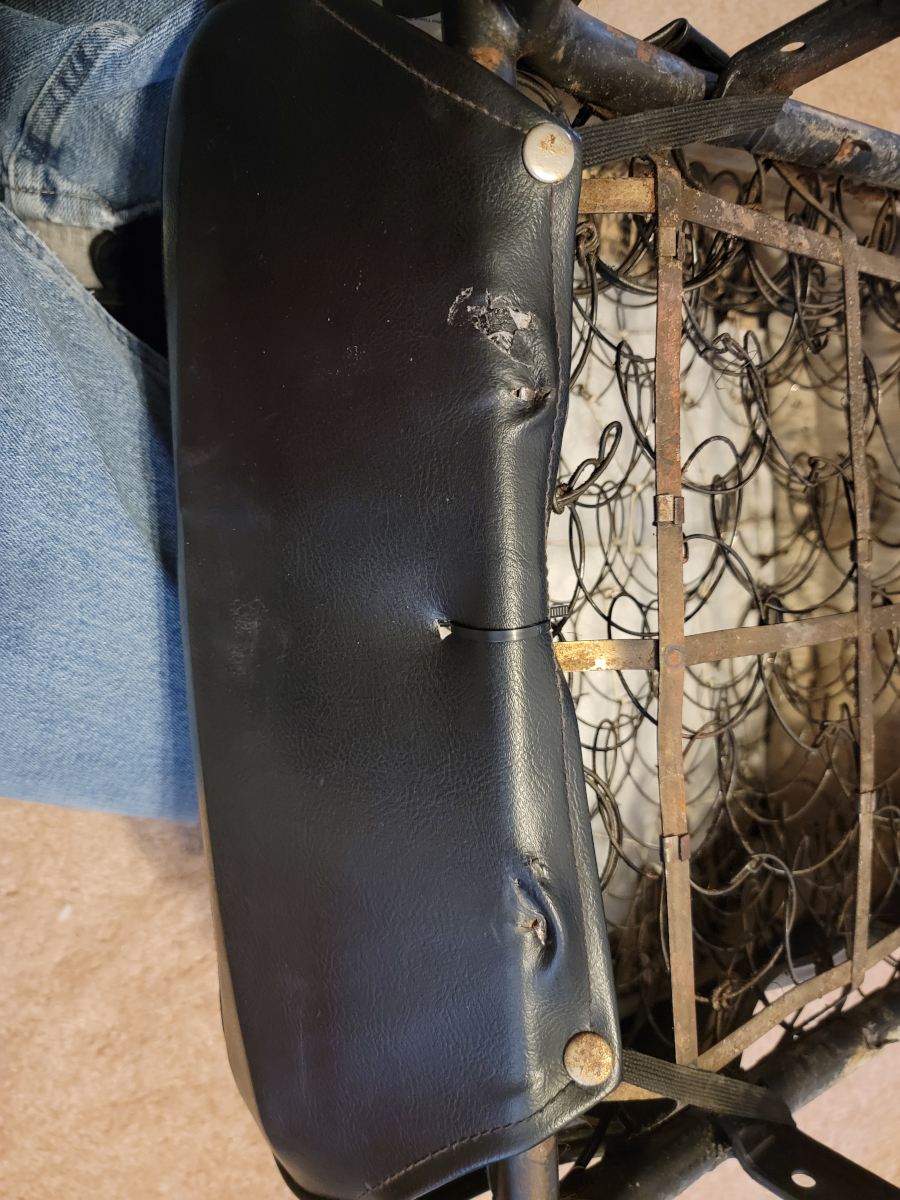
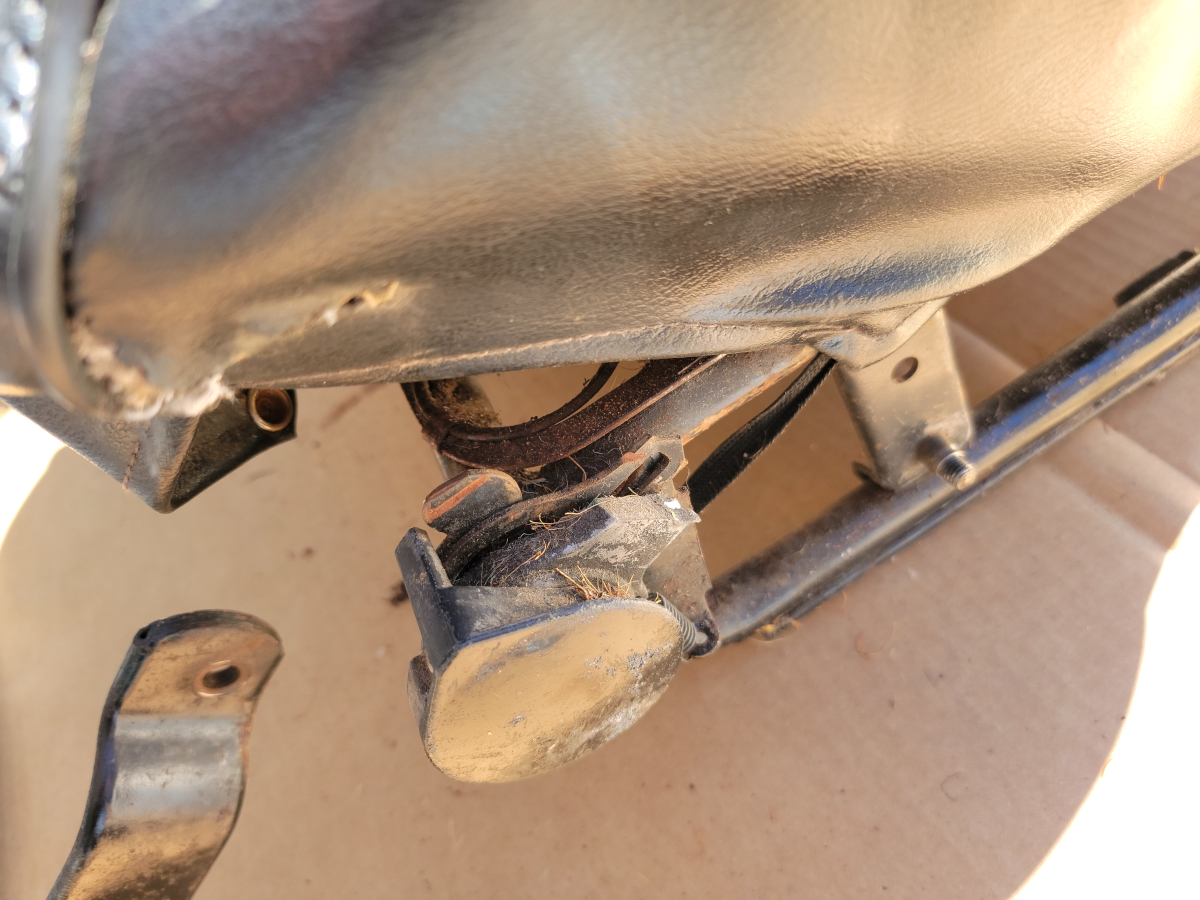
As I started unfolding the little prongs to release the seat cover, one on the back side of the seat base popped off.
I pulled the metal trim piece off the side of the seat. It was missing the rotating metal bracket that holds the back half in place. It looks like someone had previously tried to put a plastic GM push button trim thing in there, but it was broken off.
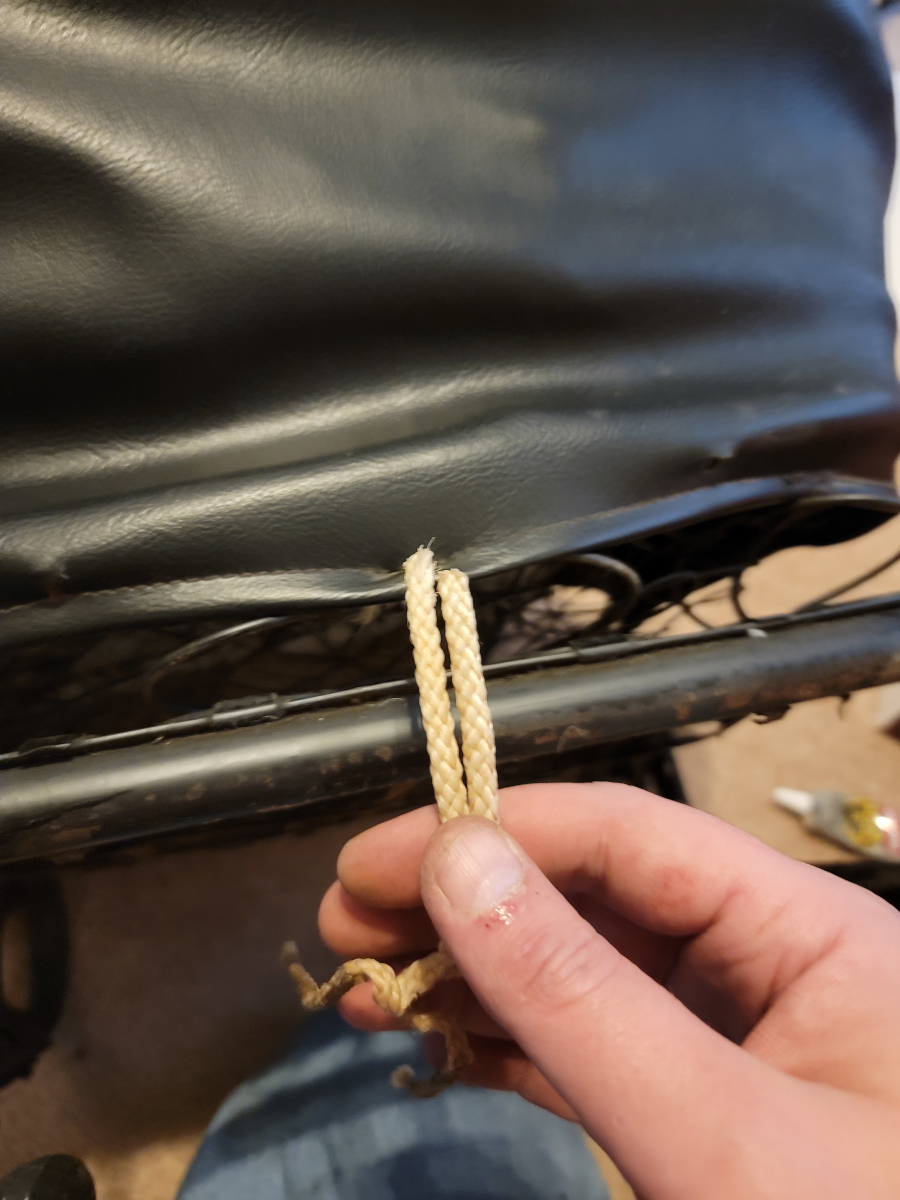
This passenger side seat cover also had the tie down strings in the front, though they were tied differently than those on the driver’s side. When I tried to untie the knots, they quickly fell to pieces, just like the ones on the driver’s seat.
When I had everything disconnected and started peeling back the vinyl seat cover, I found another hat on a hat type situation.
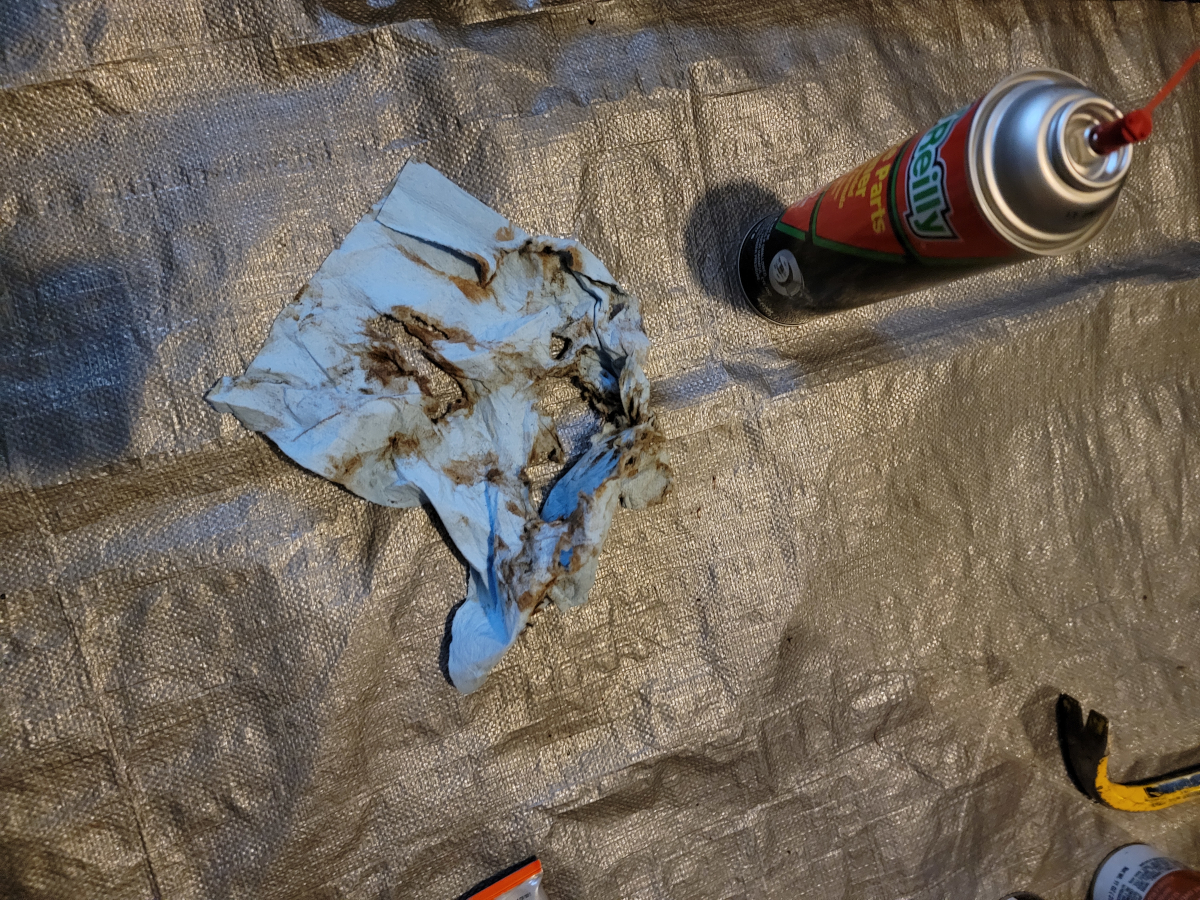
I got the seat base all stripped down and brushed it clean. I used all my brake parts cleaner spray last weekend and hadn’t been back to the parts store to pick up some more. I’m sure it will be fine.
Friends, let me just say that most of the DE1634 paint (Amazon link) I sprayed never actually set. My experience on the driver’s side was after emptying a can of brake parts cleaner into/onto the seat frame, the paint stuck like glue. Also, I have sprayed that engine enamel on the oily, dirty underside of the car many times with no issues.
Here on the passenger side, five hours after spraying the paint, it was still gelatinous and quickly became a mess I had to deal with.
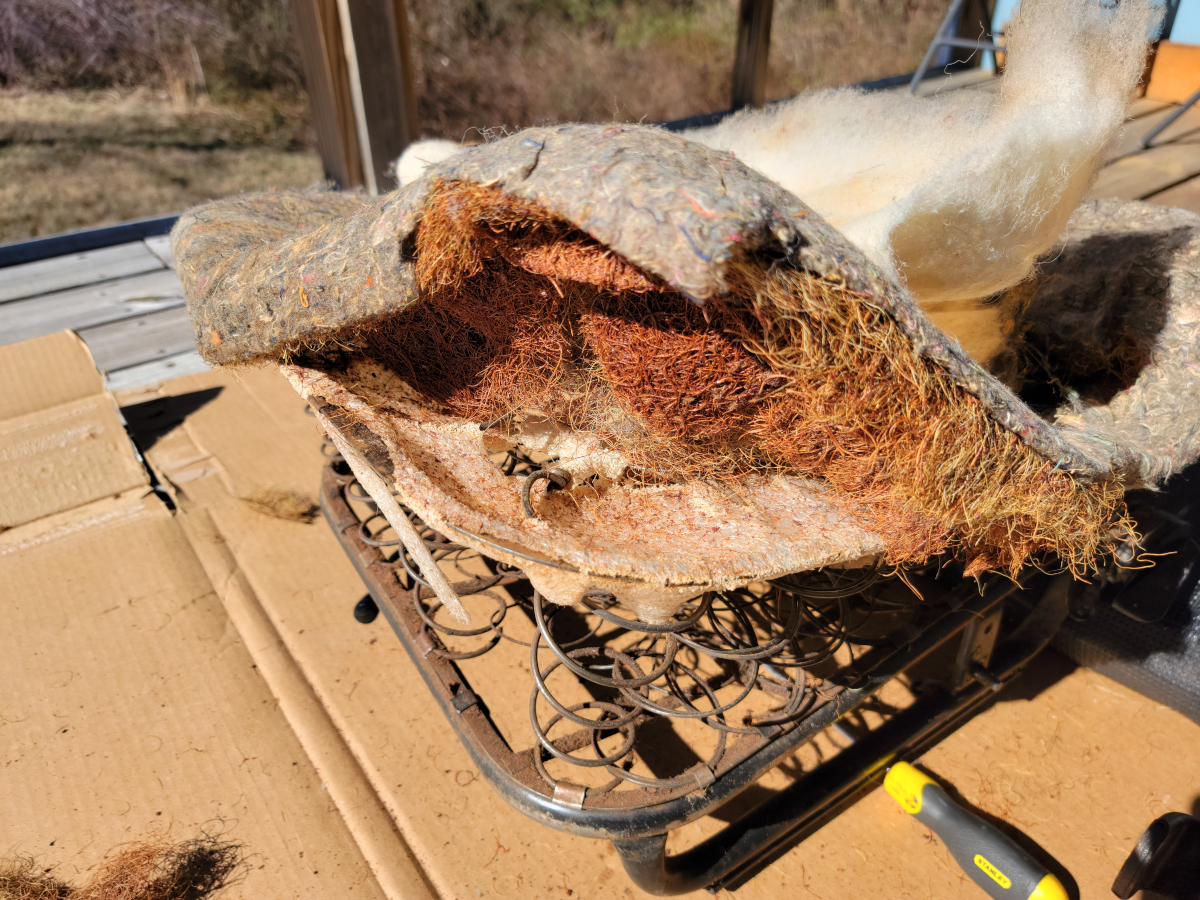
Moving on to the seat back, I stripped it all down and there was only a trace of the two tone tan seat back cover like the driver’s side seat back had. It appears the prior seat back cover was just quickly cut off at some point.
It did have the same traces of mouse house, with chewed up acorn shells or whatever, as the driver’s side, as seen here, after sweeping up.
The seat back had the same broken braces as the driver’s side, though these didn’t have the additional broken welds. I zip-tied them together.
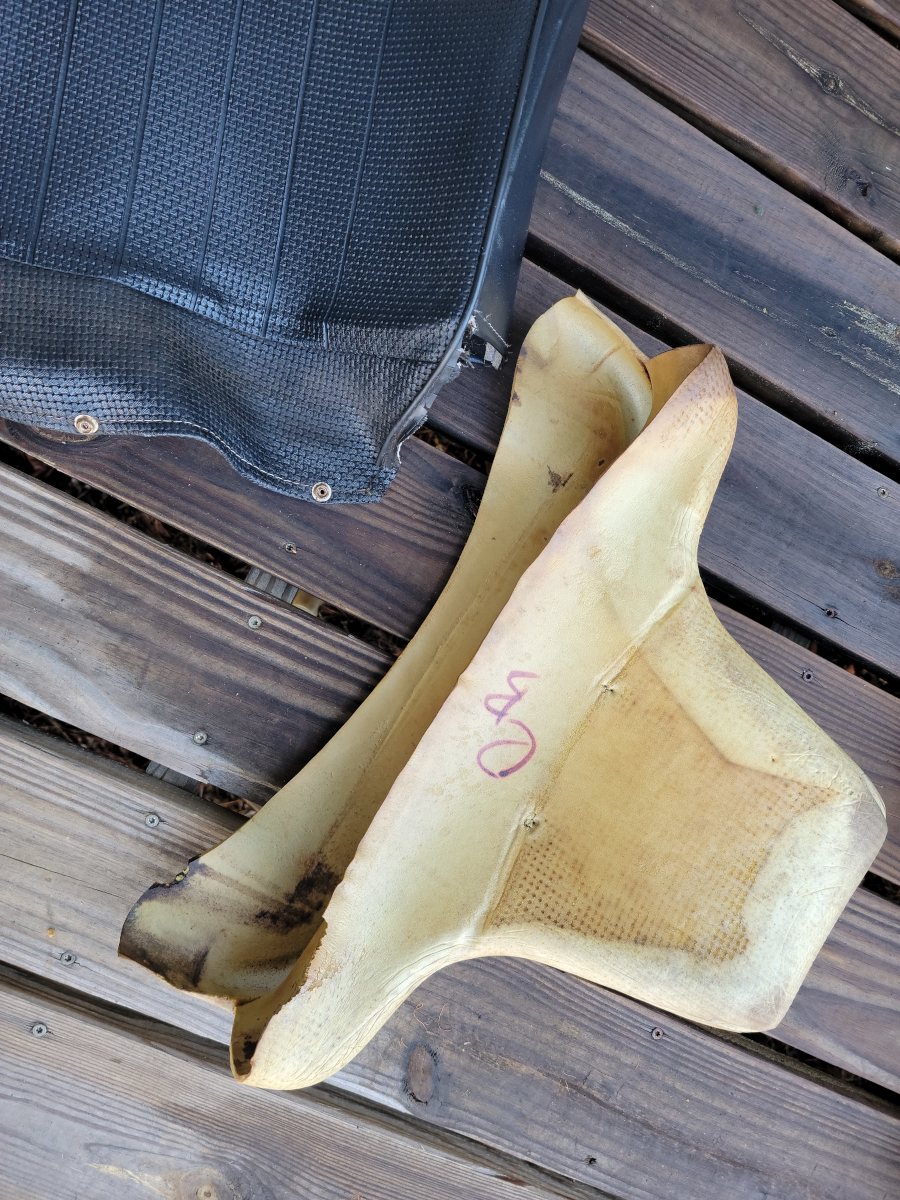
It also had the same surprisingly high quality foam headrest in surprisingly good condition that the driver’s side side had.
Rebuilding
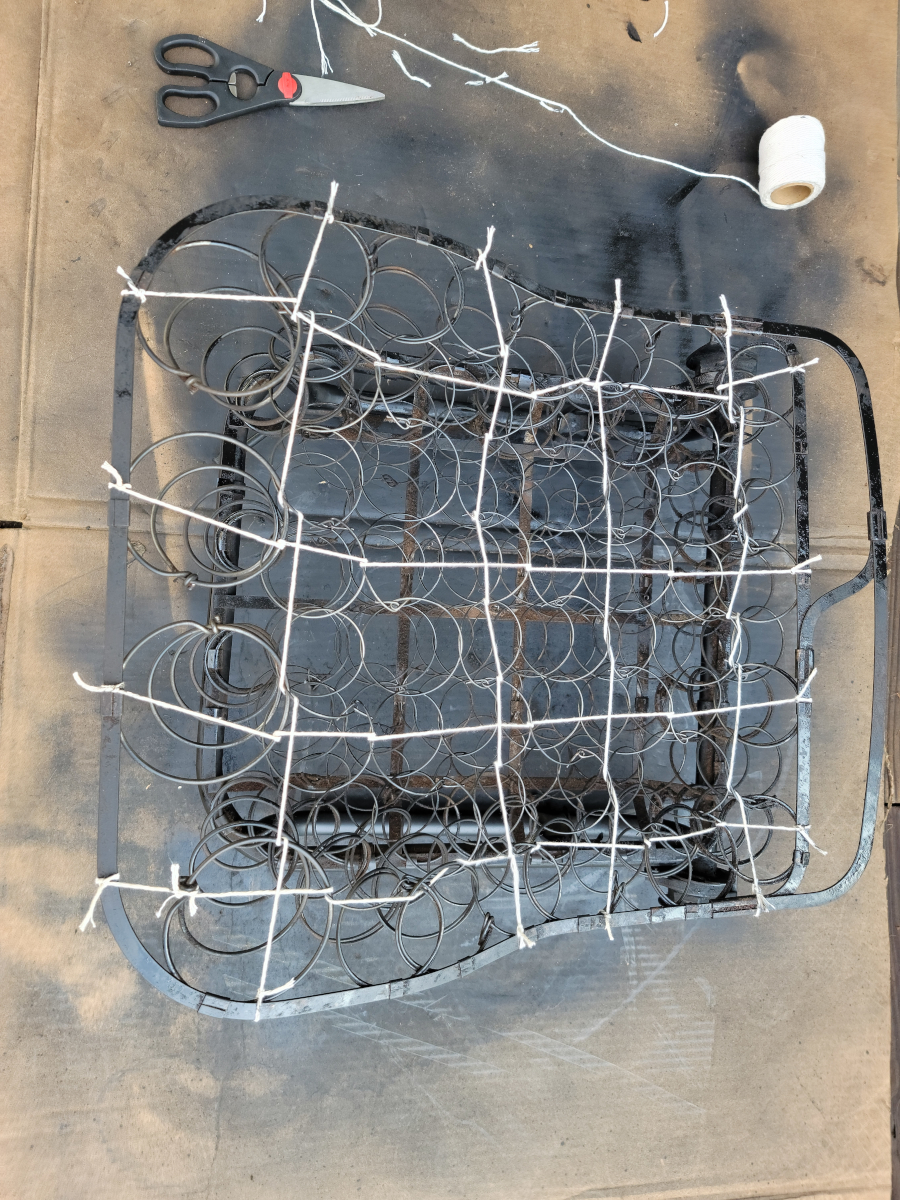
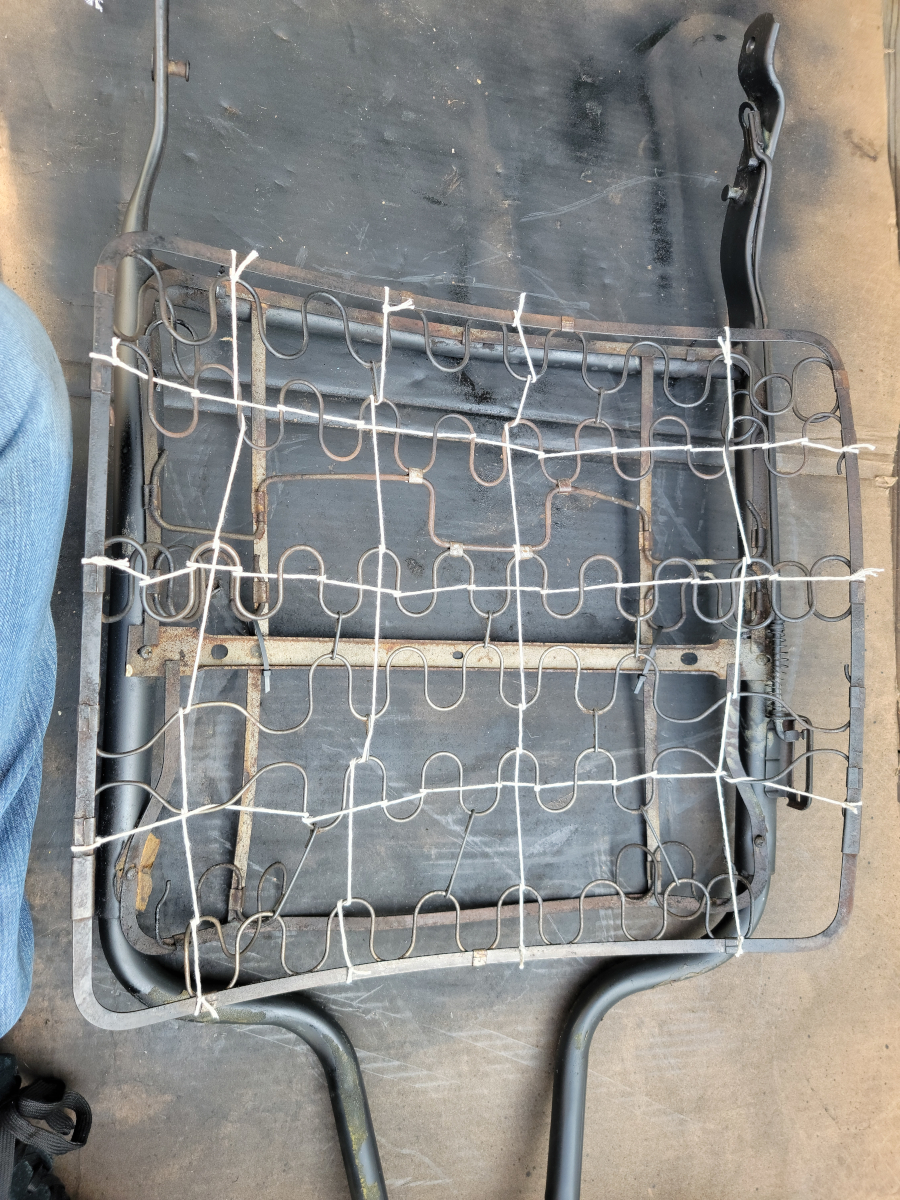
I performed the act of tying twine into a grid on both the seat base and back.
I then hog-ringed some jute webbing across the seat base and back, but apparently forgot to take a picture of the seat back. Still wet/forever wet paint is visible in this picture.
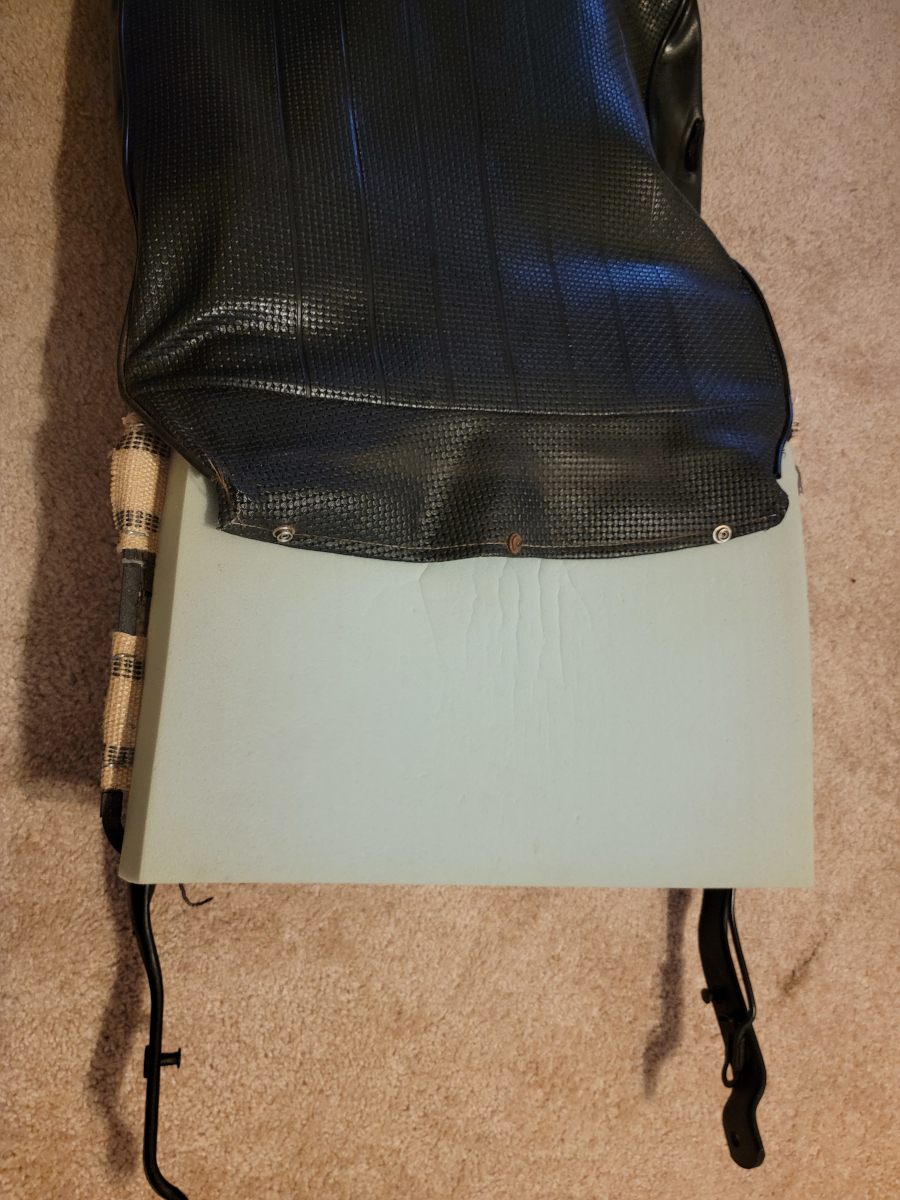
Next up, I cut another panel off of that dishwasher box to flatten the back of the seat and zip-tied it on.
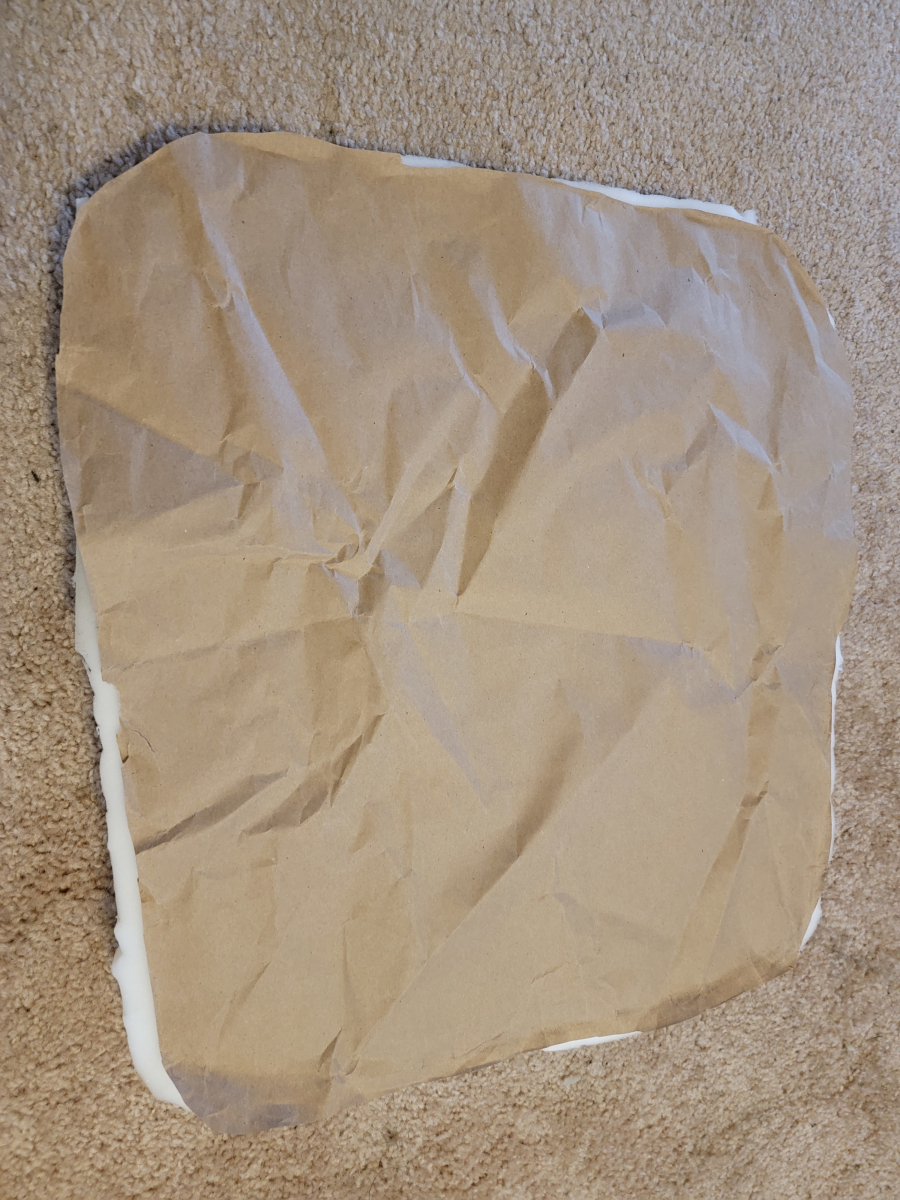
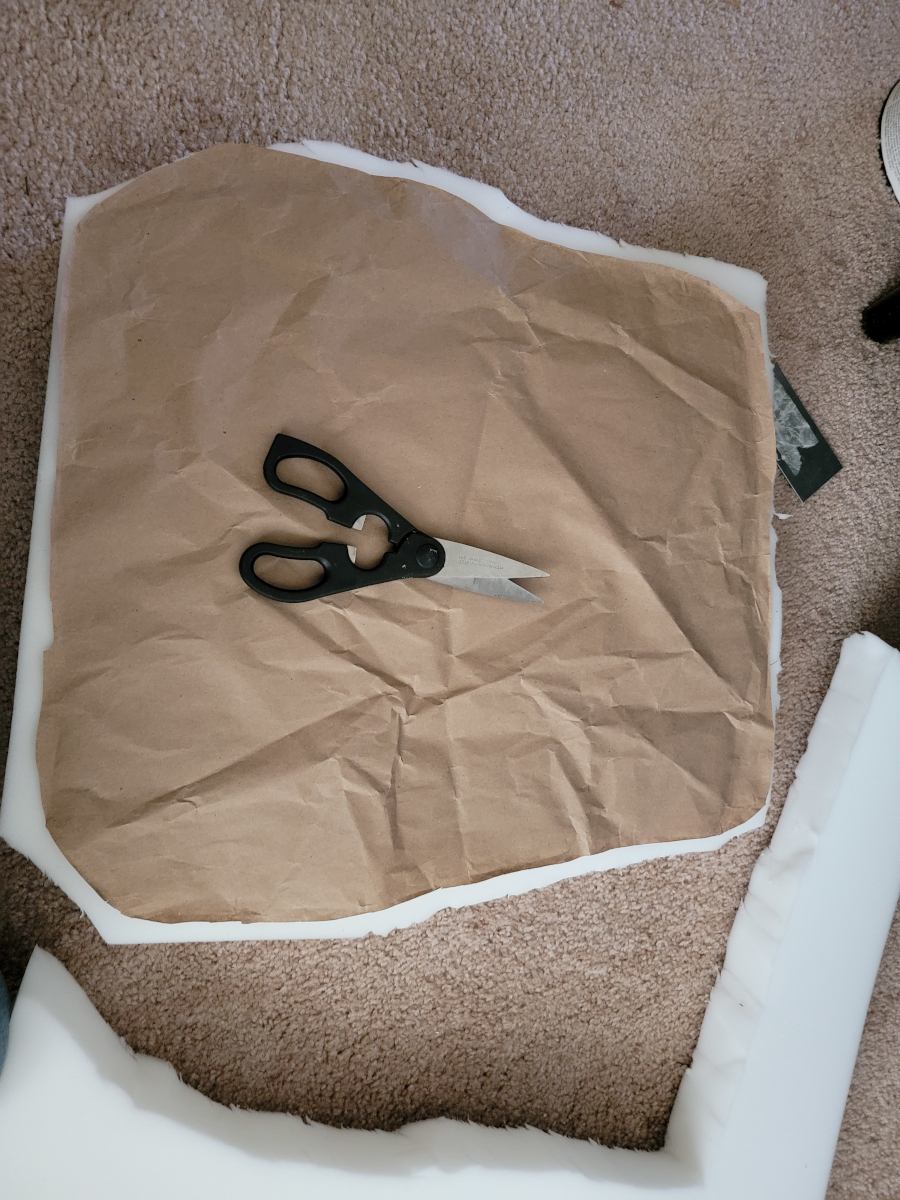
Last time, I had cut a piece of high density foam for the seat back, but decided to use some softer foam I had purchased a year ago for this purpose. I cut that seat back piece into a seat base shape using the craft paper pattern from the driver’s side.
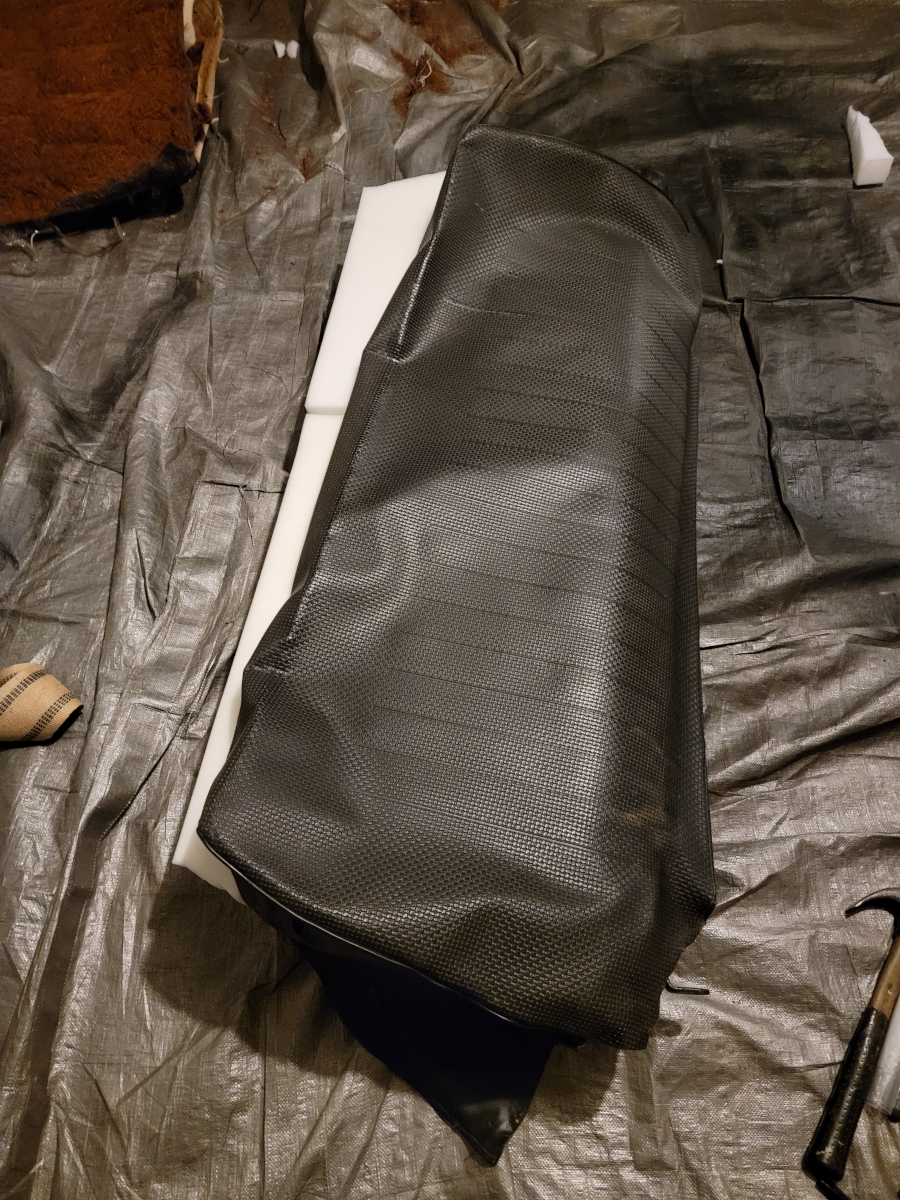
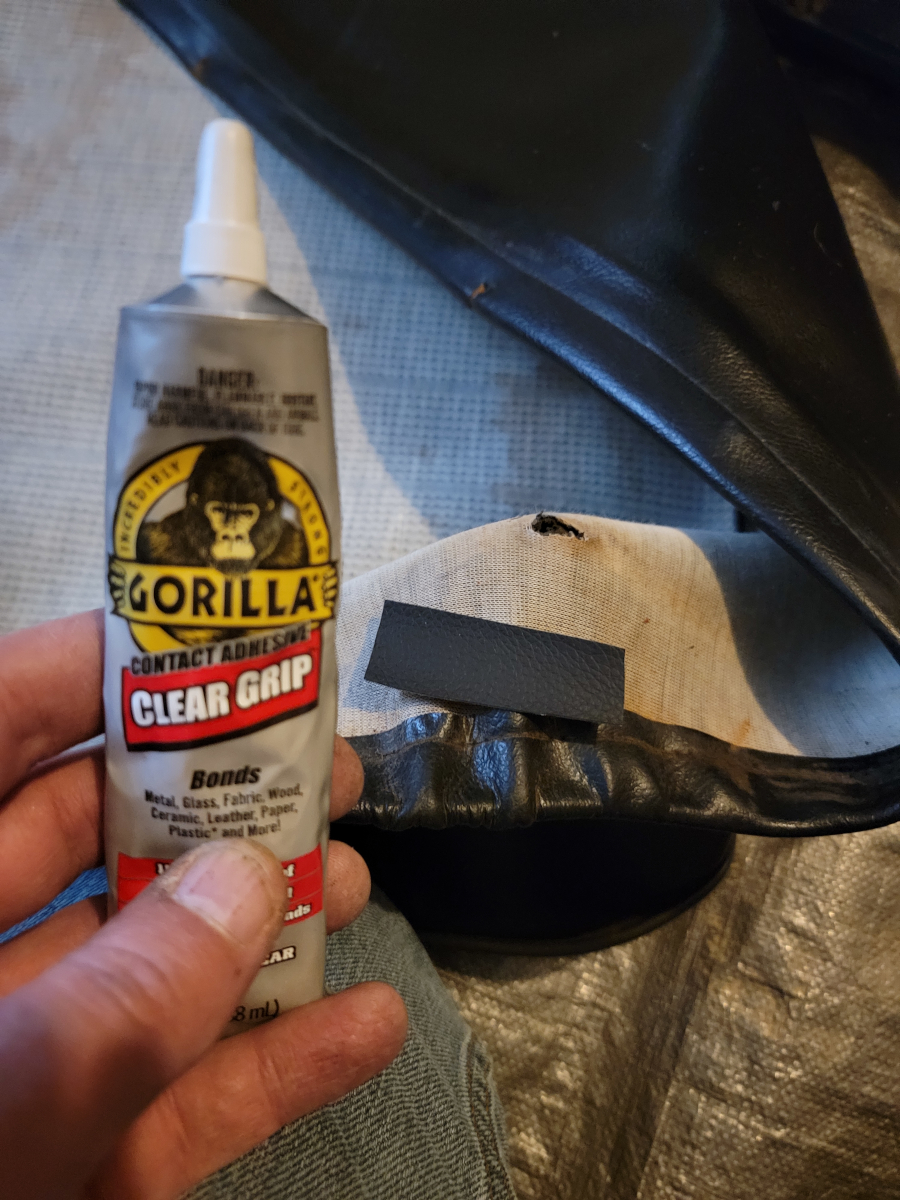
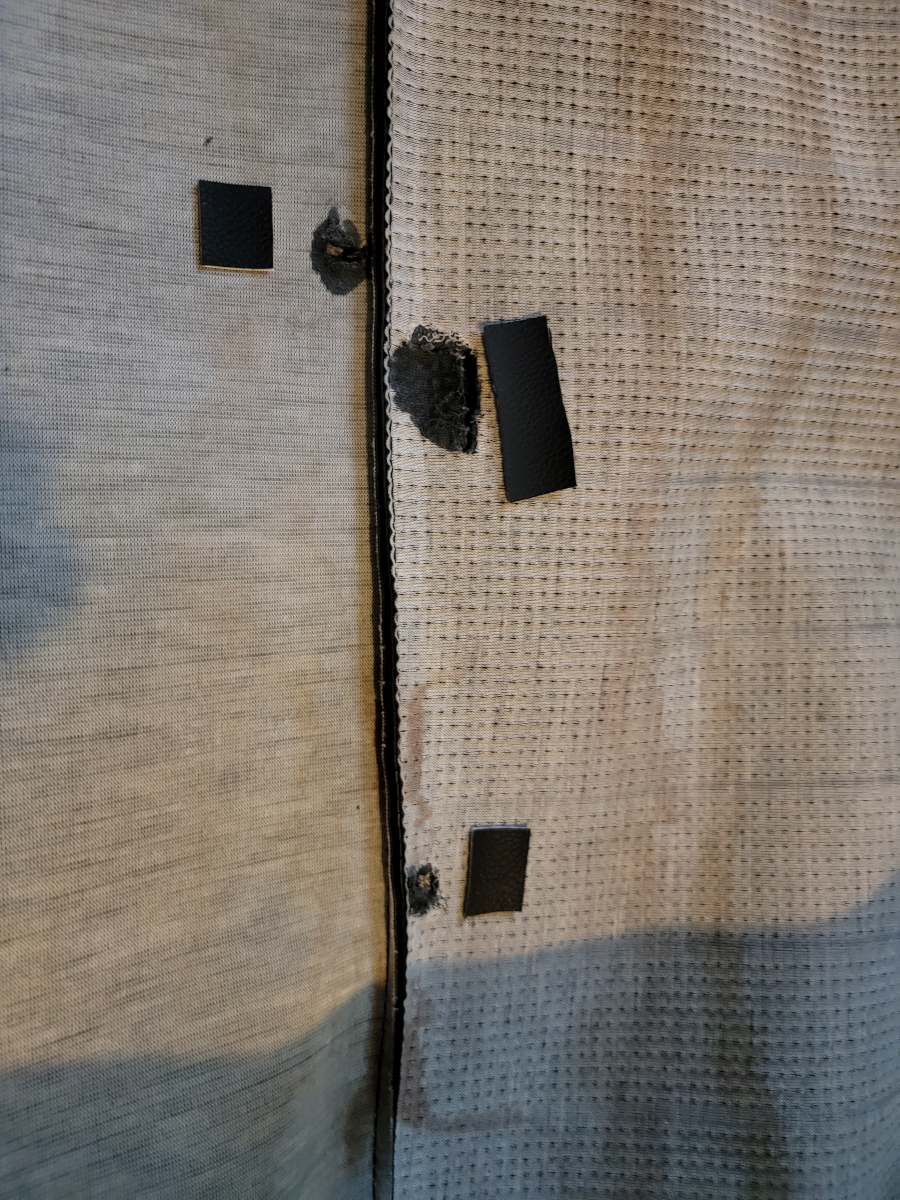
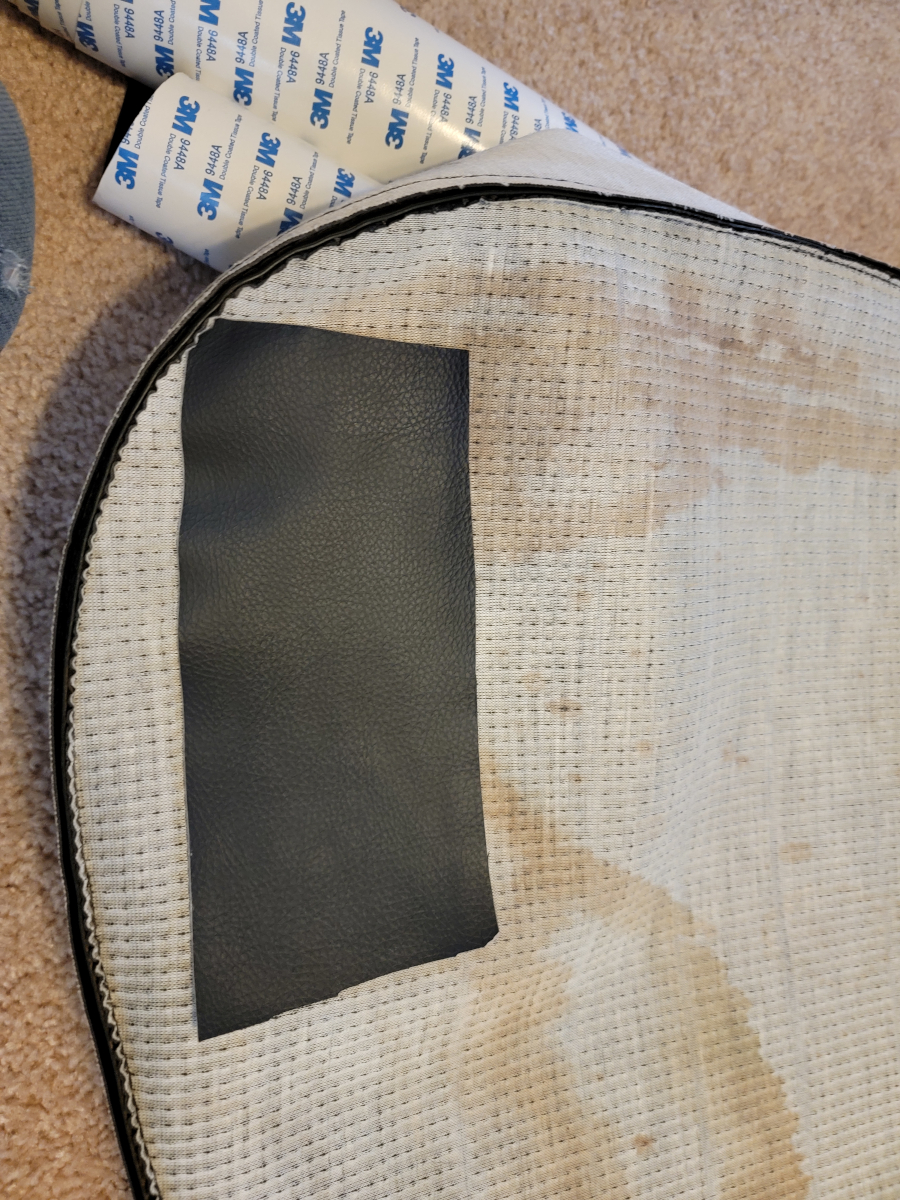
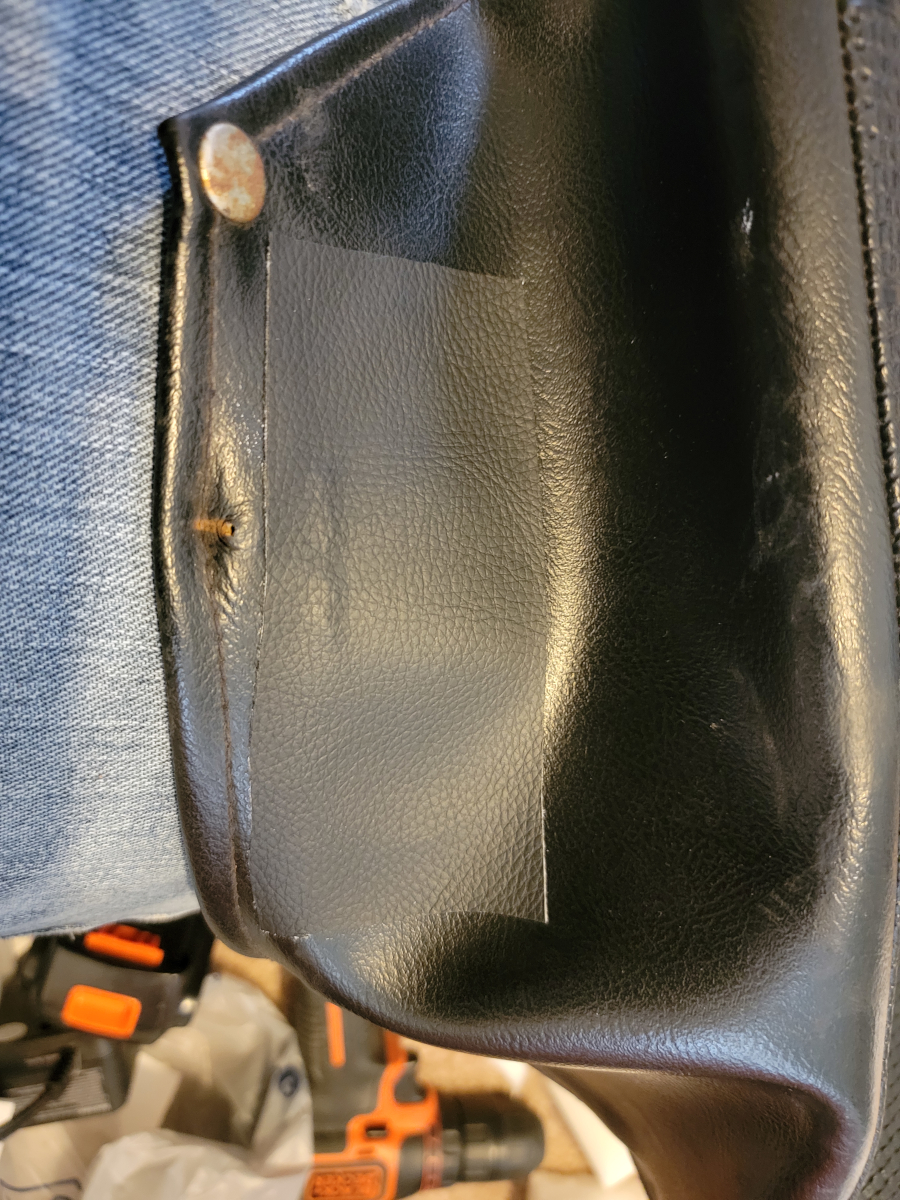
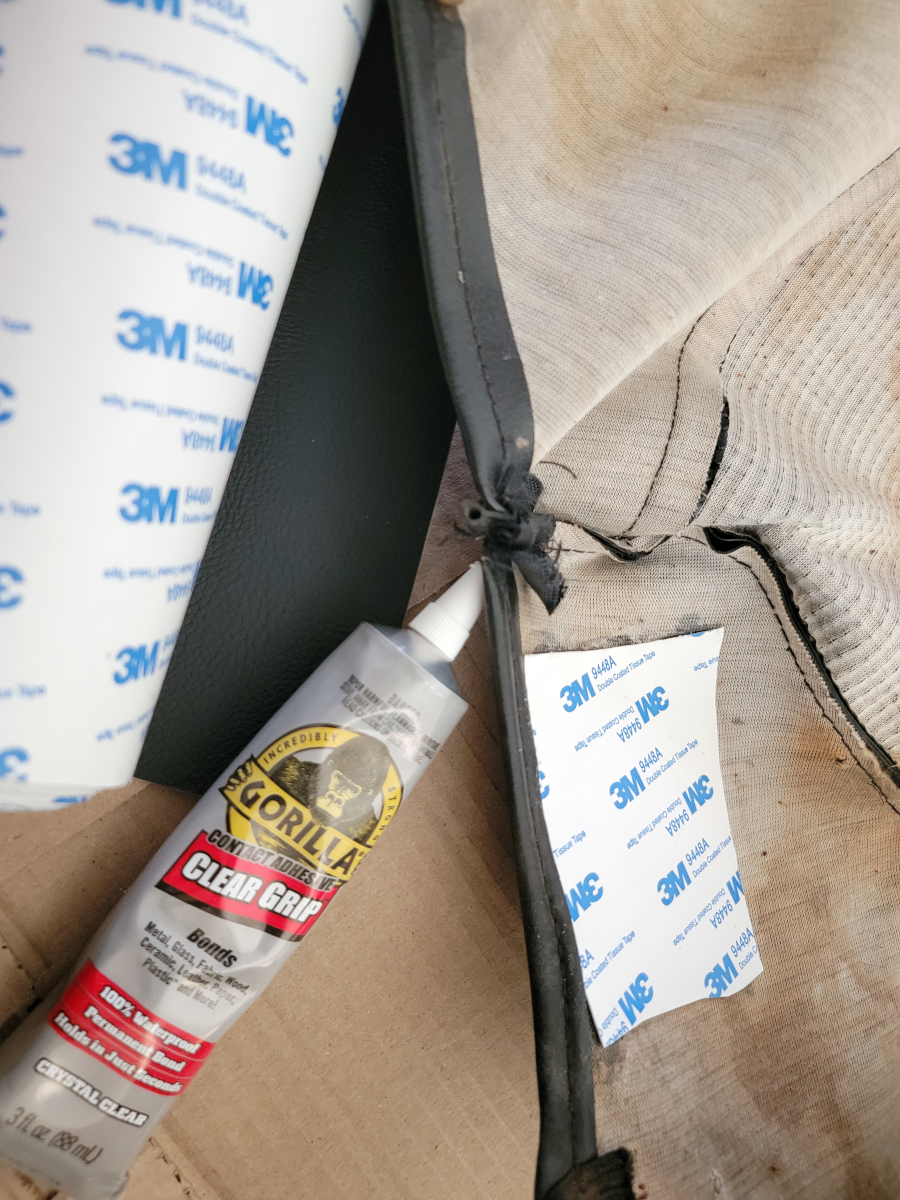
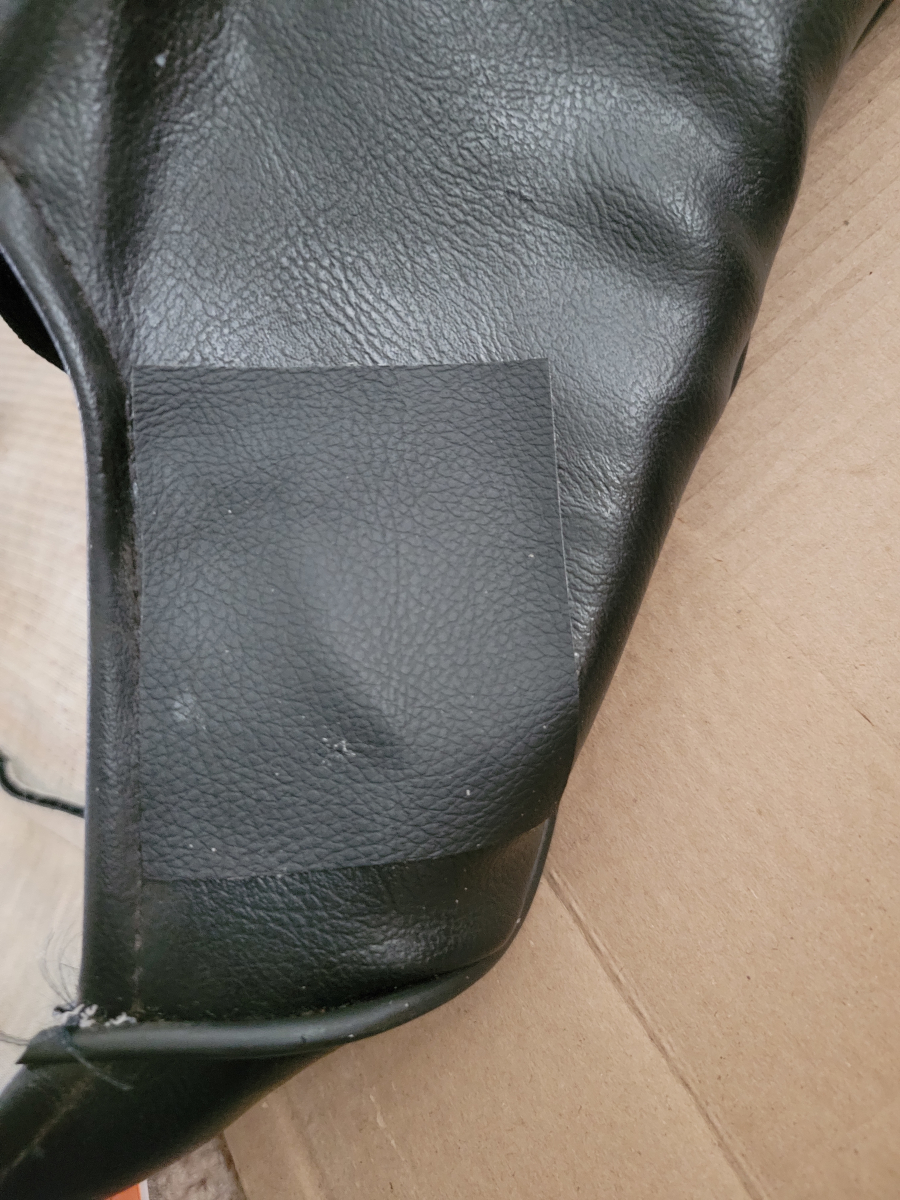
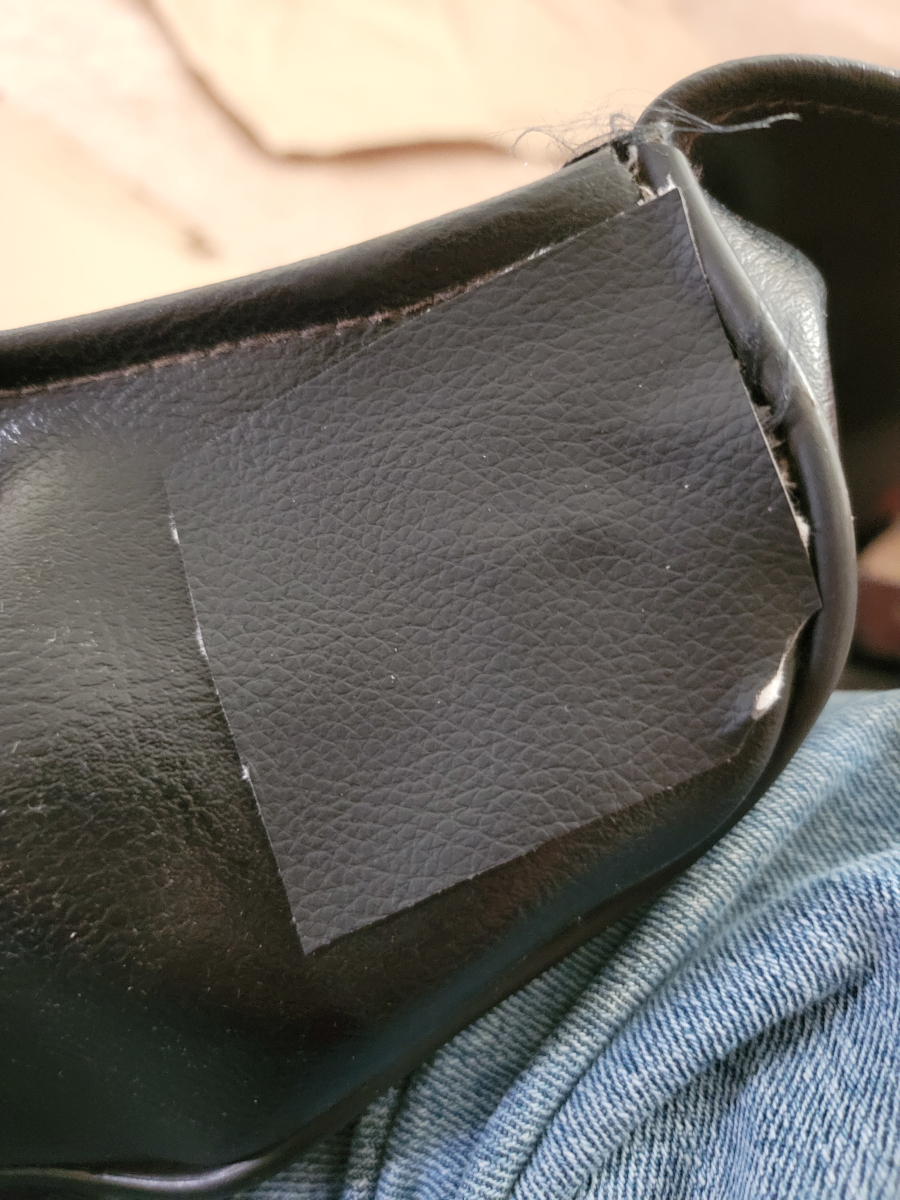
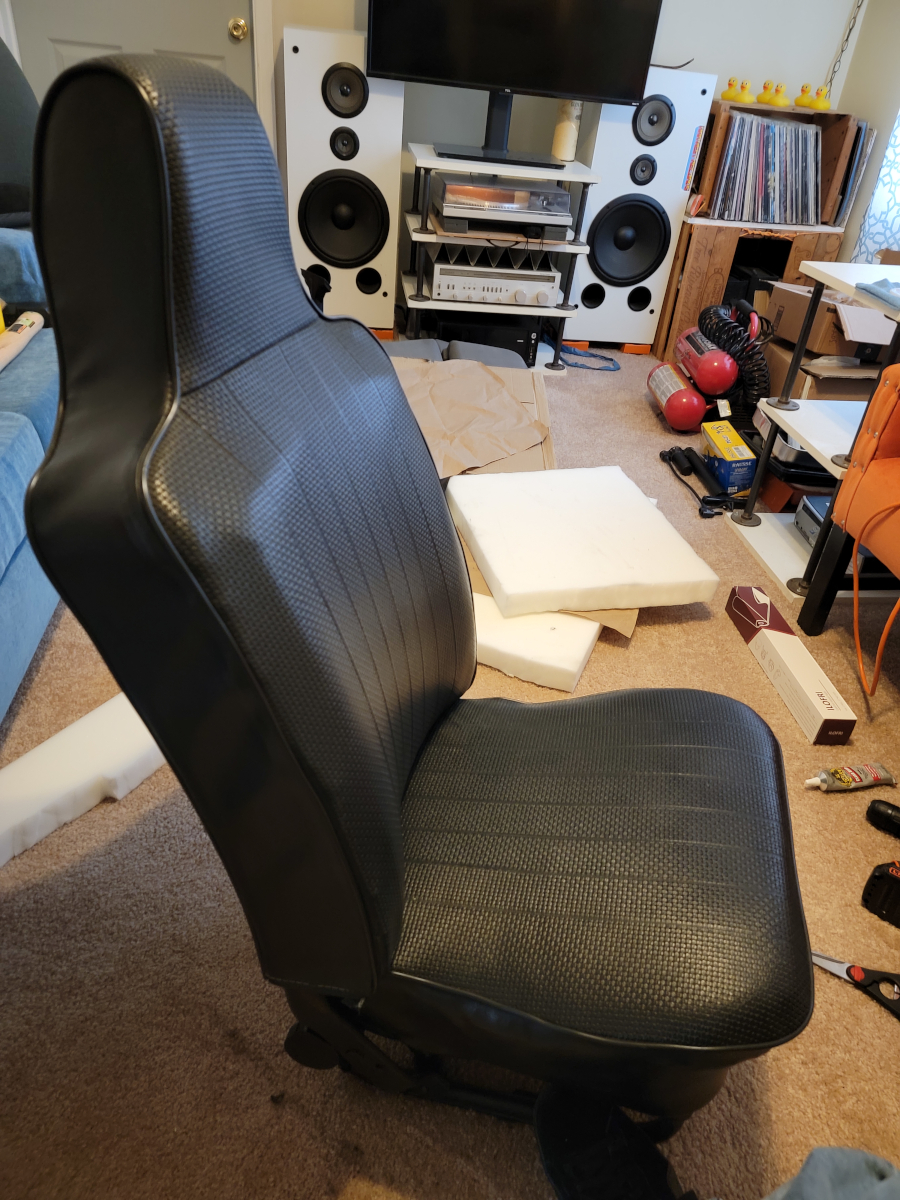
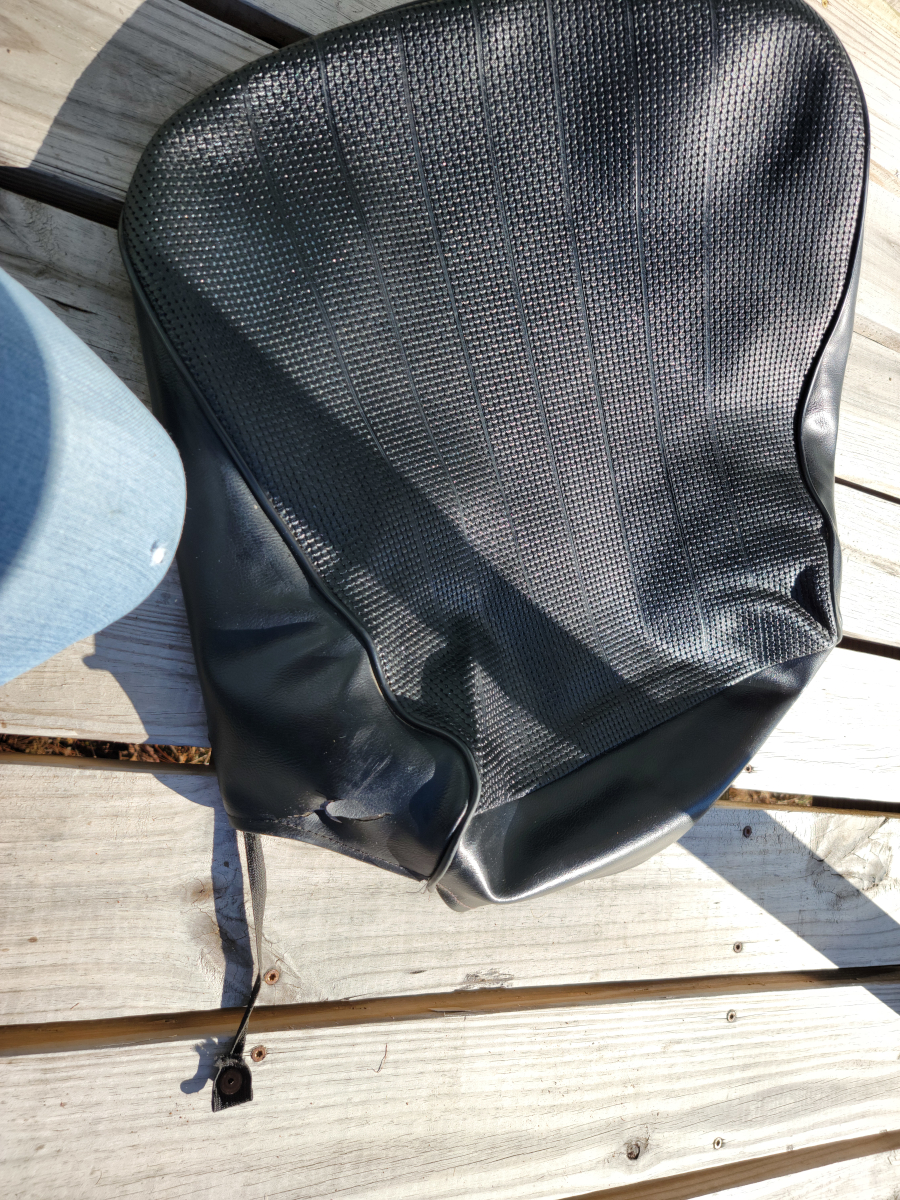
Now onto patching the vinyl seat covers. On the outside, the passenger side was in worse condition than the driver’s side, but from the inside, was not as worn. There was only light showing through in a couple of little places. Using a combination of the self adhesive vinyl patch (Amazon link) and Gorilla Clear Grip (Amazon link), I got them sealed up as best I could. I have been really impressed with that roll of vinyl patch! The texture is great and the adhesive back sticks well.
I wiped the seat covers down with Mothers VLR (Amazon link) spray – it Cleans, Conditions, & Protects!
I got the seat back cover slipped on with relative ease. The passenger side was missing the plastic rail guards, which made it a much looser fit. All three snaps on the seat back cover were holding firm, but I went ahead and added a couple of zip-ties as well, just to be safe.
The cover on the seat base also went on without issue.
I mounted the metal trim piece on the side of the seat with another zip-tie.
I had just enough of everything to finish the passenger side seat. Another Amazon order was required to get enough jute webbing (Amazon link) and high density foam (Amazon link) to start on the back seat.
I’m again waiting for the upholstery foam to be delivered. That’s my only complaint with any of this lot is that the roll of seat foam isn’t sold by Amazon directly and takes a week or more to receive once the order has been processed, shipped, and delivered. Let’s just hope next weekend’s weather is cooperative. It tends to rain for a couple of months here once the weather starts to change into Spring.
Once the roll of vinyl repair stuff (Amazon link) arrived, I got started patching up the seat covers. I picked up some Gorilla Clear Grip (Amazon link). The package says to use it like E6000, so I did.
In places where there were gaping holes in the seat cover, I used the vinyl patch as a backing and glued it with the glue. Where that didn’t look great from the outside, I just slapped a patch on the outside and used the adhesive backing on the vinyl repair roll.
Replacing the seat foam
I had previously picked up some low density green upholstery foam pads (Wal-Mart link) and decided to use those in the seat backs. After cutting a seat pad and seat back out of the high density foam roll I bought, I realized there wasn’t going to be enough for both front seats.
It was a really tight fit in the seat back and needed to be massaged into place. The seat back cover started off being 2-3 inches away from being able to snap closed.
I apologize for the gratuitous crotch shot, but luckily, I’m still a baggy pants 90s kid, so it could have been worse.
We don’t need no rusty snaps
I pulled the plastic side bar supports out to free up some space and was finally able to get the ends to meet up, but the snap was failing. After bending the female side of the snap into a little oblong, it finally held.
I did the same with the other side and got it snapped as well.
The middle snap had been previously pulled through the vinyl, so I cinched it all together with zip-ties.
I then got the side of the seat back wrestled into place to be able to put the plastic trim piece and knob for the seat back release lever in place.
Once the seat back was fitted, I wriggled those plastic side bar supports back into place. The fit is now very revealing. As you can see in the picture above, much like Robert Plant’s hip-huggers, you can see the hog rings that are holding the jute webbing in place.
Moving on to the seat base, it was a much better fit than the seat back, initially at least. With all the stretching and pulling, the strings sewn into the front edge of the seat cover snapped off. They were very crispy. A zip-tie helped cinch it down.
One edge at a time, I stretched the cover down over the bottom of the seat base and stabbed the little prongs through. The last edge was the toughest, as you might imagine, but smooshing the seat springs down with one hand while pulling with the other was enough to bring it home.
Buttoning it up
I flattened the prongs down all around, only stabbing myself several times, and it was a nice, secure fit with no need for more zip-ties.
The foam pads are too much for the seat back and you can see the square edges, but other than that, it is very firm and comfortable! The high density foam would have looked even worse. I’m glad that I remembered I had those low density green pads laying around for the last year.
Pardon the mess! The housekeeping staff is on a gap year.
The weather app said it was 54 degrees today and the sun was blazing. Beautiful!
I watched a couple of videos about how to remove the front seats and it’s really quite easy. Simply lift the lever and slide it all the way forward. There are many references I found to a locking tab on the side of the rail that needed to be depressed (I think I’ve got enough of that already, thanks), but it slid all the way out with no bother.
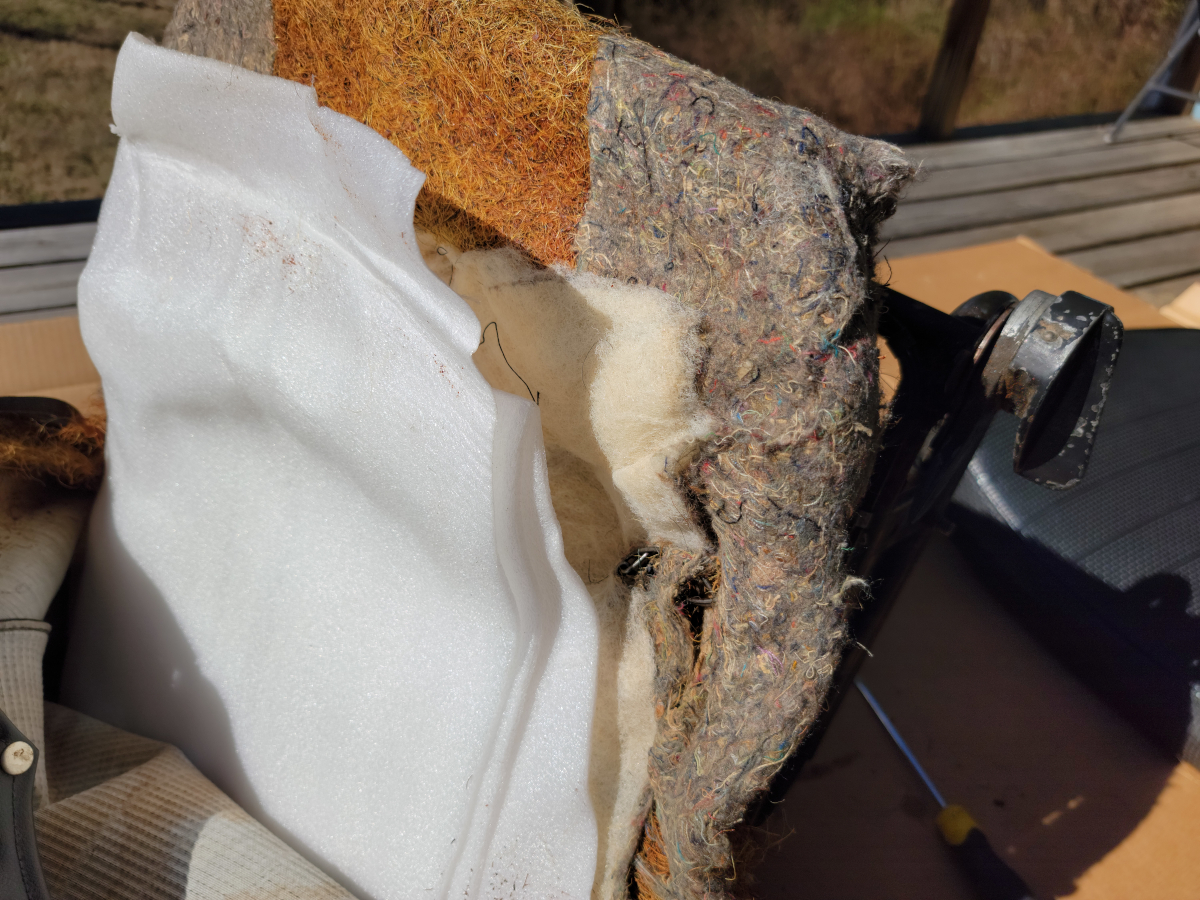
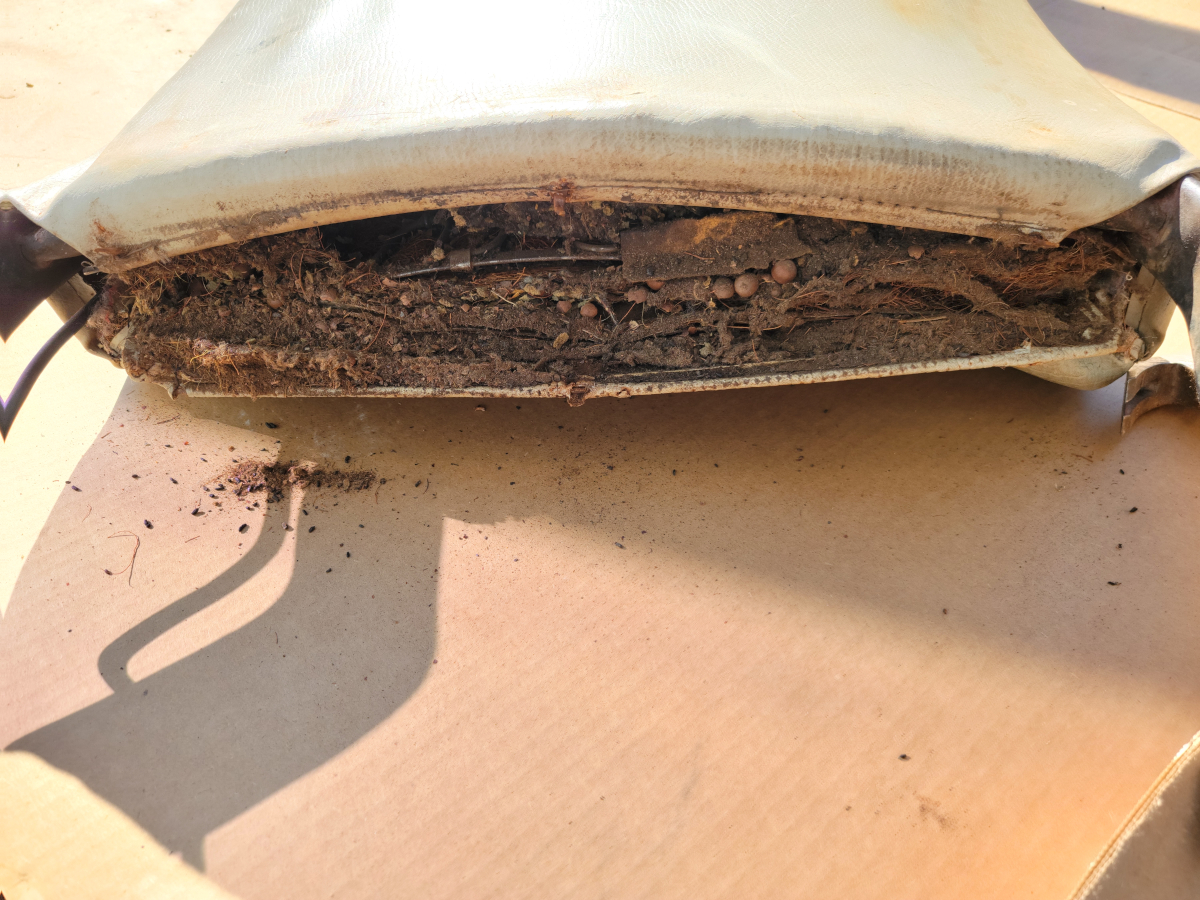
The floorboards have been full of coconut hair since I bought it, as I’m sure I’ve mentioned previously.
Underneath, it was clear that there were multiple layers of old “fixes” in place.
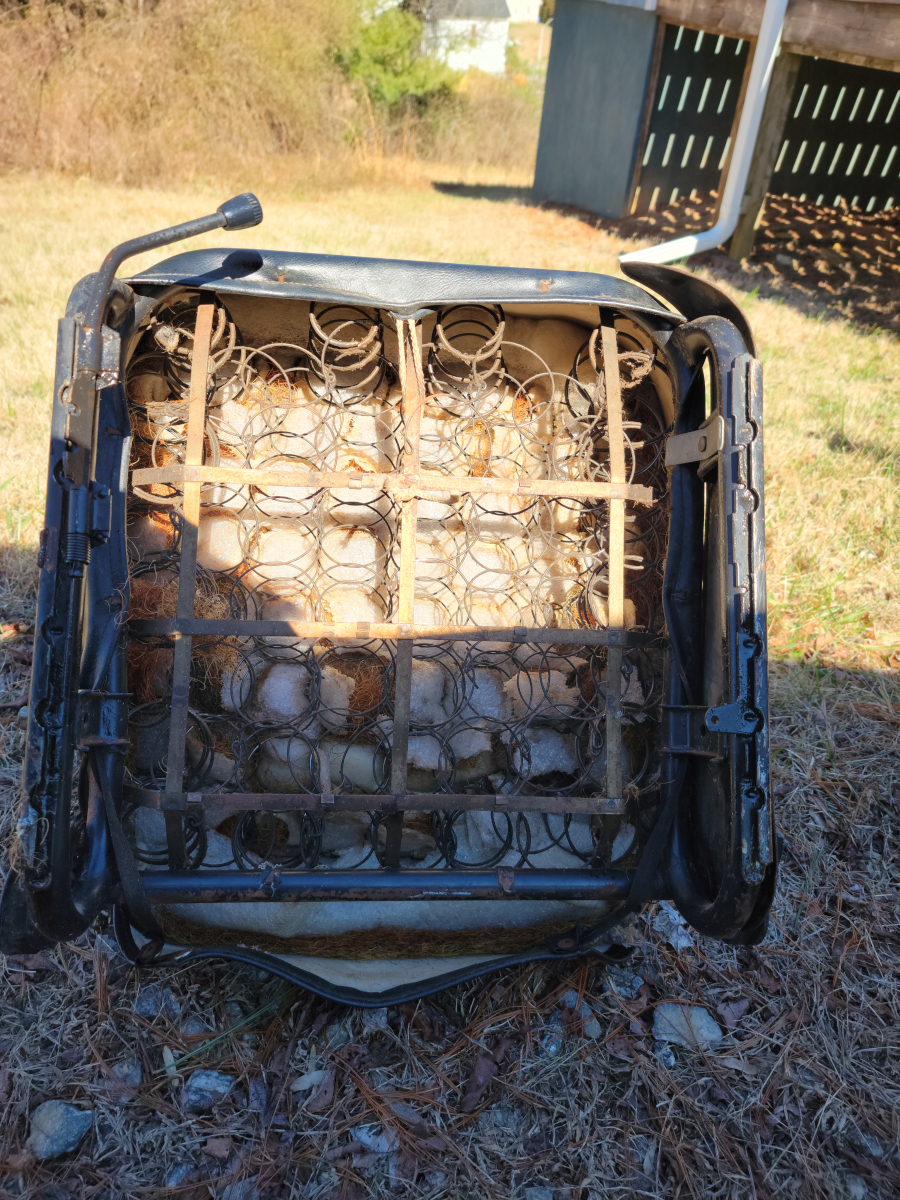
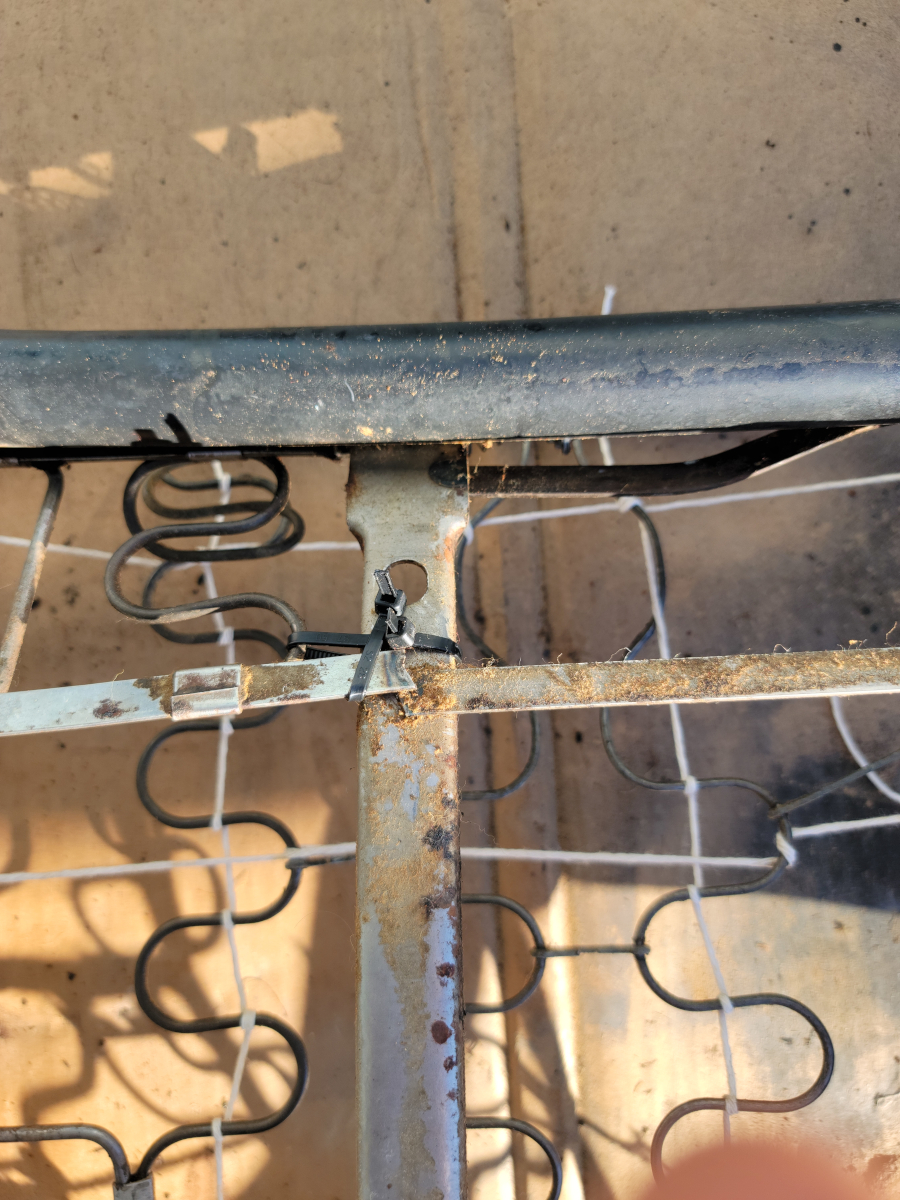
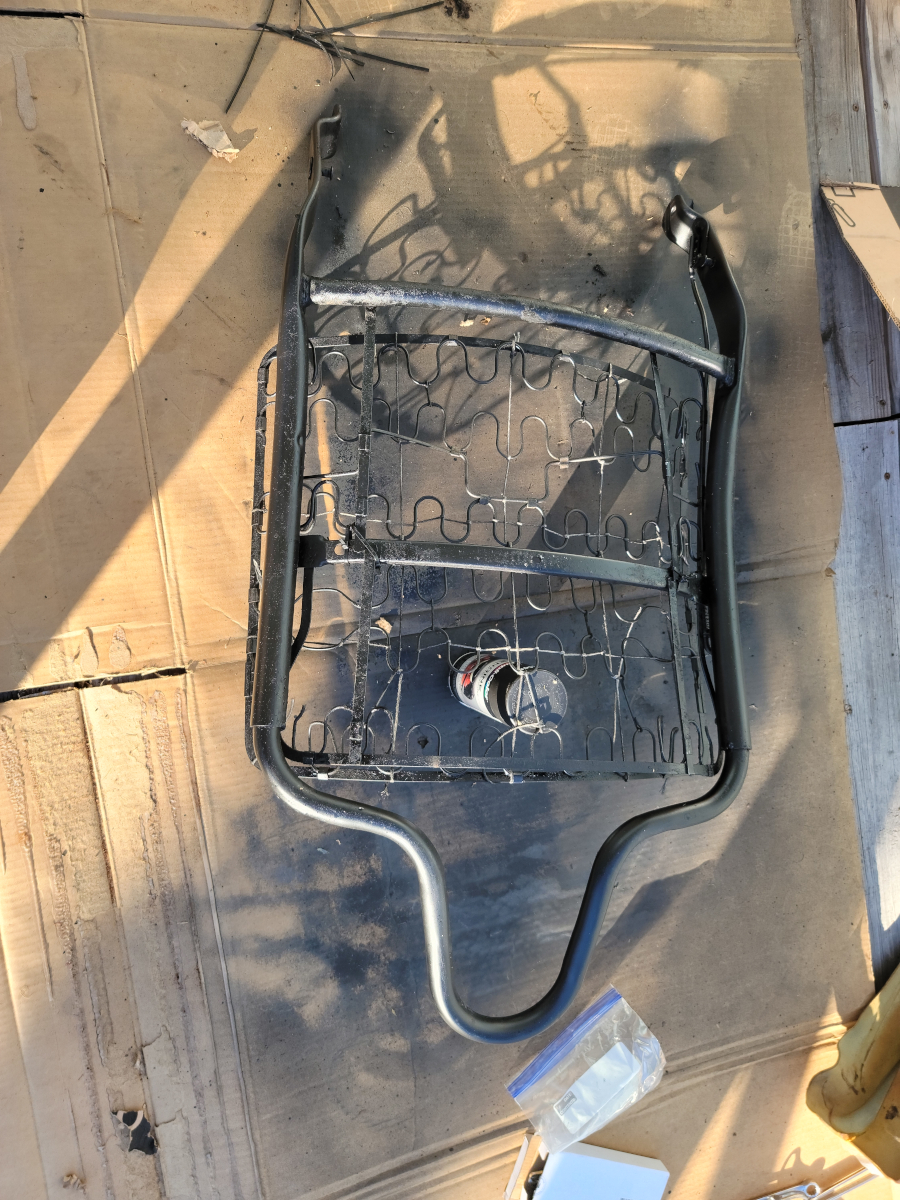
Deconstructing the seat base
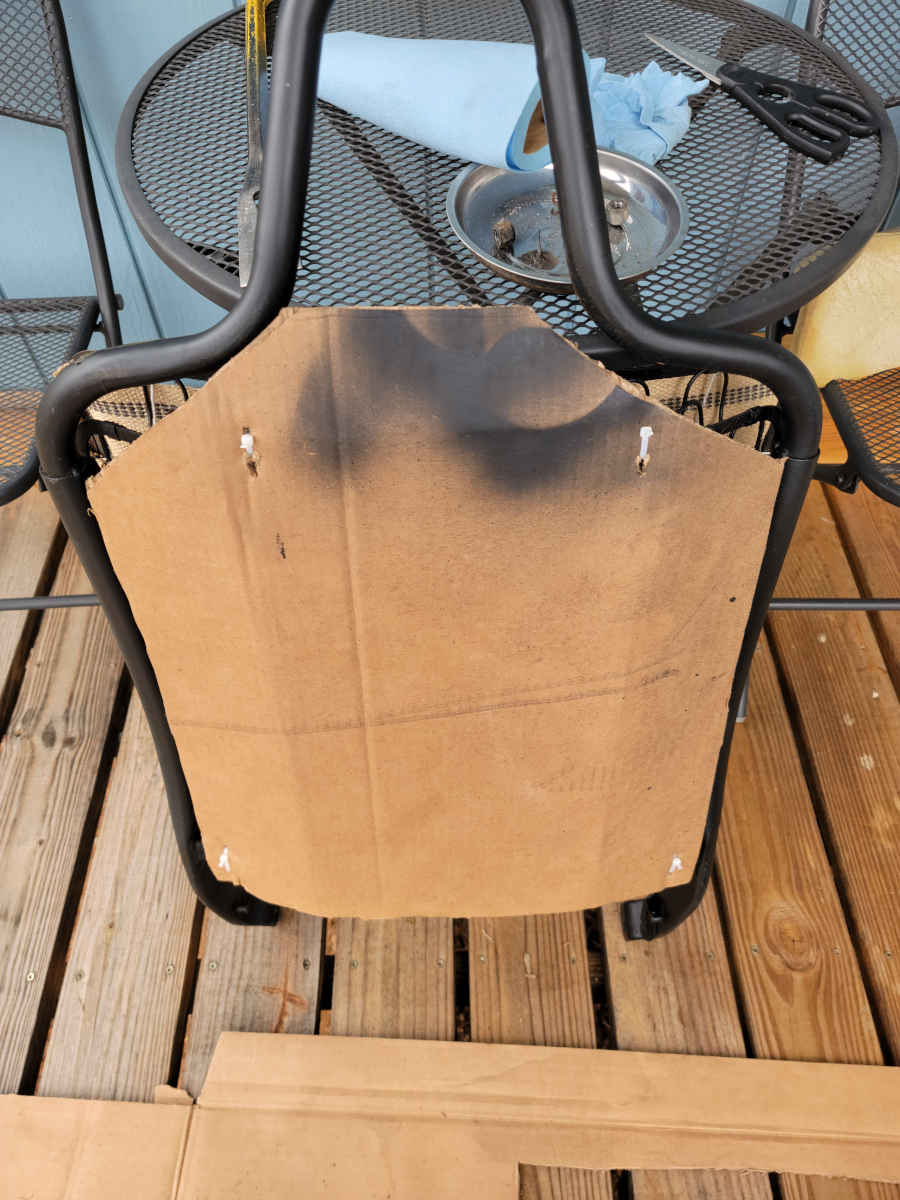
I flatted the box my dishwasher came in and set up shop on the front porch. A couple of acorn nuts and washers to remove and then the seat back and base were separated.
It looks like there is a broken lever or catch on the inside seat back hinge. Missing springs as well.
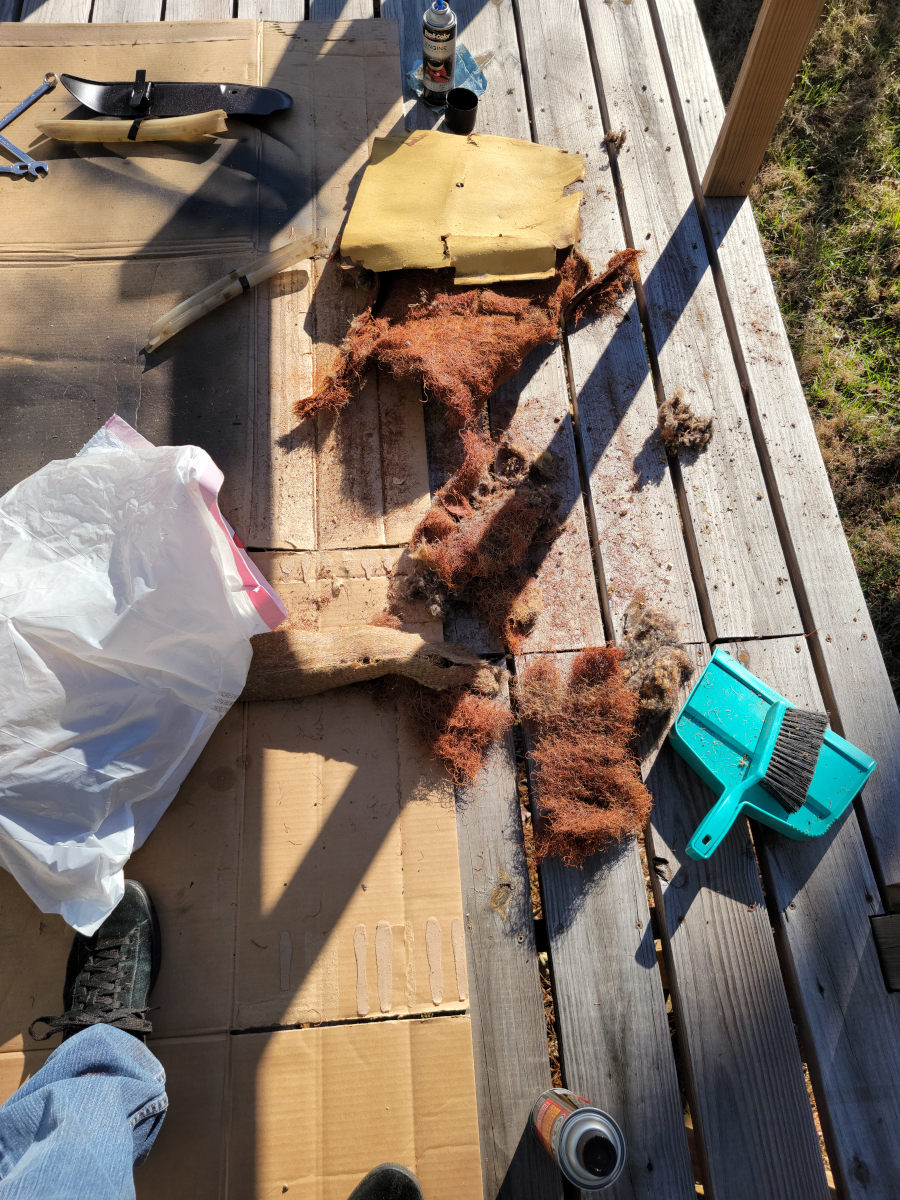
After bending back the little prongs/spikes that hold the seat cover on and removing the seat cover, it was time to start peeling back the layers.
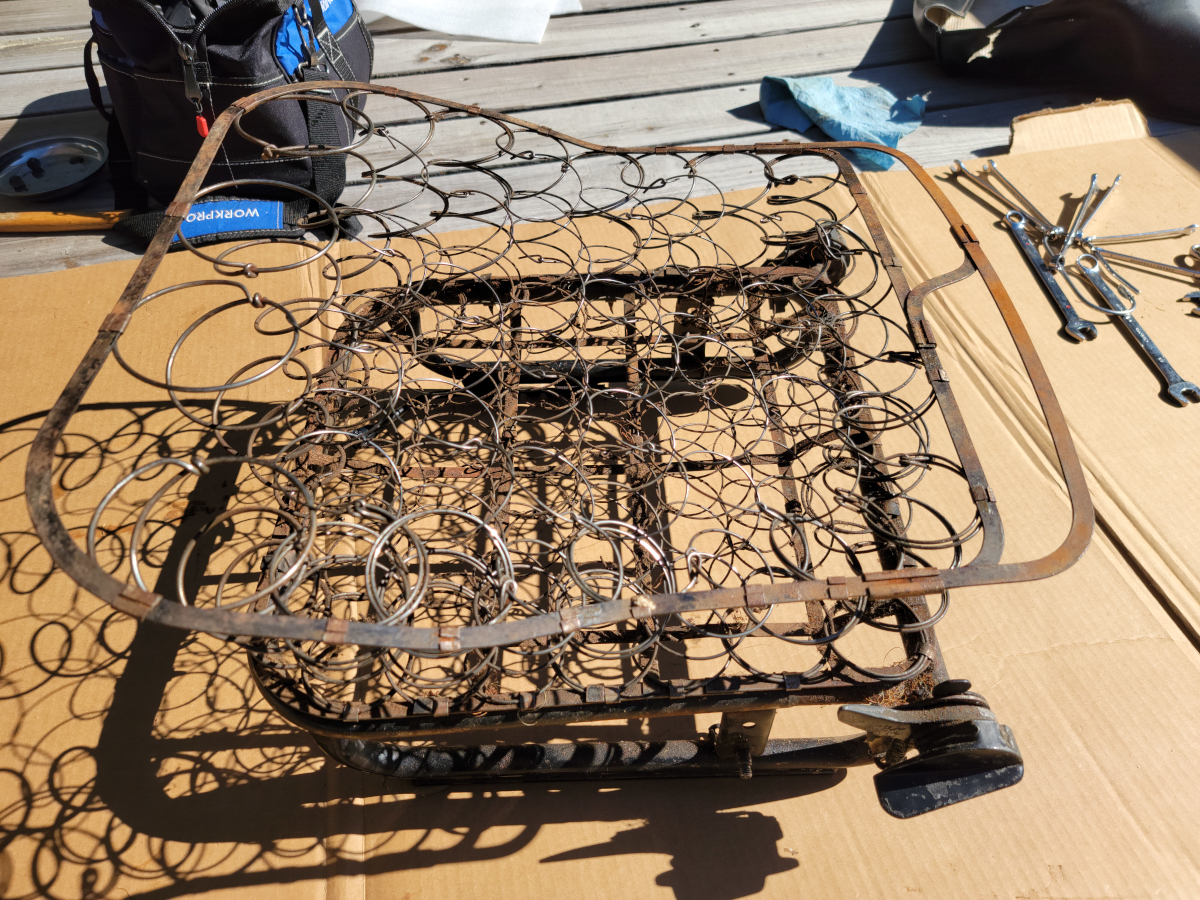
There was a very chintzy packing foam, almost like bubble wrap on the bottom, then there was the factory coconut hair pad with furniture padding edges. Above that, I think to try and soften the edges of the springs that had sprung up through the now nonexistent coconut pad, there was some white fluffy batting, like upholstery lining, and finally a couple of layers of much more modern packing foam. All of that, aside from that last layer of packing foam, went straight into a trash bag.
Rebuilding the seat base
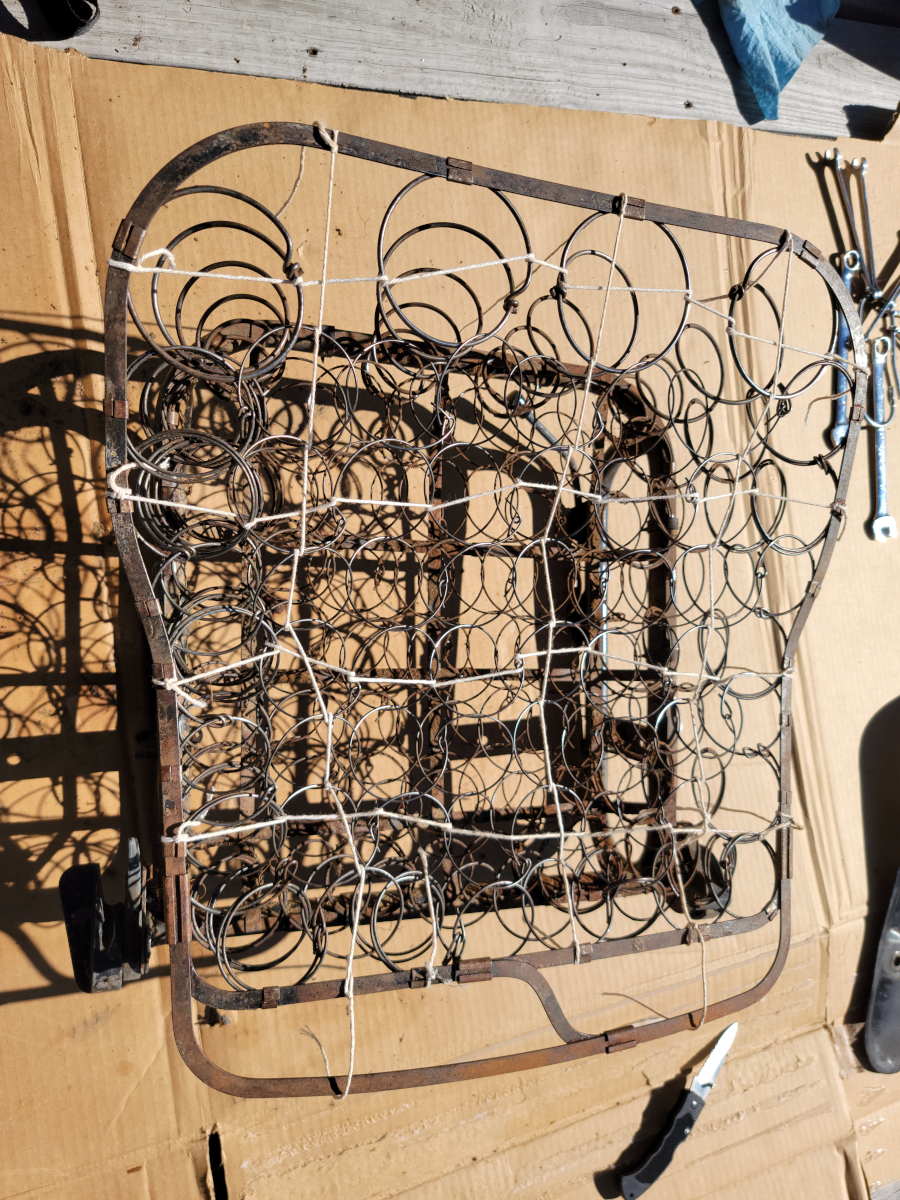
The rebuilding process can now begin. I started with a ball of twine, wrapping and looping a grid across the top of each row and column of springs.
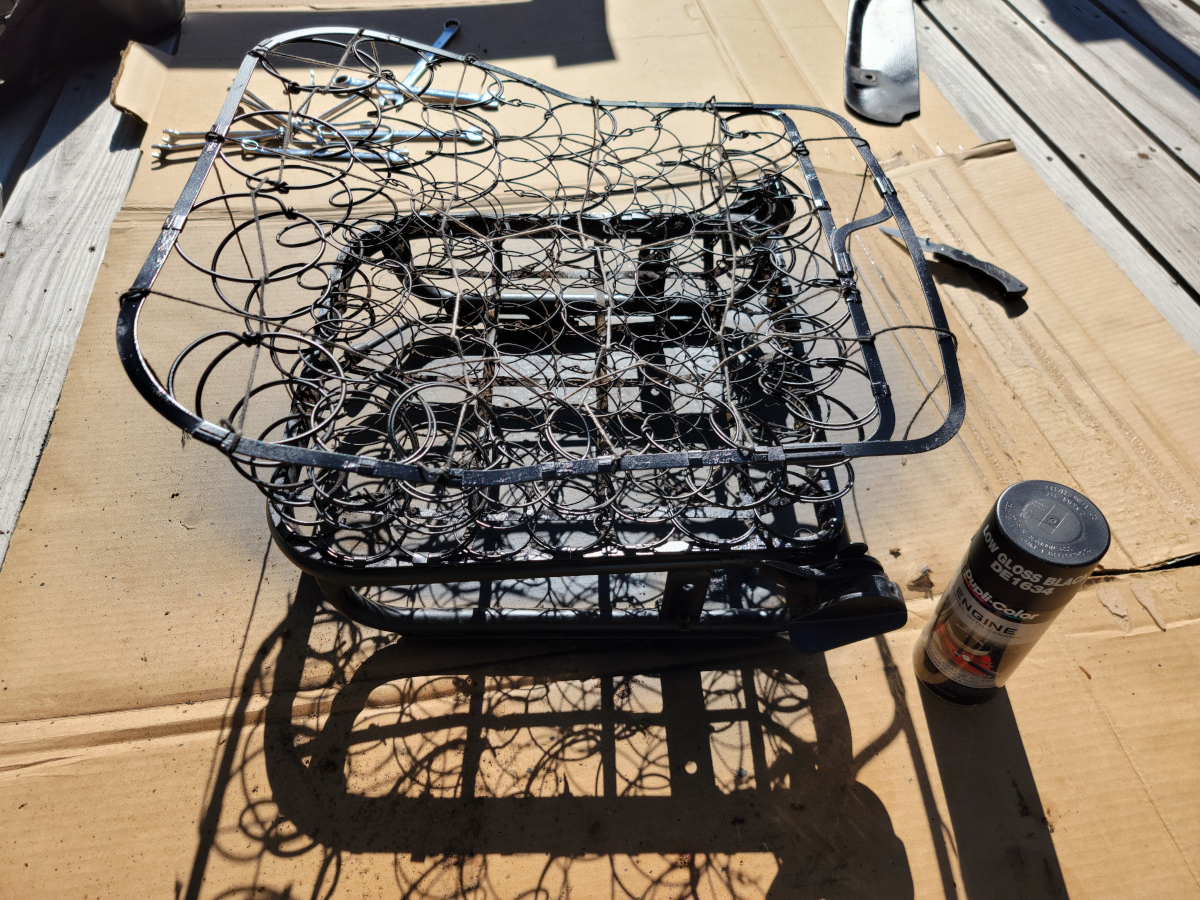
Then I hosed the whole thing down with a couple of layers of Dupli-Color Low Gloss Black black engine enamel DE1634 (Amazon link).
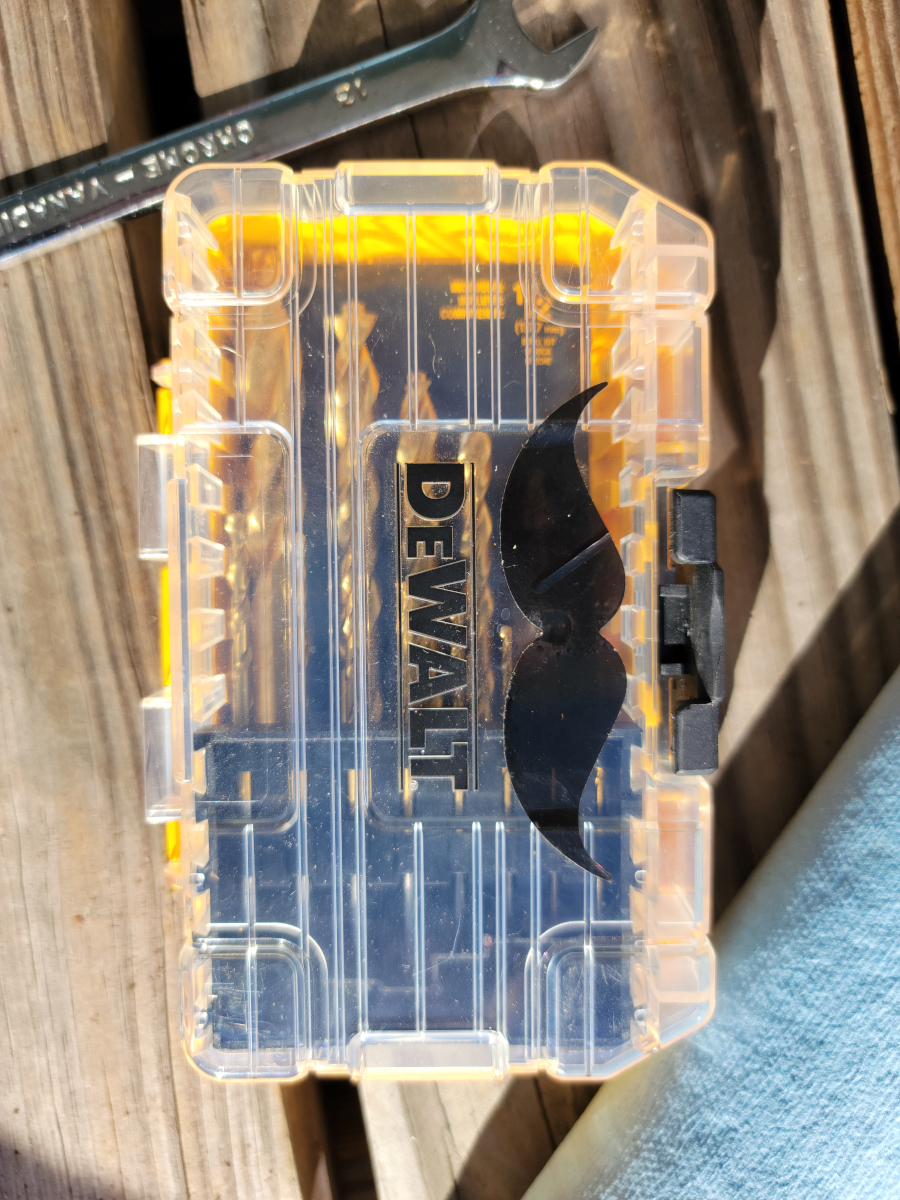
I bought a roll of jute upholstery webbing (Amazon link) and a set of hog ring pliers (Amazon link) for this project.
The hog ring pliers kit randomly came with a mustache sticker in the box, which was quickly applied to the nearest flat surface.
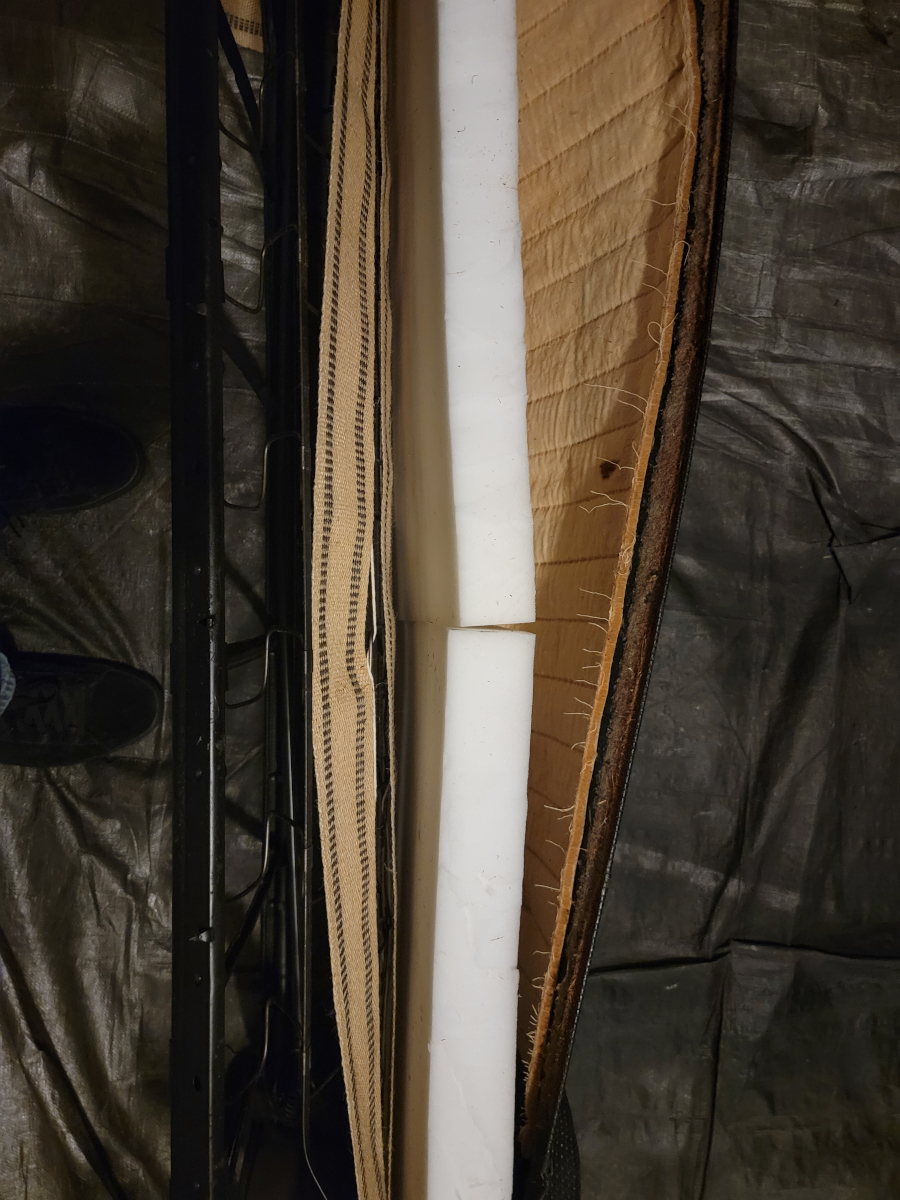
I attached a few rows of jute webbing across the seat base and decided to reuse some of that packing foam.
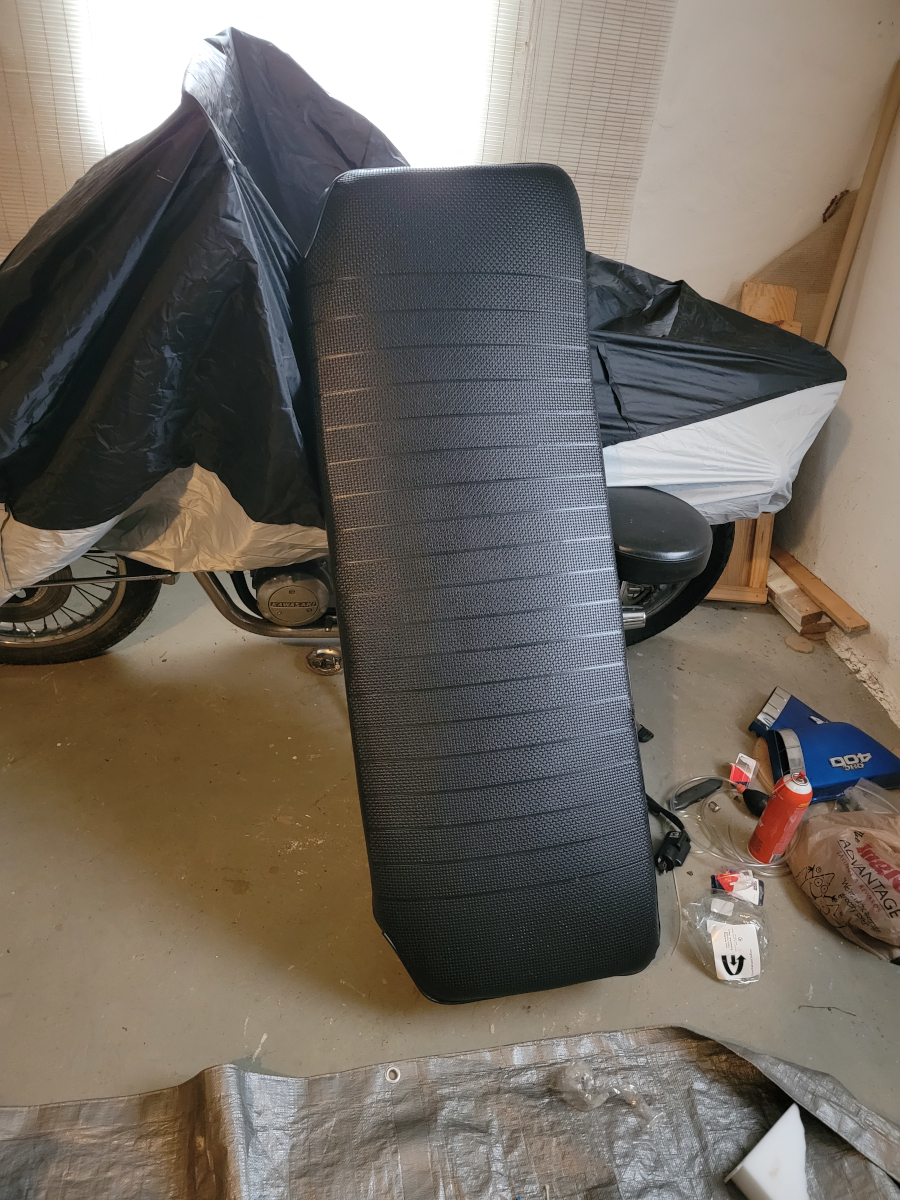
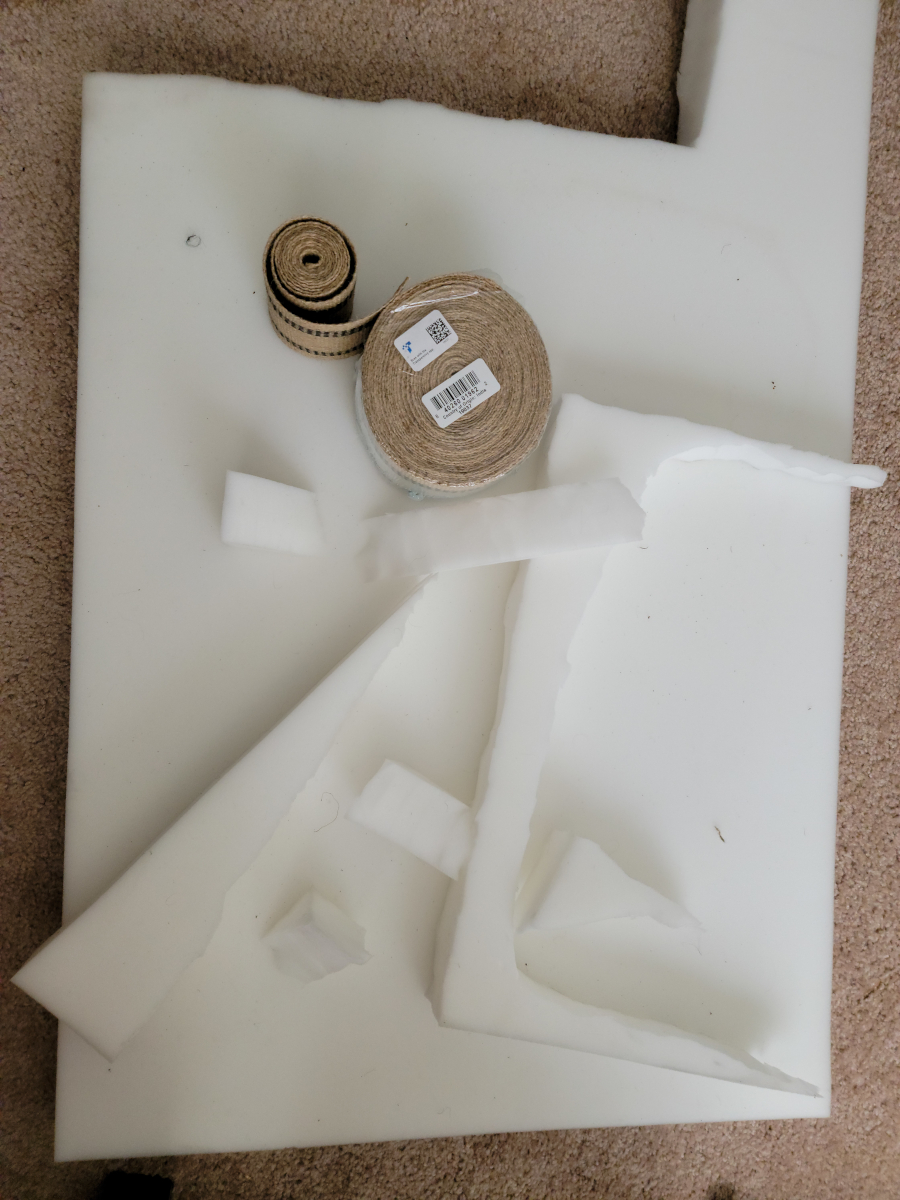
I used some craft paper to make a seat base template, then laid it out on a roll of two inch high density upholstery foam (Amazon link).
I have tried various methods of cutting upholstery foam in the past and have always made a mess of it. This time, I had some old kitchen scissors in my tool bag and decided to give those a try. Other than my lack of scissor skills, it was really easy and came out great.
It’s a tight fit and I’ll likely have to trim some around the edges.
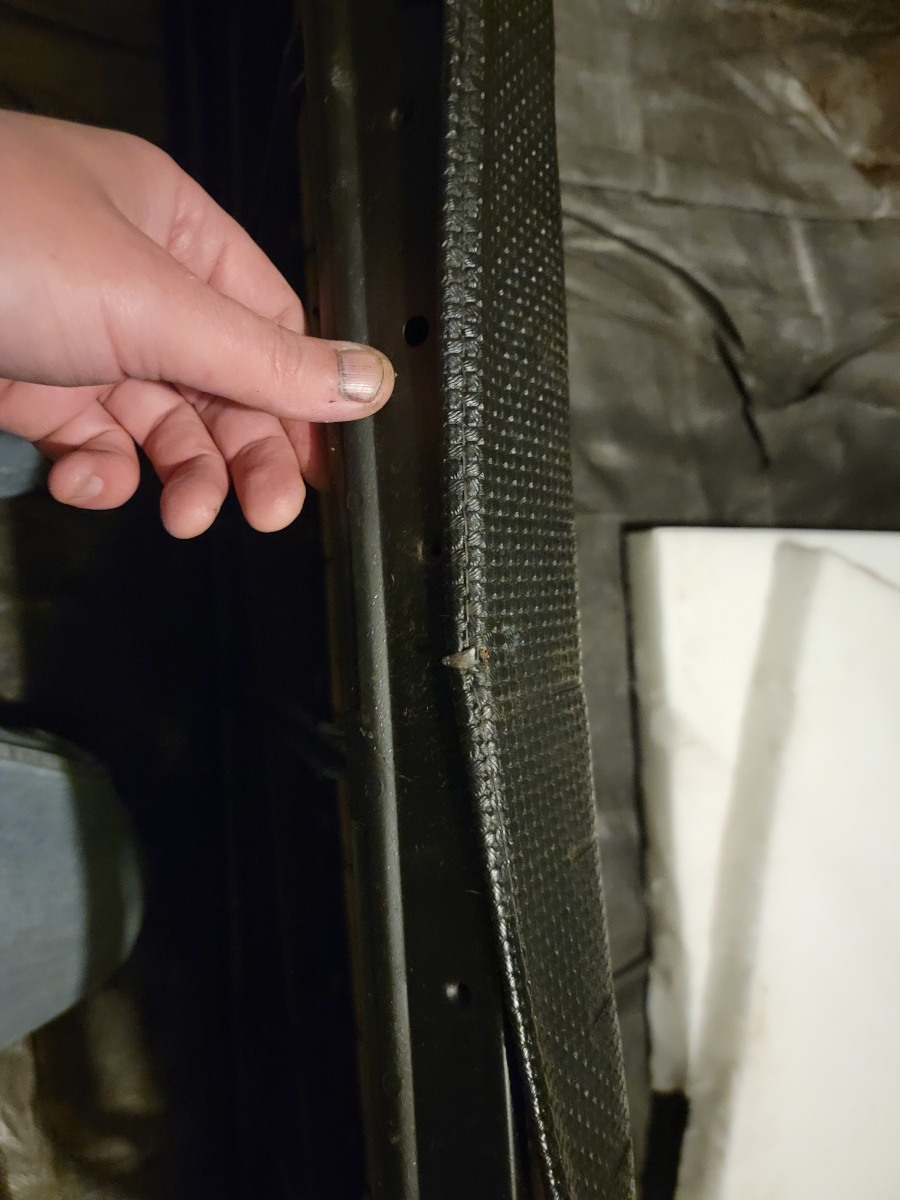
There was a metal trim piece along the outside edge of the seat base, which had previously been repainted and was tired looking. I hosed it down with brake parts cleaner, wiped it down, and made it look a little blacker. It needed to be cleaned a little deeper, apparently, as it went very heavily orange peeled immediately.
The vinyl seat covers looked like brand new in the pictures when I bought the car, but there are cracks and breaks all through them. I wiped them down with some Mothers VLR (Amazon link) vinyl cleaner and conditioner.
I am waiting for a delivery of a roll of self adhesive black upholstery patch material (Amazon link). I’m going to try using that as a reinforcement behind the cracked and broken areas.
Deconstructing the seat back
Moving onto the seat back, as I had previously mentioned in The Next Saturday Updates, I found a nice surprise inside. This was a much higher quality seat cover, being two tone vinyl with buttons connecting the front and back side of the headrest. It appears to be a factory model, though I wouldn’t expect it to have originally come from this car.
When I started digging into the second seat cover, I found the first signs of mouse house. There wasn’t any smell to it, just some little acorns or whatever.
This seat cover arrangement didn’t have as many layers as the base.
I got it all stripped clean and sprayed it down with some brake parts cleaner.
Rebuilding the seat back
I tied the spring tops together in a grid, as I did with the seat base. I also found a couple of broken supports on the back side that were previously welded and re-broken. I zip-tied them back together. If that lasts as long as the broken welds, I will be happy. If not, it’s fine.
I sprayed the whole thing down with a couple of coats of DE1634.
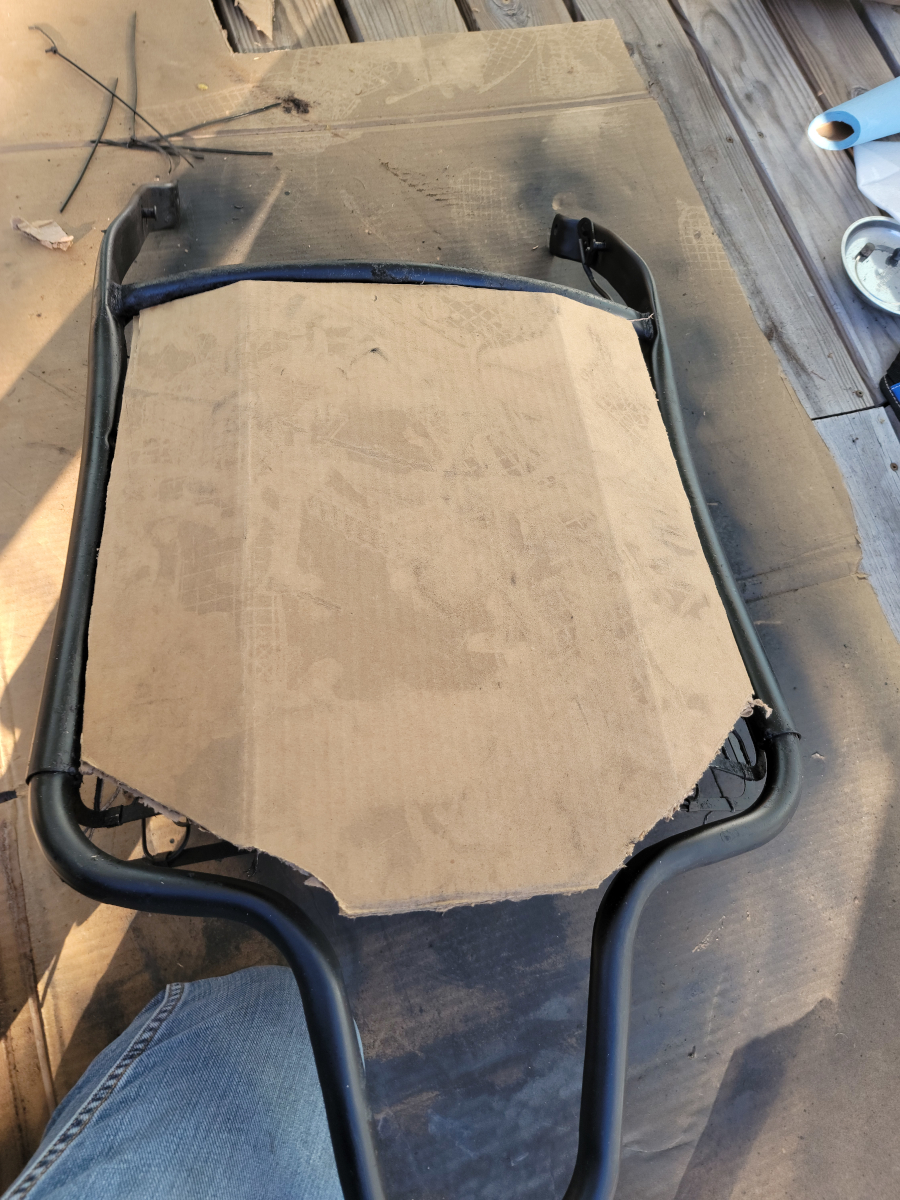
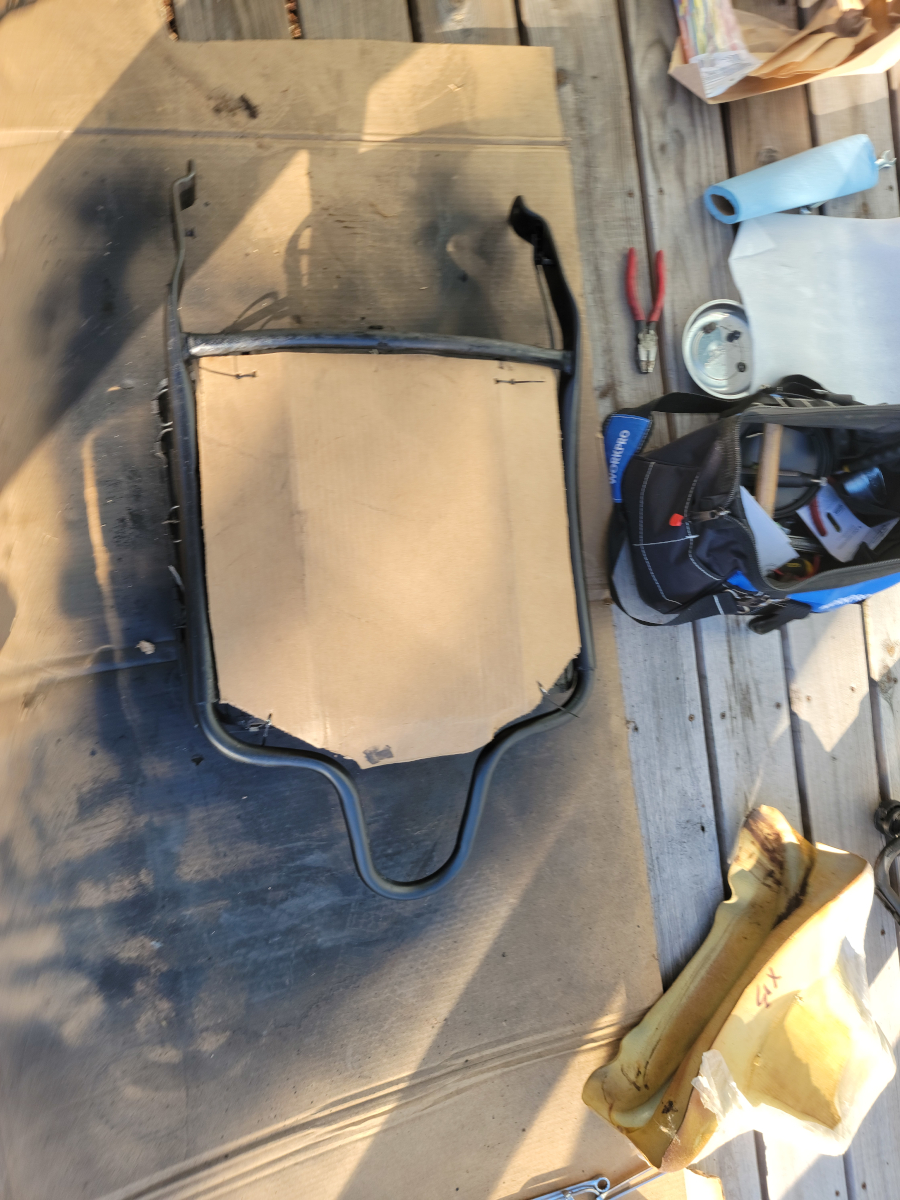
There was a cardboard back, to separate the springs from the seat cover, but it crumbled away when trying to pull the seat cover off. I cut a panel out of the dishwasher box and bent it to fit. Initially, I tried to attach it with hog rings, but that tore through the cardboard, so back to the zip-ties.
Then I added some jut webbing on the front side.
And did the same process of tracing out the seat back shape on some craft paper and cut it out of the upholstery foam.
The shadows were getting long and as mentioned previously, I’m still waiting on the vinyl patch material, so I packed it all back in the car, anxiously awaiting the next sunny day to dig back in.
As an Amazon Associate I earn from qualifying purchases. I also often provide links to products on other sites that do not provide affiliate income.