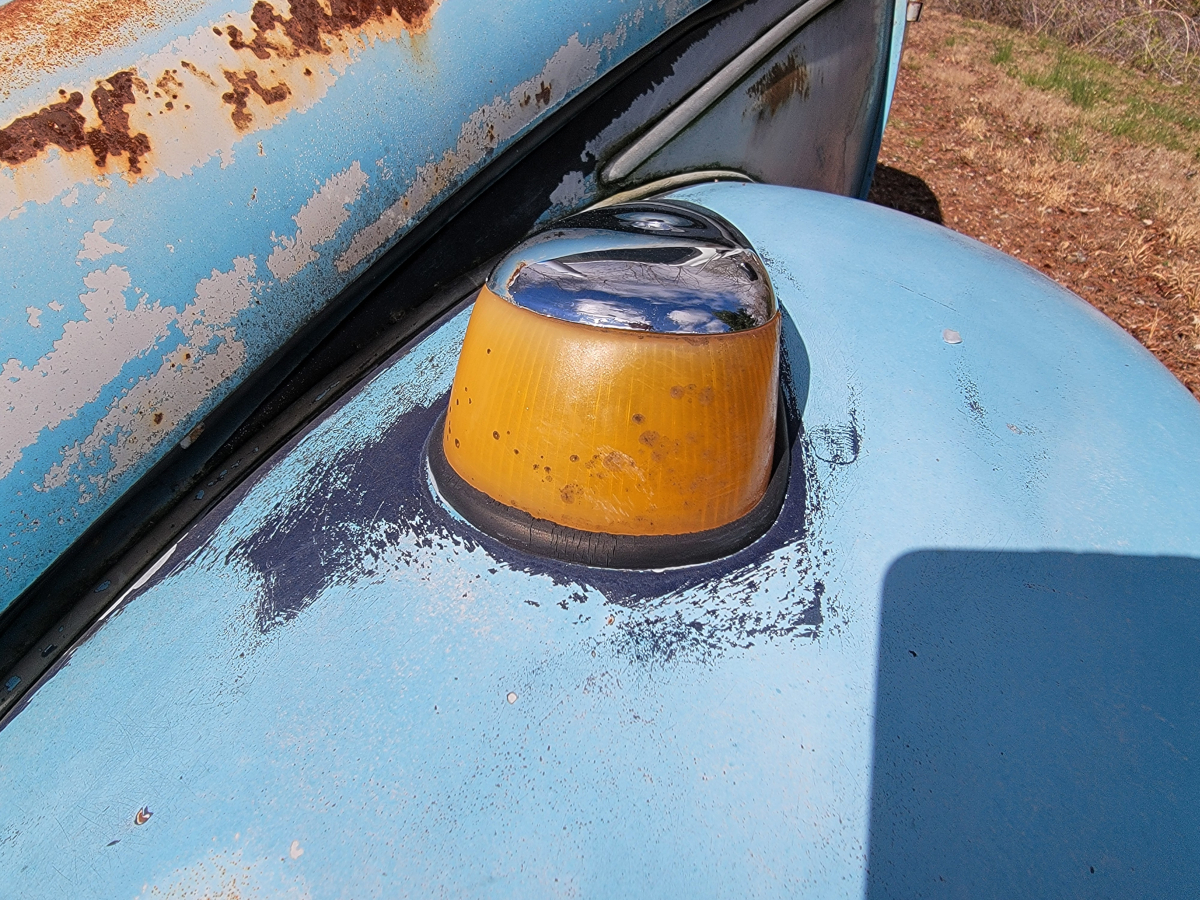
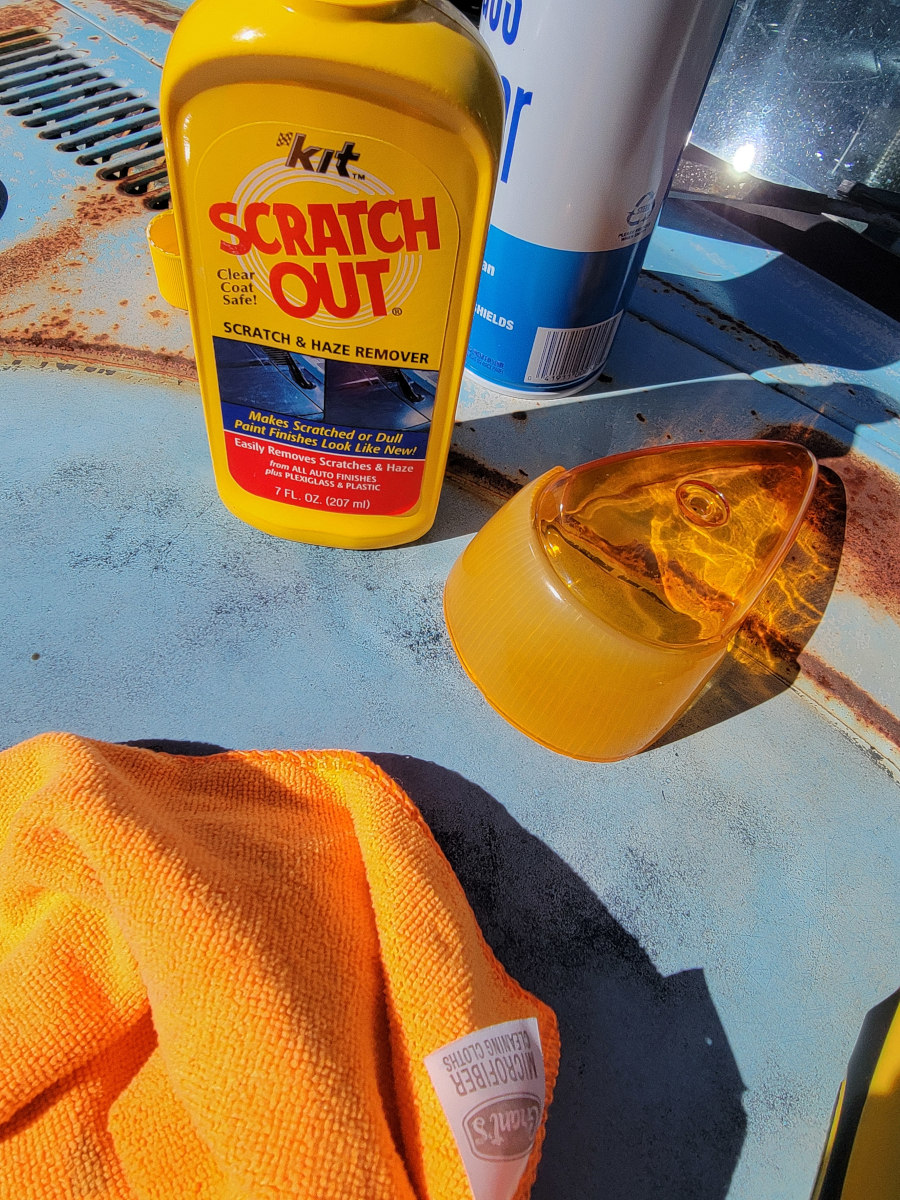
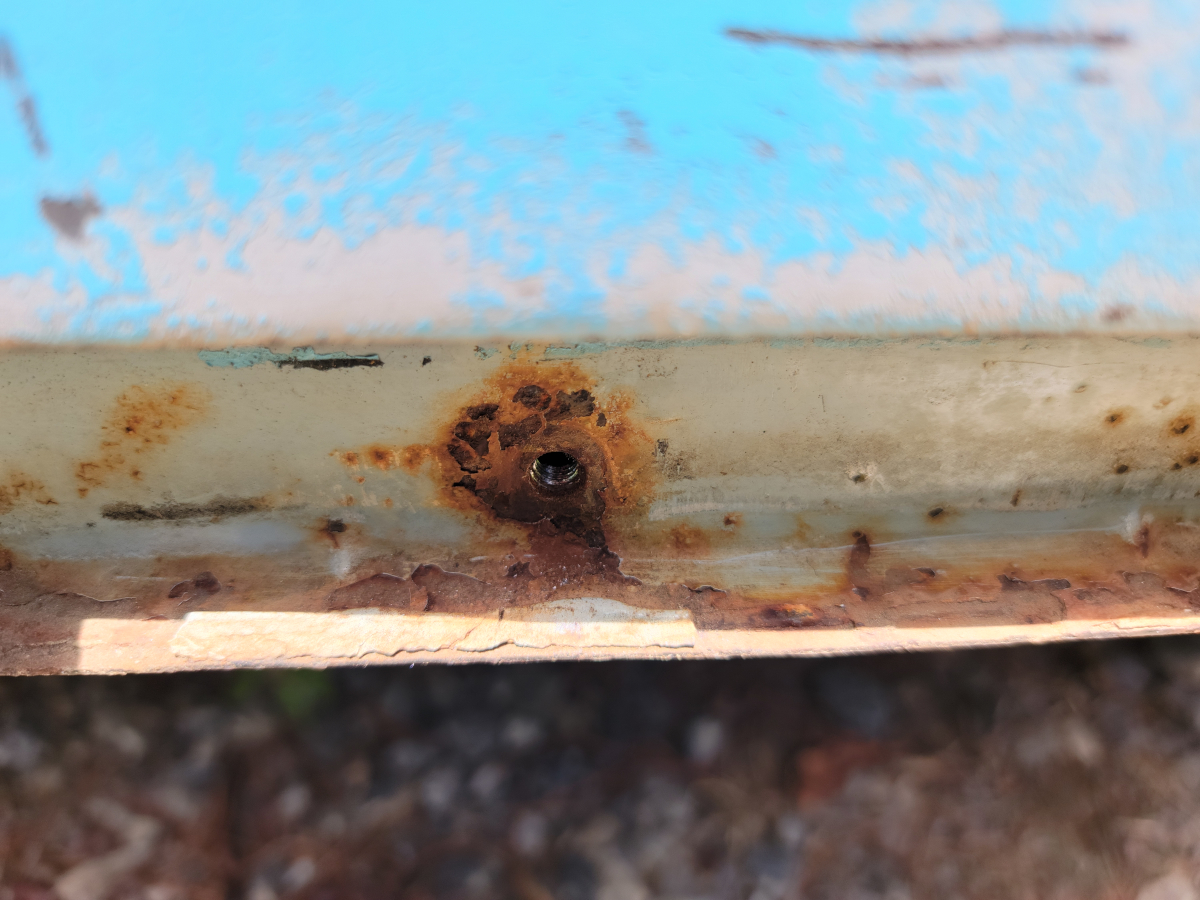
I replaced these turn signal lenses shortly after I bought the car. The lens covers quickly went milky in the sun and the rubber seals perished in no time.
The areas of the lenses are covered by the fake plastic chrome cover still look immaculate.
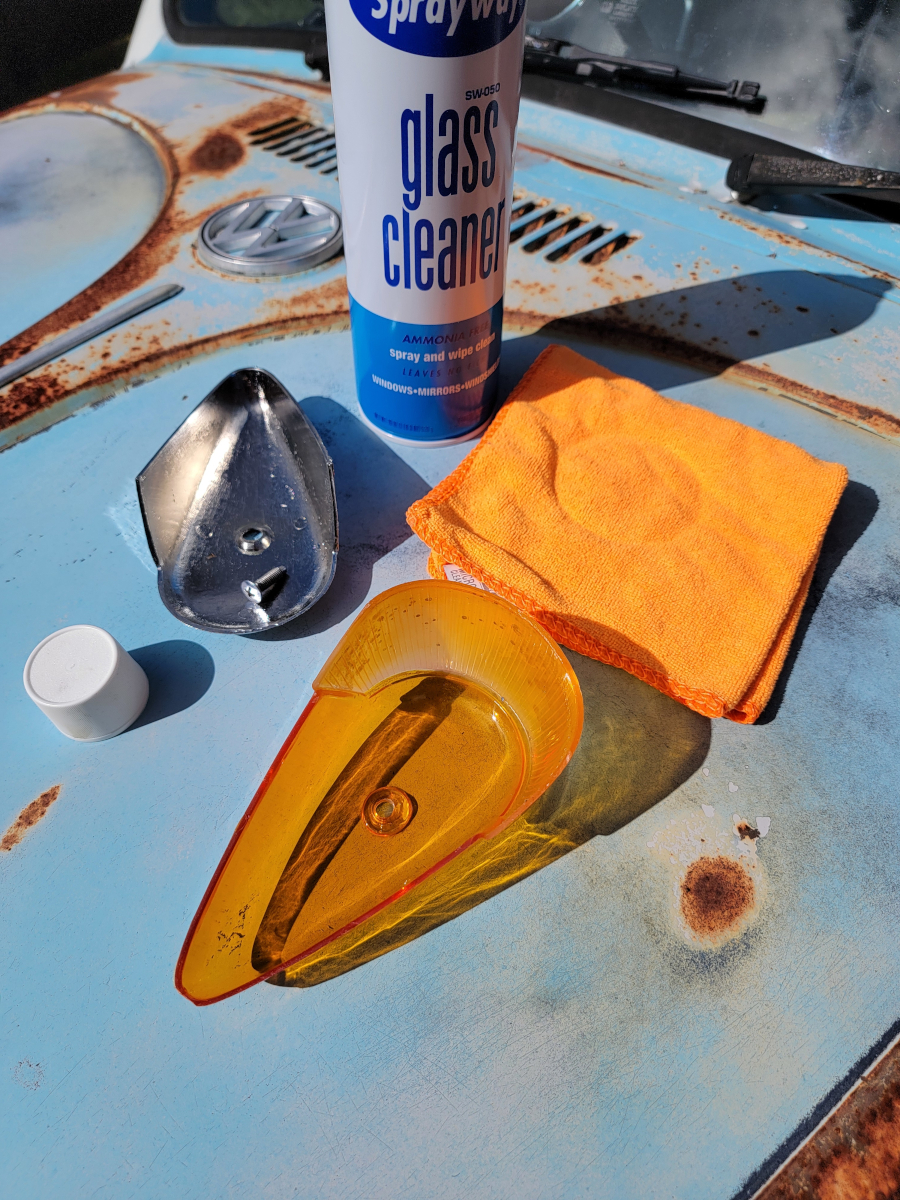
The Sprayway glass cleaner did a great job of cleaning them up, but the exposed areas were still rough and sun baked.
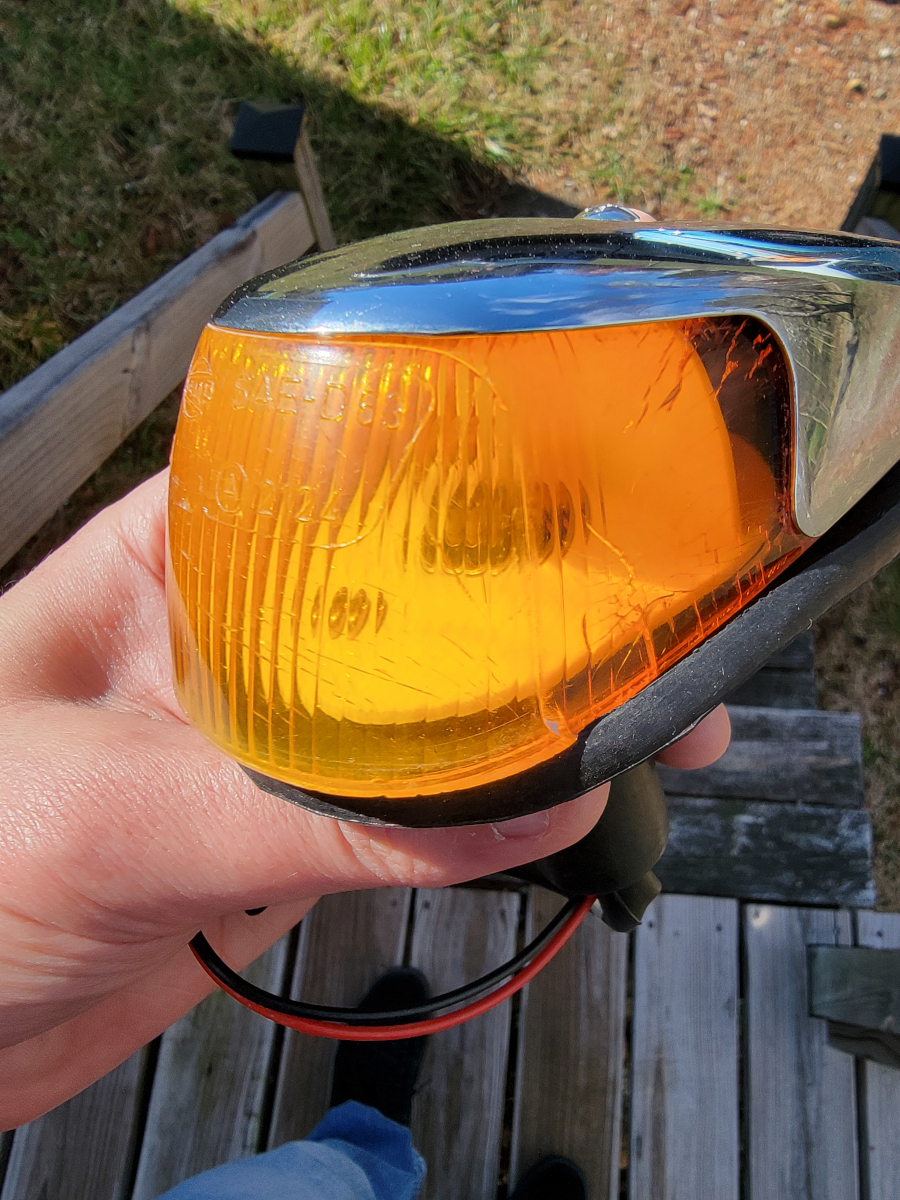
I questioned whether or not to just put the old assemblies back in. The lenses are clear and still fully amber, but are crazed and cracked all over, which is why I replaced them in the first place.
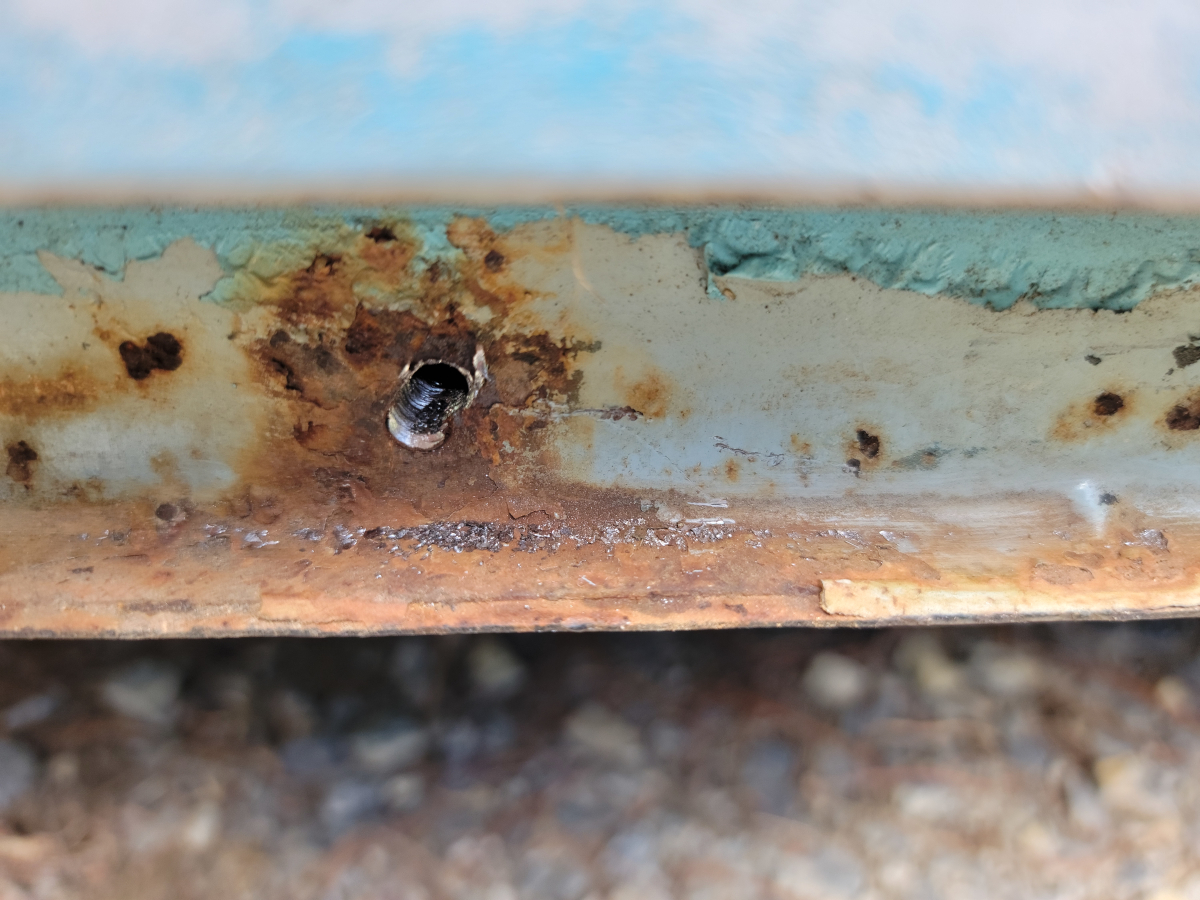
I have used this Kit Scratch Out in the past to clean up foggy plastic headlight covers.
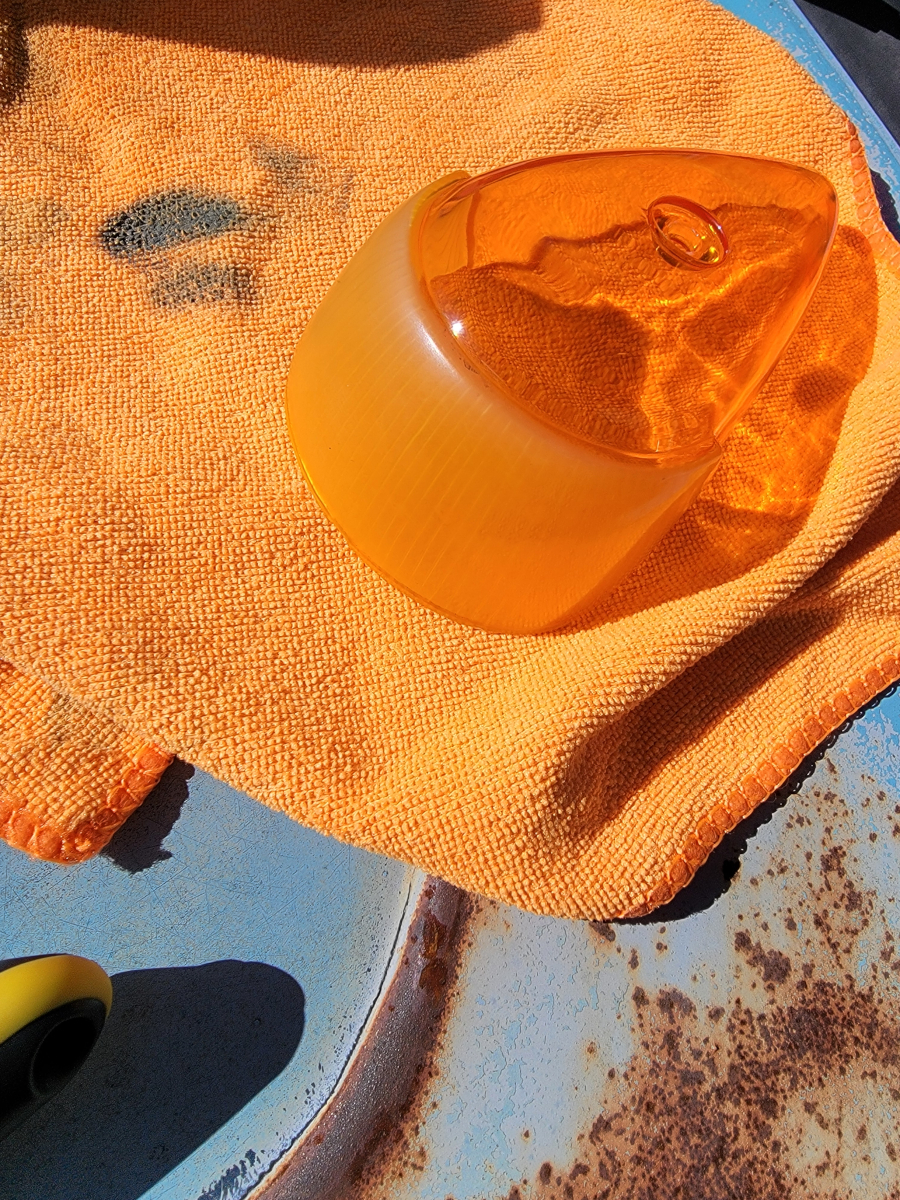
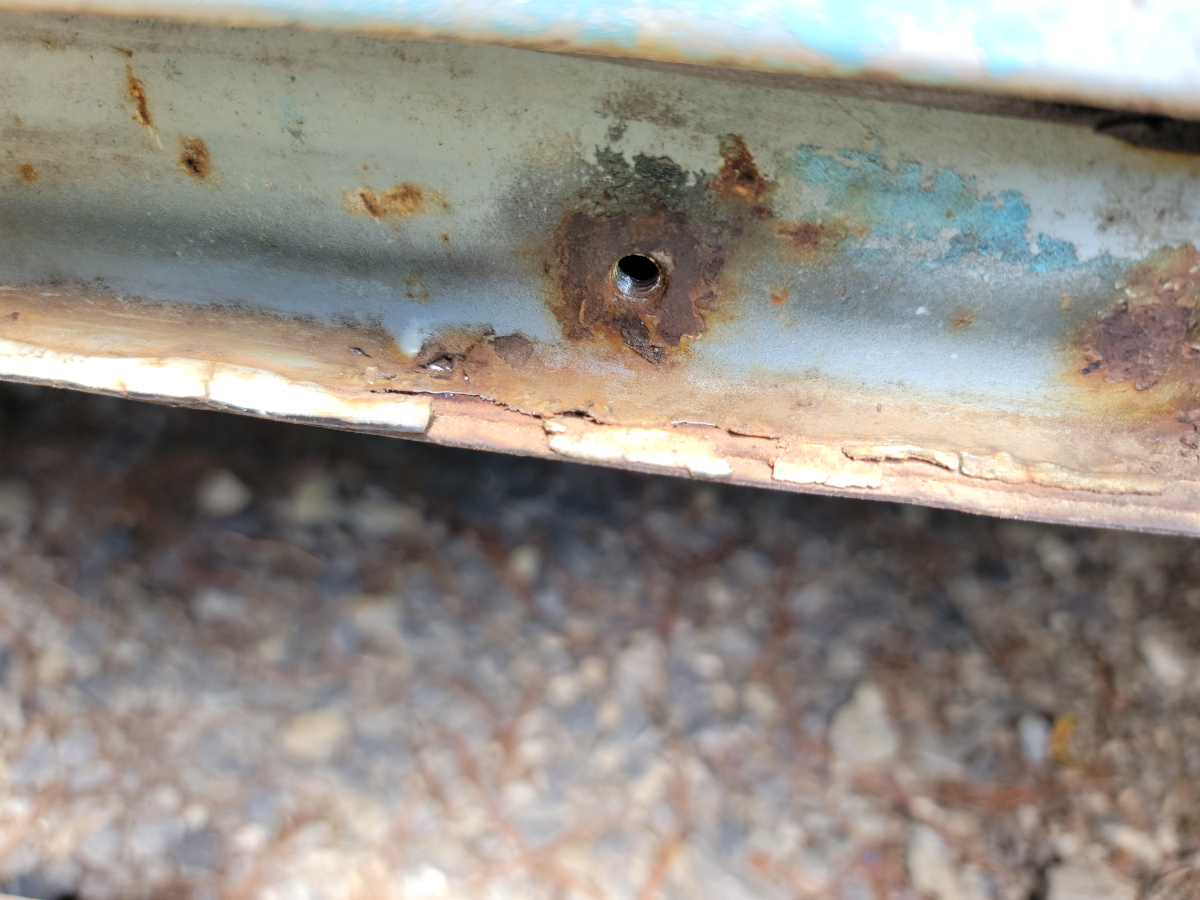
It did polish the roughness away, they are now slick and shiny, but still cloudy.
Did I mention the rubber seals are perished? Either way, the lenses look 40% better than they did a few minutes ago.
After sitting through the winter, the battery in the beetlebug was dead. After having the car for two years, this is only the third time the battery has gone flat. The first time was actually not from a lack of use at all. I was in the habit of starting the car up and letting it run every couple of weeks. I would let it heat up, then drive it back and forth in the driveway a few times to keep all the moving parts lubricated.
After one of those sessions, I found the battery was dead a couple of days later. It turns out the old style generators don’t charge at idle like more modern alternators. Letting the car sit and idle will actually run the battery down.
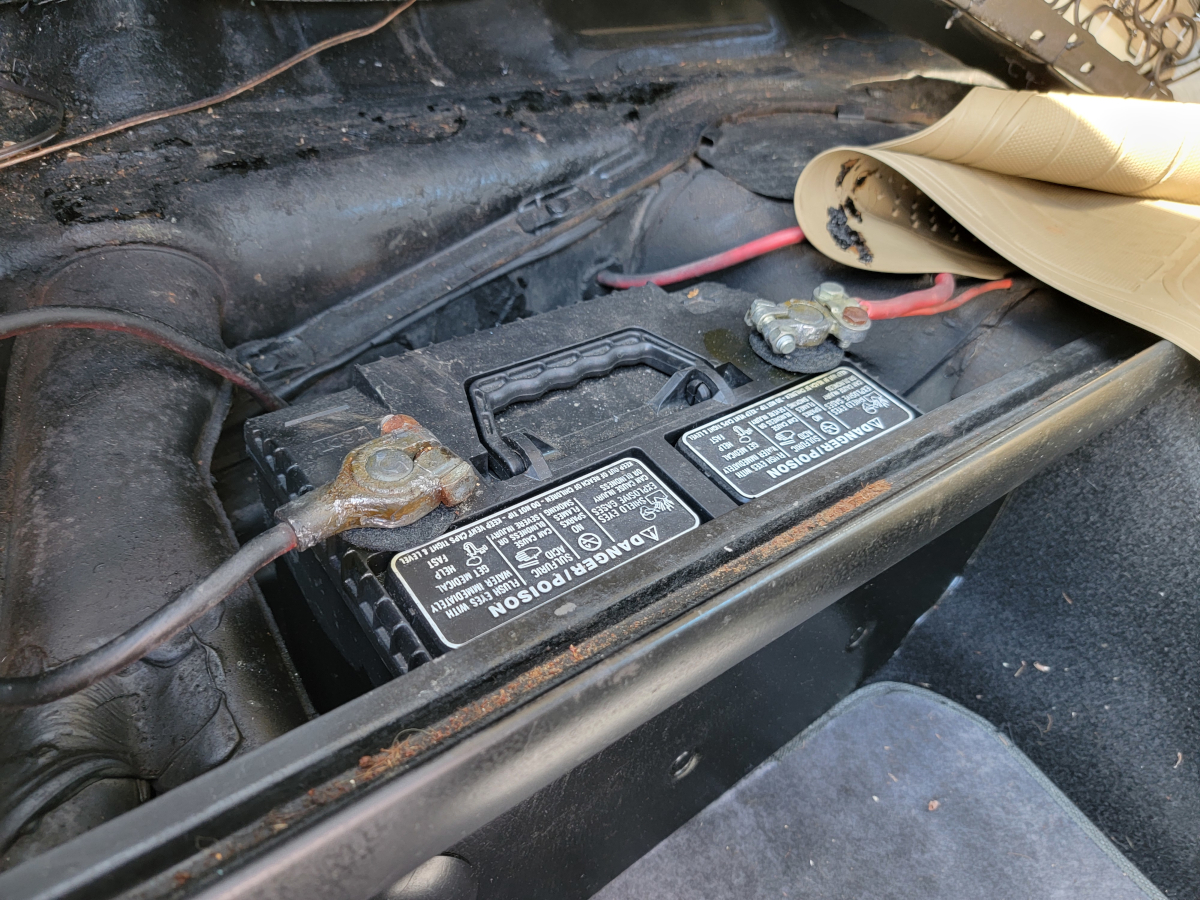
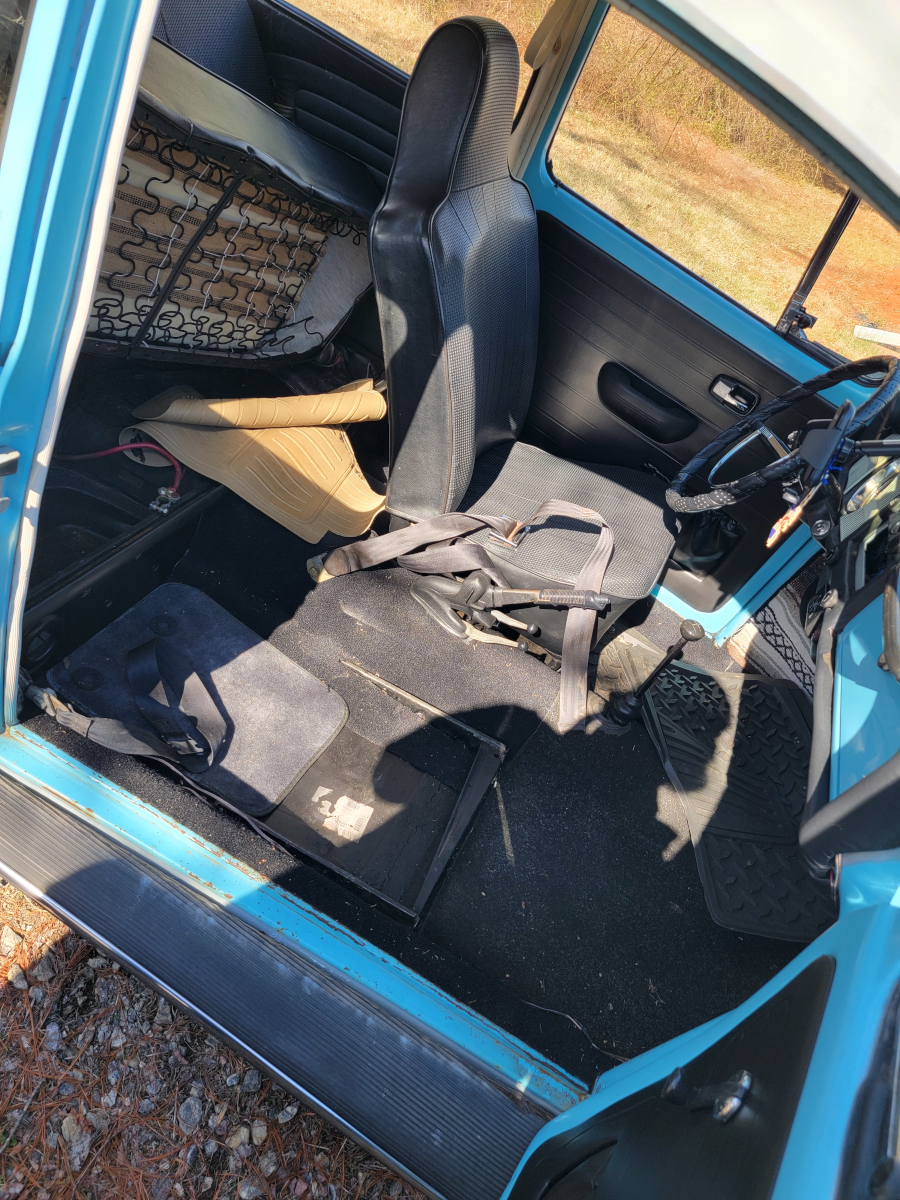
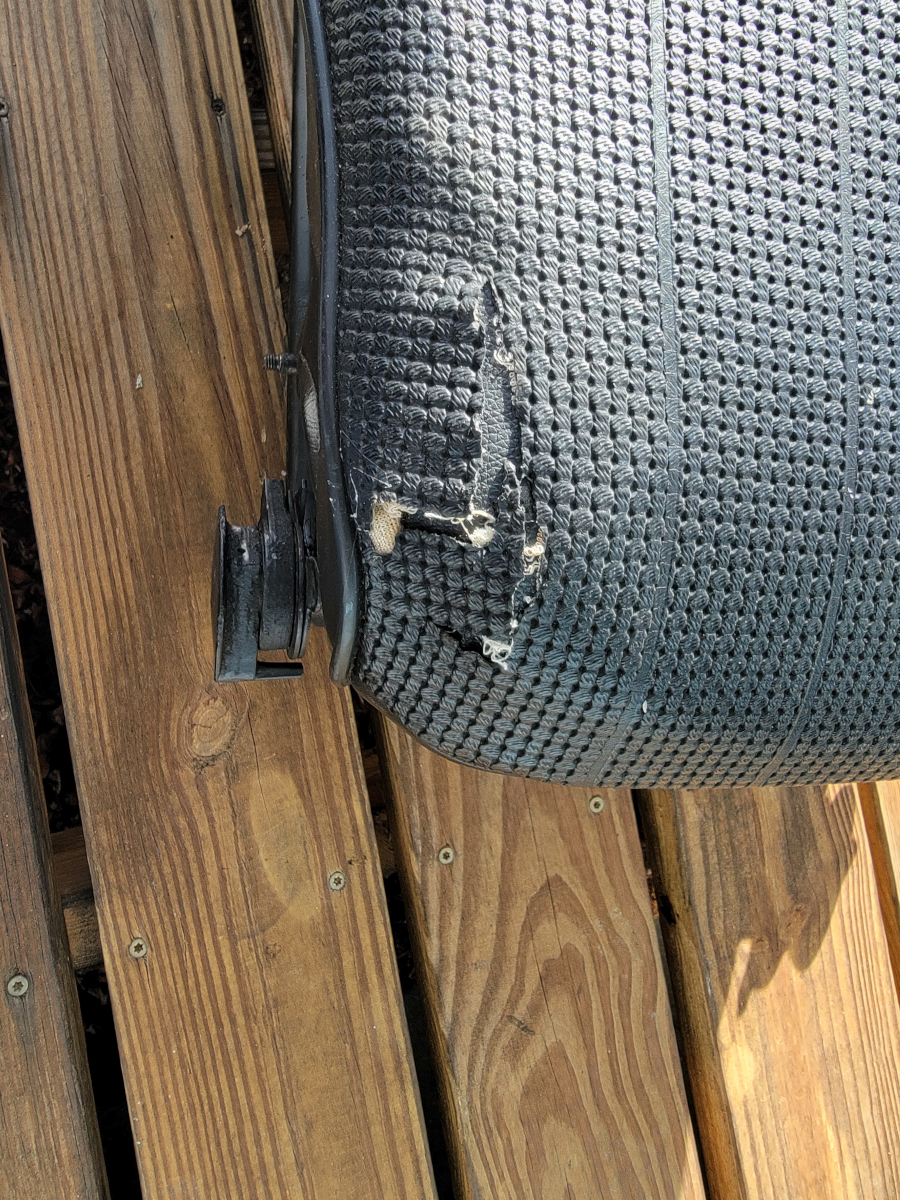
The battery is under the back seat. So, I flipped the passenger seat back forward and heard the terrible sound of seat cover ripping. One of the upholstery spikes on the bottom rail was fully extended. It tore a long gouge in the seat cover and new foam padding I installed last spring.
I connected jumper cables to my truck and started the car. I left the cables connected, hoping to get a better charge off the truck’s alternator. After letting it run for ten or fifteen minutes, I disconnected the jumper cables and turned off the car. When I turned the key, the battery was still completely dead.
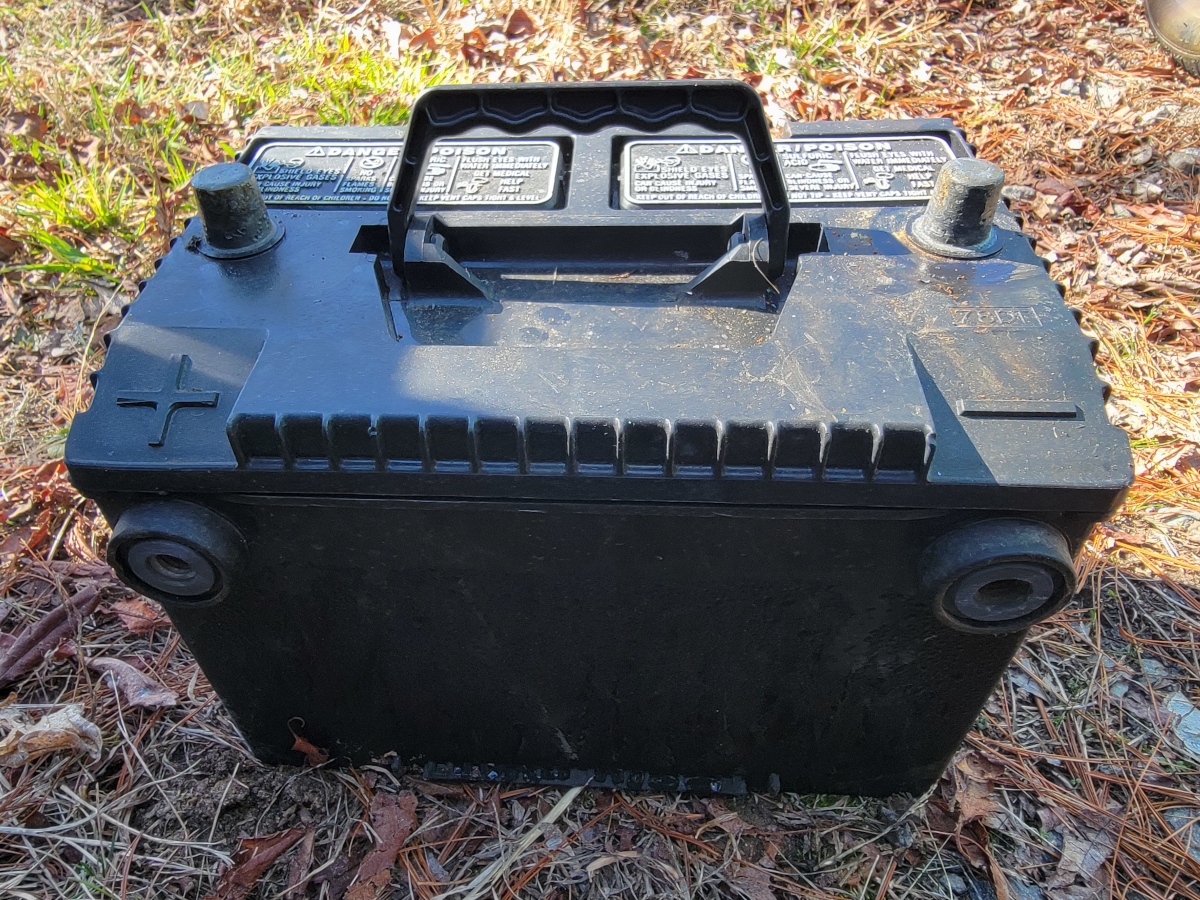
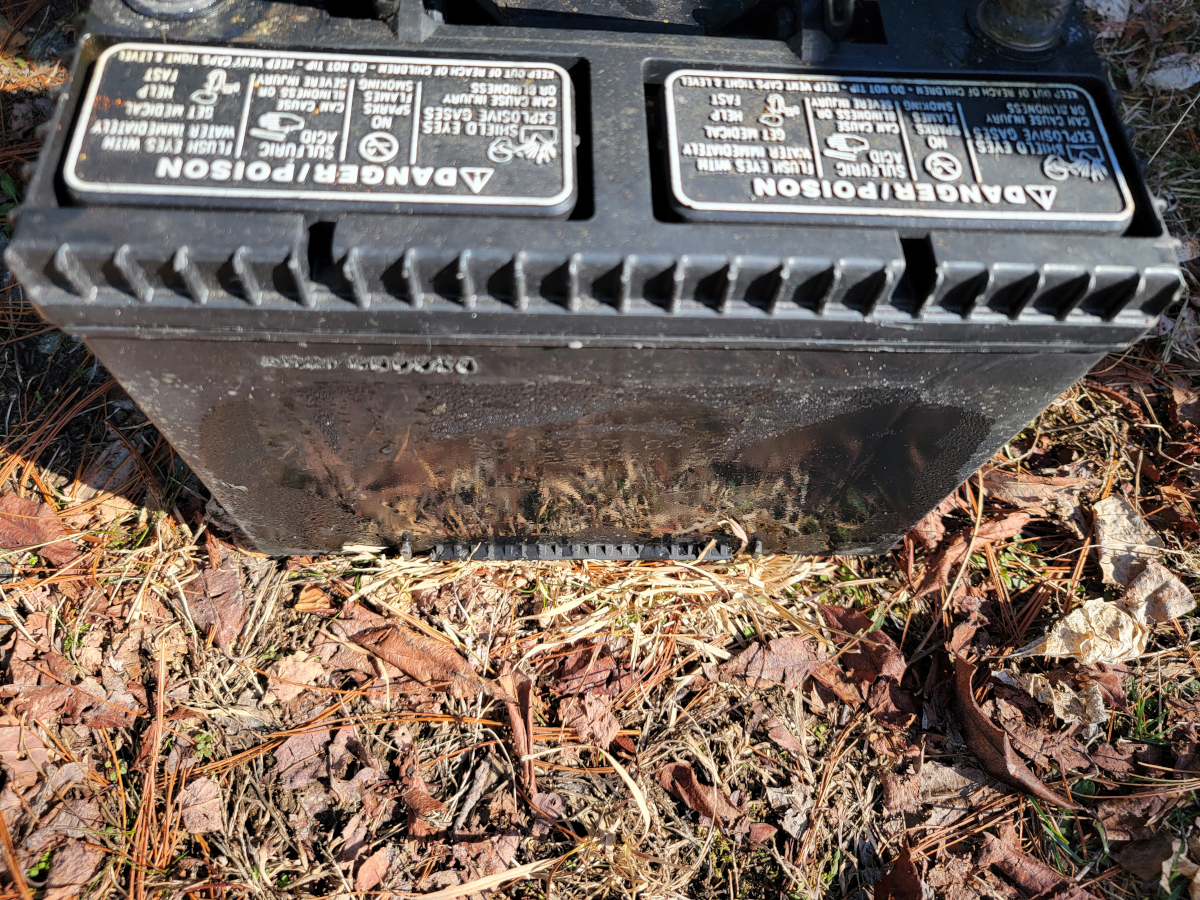
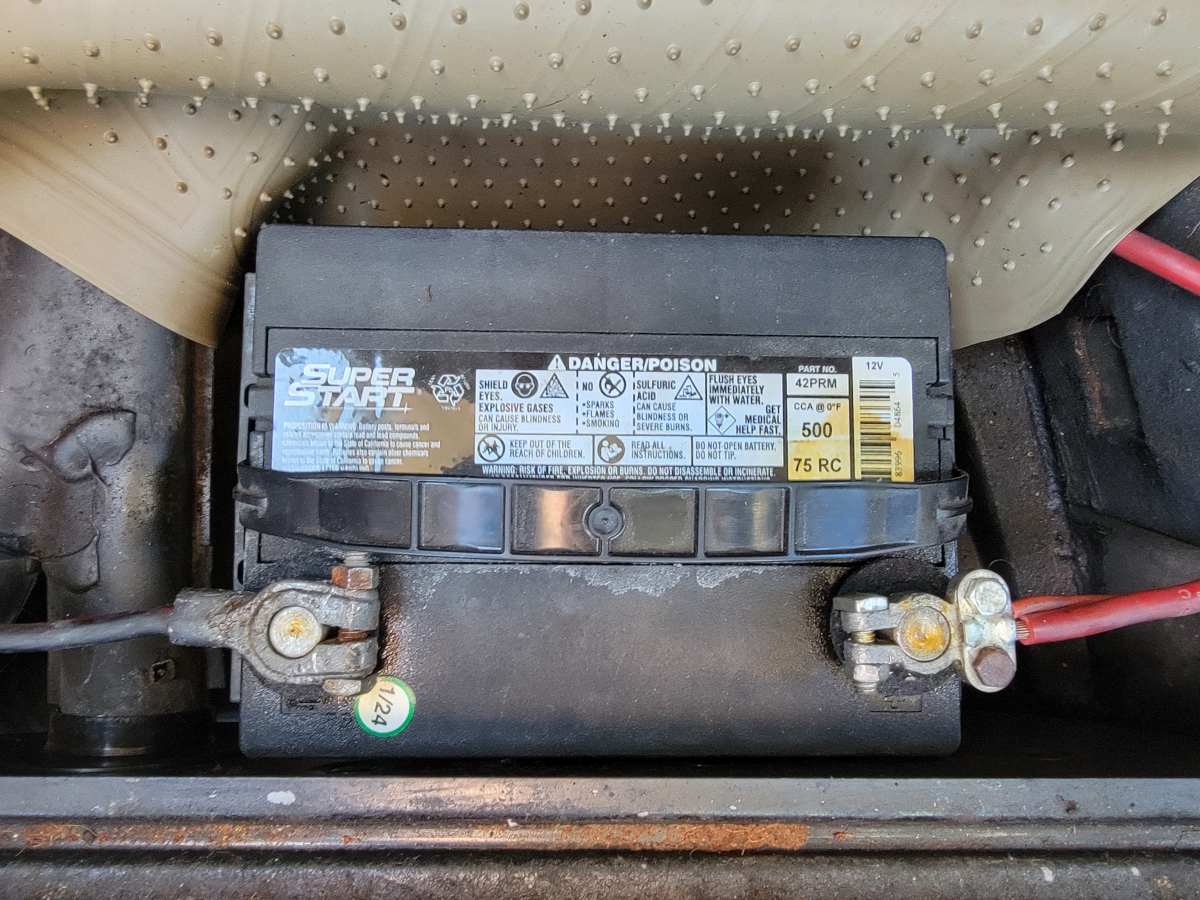
I was curious about the old battery. When I pulled it out, I noticed all of the labels/stickers/branding was gone. It has top and side posts and a handle, which is convenient.
Something else caught my eye, it had condensation all over. I’m assuming that’s what happened to all the stickers.
Next, I took the passenger seat out to repair the seat cover.
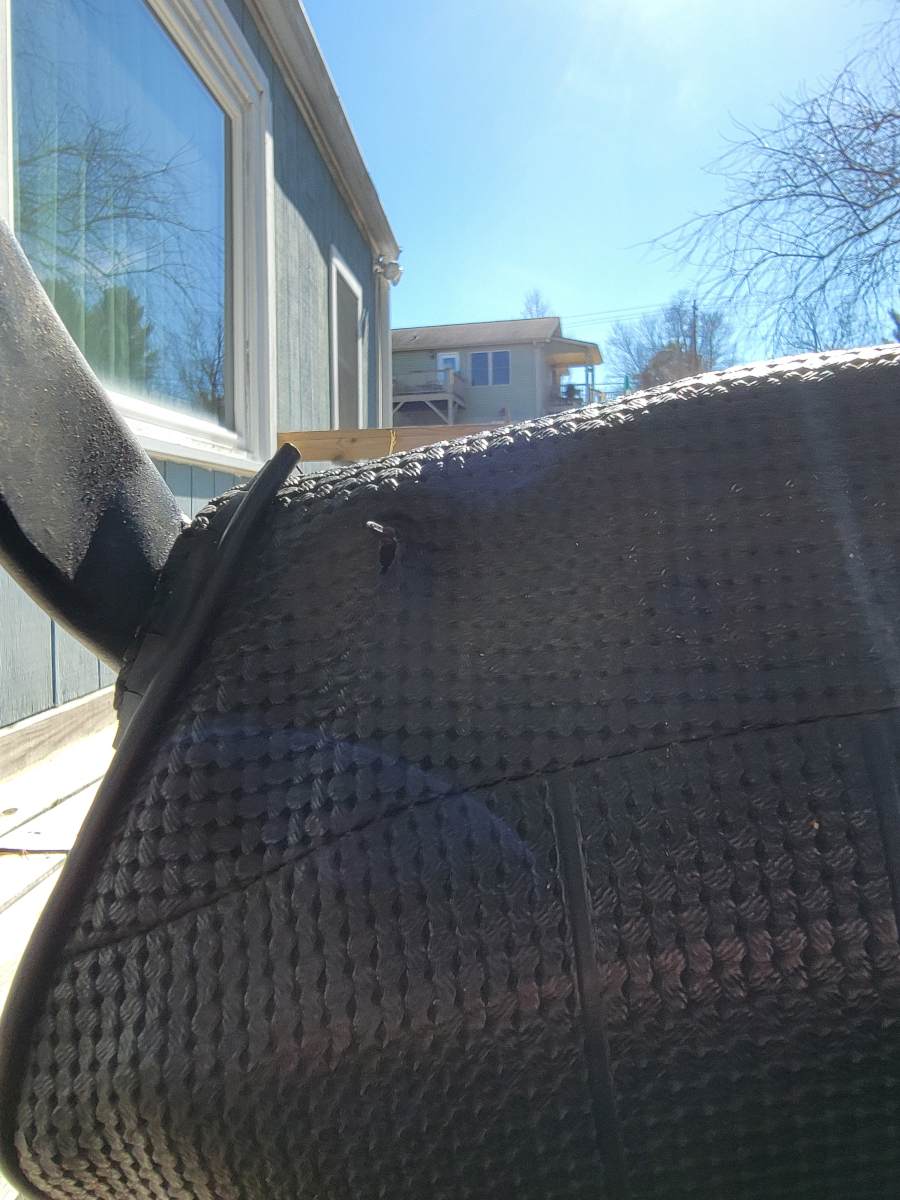
I carried the seat up to the porch to have a more stable place to work on it. I separated the two halves of the seat and found the offending article.
So, I pounded that one flat. The others in the area hadn’t found daylight through the seat cover, but they weren’t exactly out of harm’s way, so I flattened them as well.
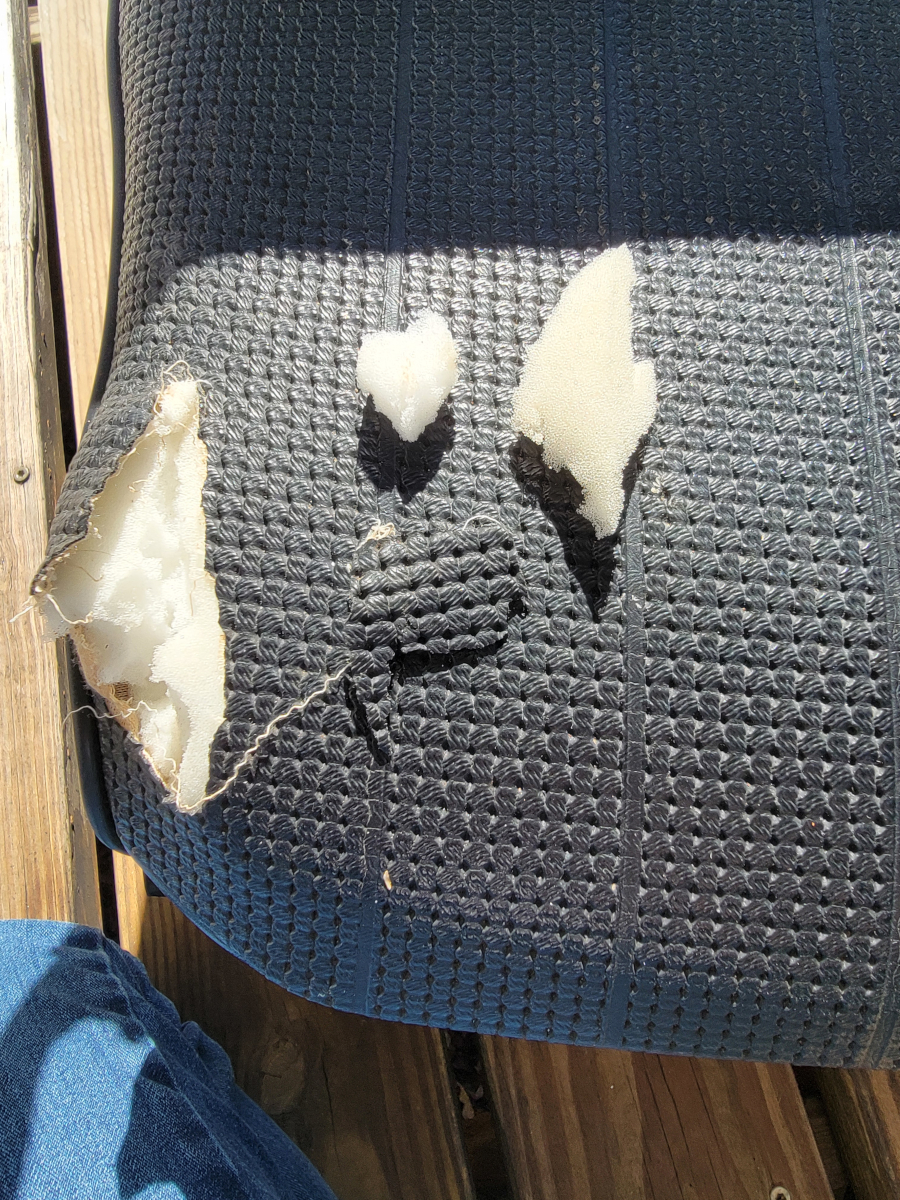
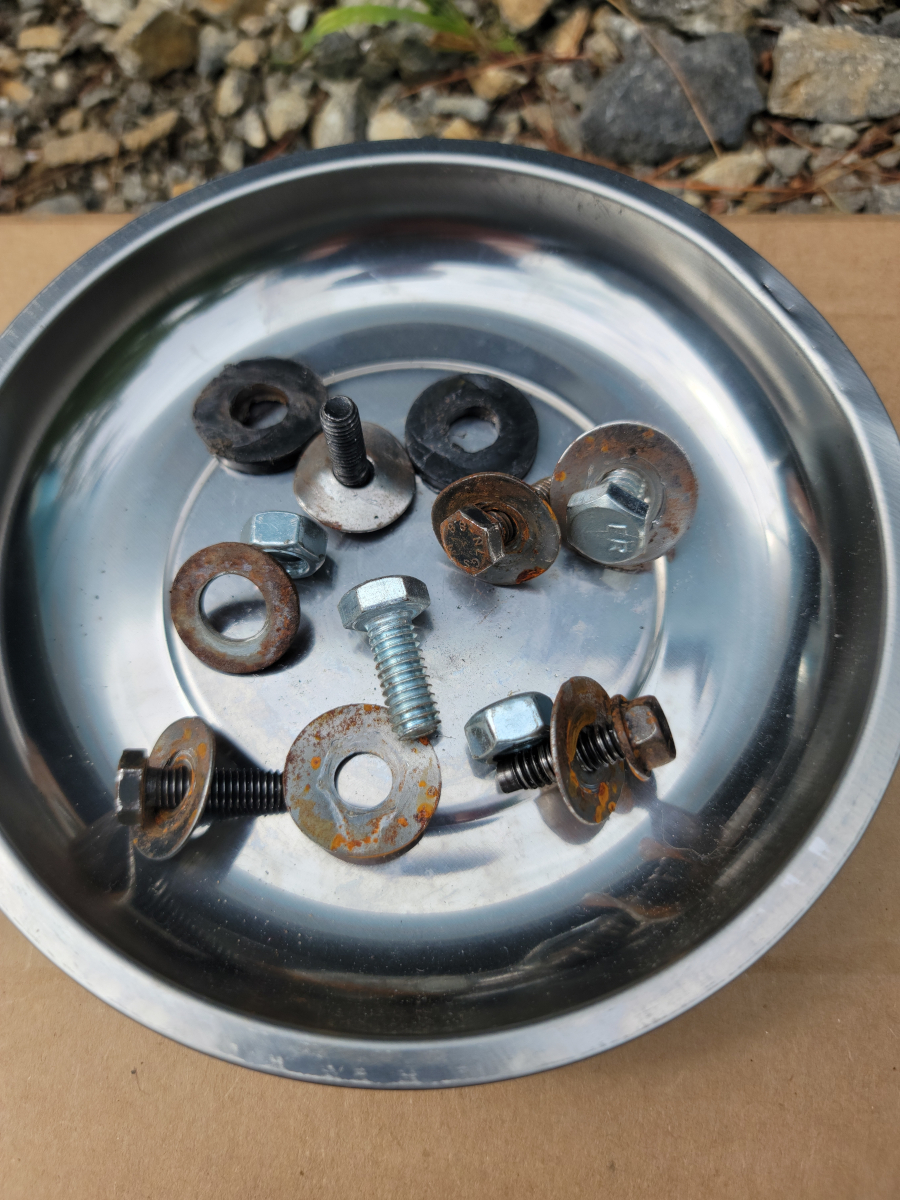
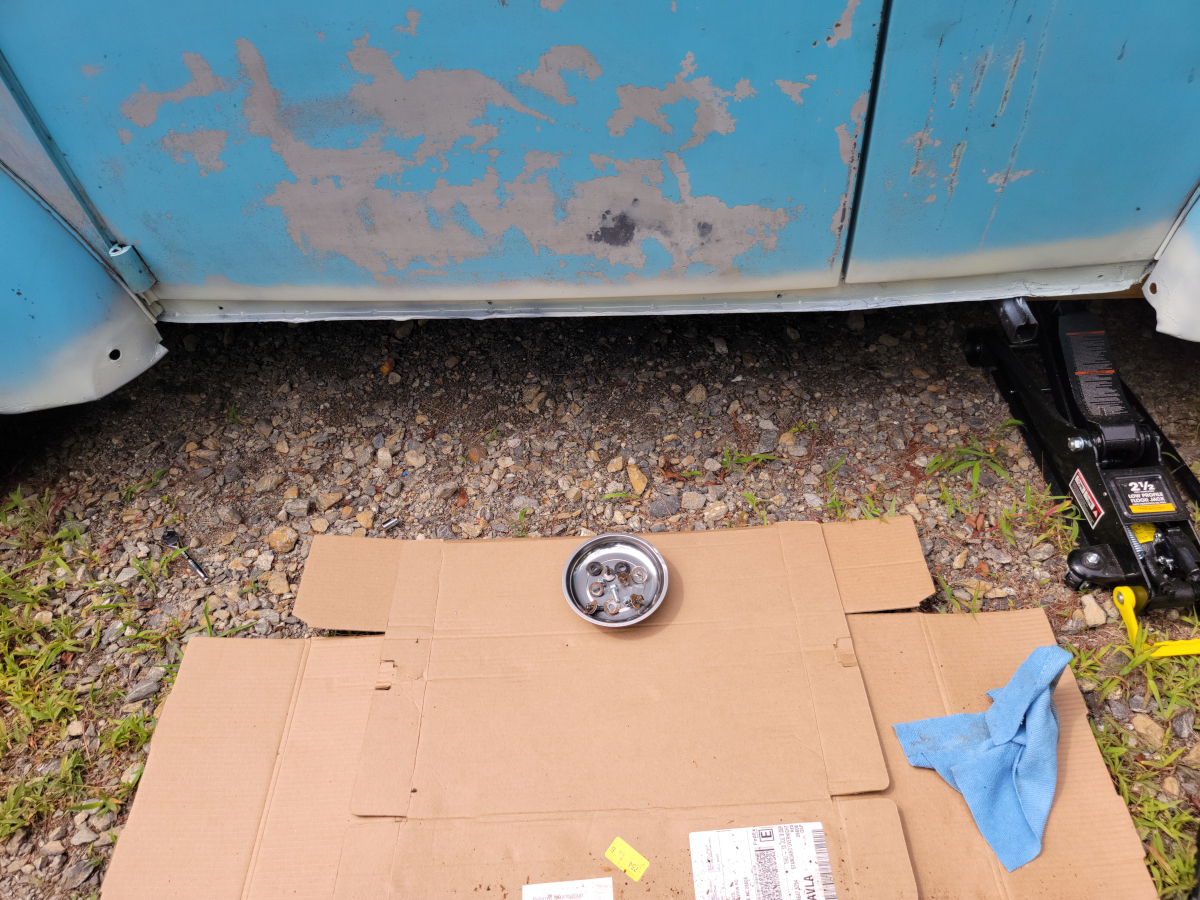
Taking inventory of the situation…
First, I glued the chunks of foam back into place with some Scotch Maximum Strength Adhesive I had laying around. In my experience, this stuff doesn’t hold up well over time. To be fair, none of the others that I have tried to either. Also, the nozzle broke in half, glued to the cap, so at least it sticks to its own packaging.
While I let that dry in the sun, I headed out to the parts store.
I haven’t purchased a battery in a few years and was surprised to find that prices have doubled. It was $194.99 for a Super Start Size 42 T5 – 42PRM (O’Reilly link).
I sprayed the anti-corrosion stuff on the terminals and installed the new battery.
Back to the front (YOU WILL DO WHAT I SAY WHEN I SAY). Sorry.
Back to the front (YOU COWARD, YOU SERVANT, YOU BLIND MAN, BACK TO THE FRONT)
…seat, I cut an oversized piece of the black vinyl that I used to recover the dash pad last year. Because the patch piece was so much bigger than the hole in the seat cover, it took some creative contortion and origami to get it in there and laying flat.
I used the rest of the tube of glue in between the vinyl patch and the shreds of seat cover to hold it in place. I thought about trying to stitch those edges together, pulling them tight. However, these old seat covers are so brittle, I knew the upholstery thread would have just pulled through.
It doesn’t look great as is, but luckily, the damage is at the back of the seat pad, right below the seat back. It’s not noticeable until you flip the seat back forward.
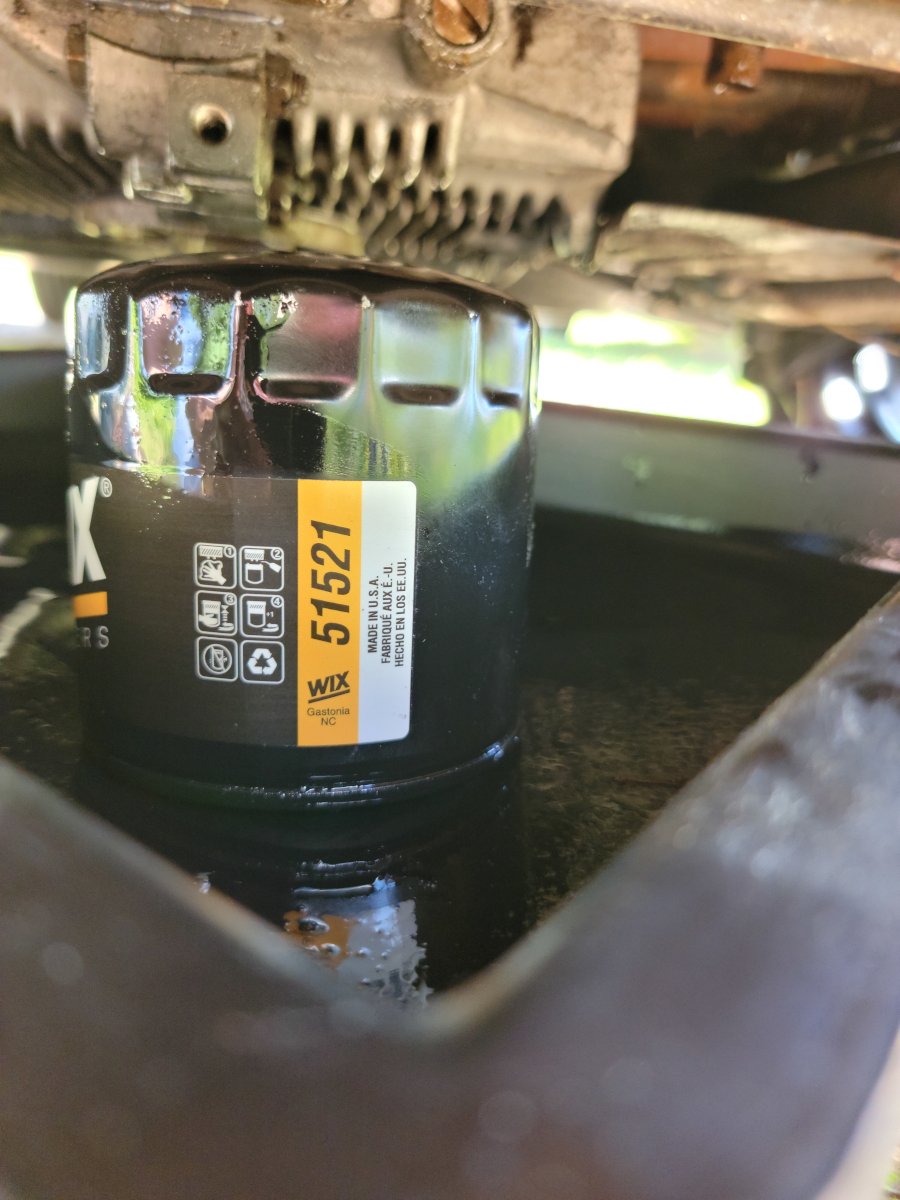
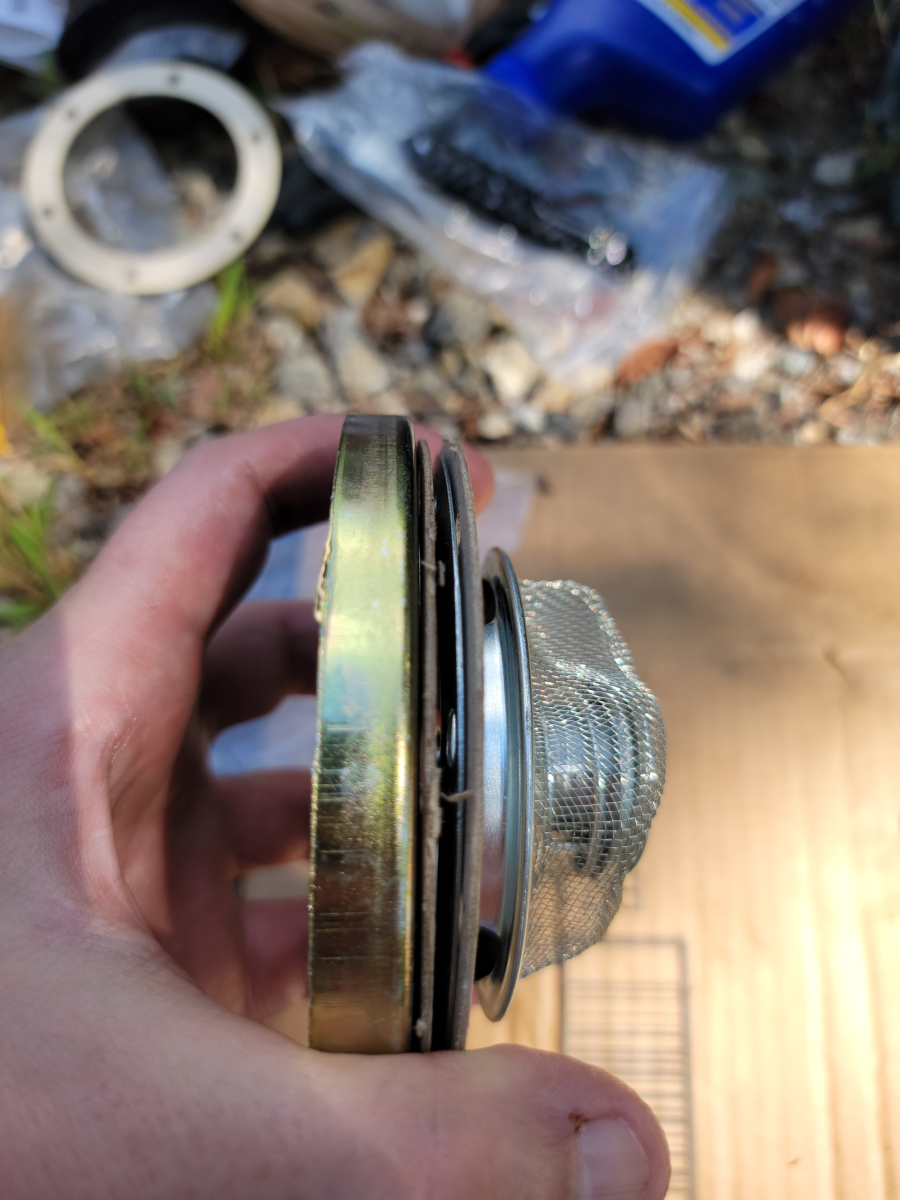
It had been a while since I last changed the oil. Though I haven’t driven many miles, it seems like a good thing to do. I remembered something was strange last time around and I couldn’t remember what it was, so I ordered a new sump cover and magnetic drain plug, along with a new oil filter and the usual oil change kit with new gaskets and screen.
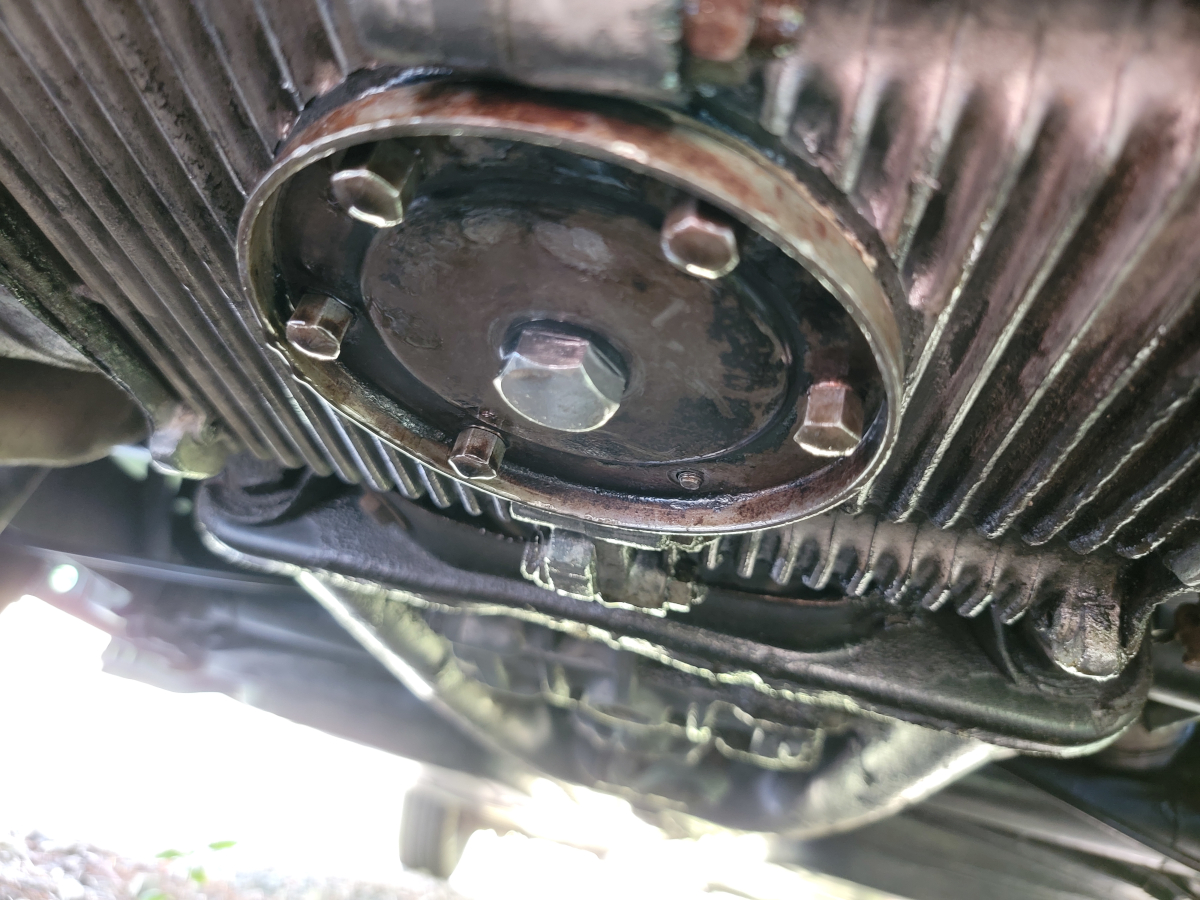
Once I got up in there, I was reminded of what the problem was before. One of the studs on the sump cover is stripped, or at least threaded almost all the way up into the case. I was able to get a bit of thread to bite on the cap last time, but not so much this time.
The rest of them tighten it up enough that it isn’t leaking. The oil that you see in the pic is from elsewhere under there. I will need to add that to the To Do list for next season.
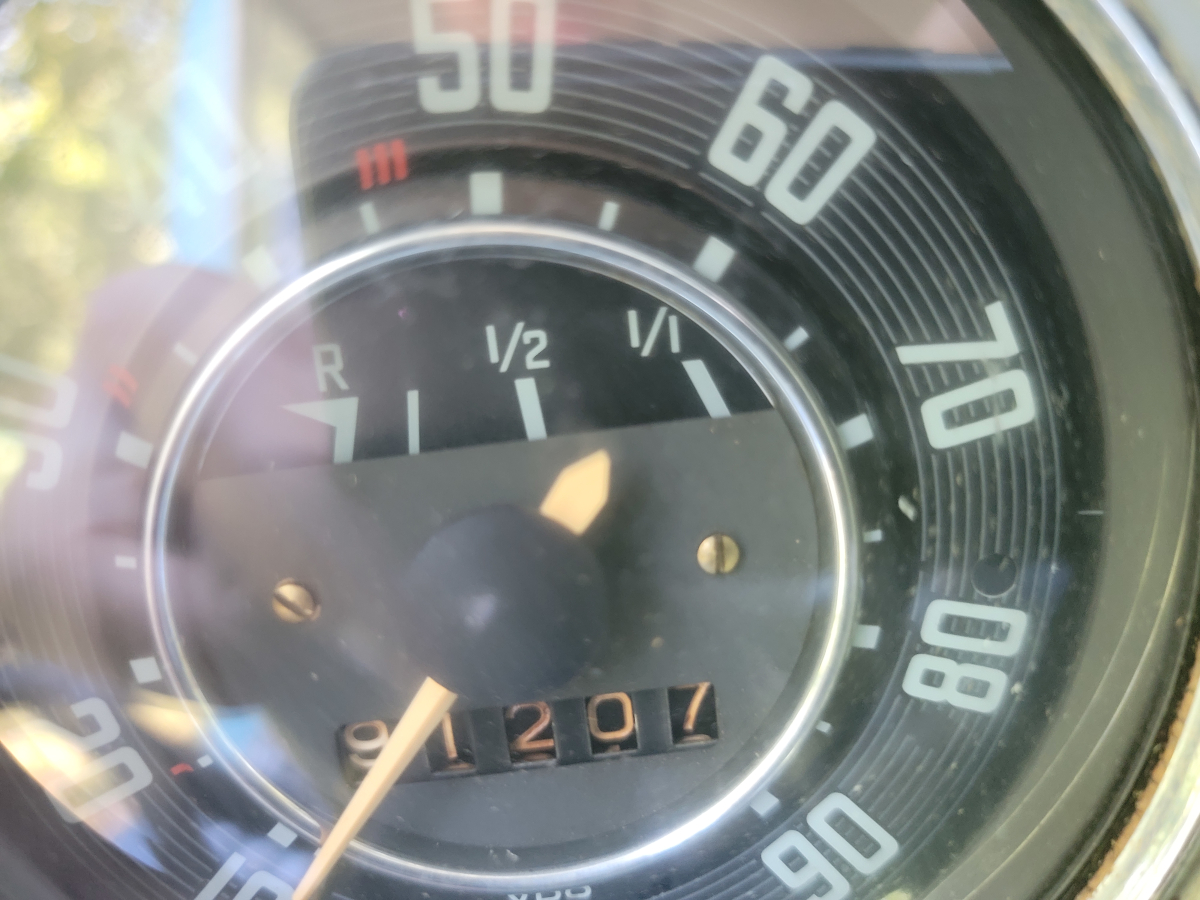
And for my own reference, let’s check the odometer instead of a calendar this time.
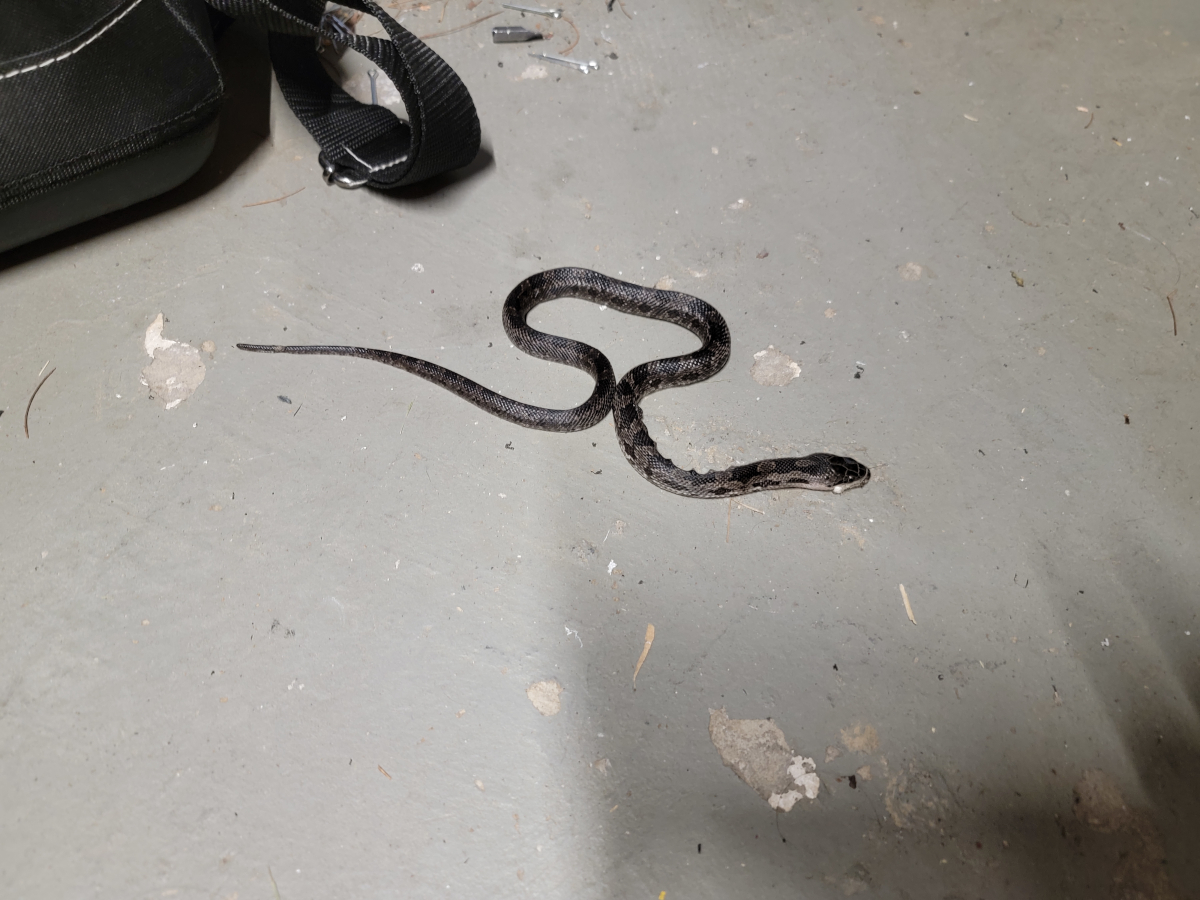
Let’s start this off by saying GET OUT OF MY HOUSE YOU TINY BABY RAT SNAKE!
I’m glad it was outside of the tool bag. If I had found it in there wrapped up in my tools, it would have been a lot more of a shock. I don’t have a phobia of snakes, but my monkey brain still tingles. Oddly, wet cardboard gives me the same sinking feeling. Weirdo.
OK, so there is another thing I need to address before getting started… This project is a mess. My “repairs” are intended to be temporary. At least until I can get access to a welder and spend some time cutting and cleaning and plating things up “properly”. In Rust (Not) Repair – Part 1, I plated the C channel on the side, but got lazy and didn’t cut the contour into the rear edge, so it didn’t properly cover the affected area.
So, that’s where I’m going to start.
While the plate is off, I’ll take this opportunity to clear off a lot of the loose rust. Inside the heater channel behind, there is a lot of flaky rust that I was able to “sweep out” with a long screwdriver.
It doesn’t really translate in the picture above, but there is a handful of loose rust chunks piled up under there.
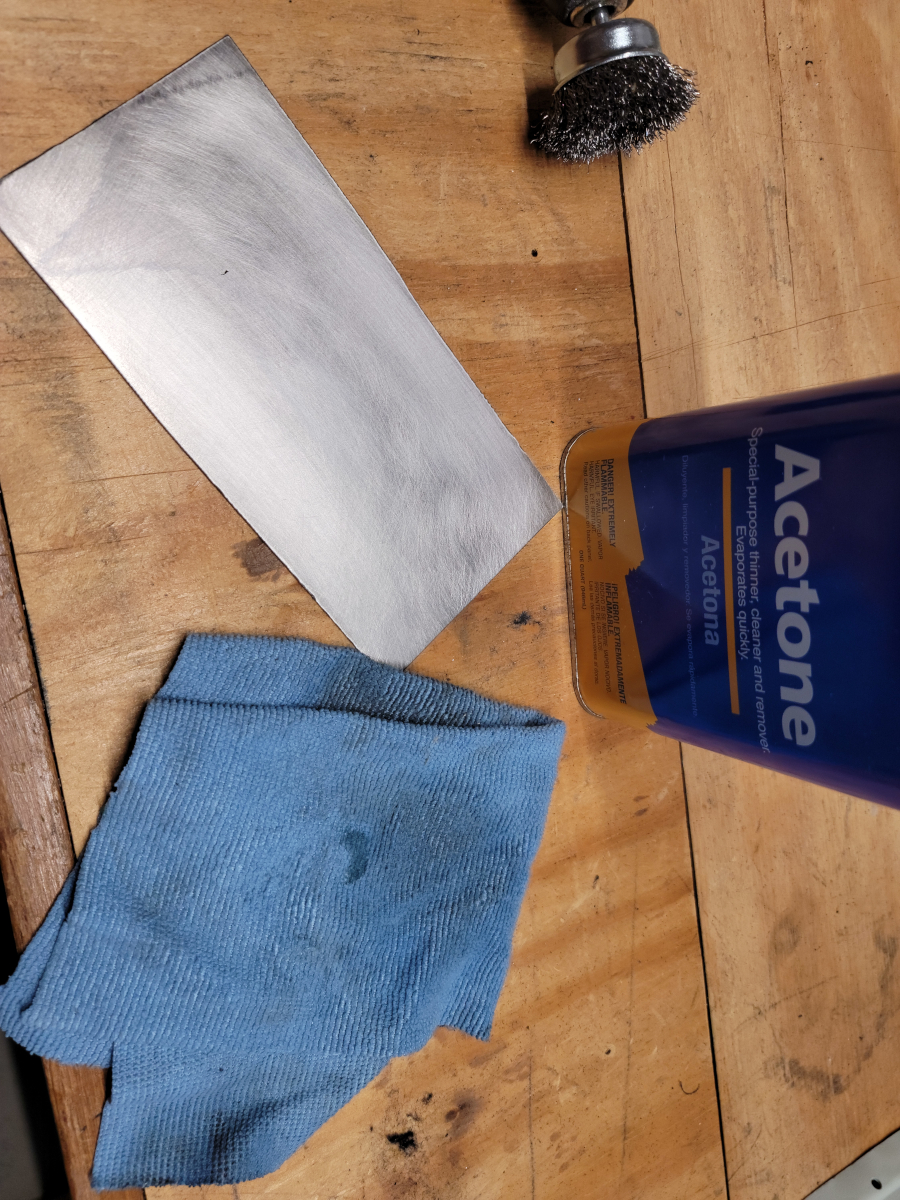
Since the previous layers of primer and paint peeled off so easily, I got out the wire cup brush and cleaned the side plate back to bare metal. I mounted it in the vise, getting ready for a couple of cuts.
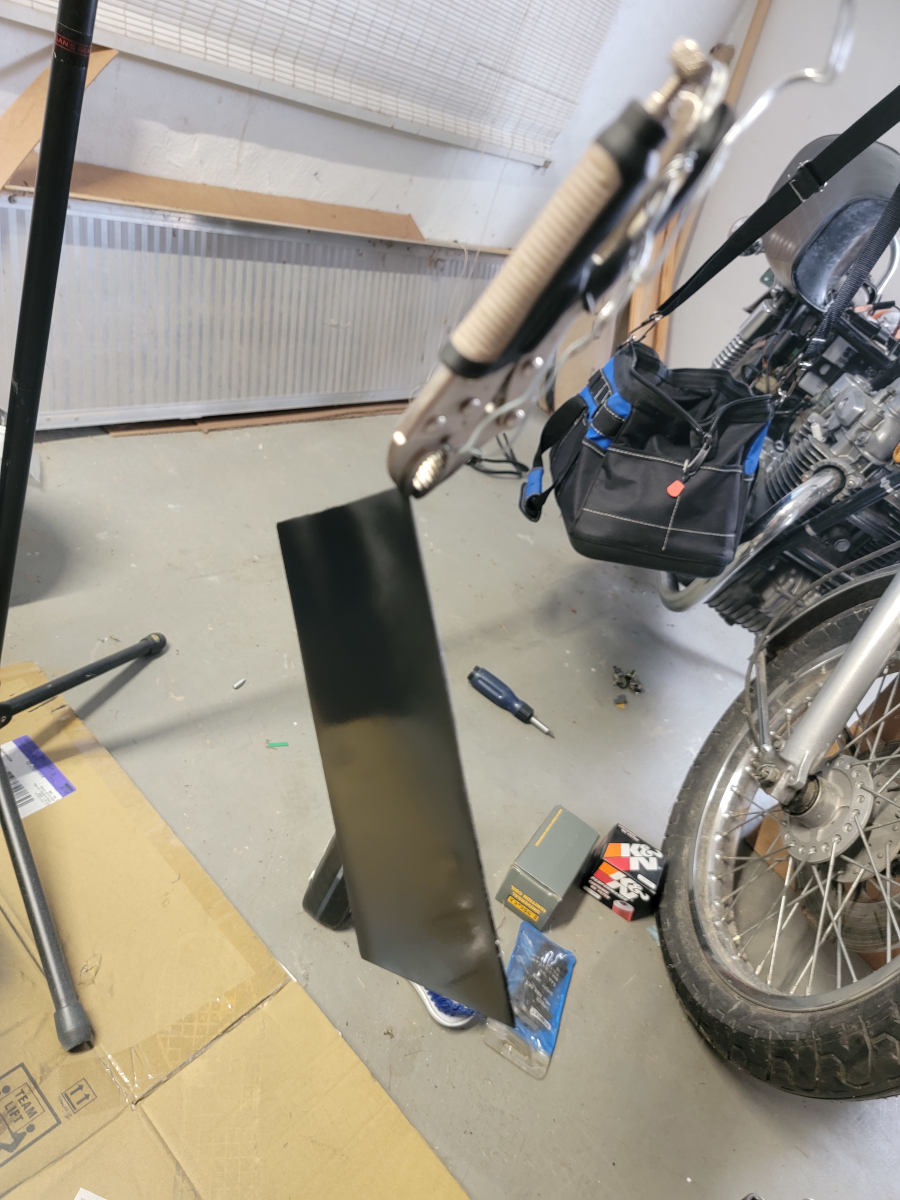
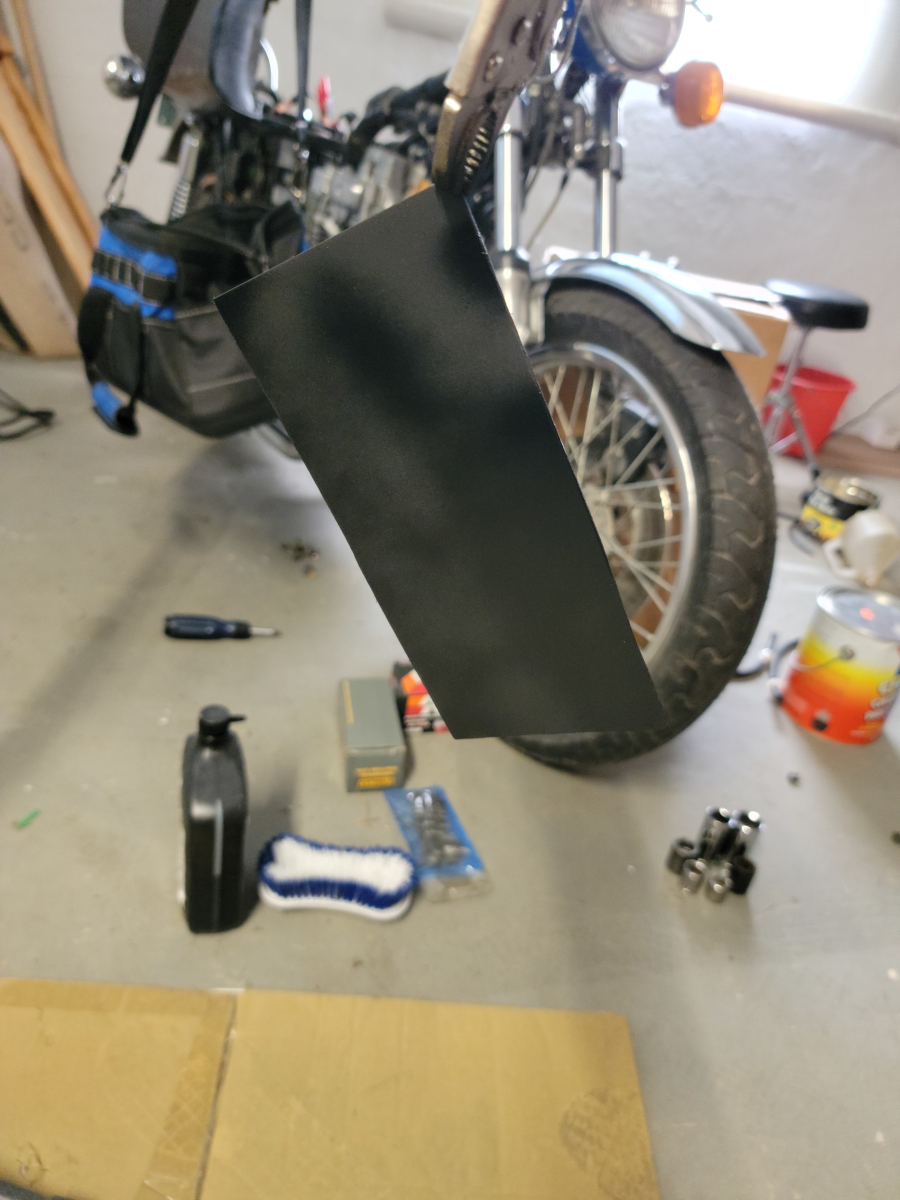
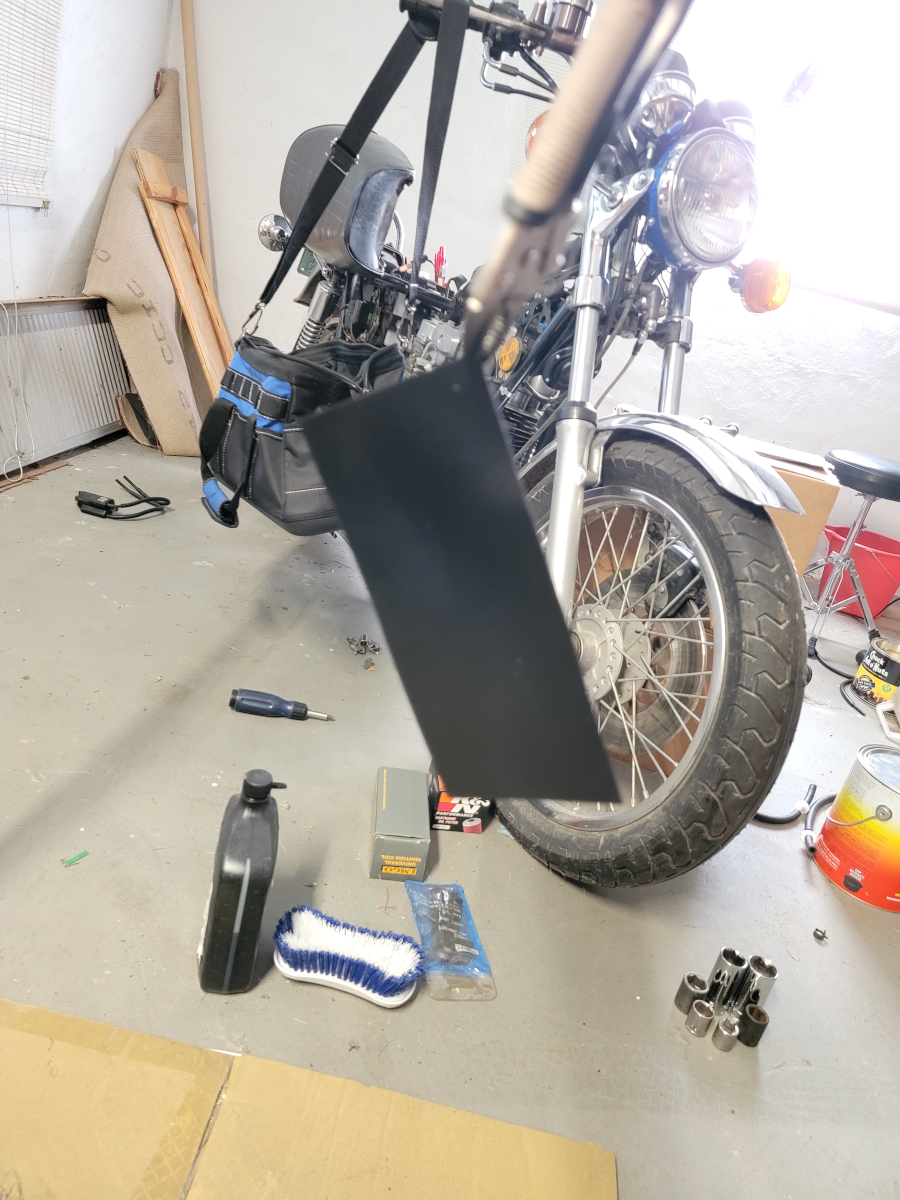
Death wheel engaged. I made the cuts and sanded off the burred edges, then lightly sanded it all over, and cleaned with acetone before beginning the prime and paint process. I was trying different hanger methods, to be able to access both sides at a time, rather than laying it on the cardboard on the floor.
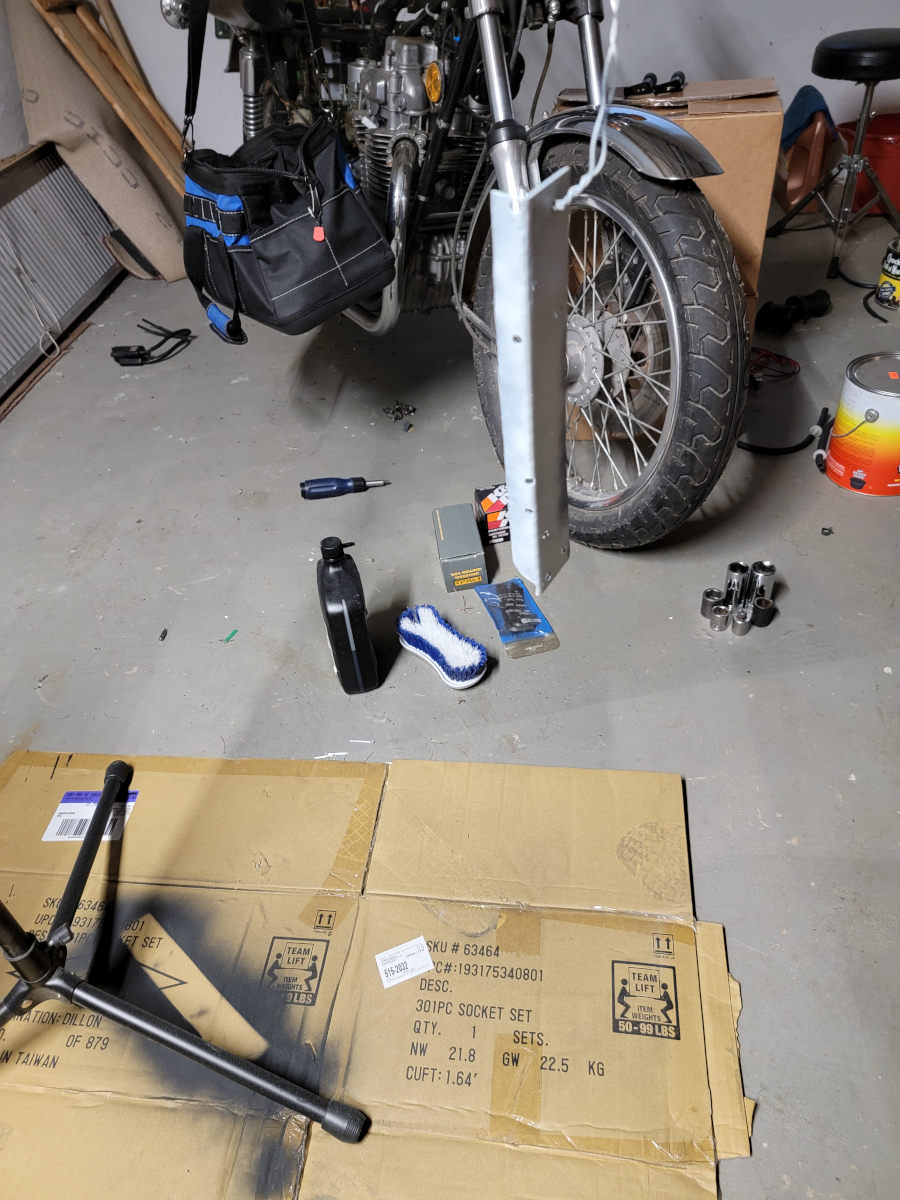
Hanging it out of the vise on mechanics wire was not optimal. I moved on to a boom mic stand, which worked a lot better. I still haven’t gotten the Kawasaki running, but progress has actually been made.
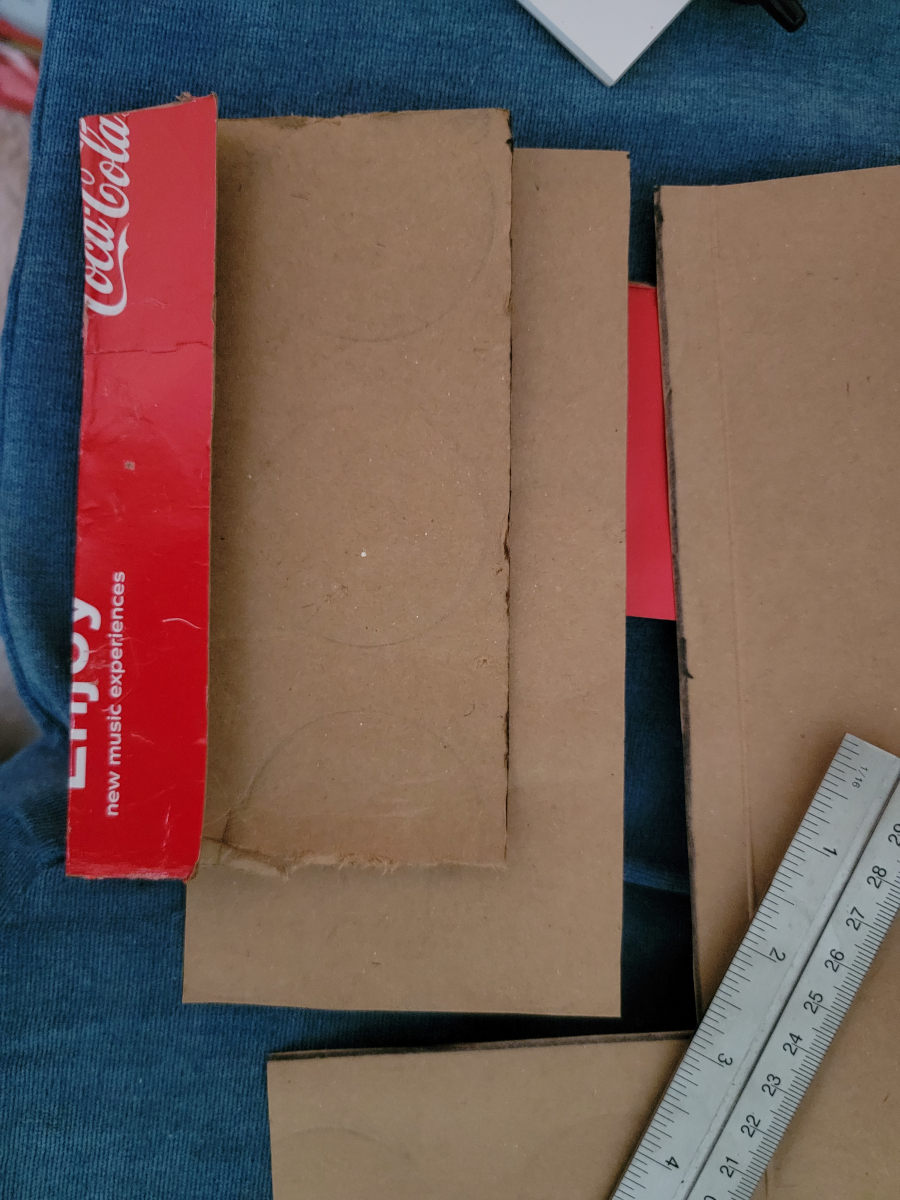
Back outside, I used the same Coke 12 pack box to cut a template for the floor plate.
Fits perfectly!
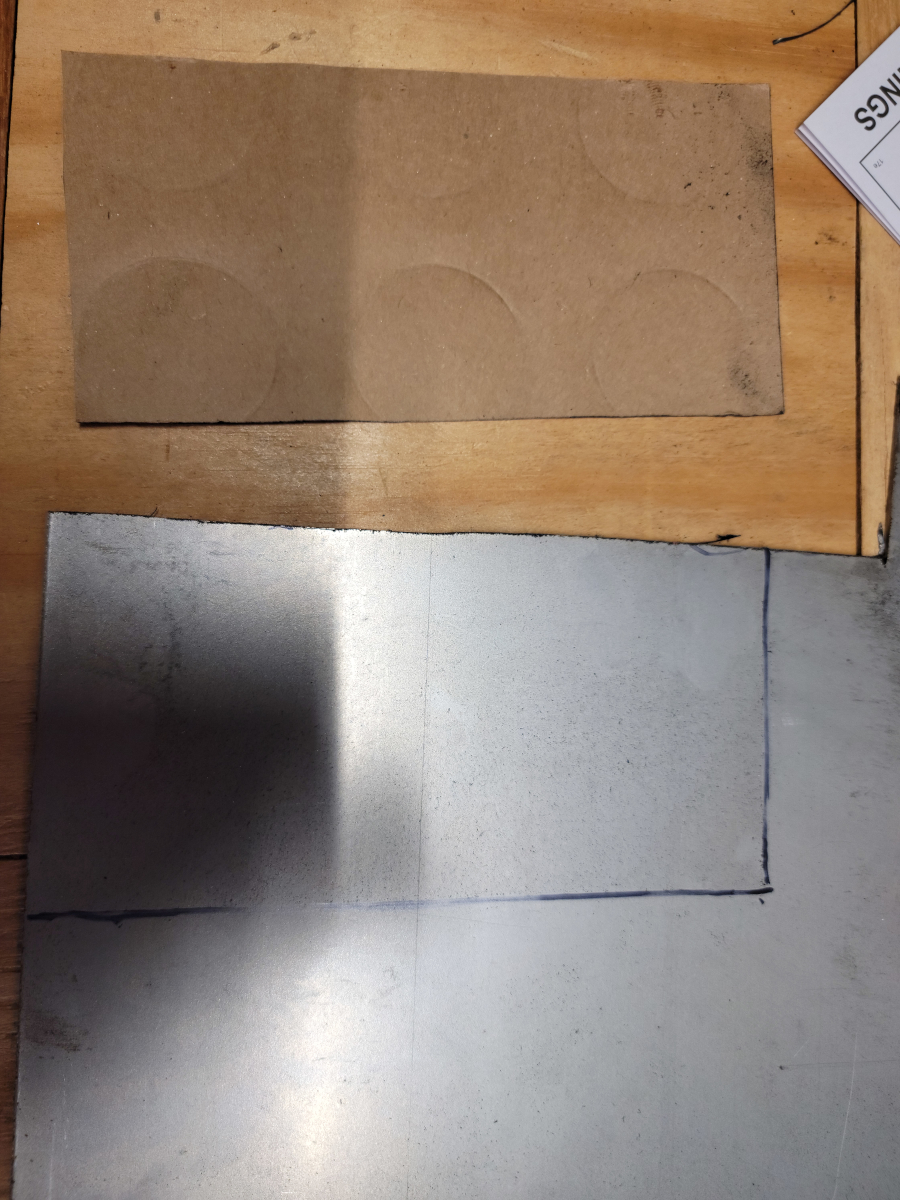
I moved back down to the basement and marked out the template on the sheet steel.
Death wheel engaged!
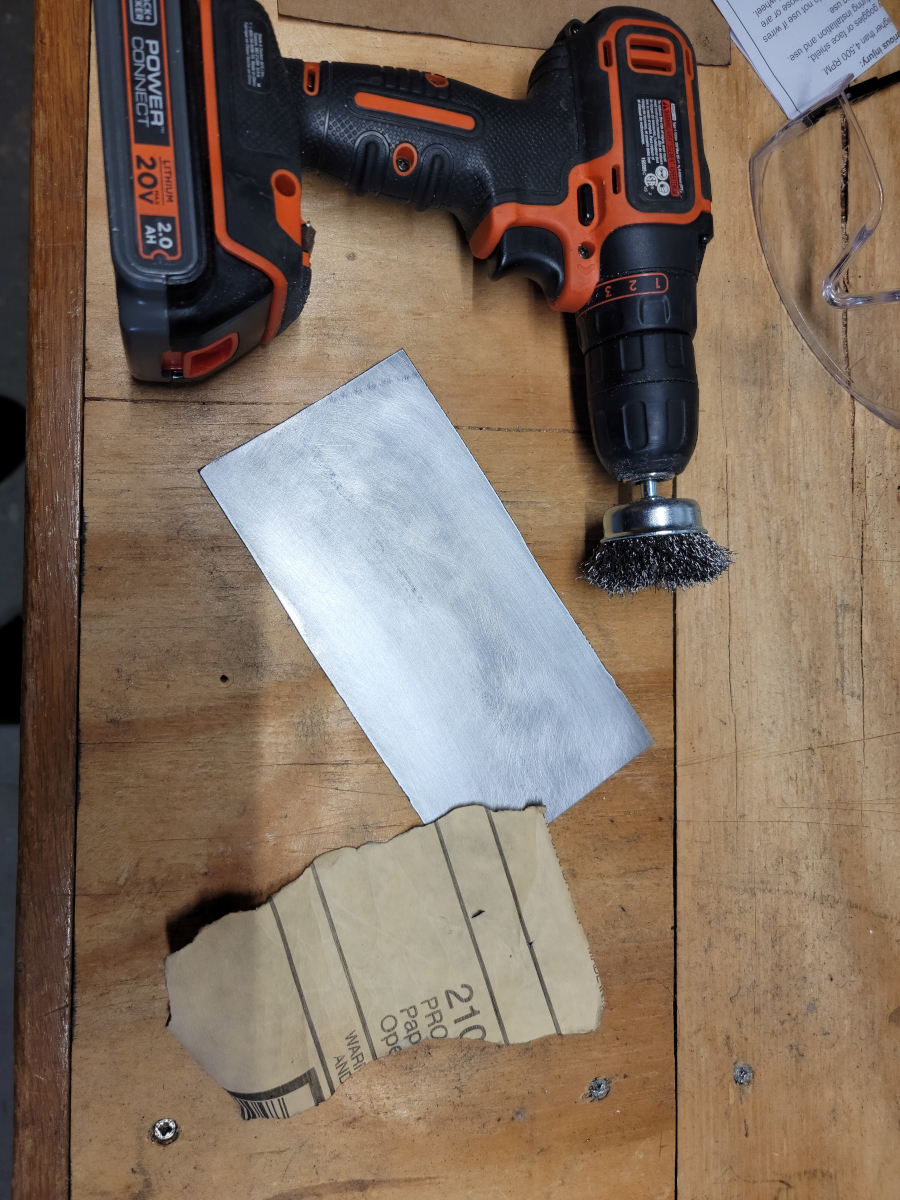
Once again, I cut out the shape, sanded the burrs off the edges, hit it with the cup brush, then lightly sanded it.
Then I washed it down with acetone, getting ready for primer and paint.
The new plate doesn’t have any holes to hang by the mechanics wire, so I added tiny Harbor Freight vise grips to the assembly.
I rotated and hung it by a different corner for each coat.
Primer, primer
Paint, paint
And here are the “finished” products.
When I saw how much of a gap was going to be in between the floor and the plate, I decided maybe it would be better to put the plate underneath instead. To do that, I would need to pull the factory jack point down to make room for the plate.
It just so happens the handle of the largest standard screwdriver from my Harbor Freight tool kit fit in there perfectly and was doing a good job until…
Dang.
Pittsburgh tools have a lifetime replacement warranty, but I’m not sure they would replace it for something like this. Clearly it wasn’t being used as it’s intended. Anyway, I need to get the rest of the handle out of there.
Needle nose pliers engaged! Also, as you can see in the pic, I had to put the plate inside after all, so all that was pointless.
Back to the vise grips, which did a decent job of pinning the plate down to the floor.
I feel like an official
TRIGGER WARNING
is the right thing to do here. For those who might be super-sensitive to terrible automotive hackery, consider yourself warned.
This is where it all goes wrong.
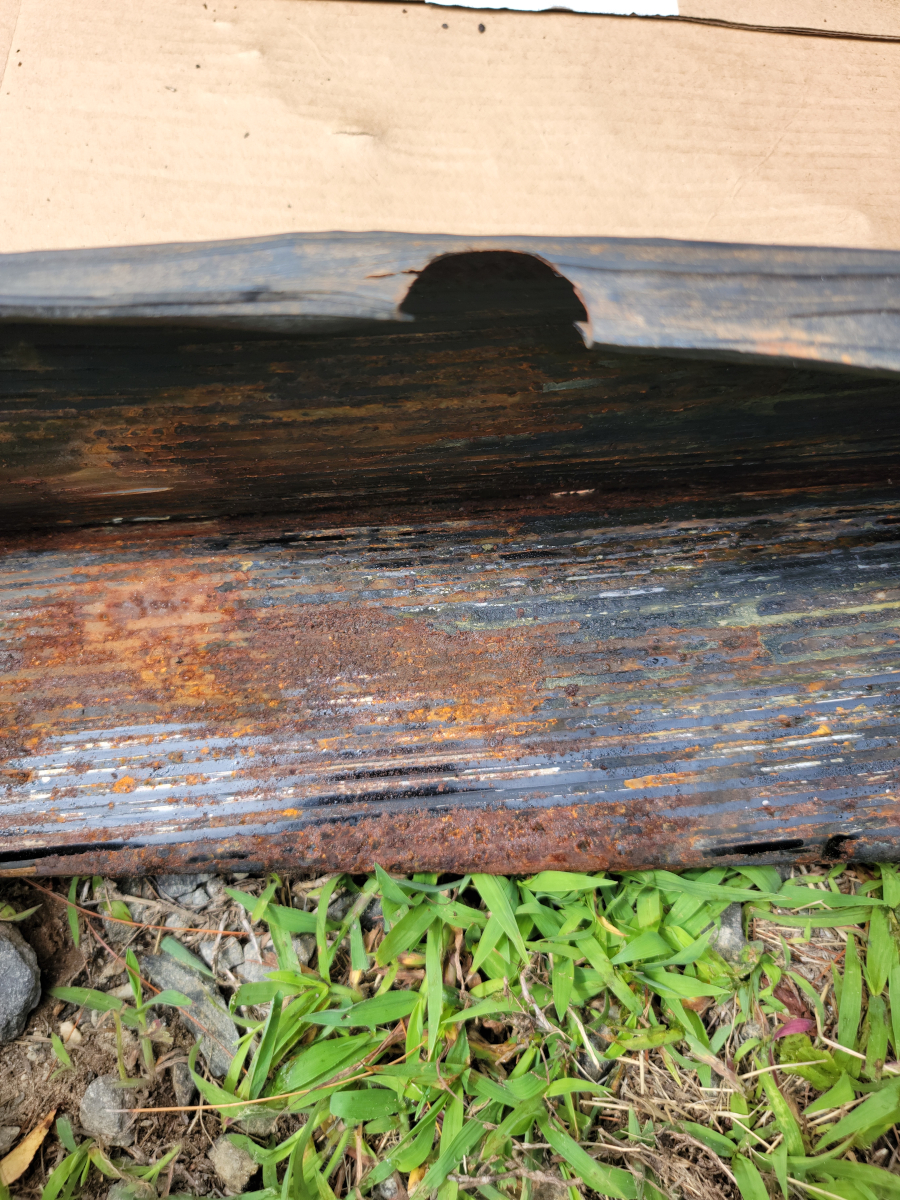
The old floor really needs to be cut out and replaced along the side. The metal is so thin and rusty, the self tappers were pushing right through what was left of the metal.
I just happened to have a handful of very thin and flimsy washers that came with the new running boards.
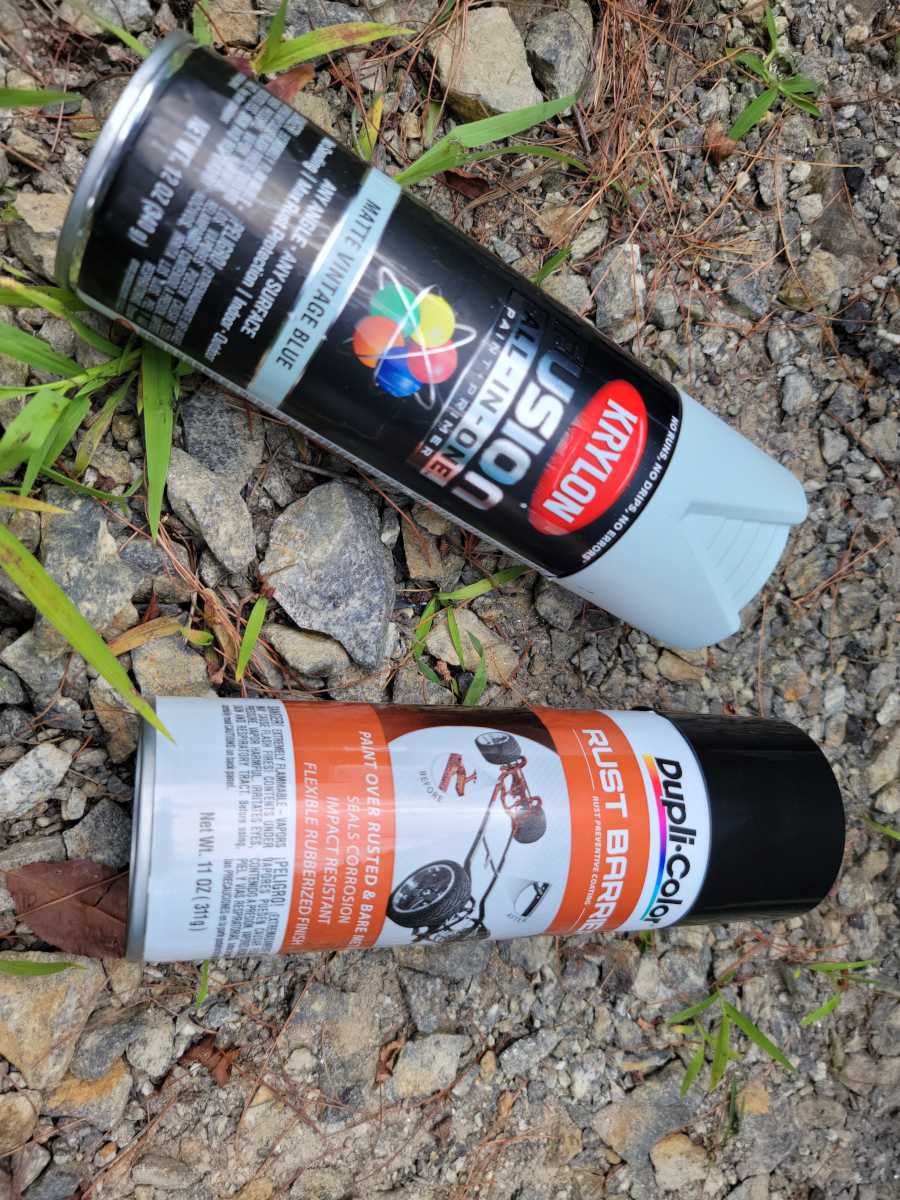
What a mess. My intention at that moment was to smear all of the remaining (rust and failed self tapper) holes with JB Weld Steel Stik. In perfect harmony with how everything else has been going, I seem to have lost the new pack I had laying around. I was drenched in sweat and was done for the day by this point. So, I just hosed the whole area down with Rust Barrier and DE1634. Hopefully, that will slow down the rust by an extra week or two.
The C channel is apparently more out of shape now than it was the first time around. Clearly, the plate doesn’t fit nearly as well now. However, it is at least able to be tucked in behind the fender.
Running board re-mounted to hide this nightmare until a later date.
I am truly sorry to anyone this post has negatively affected. I promise I will try to do better in the future.
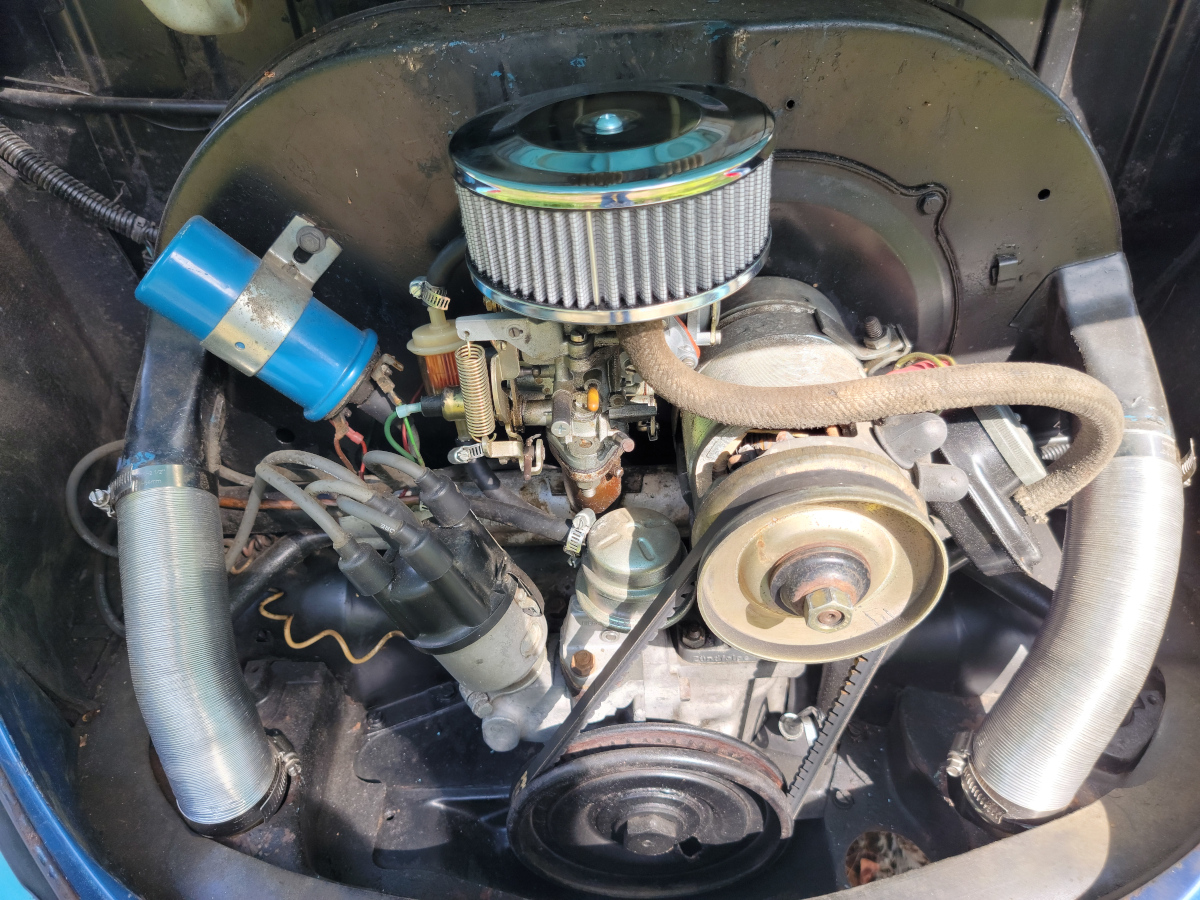
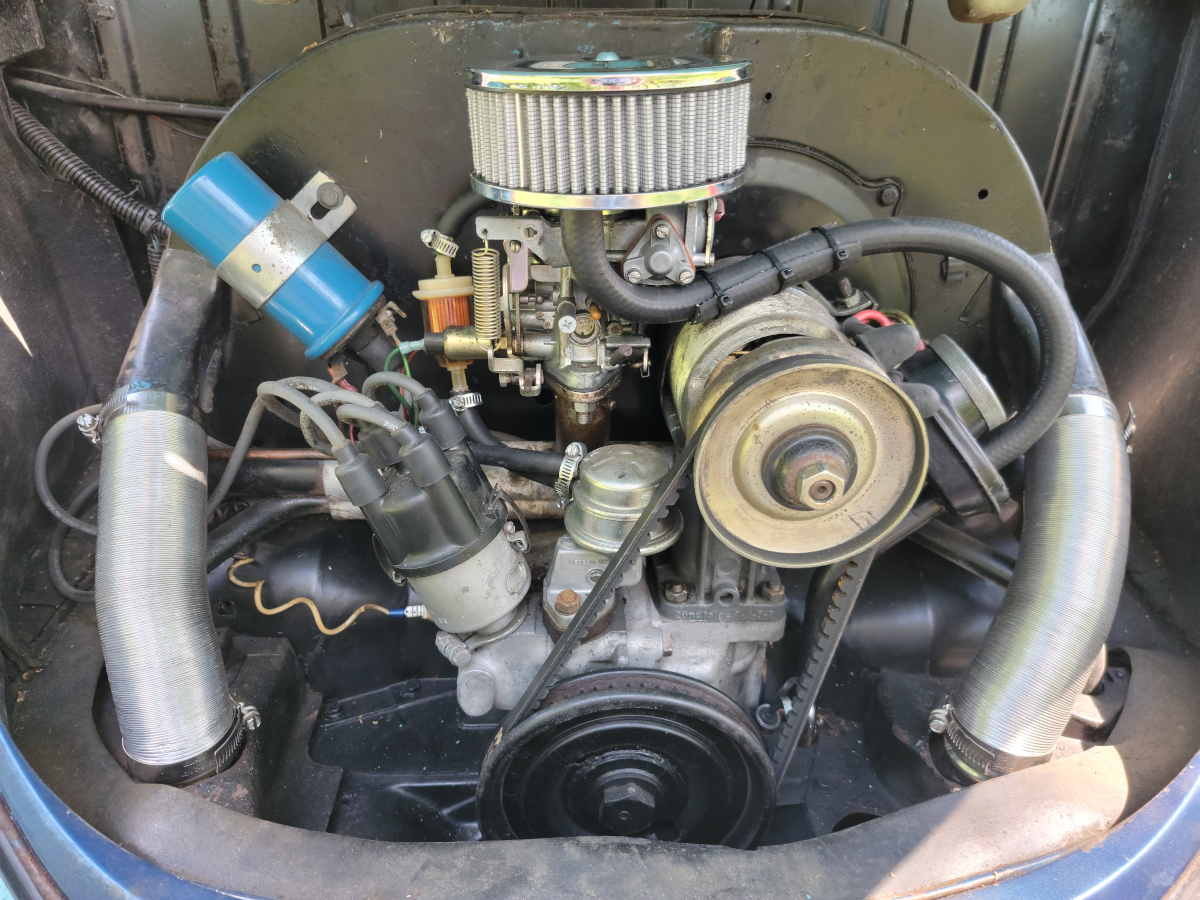
A few days ago, I ordered this Empi foam air cleaner (Amazon link).
It’s a good fit, but I feel like it could use a half inch riser on top of the carb. The air cleaner sits at a little bit of an angle against the top of the choke assembly. Also, the position of the crankcase ventilation nipple on this air cleaner makes it a little too far of a stretch for the old hose.
I stopped by O’Reilly this afternoon and picked up two feet of 1/2 inch fuel line. The original hose is about 14 inches, so I figured that 24 would give me plenty to work with.
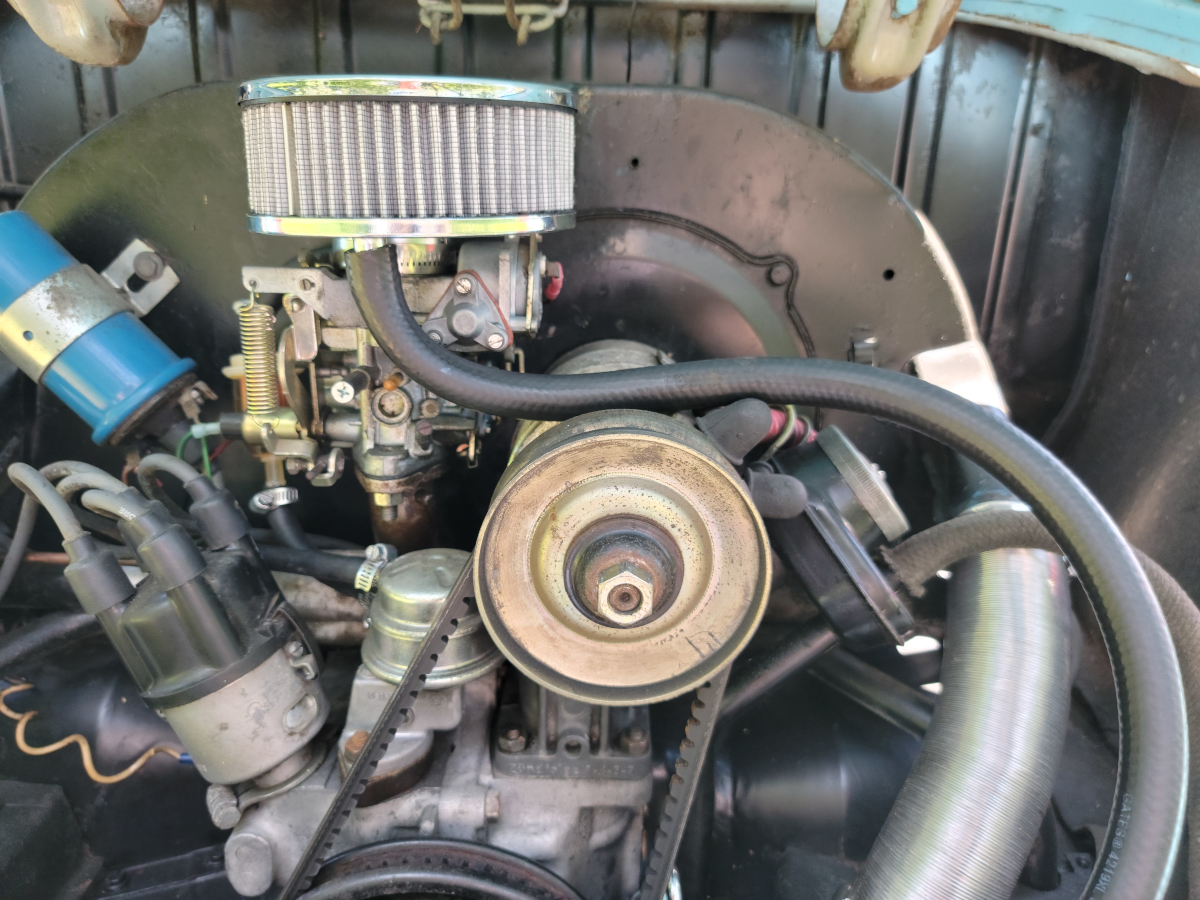
I tried various positions and routing, but “down and out” was the only one that would work. I could have routed it around the whole engine bay if I had another foot of hose, but who really cares how it looks. New, shiny rubber front and center.
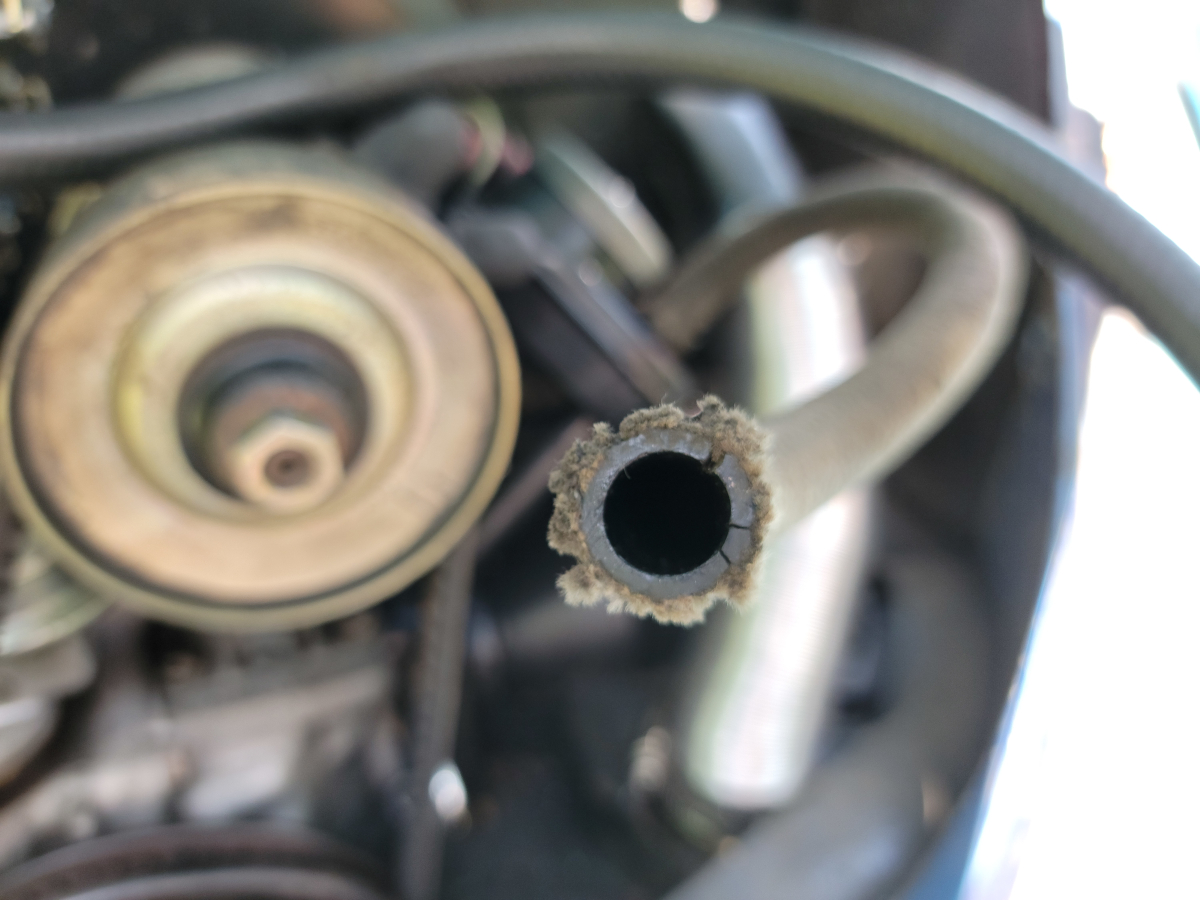
Speaking of which, the old, fabric wrapped hose wasn’t doing too well.
That looks like the fuel lines did. Don’t be fooled by the nice condition of the fabric covering.
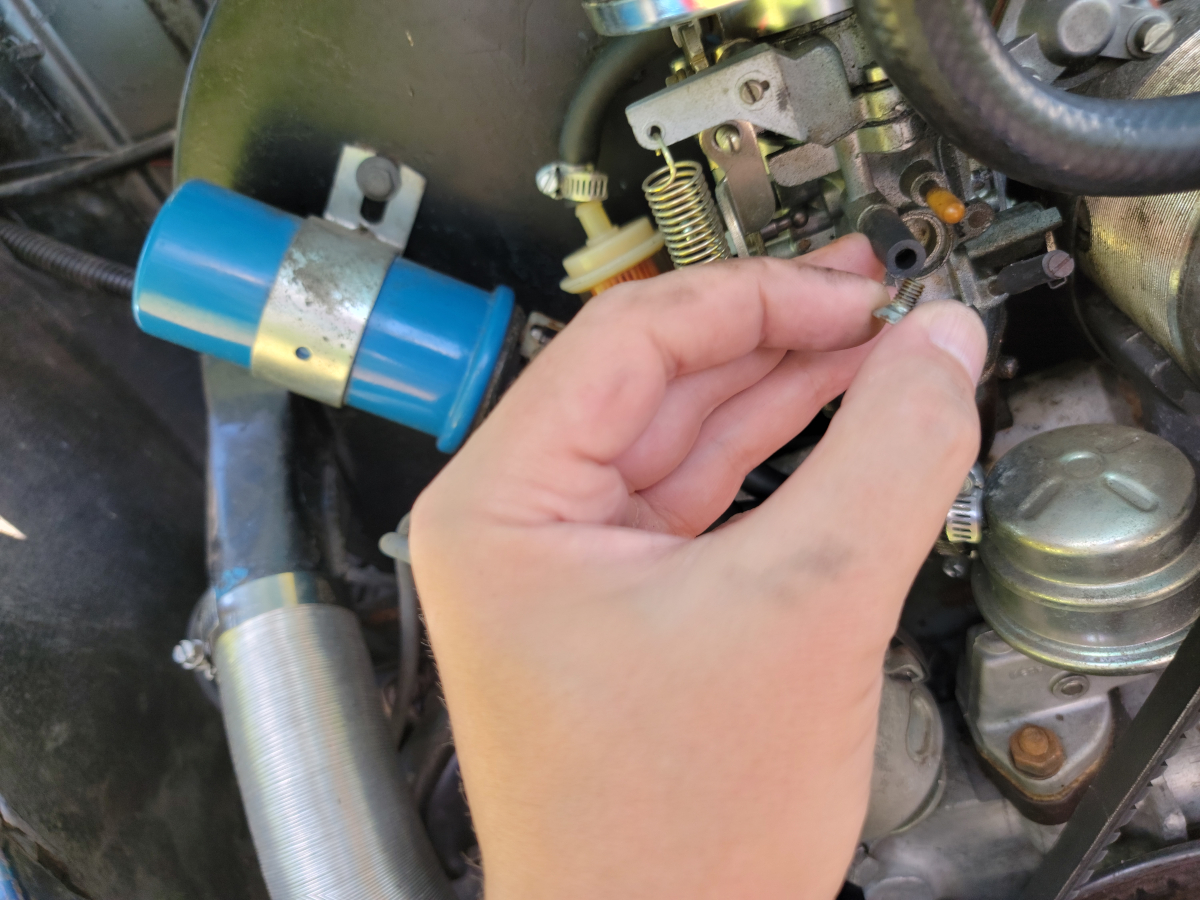
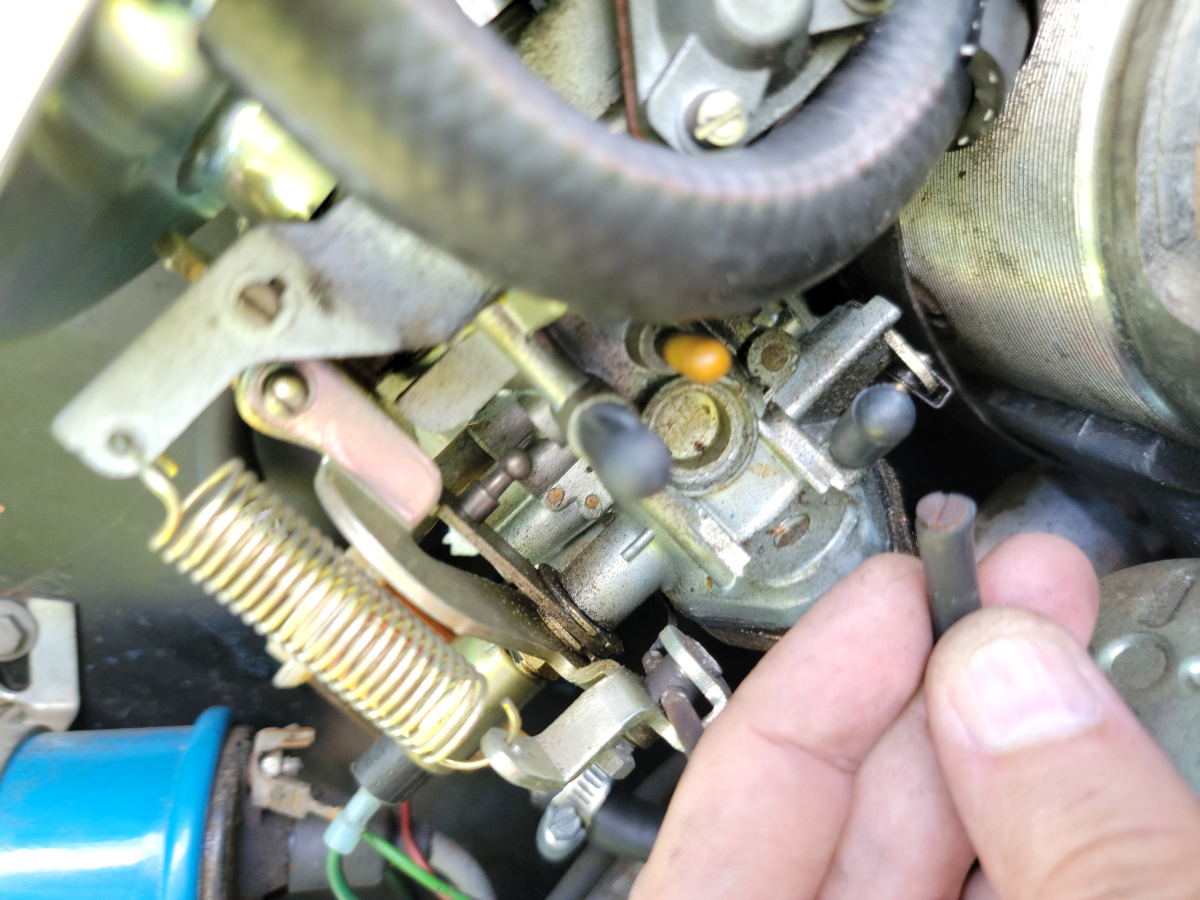
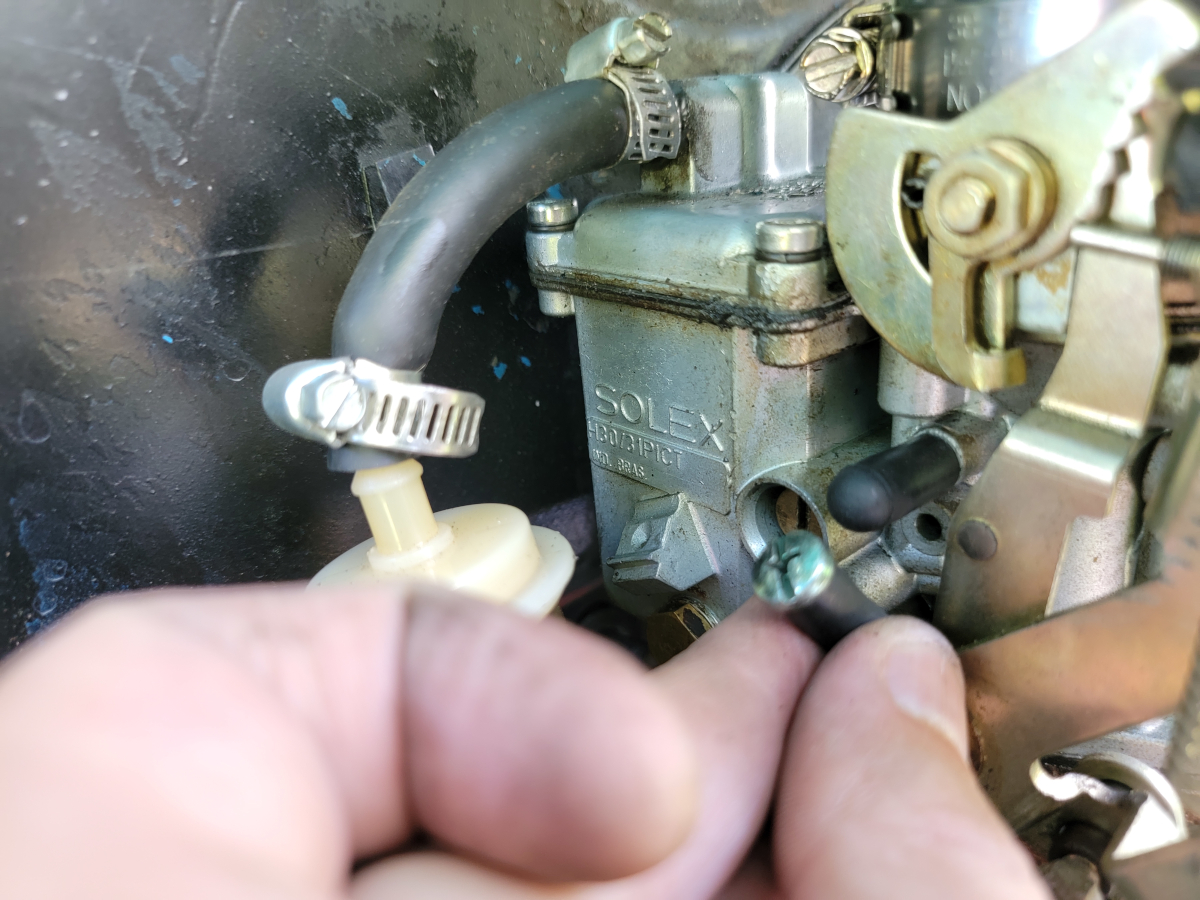
I happened to brush my hand against this “vacuum cap” and the screw fell out. It was a really loose fit. I’ll get back to that once I’ve finished the job at hand.
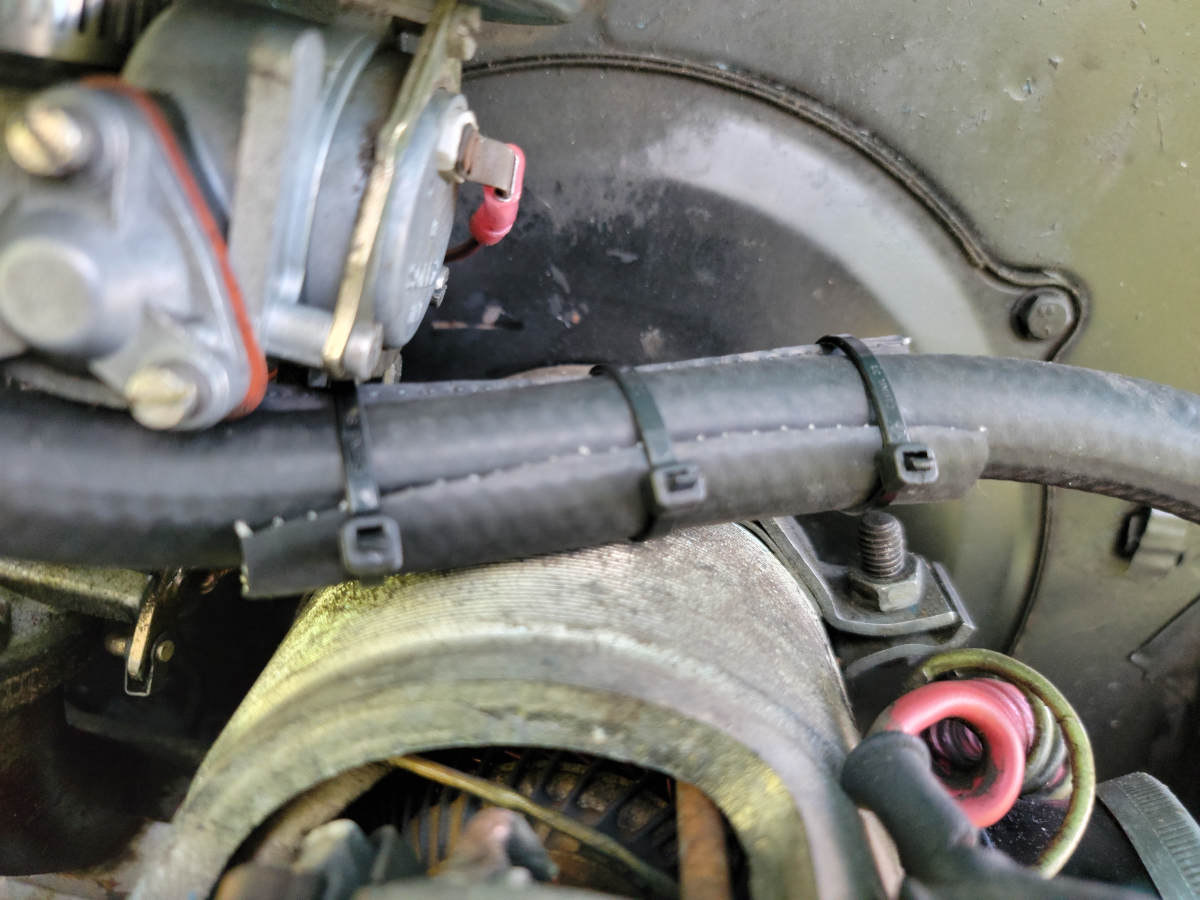
Once I gave in and routed the vent hose across the top of the generator, I had cut off a few inches to get a good, clean fit. Knowing that this new hose is going to be jiggling around rubbing against everything, I took one of the off-cuts of fuel line and taco’ed it around the new hose. A few zip ties snugged it up.
She’s not going to win any beauty pageants, but it’s fine.
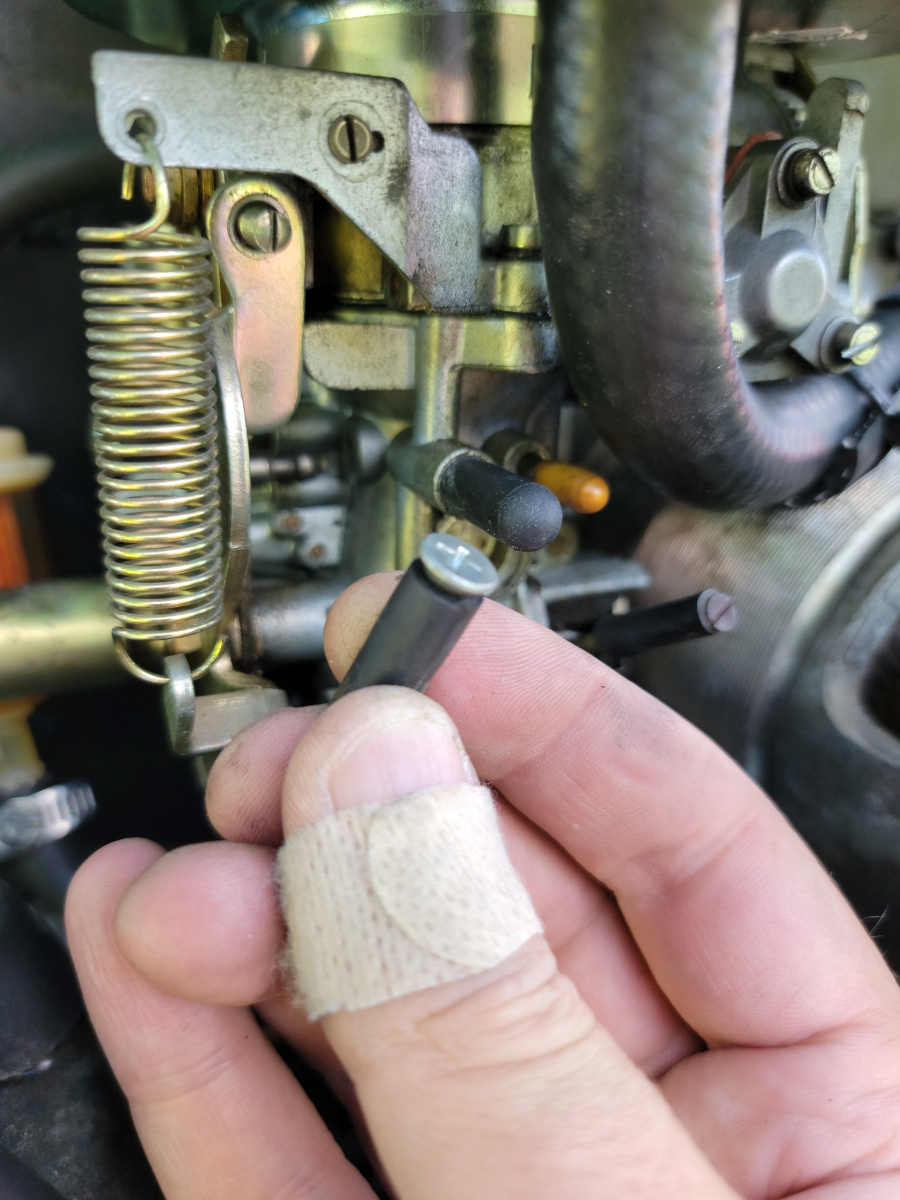
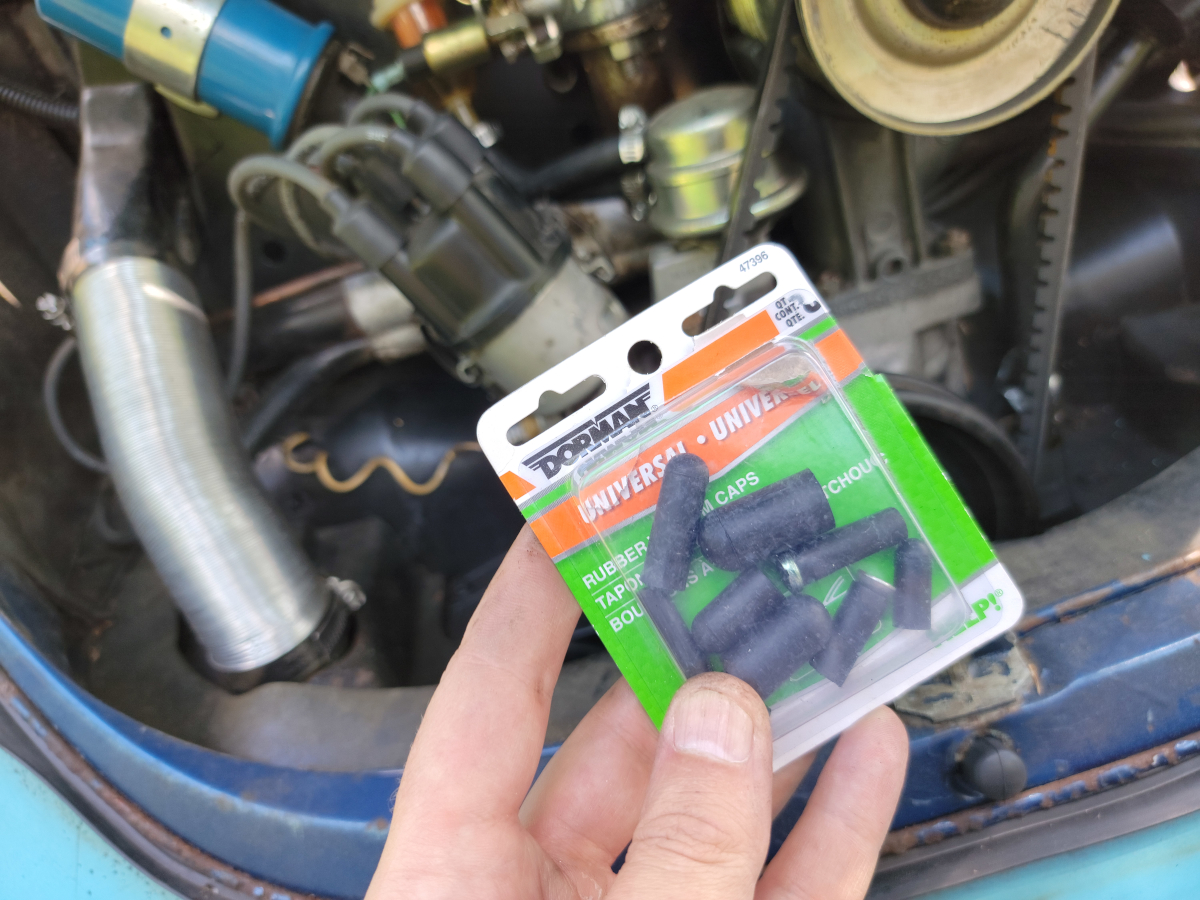
I had bought a pack of assorted vacuum caps off the wall at O’Reilly last year and never got around to replacing those homemade “screw jammed in a hose” deals.
I manage to cut myself every time I’m working on something. This time, it was my super sharp pocket knife that tried to take half my thumb off.
Last one…
And when finished, I chucked all of the old ones back in the pack, so when these crappy Dorman parts fail, I can go back to what had been working on there for years.
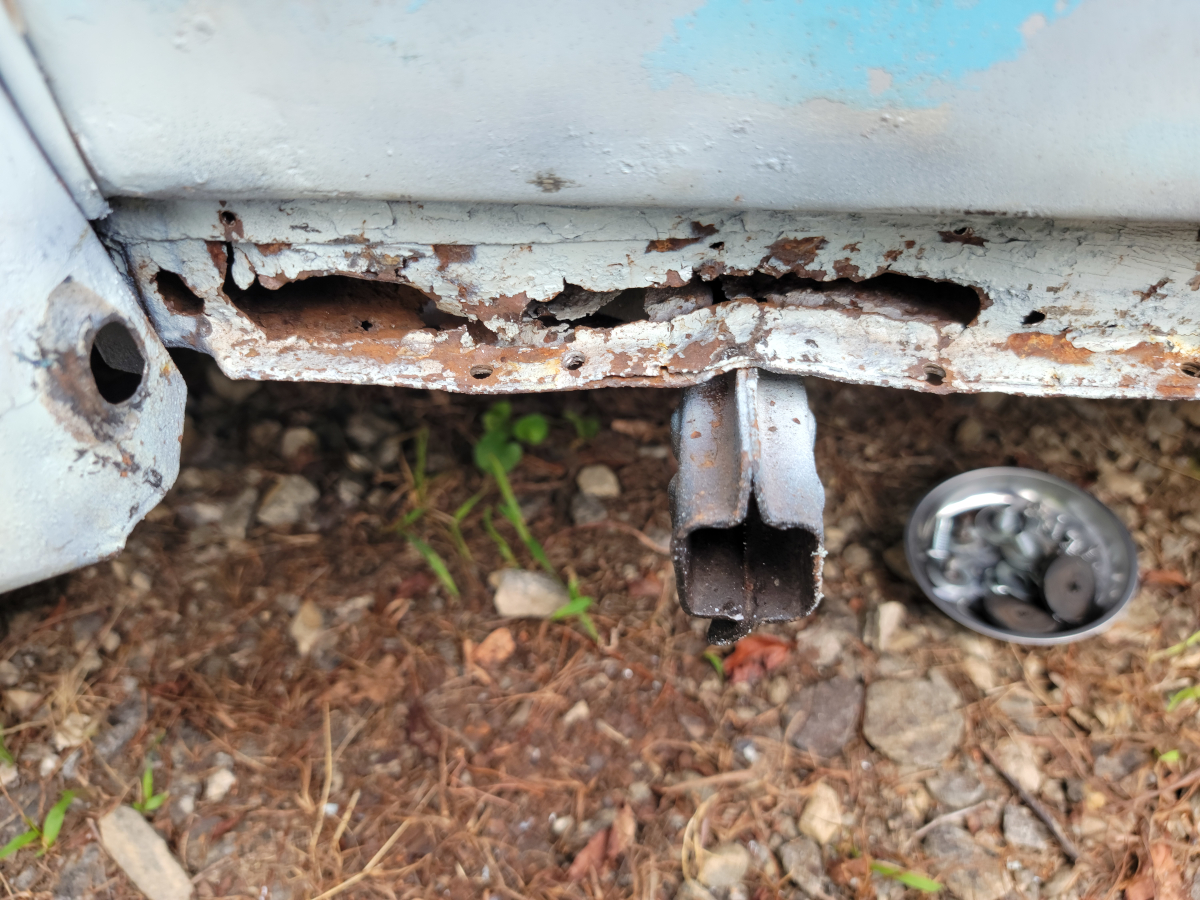
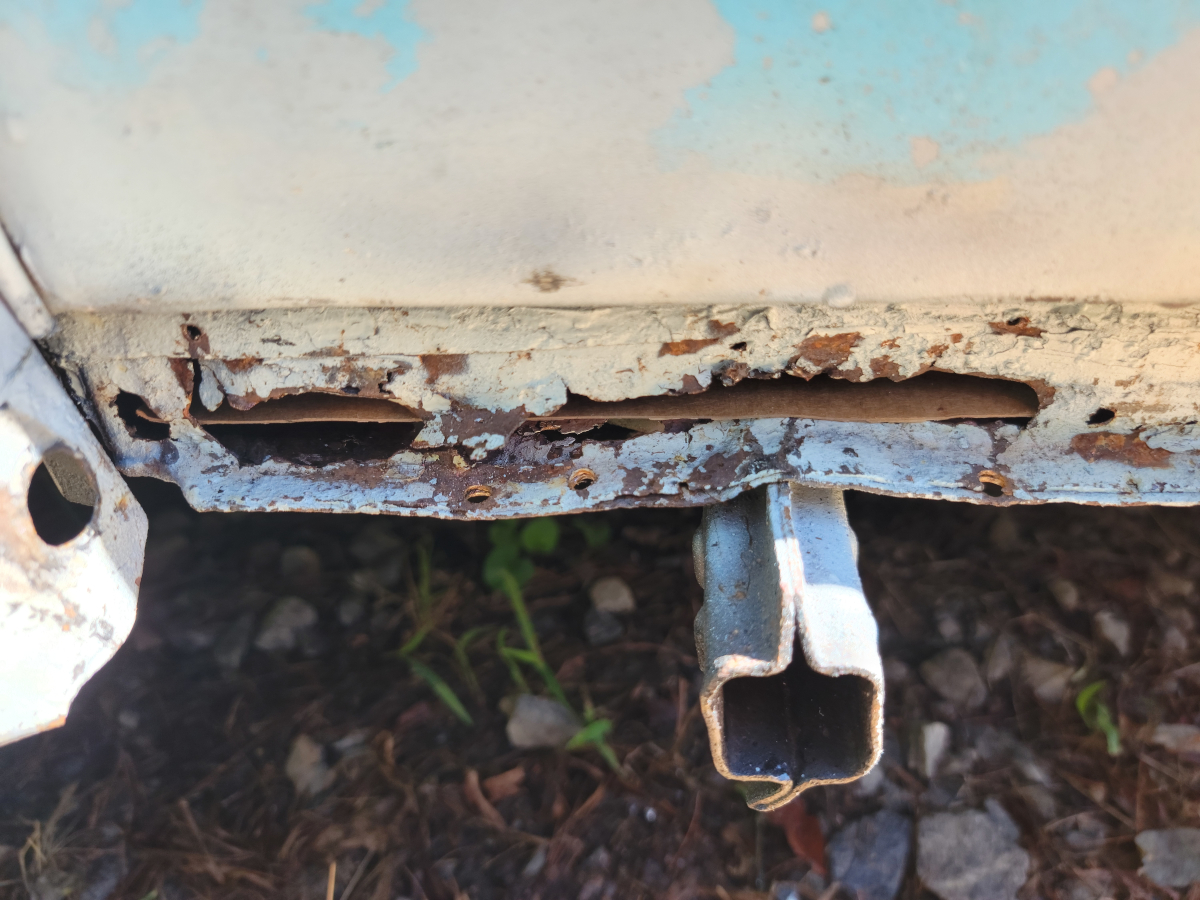
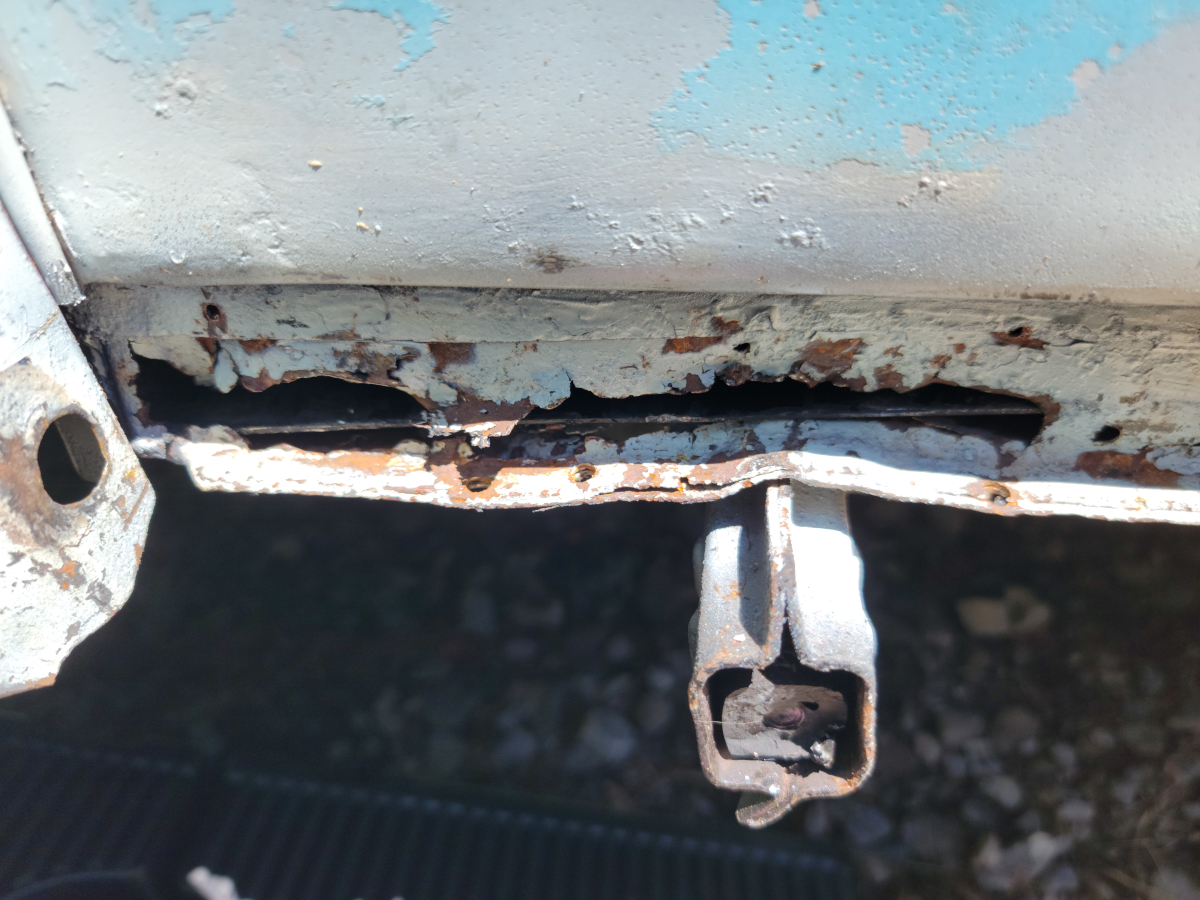
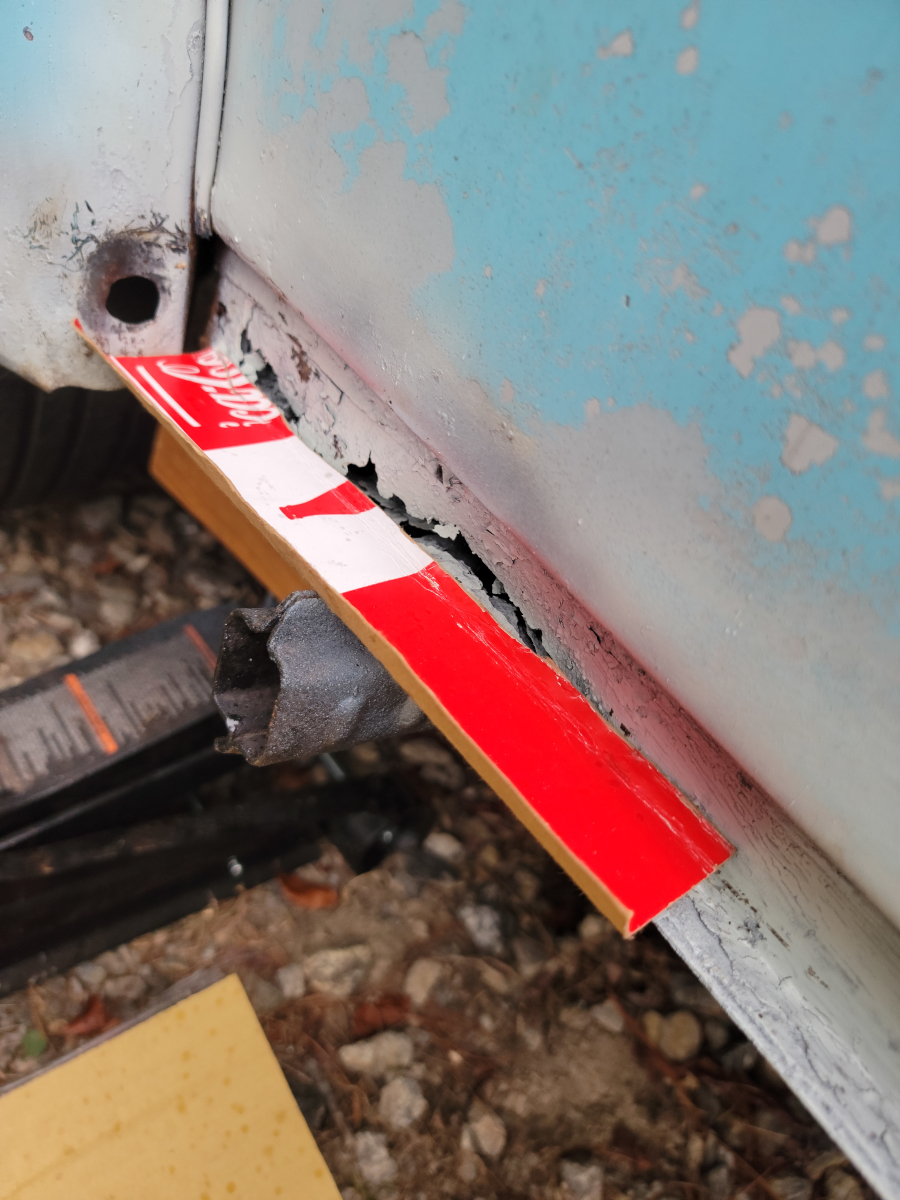
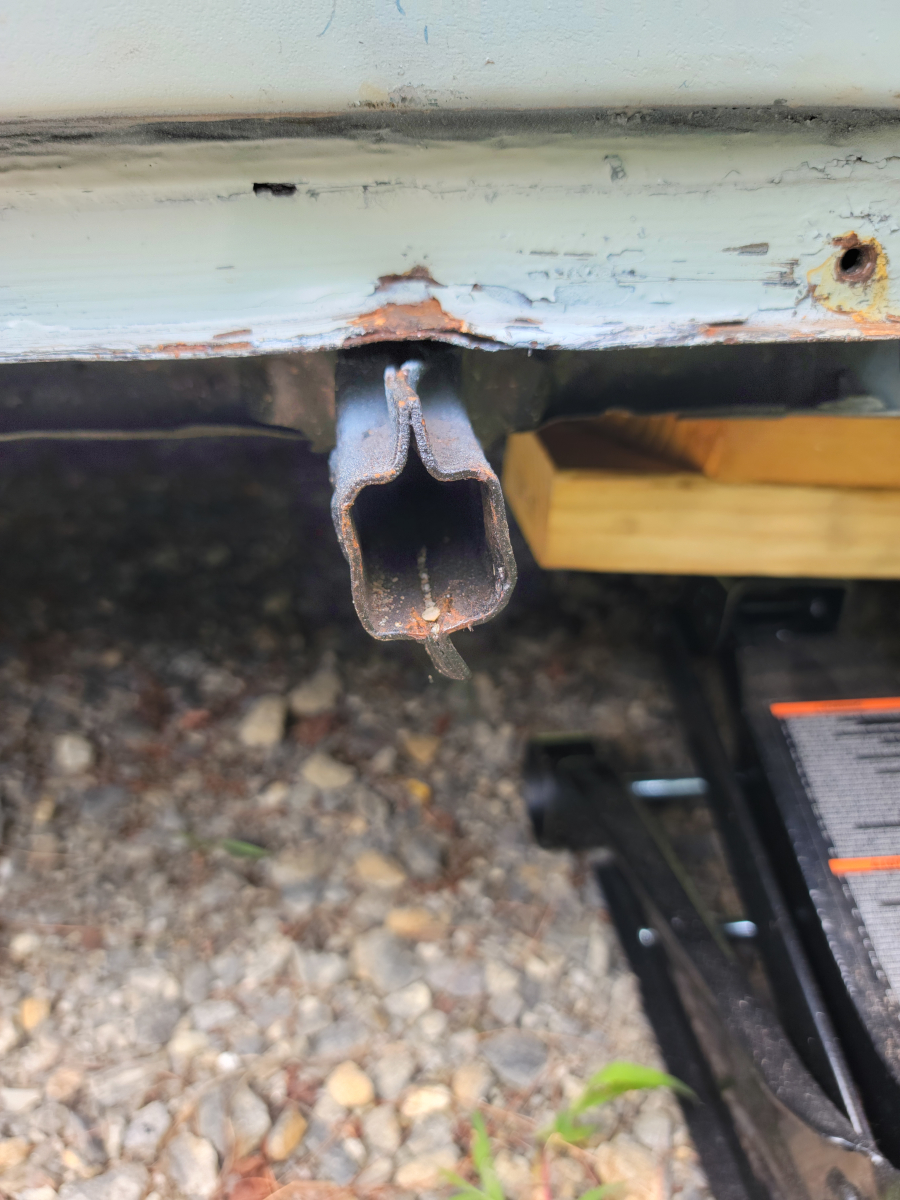
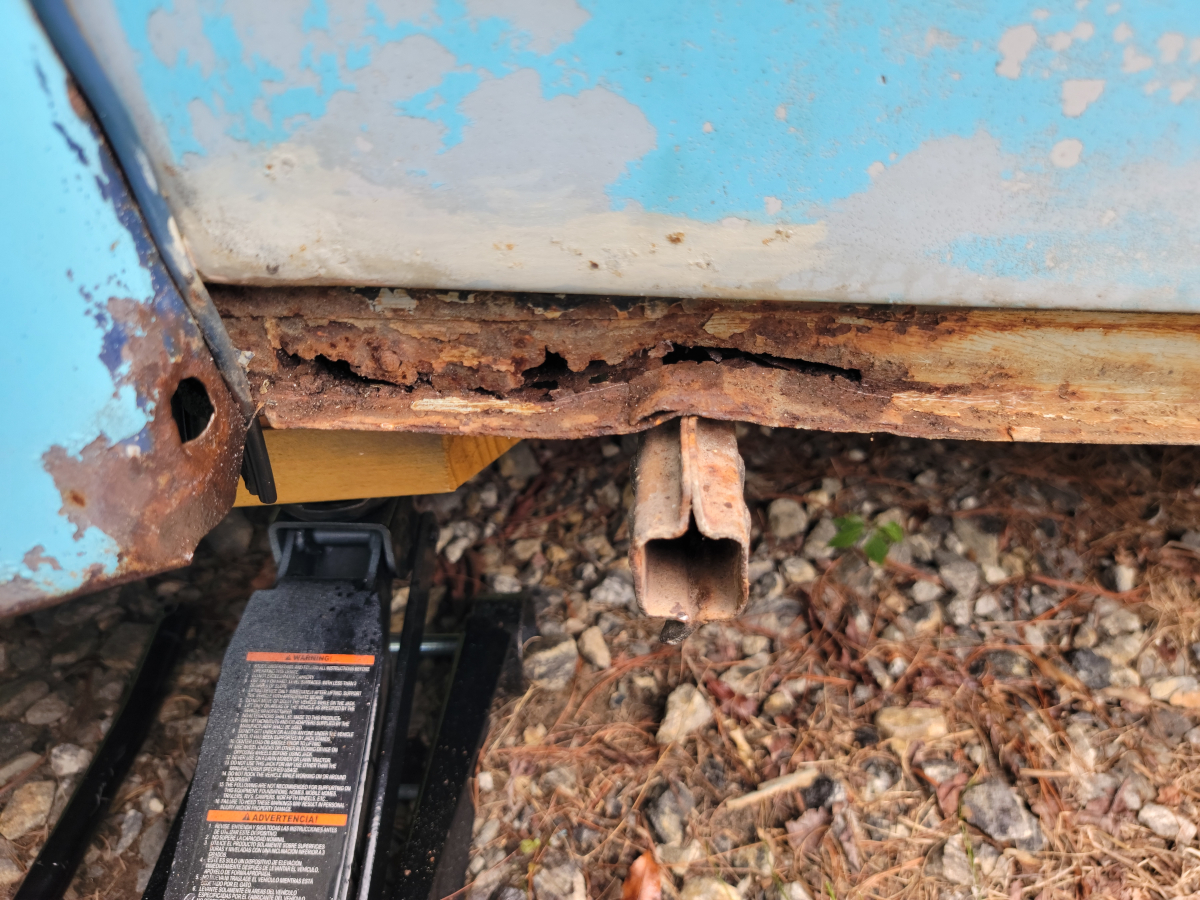
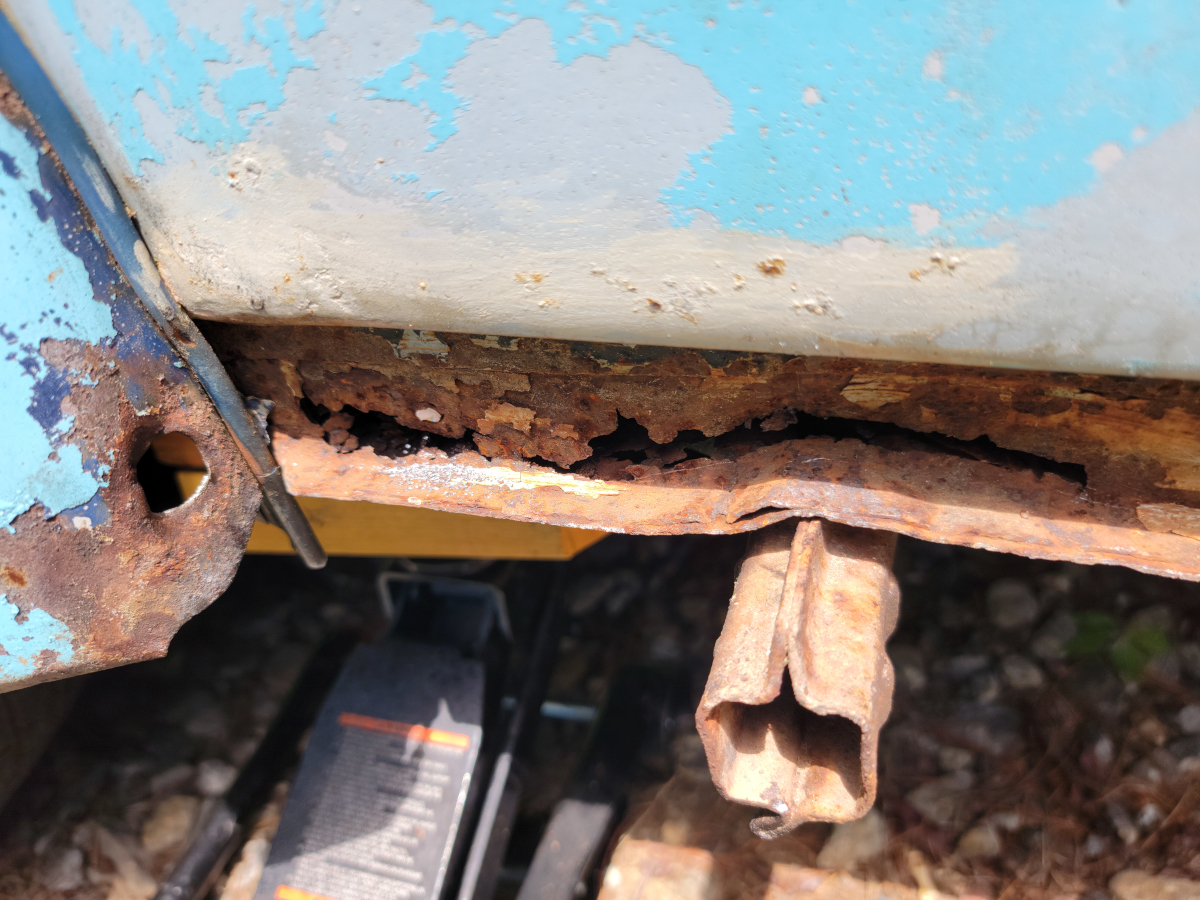
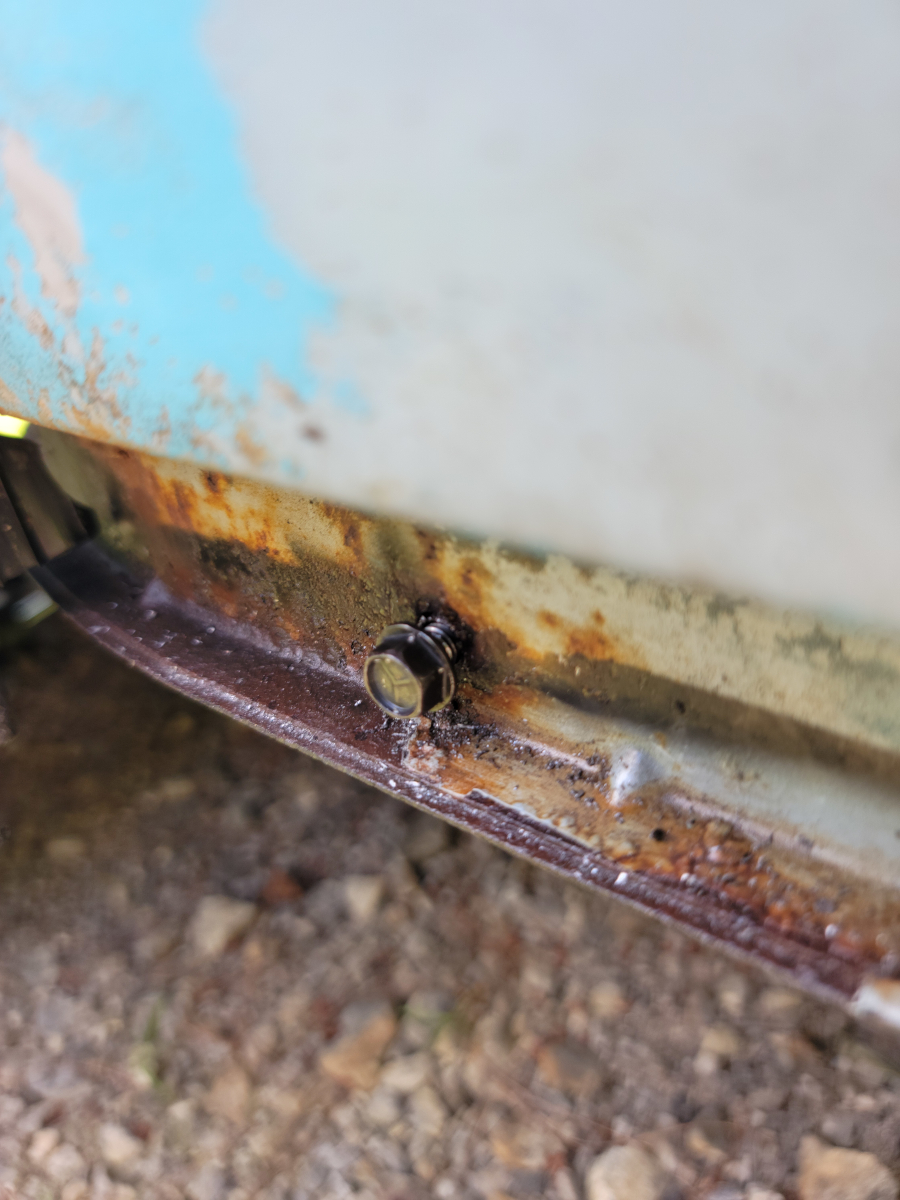
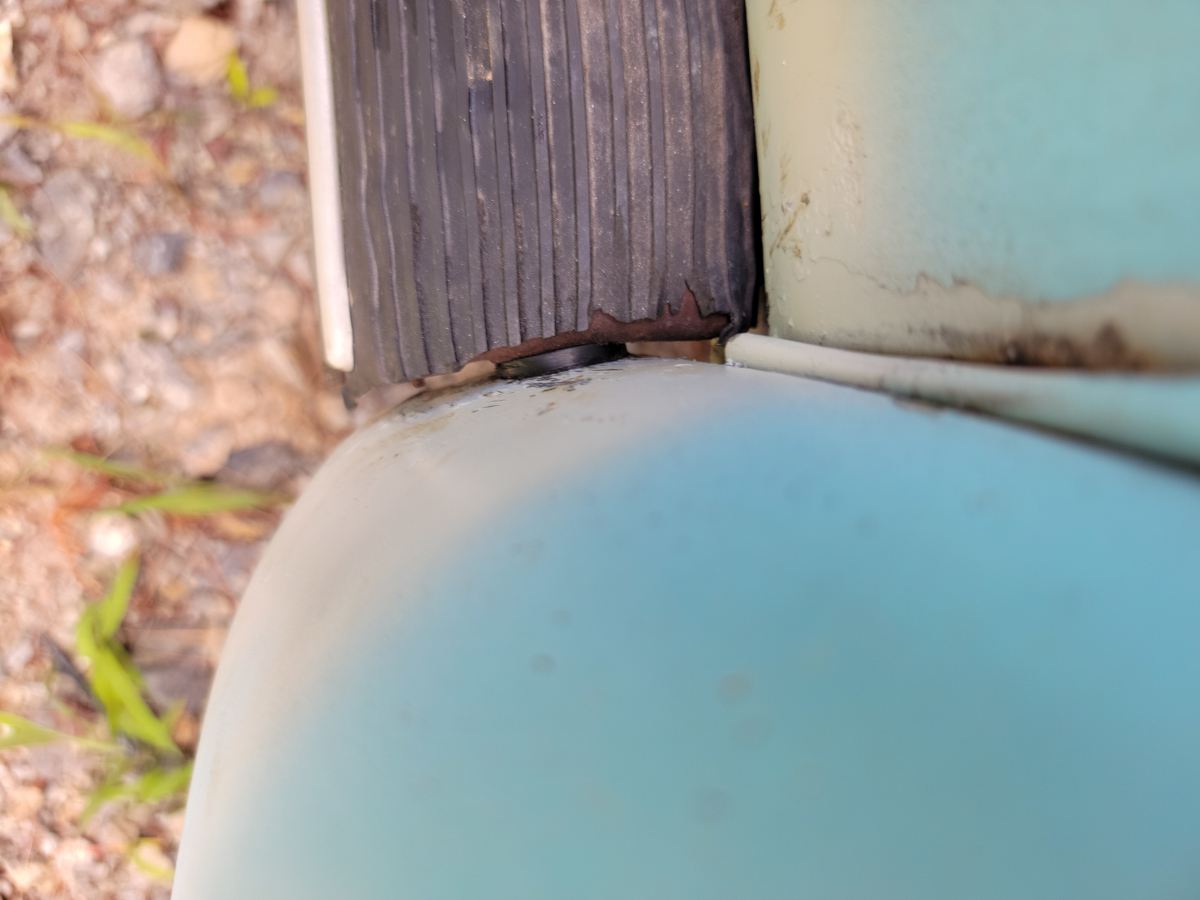
In the previous post, I found a nasty rust hole in the heater channel/frame in front of the rear fender on the passenger side. Through that hole in the side, I could also see the ground underneath, so there is more work to do under there. Today, I’m going to (not) repair the rust hole in the side.
I don’t have a welder and it will potentially be a couple of months before I can get access to one. I decided to take quick action and create plates to box in the affected area. Later, I will cut out the affected areas and properly weld the plates in.
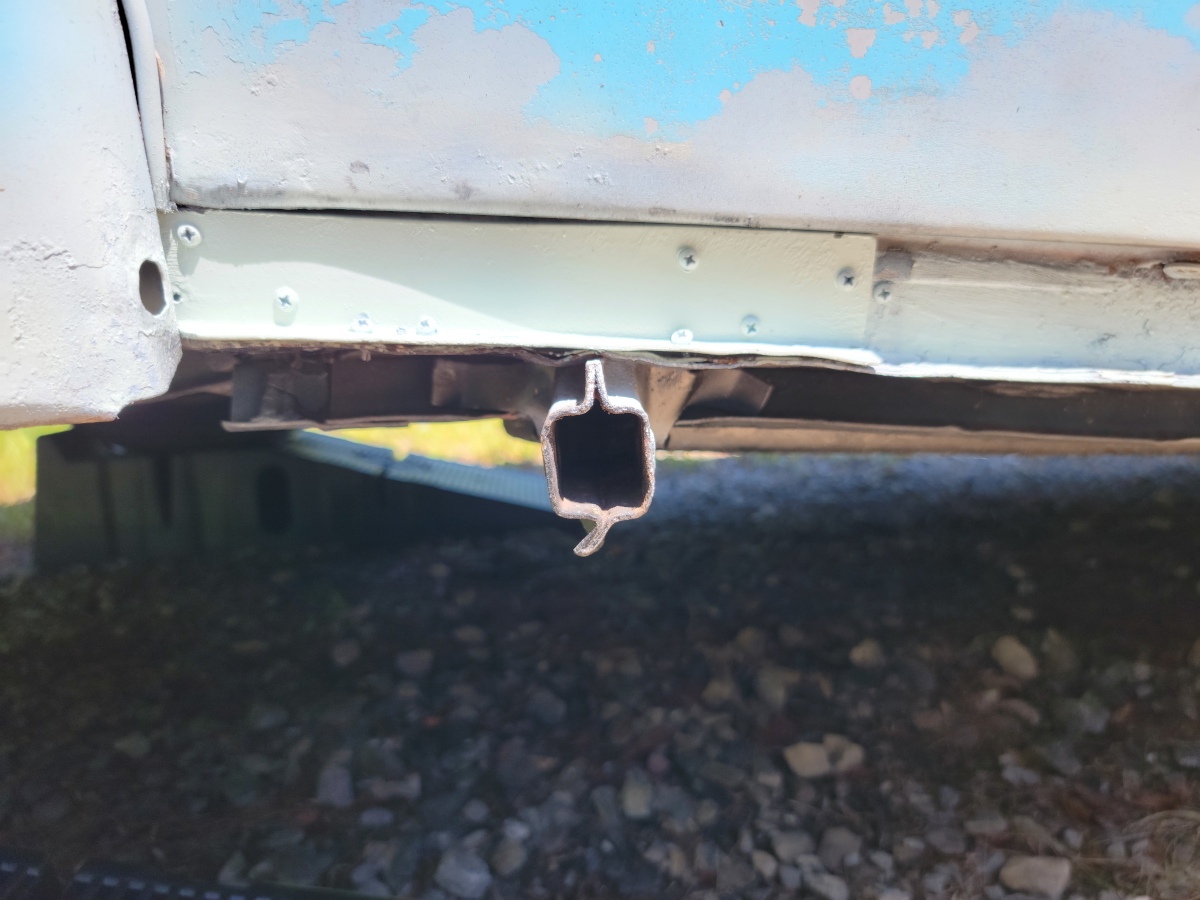
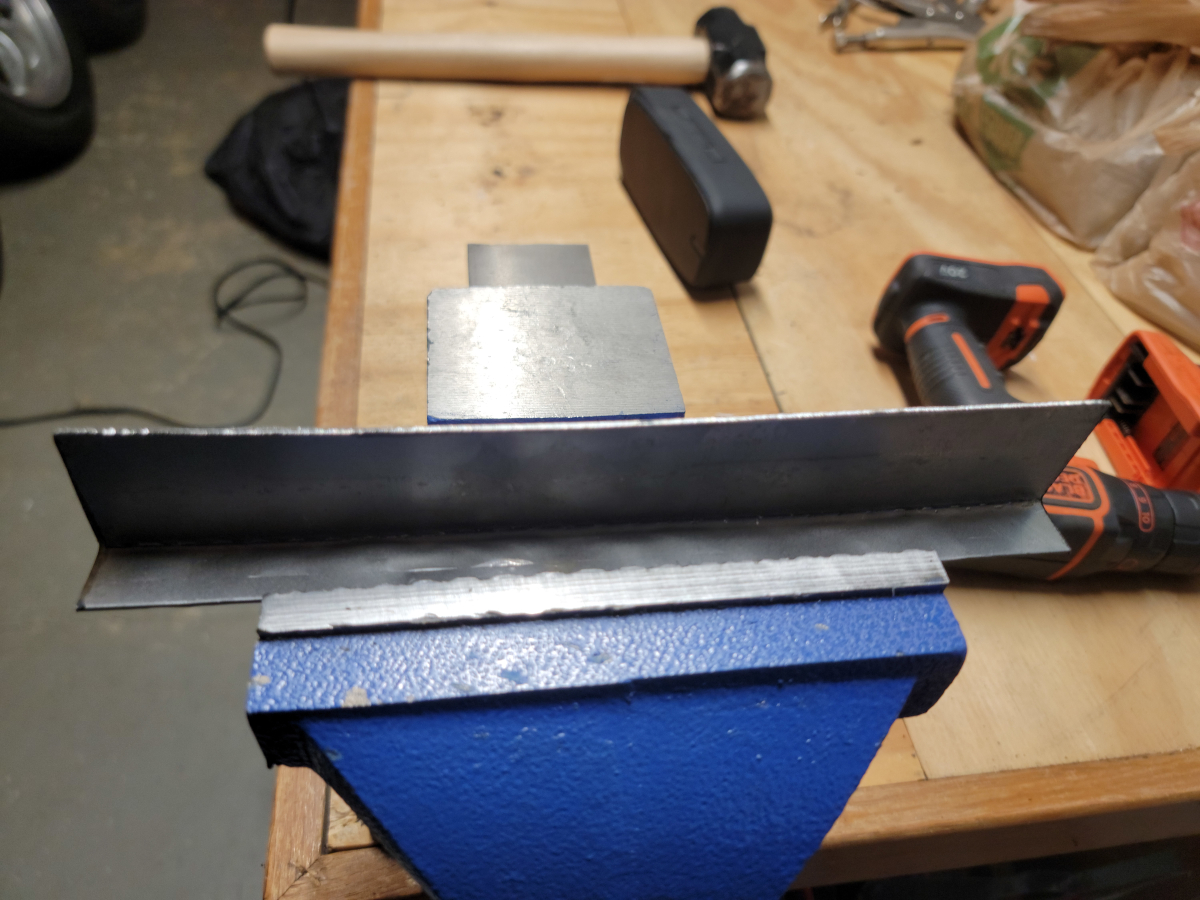
I started the process by cutting out a template for the C-channel. For simplicity, my plate will be an L. Since the size of the C-channel should be consistent, I made the template under the door, nearer to the front of the car. Back in the rusty area, the channel was bent out of shape (as per usual) from the factory jack point below.
The plate, once it’s in place, will strengthen and reinforce the area, but also will force the channel back into shape.
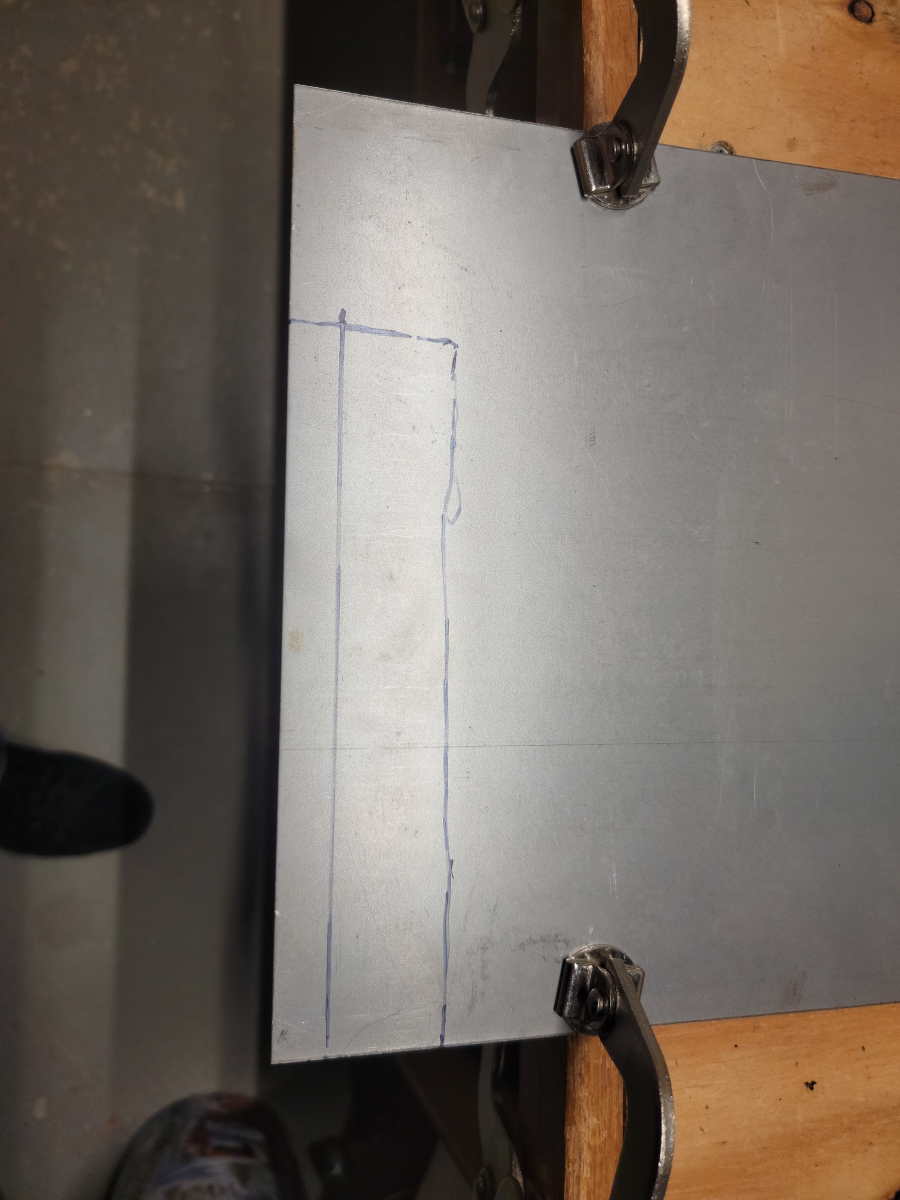
I had purchased a 12 inch by 12 inch panel of 16 gauge sheet steel at Home Depot (homedepot.com link). I will likely only have access to a stick welder and from what I’ve read online, 16 gauge is as thin as you would want to go to have a chance at getting a solid weld. That’s also the thickest that they had available in stores.
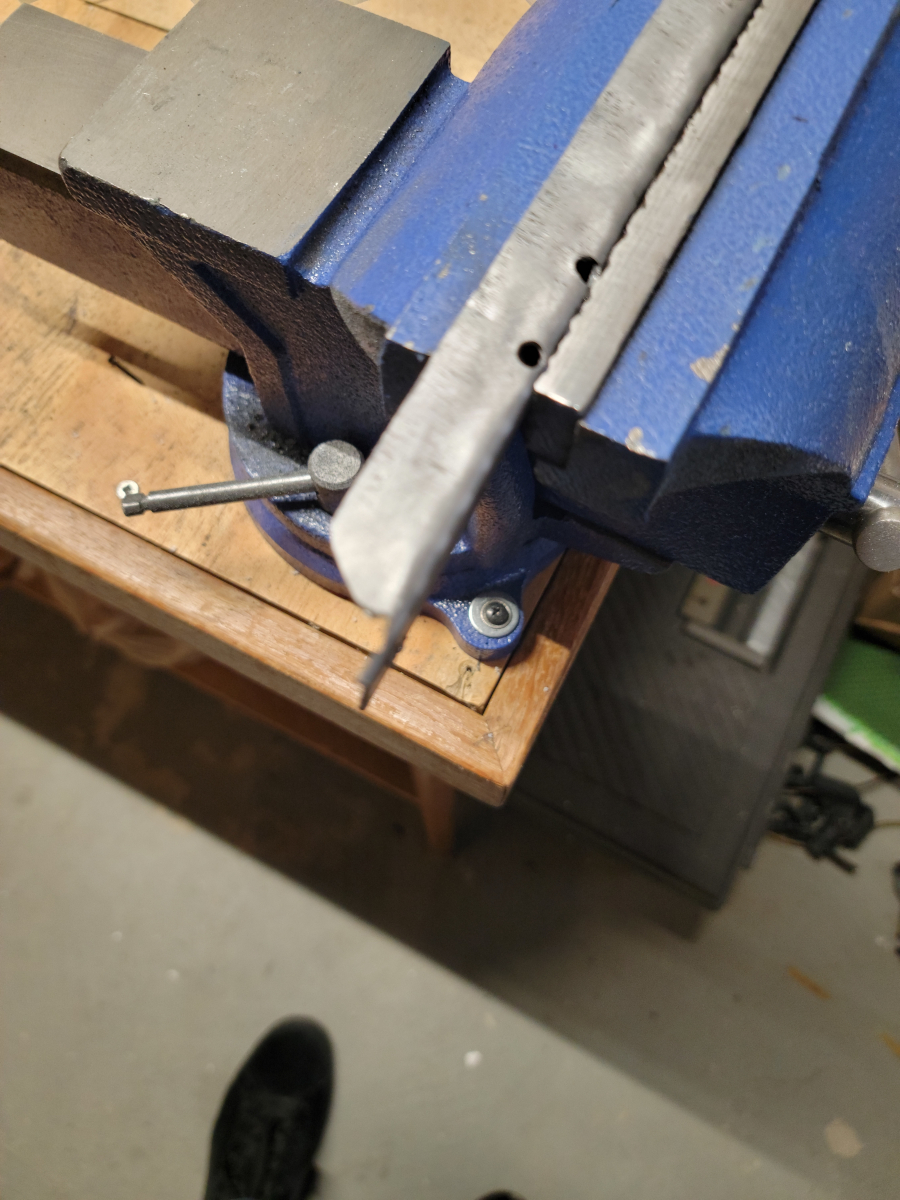
I traced the template out on the sheet steel with a marker.
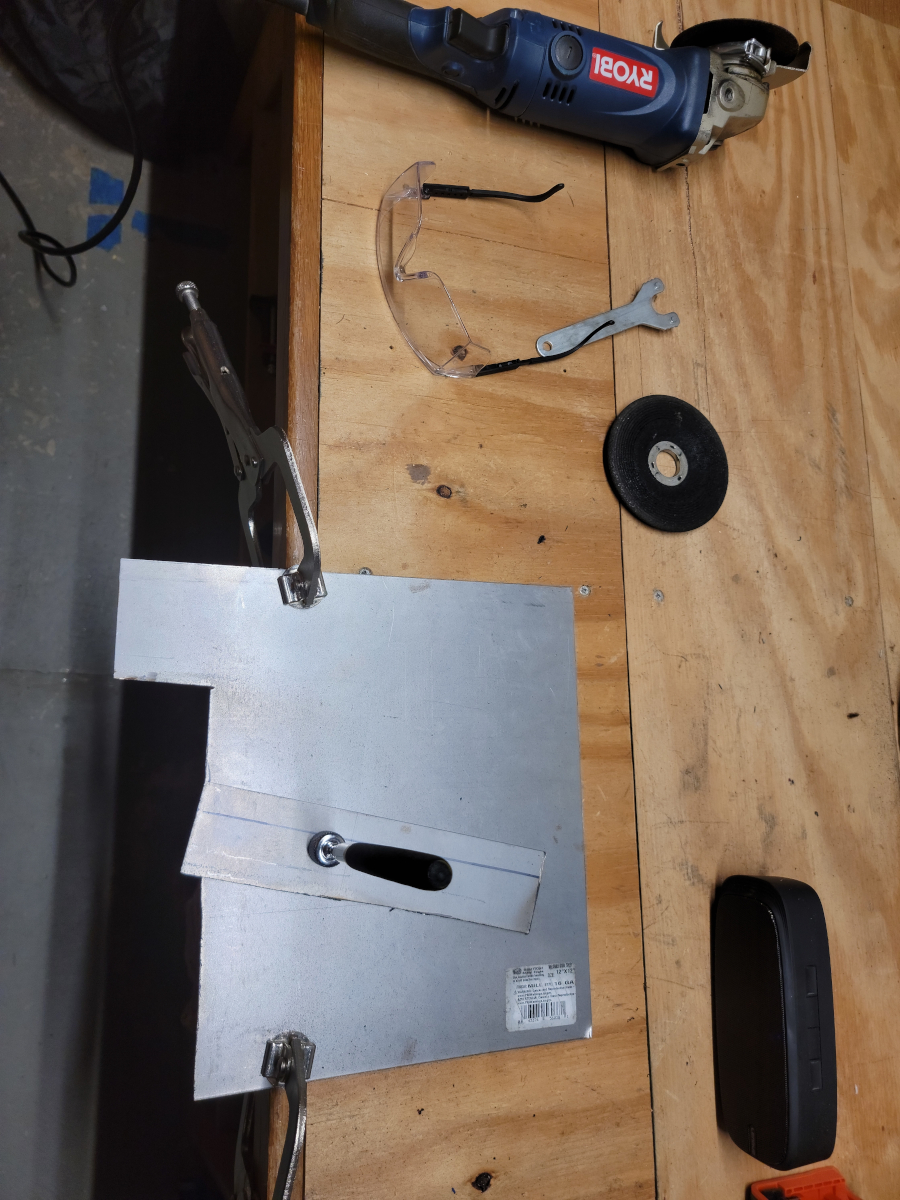
And then applied my best death wheel artistry.
I then locked it in the bench vise…
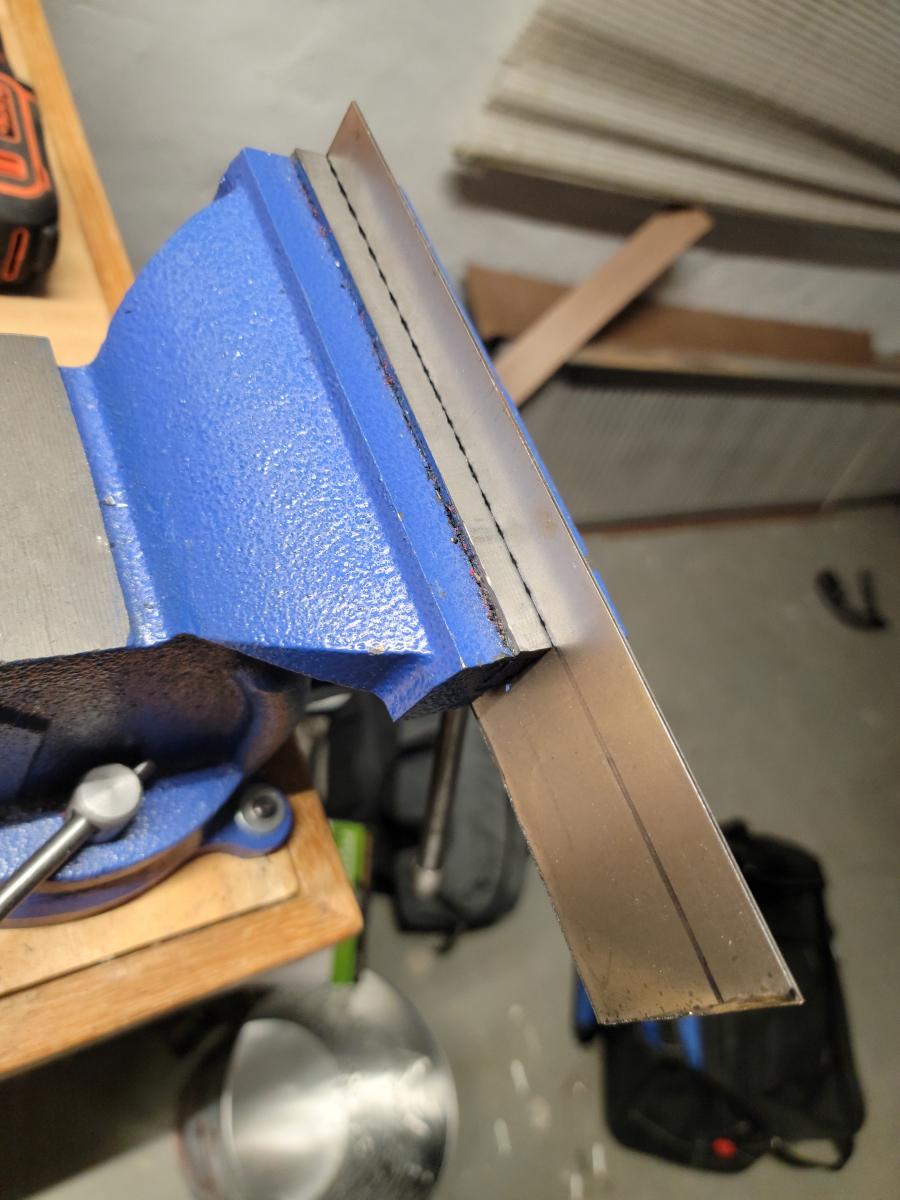
…and applied some 4 pound mini sledge artistry. We don’t need no stinking sheet metal brake.
Actually, the whole piece bowed a bit from the force, so yeah, a sheet metal brake would have been great…
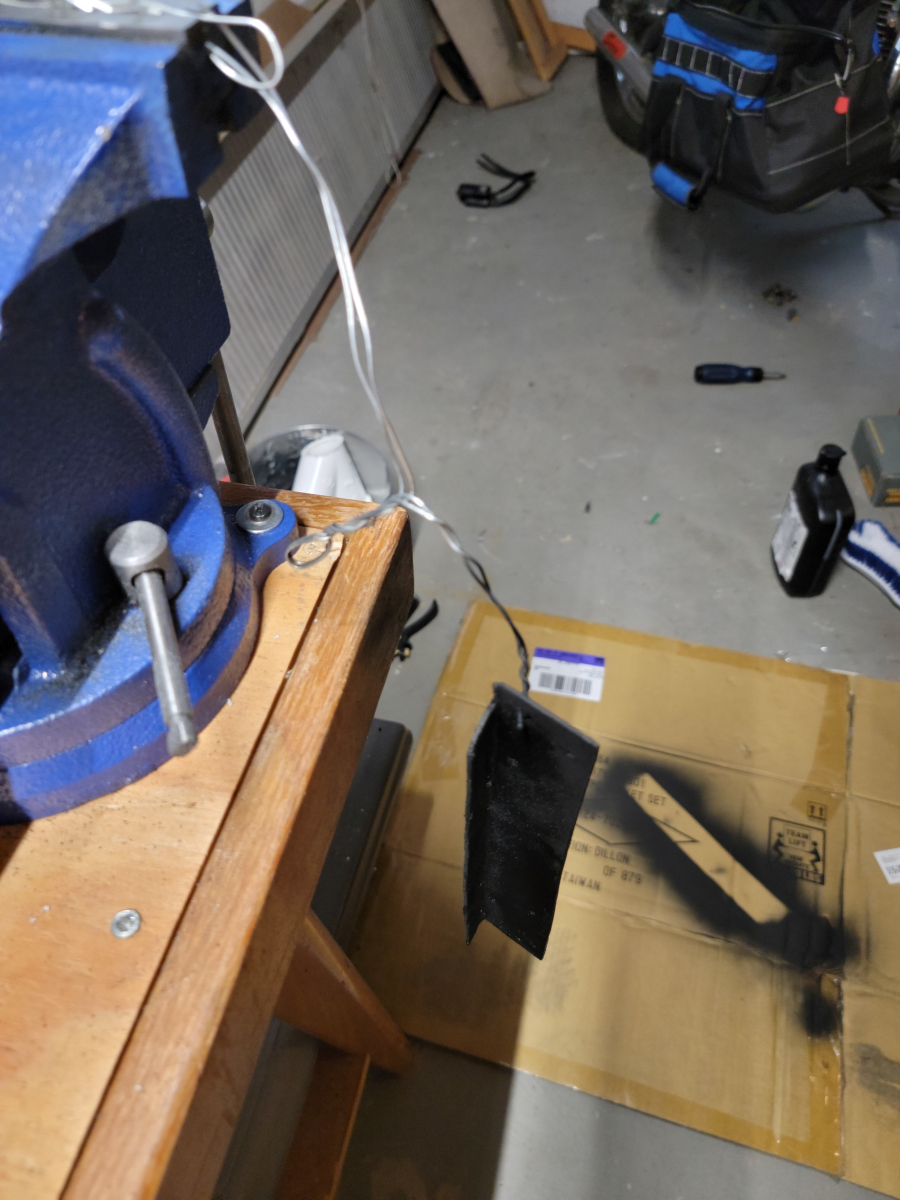
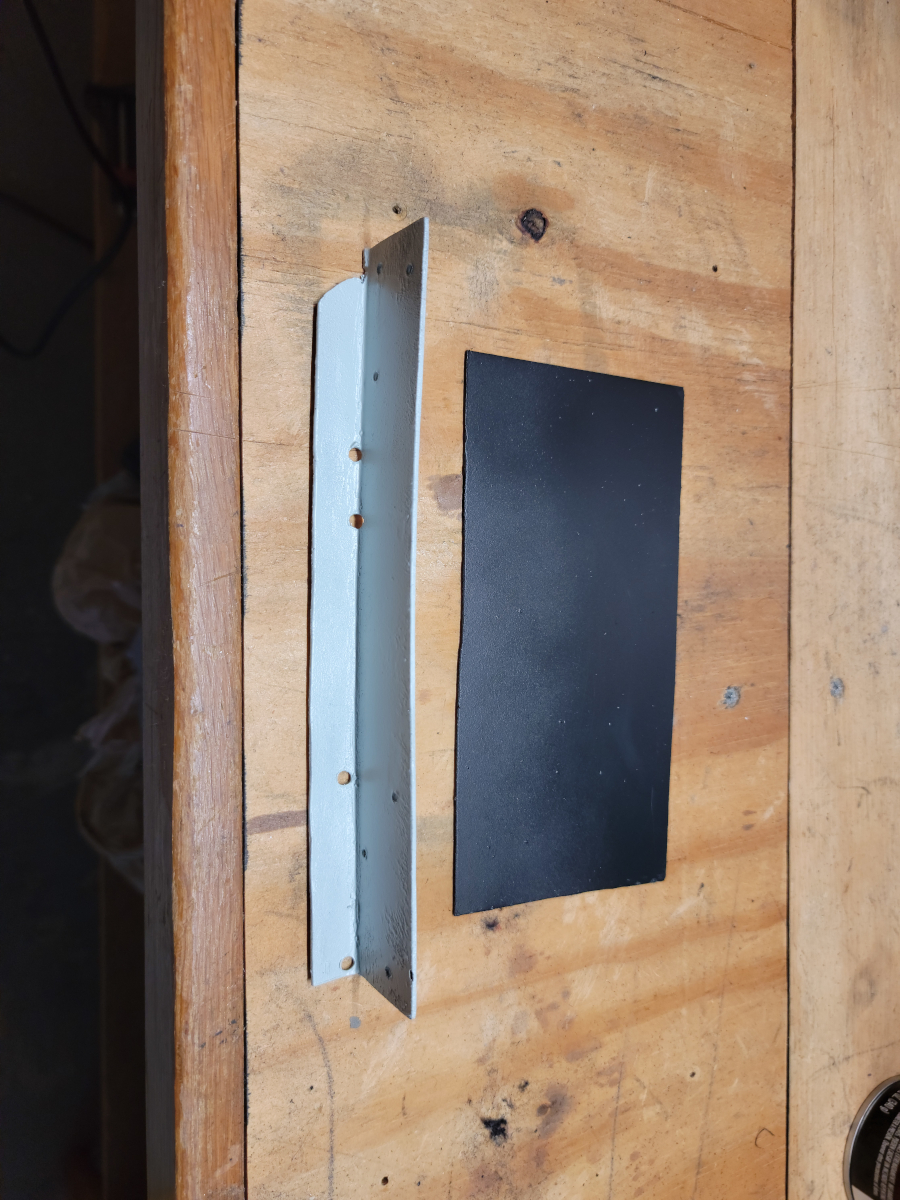
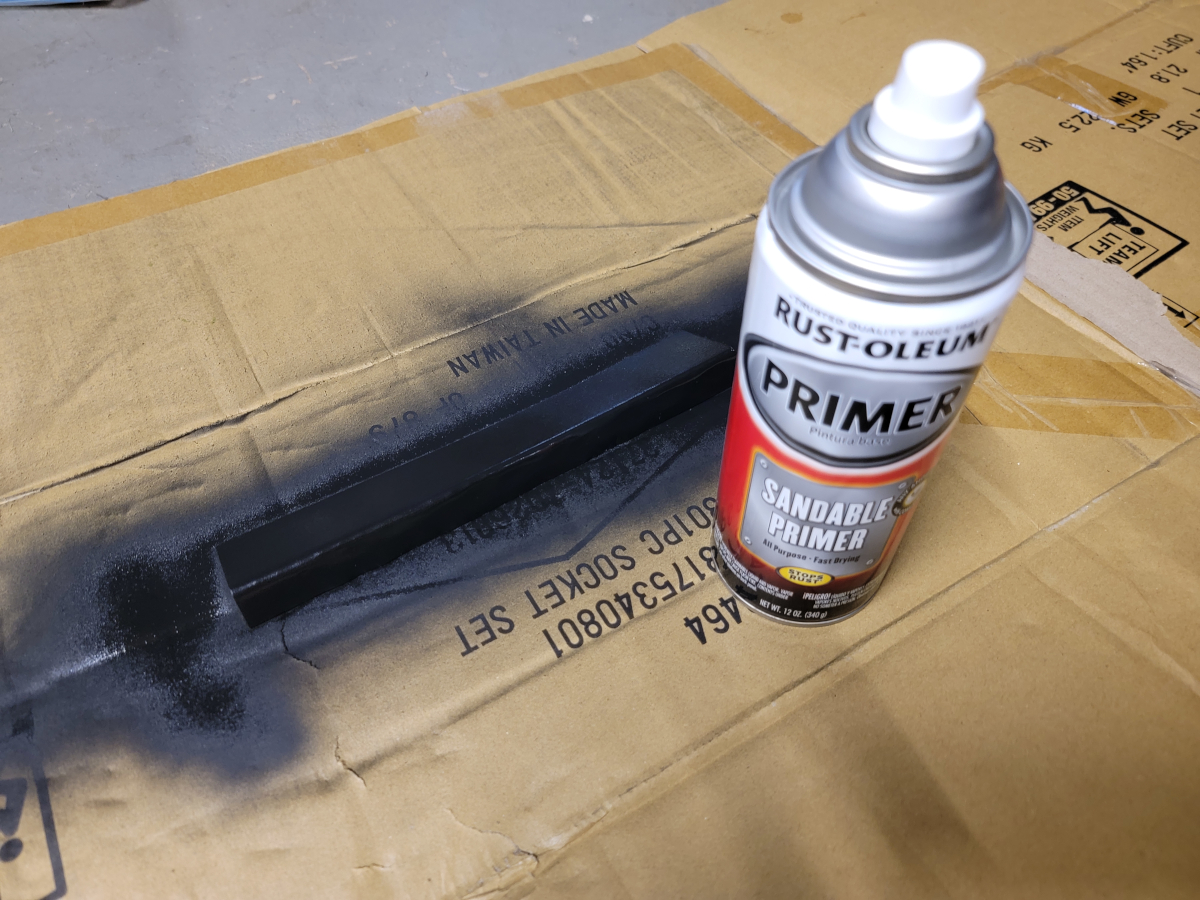
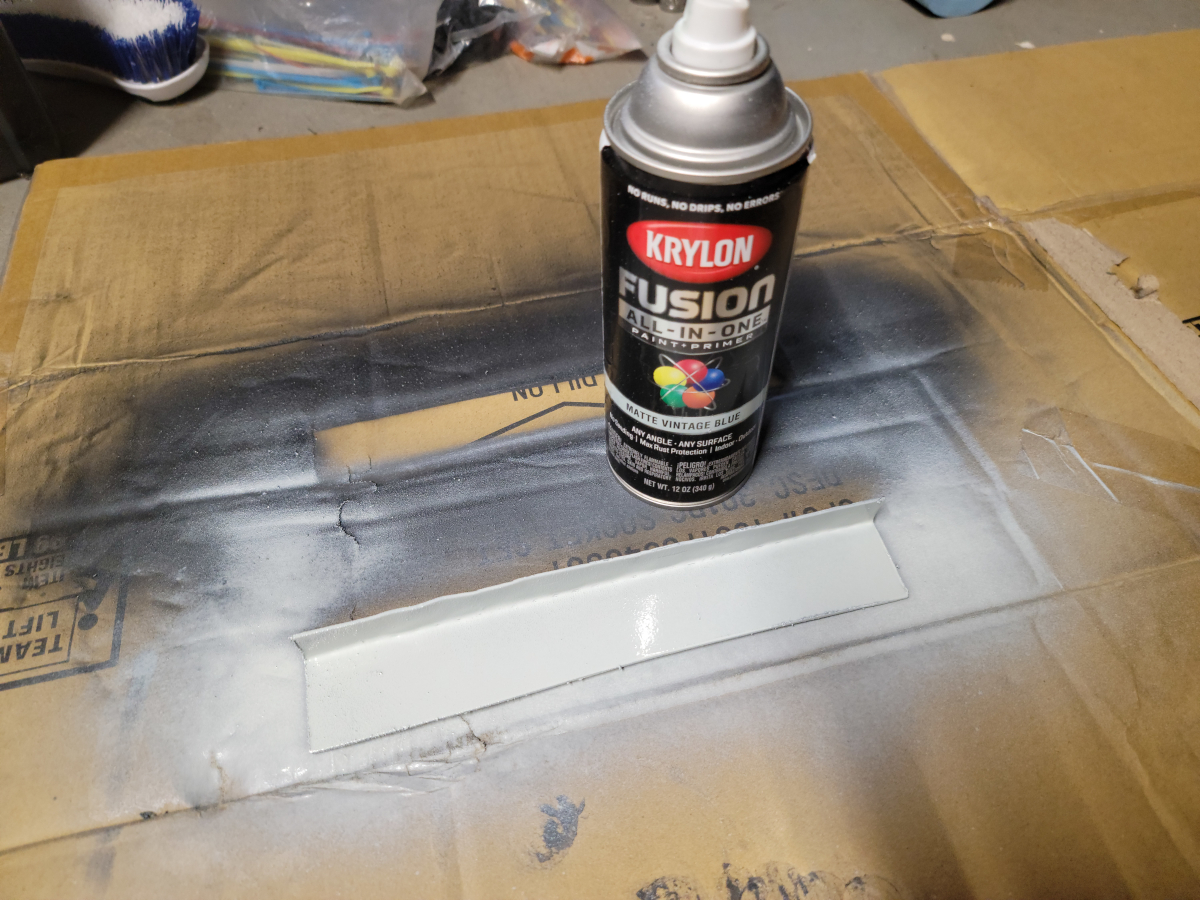
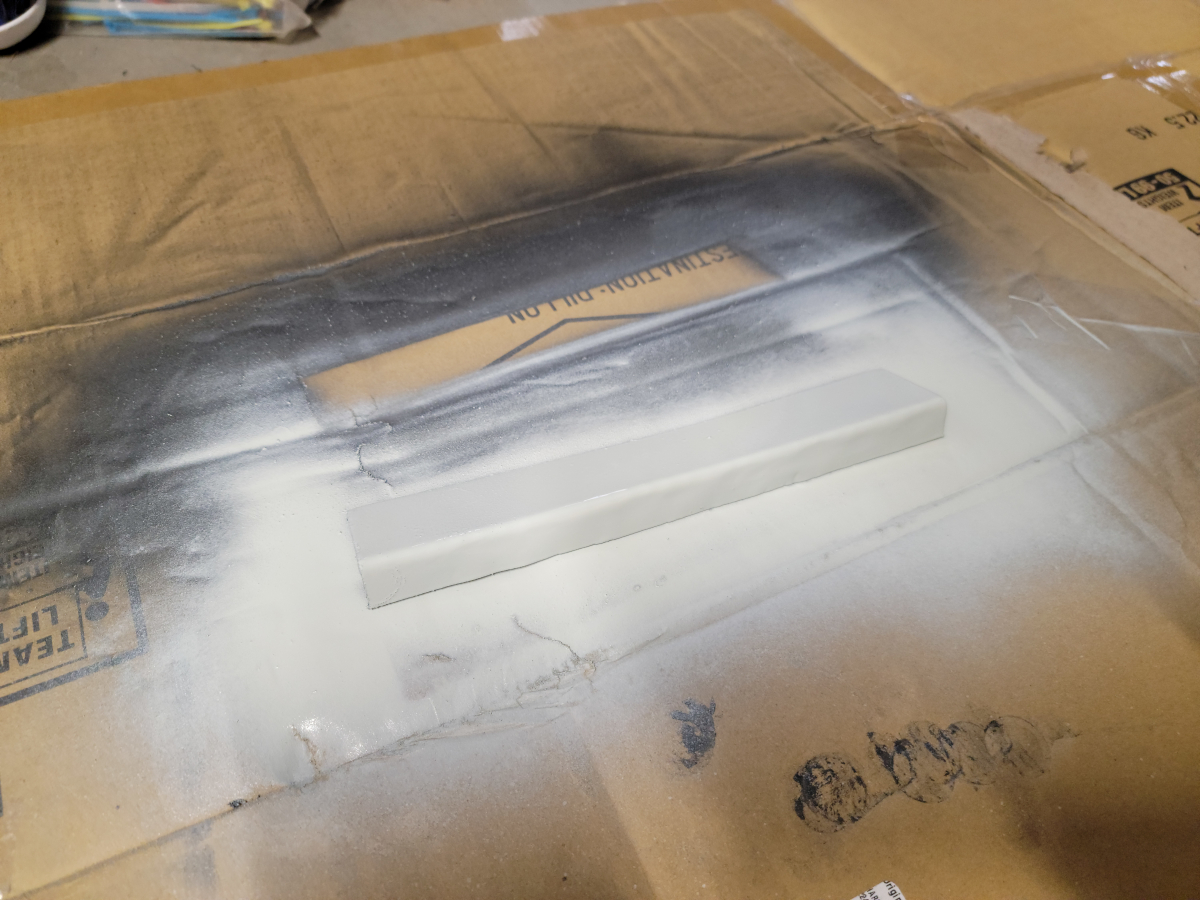
I washed and wiped the plate down with brake parts cleaner and then acetone, both of which nearly blackened the rag. Once it was dry, I sprayed it down with primer.
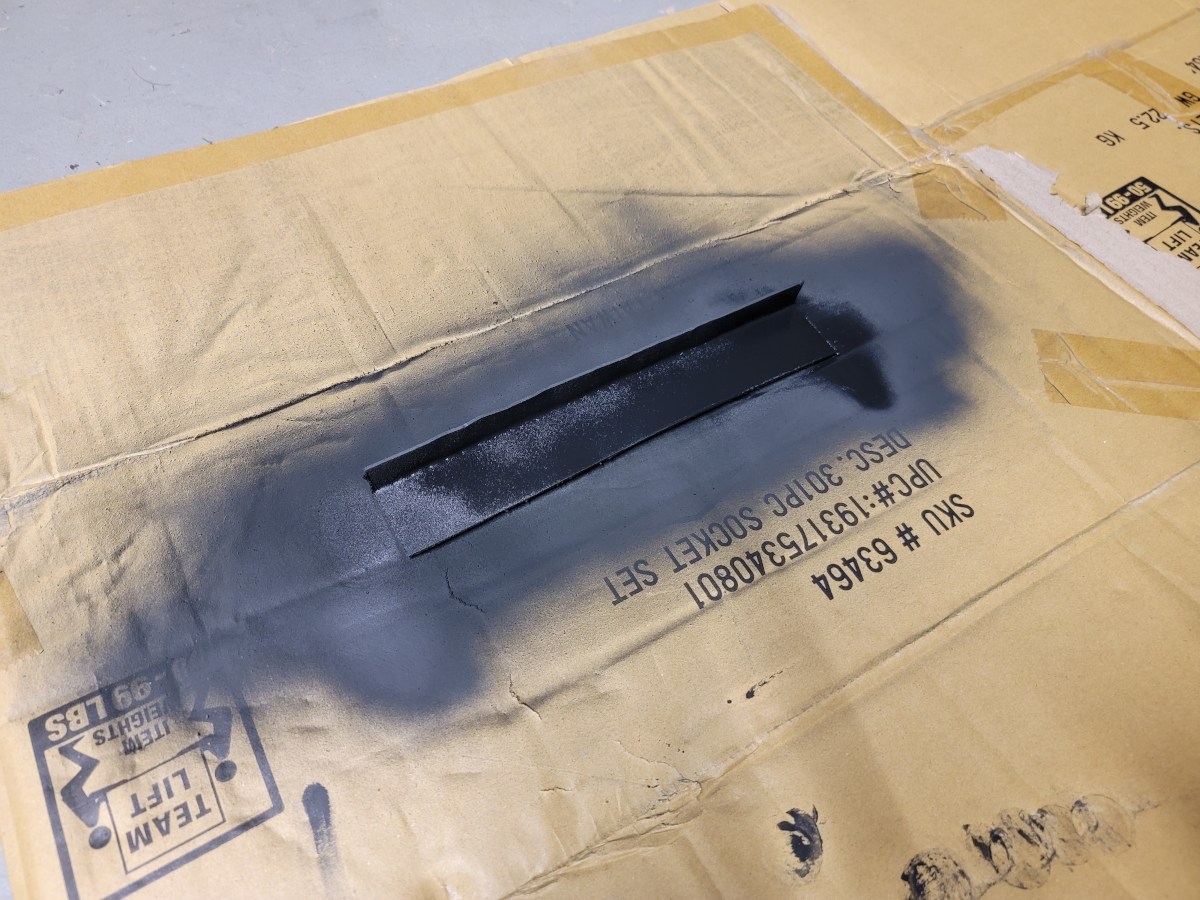
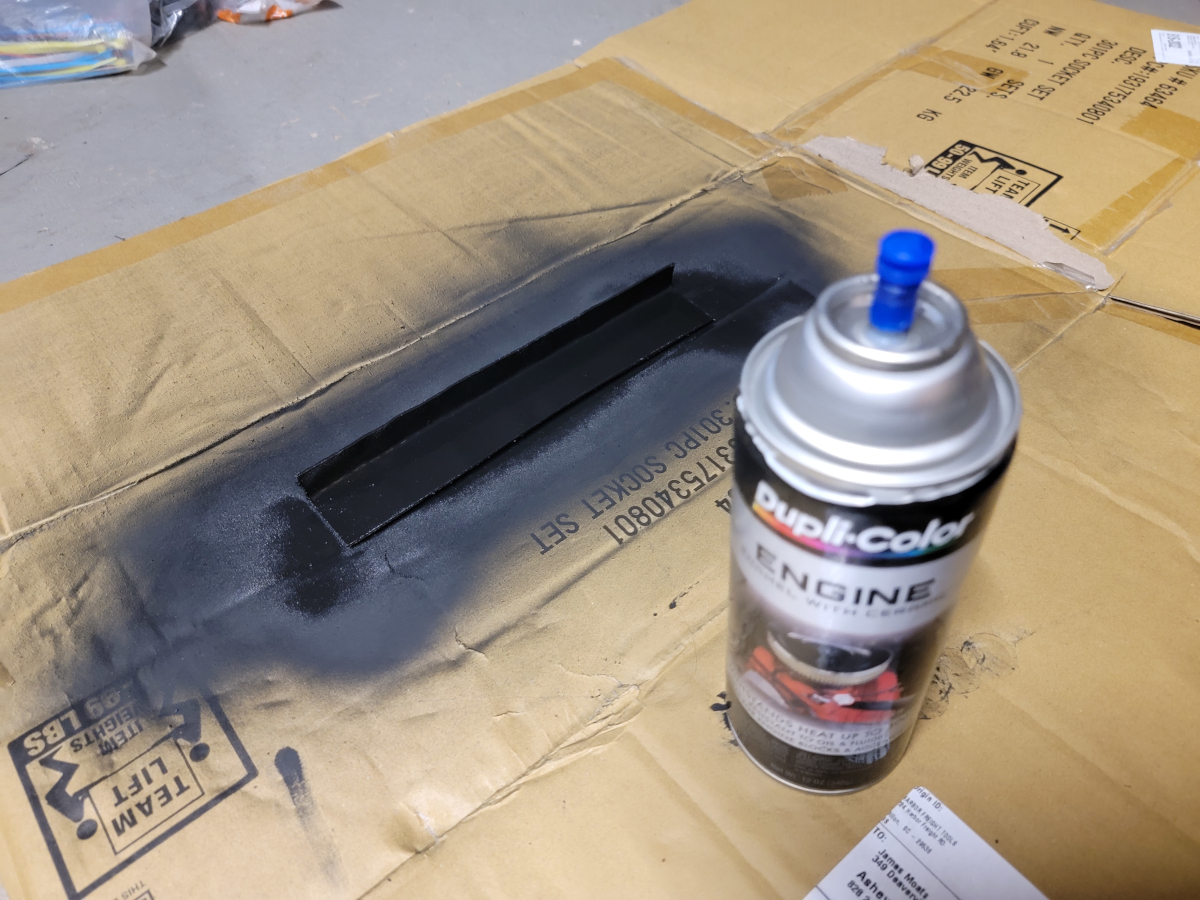
And then a layer of engine black. The can is still spitting little bits of ceramic (I assume). Luckily, it’s not the full silly string action that started happening in the Refinishing the Rear Seat post.
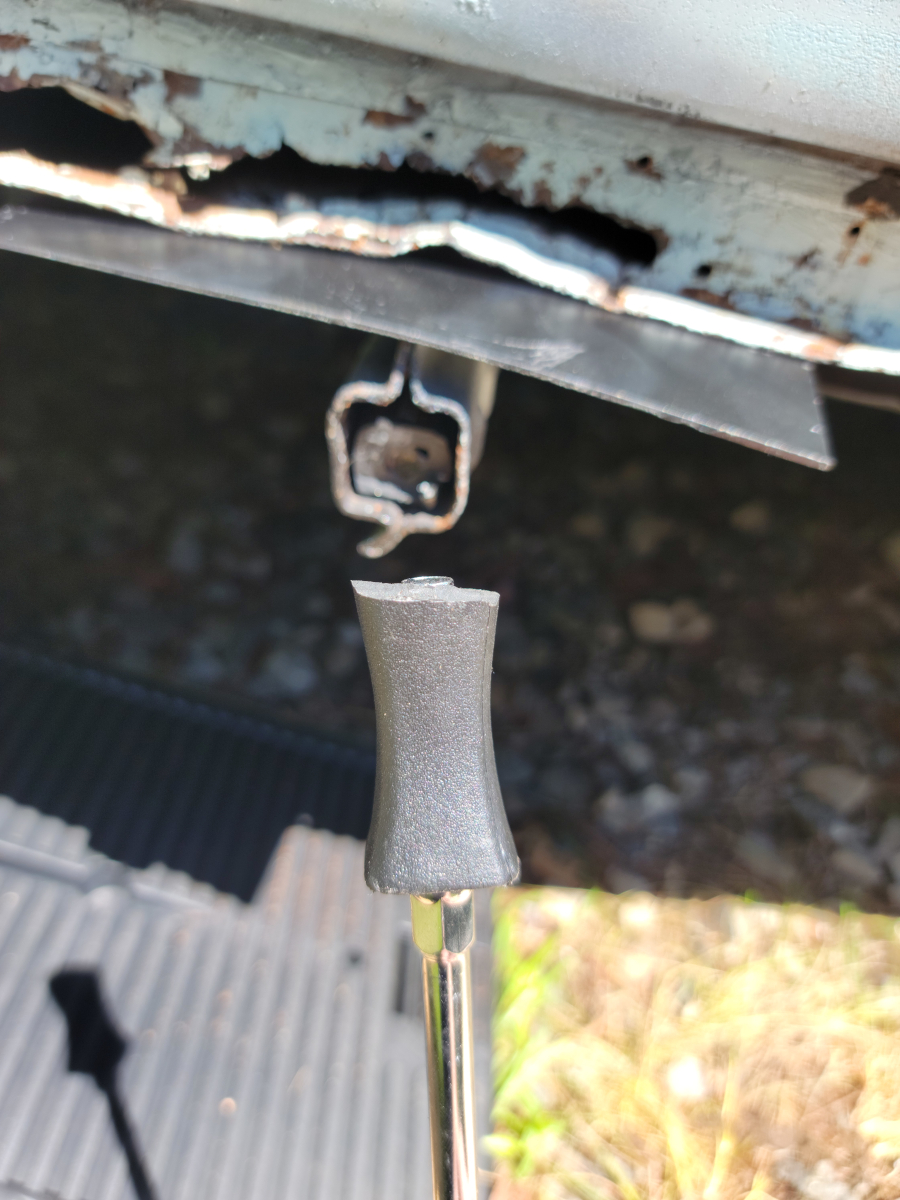
A couple of hours later, I took the plate back outside and clamped it in place with a couple of vise grips. I had a little remnant of a roll of shelf lining stuff that I hoped would “cushion” the grip.
In the image above, it’s clear that I really wasn’t paying attention – or if I may be so bold as to say “being super lazy” – I didn’t cut the necessary notch to allow the plate to fit in behind the edge of the fender. That left a little bit of exposed rust and pushed the plate forward an inch or so. I will need to cut that notch out and align the plate properly before welding.
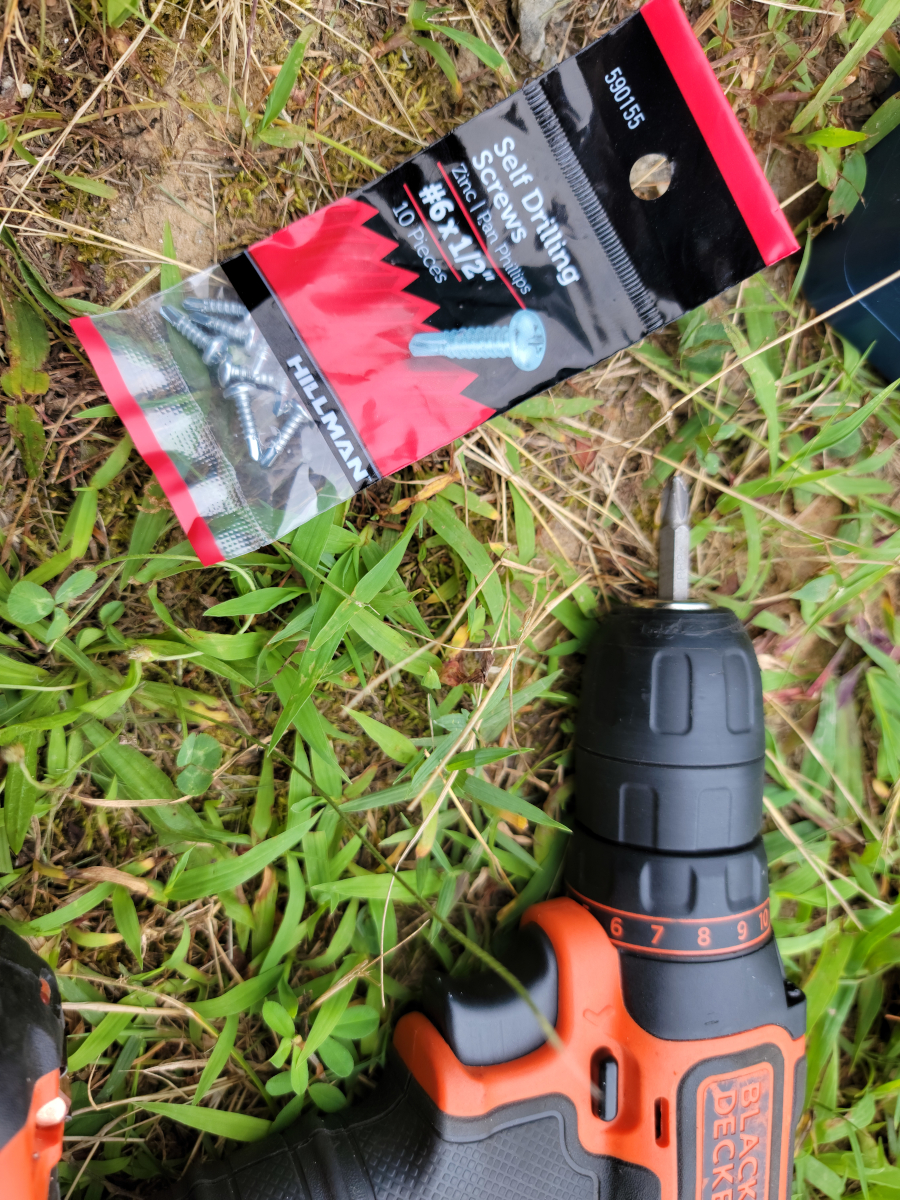
Along with the sheet steel, I picked up a couple of packs of the smallest self drilling screws they had at Walmart (walmart link).
Once the screws were in place and the vise grips removed, it was clear that my paint prep was subpar. I didn’t scuff up the surface like I knew I should have. All of those layers of paint and primer peeled right off, stuck to the shelf liner material.
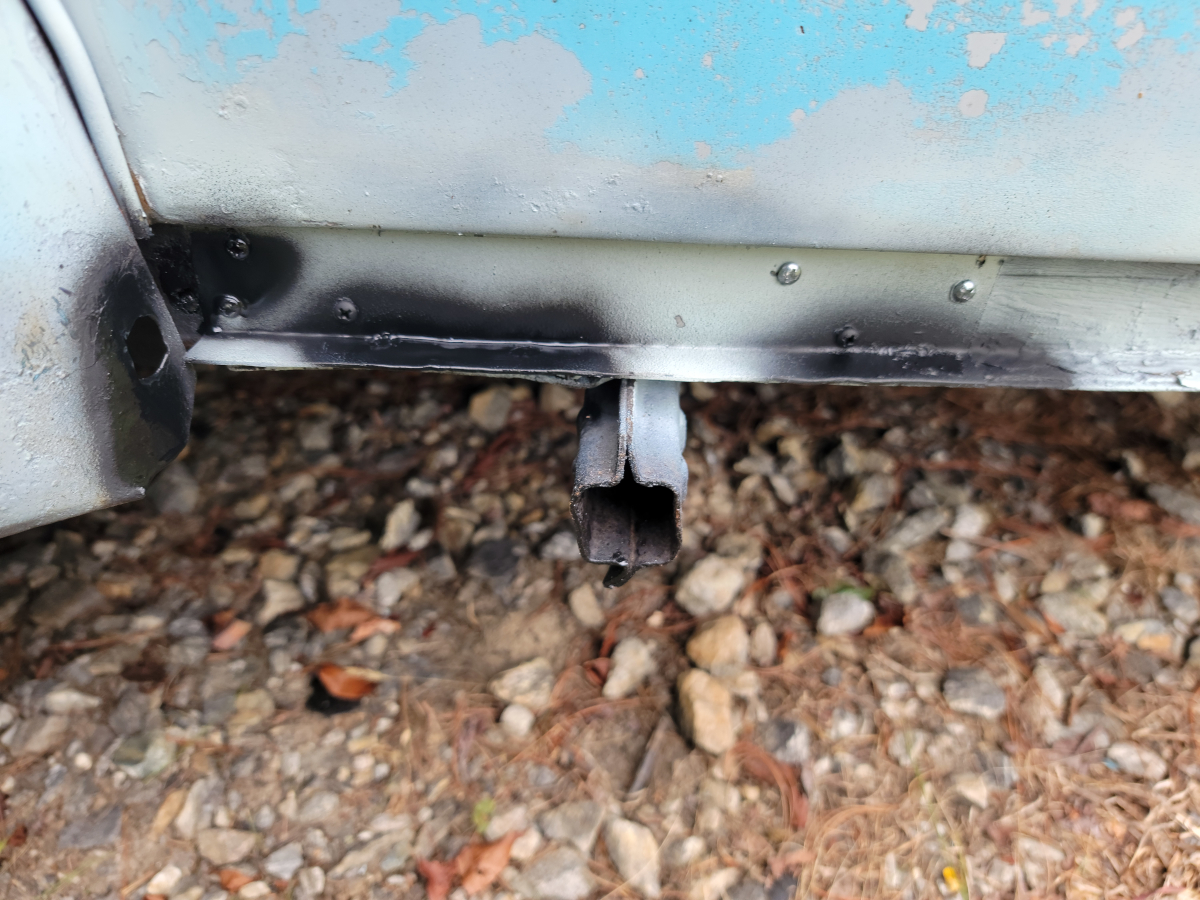
Regardless, we’re square again.
I then added another quick coat of engine black to cover up the bare metal spots.
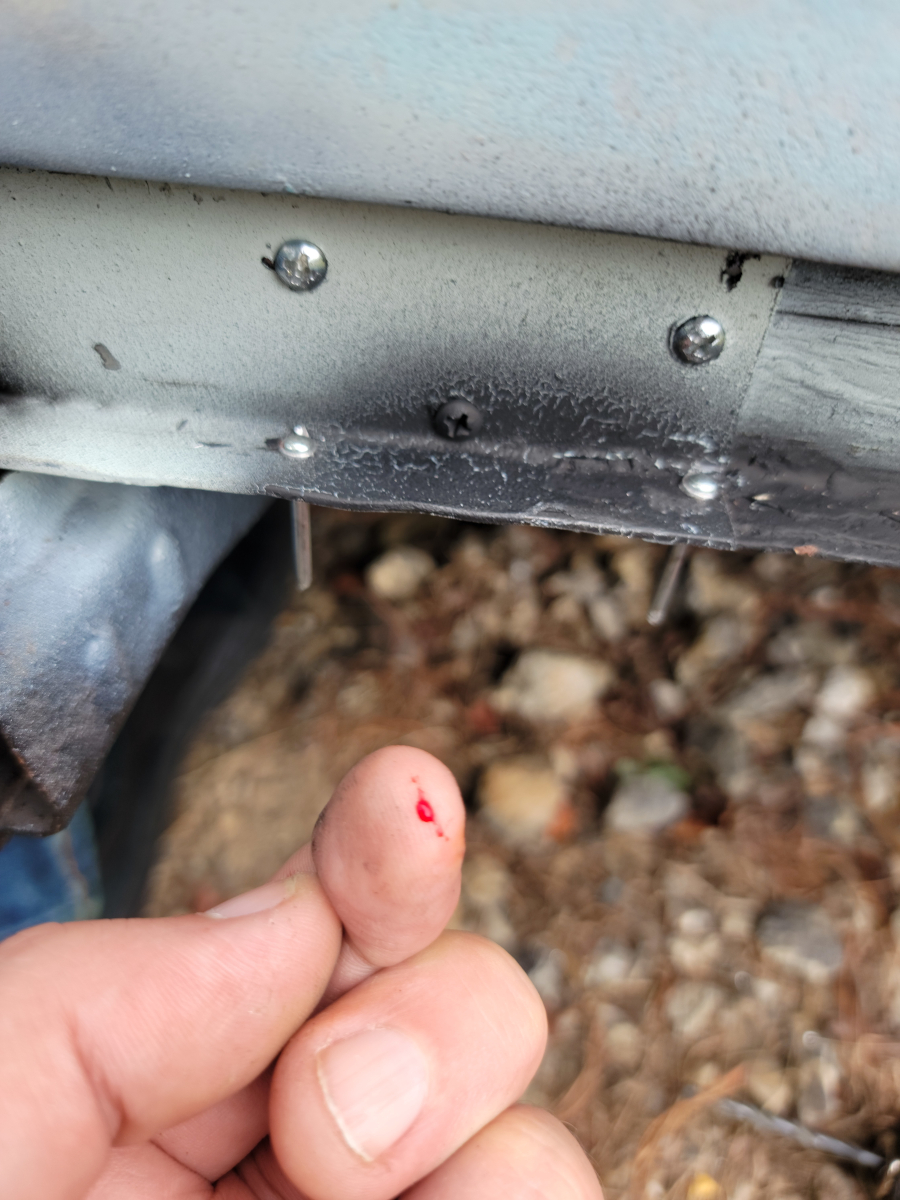
Next, I drilled a couple of holes through the bottom leg of the L and shot some rivets through. My chintzy hand riveter was barely up to the task and the largest rivets I have were barely long enough the reach through the layers of steel.
Of course there’s blood. And that’s a really inconvenient place for it. I didn’t feel when it happened. Instead, I just noticed that everything was getting smeared with blood.
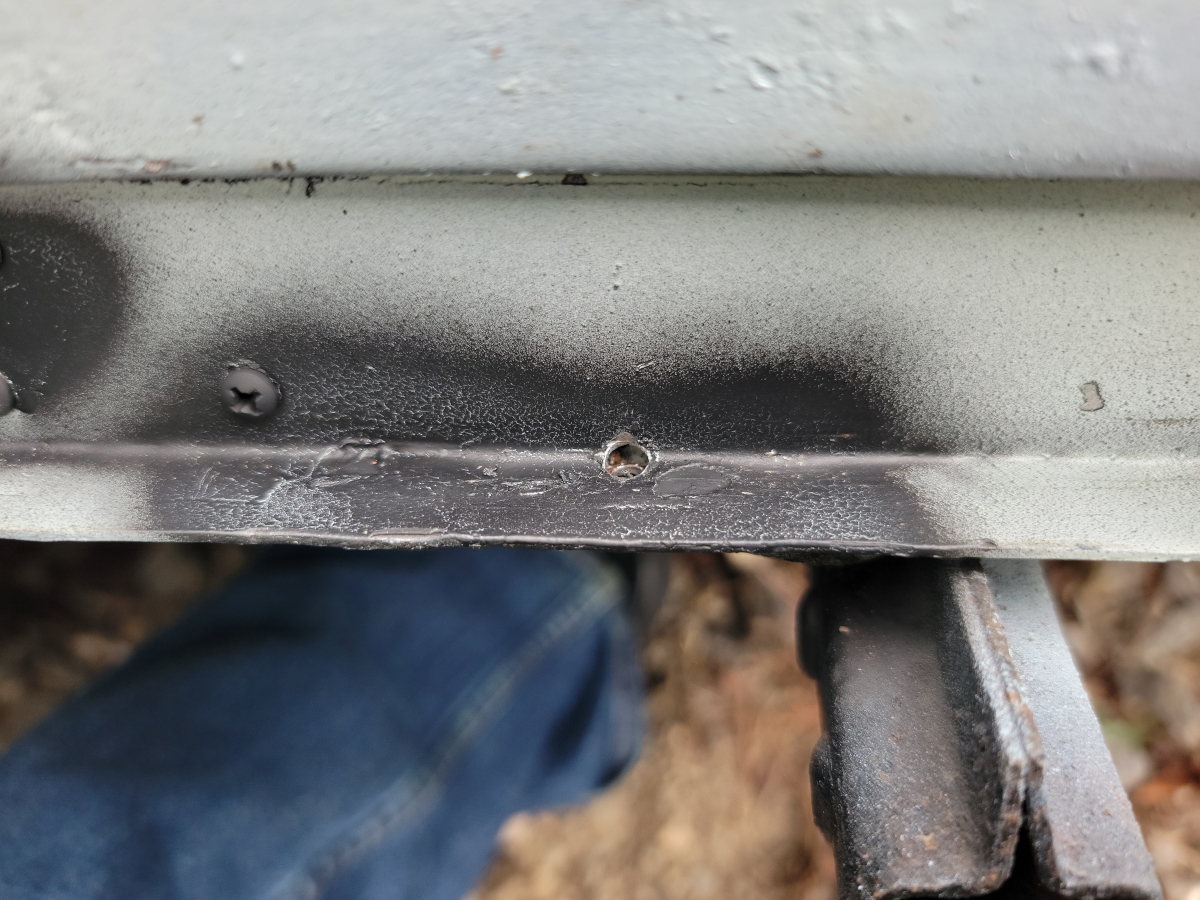
Now, moving further back to drill holes for more rivets. Whoops. Too far in. The rivet isn’t long enough to go through at an angle, so that will need to be filled…
And whoops again! But at least there was enough room for a rivet this time.
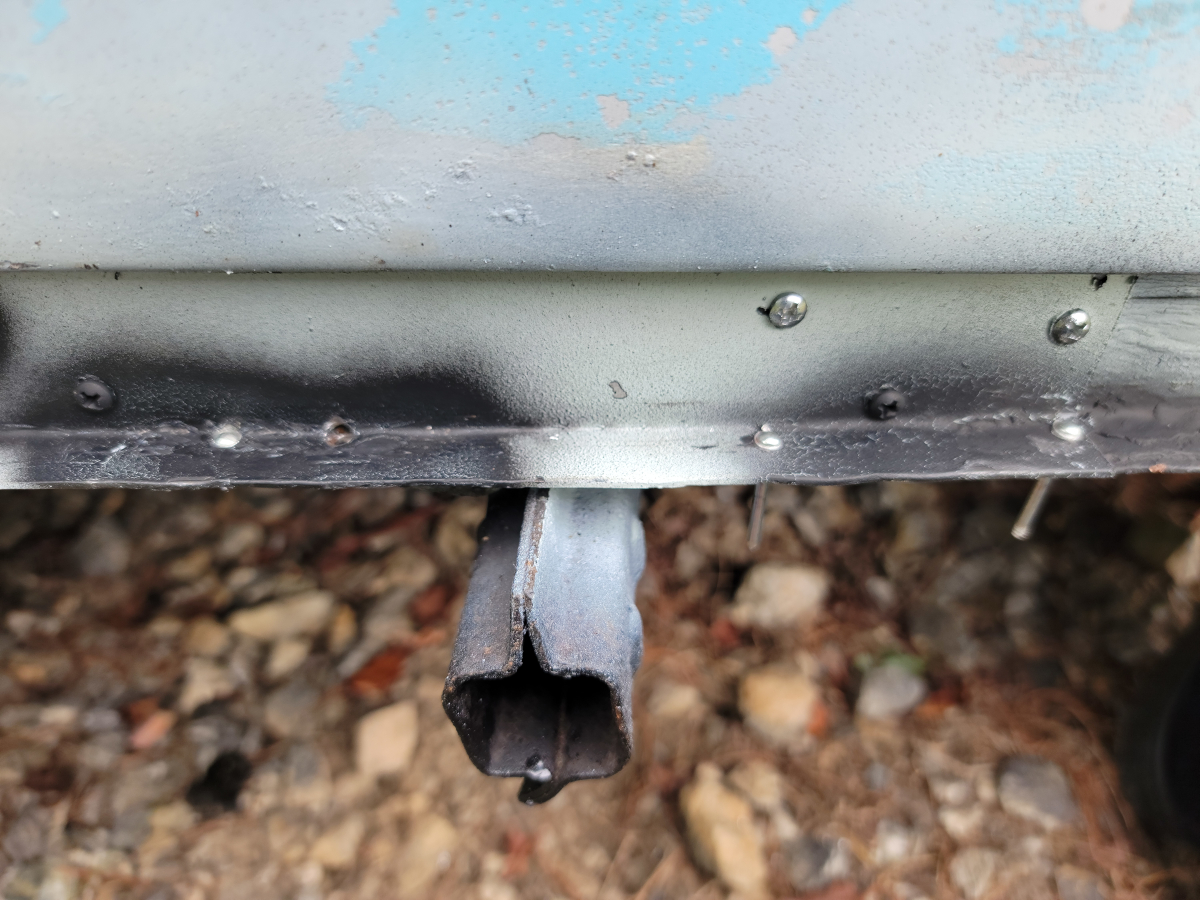
Yeah, that’s proper fixed real good like.
And boom, like it never happened…
Nothing to see here.
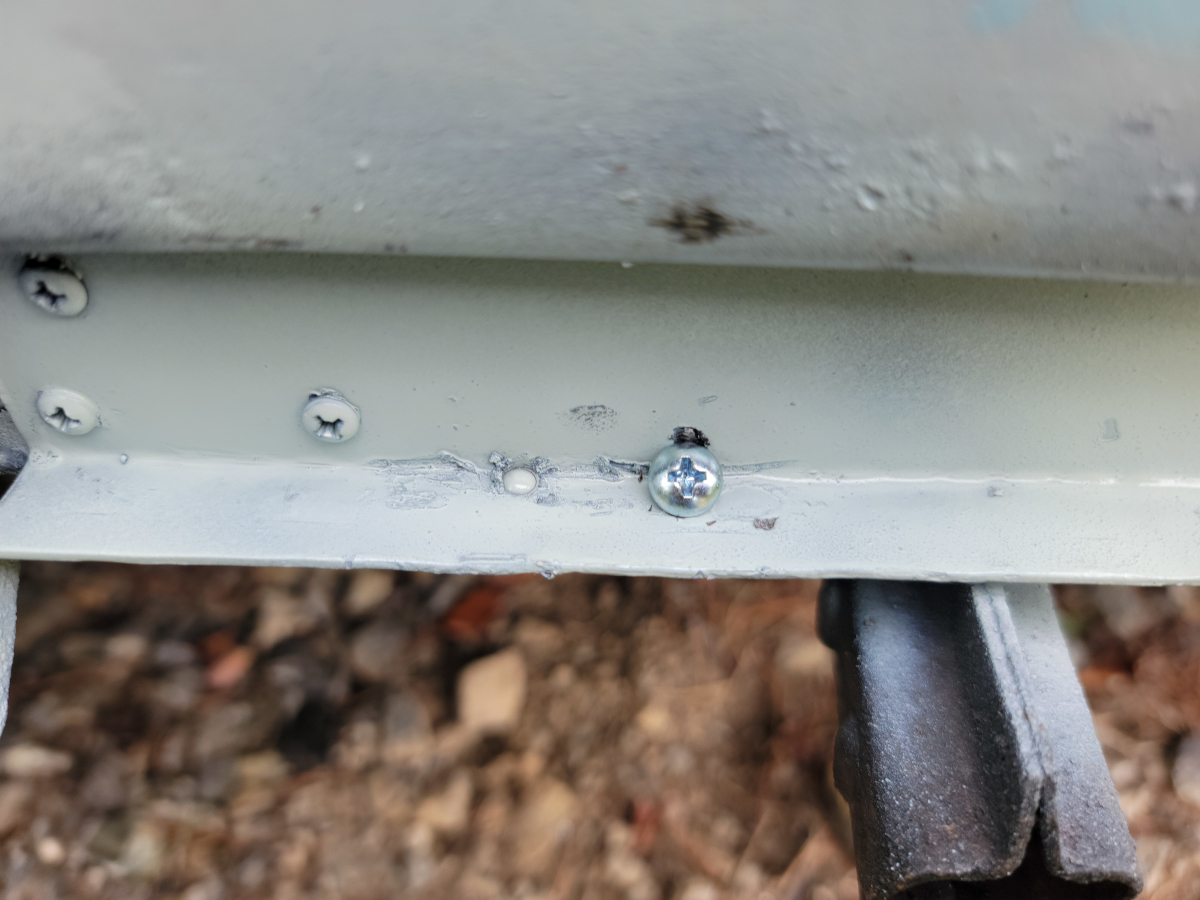
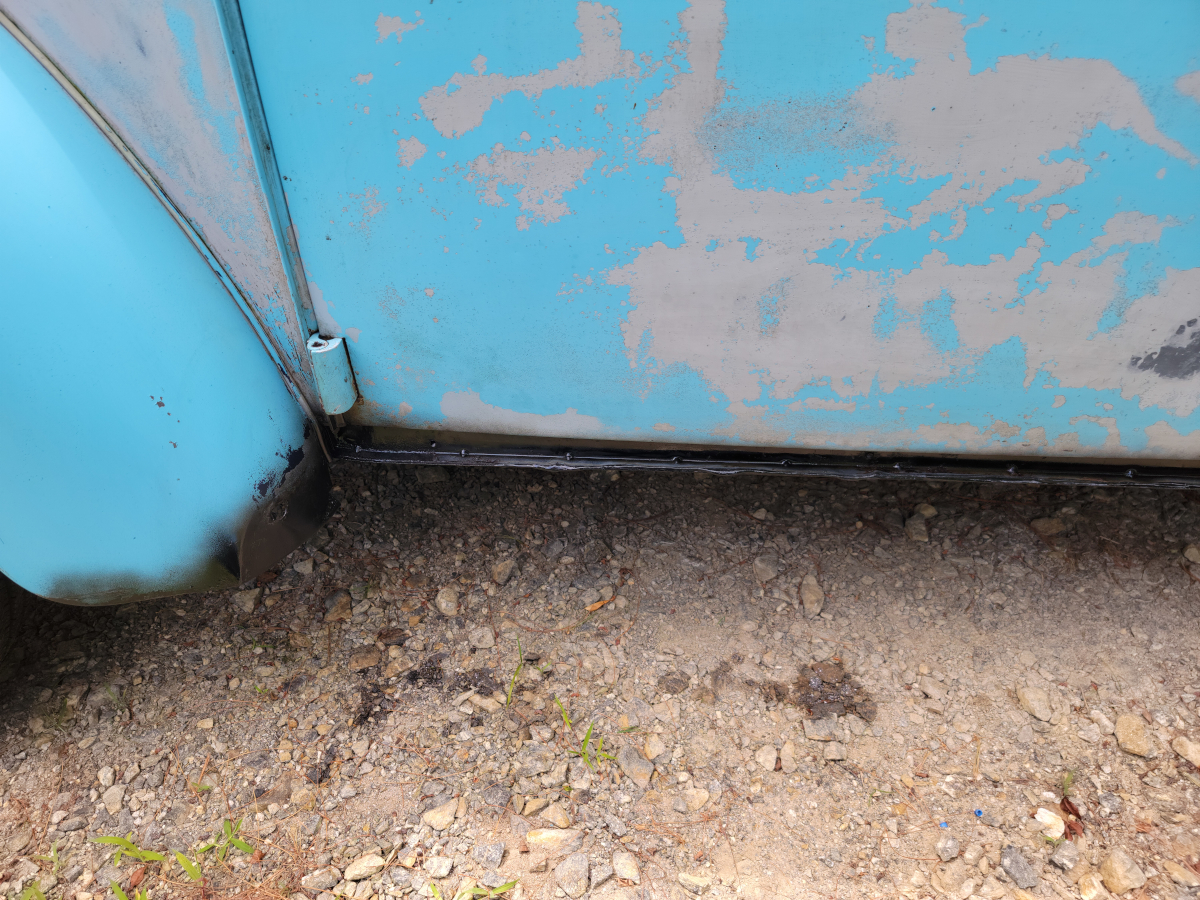
Expert over-spray on the rear tire there. Good job, man. Real proud of ya.
In the previous post, I got started trying to replace the running boards, with only moderate success. It was a complete failure at replacing the actual running board. But, I was able to get all of the broken body bolts drilled out, tapped, and replaced.
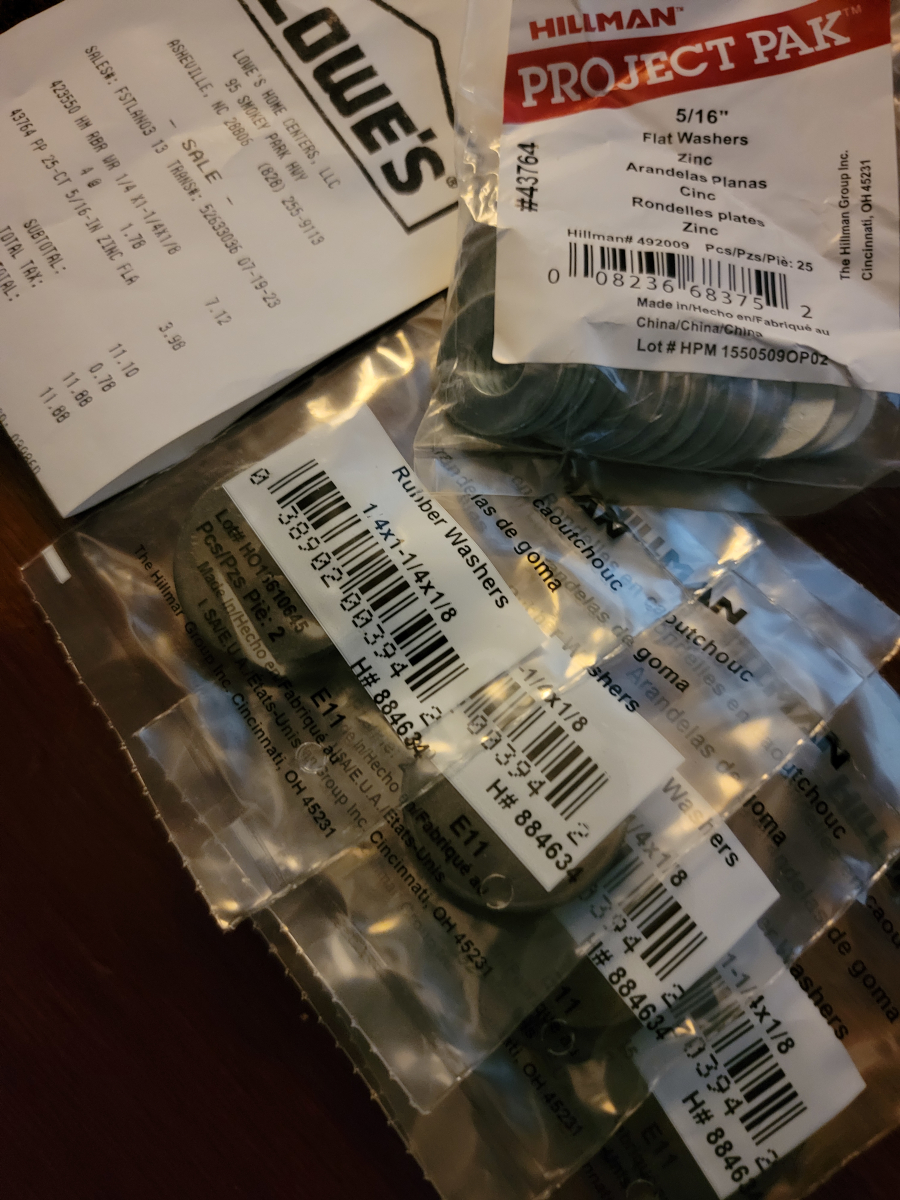
The hardware that came with the new running boards was really chintzy. I have come to expect that. So, I picked up some new hardware at Lowe’s a couple of days ago.
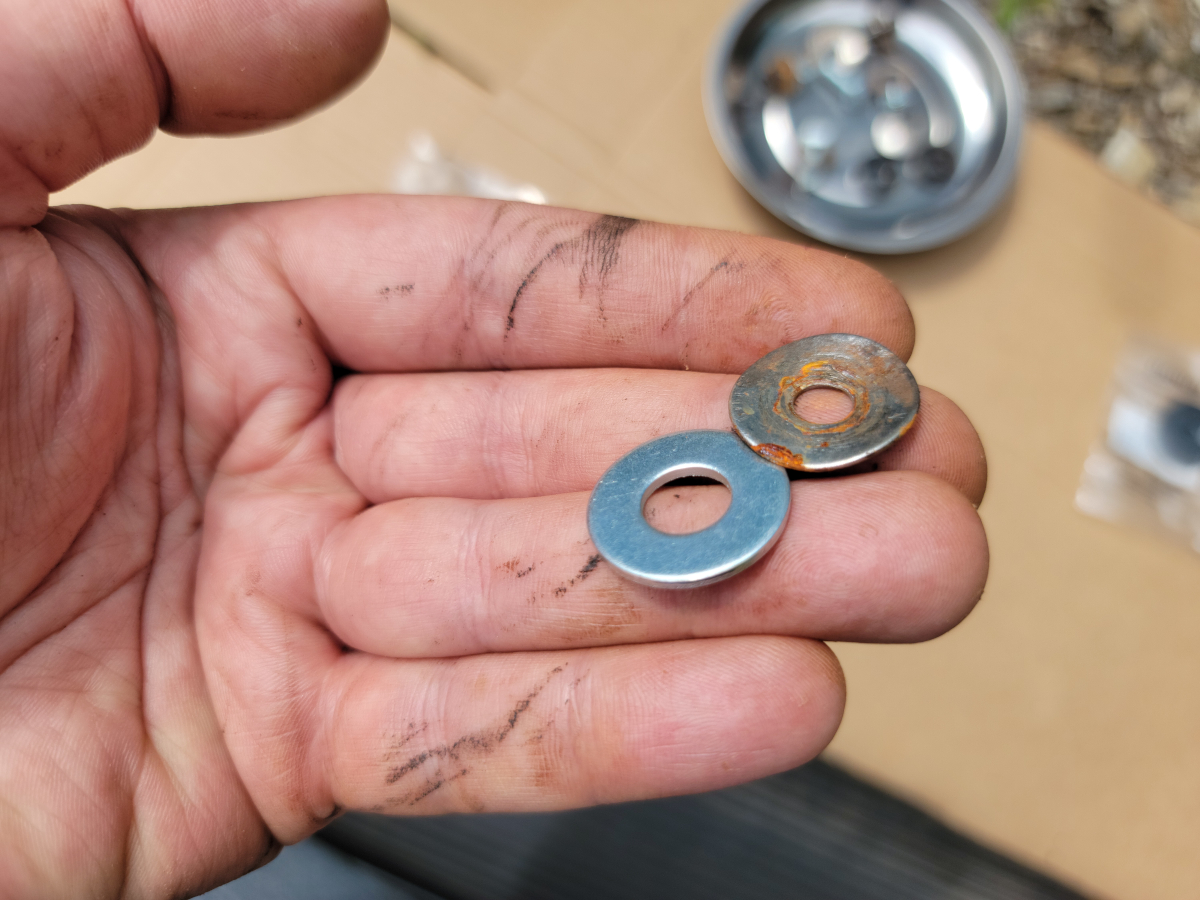
I removed the driver side running board again, to replace the washers. What I found was that after one week, the flimsy metal washers were already starting to rust.
You don’t always get what you pay for. Yeah, I may have mentioned that before.
I decided to spend some more time trying to straighten out the jack point and channel. Jamming the end of a breaker bar in there, it easily straightened back out.
Then I hammered on the end of a ratchet, because the right tool for the job, or whatever.
And then sprayed another obligatory coat of Rust Barrier and Matte Vintage Blue.
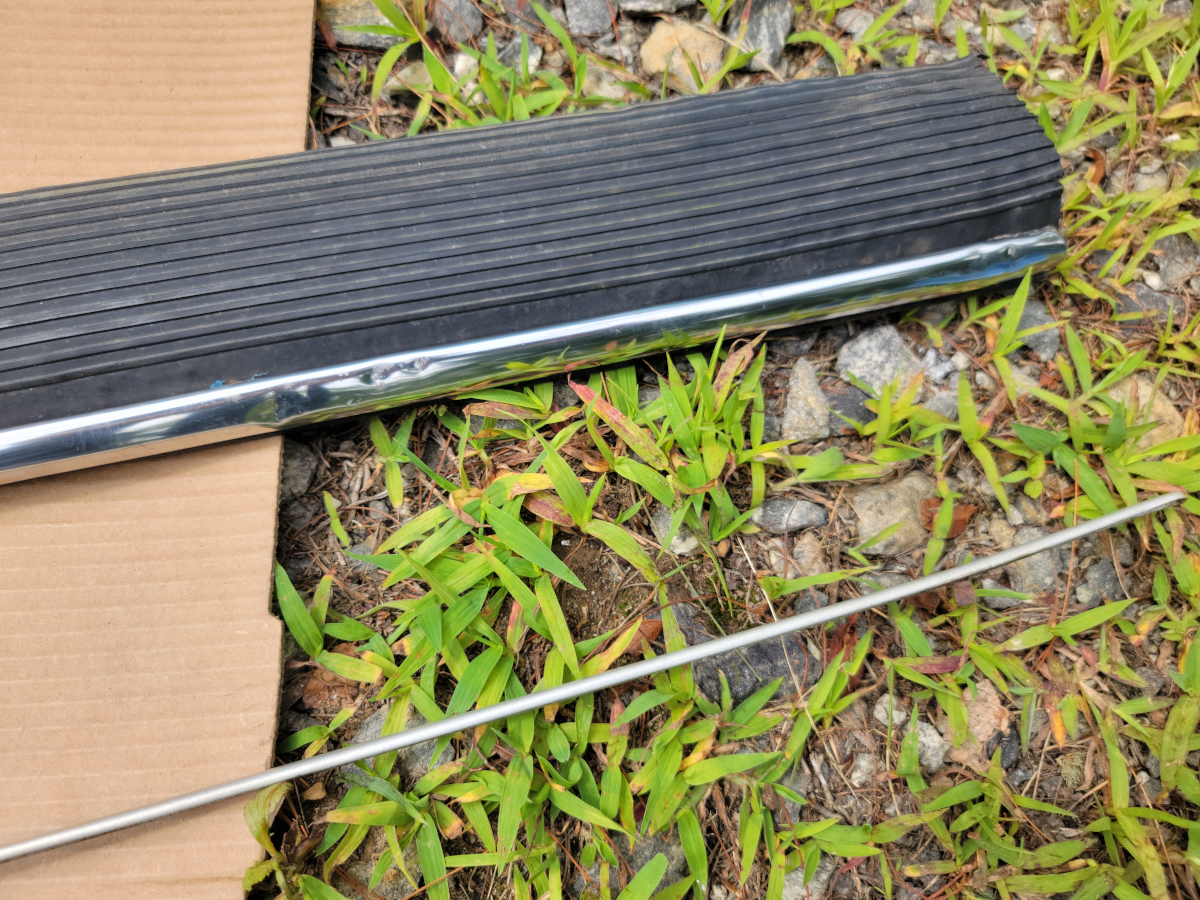
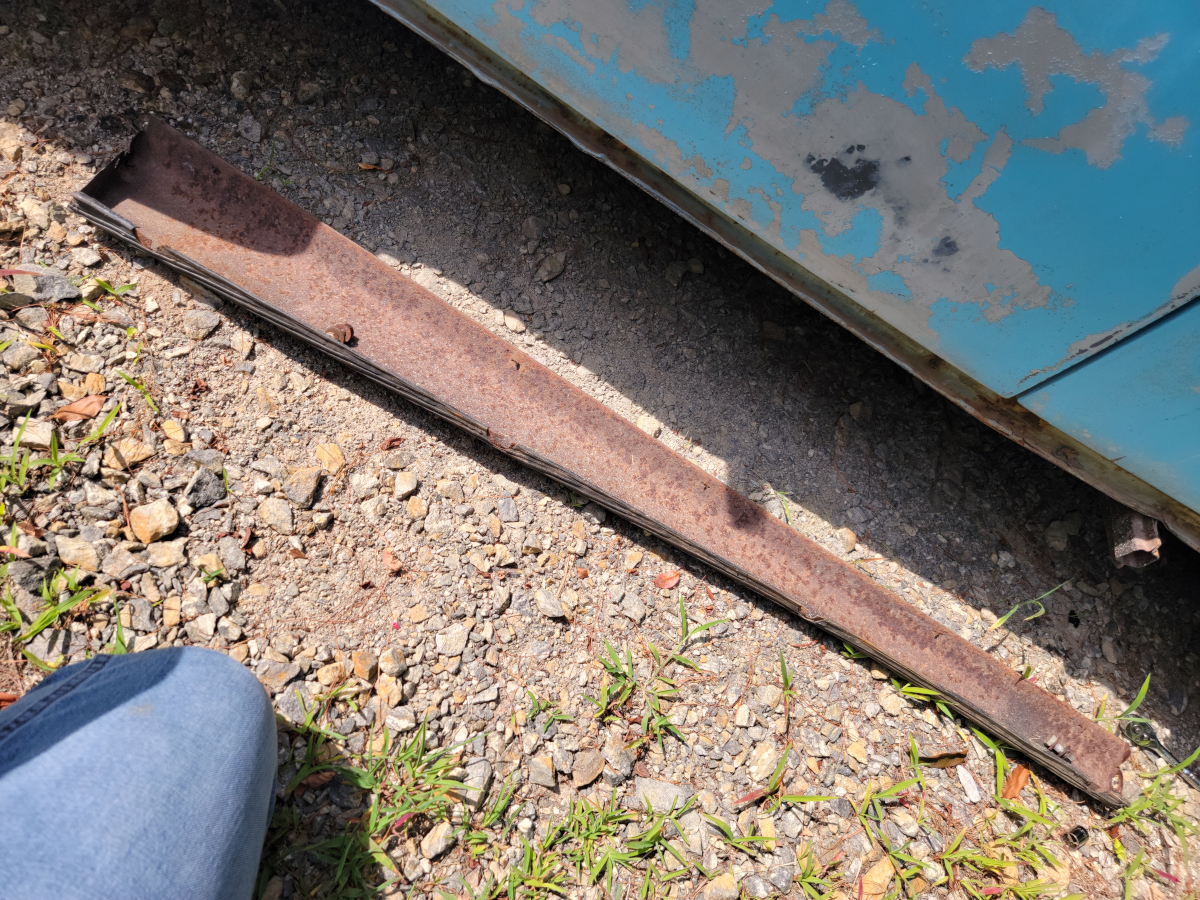
That channel is now perfectly restored and ready for the Concours d’Elegance. Next, I tried fitting the new running board again, but it’s still way too tall. My next brilliant idea was to swap the rubber cover over from the new one onto the old running board.
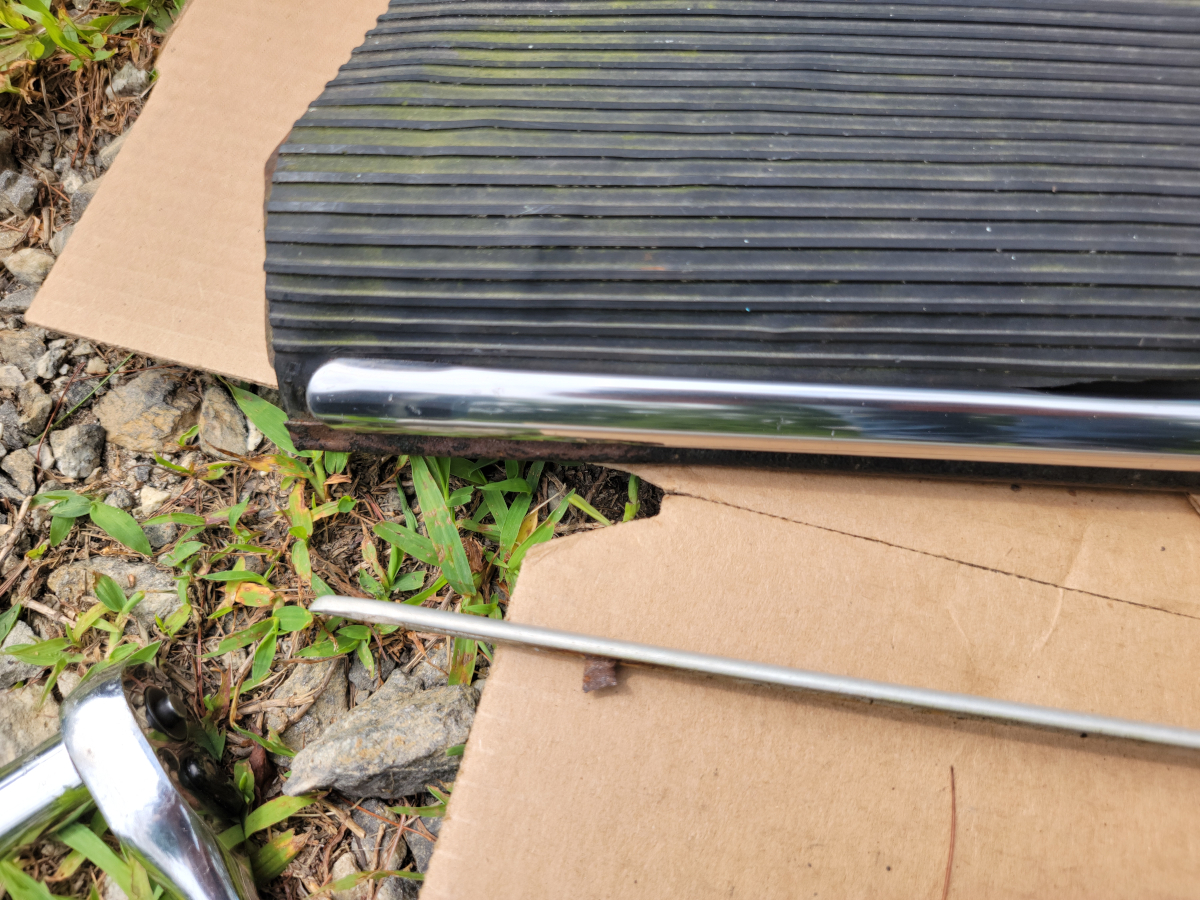
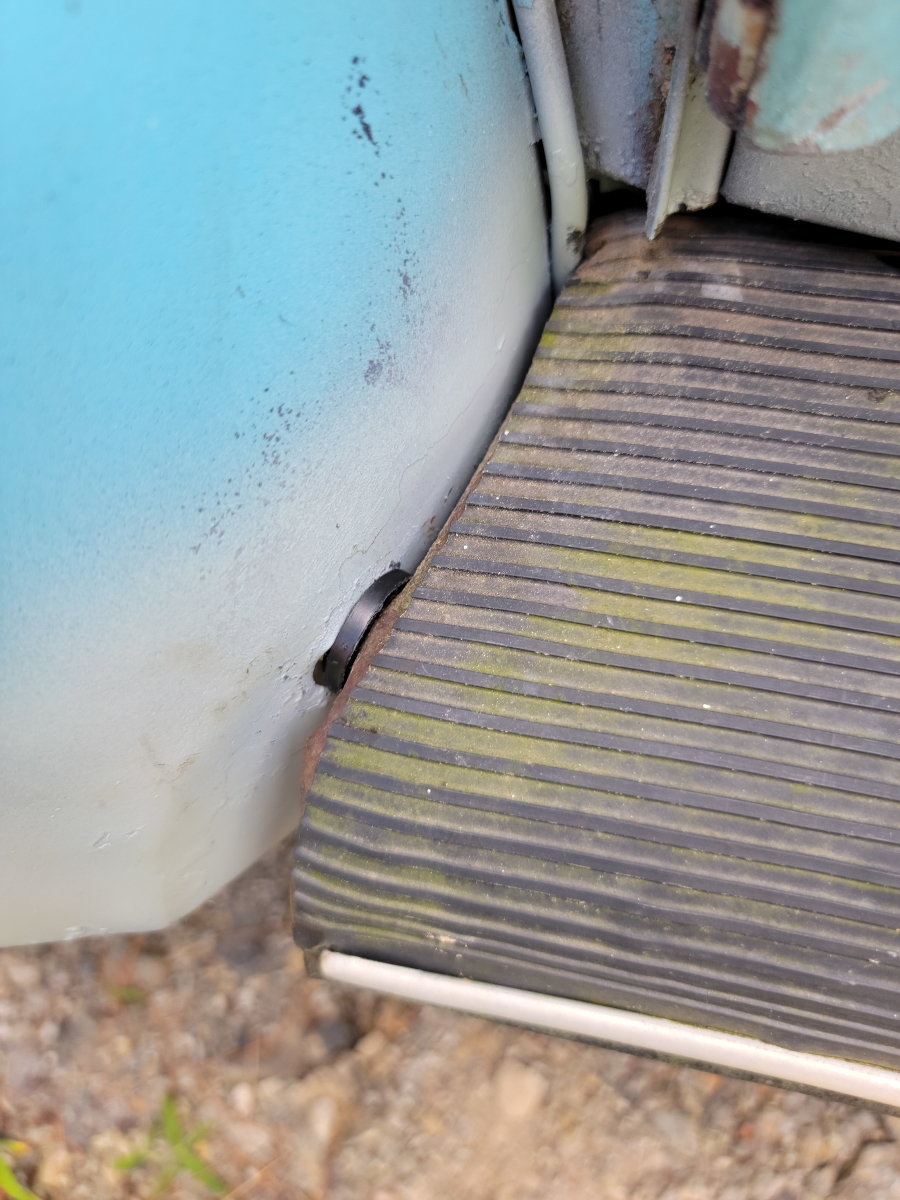
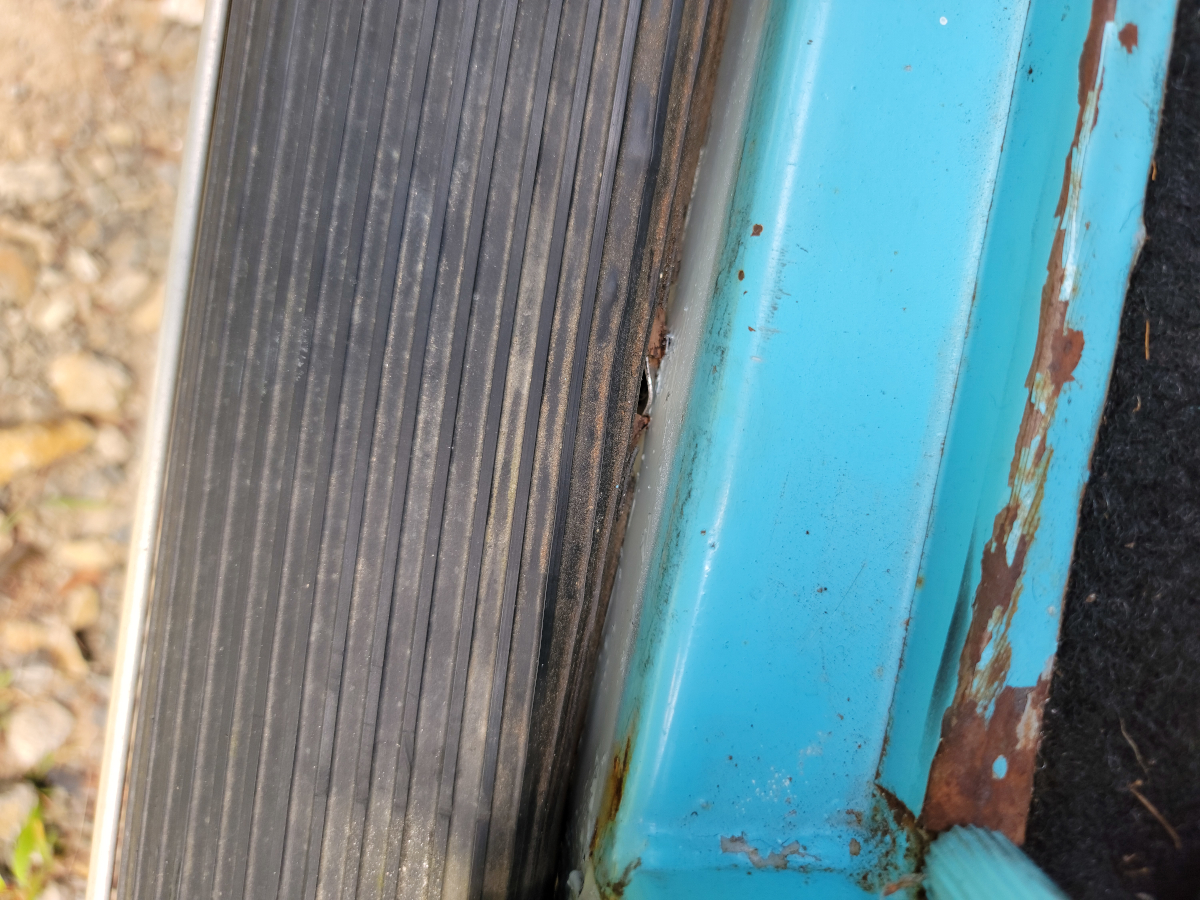
There is a groove across the back side that clips onto the edge of the sheet metal. That peeled back without issue. It’s a rusty mess under there.
On the front edge, the sheet metal is rolled and crimped over the rubber cover to hold it in place. I was able to get that pried open easily enough with a putty knife. However, the brittle, old rubber cover was just shredding.
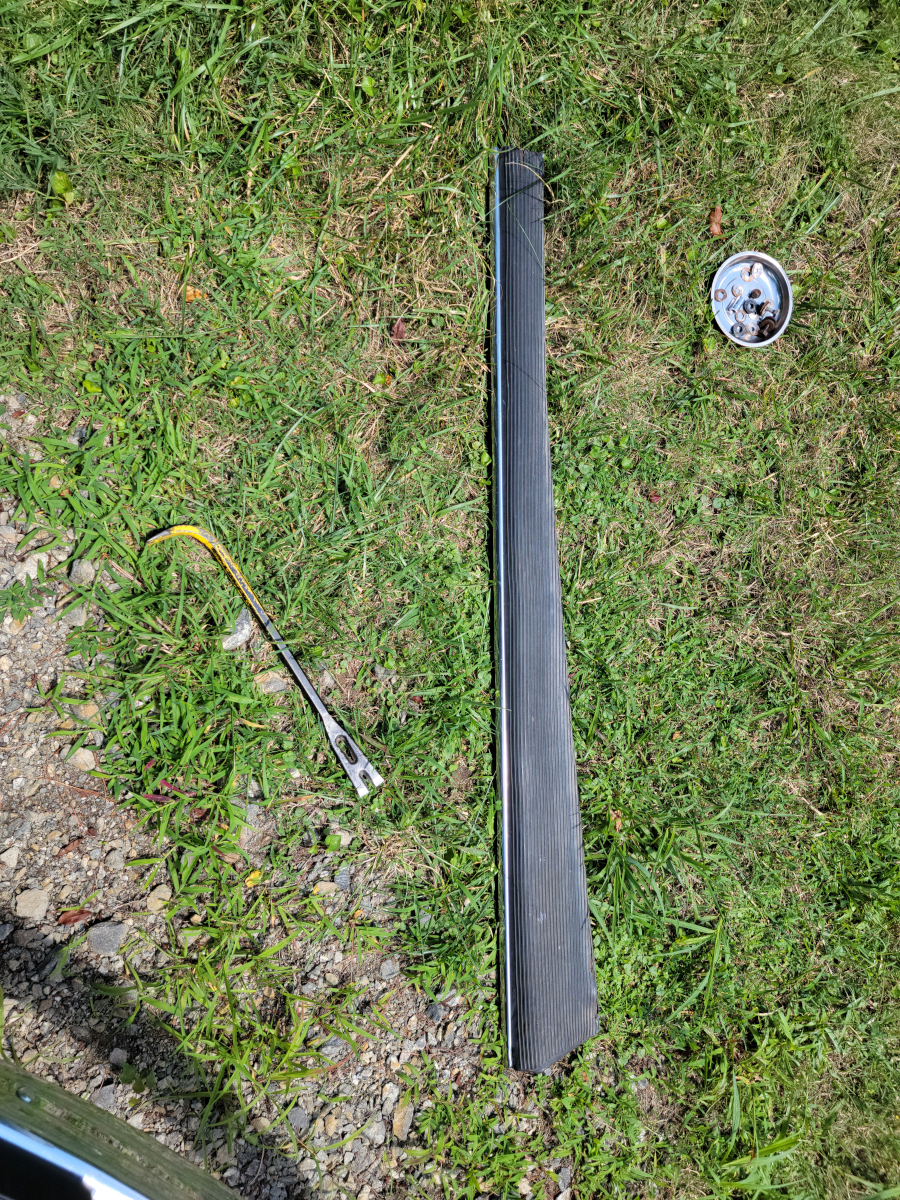
I decided to just put it back together. I would have been out there all day trying to get all of the shrapnel picked out of the channel. At least I can swap the metal trim strip over from the new running board. The ones on the car were from newer 70s model Beetles with the narrow trim strip. The new ones are supposedly the right size.
Once mounted, I peeled back the blue plastic protective cover. I found the new trim was made of the same stuff as the washers that came in the hardware pack. Ridiculous.
Old vs. new. I think the new trim pieces might be for the first generation. They are significantly larger than the one that was on there originally.
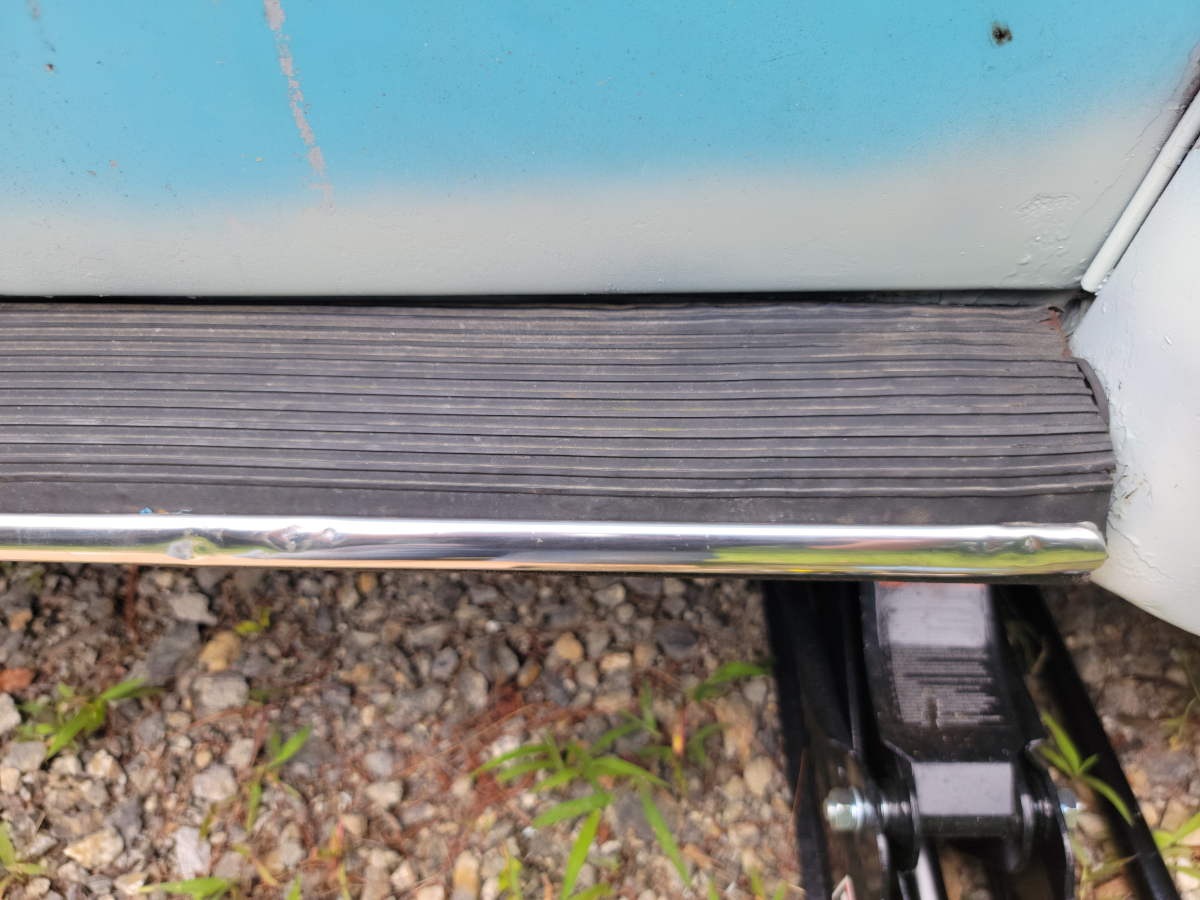
In any case, more brand new, shiny, dented, cheap crap mounted up!
The soft rubber fender washers did their job well.
Moving on to the passenger side, I got the new trim piece moved over to the old running board. The pry bar was not involved in this, it just happened to be laying there from before.
And I moved the old trim piece onto the new running board for safe keeping.
Oh hey, great news!
That’s going to take more than a Steel Stik to fix. I started to drill out one of the broken body bolts in that big rust hole. The whole thing started folding up under the pressure, so I left it alone.
So yeah, nothing to see here.
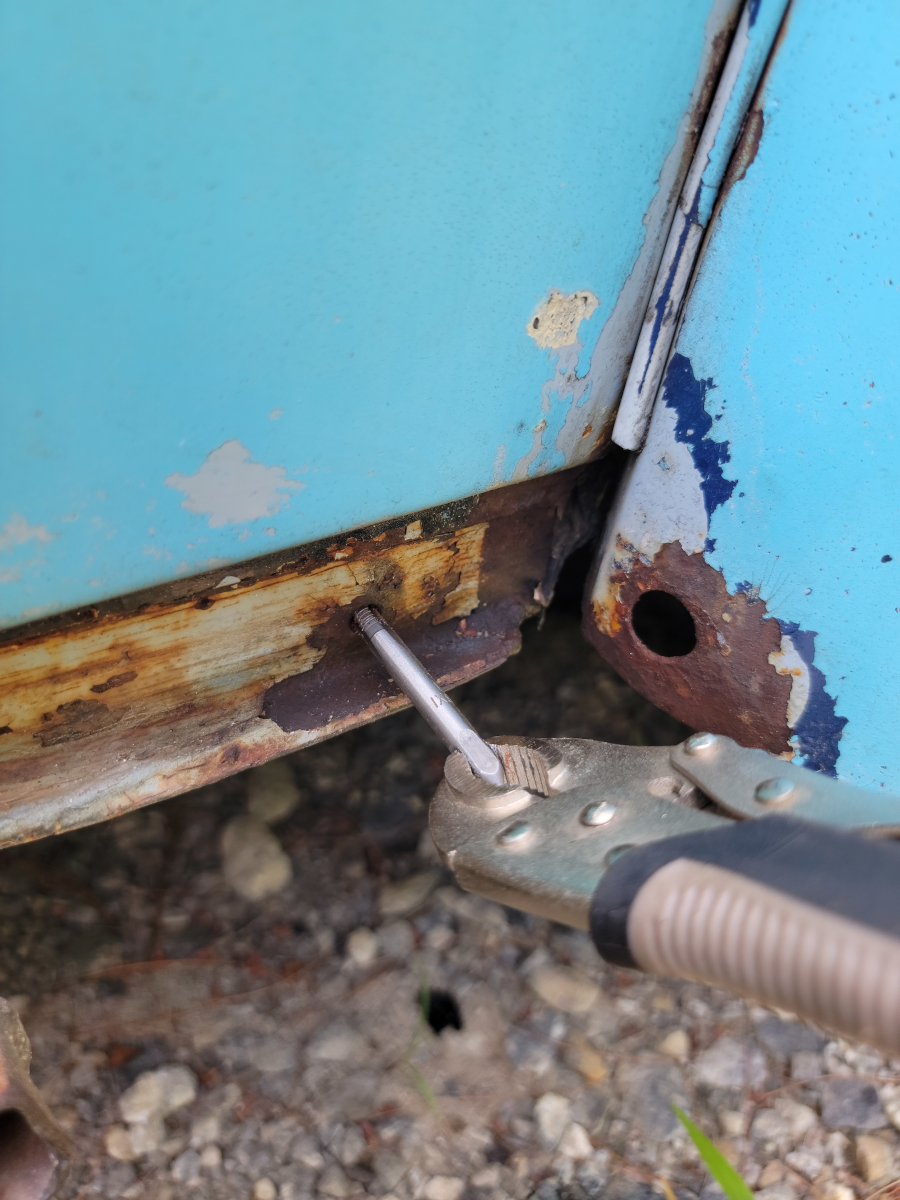
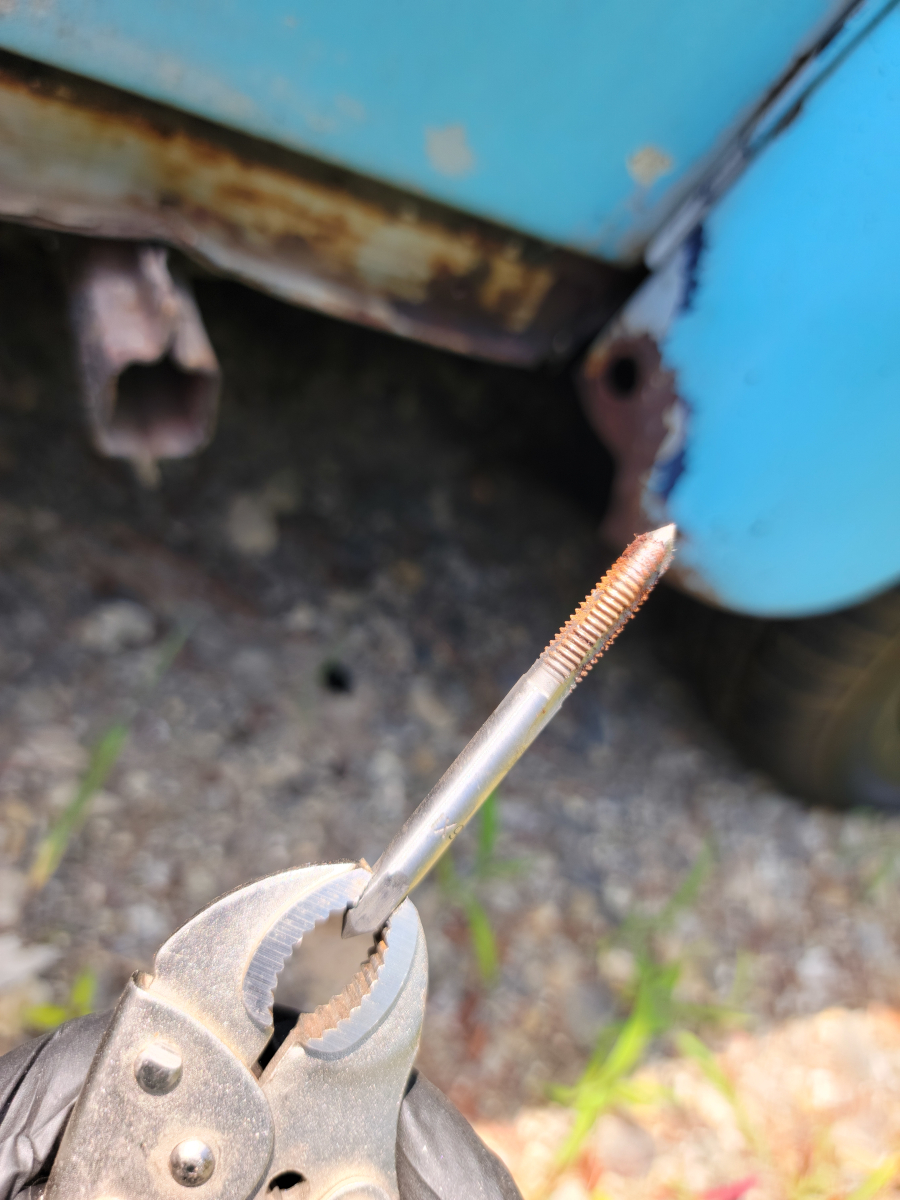
Moving on, I chased threads on the next rusty bolt hole, which had been missing a bolt.
The next one had a broken bolt, which I drilled and tapped. I clearly got off to a bad start at first… I did eventually get the hole drilled in the right place.
The last one had a bolt in it, but was still very crusty. I chased the threads on that one as well.
Rust Barrier engaged. I can rest easy now that the giant rust hole above the jack point is now fully reinforced!
Buttoning this all up for now, but that is going to require some serious attention sooner rather than later.
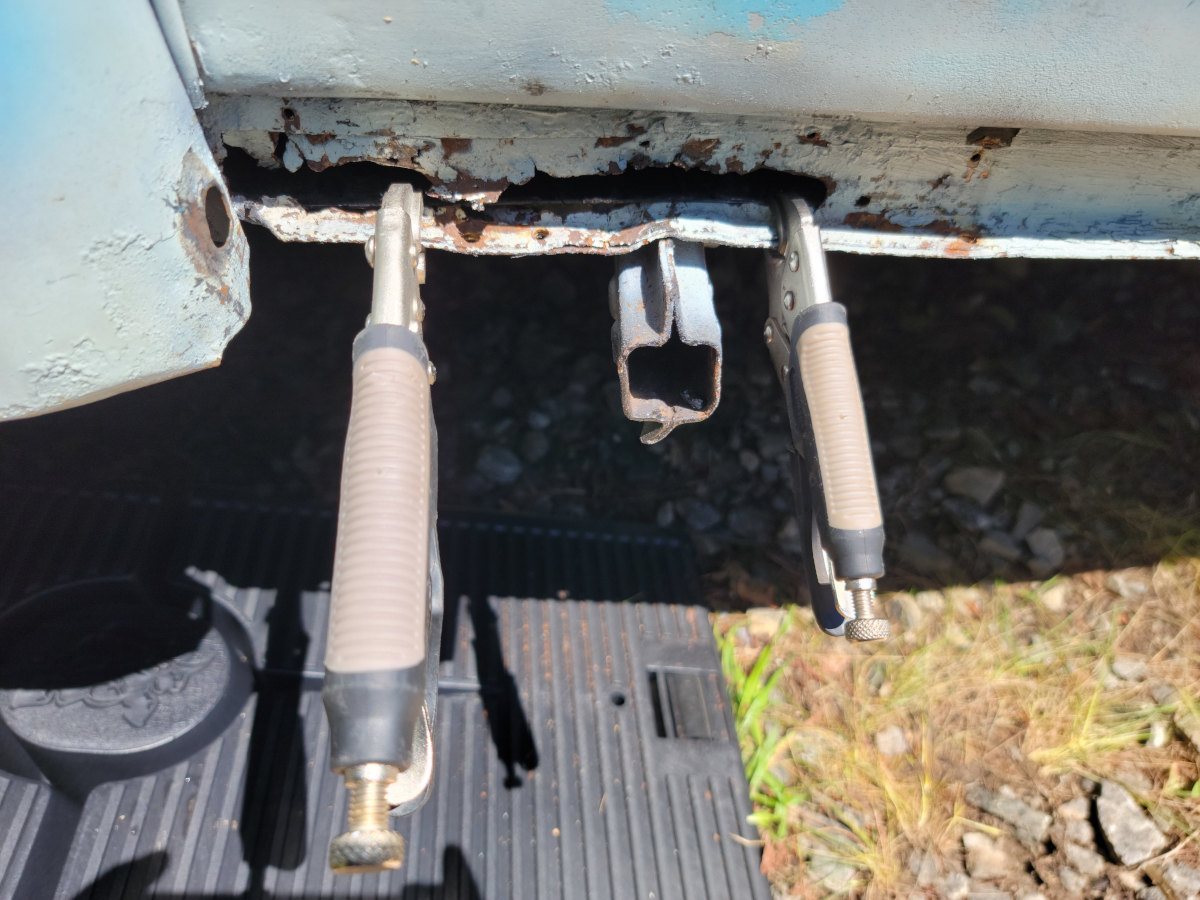
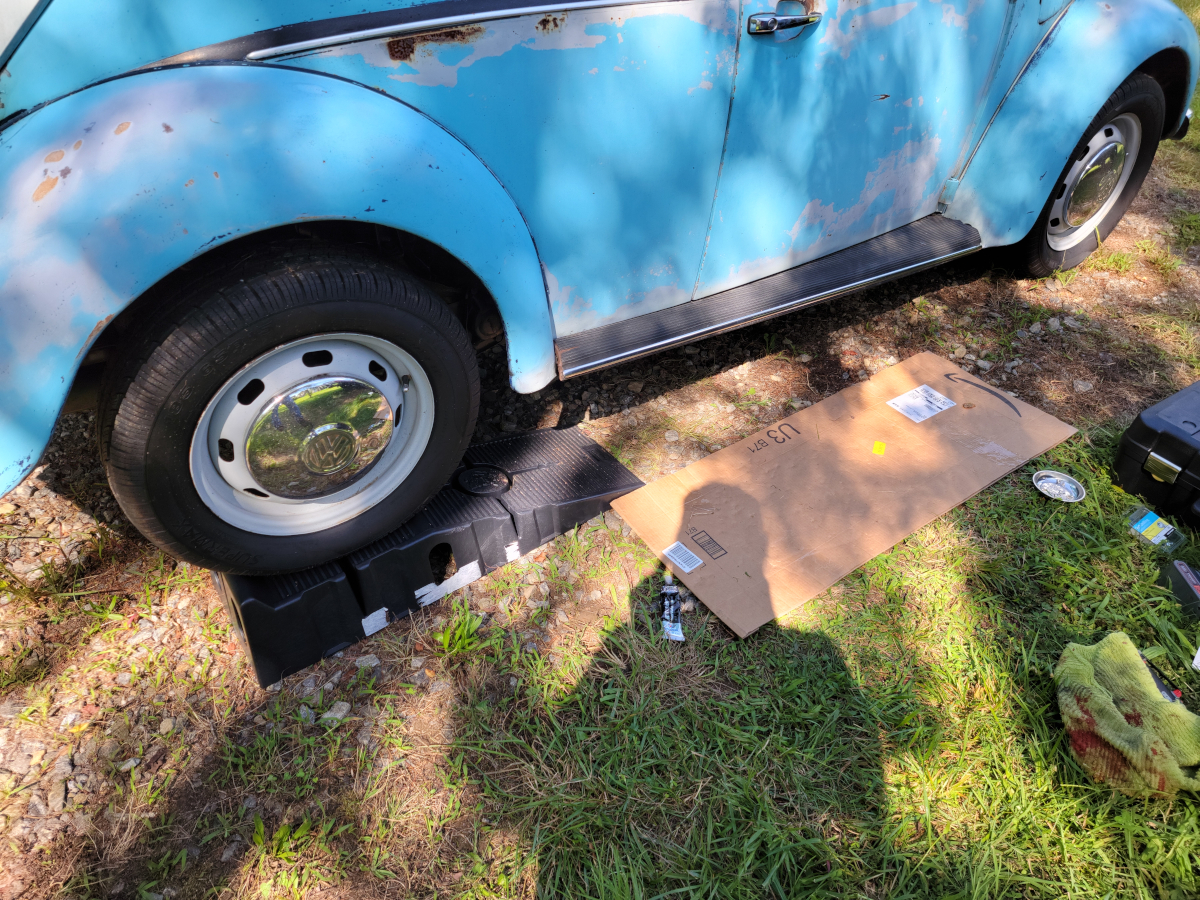
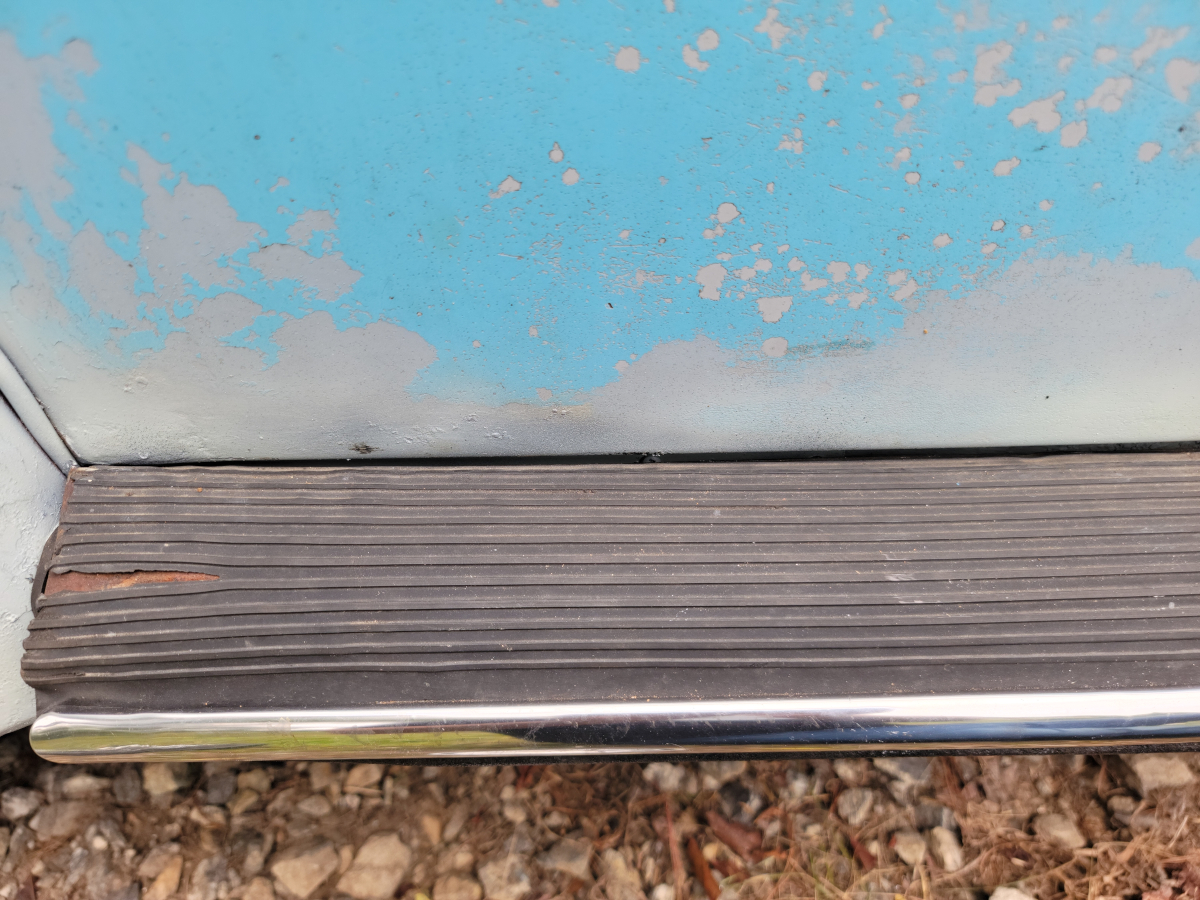
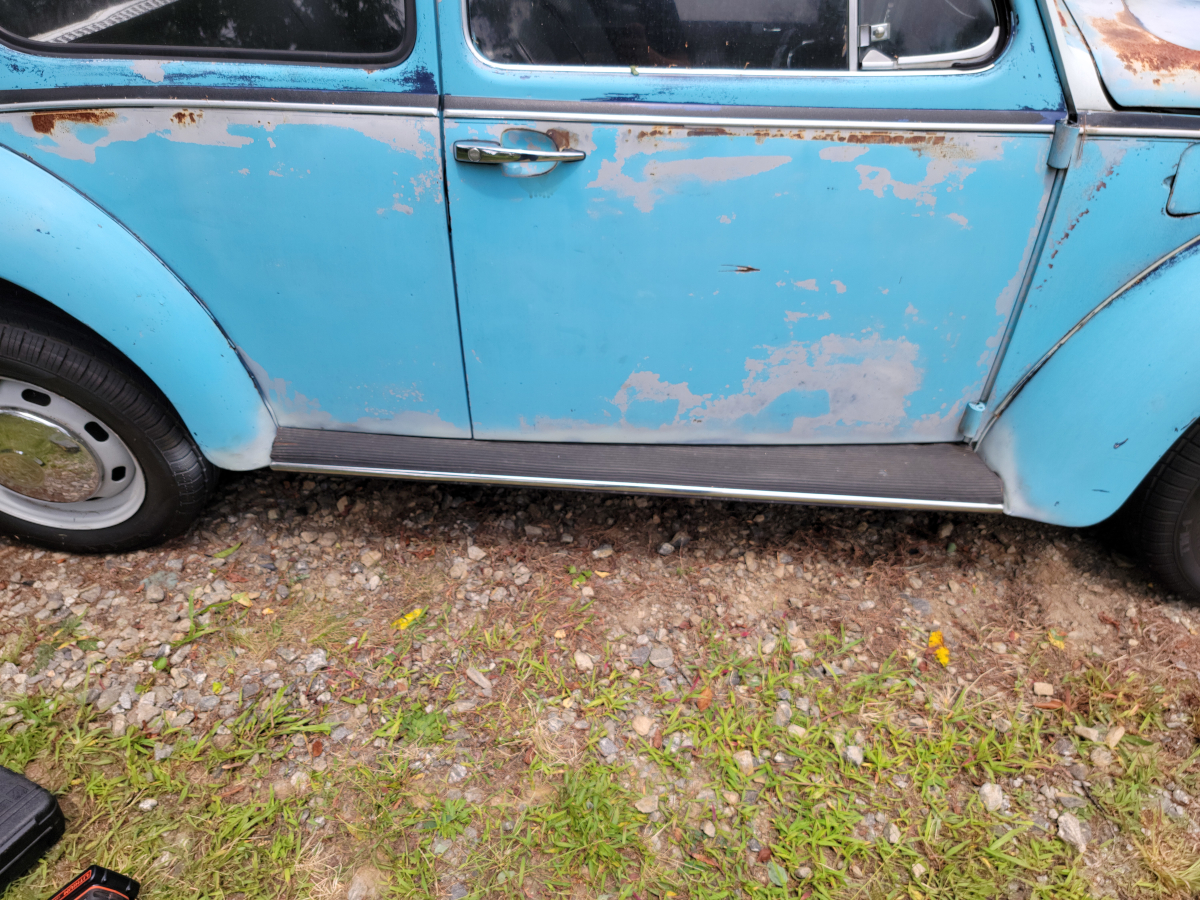
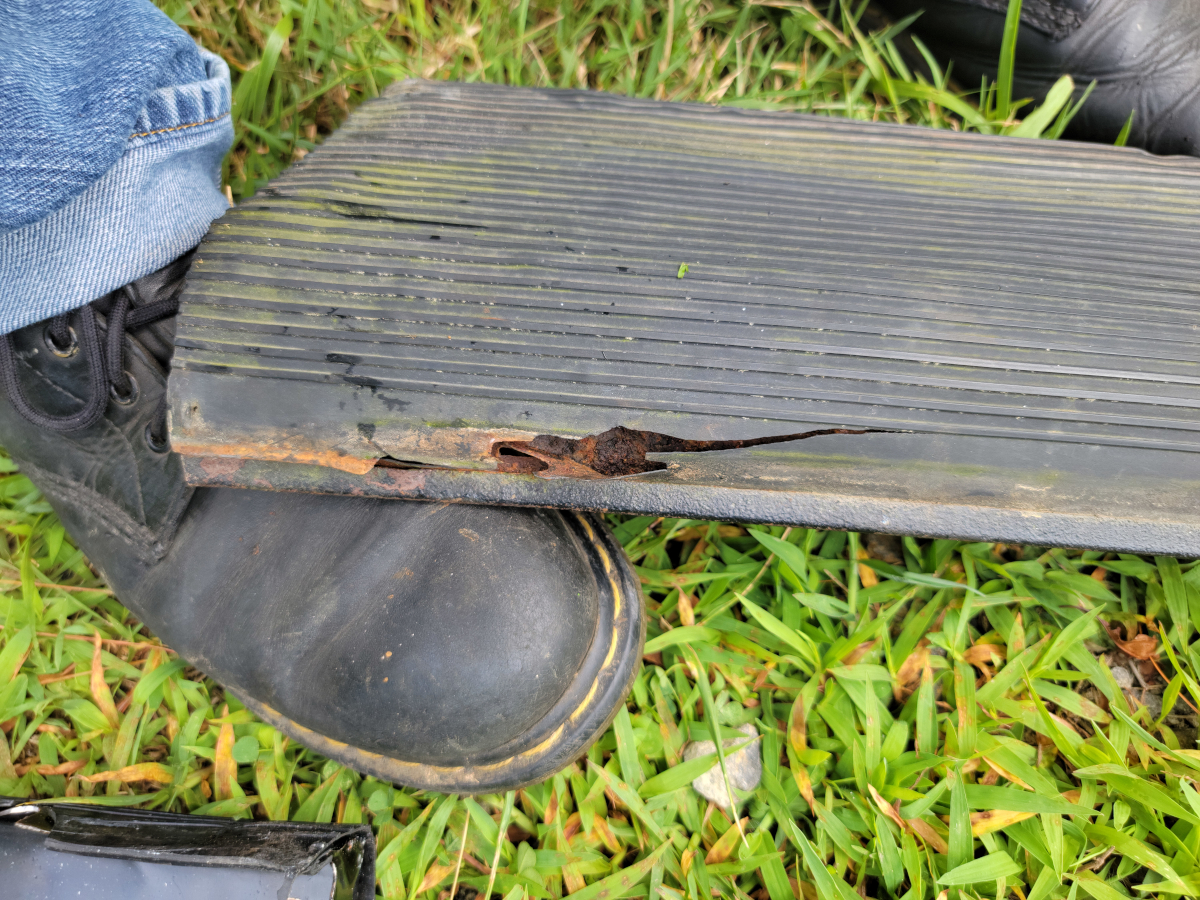
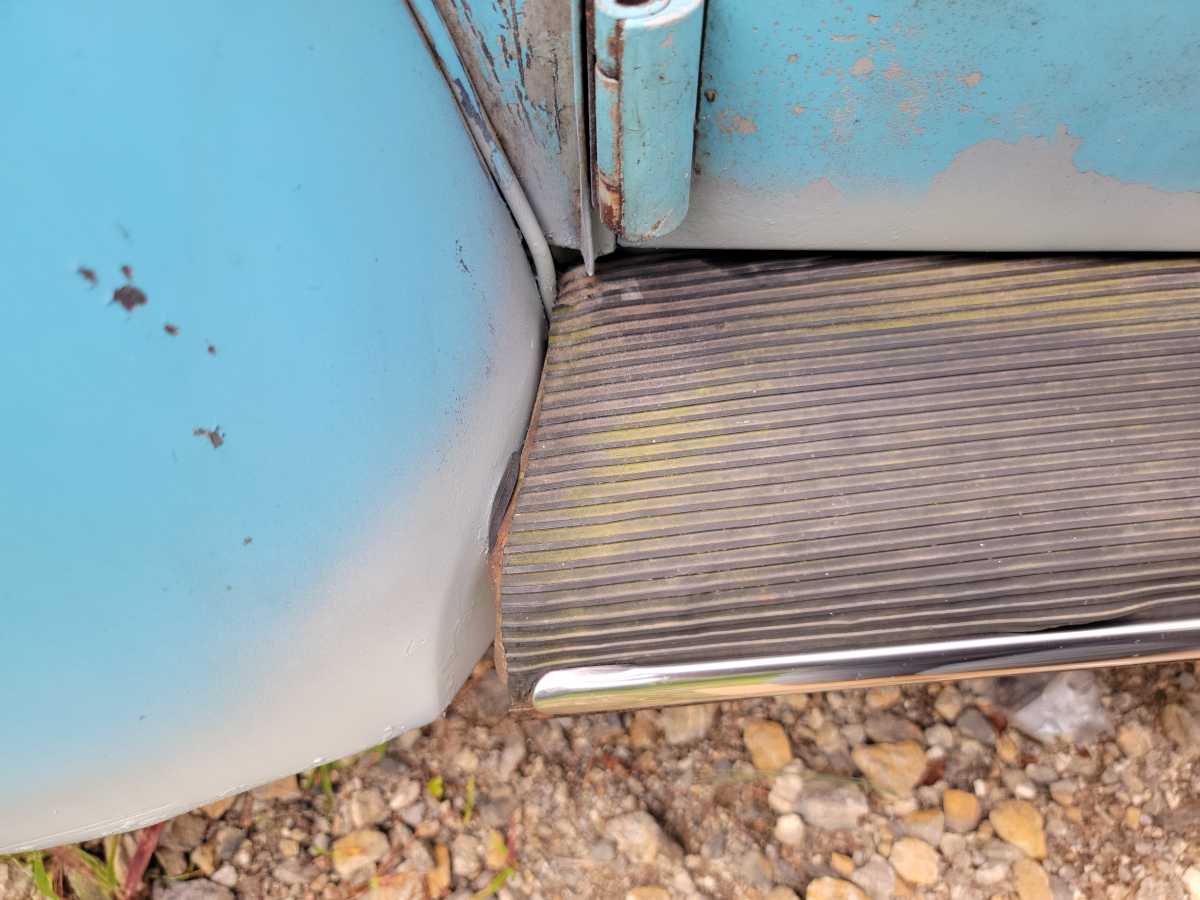
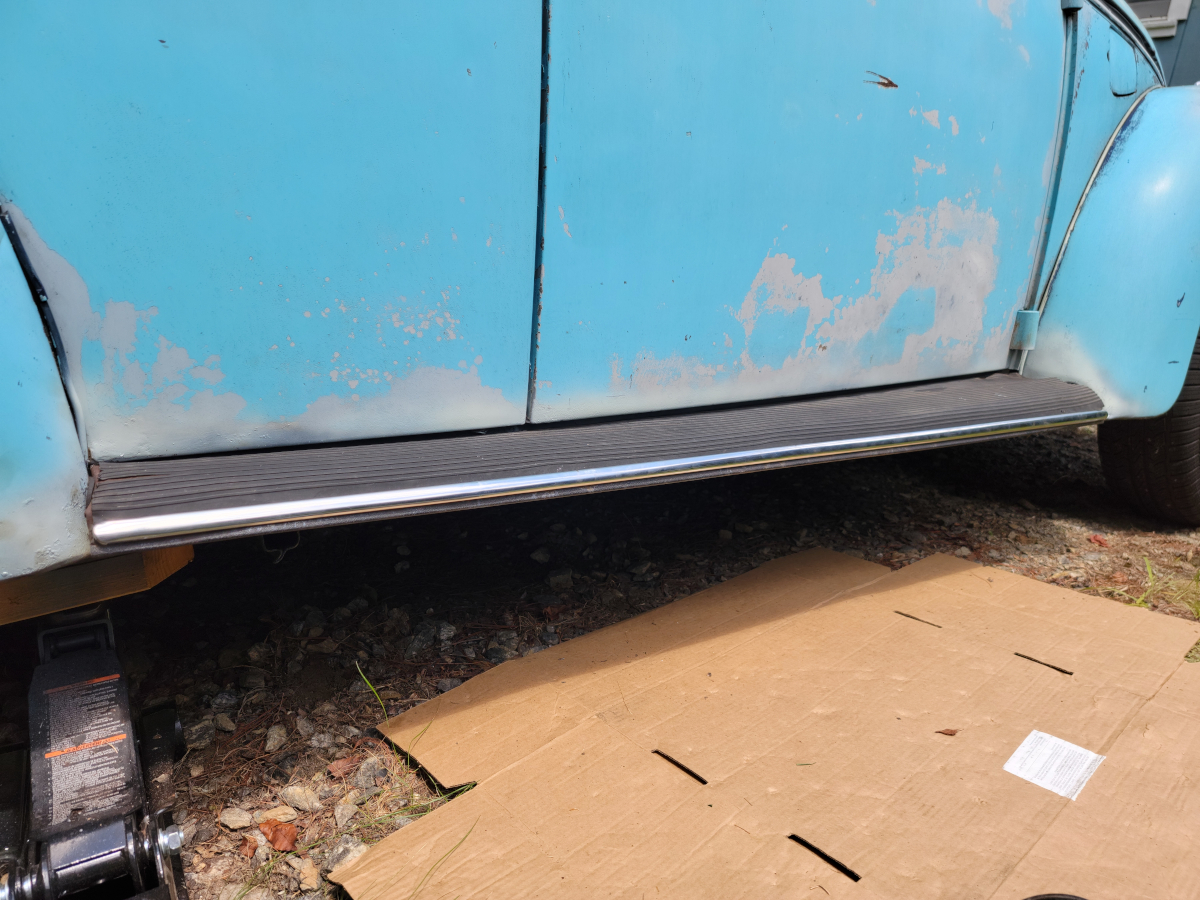
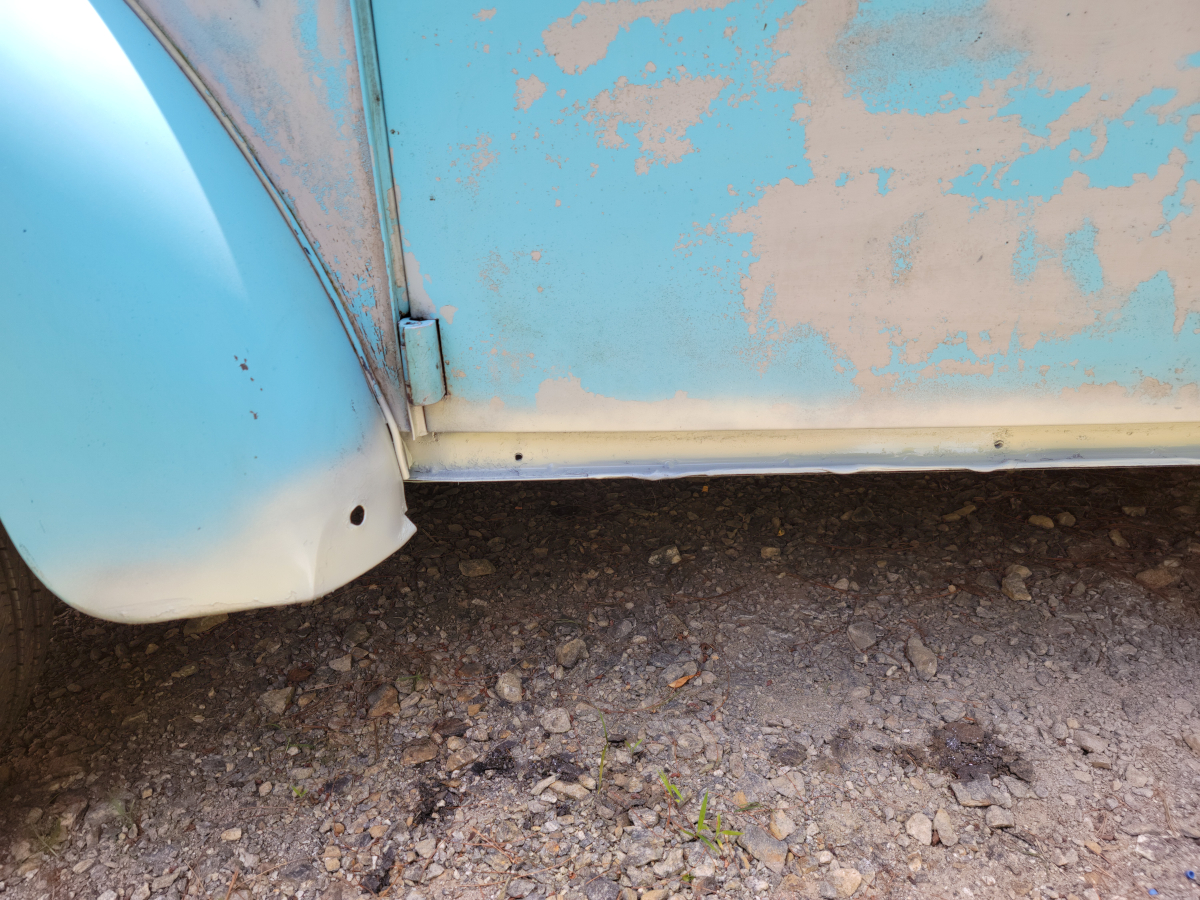
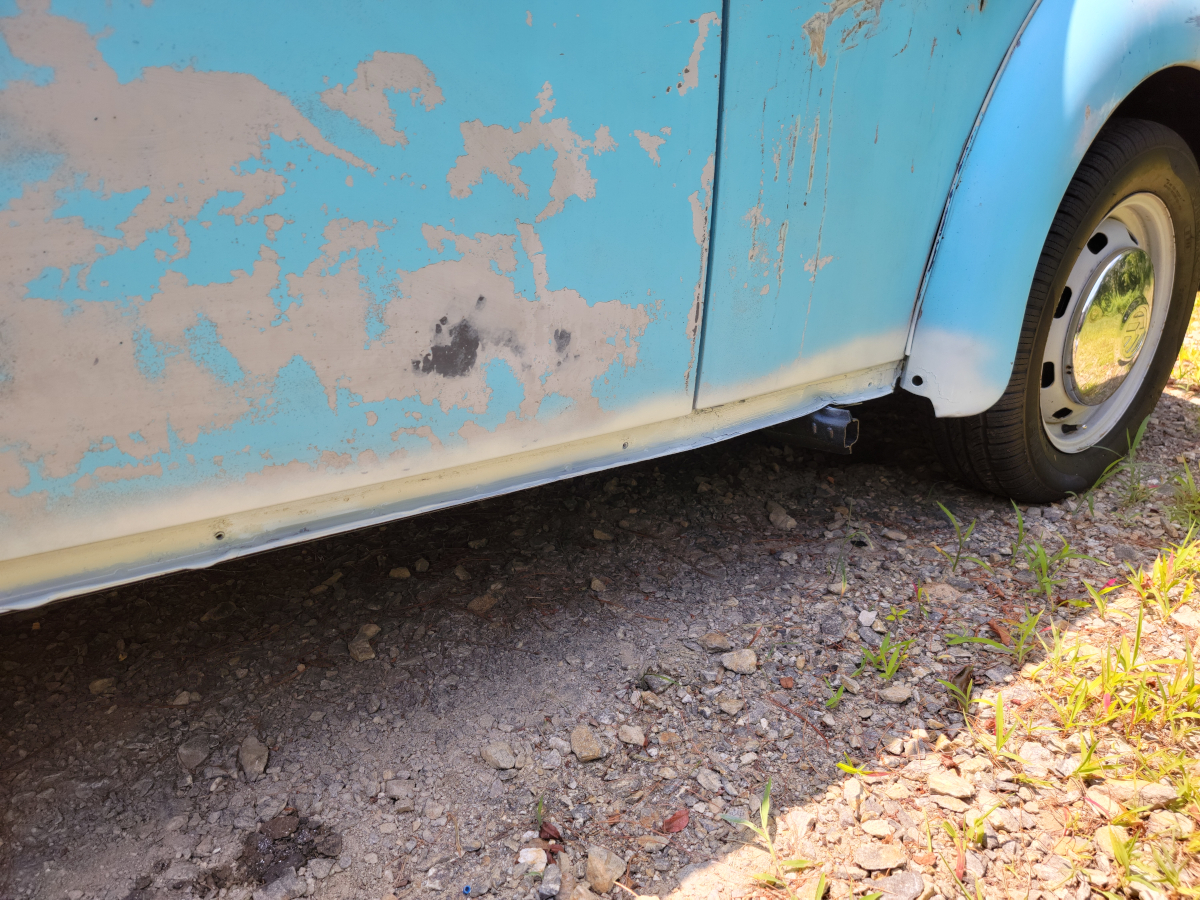
One of the first things I noticed when checking out this car before I bought it was the running boards were rusty and made crunching sounds when I pressed on them. I recently bought a new pair of running boards from jbugs (jbugs link).
I started on the driver side. Removing the bolt first from the front fender:
And then the rear fender:
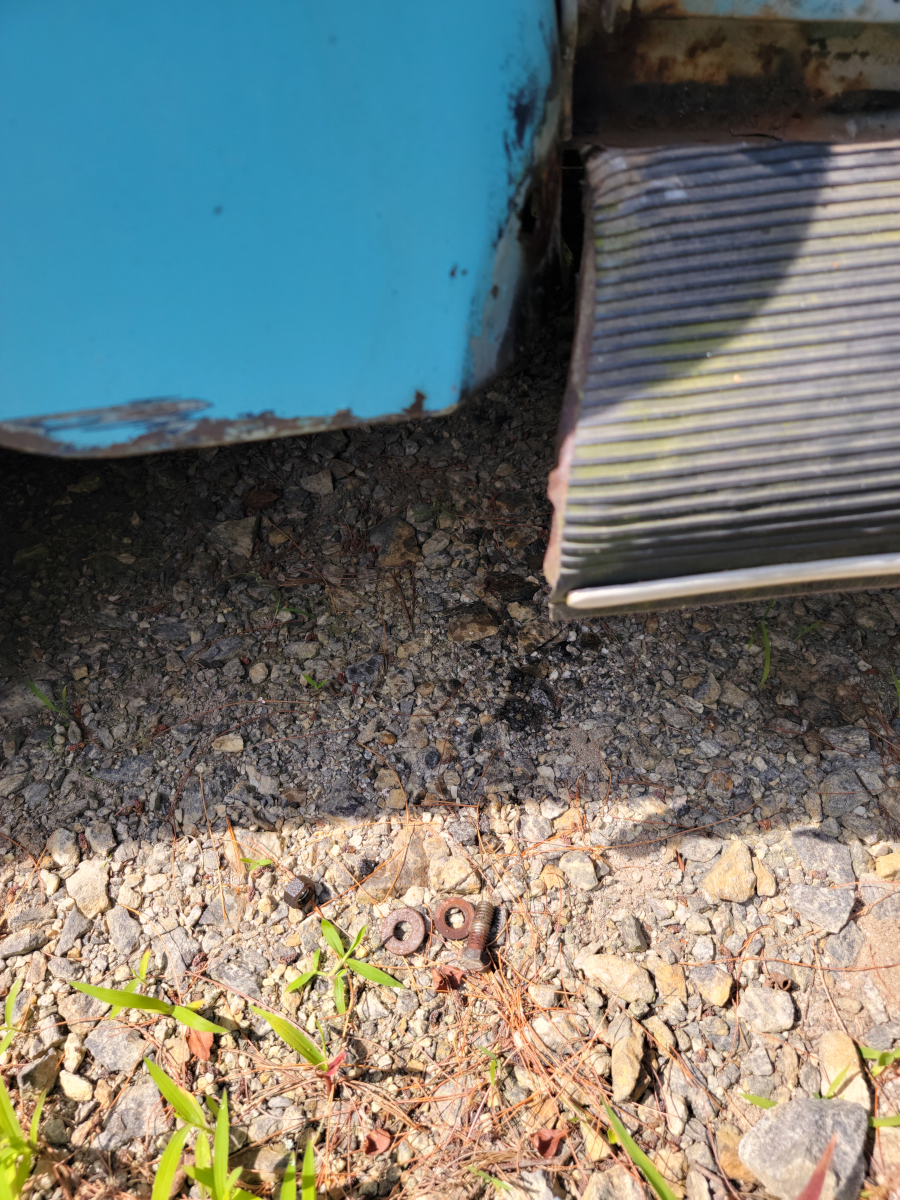
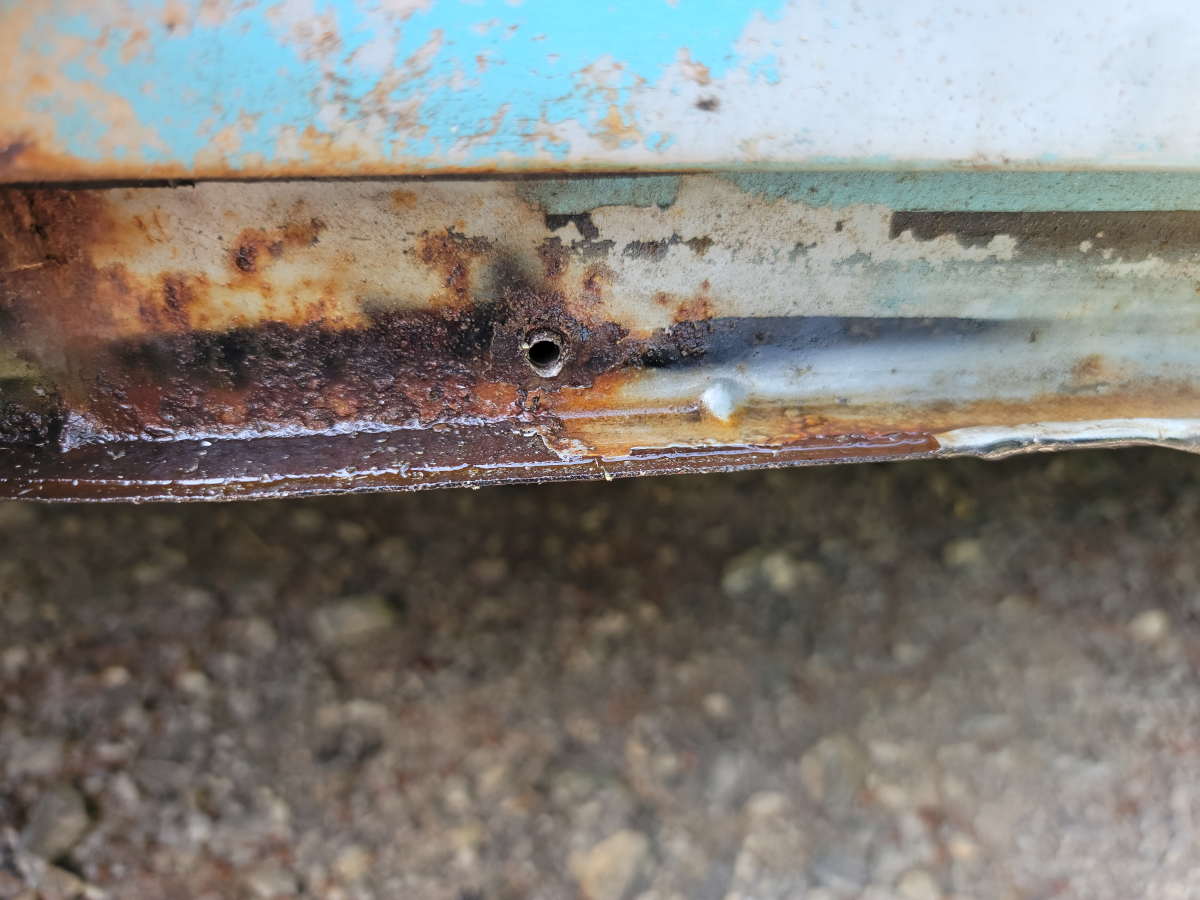
Whoopsy daisy… There are supposed to be four bolts in the body channel below the door. Three were broken off and one was just missing.
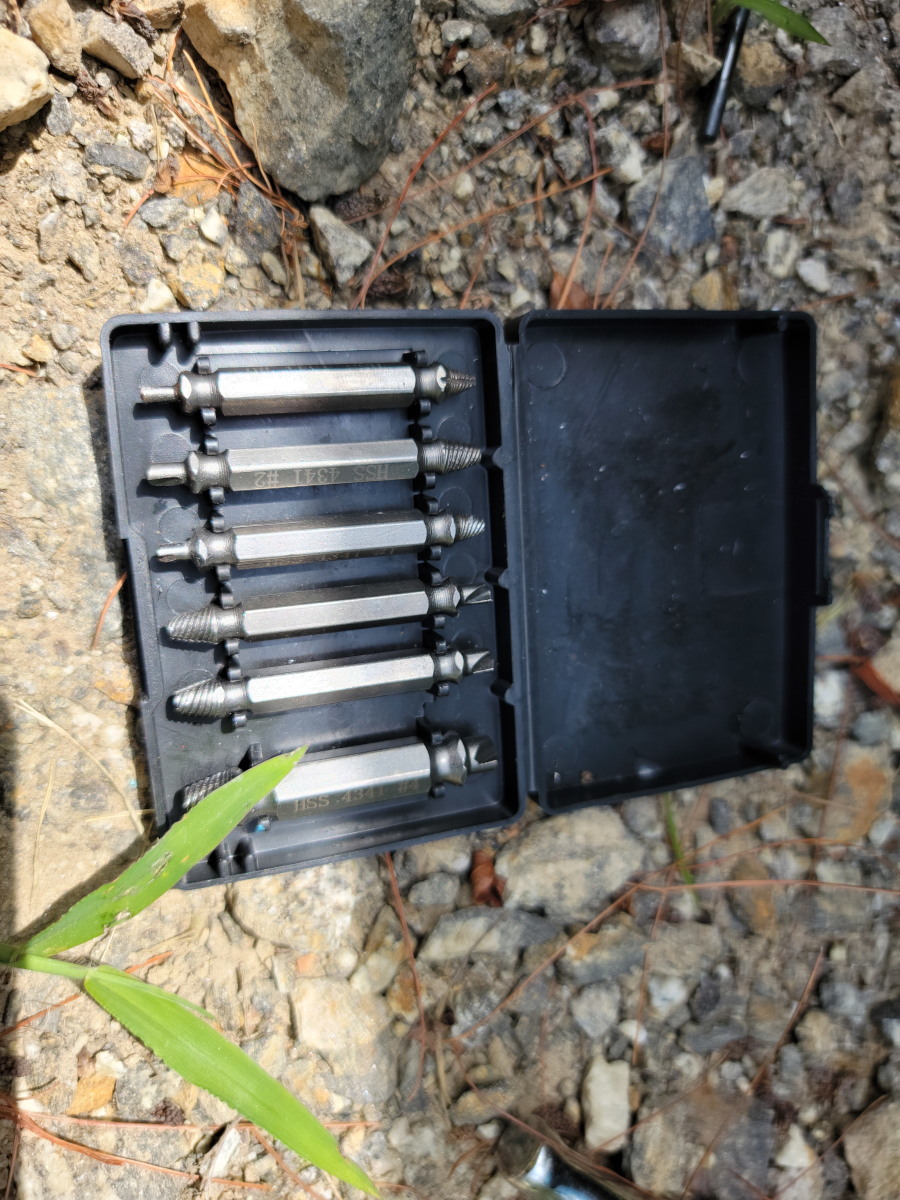
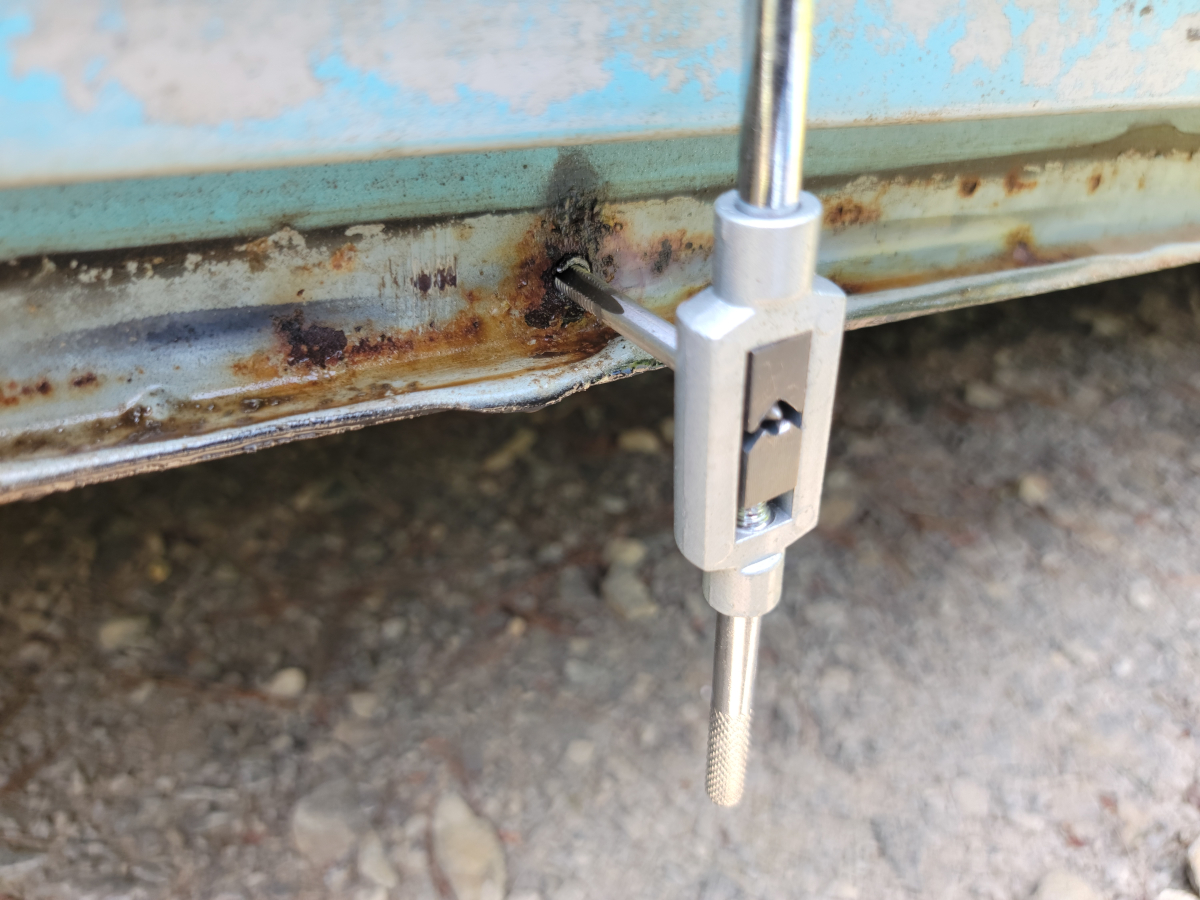
I hosed them down with PB Blaster in hopes of getting the broken bolts out. A few days ago, I ordered a little set of screw/bolt extractors (Amazon link)…
I didn’t hold out a lot of hope, but gave them a try. They didn’t work. I was able to get a good bite on one of the bolts. However, my drill was smoking a little by the time I gave up on that.
I think it was trying to pick up and rotate the whole car. I would have preferred that the bolt would have given up and broken loose.
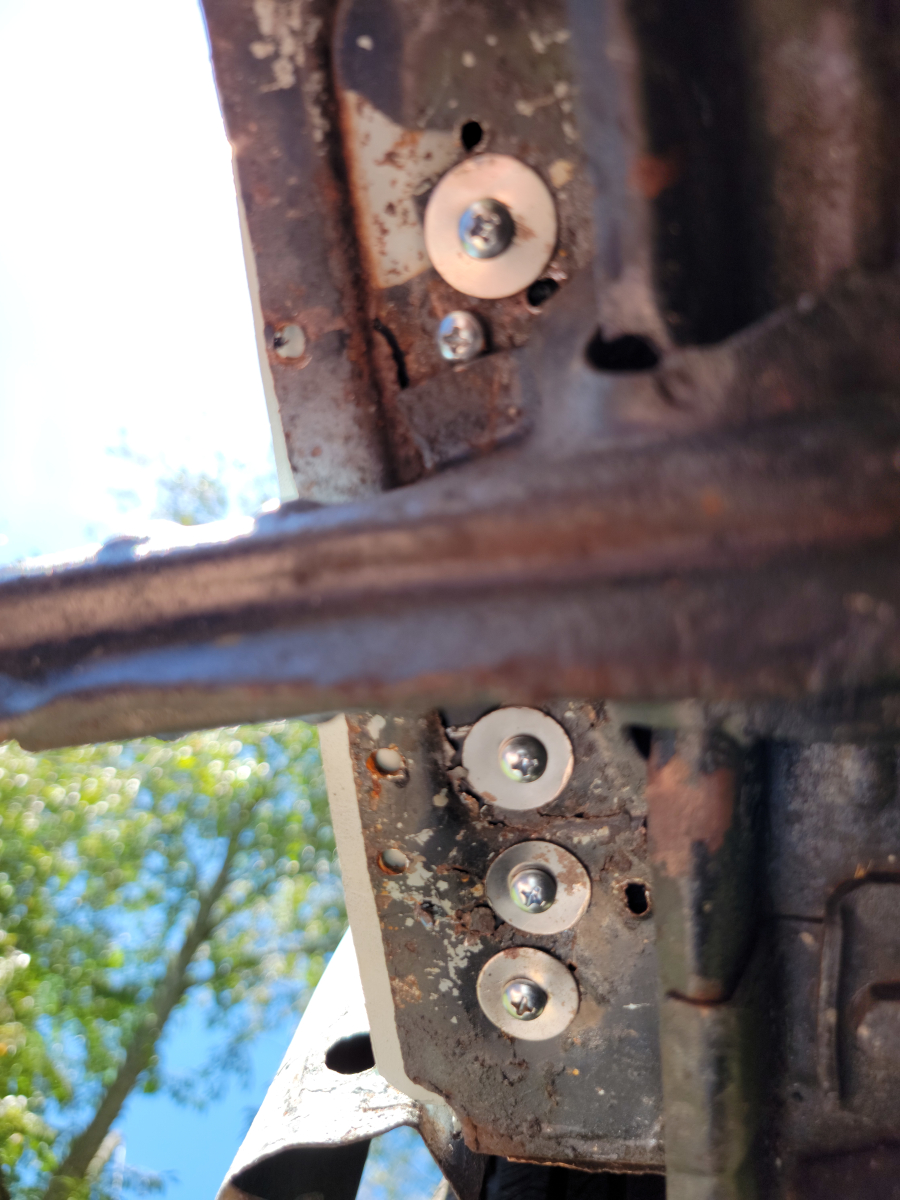
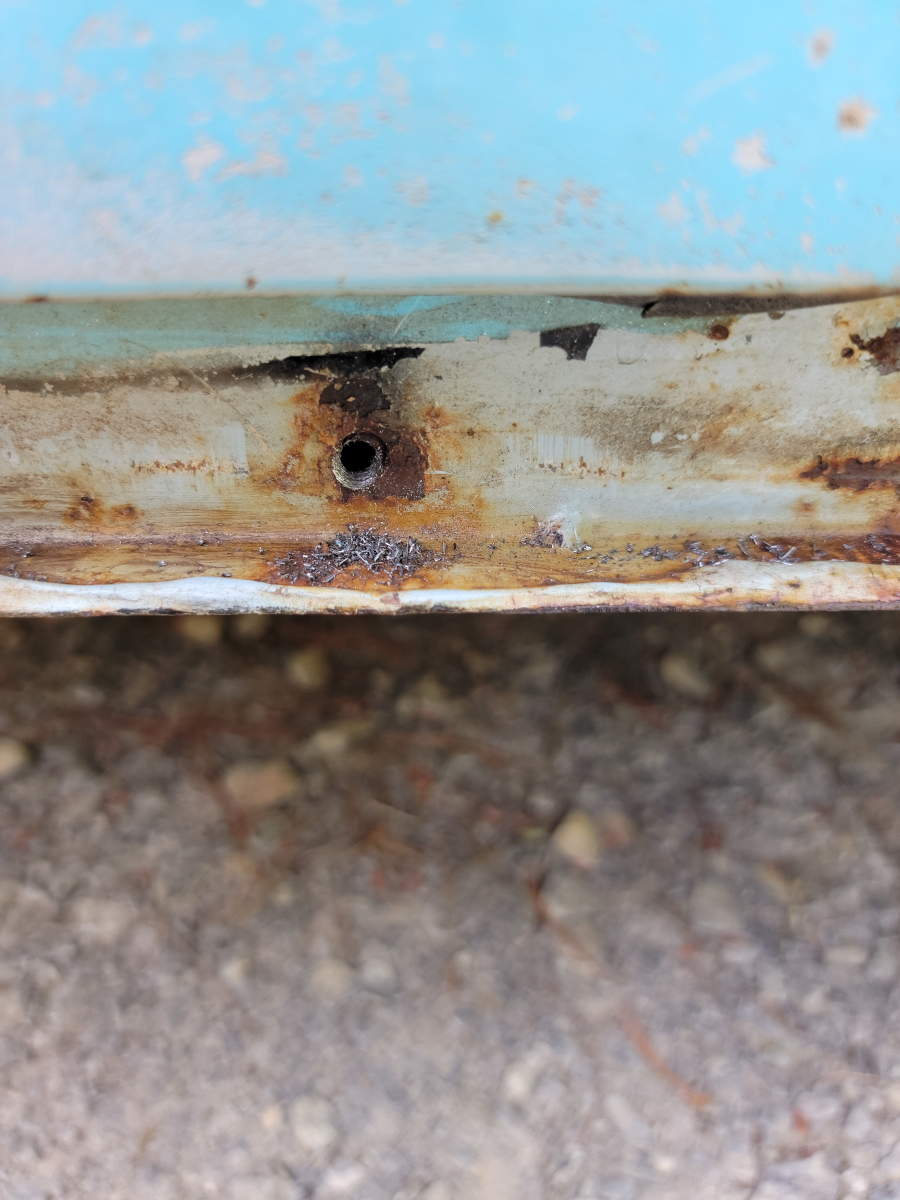
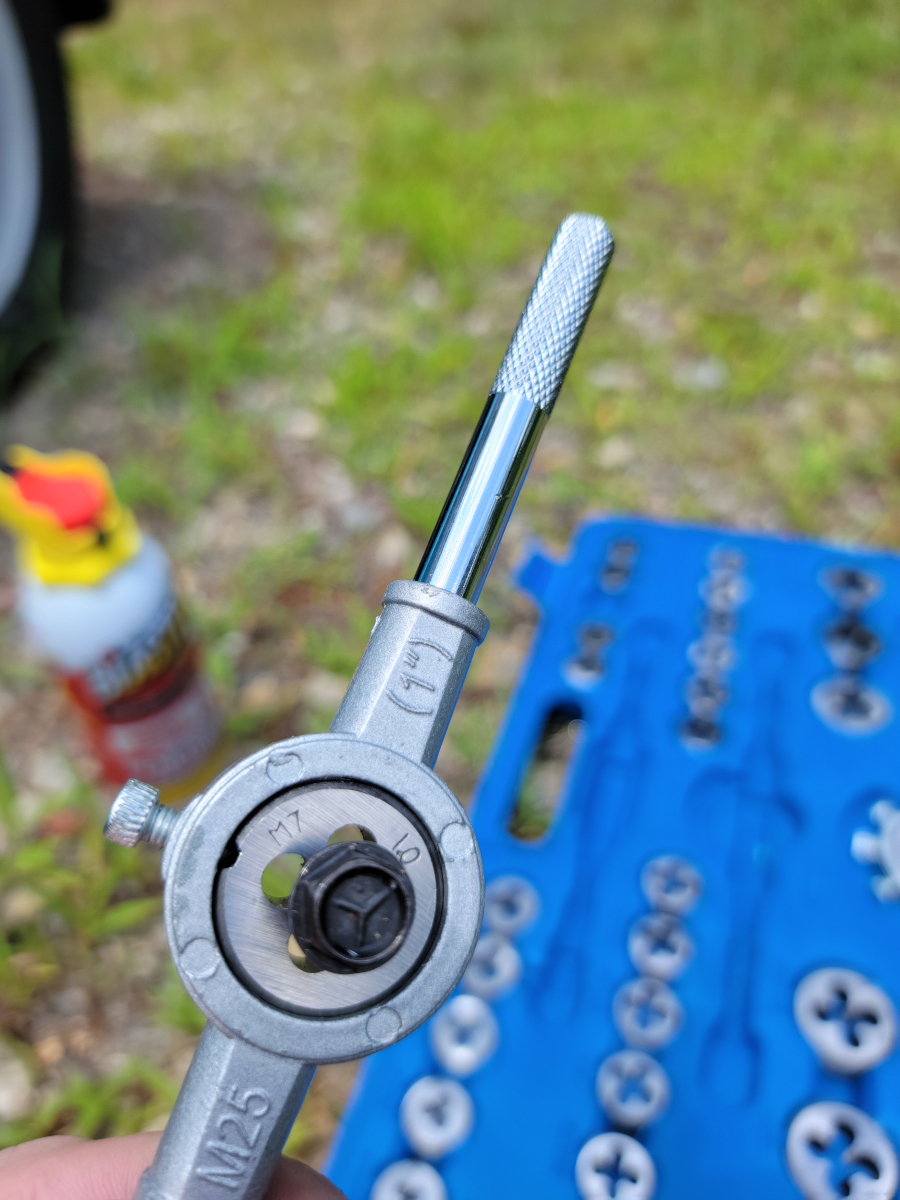
So, I got out the drill bits and just drilled it through. I was a little off-center drilling the original hole. That meant I ended up having to “upgrade” that to a 7mm bolt. The rest of them are 6mm.
After drilling out the bolts, I went back through and threaded the new holes. I used the original 6mm x 1 size.
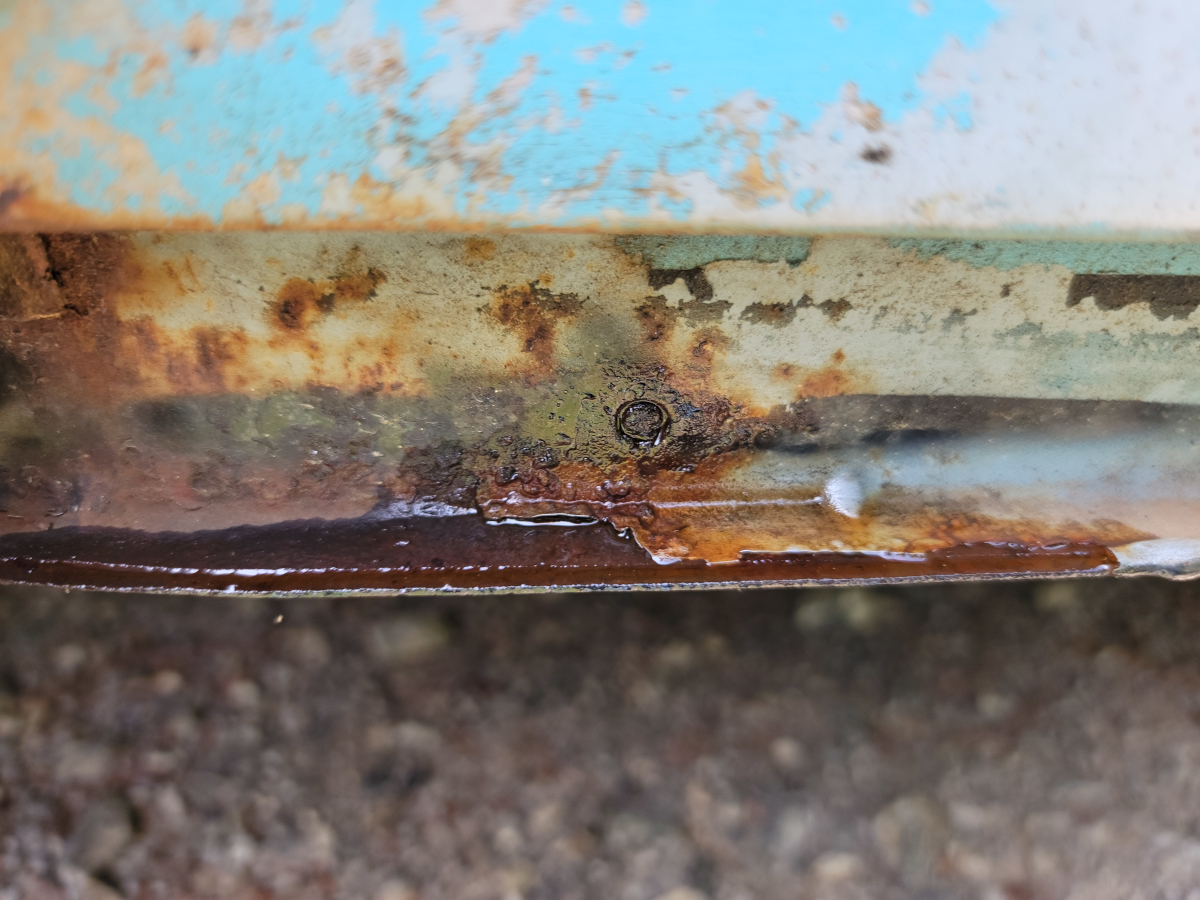
The last bolt hole in the rear had been left empty, but the threads were heavily rusted.
Like I said…
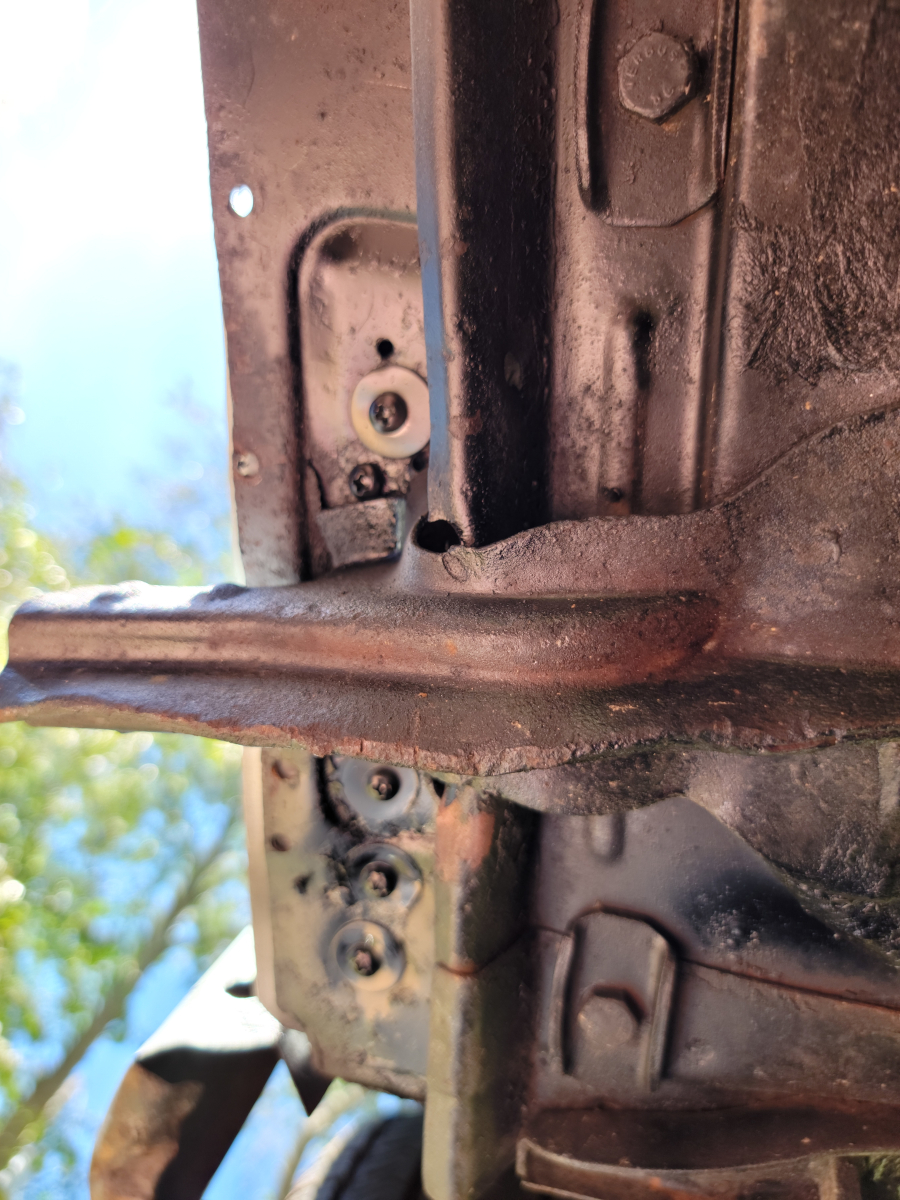
That picture also shows another problem. Above the factory jack point, the body channel is bent up. I tried pounding it back down flat, but there isn’t a lot of room in there. I just ended up knocking a little surface rust loose.
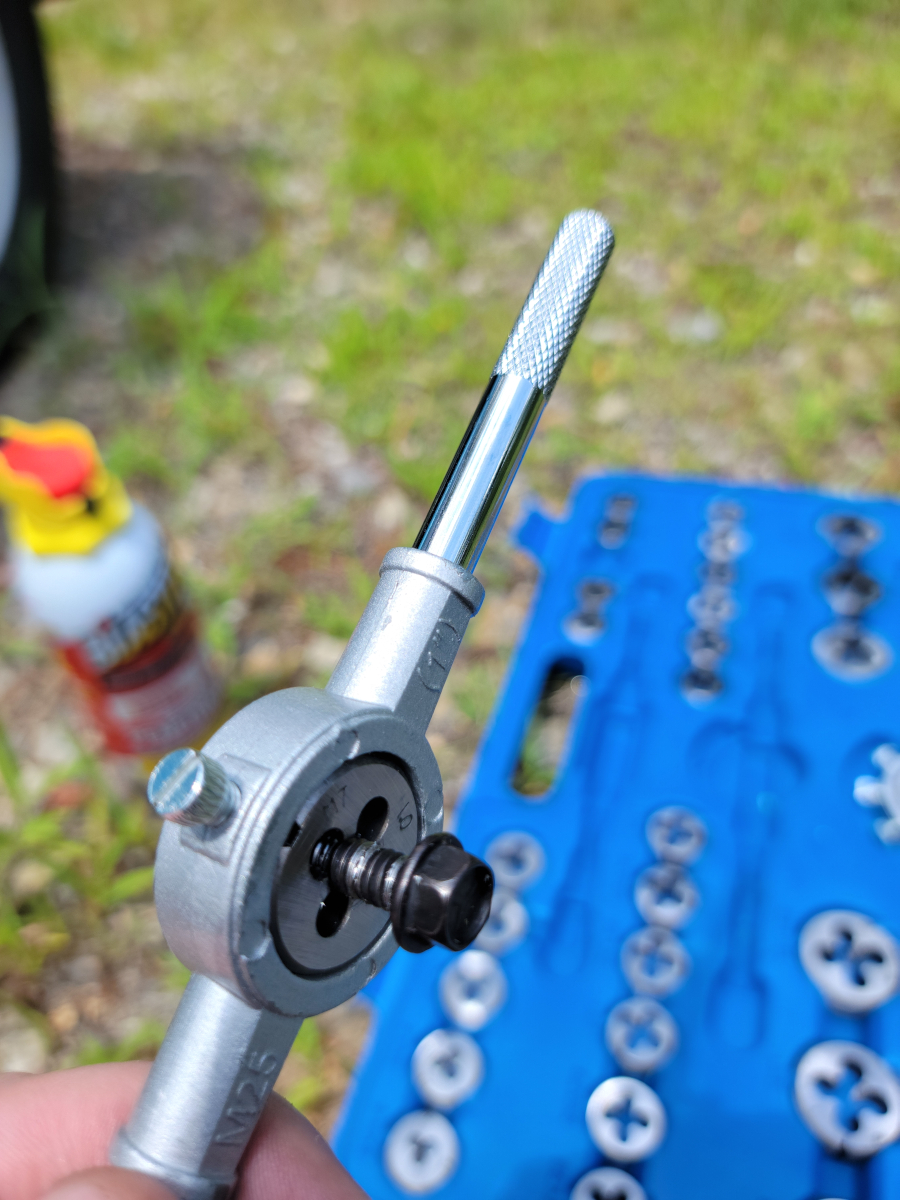
So, now I had one bolt hole threaded for 7mm x 1 and the rest 6mm x 1. I was able to find a 7mm bolt, but the threads weren’t 1 or .75. Those are the two options that I have in my set. So, I decided to cut new threads into it.
And hey, surprise, it actually worked.
It’s clearly a mess, but the bolt threads tightly into the new bolt hole in the body.
I hosed that side of the car down with brake parts cleaner, then wiped it all down and prepared to do some “rustproofing”.
There are lots of negative reviews of those MIM running boards not fitting correctly. I had read the warning in the description saying to expect to have to trim them. That’s fine. However, the height of the running boards on the back side, the mating face, is too tall to fit in the channel. Also, with that place above the jack point being bent up, that doesn’t help.
I could use the death wheel to cut off 1/4 of an inch across the whole length of the running board. Easy enough, but the rubber mat cover “clips” over the bottom edge in front and back. If I cut off a strip across the bottom, I would have loose rubber back there, not clipped to anything. Maybe glue…
By this time, I had been outside in the sun four hours. I used the new hardware to mount the old running board. I will get back to address that in the future.
In the picture below, you can see one of the body washers is warped and bent through the opening in the running board. This hardware is garbage. The washers are about as thick as a paper clip and are super soft.
These black washers are hard plastic, the kind that will have split and gone missing by next year. Criminal.
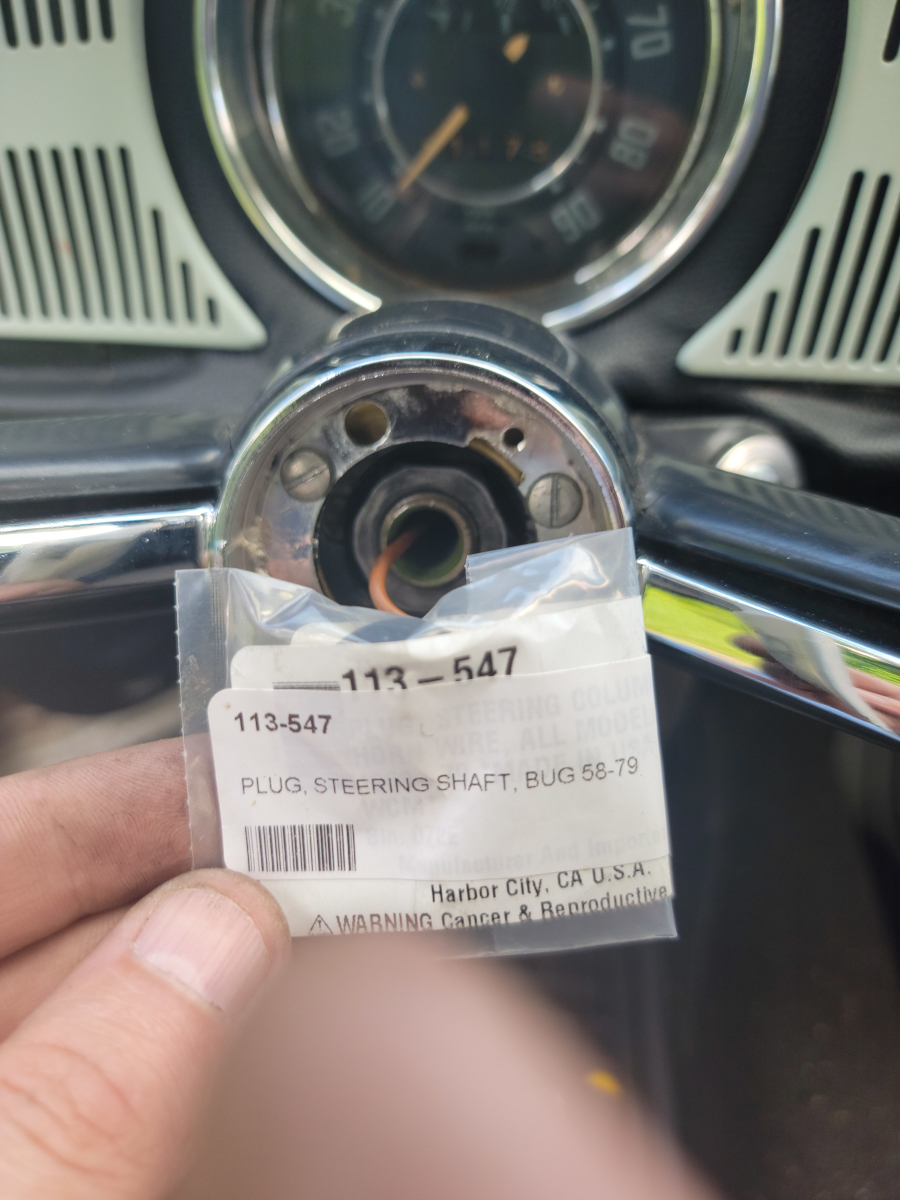
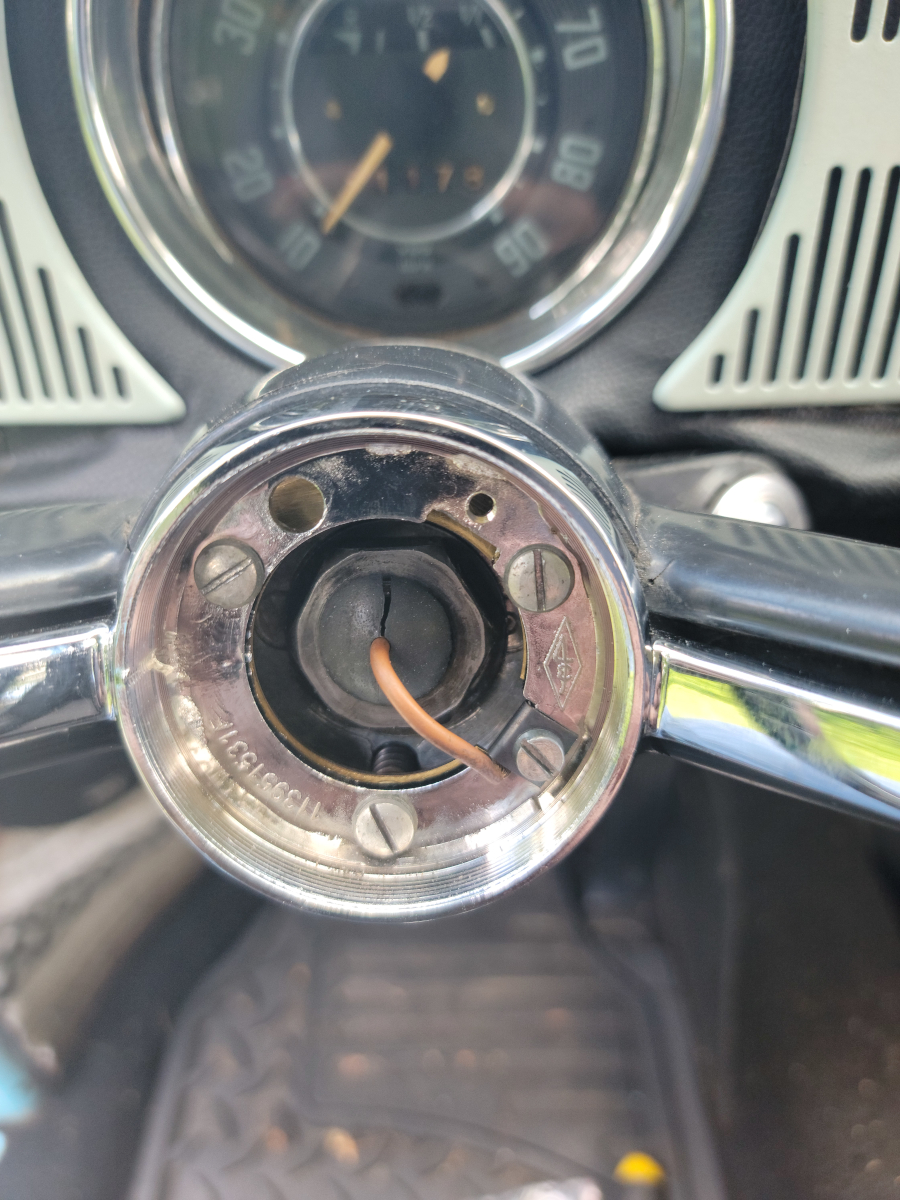
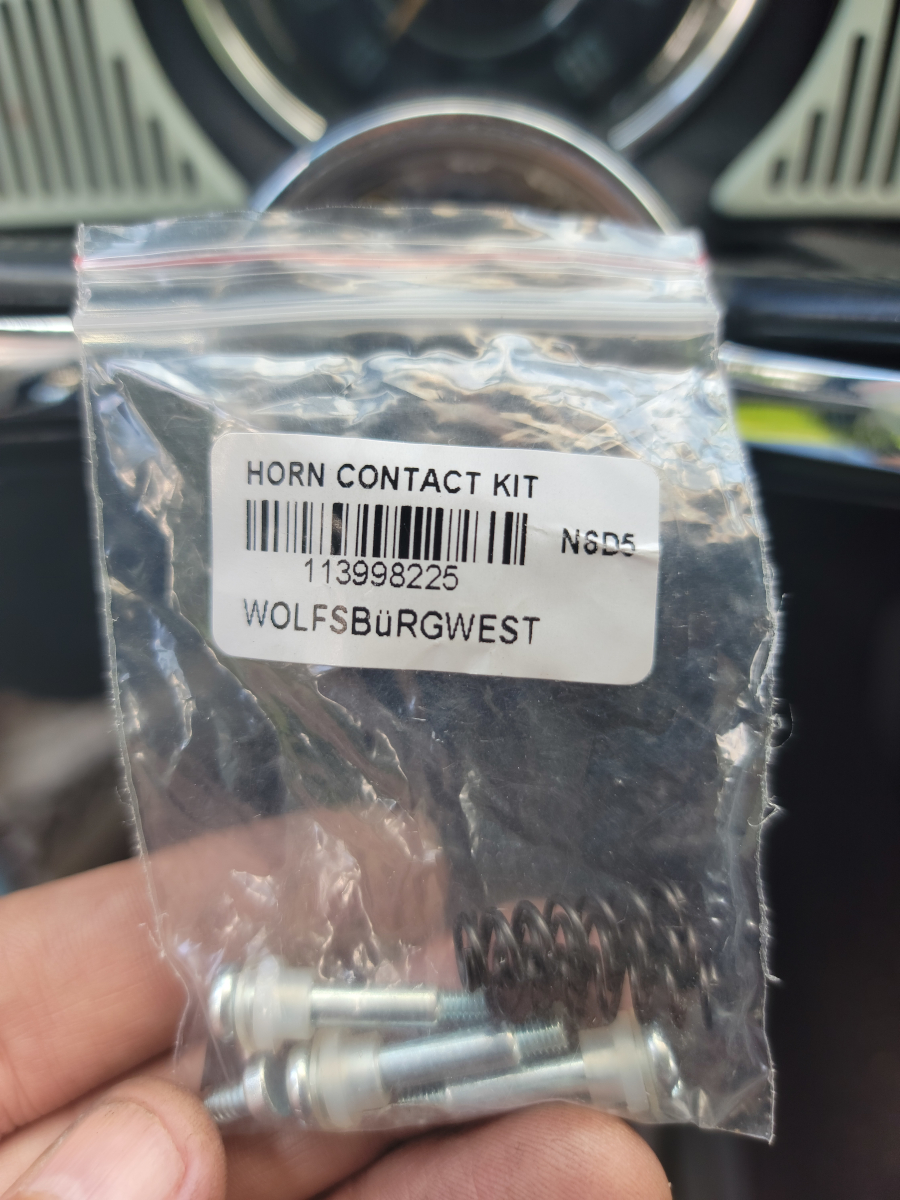
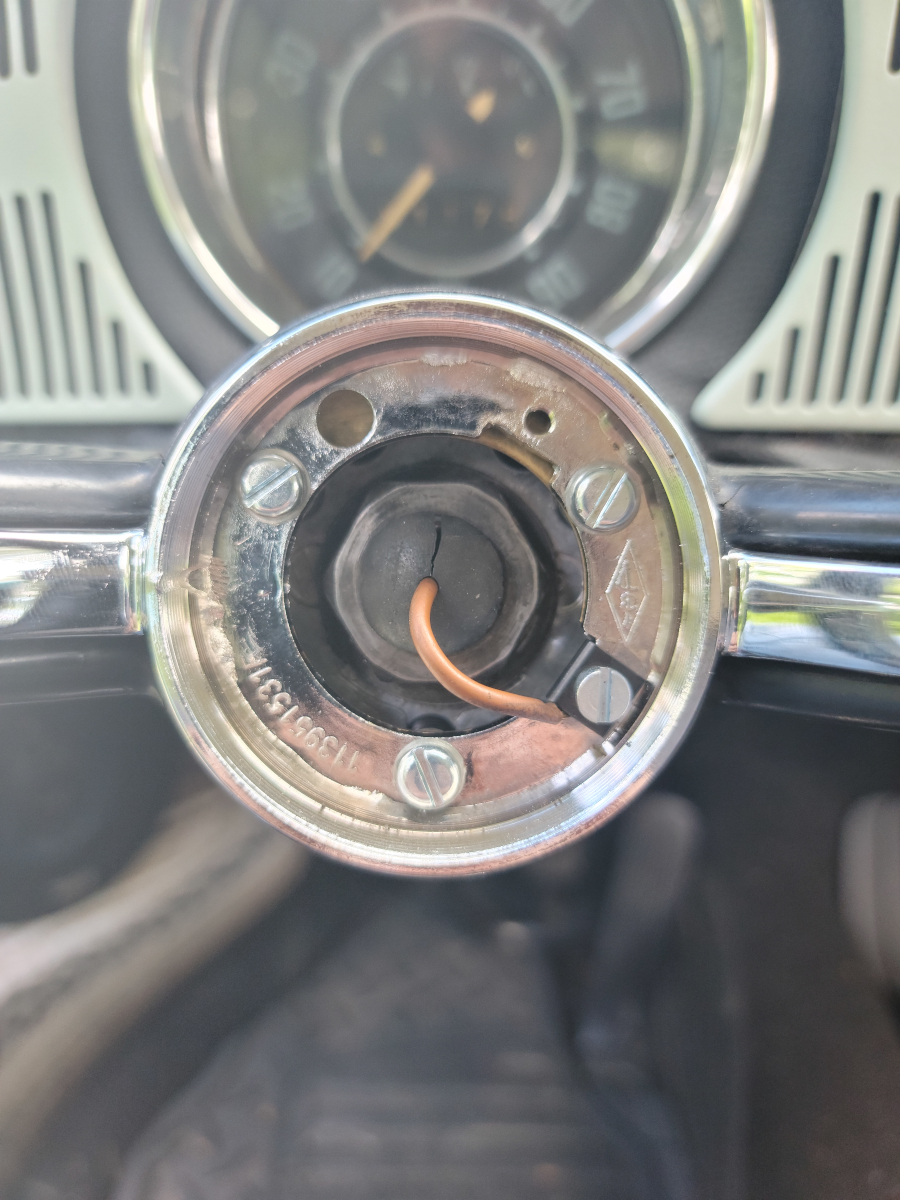
As a last ditch effort to getting the horn working again, I bought new horn ring hardware and replaced the missing wire insulator.
Being too lazy (and frankly, stupid) to bother trying to thread that tinned wire tip through the tiny hole in the new plug, I just sliced it open like a hot dog bun.
It’s an insulated wire, anyway, so I’m not sure it’s even necessary. I’m just getting desperate at this point.
Throw parts at the problem if you’re not smart enough to figure it out!
Still no dice (or horn… there never were any dice).
I’m tired.
As an Amazon Associate I earn from qualifying purchases. I also often provide links to products on other sites that do not provide affiliate income.